This survey will take about 1 minute.
Your answers will help us to improve our website.
Demon's Souls PS5
1-3: Tower Knight Archstone Story Walkthrough and Map
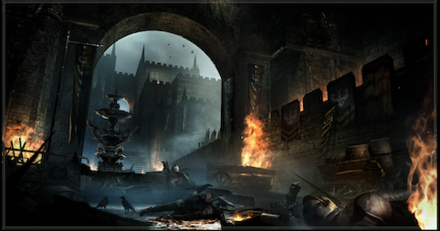
This is the story walkthrough for 1-3: Tower Knight Archstone in the Demon's Souls Remake (DS) for PS5. Keep reading for maps, tips on how to complete this stage, a list of NPCs, and items that can be found!
| Archstone of the Small King | |
|---|---|
| 1-1: Boletarian Palace | 1-2: Phalanx Archstone |
| 1-3: Tower Knight Archstone | 1-4: Penetrator Archstone |
List of Contents
1-3: Tower Knight Archstone Story Walkthrough
Map

Walkthrough Chart
To access Boletarian Palace 1-3, you'll need to have slain at least one Archdemon (one of the last bosses of the other Archstones)
| ① | At the start of the area, prepare some long-ranged weapons to snipe the wolves. Since their damage ramps up on 1-3, you'll want to play things safely. Also, beware of easy to obtain items from corpses or cramped spaces. There are several traps in the area so approach these areas with caution. |
|---|---|
| ② | Head towards the stairs slowly, they will release a flaming boulder. Once you reach safety, approach the Fat Official for a short cutscene. |
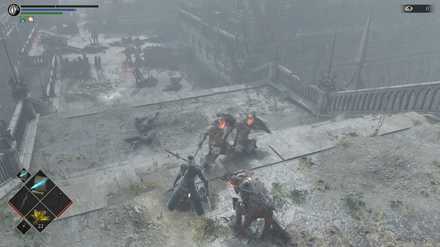
| ③ | After the cutscene, you'll be ambushed by 3 soldiers. Defeat them then enter the door they came from. The following area will be cramped so using vertical attacks or piercing attacks will greatly prove beneficial. |
| ④ | After clearing the narrow path, you can snipe the crossbowman stationed across the area to rid yourself of a headache, then take the path to the left to encounter your first Assassins. The Assassins attack fast so you can easily parry their blows and aim for a riposte. |
| ⑤ | Once you reach the area where the crossbowman was stationed, approach the stairs slowly then back out to bait the flaming boulder trap. Once again, the path will be narrow and there will be several assassins here so preparing a riposte or using piercing attacks is the way to go. |
| ⑥ | After getting through the spies, and reaching an open area, you will notice a Fat Official on the other side of the map along with some crossbowmen. You can start sniping them here with bows if you wish. To the right is a room containing a Red Eyes Knight and a Soldier, you can use a Soul Remains to get them distracted or you can just try to pick the Soldier off then aim for a backstab against the Knight (or a Riposte). |
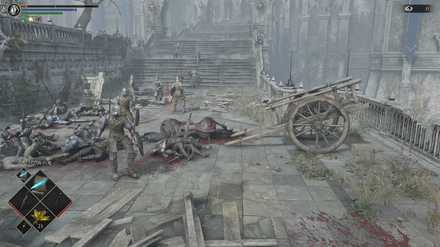
| ⑦ | Destroy the barricade to reveal a path. Upstairs, you'll meet your friendly Dregling Merchant and outside, you can loot a body for a Great Sword. Once done shopping, exit the room and head through the fog. |
| ⑧ | Defeat the Red Knight then make your way slowly to the Fat Official. Before you can do it, an assassin will swoop in from above, eliminate it first then head for the Fat Official. The Fat Official uses a lot of moves that make it vulnerable. Wait for its fireball or its overhead slash before going in for the kill. |
| ⑨ | You'll obtain the Iron Key Ring from the Fat Official which can be used to rescue Biorr. Biorr is going to aid you in your fight against the Penetrator so make sure to rescue him before heading for the boss fight. |
| ⑩ | Make your way up by clearing the enemies. Before the last staircase is a flaming boulder trap so approach with caution. |
| ⑪ | From here, you can drop down to go for the Fat Official that was taunting you earlier. Take note that on this fight, you'll want to quickly open the gate to free our friend Ostrava from the two Red Eyes Knights. Make sure to loot the Fat Official's body to gain the Official's Cap. Also, talk to Ostrava to get a Pure Clearstone. |
| ⑫ | The area's almost cleared so now's a good time to return to the Tower Knight's area. Open the door using the Iron Key Ring. Defeat the Fat Official located inside and open the door to Biorr's Cell. Also, on the end of the path, you can loot the body at the end to gain a Tower Shield Loot the Fat Official's Body to get the Bloody Iron Key. |
| ⑬ | Return to the starting area of 1-3 then take the path at the upper right (from the entrance's perspective) to find a locked door. Use the Bloody Iron Key to open it. Make your way to the maze-like area to find a tower. Climb it then equip the Official's Cap. |
| ⑭ | At the top of the tower, the Fat Official will use the lever to lower the path allowing you to reach Yuria. The Fat Official won't aggro you while you're wearing the cap. Taking it off or damaging it will make it resume aggro. Take the cap off after killing the Fat Official then talk to Yuria. |
| ⑮ | Return to the end of 1-3 then eliminate the 3 Red Knights guarding the fog. Once done, enter the fog to initiate your fight with the Penetrator. With Biorr's help, the fight should be extremely easy. Recruiting Biorr to fight with you will also net you a trophy. |
④ Assassins
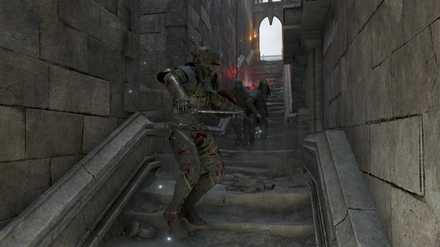
The Assassins will often be encountered on areas you will be at a disadvantage. They can lie in ambush in narrow paths or can also come swooping from above. Always be on the lookout for them and dispatch them ASAP.
⑫ Saving Biorr
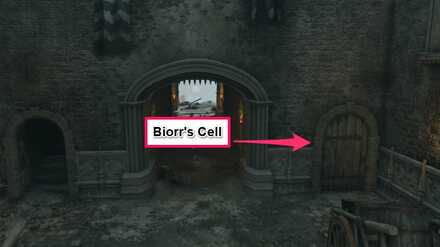
Biorr's Cell is located at the area where you fought the Tower Knight. There's a Fat Minister inside so prepare for a fight.
⑬ Saving Yuria
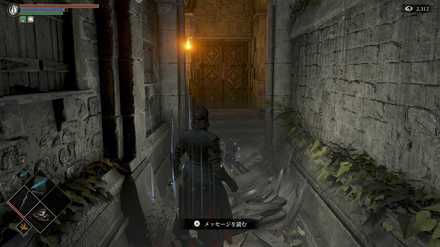
Before proceeding to this step, make sure that you have obtained the Bloody Iron Key and the Official's Cap. If any of the two are missing, it will be impossible to save Yuria.
Boss: Penetrator
 | |
| HP | Souls |
|---|---|
| 2960 | Silver Demon Soul |
| Tips | |
| Save Biorr to gain an ally for the fight! | |
1-3: Tower Knight Archstone Tips and Tricks
| ★Tips Summary★ |
|---|
Saving Three NPCs
The three NPCs (two if you failed to save Ostrava in area 1-1 or 1-2) all require saving. Biorr in particular will aid you in your fight against the Penetrator so it's good to make sure you save him if you're having trouble with the fight.
Eliminating Red Knights
There are several Red Knights in the area, they unleash a flurry of heavy attacks so guarding with small shields isn't recommended. Wait for their 4 flurry attack to gain a free backstab or use a Soul Remains to distract them while you can go for the kill.
Climbable Ledges
Like the ledge that leads to Ostrava in part 1-1, there are several ledges you can hop to gain access to new areas, like hopping on one area to be able to get a shortcut to the second Fat Official. Use the camera to angle downwards; if there are platforms or lootable bodies, the ledge is most likely climbable.
Sprint Through Enemies or Use Soul Remains
Sometimes, it is better to just skip through the enemies in order to proceed. Equipping the Thief's Ring can also reduce the enemy's aggro range. If still insufficient, you can also distract the enemies with Soul Remains.
1-3: Tower Knight Archstone NPCs
Regular NPCs
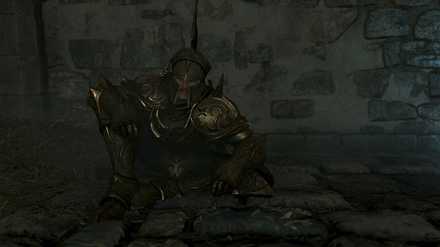
Biorr Of the Twin Fangs
 |
|
| HP | Acquired Soul |
|---|---|
| 1250 | 740 |
| Dropped Items | |
| Large Brushwood Shield, Brushwood Armor Set, Ring of Great Strength | |
You can rescue him by using the Iron Ring of Keys on the locked door from where you fought the Tower Knight. You can also obtain the Bloody Key from the Fat Official that's guarding Biorr's cell which you can use to access the tower where Yuria is locked in.
Where to Find Biorr of the Twin Fangs
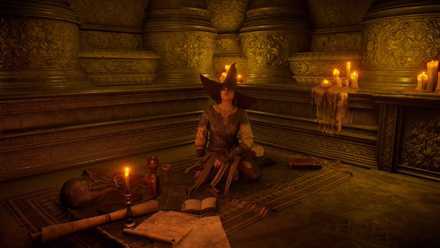
Yuria The Witch
 |
|
| HP | Acquired Soul |
|---|---|
| 700 | 440 |
| Dropped Items | |
| Old Ragged Armor Set, Ring of Magical Nature | |
Can be rescued by obtaining the Bloody Key from the Fat Official that is guarding Biorr's cell. You'll also need the Official's Cap to get the Fat Official to use the lever that will allow you to reach Yuria. The Official's Cap can be obtained from the Fat Official that blocked your path while the bloody key can be obtained from the Fat Official that's guarding Biorr's Cell.
Where to Find Yuria, the Witch
Ostrava of Boletaria
You will find Ostrava, once again, in need of dire help. He'll be trapped fighting 2 red eye knights and one undead knight while trapped with the gate that the fat minister has used to bar your path. Quickly open it when you reach the Fat Official on the other side to save Ostrava.
Where to Find Ostrava of Boletaria
1-3: Tower Knight Archstone Items
| Ring of Magical Nature | Penetrating Sword | Ring of the Accursed |
Demon's Souls Remake Related Links
All Story Levels
Author
1-3: Tower Knight Archstone Story Walkthrough and Map
Please participate in our site
improvement survey
03/2026
improvement survey
03/2026
Would you assist in
improving Game8's site?
improving Game8's site?

×
We are listening to our users' valuable opinions and discussing how to act on them.
The information collected through this survey will be used for the purpose of improving our services. In addition, the information will only be disclosed a part of a statistic in a format that will not allow identification of personal information.
Begin Survey
Not Now
×
Please rate each item regarding Game8.co's Advertisements.
Amount of Ads
Very Dissatisfied
Somewhat Dissatisfied
Fine
Somewhat Satisfied
Highly Satisfied
Placement of Ads
Timing of Ad Display
Ad Loading Speed
Safeness of Ads
Content of Ads
×
Please rate each item regarding Game8.co's Quality of Articles.
Amount of information
Very Dissatisfied
Somewhat Dissatisfied
Fine
Somewhat Satisfied
Highly Satisfied
Frequency of updates
Speed of new information
Accuracy of articles
Understandibility of articles
Readability of sentences
×
Please rate each item regarding Game8.co's Usability of the Site.
Ease of finding information
Very Dissatisfied
Somewhat Dissatisfied
Fine
Somewhat Satisfied
Highly Satisfied
Loading Speed
Use of Color
Font Size
Visibility of Images
Easy to Understand Layout
×
Please rate each item regarding Game8.co's Message Boards, Comments.
Ease of Writing
Very Dissatisfied
Somewhat Dissatisfied
Fine
Somewhat Satisfied
Highly Satisfied
Readability
Ease in Finding Information
Comment Quality
Comment Quantity
Admin Response
×
Please rate each item regarding Game8.co's Site's new design.
Please rate our site's new design
Very Dissatisfied
Somewhat Dissatisfied
Fine
Somewhat Satisfied
Highly Satisfied
Do you think that the website's design change makes the site easier to use?
Has the new design made it easier for you to find information on the site?
Has the new design improved the overall visual appeal of the site?
How would you rate your overall satisfaction with the new design of the site?
×
How likely are you to recommend Game8 to someone you know?
Very Unlikely
0
1
2
3
4
5
6
7
8
9
10
Very Likely
If you have other opinions regarding potential improvement to the website, please share them with us. We would appreciate your honest opinion.
Note: This is a free response section, so you can proceed without entering anything.
Note: Please be sure not to enter any kind of personal information into your response.
Note: Please be sure not to enter any kind of personal information into your response.
×
Thank You
×
Thank you for participating in our survey! Your answers will help us to improve the quality of our website and services.
We hope you continue to make use of Game8.
We hope you continue to make use of Game8.
Close
Rankings
- We could not find the message board you were looking for.
Gaming News


![Monster Hunter Stories 3 Review [First Impressions] | Simply Rejuvenating](https://img.game8.co/4438641/2a31b7702bd70e78ec8efd24661dacda.jpeg/thumb)

Popular Games

Genshin Impact Walkthrough & Guides Wiki
Honkai: Star Rail Walkthrough & Guides Wiki
Umamusume: Pretty Derby Walkthrough & Guides Wiki
Pokemon Pokopia Walkthrough & Guides Wiki
Resident Evil Requiem (RE9) Walkthrough & Guides Wiki
Monster Hunter Wilds Walkthrough & Guides Wiki
Wuthering Waves Walkthrough & Guides Wiki
Arknights: Endfield Walkthrough & Guides Wiki
Pokemon FireRed and LeafGreen (FRLG) Walkthrough & Guides Wiki
Pokemon TCG Pocket (PTCGP) Strategies & Guides Wiki


Recommended Games
Diablo 4: Vessel of Hatred Walkthrough & Guides Wiki
Fire Emblem Heroes (FEH) Walkthrough & Guides Wiki
Yu-Gi-Oh! Master Duel Walkthrough & Guides Wiki
Super Smash Bros. Ultimate Walkthrough & Guides Wiki
Pokemon Brilliant Diamond and Shining Pearl (BDSP) Walkthrough & Guides Wiki
Elden Ring Shadow of the Erdtree Walkthrough & Guides Wiki
Monster Hunter World Walkthrough & Guides Wiki
The Legend of Zelda: Tears of the Kingdom Walkthrough & Guides Wiki
Persona 3 Reload Walkthrough & Guides Wiki
Cyberpunk 2077: Ultimate Edition Walkthrough & Guides Wiki


All rights reserved
©2009, 2020 Sony Interactive Entertainment Inc. Demon’s Souls is a trademark of Sony Interactive Entertainment Inc.
The copyrights of videos of games used in our content and other intellectual property rights belong to the provider of the game.
The contents we provide on this site were created personally by members of the Game8 editorial department.
We refuse the right to reuse or repost content taken without our permission such as data or images to other sites.