This survey will take about 1 minute.
Your answers will help us to improve our website.
Demon's Souls PS5
3-2: Fool's Idol Archstone Story Walkthrough and Map

This is the story walkthrough for 3-2: Fool's Idol Archstone in the Demon's Souls Remake (DS) for PS5. Keep reading for maps, tips on how to complete this stage, a list of NPCs, and items that can be found!
| Archstone of the Tower Queen | ||
|---|---|---|
| 3-1: Tower of Latria Archstone | 3-2: Fool's Idol Archstone | 3-3: Maneater Archstone |
List of Contents
3-2: Fool's Idol Archstone Story Walkthrough
Map
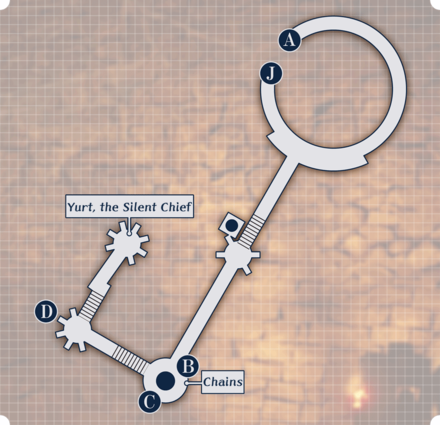
| Area 1 Starting Point to A |
Area 2 Connected to ABCD and J |
|---|---|
 |
 |
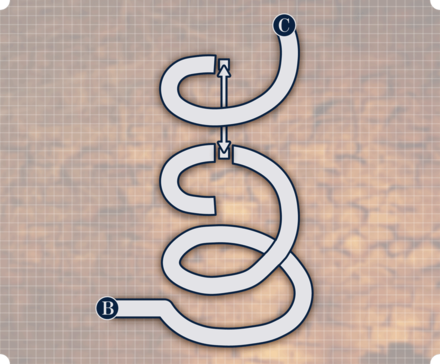
| Area 3 Connected to B and C |
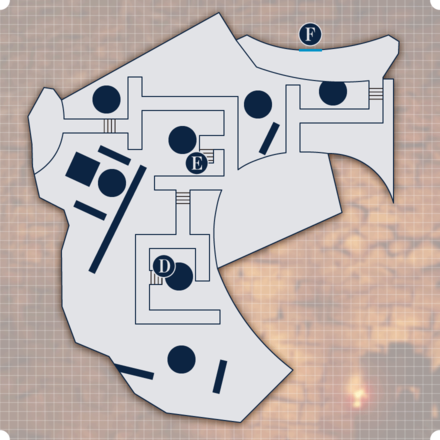
Area 4 Connected to DE and F |
 ※3D Map |
 |
| Area 5 Connected to F and G |
Area 6 Connected to G and H |
 |
 ※3D Map |
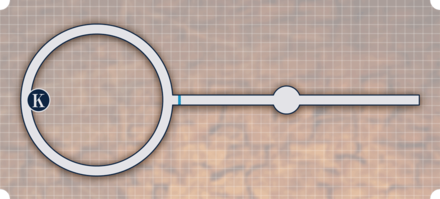
| Area 7 Connected to J and K |
Area 8 Connected to K |
 |
 |
The ★ is the Archstone and blue lines represent fog
Walkthrough Chart
| ① | Climb up the tower in the middle and take the path at the top of the stairs. |
|---|---|
| ② | Keep following the walkways and enter another tower. |
| ③ | Climb the stairs and take the elevator up. |
| ④ | Defeat all of the Prisoners worshipping at the Altar to destroy one set of chains. |
| ⑤ | Take the other path near the Altar to move on. |
| ⑥ | Climb into a cage at the end of the path to go down to the swamp. |
| ⑦ | Upon exiting the cage, take the nearby staircase up and head right towards the rocky area. |
| ⑧ | Keep following the path and take a right when you can, |
| ⑨ | Pass through the fog door and climb up the stairs. Watch out for the Mindflayer Black Phantom. |
| ⑩ | Ride the elevator up to another Altar surrounded by Prisoners. Repeat the same process as before to break the second chain. |
| ⑪ | Follow the path to return to the starting area where you can now climb up the tower. Be careful of another Mindflayer Black Phantom on your way up and pass through the fog to fight the Maneaters. |
①Be Careful of Gargoyles
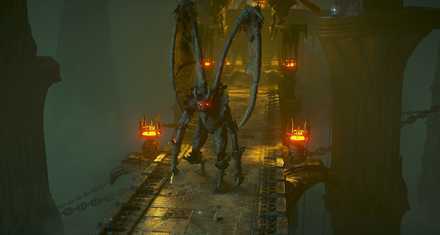
Gargoyles will surprise and assault you constantly on your way through this area. As the paths are narrow, make sure you have a decent sized area to take them on if you choose to fight. Rolling in the wrong direction could spell your doom.
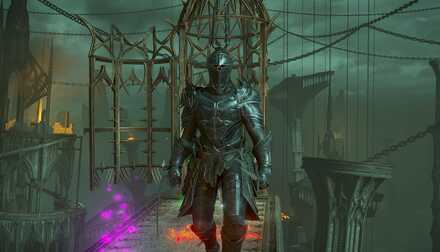
⑤Jump to a Nearby Platform Later On to Find an NPC
Yurt, the Silent Chief can be found in a cage on your way to the swamp. After saving him, you can take his cage down to the swamp, but be warned that keeping him alive means that each time you defaet a Major Demon, Yurt will kill an NPC in the Nexus, even the important ones. This can really make a run harder if not completely ruin it, so you're best off killing him here and now.
⑦Watch Out For the Vermin's Gear Breaking Breath
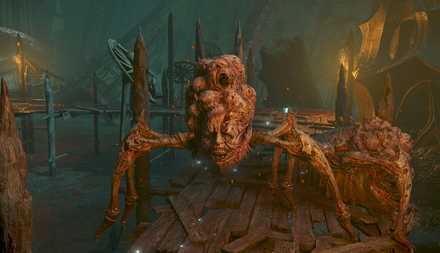
The enemies in the swamp can break your gear when they breath on you. After 2 to 3 hits they can wipe out the durability of most equipment, leaving you defenseless. Try to kill them before this happens or run away.
⑨Don't Get Hit by the Mindflayer Black Phantom's Paralysis Spell
There are two Mindflayer Black Phantoms in the area, and they can be difficult to avoid because of their location on narrow staircases. If you don't dodge the Paralysis Spell, just like normal Mindflayers, they'll grab you and stab you for a huge chunk of damage, possibly even one-shotting lower Soul Level players. Try and backstab them if you can, or go around if there's an opening.
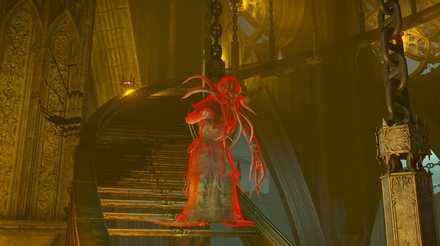
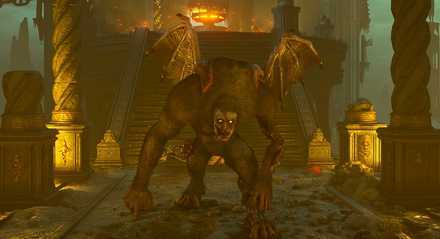
Boss: Maneater
 |
|
| HP | Dropped Items |
|---|---|
| 2790 | Mixed Demon Soul |
| Walkthrough | |
| ・Be careful not to fall! | |
To put things bluntly, this is one of the worst boss arenas in the game and you need to be extra careful. Once you've dealt enough damage to the boss or 1-2 minutes passes, another one will appear with full health to ruin your day.
3-2: Fool's Idol Archstone Tips and Tricks
| ★Tips Summary★ | ||
|---|---|---|
|
|
Watch Your Step or Fall to Your Death
Including the boss area, the majority of this level is a death trap for those with bad footing. Things are pretty dark and the paths are narrow so you may want to up your brightness to have an easier time seeing where your path is.
Fight On Stable Ground
Avoid fighting the Vermin on the narrow walkways or risk falling. If you get hit just right by a Gargoyle's attack you may get knocked off as well.
Pick Up the Rare Gear
In this level you can find a Moon Short Sword +1 among other things that you should definitely pick up. These can help you in other areas as well so it's worth going out of your way for.
3-2: Fool's Idol Archstone NPCs
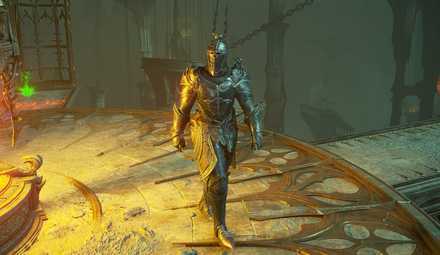
Yurt, the Silent Chief
|
|
| HP | Souls |
|---|---|
| 750~ | 780 |
| Dropped Items | |
| Gloom Armor Set | |
Once you've secured both altars and cut the chains, on your way back you'll see an NPC trapped in a cage. Releasing him will allow you to take the cage down to the swamp.
However, freeing Yurt puts the NPCs in the Nexus at risk. For every demon you defeat, Yurt will kill someone in the Nexus. It is best to kill him now while he is still isolated to prevent losing valuable NPCs like Freke and Patches.
Where to Find Yurt, the Silent Chief
3-2: Fool's Idol Archstone Items
| Rune Sword | Rune Shield | Gold Mask |
| Flamberge | Epee Rapier | Ring of Avarice |
| Plague Resistance Ring | Moon Short Sword +1 (Boss Room) | - |
※Consumables are not included in this list
Demon's Souls Remake Related Links
All Story Levels
Author
3-2: Fool's Idol Archstone Story Walkthrough and Map
Please participate in our site
improvement survey
03/2026
improvement survey
03/2026
Would you assist in
improving Game8's site?
improving Game8's site?

×
We are listening to our users' valuable opinions and discussing how to act on them.
The information collected through this survey will be used for the purpose of improving our services. In addition, the information will only be disclosed a part of a statistic in a format that will not allow identification of personal information.
Begin Survey
Not Now
×
Please rate each item regarding Game8.co's Advertisements.
Amount of Ads
Very Dissatisfied
Somewhat Dissatisfied
Fine
Somewhat Satisfied
Highly Satisfied
Placement of Ads
Timing of Ad Display
Ad Loading Speed
Safeness of Ads
Content of Ads
×
Please rate each item regarding Game8.co's Quality of Articles.
Amount of information
Very Dissatisfied
Somewhat Dissatisfied
Fine
Somewhat Satisfied
Highly Satisfied
Frequency of updates
Speed of new information
Accuracy of articles
Understandibility of articles
Readability of sentences
×
Please rate each item regarding Game8.co's Usability of the Site.
Ease of finding information
Very Dissatisfied
Somewhat Dissatisfied
Fine
Somewhat Satisfied
Highly Satisfied
Loading Speed
Use of Color
Font Size
Visibility of Images
Easy to Understand Layout
×
Please rate each item regarding Game8.co's Message Boards, Comments.
Ease of Writing
Very Dissatisfied
Somewhat Dissatisfied
Fine
Somewhat Satisfied
Highly Satisfied
Readability
Ease in Finding Information
Comment Quality
Comment Quantity
Admin Response
×
Please rate each item regarding Game8.co's Site's new design.
Please rate our site's new design
Very Dissatisfied
Somewhat Dissatisfied
Fine
Somewhat Satisfied
Highly Satisfied
Do you think that the website's design change makes the site easier to use?
Has the new design made it easier for you to find information on the site?
Has the new design improved the overall visual appeal of the site?
How would you rate your overall satisfaction with the new design of the site?
×
How likely are you to recommend Game8 to someone you know?
Very Unlikely
0
1
2
3
4
5
6
7
8
9
10
Very Likely
If you have other opinions regarding potential improvement to the website, please share them with us. We would appreciate your honest opinion.
Note: This is a free response section, so you can proceed without entering anything.
Note: Please be sure not to enter any kind of personal information into your response.
Note: Please be sure not to enter any kind of personal information into your response.
×
Thank You
×
Thank you for participating in our survey! Your answers will help us to improve the quality of our website and services.
We hope you continue to make use of Game8.
We hope you continue to make use of Game8.
Close
Rankings
- We could not find the message board you were looking for.
Gaming News


![Everwind Review [Early Access] | The Shaky First Step to A Very Long Journey](https://img.game8.co/4440226/ab079b1153298a042633dd1ef51e878e.png/thumb)

![Monster Hunter Stories 3 Review [First Impressions] | Simply Rejuvenating](https://img.game8.co/4438641/2a31b7702bd70e78ec8efd24661dacda.jpeg/thumb)
Popular Games

Genshin Impact Walkthrough & Guides Wiki
Honkai: Star Rail Walkthrough & Guides Wiki
Umamusume: Pretty Derby Walkthrough & Guides Wiki
Pokemon Pokopia Walkthrough & Guides Wiki
Resident Evil Requiem (RE9) Walkthrough & Guides Wiki
Monster Hunter Wilds Walkthrough & Guides Wiki
Wuthering Waves Walkthrough & Guides Wiki
Arknights: Endfield Walkthrough & Guides Wiki
Pokemon FireRed and LeafGreen (FRLG) Walkthrough & Guides Wiki
Pokemon TCG Pocket (PTCGP) Strategies & Guides Wiki


Recommended Games
Diablo 4: Vessel of Hatred Walkthrough & Guides Wiki
Fire Emblem Heroes (FEH) Walkthrough & Guides Wiki
Yu-Gi-Oh! Master Duel Walkthrough & Guides Wiki
Super Smash Bros. Ultimate Walkthrough & Guides Wiki
Pokemon Brilliant Diamond and Shining Pearl (BDSP) Walkthrough & Guides Wiki
Elden Ring Shadow of the Erdtree Walkthrough & Guides Wiki
Monster Hunter World Walkthrough & Guides Wiki
The Legend of Zelda: Tears of the Kingdom Walkthrough & Guides Wiki
Persona 3 Reload Walkthrough & Guides Wiki
Cyberpunk 2077: Ultimate Edition Walkthrough & Guides Wiki


All rights reserved
©2009, 2020 Sony Interactive Entertainment Inc. Demon’s Souls is a trademark of Sony Interactive Entertainment Inc.
The copyrights of videos of games used in our content and other intellectual property rights belong to the provider of the game.
The contents we provide on this site were created personally by members of the Game8 editorial department.
We refuse the right to reuse or repost content taken without our permission such as data or images to other sites.