2-2: Armor Spider Archstone Story Walkthrough

This is the story walkthrough for 2-2: Armor Spider Archstone in the Demon's Souls Remake (DS) for PS5. Keep reading for tips on how to complete this stage, a list of NPCs, and items that can be found!
List of Contents
2-2: Armor Spider Archstone Story Walkthrough
Walkthrough Chart
| ① | Upon entry, you'll immediately notice carts with bombs on them. They will explode when you approach so proceed with caution! |
|---|---|
| Choice | You now have two choices, you can turn left and explore the area where you can get several crafting materials by slaying the bugs, looting the corpses, and eliminating the miners, or head right and use the platforms until you reach the bottom. The bottom leads to the boss against the Flamelurker. Due to this, it is completely possible to speedrun this area by skipping the left part and shooting straight for the Flameluker. |
| ② | Heading left you'll encounter a Fat Official, dispatch it to safely proceed. After continuing, you'll encounter hardened carcasses of Landworms, you can roll through them to proceed faster. |
| Optional | 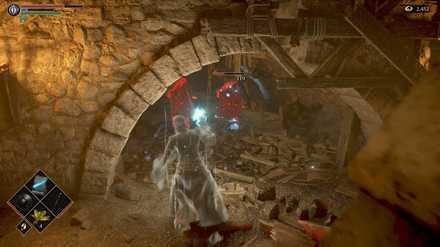 Use the lever to make the platform descend. You'll encounter a Crystal Lizard and 2 Black Phantoms It is advisable to not chase the Crystal Lizard. Bait one of the phantoms from a distance for an easier fight. |
| ③ | After clearing the area, you'll reach a place with a bunch of wooden platforms and you'll also encounter your first Bearbugs and Landworms here. Head slightly right to encounter a Landworm. After killing it, look beneath to see a platform, jump to it to descend the area. |
| ④ | There's a tunnel here opposite the area that's infested by Bearbugs. It's a tunnel that leads to a lever that allows you to use the elevator near the Fat Official at the entrance of 2-2. |
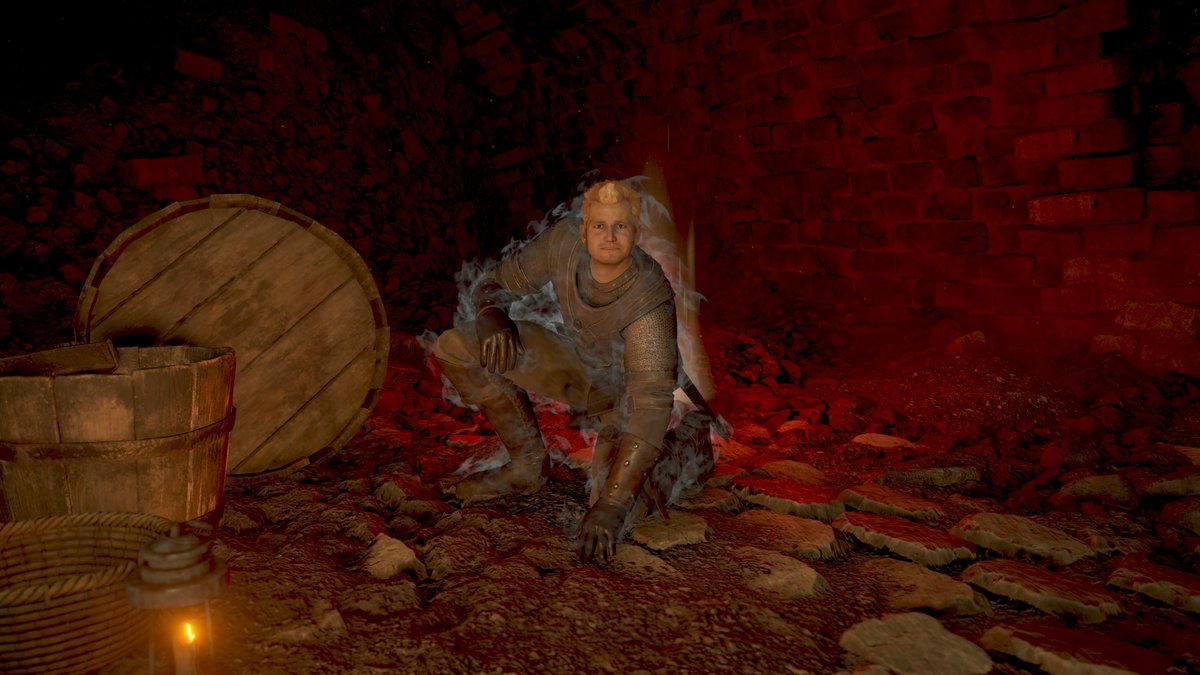
| ⑤ | On the outskirts of the area, you'll see an NPC named Patches the Hyena. He'll offer you the loot from the corpse beneath the beam "as a sign of friendship". Do not take the item yet, kill the Bearbug above it then sprint away before taking the item. |
| ⑥ | From Patches' location, step down then head north until you see a lootable corpse down below. Step forward to descend and loot it for a Black Heater Shield. |
| ⑦ | The lowest part of this area houses several flying Bearbugs and Landworms; you can skip through them but doing so might leave you trapped in the mines near there (which is also a maze and difficult to traverse) |
| ⑧ | Once inside the maze, head right for a lootable item then left (choosing which tunnel on the left side won't matter). Lure the Bearbug in one of the holes then enter the opposite hole to pass through the Bearbug Alternatively, you can always just kill it. |
| ⑨ | Head further then drop down. After dropping, head left then follow the path. You'll see an area with lava soon. |
| ⑩ | After reaching the lava, head right and make sure to tread on the rightmost side to avoid fire damage. There are two holes you can enter from here, the second hole will lead to another maze. After this point, you pretty much explored the left side of 2-2, you can now return to the Nexus and make the right turn at the entrance of 2-2 to fight the Flamelurker or just head to the end of the maze, it will also lead to the Fire Lurker. |
③ Bearbugs and Landworms
Bearbugs are extremely sturdy creatures. They're resistant to fire and physical attacks. To beat them, you need to use Magic or weapons that inflict status ailments like Poison or Blight. Against Landworms, their weakness is their head. Use a bow and aim at their heads to kill them quickly.
Boss: Flamelurker
 |
|
|---|---|
| HP | Drop |
| 3720 | Searing Demon Soul |
| Tips and Strategy | |
| Time your Dodges and Goodluck! | |
2-2: Armor Spider Archstone Tips and Tricks
| ★Tips Summary★ |
|---|
Take the Dragon Longsword +1 in the Maze

Make sure to take the Dragon Long Sword+1 inside the maze. It's a valuable weapon with high damage, low stat scaling, and deals fire damage. A highly recommended weapon for characters that highly invested in Vitality so they can still deal decent damage while being tanky.
Bring Magic or Damaging Status Ailment Causing Weapons

The Bearbugs are extremely durable. You'll need to rely on magic or status ailments to kill them easily and faster.
Bring a lot of Arrows
The Landworms' weak spots are their head. Use a bow to hit their head to take them down easier.
Beware of Lava
It is possible to cross the Lava with the right gear, level, and spells. There is valuable loot you can gain so make sure to return to the area after preparing yourself adequately.
2-2: Armor Spider Archstone NPCs
Patches the Hyena
 |
|
| HP | Soul |
|---|---|
| 650 | 165 |
| Drops | |
| Thief's Ring | |
Where to Find Patches, the Hyena
Attempts to trap you using a loot and a giant Bearbug. It might be tempting to kill him, but proceeding his questline can turn him to a merchant in the Nexus. He sells arrows and is a valuable NPC to keep alive.
Scirvir the Wanderer
|
|
|---|---|
| HP | Soul |
| 1050 | 730 |
| Drops | |
| Ronin's Ring | |
Located at the right path of 2-2. He only appears at exteme levels of World Tendency as a human or Black Phantom depending on which World Tendecy your world has reached.
Where to Find Scirvir the Wanderer
Scirvir's Black Phantom
 |
|
|---|---|
| HP | Soul |
| 2100 | 3880 |
| Drops | |
| Talisman of Beasts | |
Black Phantom 1
| HP | Soul |
|---|---|
| 1150 | 970 |
| Drops | |
| 3 Dragonstone Chunks, Black Eye Stone, Stone of Ephemeral Eyes | |
Black Phantom 2
| HP | Soul |
|---|---|
| 1110 | 1380 |
| Drops | |
| 3 Clearstone Chunks, Black Eye Stone, Stone of Ephemeral Eyes | |
2-2: Armor Spider Archstone Items
| Dragon Long Sword + 1 | Dark Heater Shield +2 | Hands of God |
| Dragonstone Chunk | Flame Resistance | Great Axe |
| Plague Resistance Ring | Club |
Demon's Souls Remake Related Links
All Story Levels
Author

2-2: Armor Spider Archstone Story Walkthrough
Rankings
- We could not find the message board you were looking for.
Gaming News


![Monster Hunter Stories 3 Review [First Impressions] | Simply Rejuvenating](https://img.game8.co/4438641/2a31b7702bd70e78ec8efd24661dacda.jpeg/thumb)
Popular Games

Genshin Impact Walkthrough & Guides Wiki
Honkai: Star Rail Walkthrough & Guides Wiki
Umamusume: Pretty Derby Walkthrough & Guides Wiki
Pokemon Pokopia Walkthrough & Guides Wiki
Resident Evil Requiem (RE9) Walkthrough & Guides Wiki
Monster Hunter Wilds Walkthrough & Guides Wiki
Wuthering Waves Walkthrough & Guides Wiki
Arknights: Endfield Walkthrough & Guides Wiki
Pokemon FireRed and LeafGreen (FRLG) Walkthrough & Guides Wiki
Pokemon TCG Pocket (PTCGP) Strategies & Guides Wiki


Recommended Games
Diablo 4: Vessel of Hatred Walkthrough & Guides Wiki
Cyberpunk 2077: Ultimate Edition Walkthrough & Guides Wiki
Fire Emblem Heroes (FEH) Walkthrough & Guides Wiki
Yu-Gi-Oh! Master Duel Walkthrough & Guides Wiki
Super Smash Bros. Ultimate Walkthrough & Guides Wiki
Pokemon Brilliant Diamond and Shining Pearl (BDSP) Walkthrough & Guides Wiki
Elden Ring Shadow of the Erdtree Walkthrough & Guides Wiki
Monster Hunter World Walkthrough & Guides Wiki
The Legend of Zelda: Tears of the Kingdom Walkthrough & Guides Wiki
Persona 3 Reload Walkthrough & Guides Wiki


All rights reserved
©2009, 2020 Sony Interactive Entertainment Inc. Demon’s Souls is a trademark of Sony Interactive Entertainment Inc.
The copyrights of videos of games used in our content and other intellectual property rights belong to the provider of the game.
The contents we provide on this site were created personally by members of the Game8 editorial department.
We refuse the right to reuse or repost content taken without our permission such as data or images to other sites.