Araguay Woods Walkthrough (Battle 12)
★ Tier Lists: Characters | Jobs | Weapons
☆ Farming Guides: Gil | JP | Rare Weapons
★ All Missables and Points of No Return
☆ Optimal Job Progression Guide
★ Recruit All Secret Characters!
☆ All Hidden Treasure Locations
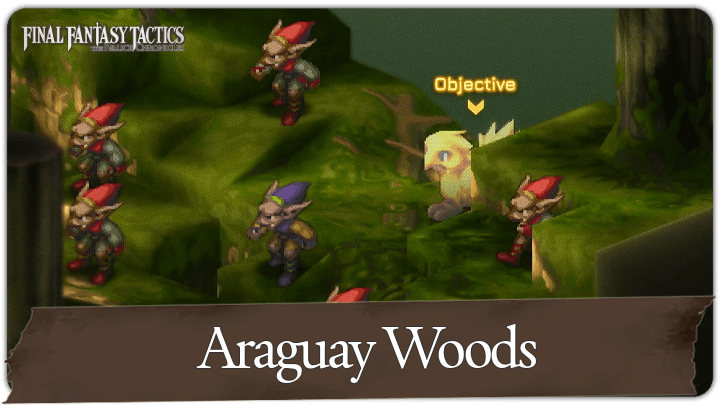
This is a guide for Battle 12: Araguay Woods in Chapter 2 of Final Fantasy Tactics - The Ivalice Chronicles. See a full walkthrough of this battle, as well as its overview, enemies, recruitable characters, treasure locations, and rewards for completing Araguay Woods.
| ◄ Previous Battle | Next Battle ► |
|---|---|
| Merchant City of Dorter | Zeirchele Falls |
List of Contents
Battle 12: Araguay Woods Overview
Battle Location and Information
| Field View | |
|---|---|
 |
|
| Chapter | Chapter 2 |
| Rec. Level / Difficulty |
Level 11
✦✧✧✧✧ |
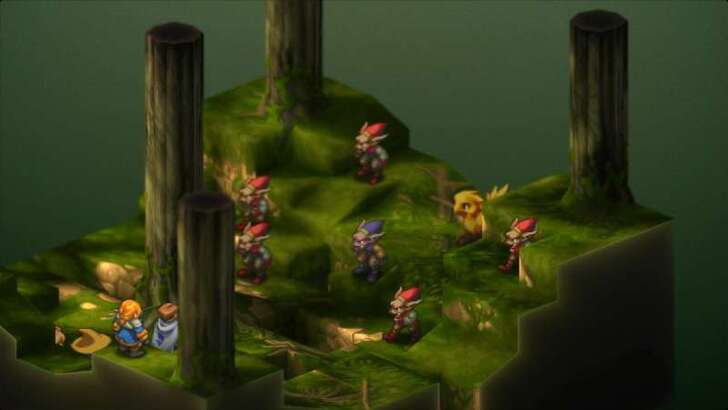
| Objective | Defeat all enemies! or Save Chocobo! |
| Party Size | You can deploy up to 4 units. |
Battle 12: Araguay Woods Recruitable Characters
All Characters You Can Recruit
| Recruitable Characters | ||
|---|---|---|
 Boco Boco
|
||
Battle 12: Araguay Woods Enemies
All Enemies in Araguay Woods
| All Stage Enemies |
|---|
|
・Goblin x5
・Black Goblin x1
|
Battle 12: Araguay Woods Recommended Party Composition
Best Characters to Use For This Battle
| Best Characters to Use | |||
|---|---|---|---|
 Ramza Ramza (Archer) |
 Black Mage Black Mage
|
 Knight Knight
|
 Dragoon Dragoon
|
Ramza as an Archer equipped with the Ice Bow is a game changer here, as it lets him snipe from afar and exploit enemy weaknesses at the same time.
Pair this with a Black Mage who knows Blizzard spells for AoE damage, a Knight for durability, and a Dragoon for reach and mobility.
Battle 12: Araguay Woods Walkthrough
Walkthrough Guide
| # | Step by Step Objectives |
|---|---|
| 1 | 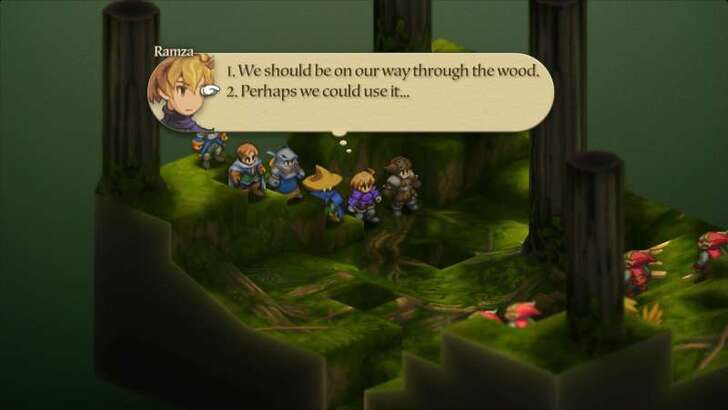 Choose to Rescue the Chocobo At the start of the battle, you’ll be prompted to either leave the Chocobo behind or attempt a rescue. Picking the second option is the better move, since you’ll gain its help during the fight and still recruit it afterward. |
| 2 | 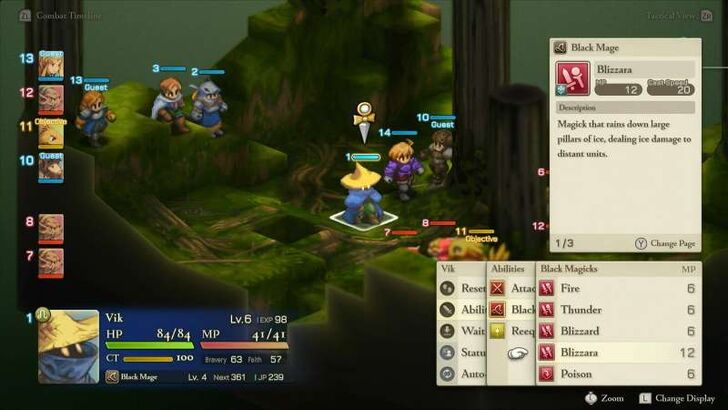 Defeat All Goblins The Goblins here are weak to ice. Have your Black Mage unleash Blizzara to wipe out clusters of them quickly. If you haven’t unlocked it yet, prioritize learning it before entering. Your Knight and Dragoon serve as frontline attackers, with the Dragoon striking from two tiles away to stay safe from counterattacks. |
| * | 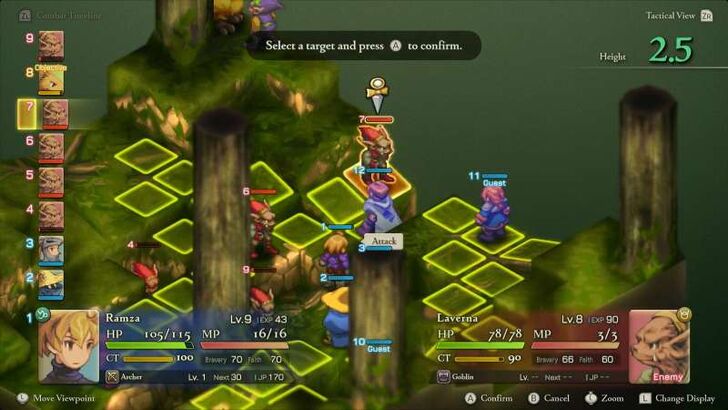 Before the battle, buy the Ice Bow at Eagrose Castle and switch Ramza into the Archer job. Goblins are weak to Ice, and with his wide firing range, Ramza can deal devastating damage across the small battlefield while staying out of harm’s way. ►How to Change Jobs |
| 3 | 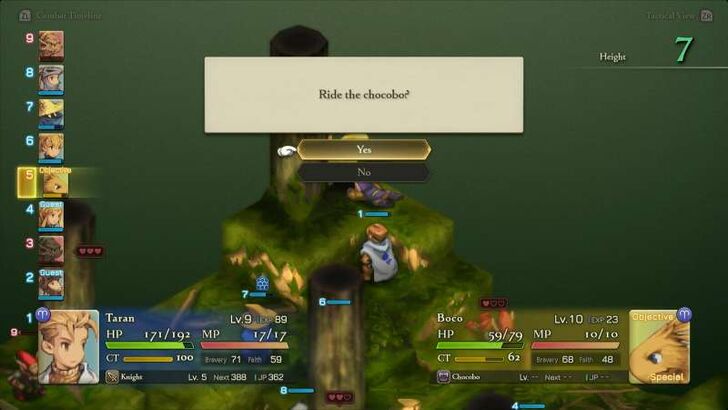 Protect the Chocobo Don’t let the chocobo fall in battle, as its death results in an instant Game Over if you’ve chosen to rescue it. Keep at least one unit nearby to intercept enemies that may target it. |
Chapter 2: The Manipulator and the Subservient Walkthrough
Should You Save or Leave the Chocobo?
Save The Chocobo to Gain a Party Member
| Decision | Effect |
|---|---|
| We should be on our way to the wood. | ・-10 Bravery to all units. ・ Chocobo does not help you out in the fight, but you will still recruit it afterward. |
| Perhaps we could use it... | ・Chocobo joins the fight as an ally. If it dies, you get a Game Over. ・Successfully protecting it means it will join your party after the battle. |
It is recommended to pick the “Perhaps we could use it...” option. While it adds the extra challenge of protecting the chocobo during battle, having its support makes the fight smoother, and you’ll still recruit it afterward as Boco, your first permanent chocobo companion.
The other option just lowers your Bravery and denies you help during the fight.
How to Recruit Boco and Overview
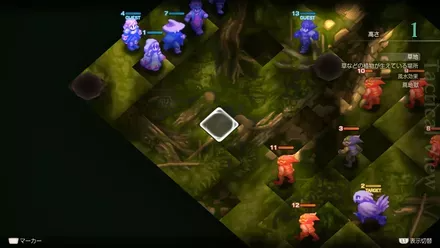
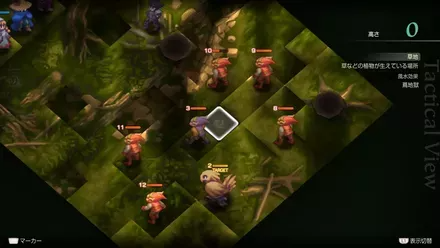
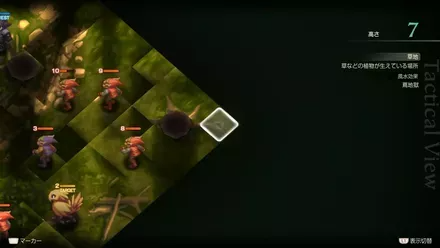
Battle 12: Araguay Woods Buried Treasure Locations
Location and Treasures
| Location | Treasures |
|---|---|
 |
Common: Rare: |
 |
Common: Rare: |
 |
Common: Rare: |
 |
Common: Rare: |
All Hidden Items and Treasure Locations
Battle 12: Araguay Woods Rewards
All Araguay Woods Spoils of War
| All Spoils of War |
|---|
|
・
|
Besides the treasures you can pick up during the fight, you’ll also receive Spoils of War once the battle ends. These are guaranteed rewards that drop after completing the objective, and always include Gil along with the items listed above.
Final Fantasy Tactics - The Ivalice Chronicles Related Guides

All Chapter Walkthroughs
| # | Chapter Title |
|---|---|
| 1 | The Meager |
| 2 | The Manipulative and the Subservient |
| 3 | The Valiant |
| 4 | In the Name of Love |
Chapter 1 Walkthrough
| # | Locations and Battles |
|---|---|
| 1 | Orbonne Monastery |
| 2 | Magick City of Gariland |
| 3 | Mandalia Plain |
| 4 | Siedge Weald |
| 5 | Dorter Slums |
| 6 | The Sand Rat's Sietch |
| 7 | Brigands' Den |
| 8 | Lenalian Plateau |
| 9 | Fovoham Windflats |
| 10 | Ziekden Fortress |
Chapter 2 Walkthrough
| # | Locations and Battles |
|---|---|
| 11 | Merchant City of Dorter |
| 12 | Araguay Woods |
| 13 | Zeirchele Falls |
| 14 | Castled City of Zaland |
| 15 | Balias Tor |
| 16 | Tchigolith Fenlands |
| 17 | Goug Lowtown |
| 18 | Balias Swale |
| 19 | Golgollada Gallows |
| 20 | Lionel Castle Gate |
| 21 | Lionel Castle Keep |
Chapter 3 Walkthrough
| # | Locations and Battles |
|---|---|
| 22 | Mining Town of Gollund |
| 23 | Lesalia Castle Postern |
| 24 | Monastery Vaults: Second Level |
| 25 | Monastery Vaults: Third Level |
| 26 | Monastery Vaults: First Level |
| 27 | Grogh Heights |
| 28 | Walled City of Yardrow |
| 29 | Yuguewood |
| 30 | Riovanes Castle Gate |
| 31 | Riovanes Castle Keep |
| 32 | Riovanes Castle Roof |
Chapter 4 Walkthrough
| # | Locations and Battles |
|---|---|
| 33 | Dugeura Pass |
| 34 | Free City of Bervenia |
| 35 | Finnath Creek |
| 36 | Outlying Church |
| 37 | Beddha Sandwaste |
| 38 A | Fort Besselat: South Wall |
| 38 B | Fort Besselat: North Wall |
| 39 | Fort Besselat Sluice |
| 40 | Mount Germinas |
| 41 | Lake Poescas |
| 42 | Limberry Castle Gate |
| 43 | Limberry Castle Keep |
| 44 | Limberry Castle Undercroft |
| 45 | Eagrose Castle Keep |
| 46 | Mullonde Cathedral |
| 47 | Mullonde Cathedral Nave |
| 48 | Mullonde Cathedral Sanctuary |
| 49 | Monastery Vaults: Fourth Level |
| 50 | Monastery Vaults: Fifth Level |
| 51 | Necrohol of Mullonde |
| 52 | Lost Halidom |
| 53 | Airship Graveyard |
| - | Mount Bervenia |
| - | Dorvauldar Marsh |
All Side Quest Locations
| # | Locations and Battles |
|---|---|
| 1 | Gollund Colliery Floor |
| 2 | Gollund Colliery Slope |
| 3 | Gollund Colliery Ridge |
| 4 | Gollund Coal Shaft |
| 5 | Nelveska Temple |
| 6 | Trade City of Sal Ghidos |
Comment
Author
Final Fantasy Tactics - The Ivalice Chronicles Walkthrough & Guides Wiki
Araguay Woods Walkthrough (Battle 12)
Rankings
- We could not find the message board you were looking for.
Gaming News
Popular Games

Genshin Impact Walkthrough & Guides Wiki

Umamusume: Pretty Derby Walkthrough & Guides Wiki

Crimson Desert Walkthrough & Guides Wiki

Monster Hunter Stories 3: Twisted Reflection Walkthrough & Guides Wiki

Honkai: Star Rail Walkthrough & Guides Wiki

Pokemon Pokopia Walkthrough & Guides Wiki

The Seven Deadly Sins: Origin Walkthrough & Guides Wiki

Wuthering Waves Walkthrough & Guides Wiki

Zenless Zone Zero Walkthrough & Guides Wiki

Arknights: Endfield Walkthrough & Guides Wiki
Recommended Games

Fire Emblem Heroes (FEH) Walkthrough & Guides Wiki

Diablo 4: Vessel of Hatred Walkthrough & Guides Wiki

Cyberpunk 2077: Ultimate Edition Walkthrough & Guides Wiki

Yu-Gi-Oh! Master Duel Walkthrough & Guides Wiki

Super Smash Bros. Ultimate Walkthrough & Guides Wiki

Pokemon Brilliant Diamond and Shining Pearl (BDSP) Walkthrough & Guides Wiki

Elden Ring Shadow of the Erdtree Walkthrough & Guides Wiki

Monster Hunter World Walkthrough & Guides Wiki

The Legend of Zelda: Tears of the Kingdom Walkthrough & Guides Wiki

Persona 3 Reload Walkthrough & Guides Wiki
All rights reserved
© SQUARE ENIX
The copyrights of videos of games used in our content and other intellectual property rights belong to the provider of the game.
The contents we provide on this site were created personally by members of the Game8 editorial department.
We refuse the right to reuse or repost content taken without our permission such as data or images to other sites.


