Fort Besselat Sluice Walkthrough (Battle 39)
★ Tier Lists: Characters | Jobs | Weapons
☆ Farming Guides: Gil | JP | Rare Weapons
★ All Missables and Points of No Return
☆ Optimal Job Progression Guide
★ Recruit All Secret Characters!
☆ All Hidden Treasure Locations
This is a guide for Battle 39: Fort Besselat Sluice in Chapter 4 of Final Fantasy Tactics - The Ivalice Chronicles. See a full walkthrough of this battle, as well as its overview, enemies, recruitable characters and rewards for completing Fort Besselat Sluice.
| ◄ Previous Battle | Next Battle ► |
|---|---|
| Fort Besselat: North Wall Fort Besselat: South Wall |
Mount Germinas |
List of Contents
Battle 39: Fort Besselat Sluice Overview
Battle Location and Information
| Field View | |
|---|---|
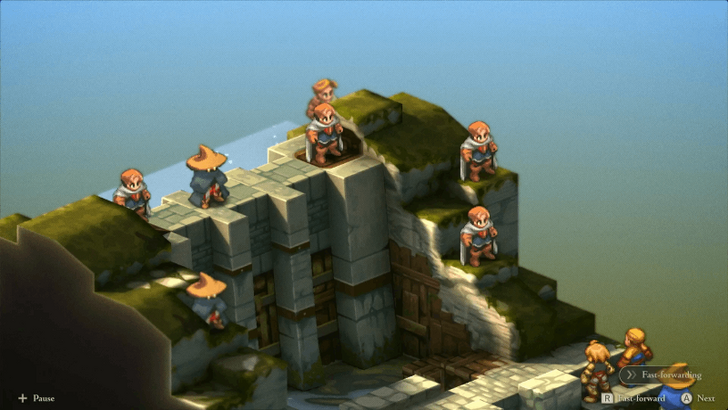 |
|
| Chapter | Chapter 4 |
| Rec. Level / Difficulty |
Level 45
✦✦✦✧✧ |
| Objective | Open water gate at Fort Besselat! |
| Party Size | You can deploy up to 5 units. |
Treasure Rewards
| All Treasure Rewards |
|---|
|
・
|
Defeated enemies leave behind a countdown timer. When it reaches 0, they will either crystallize or turn into a Treasure Chest. Crystals can restore HP/MP or grant abilities, while Treasure Chests contain items.
The list in the table shows the possible items you can obtain from these chests during this battle.
Battle 39: Fort Besselat Sluice Recruitable Characters
All Characters You Can Recruit
| Recruitable Characters | ||
|---|---|---|
 Cidolfus Orlandeau Cidolfus Orlandeau
|
||
Battle 39: Fort Besselat Sluice Enemies
All Enemies in Fort Besselat Sluice
| All Stage Enemies |
|---|
|
・
・
・
|
Battle 39: Fort Besselat Sluice Recommended Party Composition
Best Characters to Use For This Battle
| Best Characters to Use (Team A) | ||
|---|---|---|
 Ramza Ramza (Ninja) |
 Mustadio Mustadio |
 Black Mage Black Mage
|
| Best Characters to Use (Team B) | ||
 Mystic Mystic
|
 Agrias Agrias |
|
Both teams in this battle are built for offense, with Ramza leading Team A and Agrias leading Team B. Ramza’s group has the advantage of an extra slot and longer range thanks to Mustadio, while Agrias’ side runs lighter with just her and the Mystic.
Each team has its own disabler, Mustadio for Team A and the Mystic for Team B, who should focus on shutting down the Black Mage in their respective areas. Since Team B has fewer members, make sure they’re well-equipped with healing and revival options.
Battle 39: Fort Besselat Sluice Walkthrough
Walkthrough Guide
| # | Step by Step Objectives |
|---|---|
| 1 | 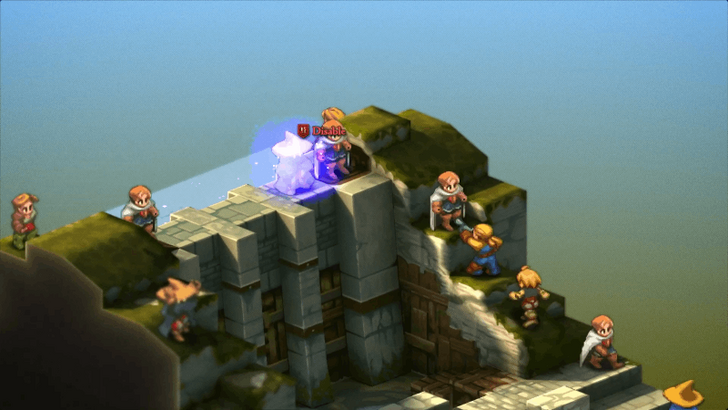 Defeat the Black Mages First Take out the Black Mages before anyone else, as they can deal heavy AoE damage. Use Mustadio on Team A and your Mystic on Team B to Disable the Black Mages with Arm Shot and Hesitation respectively, then follow up with attacks from Ramza or Agrias. Eliminating them early will make the rest of the fight much safer. Black Mages tend to stay near elevated spots so positioning your Black Mage to counter with its elevation ignoring spells can take them down even quicker. |
| 2 | 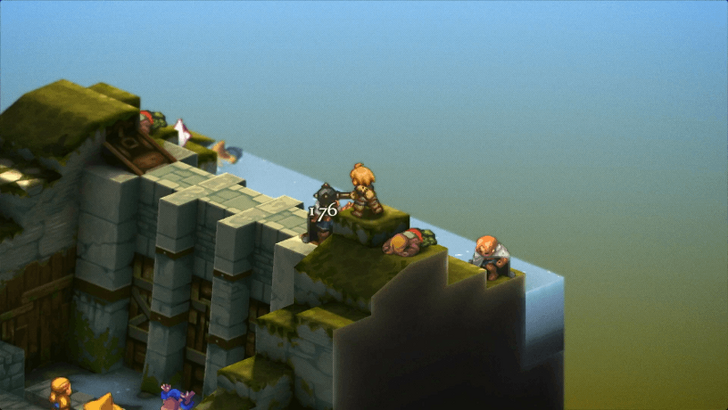 Clear the Other Knights and Archers Once the mages are gone, shift your attention to the Knights and Archers. The Knights near the floodgate levers will hold their ground, so you can isolate and eliminate the ranged units first. Although the mission’s main objective is to open the gate by pulling the levers, it’s easier and safer to defeat all enemies first. Doing so prevents counterattacks while interacting with the switches, and clears the field for a smooth finish. |
| 3 | 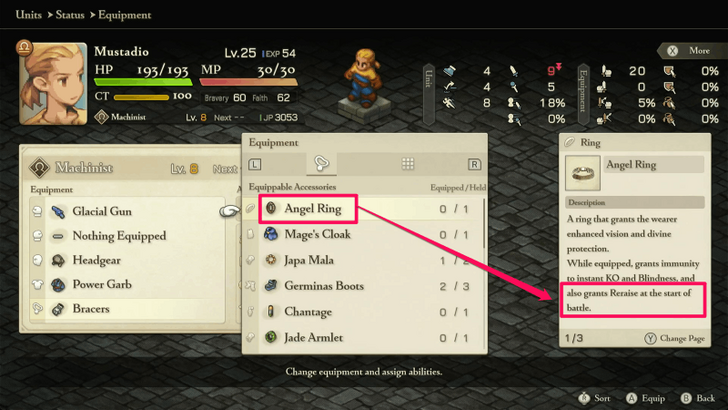 Protect Your Party This fight can get rough if you’re underleveled. Make sure everyone can heal themselves, especially Team B (Agrias and the Mystic) by equipping secondary abilities like White Magicks or Items. If you have Angel Rings, equip them for Reraise to survive sudden spell bursts or crits. Once all enemies are defeated, pull the floodgate levers to release the water and complete the battle. |
Chapter 4: In the Name of Love Walkthrough
Battle 39: Fort Besselat Sluice Rewards
All Magick City of Gariland Spoils of War
| All Spoils of War |
|---|
|
・
|
Besides the treasures you can pick up during the fight, you’ll also receive Spoils of War once the battle ends. These are guaranteed rewards that drop after completing the objective.
Final Fantasy Tactics - The Ivalice Chronicles Related Guides

All Chapter Walkthroughs
| # | Chapter Title |
|---|---|
| 1 | The Meager |
| 2 | The Manipulative and the Subservient |
| 3 | The Valiant |
| 4 | In the Name of Love |
Chapter 1 Walkthrough
| # | Locations and Battles |
|---|---|
| 1 | Orbonne Monastery |
| 2 | Magick City of Gariland |
| 3 | Mandalia Plain |
| 4 | Siedge Weald |
| 5 | Dorter Slums |
| 6 | The Sand Rat's Sietch |
| 7 | Brigands' Den |
| 8 | Lenalian Plateau |
| 9 | Fovoham Windflats |
| 10 | Ziekden Fortress |
Chapter 2 Walkthrough
| # | Locations and Battles |
|---|---|
| 11 | Merchant City of Dorter |
| 12 | Araguay Woods |
| 13 | Zeirchele Falls |
| 14 | Castled City of Zaland |
| 15 | Balias Tor |
| 16 | Tchigolith Fenlands |
| 17 | Goug Lowtown |
| 18 | Balias Swale |
| 19 | Golgollada Gallows |
| 20 | Lionel Castle Gate |
| 21 | Lionel Castle Keep |
Chapter 3 Walkthrough
| # | Locations and Battles |
|---|---|
| 22 | Mining Town of Gollund |
| 23 | Lesalia Castle Postern |
| 24 | Monastery Vaults: Second Level |
| 25 | Monastery Vaults: Third Level |
| 26 | Monastery Vaults: First Level |
| 27 | Grogh Heights |
| 28 | Walled City of Yardrow |
| 29 | Yuguewood |
| 30 | Riovanes Castle Gate |
| 31 | Riovanes Castle Keep |
| 32 | Riovanes Castle Roof |
Chapter 4 Walkthrough
| # | Locations and Battles |
|---|---|
| 33 | Dugeura Pass |
| 34 | Free City of Bervenia |
| 35 | Finnath Creek |
| 36 | Outlying Church |
| 37 | Beddha Sandwaste |
| 38 A | Fort Besselat: South Wall |
| 38 B | Fort Besselat: North Wall |
| 39 | Fort Besselat Sluice |
| 40 | Mount Germinas |
| 41 | Lake Poescas |
| 42 | Limberry Castle Gate |
| 43 | Limberry Castle Keep |
| 44 | Limberry Castle Undercroft |
| 45 | Eagrose Castle Keep |
| 46 | Mullonde Cathedral |
| 47 | Mullonde Cathedral Nave |
| 48 | Mullonde Cathedral Sanctuary |
| 49 | Monastery Vaults: Fourth Level |
| 50 | Monastery Vaults: Fifth Level |
| 51 | Necrohol of Mullonde |
| 52 | Lost Halidom |
| 53 | Airship Graveyard |
| - | Mount Bervenia |
| - | Dorvauldar Marsh |
All Side Quest Locations
| # | Locations and Battles |
|---|---|
| 1 | Gollund Colliery Floor |
| 2 | Gollund Colliery Slope |
| 3 | Gollund Colliery Ridge |
| 4 | Gollund Coal Shaft |
| 5 | Nelveska Temple |
| 6 | Trade City of Sal Ghidos |
Comment
Author
Final Fantasy Tactics - The Ivalice Chronicles Walkthrough & Guides Wiki
Fort Besselat Sluice Walkthrough (Battle 39)
Rankings
- We could not find the message board you were looking for.
Gaming News
Popular Games

Genshin Impact Walkthrough & Guides Wiki

Umamusume: Pretty Derby Walkthrough & Guides Wiki

Crimson Desert Walkthrough & Guides Wiki

Monster Hunter Stories 3: Twisted Reflection Walkthrough & Guides Wiki

Honkai: Star Rail Walkthrough & Guides Wiki

Pokemon Pokopia Walkthrough & Guides Wiki

The Seven Deadly Sins: Origin Walkthrough & Guides Wiki

Wuthering Waves Walkthrough & Guides Wiki

Zenless Zone Zero Walkthrough & Guides Wiki

Arknights: Endfield Walkthrough & Guides Wiki
Recommended Games

Fire Emblem Heroes (FEH) Walkthrough & Guides Wiki

Diablo 4: Vessel of Hatred Walkthrough & Guides Wiki

Cyberpunk 2077: Ultimate Edition Walkthrough & Guides Wiki

Yu-Gi-Oh! Master Duel Walkthrough & Guides Wiki

Super Smash Bros. Ultimate Walkthrough & Guides Wiki

Pokemon Brilliant Diamond and Shining Pearl (BDSP) Walkthrough & Guides Wiki

Elden Ring Shadow of the Erdtree Walkthrough & Guides Wiki

Monster Hunter World Walkthrough & Guides Wiki

The Legend of Zelda: Tears of the Kingdom Walkthrough & Guides Wiki

Persona 3 Reload Walkthrough & Guides Wiki
All rights reserved
© SQUARE ENIX
The copyrights of videos of games used in our content and other intellectual property rights belong to the provider of the game.
The contents we provide on this site were created personally by members of the Game8 editorial department.
We refuse the right to reuse or repost content taken without our permission such as data or images to other sites.



![Star Savior Review [First Impressions] | Engaging, Entertaining, and Expensive](https://img.game8.co/4447603/8f500e9bf666bdb8adb1af478e9dfdbd.png/show)


