The Sand Rat's Sietch Walkthrough (Battle 6)
★ Tier Lists: Characters | Jobs | Weapons
☆ Farming Guides: Gil | JP | Rare Weapons
★ All Missables and Points of No Return
☆ Optimal Job Progression Guide
★ Recruit All Secret Characters!
☆ All Hidden Treasure Locations
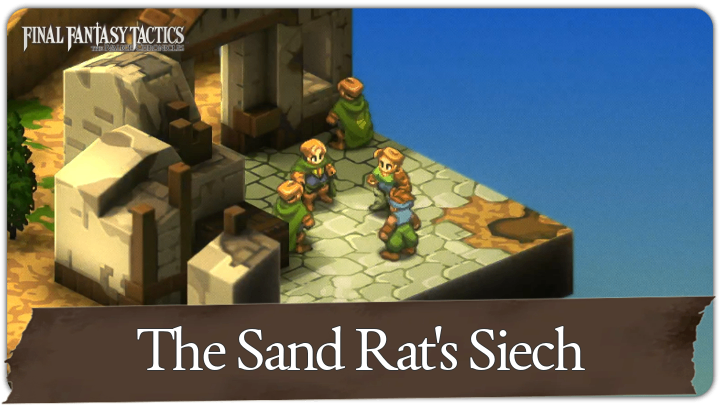
This is a guide for Battle 6: The Sand Rat's Sietch in Chapter 1 of Final Fantasy Tactics - The Ivalice Chronicles. See a full walkthrough of this battle, as well as its overview, enemies, recruitable characters, treasure locations, and rewards for completing Sand Rat Sietch.
| ◄ Previous Battle | Next Battle ► |
|---|---|
| Dorter Slums | Brigands' Den |
List of Contents
Battle 6: The Sand Rat's Sietch Overview
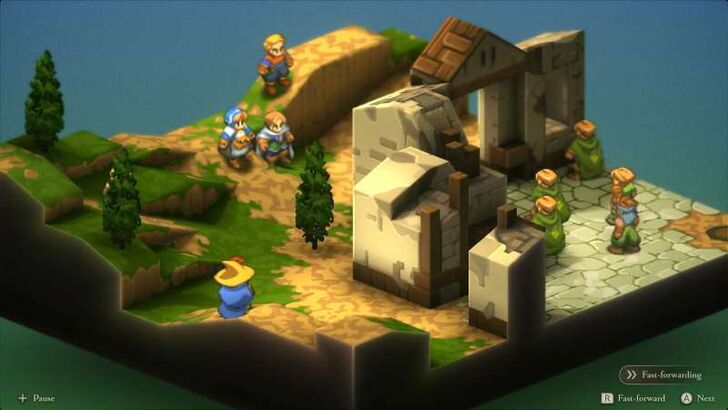
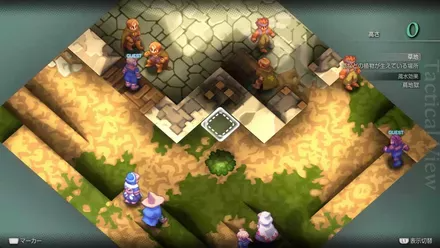
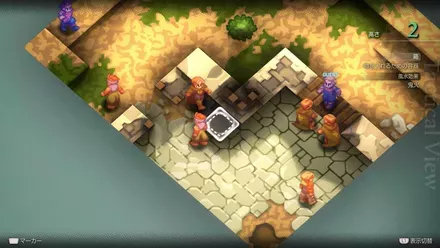
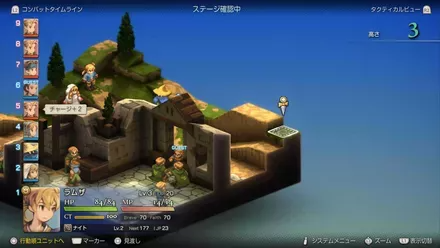
Battle Location and Information
| Field View | |
|---|---|
 |
|
| Chapter | Chapter 1 |
| Rec. Level / Difficulty |
Level 4
✦✦✧✧✧ |
| Objective | Defeat all enemies! |
| Party Size | You can deploy up to 4 units. |
Battle 6: The Sand Rat's Sietch Recruitable Characters
All Characters You Can Recruit
| There are no known characters that can be recruited in this stage. |
Battle 6: The Sand Rat's Sietch Enemies
All Enemies in Sand Rat Sietch
| All Stage Enemies |
|---|
|
・
・
・
|
Battle 6: The Sand Rat's Sietch Recommended Party Composition
Best Characters to Use For This Battle
| Best Characters to Use (Team A) | |||
|---|---|---|---|
 Ramza Ramza |
 Black Mage Black Mage
|
||
| Best Characters to Use (Team B) | |||
 Knight Knight
|
 Chemist Chemist
|
||
In this fight, your party is split into two groups, so balance is key. Team A should have Ramza and a Black Mage to handle enemies on the right side with strong spell damage and support.
Team B works best with a sturdy Knight to hold the chokepoint on the left, backed by a Chemist for healing. Argath and Delita join as guests to help round out each side, giving you enough offense and defense to manage both fronts.
Battle 6: The Sand Rat's Sietch Walkthrough
Walkthrough Guide
| # | Step by Step Objectives |
|---|---|
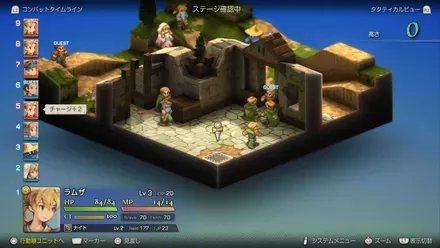
| 1 | 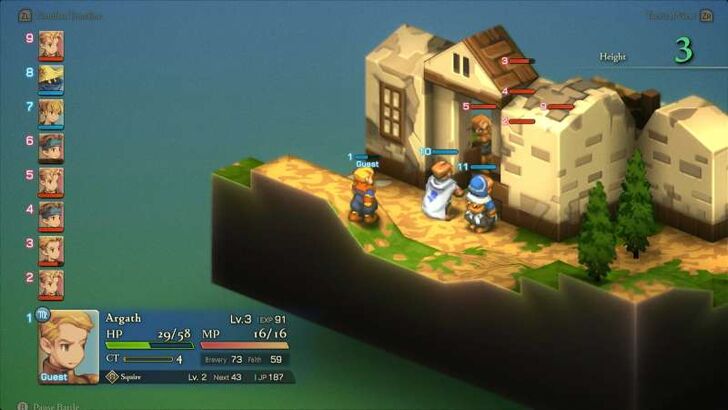 Hold the Left Side With Your Knight and Chemist Deploy your Knight and Chemist with Argath on the left entrance of the building. Most of the enemy units will funnel out from this doorway, so use your Knight to block the chokepoint. Keep your Chemist just behind him for healing support, while Argath can provide extra chip damage with his Throw Stone ability. |
| 2 | 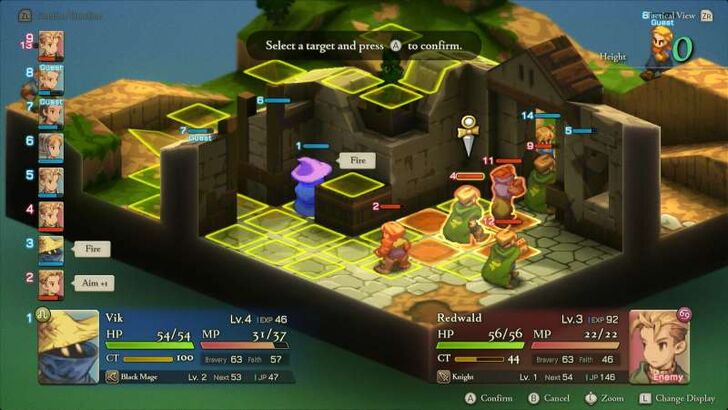 Push the Right Side With Ramza and Your Black Mage Meanwhile, send Ramza and your Black Mage to circle around the right side, Delita will also go here. Have your Black Mage hang back and cast from a safe spot, this is especially effective once you’re inside the building, since enemies tend to cluster near the doorway on the other side and can be hit with area spells. Keep Ramza close to shield your mage and use Chant for quick heals, while Delita holds the line and draws enemy attention. |
| 3 | 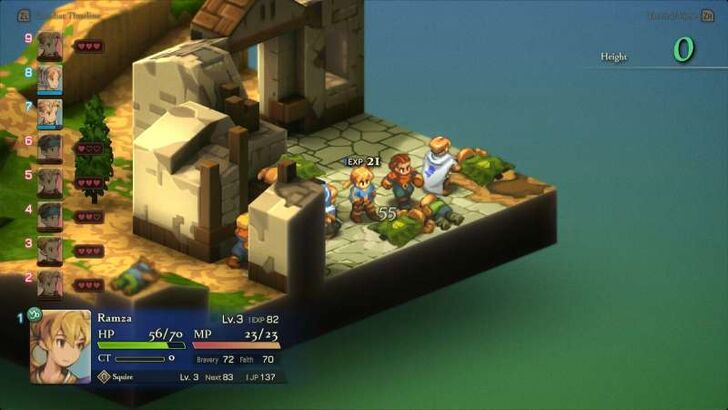 Converge on the Center Once both sides have gained ground, close in on the center and finish off the remaining enemies. |
Chapter 1: The Meager Walkthrough
Battle 6: The Sand Rat's Sietch Buried Treasure Locations
Location and Treasures
| Location | Treasures |
|---|---|
 |
Common: Rare: |
 |
Common: Rare: |
 |
Common: Rare: |
 |
Common: Rare: |
All Hidden Items and Treasure Locations
Battle 6: The Sand Rat's Sietch Rewards
All The Sand Rat's Sietch Spoils of War
| All Spoils of War |
|---|
|
・
|
Besides the treasures you can pick up during the fight, you’ll also receive Spoils of War once the battle ends. These are guaranteed rewards that drop after completing the objective, and always include Gil along with the items listed above.
Final Fantasy Tactics - The Ivalice Chronicles Related Guides
All Chapter Walkthroughs
| # | Chapter Title |
|---|---|
| 1 | The Meager |
| 2 | The Manipulative and the Subservient |
| 3 | The Valiant |
| 4 | In the Name of Love |
Chapter 1 Walkthrough
| # | Locations and Battles |
|---|---|
| 1 | Orbonne Monastery |
| 2 | Magick City of Gariland |
| 3 | Mandalia Plain |
| 4 | Siedge Weald |
| 5 | Dorter Slums |
| 6 | The Sand Rat's Sietch |
| 7 | Brigands' Den |
| 8 | Lenalian Plateau |
| 9 | Fovoham Windflats |
| 10 | Ziekden Fortress |
Chapter 2 Walkthrough
| # | Locations and Battles |
|---|---|
| 11 | Merchant City of Dorter |
| 12 | Araguay Woods |
| 13 | Zeirchele Falls |
| 14 | Castled City of Zaland |
| 15 | Balias Tor |
| 16 | Tchigolith Fenlands |
| 17 | Goug Lowtown |
| 18 | Balias Swale |
| 19 | Golgollada Gallows |
| 20 | Lionel Castle Gate |
| 21 | Lionel Castle Keep |
Chapter 3 Walkthrough
| # | Locations and Battles |
|---|---|
| 22 | Mining Town of Gollund |
| 23 | Lesalia Castle Postern |
| 24 | Monastery Vaults: Second Level |
| 25 | Monastery Vaults: Third Level |
| 26 | Monastery Vaults: First Level |
| 27 | Grogh Heights |
| 28 | Walled City of Yardrow |
| 29 | Yuguewood |
| 30 | Riovanes Castle Gate |
| 31 | Riovanes Castle Keep |
| 32 | Riovanes Castle Roof |
Chapter 4 Walkthrough
| # | Locations and Battles |
|---|---|
| 33 | Dugeura Pass |
| 34 | Free City of Bervenia |
| 35 | Finnath Creek |
| 36 | Outlying Church |
| 37 | Beddha Sandwaste |
| 38 A | Fort Besselat: South Wall |
| 38 B | Fort Besselat: North Wall |
| 39 | Fort Besselat Sluice |
| 40 | Mount Germinas |
| 41 | Lake Poescas |
| 42 | Limberry Castle Gate |
| 43 | Limberry Castle Keep |
| 44 | Limberry Castle Undercroft |
| 45 | Eagrose Castle Keep |
| 46 | Mullonde Cathedral |
| 47 | Mullonde Cathedral Nave |
| 48 | Mullonde Cathedral Sanctuary |
| 49 | Monastery Vaults: Fourth Level |
| 50 | Monastery Vaults: Fifth Level |
| 51 | Necrohol of Mullonde |
| 52 | Lost Halidom |
| 53 | Airship Graveyard |
| - | Mount Bervenia |
| - | Dorvauldar Marsh |
All Side Quest Locations
| # | Locations and Battles |
|---|---|
| 1 | Gollund Colliery Floor |
| 2 | Gollund Colliery Slope |
| 3 | Gollund Colliery Ridge |
| 4 | Gollund Coal Shaft |
| 5 | Nelveska Temple |
| 6 | Trade City of Sal Ghidos |
Comment
Author
Final Fantasy Tactics - The Ivalice Chronicles Walkthrough & Guides Wiki
The Sand Rat's Sietch Walkthrough (Battle 6)
Rankings
- We could not find the message board you were looking for.
Gaming News


Popular Games

Genshin Impact Walkthrough & Guides Wiki
Umamusume: Pretty Derby Walkthrough & Guides Wiki
Crimson Desert Walkthrough & Guides Wiki
Monster Hunter Stories 3: Twisted Reflection Walkthrough & Guides Wiki
Honkai: Star Rail Walkthrough & Guides Wiki
Pokemon Pokopia Walkthrough & Guides Wiki
The Seven Deadly Sins: Origin Walkthrough & Guides Wiki
Wuthering Waves Walkthrough & Guides Wiki
Zenless Zone Zero Walkthrough & Guides Wiki
Arknights: Endfield Walkthrough & Guides Wiki


Recommended Games
Fire Emblem Heroes (FEH) Walkthrough & Guides Wiki
Diablo 4: Vessel of Hatred Walkthrough & Guides Wiki
Cyberpunk 2077: Ultimate Edition Walkthrough & Guides Wiki
Yu-Gi-Oh! Master Duel Walkthrough & Guides Wiki
Super Smash Bros. Ultimate Walkthrough & Guides Wiki
Pokemon Brilliant Diamond and Shining Pearl (BDSP) Walkthrough & Guides Wiki
Elden Ring Shadow of the Erdtree Walkthrough & Guides Wiki
Monster Hunter World Walkthrough & Guides Wiki
The Legend of Zelda: Tears of the Kingdom Walkthrough & Guides Wiki
Persona 3 Reload Walkthrough & Guides Wiki


All rights reserved
© SQUARE ENIX
The copyrights of videos of games used in our content and other intellectual property rights belong to the provider of the game.
The contents we provide on this site were created personally by members of the Game8 editorial department.
We refuse the right to reuse or repost content taken without our permission such as data or images to other sites.