Airship Graveyard Walkthrough (Battle 59)
★ Tier Lists: Characters | Jobs | Weapons
☆ Farming Guides: Gil | JP | Rare Weapons
★ All Missables and Points of No Return
☆ Optimal Job Progression Guide
★ Recruit All Secret Characters!
☆ All Hidden Treasure Locations
This is a guide for Battle 59: Airship Graveyard in Chapter 4 of Final Fantasy Tactics - The Ivalice Chronicles. See a full walkthrough of this battle, as well as its overview, enemies, recruitable characters, treasure locations, and rewards for completing Airship Graveyard.
| ◄ Previous Battle | |
|---|---|
| Lost Halidom |
List of Contents
Battle 59: Airship Graveyard Overview
Battle Location and Information
| Field View | |
|---|---|
 |
|
| Chapter | Chapter 4 |
| Rec. Level / Difficulty |
Level 60+
✦✦✦✦✧ |
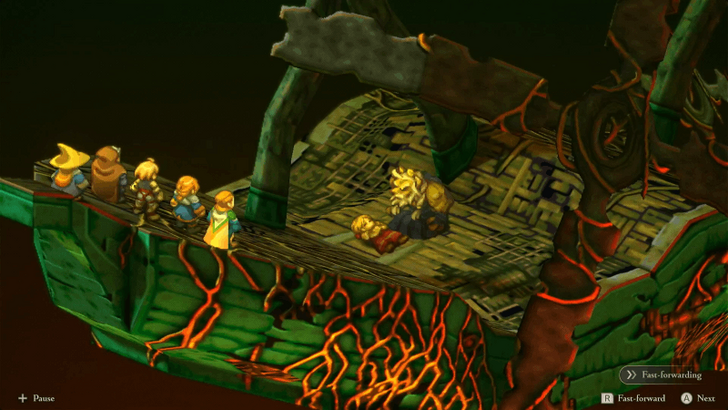
| Objective | Defeat Hashmal! Then Defeat Ultima! |
| Party Size | You can deploy up to 5 units. |
Battle 59: Airship Graveyard Recruitable Characters
All Characters You Can Recruit
| There are no known characters that can be recruited in this stage. |
Battle 59: Airship Graveyard Enemies
All Enemies in Airship Graveyard
| All Stage Enemies |
|---|
|
・Barich (Lost Halidom)
|
Battle 59: Airship Graveyard Recommended Party Composition
Best Characters to Use For Hashmal Battle
| Best Characters to Use | ||
|---|---|---|
 Ramza Ramza (Ninja) |
 Agrias Agrias (Knight) |
 Meliadoul Meliadoul |
 Orlandeau Orlandeau |
 Black Mage Black Mage
|
|
Ramza and Orlandeau serve as your main damage dealers, while Agrias and Meliadoul can weaken Hashmal with strong physical attacks and defense breaks.
The Black Mage provides essential support through Arithmeticks, allowing flexible access to healing or Graviga without worrying about range or line of sight. This setup ensures consistent damage output while keeping your team safe from Hashmal’s wide-area attacks.
Best Characters to Use For Ultima Battle
| Best Characters to Use | ||
|---|---|---|
 Ramza Ramza (Ninja) |
 Agrias Agrias (Knight) |
 Mustadio Mustadio (Chemist) |
 Orlandeau Orlandeau |
 Time Mage Time Mage
|
|
Ramza and the Time Mage with Arithmeticks serve as your main heavy hitters, while Agrias and Orlandeau provides defensive stability and crowd control. Mustadio shines as a support Chemist, supplying X-Potions, Elixirs, and High Ethers while disabling Ultima Demons when possible. The Time Mage delivers devastating AoE damage and Graviga setups without worrying about MP or targeting limitations.
Battle 59: Airship Graveyard Walkthrough
Walkthrough Guide Versus Hashmal
| # | Step by Step Objectives |
|---|---|
| 1 |  Prepare Your Party Before entering the Airship Graveyard, ensure your units are fully equipped with endgame weapons. Equip Black Garb or Jade Armlets to make your team immune to Hashmal’s Stop ability. The rest of your units should focus on high burst damage while using Auto-Potion to sustain through heavy hits. |
| 2 | Do Not Clump Together Hashmal uses wide-area attacks that can wipe clustered units. Keep your formation spread out and attack from a distance whenever possible. Let Ramza act as your close-range attacker to bait Hashmal’s strikes. Once Hashmal falls, you’ll receive Ragnarok as a reward and get the chance to reorganize your party before the final showdown against Ultima. ►How to Beat Ultima |
Walkthrough Guide Versus Ultima
| # | Step by Step Objectives |
|---|---|
| 1 | Reorganize Your Party After defeating Hashmal, your HP and MP will automatically be restored, giving you time to prepare before facing Ultima. Replace Meliadoul with Mustadio equipped as a Chemist he’ll be your main item support, supplying X-Potions, Elixirs, and High Ethers to your party. Don’t forget to equip Ragnarok, the sword you just earned from the previous battle, and make sure everyone still has Auto-Potion set for emergencies. Also, swap your Black Mage to a Time Mage with Arithmeticks, so they can cast Graviga when Arithmeticks cannot target the enemy. |
| 2 | 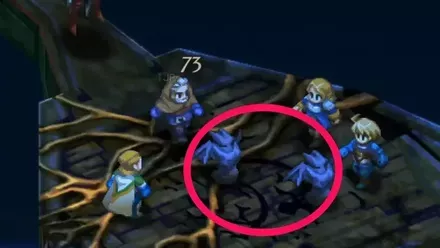 Defeat the Ultima Demons First The fight begins with Ultima and several Ultima Demons surrounding your team. These demons use powerful AoE skills like Almagest, which deals a percentage of your HP as damage. Prioritize eliminating them first to reduce incoming pressure. If any of them crystallize, do not let Ultima reach those crystals as she can absorb them to fully restore her HP. Keep Mustadio on standby to heal allies and use Arm Shot if possible to Disable the Demons’ offense. |
| 3 | 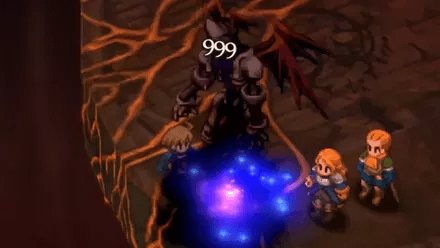 Go All Out on Ultima Once the Ultima Demons are defeated, focus all attacks on Ultima. Use Ramza, Orlandeau, and Agrias to unleash their strongest physical skills while your Time Mage casts Graviga through Arithmeticks to shave off a huge portion of her HP. Auto-Potion will keep your team standing through her powerful magic bursts, so maintain pressure and heal as needed until the next phase begins. |
| 4 | 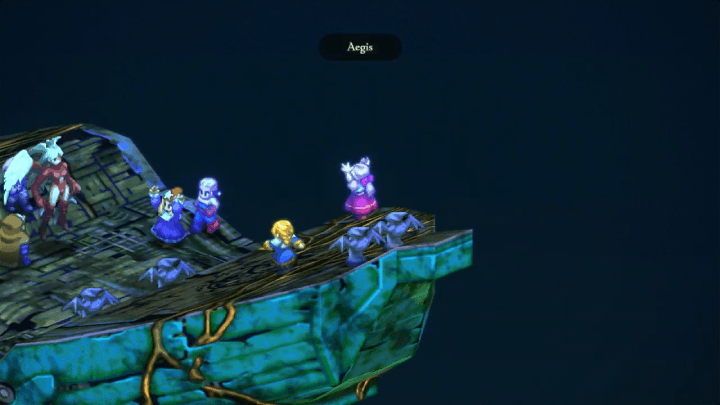 Prepare for the Second Phase When Ultima reaches low HP, the second phase begins, she’ll regain strength and access stronger spells. Stay close to Alma, who can cast Aegis for extra protection. You can also manipulate Ultima’s behavior by clustering your units as she’ll often waste turns casting Dispelja to remove buffs instead of using deadlier magic. Once she starts casting, spread your units out again to avoid further AoE damage. Keep the offensive going until she finally falls, concluding the main story battle. |
Battle 59: Airship Graveyard Buried Treasure Locations
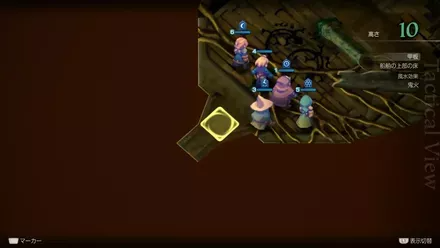
Location and Treasures
| Location | Treasures |
|---|---|
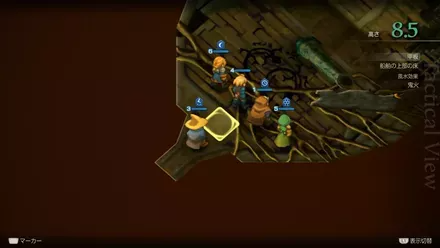 |
Common: Rare: |
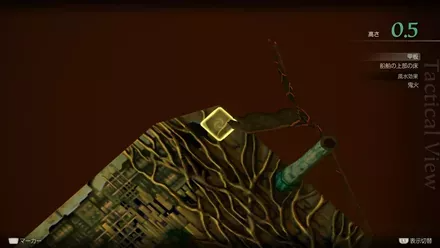 |
Common: Rare: |
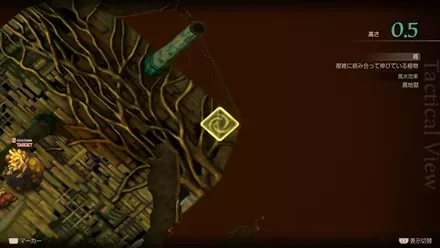 |
Common: Rare: |
 |
Common: Rare: |
All Hidden Items and Treasure Locations
Battle 59: Airship Graveyard Undercroft Rewards
All Airship Graveyard Spoils of War
| All Spoils of War |
|---|
Final Fantasy Tactics - The Ivalice Chronicles Related Guides

All Chapter Walkthroughs
| # | Chapter Title |
|---|---|
| 1 | The Meager |
| 2 | The Manipulative and the Subservient |
| 3 | The Valiant |
| 4 | In the Name of Love |
Chapter 1 Walkthrough
| # | Locations and Battles |
|---|---|
| 1 | Orbonne Monastery |
| 2 | Magick City of Gariland |
| 3 | Mandalia Plain |
| 4 | Siedge Weald |
| 5 | Dorter Slums |
| 6 | The Sand Rat's Sietch |
| 7 | Brigands' Den |
| 8 | Lenalian Plateau |
| 9 | Fovoham Windflats |
| 10 | Ziekden Fortress |
Chapter 2 Walkthrough
| # | Locations and Battles |
|---|---|
| 11 | Merchant City of Dorter |
| 12 | Araguay Woods |
| 13 | Zeirchele Falls |
| 14 | Castled City of Zaland |
| 15 | Balias Tor |
| 16 | Tchigolith Fenlands |
| 17 | Goug Lowtown |
| 18 | Balias Swale |
| 19 | Golgollada Gallows |
| 20 | Lionel Castle Gate |
| 21 | Lionel Castle Keep |
Chapter 3 Walkthrough
| # | Locations and Battles |
|---|---|
| 22 | Mining Town of Gollund |
| 23 | Lesalia Castle Postern |
| 24 | Monastery Vaults: Second Level |
| 25 | Monastery Vaults: Third Level |
| 26 | Monastery Vaults: First Level |
| 27 | Grogh Heights |
| 28 | Walled City of Yardrow |
| 29 | Yuguewood |
| 30 | Riovanes Castle Gate |
| 31 | Riovanes Castle Keep |
| 32 | Riovanes Castle Roof |
Chapter 4 Walkthrough
| # | Locations and Battles |
|---|---|
| 33 | Dugeura Pass |
| 34 | Free City of Bervenia |
| 35 | Finnath Creek |
| 36 | Outlying Church |
| 37 | Beddha Sandwaste |
| 38 A | Fort Besselat: South Wall |
| 38 B | Fort Besselat: North Wall |
| 39 | Fort Besselat Sluice |
| 40 | Mount Germinas |
| 41 | Lake Poescas |
| 42 | Limberry Castle Gate |
| 43 | Limberry Castle Keep |
| 44 | Limberry Castle Undercroft |
| 45 | Eagrose Castle Keep |
| 46 | Mullonde Cathedral |
| 47 | Mullonde Cathedral Nave |
| 48 | Mullonde Cathedral Sanctuary |
| 49 | Monastery Vaults: Fourth Level |
| 50 | Monastery Vaults: Fifth Level |
| 51 | Necrohol of Mullonde |
| 52 | Lost Halidom |
| 53 | Airship Graveyard |
| - | Mount Bervenia |
| - | Dorvauldar Marsh |
All Side Quest Locations
| # | Locations and Battles |
|---|---|
| 1 | Gollund Colliery Floor |
| 2 | Gollund Colliery Slope |
| 3 | Gollund Colliery Ridge |
| 4 | Gollund Coal Shaft |
| 5 | Nelveska Temple |
| 6 | Trade City of Sal Ghidos |
Comment
Author
Final Fantasy Tactics - The Ivalice Chronicles Walkthrough & Guides Wiki
Airship Graveyard Walkthrough (Battle 59)
Rankings
- We could not find the message board you were looking for.
Gaming News
Popular Games

Genshin Impact Walkthrough & Guides Wiki

Umamusume: Pretty Derby Walkthrough & Guides Wiki

Crimson Desert Walkthrough & Guides Wiki

Monster Hunter Stories 3: Twisted Reflection Walkthrough & Guides Wiki

Honkai: Star Rail Walkthrough & Guides Wiki

Pokemon Pokopia Walkthrough & Guides Wiki

The Seven Deadly Sins: Origin Walkthrough & Guides Wiki

Wuthering Waves Walkthrough & Guides Wiki

Zenless Zone Zero Walkthrough & Guides Wiki

Arknights: Endfield Walkthrough & Guides Wiki
Recommended Games

Fire Emblem Heroes (FEH) Walkthrough & Guides Wiki

Diablo 4: Vessel of Hatred Walkthrough & Guides Wiki

Cyberpunk 2077: Ultimate Edition Walkthrough & Guides Wiki

Yu-Gi-Oh! Master Duel Walkthrough & Guides Wiki

Super Smash Bros. Ultimate Walkthrough & Guides Wiki

Pokemon Brilliant Diamond and Shining Pearl (BDSP) Walkthrough & Guides Wiki

Elden Ring Shadow of the Erdtree Walkthrough & Guides Wiki

Monster Hunter World Walkthrough & Guides Wiki

The Legend of Zelda: Tears of the Kingdom Walkthrough & Guides Wiki

Persona 3 Reload Walkthrough & Guides Wiki
All rights reserved
© SQUARE ENIX
The copyrights of videos of games used in our content and other intellectual property rights belong to the provider of the game.
The contents we provide on this site were created personally by members of the Game8 editorial department.
We refuse the right to reuse or repost content taken without our permission such as data or images to other sites.




![Warframe Review [Switch 2] | Old Ninjas Can Learn New Tricks](https://img.game8.co/4455326/d5811d4c48e5fa4bbc3250cc4c10aedc.png/thumb)


