Midlight's Deep Dungeon Guide
★ Tier Lists: Characters | Jobs | Weapons
☆ Farming Guides: Gil | JP | Rare Weapons
★ All Missables and Points of No Return
☆ Optimal Job Progression Guide
★ Recruit All Secret Characters!
☆ All Hidden Treasure Locations
Midlight's Deep is a 10-part optional dungeon in Chapter 4 of FInal Fantasy Tactics - The Ivalice Chronicles. See the walkthrough and best party setup for Midlight's Deep, as well as its maps, enemies, recruitable characters, and treasure locations here!
List of Contents
How to Unlock Midlight's Deep
Complete Mullonde Cathedral Battles in Chapter 4
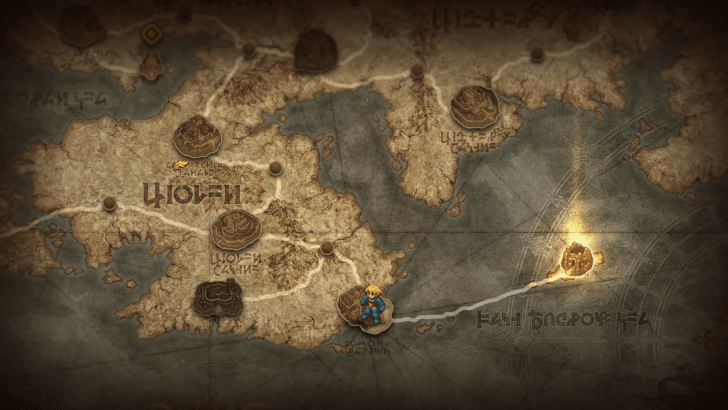
Midlight's Deep is unlocked after completing all the battles in Mullonde Cathedral in Chapter 4.
After completing Mullonde Cathedral Sanctuary, return to Port City of Warjilis for a cutscene that unlocks the island where you can enter Midlight's Deep.
Mullonde Cathedral Sanctuary Walkthrough
Midlight's Deep Walkthrough
| Jump to a Section! | |||
|---|---|---|---|
| 1 | NOISSIM | 2 | TERMINATION |
| 3 | DELTA | 4 | VALKYRIES |
| 5 | YROTCIV | 6 | TIGER |
| 7 | BRIDGE | 8 | VOYAGE |
| 9 | HORROR | 10 | END |
Midlight's Deep is a dungeon with 10 floors, each boasting a different battlefield. The first nine floors have random battles where you'll face against a randomized group of enemies.
Once you reach the 10th floor, a story battle will play out where you'll face against the legendary wizard Elidibus who is the superboss of the game.
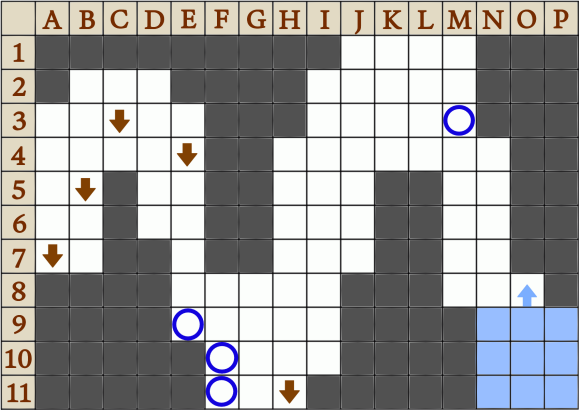
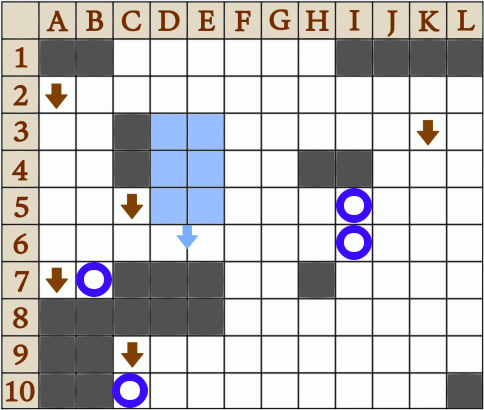
NOISSIM
| Grid View | |
|---|---|
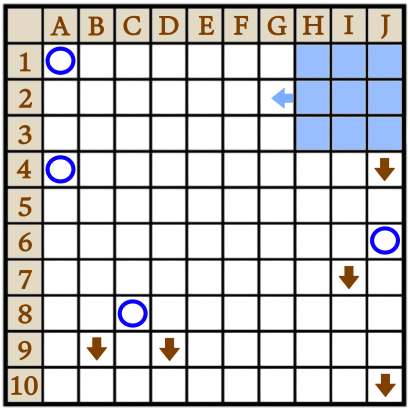 Blue Circles: Hidden Treasure Blue Tiles: Starting Area |
|
| Exits | J4, I7, B9, D9, J10 |
| Treasure | A1, A4, C8, J6 |
| Rec. Level / Difficulty | Level 60+ ✦✦✦✦✦ |
| Objective | Defeat all enemies. |
| Defeat | Ramza is killed. |
| Party Size | You can deploy up to 5 units. |
NOISSIM is the first floor of Midlight's Deep and features different elevations that make it hard to navigate without Jump +3 or Ignore Elevation.
The Glacial Gun, Blaze Gun,and Kiyomori are rare weapons you can get from this floor using the Treasure Hunter ability.
NOISSIM Dungeon Walkthrough
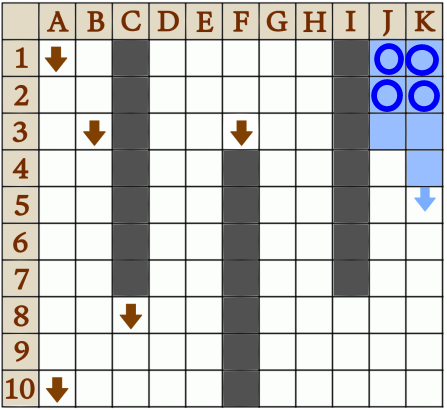
TERMINATION
| Grid View | |
|---|---|
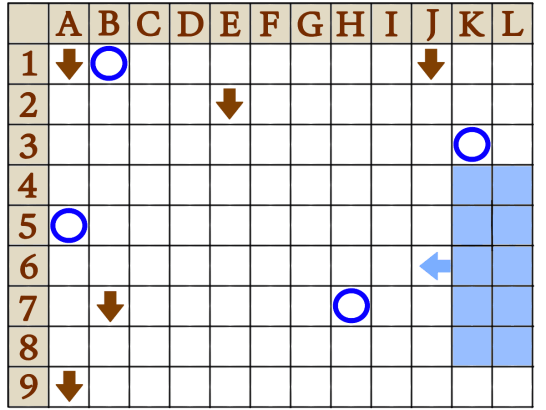 Blue Circles: Hidden Treasure Blue Tiles: Starting Area |
|
| Exits | A1, E2, J1, A9, B7 |
| Treasure | A5, B1, H7, K3 |
| Rec. Level / Difficulty | Level 60+ ✦✦✦✦✦ |
| Objective | Defeat all enemies. |
| Defeat | Ramza is killed. |
| Party Size | You can deploy up to 5 units. |
TERMINATION is the second floor of Midlight's Deep and features a relatively flat stage. This floor tends to spawn undead enemies which makes White Mages and Chemist effective here.
The Blood Sword and Save the Queen are rare weapons you can get from this floor using the Treasure Hunter ability.
TERMINATION Dungeon Walkthrough
DELTA
Map and Battle Overview
| Field View | |
|---|---|
 Blue Circles: Hidden Treasure Blue Tiles: Starting Area |
|
| Exits | E7, H2, H3, N2, O9 |
| Treasure | A8, G3, J9, M5 |
| Rec. Level / Difficulty | Level 60+ ✦✦✦✦✦ |
| Objective | Defeat all enemies. |
| Defeat | Ramza is killed. |
| Party Size | You can deploy up to 5 units. |
DELTA is the third floor of Midlight's Deep. The map layout has many changes in elevation, making it advantageous to field ranged units like Archers and Chemists.
The rare Zeus Mace and Yoichi Bow can be looted from this floor using a Treasure Hunter unit.
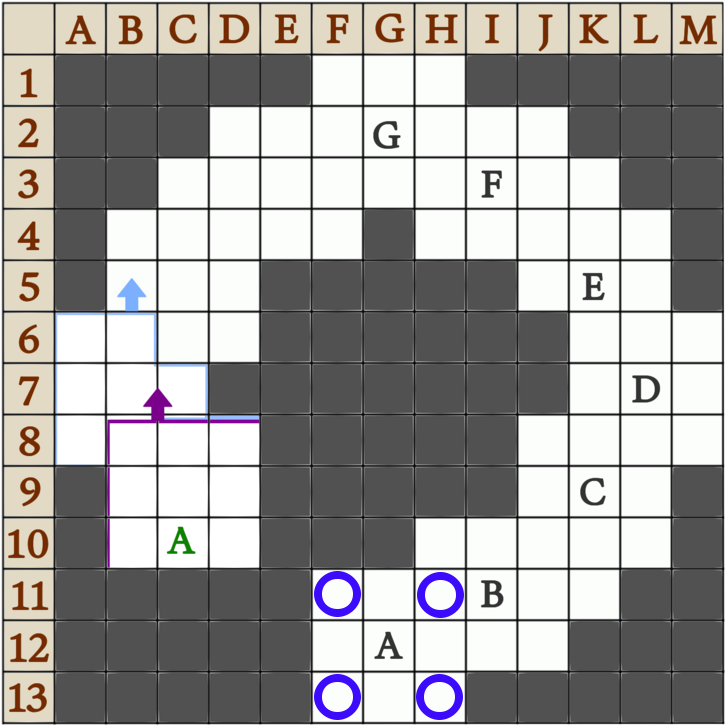
VALKYRIES
Map and Battle Overview
| Field View | |
|---|---|
 Blue Circles: Hidden Treasure Blue Tiles: Starting Area |
|
| Exits | A7, B5, C3, E4, H11 |
| Rec. Level / Difficulty | Level 60+ ✦✦✦✦✦ |
| Objective | Defeat all enemies. |
| Defeat | Ramza is killed. |
| Party Size | You can deploy up to 5 units. |
VALKYRIES is the fourth floor of Midlight's Deep. This floor tends to spawn enemies that can inflict harmful status effects which make White Mages and Chemists effective here.
The Rod of Faith, Faerie Harp, and Kaiser Shield are rare equipment you can get from this floor using the Treasure Hunter ability.
YROTCIV
Map and Battle Overview
| Field View | |
|---|---|
 Blue Circles: Hidden Treasure Blue Tiles: Starting Area |
|
| Exits | B10, D8, E10, G8, G12 |
| Rec. Level / Difficulty | Level 60+ ✦✦✦✦✦ |
| Objective | Defeat all enemies. |
| Defeat | Ramza is killed. |
| Party Size | You can deploy up to 5 units. |
YROTCIV is the fifth floor of Midlight's Deep. You are likely to face enemies that can heal themselves and apply defensive buffs so prepare for a long fight by stocking up on items.
The Excalibur and Iga Blade are rare weapons you can get from this floor using the Treasure Hunter ability.
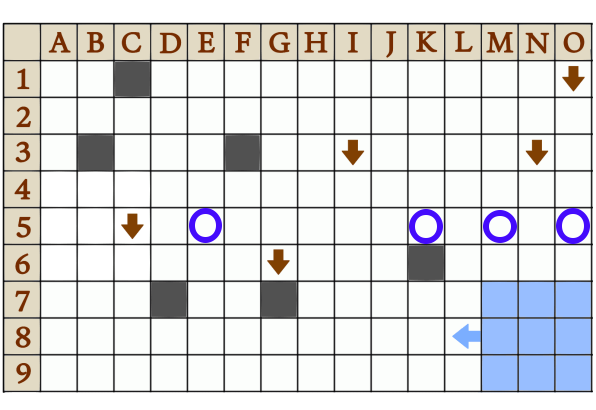
TIGER
Map and Battle Overview
| Field View | |
|---|---|
 Blue Circles: Hidden Treasure Blue Tiles: Starting Area |
|
| Exits | A1, A10, B3, C8, F3 |
| Treasure | J1, J2, K1, K2 |
| Rec. Level / Difficulty | Level 60+ ✦✦✦✦✦ |
| Objective | Defeat all enemies. |
| Defeat | Ramza is killed. |
| Party Size | You can deploy up to 5 units. |
TIGER is the sixth floor of Midlight's Deep. The map layout features a massive, nearly impassable wall that can best be circumvented using Fly or Teleport.
Beyond that, the fighting area is narrow and cramped, favoring area spells and attacks like Holy Sword. All of its loot, including a Cursed Ring, Ninja Gear, and a Blaster is clustered near the spawn area.
BRIDGE
Map and Battle Overview
| Field View | |
|---|---|
 Blue Circles: Hidden Treasure Blue Tiles: Starting Area |
|
| Exits | C5, G6, I3, N3, O1 |
| Rec. Level / Difficulty | Level 60+ ✦✦✦✦✦ |
| Objective | Defeat all enemies. |
| Defeat | Ramza is killed. |
| Party Size | You can deploy up to 5 units. |
BRIDGE is the seventh floor of Midlight's Deep. You can encounter several undead enemies here, so be sure to bring a unit that has access to White Magic or Items.
While exploring this map, you can obtain the rare high-level weapons Staff of the Magi and Koga Blade through the Treasure Hunter ability.
VOYAGE
Map and Battle Overview
| Field View | |
|---|---|
 Blue Circles: Hidden Treasure Blue Tiles: Starting Area |
|
| Exits | A1, B1, B4, I9, K4 |
| Rec. Level / Difficulty | Level 60+ ✦✦✦✦✦ |
| Objective | Defeat all enemies. |
| Defeat | Ramza is killed. |
| Party Size | You can deploy up to 5 units. |
VOYAGE is the eighth floor of Midlight's Deep. Here, you can encounter a variety of enemies from powerful monsters to high-level Archers so you should prepare for several different scenarios.
The Lordly Robe, a piece of armor that provides several buffs, can be obtained here as well as the rare weapons Ragnarok and Perseus Bow.
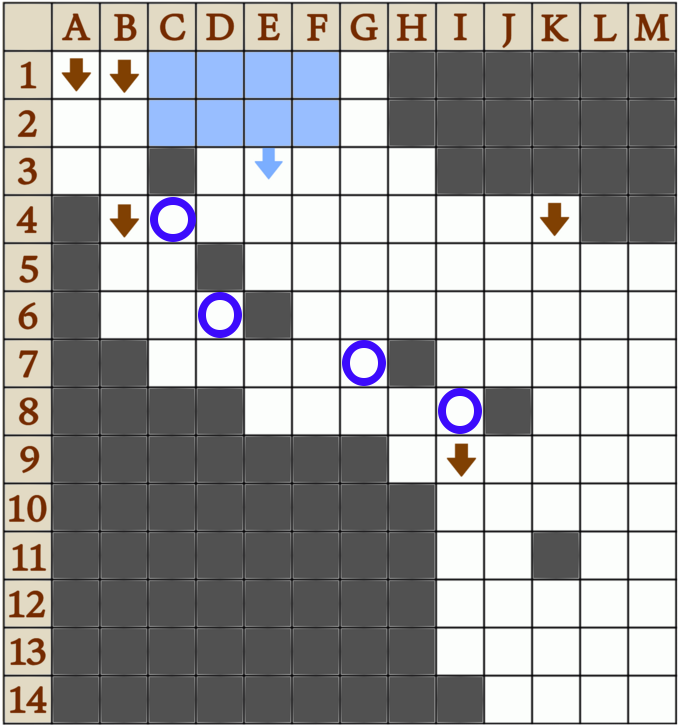
HORROR
Map and Battle Overview
| Field View | |
|---|---|
 Blue Circles: Hidden Treasure Blue Tiles: Starting Area |
|
| Exits | A2, A7, C5, C9, K3 |
| Rec. Level / Difficulty | Level 60+ ✦✦✦✦✦ |
| Objective | Defeat all enemies. |
| Defeat | Ramza is killed. |
| Party Size | You can deploy up to 5 units. |
HORROR is the ninth floor of Midlight's Deep. You can run into several different kinds of hard-hitting enemies like Samurai, Ninjas, and Behemoths here, so have your units equipped for survivability.
You can pick up a Venetian Shield in this level, which is great for mitigating elemental damage. A Maximillian and Grand Helm can also be obtained here.
END
Map and Battle Overview
| Field View | |
|---|---|
 Blue Tiles: Starting Area |
|
| Rec. Level / Difficulty | Level 60+ ✦✦✦✦✦ |
| Objective | Defeat Elidibus. |
| Defeat | Ramza is killed. |
| Party Size | You can deploy up to 5 units. |
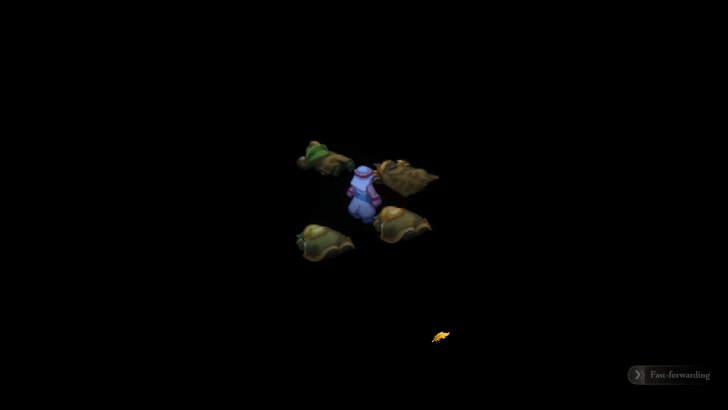
END is the tenth and final floor of Midlight's Deep. Here, you will take on the superboss Elidibus with a chance to recruit Byblos, learn the Zodiark summon, and pick up the rare weapons Chaos Blade and Chirijiraden.
Midlight's Deep Tips and Tricks
Kill Enemies to Light Up Each Floor
Each floor starts in complete darkness which makes it very difficult to see what tiles to step on and where enemies are coming from. You need to kill enemies so that they drop their crystals, which would then light up the floor. Once all enemies are defeated, their crystals will completely light up a room.
It's important that you don't pick up the crystals the enemies drop as this will cause the floor to darken again. Additionally, certain abilities can temporarily light up the room, such as the Teleport movement ability from Time Mage.
Find the Hidden Exits to Proceed to the Next Floor
You need to find hidden exits in each floor to proceed to the next one. You'll receive a notification when you discover an exit, but you need to defeat all enemies on the floor to proceed.
Find Treasure Using Low Brave Units
You can only get the rare and powerful equipment in Midlight's Deep by uncovering them using the Treasure Hunter movement ability.
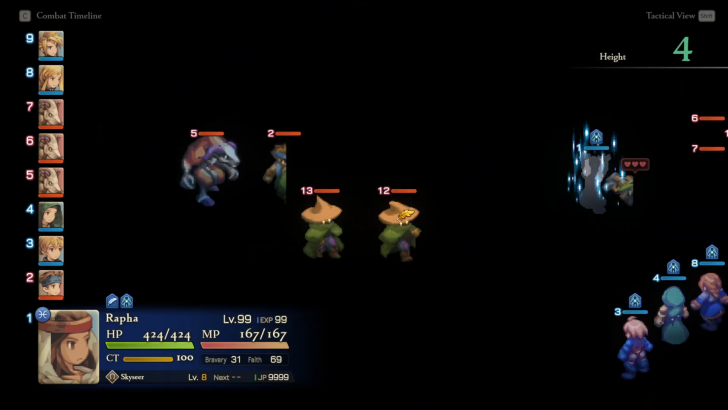
Units with low Bravery have a higher chance of getting the rarest treasure from tiles. Rapha is a good choice for this role due to her naturally low Bravery stat, though any unit that you have lowered their Bravery is good to have for your party.
How to Increase or Decrease Bravery
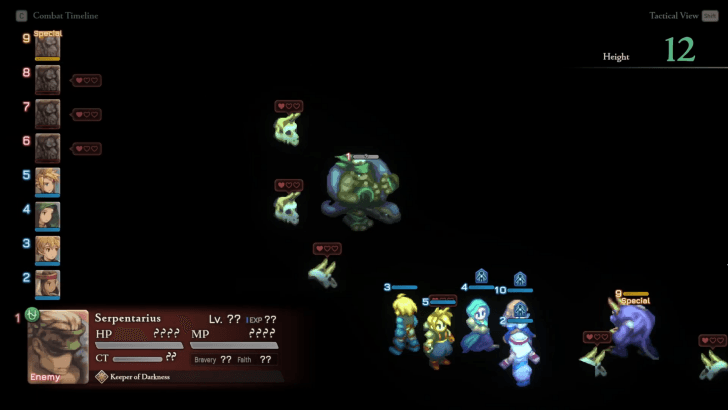
Best Party Setup for Midlight's Deep
Recommended Characters and Units
| Best Characters to Use | ||||
|---|---|---|---|---|
 Ramza Ramza |
 Beowulf Beowulf |
 Orlandeau Orlandeau |
||
 Ninja Ninja
|
 Black Mage Black Mage
|
 Chemist Chemist
|
||
Ramza can fill the role of either a frontline buffer with Mettle or as the dedicated Treasure Hunter with a low bravery setup. Beowulf is also good to have since he can debuff and neuter the last enemy, giving you free reign to move around the stage with your Treasure Hunter unit.
Beowulf also has access to Chicken, which reduces the target's Bravery by 50. When paired with Ramza who can use Steel to give +5 Bravery, you can easily modify a unit's Bravery levels on the fly which makes hunting for treasure in each floor easier!
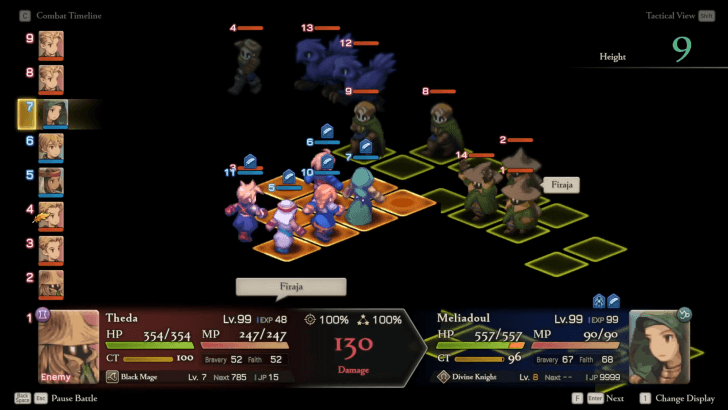
Orlandeau's speed and sheer power with his Swordplay skills is almost required to easily clear the enemies in the dungeon, while Ninja and Black Mage are great backup attackers. A Ninja equipped with Catch is also useful to have for farming the Ninja enemies in the first nine floors.
Finally, having a Chemist equipped with a gun and Arts of War allows you to debuff enemies from range. Easy access to healing items such as X-Potion and Phoenix Down is also invaluable to have for many of the encounters in the dungeon.
Alternative Characters and Units
| Best Characters to Use | ||||
|---|---|---|---|---|
 Rapha Rapha |
 Summoner Summoner
|
 White Mage White Mage
|
||
Rapha can fill the role of dedicated Treasure Hunter due to her naturally low Bravery and is good alternative if your Ramza is already filling a different role. Having a low Faith Summoner ready to field during END is also required if you want to safely learn the Zodiark summon.
Finally, a White Mage with secondary Time Magick is a good alternative to Chemist if you want a class that can speed up your party, while providing debuffs and healing at the same time.
Midlight's Deep Rewards
Zodiark Summon
A Summoner that successfully survives Elidibus' Zodiark spell can learn Zodiark which is the strongest summon in the game. This is potentially missable, and you only have one chance to learn the summon during the fight!
Zodiark (Darkening Cloud) Summon Effect
Byblos
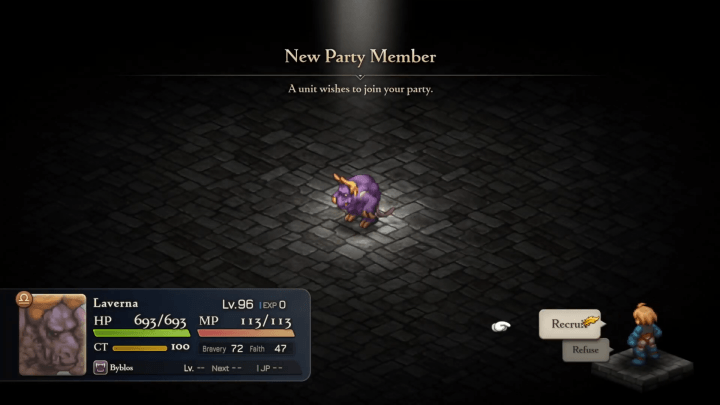
Byblos is a special Reaver that will join your party if they survive the fight during Elidibus in END. This unit is missable, and you only have one chance to recruit him during the fight with Elidibus in END!
Byblos Stats, Abilities, and Equipment
Rare Equipment from Each Floor
Each floor in Midlight's Deep has hidden treasure that a unit with Treasure Hunter equipped can obtain. Lower Bravery Treasure Hunters have a higher chance of getting some of the strongest and rarest equipment in the game such as the Chaos Blade and Chirijiraden!
What is Midlight's Deep?
10-Floor Endgame Dungeon in Chapter 4
Midlight's Deep is a difficult endgame dungeon consisting of 10 floors that you can access in Chapter 4. You need to defeat all enemies in each floor and look for the hidden exit to proceed to the next floor.
You Can Get Rare and Powerful Equipment from Each Floor
Each floor in Midlight's Deep has treasure spots where you can get some of the most powerful equipment in the game, such as Excalibur, Chaos Blade, and Chirijiraden.
You can only get these items with a unit equipped with the Treasure Hunter ability. Low Bravery units are recommended to increase the chance of getting the rarest treasure!
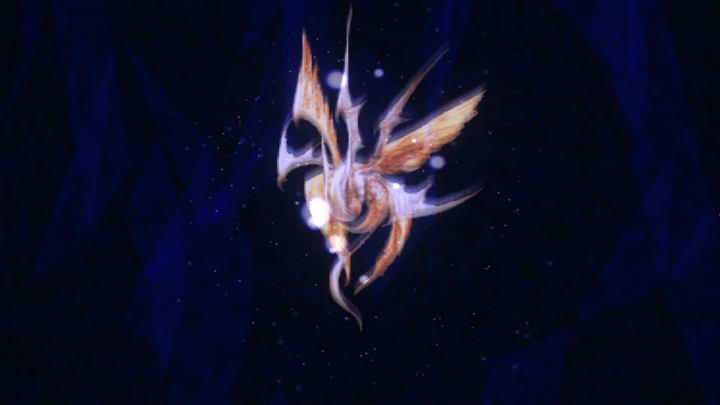
Fight the Superboss Elidibus
The superboss Elidibus resides in the 10th floor of Midlight's Deep. This legendary Wizard transforms into the Lucavi Serpentarius during the fight can use the most powerful summoning spell Zodiark, which Summoners can learn they survive the spell!
You only have one chance to fight Elidibus, so make sure you have a Summoner ready who can survive the spell to learn it!
All Missables and Points of No Return
Final Fantasy Tactics - The Ivalice Chronicles Related Guides

Guides by Category
| List of Categories | |
|---|---|
 Walkthrough Walkthrough |
 Jobs Jobs |
 Characters Characters |
 Tips and Tricks Tips and Tricks |
 Builds Builds |
 Abilities Abilities |
 Errands Errands |
 Midlight's Deep Midlight's Deep |
 Weapons Weapons |
 Armor Armor |
 Accessories Accessories |
 Items Items |
 Bosses Bosses |
 Enemies Enemies |
 Summons Summons |
 Locations Locations |
 Chronicles Chronicles |
 Latest News Latest News |
Recommended Guides
 Best Job Tier List
 Best Character Tier List
 Best Weapons Tier List
 Best Zodiac Signs for Ramza
 Best Job Combinations
 Best Abilities to Learn
 Best Armor to Get
 Best Accessories to Get
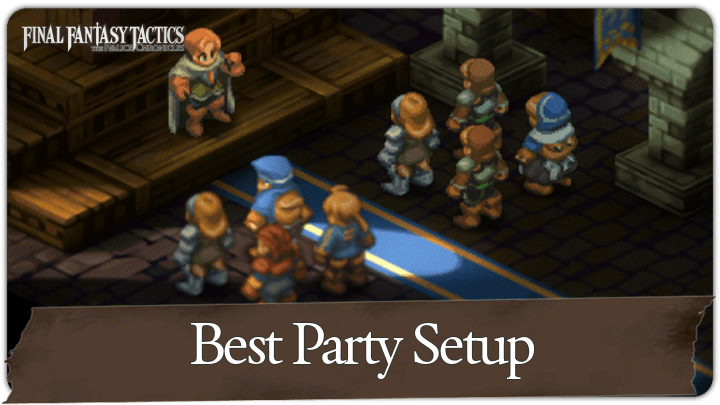 Best Party Setup and Team Composition
 Best Equipment to Steal
 Zodiac Signs and Compatibility Chart
 How to Farm Rare Weapons
 Missables and Points of No Return
 Money Farming Guide
 How to Steal Equipment
 North Wall or South Wall in Chapter 4?
 List of Trophies and Achievements
 Job Progression Guide
 Is the Dark Knight in the Game?
 Bravery and Faith Explained
 List of Weather and Effects Explained
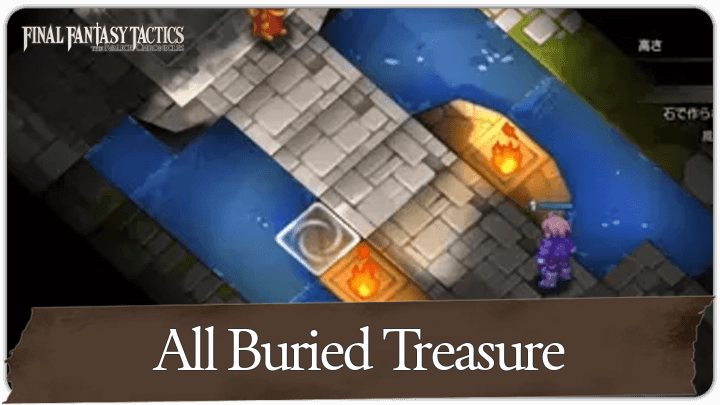 List of Buried Treasure
Comment
Author
Final Fantasy Tactics - The Ivalice Chronicles Walkthrough & Guides Wiki
Midlight's Deep Dungeon Guide
Rankings
- We could not find the message board you were looking for.
Gaming News


Popular Games

Genshin Impact Walkthrough & Guides Wiki
Umamusume: Pretty Derby Walkthrough & Guides Wiki
Crimson Desert Walkthrough & Guides Wiki
Monster Hunter Stories 3: Twisted Reflection Walkthrough & Guides Wiki
Honkai: Star Rail Walkthrough & Guides Wiki
Pokemon Pokopia Walkthrough & Guides Wiki
The Seven Deadly Sins: Origin Walkthrough & Guides Wiki
Wuthering Waves Walkthrough & Guides Wiki
Zenless Zone Zero Walkthrough & Guides Wiki
Arknights: Endfield Walkthrough & Guides Wiki


Recommended Games
Fire Emblem Heroes (FEH) Walkthrough & Guides Wiki
Diablo 4: Vessel of Hatred Walkthrough & Guides Wiki
Cyberpunk 2077: Ultimate Edition Walkthrough & Guides Wiki
Yu-Gi-Oh! Master Duel Walkthrough & Guides Wiki
Super Smash Bros. Ultimate Walkthrough & Guides Wiki
Pokemon Brilliant Diamond and Shining Pearl (BDSP) Walkthrough & Guides Wiki
Elden Ring Shadow of the Erdtree Walkthrough & Guides Wiki
Monster Hunter World Walkthrough & Guides Wiki
The Legend of Zelda: Tears of the Kingdom Walkthrough & Guides Wiki
Persona 3 Reload Walkthrough & Guides Wiki


All rights reserved
© SQUARE ENIX
The copyrights of videos of games used in our content and other intellectual property rights belong to the provider of the game.
The contents we provide on this site were created personally by members of the Game8 editorial department.
We refuse the right to reuse or repost content taken without our permission such as data or images to other sites.