100% Walkthrough Guide
★ Tier Lists: Characters | Jobs | Weapons
☆ Farming Guides: Gil | JP | Rare Weapons
★ All Missables and Points of No Return
☆ Optimal Job Progression Guide
★ Recruit All Secret Characters!
☆ All Hidden Treasure Locations
Discover a step-by-step 100% walkthrough guide for Final Fantasy Tactics - The Ivalice Chronicles. Learn how to clear all 4 Chapters and get 100% here!
List of Contents
List of All Chapters
All 4 Chapter Guides
| Chapter | Title |
|---|---|
| 1 | The Meager |
| 2 | The Manipulator and the Subservient |
| 3 | The Valiant |
| 4 | In the Name of Love |
Final Fantasy Tactics - The Ivalice Chronicles is divided into four main chapters. Each chapter features its own missions to complete and boss battles that must be cleared before the story advances.
Chapter 1: The Meager Walkthrough
| Jump to A Battle | |||
|---|---|---|---|
| 1 | Orbonne Monastery | 2 | The Magick City of Gariland |
| 3 | Mandalia Plain | 4 | The Siedge Weald |
| 5 | Dorter Slums | 6 | Sand Rat's Sietch |
| 7 | Brigand's Den | 8 | Lenalian Plateau |
| 9 | Fovoham Windflats | 10 | Ziekden Fortress |
Chapter 1: The Meager Walkthrough
Battle 1: Orbonne Monastery
| # | Step by Step Objectives |
|---|---|
| 1 | 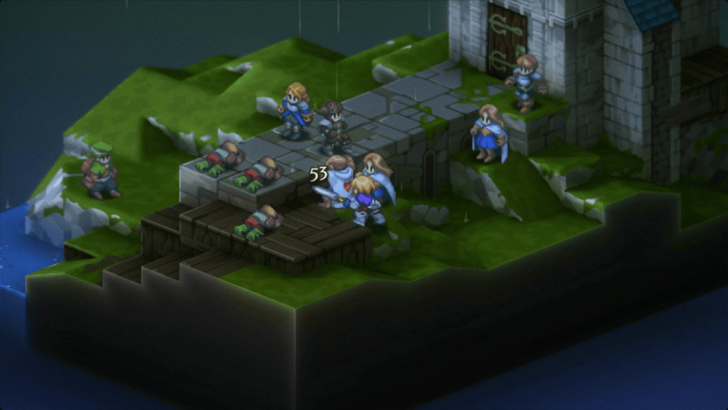 Complete the Tutorial For This Stage This level serves as a tutorial for the player to be acquainted with the combat mechanics of the game, so simply follow the tutorial to complete this level. You will be joined by guest characters who moves and attacks freely on their own. You can have them deal with the enemies, or lead the charge against your foes! ▶ List of All Characters |
Battle 1: Orbonne Monastery Guide
Battle 2: The Magick City of Gariland
| # | Step by Step Objectives |
|---|---|
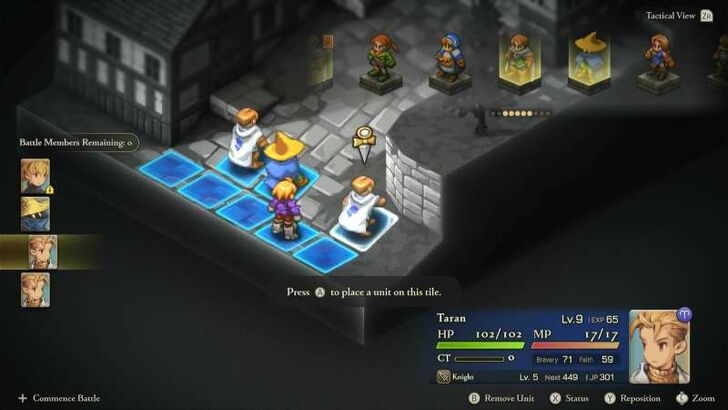
| 1 | 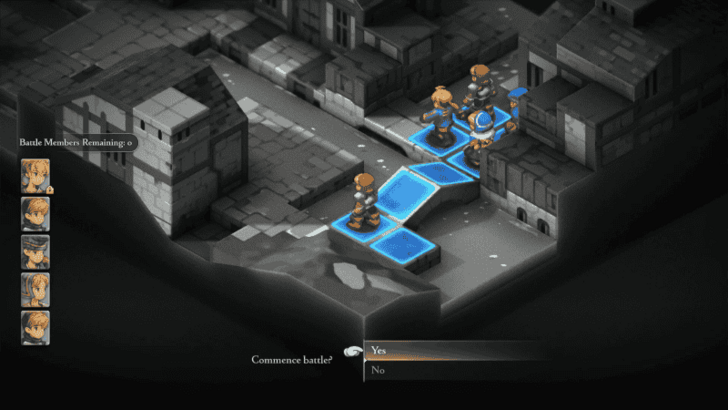 Deploy 2 Squires and 2 Chemists You can only deploy up to 5 units in this battle, and that includes Ramza. Alongside him, you'll want to deploy 2 Squires and 2 Chemists. Position the Chemists side by side in the back so they can easily target each other for the JP Trick later on. ▶How to Farm JP (Job Points) |
| 2 | 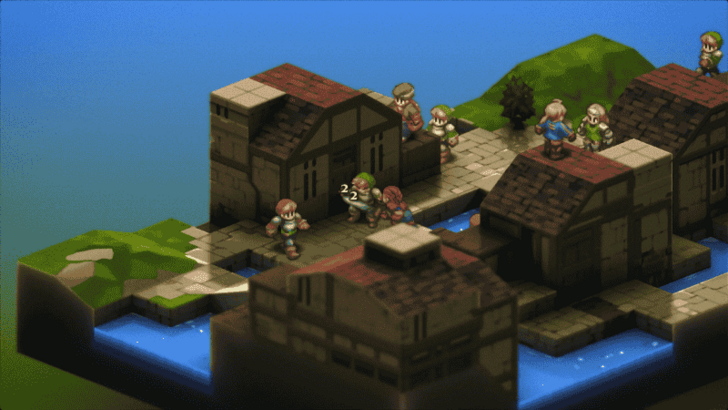 Let the Squires and Delita Handle the Fight Ramza, your 2 Squires, and Delita will form the offensive line. Have them focus on defeating the enemy units while protecting your Chemists. Don’t worry too much about rushing the fight since the enemies here aren’t too dangerous. |
| 3 |  Get Your Chemists To Turn On Each Other (Optional) While your Squires and Delita keep the enemies occupied, have your two Chemists attack each other with basic attacks. Both the attacker and the target gain EXP and JP this way. For maximum efficiency, have one Chemist heal the other with Potions after trading blows, this doubles your JP farming and prevents accidental knockouts. By the end of the battle, your Chemists will have enough JP to unlock core abilities, and you’ll be ready to branch into White and Black Mages much sooner than usual. |
| 4 |
End the Battle When You’re Satisfied Once your Chemists have farmed enough JP, finish off the last enemies to clear the fight. Keep an eye on Delita though, as he can sometimes KO enemies faster than you’d like, so make sure you’re done grinding before he wraps things up. |
Battle 2: Magick City of Gariland Guide
Battle 3: Mandalia Plain
| # | Step by Step Objectives |
|---|---|
| 1 | 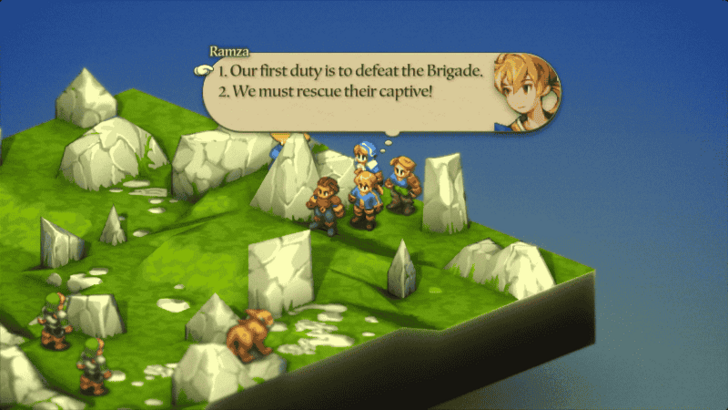 Choose the First Option Before the battle starts, you’ll be asked to pick between two dialogue choices. Both eventually lead to saving Argath, but the first option, "Our first duty is to defeat the Brigade", is the smarter pick. It grants all your units +2 Bravery, and Argath’s death during battle will not cause a game over. If you choose the second option, "We must rescue their captive!", you won’t get the Bravery boost, and Argath’s death will instantly end the battle in failure. ▶ How to Increase or Decrease Bravery |
| 2 |  Have Long Range Units Ready Since the stage is fairly wide and enemies may spawn scattered across the field, it’s best to bring at least one unit who can attack from afar. Archers with bows can chip away at enemies safely, while Black Mages can target clustered foes with spells. Long-range damage also helps you reach and protect Argath faster, preventing him from being overwhelmed before your melee units close the distance. |
| 3 |  Prioritize Argath’s Safety Argath starts the battle surrounded and will aggressively charge forward, making him vulnerable. Focus on taking out the nearest enemies threatening him first. Use your ranged units to thin the enemy line while your melee units close in for support. If you picked the first option earlier, Argath’s death won’t cause a game over, but keeping him alive still makes the fight easier, since his extra damage can help you clear enemies faster. |
Battle 3: Mandalia Plain Guide
Battle 4: The Siedge Weald
| # | Step by Step Objectives |
|---|---|
| 1 |  Deploy Knights, Black Mages, and a Chemist This battle introduces tougher enemies than before, so it’s best if your starting Squires and Chemists have already been promoted to stronger Jobs. Bring a Black Mage who knows Blizzard and Thunder, since Goblins are weak to Ice and Bombs are weak to Thunder. Pair this with a Knight for frontline damage and a Chemist for healing support. |
| * |
Avoid Overleveling a Single Character Don’t focus all your EXP into one unit as enemy levels scale to your strongest character, so relying on a single powerhouse can make battles harder than necessary. Keep your party evenly trained to avoid being outmatched. |
| 2 |  Prioritize Defeating the Bombs Bombs can be extremely dangerous, as they may use Self-Destruct when their HP gets low. Eliminate them quickly before they have the chance. Since they’re weak to Thunder, have your Black Mage target them with lightning spells for an efficient takedown. |
| 3 |
Limit Argath and Delita’s Contributions While they can still help in battle, it’s better not to let Argath and Delita handle most of the kills since they are just guest characters. Try to minimize their contributions so your core party members gain more EXP and JP instead. This way, your main team will stay stronger and more reliable for tougher battles ahead. |
Battle 5: Dorter Slums
| # | Step by Step Objectives |
|---|---|
| 1 |  Deploy a Black Mage to Target the Rooftop Archer The Archer placed at the topmost building has an offensive reach encompassing most of the map, so it is recommended to have a Black Mage to deal heavy damage to it from a distance. |
| * |  Position Your Black Mage Close to the Enemy Archer On the deployment screen, place your Black Mage on the elevated tile closest to the rooftop Archer. This ensures that when the battle starts, you’ll be able to cast a spell immediately after moving, putting the Archer in range right away. |
| 2 | 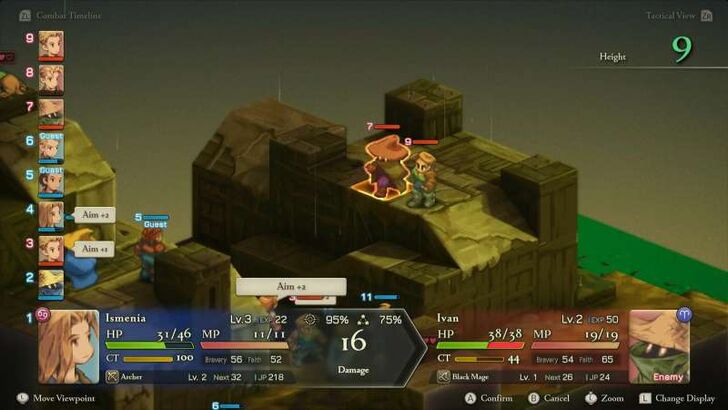 Focus on Elevated Enemies After the rooftop Archer is dealt with, shift your attention to the remaining elevated enemies. Use your own Archer or Black Mage to chip away at them safely from a distance while avoiding unnecessary exposure. |
| 3 |  Let Ramza and Your Knight Handle the Ground Units While your ranged units handle threats above, deploy Ramza and your Knight to finish off the enemies on the ground. |
Battle 6: Sand Rat Sietch
| # | Step by Step Objectives |
|---|---|
| 1 | 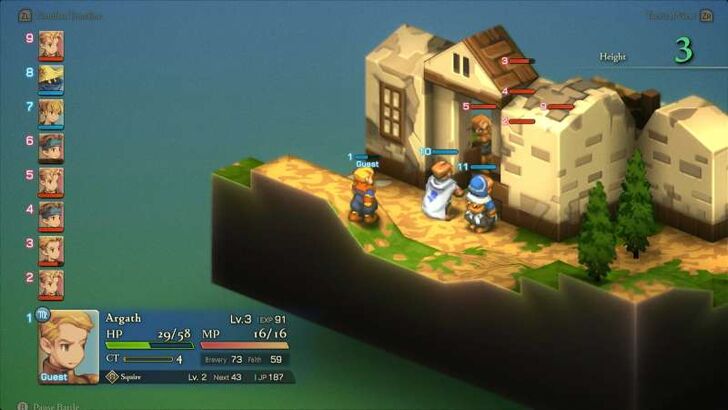 Hold the Left Side With Your Knight and Chemist Deploy your Knight and Chemist with Argath on the left entrance of the building. Most of the enemy units will funnel out from this doorway, so use your Knight to block the chokepoint. Keep your Chemist just behind him for healing support, while Argath can provide extra chip damage with his Throw Stone ability. |
| 2 | 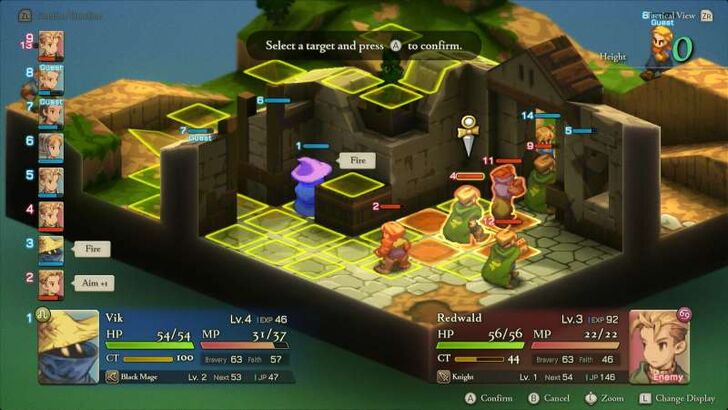 Push the Right Side With Ramza and Your Black Mage Meanwhile, send Ramza and your Black Mage to circle around the right side, Delita will also go here. Have your Black Mage hang back and cast from a safe spot, this is especially effective once you’re inside the building, since enemies tend to cluster near the doorway on the other side and can be hit with area spells. Keep Ramza close to shield your mage and use Chant for quick heals, while Delita holds the line and draws enemy attention. |
| 3 | 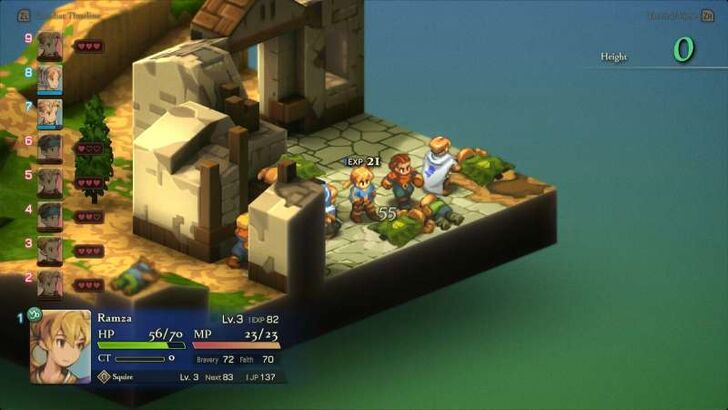 Converge on the Center Once both sides have gained ground, close in on the center and finish off the remaining enemies. |
Battle 6: The Sand Rat's Sietch Walkthrough
Battle 7: Brigands' Den
| # | Step by Step Objectives |
|---|---|
| 1 | 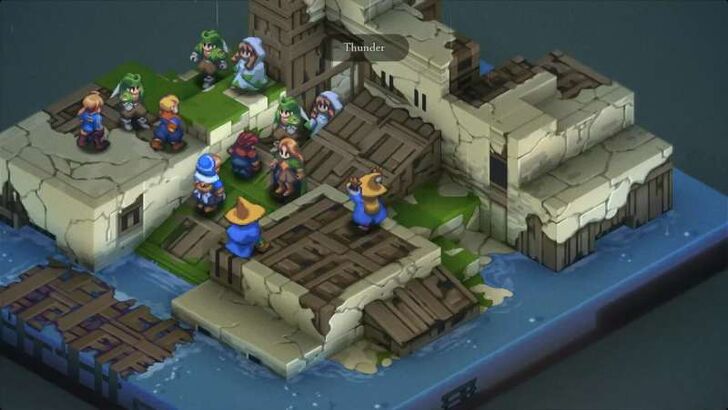 Get the Black Mages on the Platform to the Right At the start, move your Black Mages onto the raised platform on the right. From this vantage point, they can safely rain down spells on Milleuda. Stick to Thunder here, as the rainy weather increases its damage, making it the best option in this fight. |
| 2 | 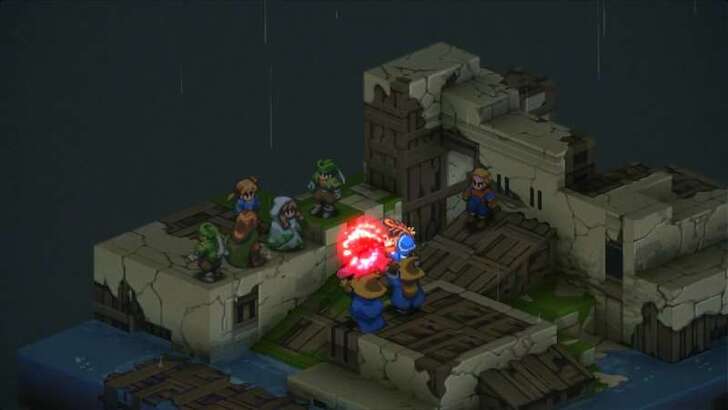 Have the Chemist Handle Healing and Revives While your Black Mages unleash damage, your Chemist should focus on support. Make sure they’ve learned Potion and Phoenix Down, as Ramza, Argath, and Delita will be absorbing most of the frontline pressure while your casters charge spells. |
| 3 |
Beware of Enemy White Mages Enemy White Mages can drag the fight out by healing allies and also have access to offensive Black Magick. Taking them out early can prevent drawn-out battles and keep Milleuda exposed. |
| 4 | 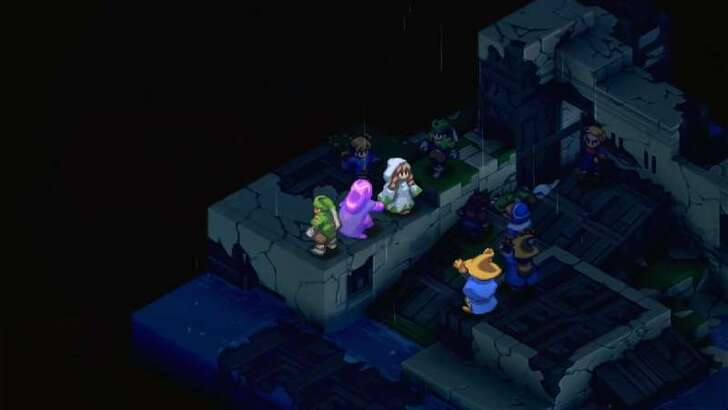 Battle Ends Once Milleuda Falls Once Milleuda’s HP drops to about half, consider focusing all attacks directly on her. Defeating her ends the battle immediately, saving you from having to wipe out the entire enemy team. |
Battle 8: Lenalian Plateau
| # | Step by Step Objectives |
|---|---|
| 1 | 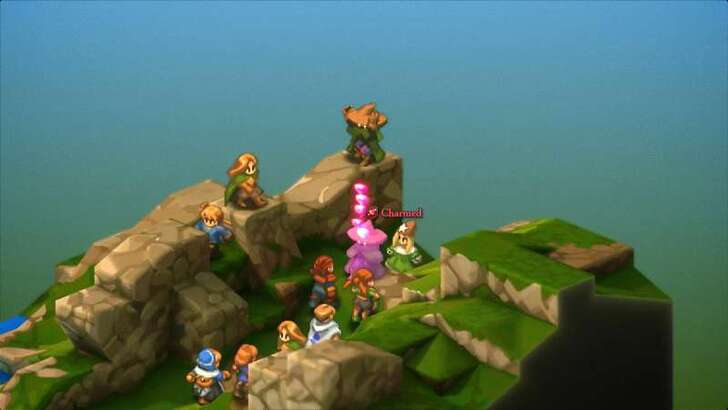 Charm the Black Mages With Your Thief Don’t rush Milleuda right away, deal with the two Black Mages in the back first, as they’ll spam Level 2 spells and shred your team if left ignored. A strong option is to use a Thief with Steal Heart to charm them. This turns their devastating magick against their allies and buys you time to thin out the herd. |
| 2 | 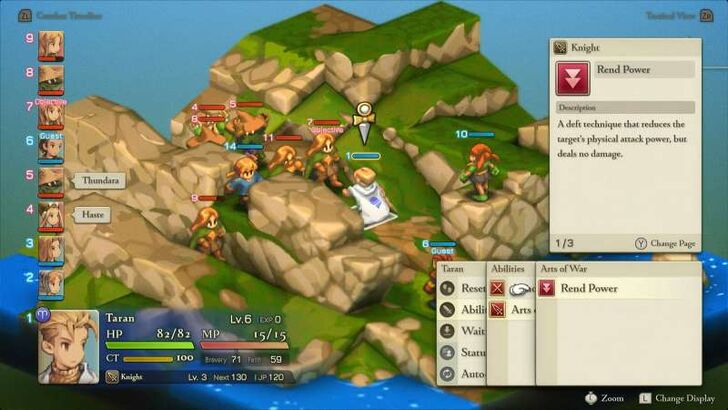 Use Rend Power on Milleuda Milleuda hits hard and can easily wipe your weak allies if left unchecked. Assign your Knight to repeatedly use Rend Power, lowering her physical attack and making the fight far safer. Ramza and Delita can focus on direct damage while the Knight weakens her. |
| 3 | 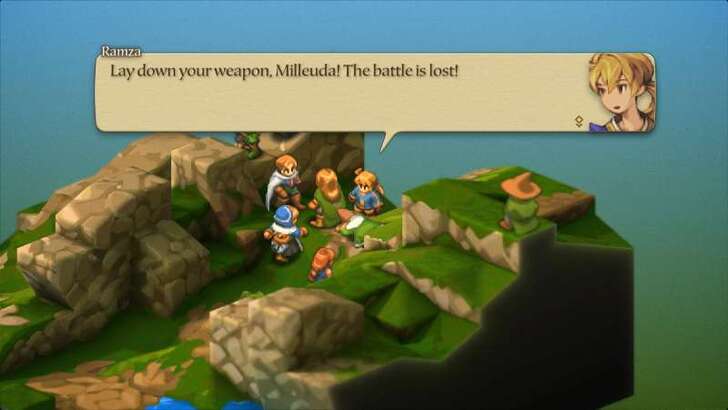 Chemist for Healing, Archer for Support Have your Chemist stick close to your melee attackers to heal them up as needed. Position your Archer on a separate area to rain down damage from afar. Keeping the Archer spread out prevents him from getting wiped by enemy AoE spells, especially since Archers have low HP. |
| * |
Battle Ends Once Milleuda is Defeated Just like in the previous fight, the battle will automatically end once Milleuda is taken down. |
Battle 8: Lenalian Plateau Guide
Battle 9: Fovoham Windflats
| # | Step by Step Objectives |
|---|---|
| 1 |
Buy Mythril Swords and Chainmail For Your Knights Before starting this battle, head to Eagrose Castle and stock up on equipment that will strengthen your Knight units. Purchasing Mythril Swords and Chainmail will give them the durability and damage output needed to withstand stronger enemy forces. |
| 2 |  Have Your Black Mage Learn a Level 2 Spell It’s highly recommended to enter this fight with your Black Mage having at least one Level 2 spell (Fira, Blizzara, or Thundara). Pair this with Ramza’s Tailwind ability to shorten casting time, letting your Black Mage fire off spells more often. Position your Chemist beside the Black Mage to provide healing support, and make sure they know Ether so they can restore MP once your mage runs dry. |
| 3 | 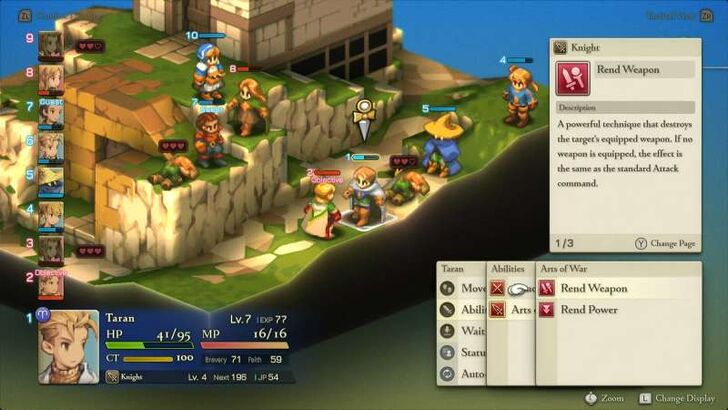 Rend Wiegraf's Sword Wiegraf’s Judgement Blade is a devastating ability that can cripple your units. To shut this down, you’ll first need to eliminate the Monks accompanying him. Once they’re out of the way, Wiegraf will descend from the cliff to engage. Have your Knight use Rend Weapon on Wiegraf as soon as possible. This prevents him from using Judgement Blade for the rest of the battle, making the fight much more manageable. |
| 4 |  Battle Ends Once Wiegraf Retreats You don’t need to defeat every enemy here. Once Wiegraf’s HP drops low enough, he will automatically retreat, signaling the end of the battle. Focus your attacks on him after disabling his weapon to finish the fight quickly, rather than spending too much time clearing the rest of the enemy forces. |
Battle 9: Fovoham Windflats Guide
Battle 10: Ziekden Fortress
| # | Step by Step Objectives |
|---|---|
| 1 |
Have Everyone Learn Safeguard Before Battle The enemy Knights in this stage can use Rend abilities to break your weapons and armor. Equip the Support Ability Safeguard on all your units to prevent this. You can unlock it by temporarily switching your units to the Chemist job, earning JP, and then keeping it equipped when switching back to their main jobs. ▶How to Farm JP (Job Points) |
| 2 |  Deploy a Black Mage on Ramza's Side Enemies near Ramza start clustered together, making them vulnerable to Black Magick. Have your Black Mage cast Fira, Blizzara, or Thundara to damage multiple targets at once. This also allows you to safely chip at Argath’s HP from a distance without risking counterattacks. |
| 3 |  Deploy a Knight and Chemist on the Other Side Since the battlefield is split, your second group needs to be self-sufficient. A Knight provides frontline strength while the Chemist ensures steady healing and item support. Together, they can hold their ground against incoming enemies while Ramza’s group handles the heavier threats. |
| 4 |  Focus Attacks on the Black Mages First The two enemy Black Mages are the biggest threat if left unchecked. Eliminate them early with your own Black Magick, and as a bonus, if Argath is within range, he’ll take splash damage too. |
| * |  Stay Beside Argath When Targeted by Magick If an enemy Black Mage locks onto your unit, move next to Argath. Their spells will damage him as well, and since he’s especially weak to magick, this turns their attacks into an advantage for you. |
| 5 |
Battle Ends Once Argath is Defeated The fight concludes as soon as Argath’s HP reaches zero, even if other enemies remain. Don’t waste resources clearing the field, prioritize taking him down once the Black Mages are offed to end the battle quickly. |
Battle 10: Ziekden Fortress Guide
Chapter 2: The Manipulator and the Subservient Walkthrough
| Jump to A Battle | |||
|---|---|---|---|
| 11 | Merchant City of Dorter | 12 | Araguay Woods |
| 13 | Zeirchele Falls | 14 | Castled City of Zaland |
| 15 | Balias Tor | 16 | Tchigolith Fenlands |
| 17 | The Slums of Goug | 18 | Balias Swale |
| 19 | Golgollada Gallows | 20 | At the Gate of Lionel Castle |
| 21 | Inside of Lionel Castle | - | |
Chapter 2: The Manipulator and the Subservient Walkthrough
Battle 11: Merchant City of Dorter
| # | Step by Step Objectives |
|---|---|
| 1 |  Target the Black Mages Immediately The two enemy Black Mages are the biggest threat thanks to their AoE spells, which can devastate clustered units. Take them down first using your own Black Mage’s spells or Knights to rush their position. Because the map is fairly compact, enemies will often be grouped together. Use this to your advantage, your spells can hit multiple targets at once, but watch out though cause they can do this too if your party is clustered together. Consider maintaining a distance from each other to avoid joint damage. |
| 2 | 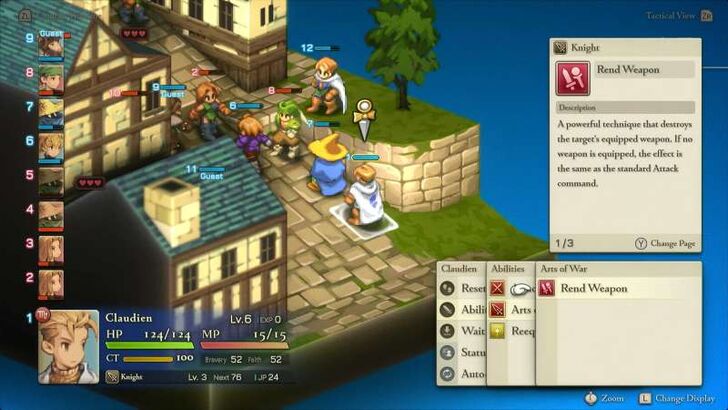 Control the High Ground and Pressure Archers The enemy Archers posted on higher tiles will pepper your team with ranged attacks. Push forward with your Knights to pin them down or disable them with Rend Weapon. Meanwhile, Ramza can use Chant for healing or Tailwind to boost your Black Mage’s speed. Gaffgarion and Agrias will contribute plenty of pressure as they move on their own accord, letting you focus on controlling the ranged enemies. |
| 3 |  Clean Up the Remaining Enemies Once the enemy Black Mages are gone, the stage becomes more breathable. Turn your attention to the Thieves and any Archers still alive. |
| * |  Assemble an All Male Team Be wary of Steal Heart, which only works on female allies, since the enemy Thieves are all males. To counter this, it’s safer to bring an all-male party for this encounter so your units can’t be charmed. ▶ Differences Between Male and Female Units |
Battle 11: Merchant City of Dorter Guide
Battle 12: Araguay Woods
| # | Step by Step Objectives |
|---|---|
| 1 | 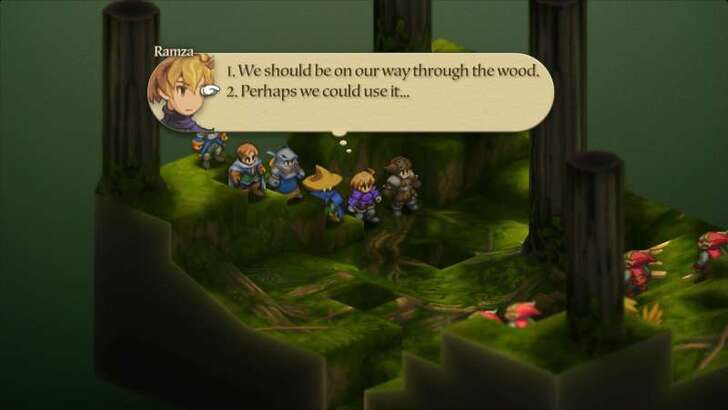 Choose to Rescue the Chocobo At the start of the battle, you’ll be prompted to either leave the Chocobo behind or attempt a rescue. Picking the second option is the better move, since you’ll gain its help during the fight and still recruit it afterward. |
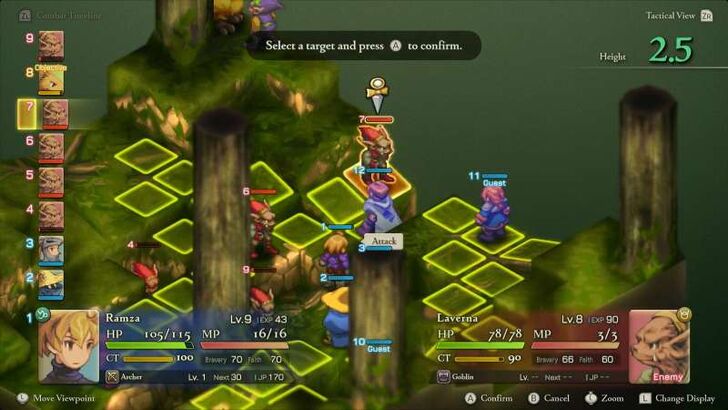
| 2 | 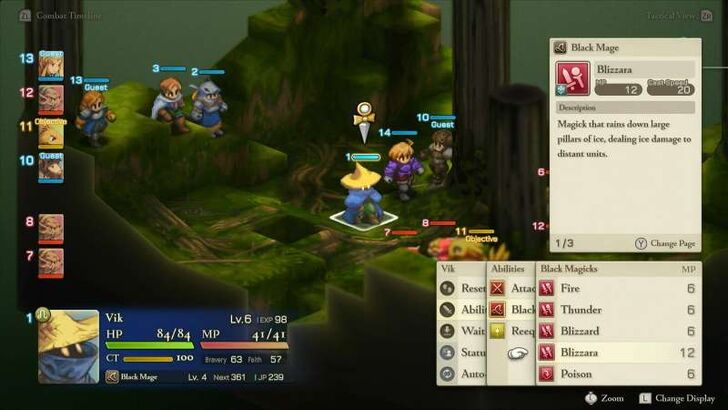 Defeat All Goblins The Goblins here are weak to ice. Have your Black Mage unleash Blizzara to wipe out clusters of them quickly. If you haven’t unlocked it yet, prioritize learning it before entering. Your Knight and Dragoon serve as frontline attackers, with the Dragoon striking from two tiles away to stay safe from counterattacks. |
| * |  Before the battle, buy the Ice Bow at Eagrose Castle and switch Ramza into the Archer job. Goblins are weak to Ice, and with his wide firing range, Ramza can deal devastating damage across the small battlefield while staying out of harm’s way. ►How to Change Jobs |
| 3 | 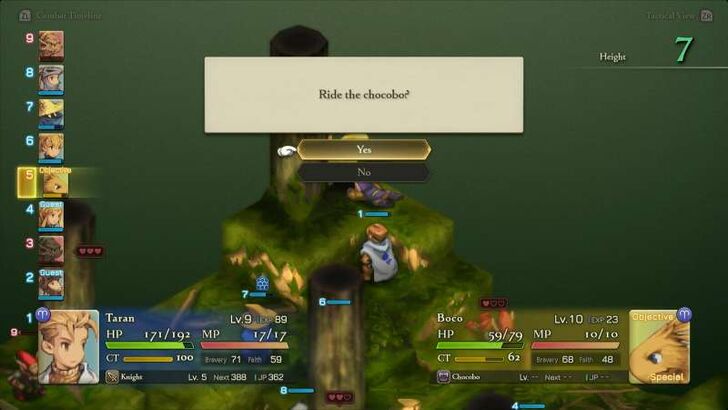 Protect the Chocobo Don’t let the chocobo fall in battle, as its death results in an instant Game Over if you’ve chosen to rescue it. Keep at least one unit nearby to intercept enemies that may target it. |
Battle 12: Araguay Woods Guide
Battle 13: Zeirchele Falls
| # | Step by Step Objectives |
|---|---|
| 1 | 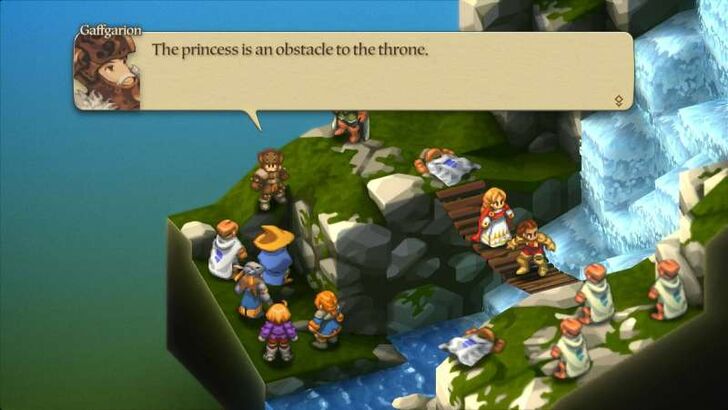 Strip Gaffgarion's Equipment Before Battle Spoiler warning: Gaffgarion betrays you in this fight. Strip him of all of his equipment him before the battle begins so his attacks are far less dangerous. |
| 2 |  Protect Princess Ovelia Delita will cross the bridge to face Gaffgarion directly, while Ovelia hangs back and casts Aegis for defense. Your main objective is to keep her alive because if she falls, it’s game over. Focus on clearing enemies on your side of the bridge quickly. Use your Knight, Dragoon, and Black Mage to overpower groups clustered on the left while Delita occupies Gaffgarion. Gaffgarion will retreat once he takes enough damage, so don’t worry about finishing him off. |
| 3 |  Ramza as an Archer will be useful when positioned on the far side of the river, covering the eastern path. From here, he can safely pick off enemies at range without being overwhelmed. Once the enemy forces thin out, regroup and mop up survivors while ensuring Ovelia stays protected. |
Battle 13: Zeirchele Falls Guide
Battle 14: Castled City of Zaland
| # | Step by Step Objectives |
|---|---|
| 1 |  Have Your Jump at 4 or Above Before heading to this location, your units' Jump stat should be at least 4 or above. The walls here are very high, making them tough to scale with low Jump. If you can’t jump high enough, you’ll need to take the alternate route by walking the long way around to the door. With high Jump, you can leap onto the castle walls and attack enemies from there. |
| * | 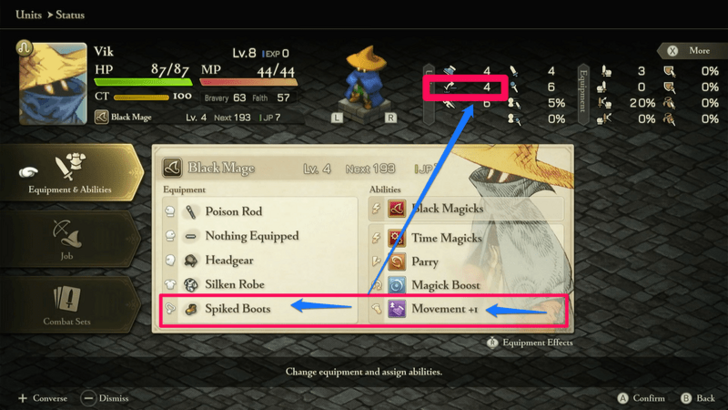 Spiked Boots and Archer's Jump +1 Ability You can manually increase your Jump stat by +2. Equip Spiked Boots, which are purchasable in towns, and learn the Archer’s Jump +1 Movement Ability. Both together grant a total +2 Jump. |
| 1 |  Save Mustadio At the start of the battle, you’ll be given the option to avoid getting involved or to save Mustadio. Regardless of your choice, you’ll still end up saving him. Choose the second option to increase your party’s Bravery by 10 and proceed with the fight. ►How to Increase or Decrease Bravery |
| 2 |  Protect Mustadio Once the battle begins, immediately cast Protect or Shell on Mustadio. He tends to fight aggressively without hesitation, and you can’t directly command him. To do this, have someone in your party learn these spells from the White Mage skillset, then equip the White Magicks command so you can use them even if the unit isn’t currently a White Mage. |
| 3 |  Eliminate the Black Mages and Archers First Once Mustadio is protected, he’ll start targeting the nearby enemies, primarily the Black Mages. Focus on defeating them first before anyone else. Have long-range units, such as Ramza and your Black Mage, assist him in taking them down. |
| 4 |
Defeat the Remaining Enemies After the Black Mages are gone, the fight becomes much easier. Have your units clean up by targeting enemies that Mustadio isn’t already focused on, quickly thinning their numbers. |
Battle 14: Castled City of Zaland Guide
Battle 15: Balias Tor
| # | Step by Step Objectives |
|---|---|
| 1 |  Ramza and Mustadio Focuses on the Left Summoner Mustadio’s gun attacks have excellent range, and with Ramza backing him as an Archer, the two can quickly eliminate the left-side Summoner. Take them out fast before they drop Ifrit or another summon on your party. |
| 2 | 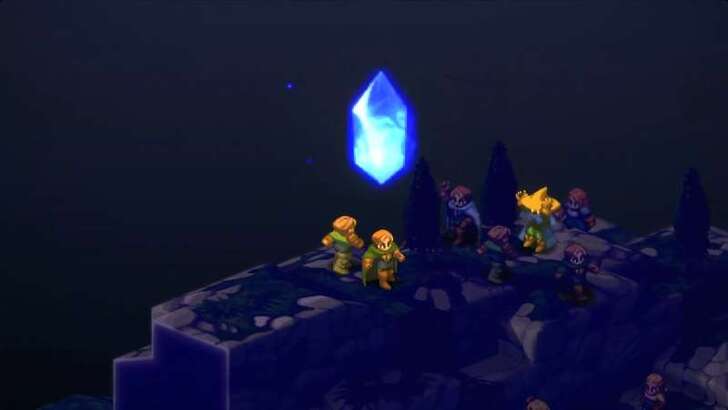 Black Mage Clears the Center The middle of the map is packed with Archers and Knights. Drop Blizzara or Thundara on these clustered enemies to thin their numbers. Keep an eye out for enemy Knights as they love using Rend attacks. Equipping Safeguard on your frontline units prevents costly gear losses. |
| 3 |  Knight Pushes Toward the Right Summoner Send your Knight toward the Summoner hiding on the far right. Their bulk lets them take hits while closing the distance. If your Knight has Black Magick as a secondary, you can chip away from range until the Summoner wanders close enough for melee. |
| 4 |  Chemist Maintains the Party Your Chemist should trail just behind the frontline, dishing out High Potions, Ethers, and Phoenix Downs when needed. They’re your safety net and without them, a bad summon or lucky crit could most likely turn into a defeat. |
Battle 16: Tchigolith Fenlands
| # | Step by Step Objectives |
|---|---|
| 1 |  Bring an All-Ranged Team Avoid intentionally heading into the swamp unless absolutely necessary. Enemies can teleport across the field, so let them come to you while you maintain high ground and safe tiles. Units like Archers, Chemists, and White Mages can attack from afar without risking Poison tiles. |
| 2 |  Exploit White Magick and Items Enemies here are undead or dark-aligned, making Cure spells from White Mages deal massive damage. If you lack a White Mage, equip another job with the White Magick command. Chemists can also weaponize items like Phoenix Downs, which grants Instakill to enemies, and High Potions, which damage undead instead of healing them. |
| 3 |  Avoid Swamp Tiles Standing in swamp tiles inflicts Poison, and enemies may follow up with Sleep, leaving your unit helpless. Always keep Antidote and Remedy stocked, or simply attack your own sleeping ally to wake them. |
| 4 |  Charm the Enemy Thieves may not hit hard here, but Steal Heart is a game changer for this battle. Charmed enemies will turn against their own allies, helping you thin the horde without wasting resources. This can help buy time for your ranged units to clean up safely. |
Battle 17: Goug Lowtown
| # | Step by Step Objectives |
|---|---|
| 1 | 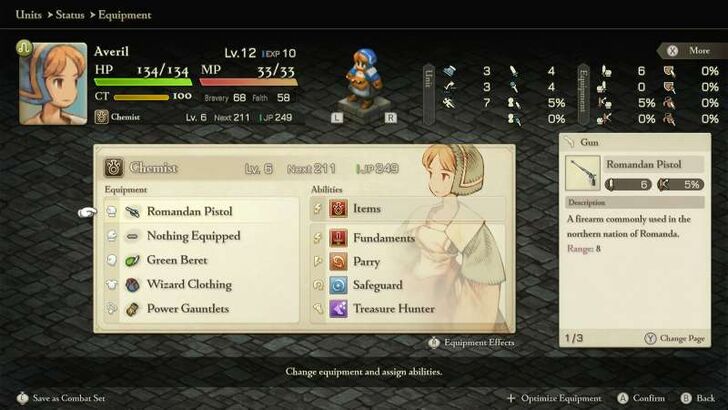 Equip Your Chemist With Mustadio’s Romandan Pistol Before this fight, Mustadio leaves the party temporarily. Strip him of all gear, especially the Romandan Pistol, and pass it to your Chemist. With it, your Chemist isn’t just a healer, but also a ranged attacker who can safely pick off enemies while still tossing Potions, Ethers, and Phoenix Downs as needed. |
| 2 |
 Neutralize the Summoners First The Summoners positioned above are the biggest threat, with devastating AoE spells and support magicks. Have Ramza (Monk) push forward, using Focus until he can reach them, while the Chemist peppers them with gunfire. Your Dragoon can leap or attack from two tiles away, making them ideal for keeping Summoners under pressure. Take them out quickly before they overwhelm you. |
| 3 |  Control the Lower Enemies Assign your Knight and Black Mage to handle the group below. Now, thanks to the rain, Thunder spells are amplified, letting your Black Mage spam Thundara while the Knight holds the frontline. Keep your Chemist close enough to feed Ethers for MP recovery. |
| 4 |  Don’t Stress About Mustadio Mustadio appears as a Guest and usually gets KO’d early. His death will not cause a Game Over, so focus on eliminating enemies rather than protecting him. |
| * | 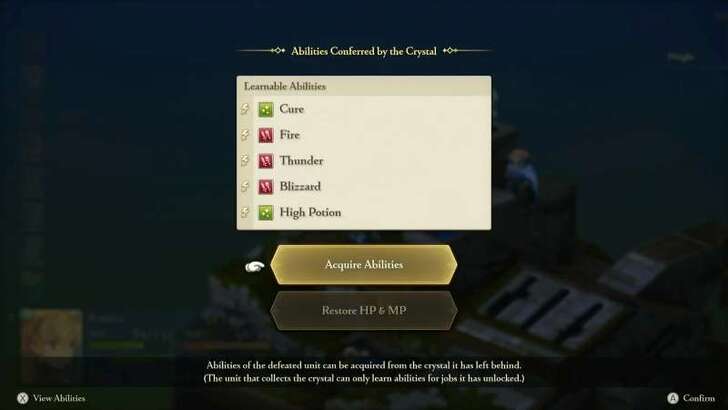 Ability Farm With Crystals Since this stage doesn’t force you to protect any Guests, it’s also a solid place to farm abilities. Let enemies crystallize when their death timers reach 0 to absorb HP, MP, or even steal abilities they had equipped. ► List of All Abilities |
Battle 18: Balias Swale
| # | Step by Step Objectives |
|---|---|
| 1 |
All Team A Members Must Have 4 Movement Stat Team A will be your main attacker team, however the enemies are on the far end of where you stand, so it's better to have it comprised of Ramza, with Aurablast, a Chemist with the Romandan Pistol, a Knight with the Black Magick job command equipped, all tied with a Movement Stat of 4. This way they can reach the enemies at the back quickly, and if ever they don't they can depend on their ranged attacks. |
| * |  Battle Boots and Squire's Movement +1 Ability You can manually increase your Movement stat by +2. Equip Battle Boots (purchasable in towns) and learn the Squire’s Movement +1 Ability. Both together grant a total +2 Movement. |
| 2 |  Deal With the Black Mages First Since it is raining, Thunder attacks are boosted, and this will most definitely be used against you by the Black Mages, should they be left unchecked. You can also use this to your advantage if your Knight has the Black Magick job command equipped and Thundara learned from the Black Mage job. |
| * | 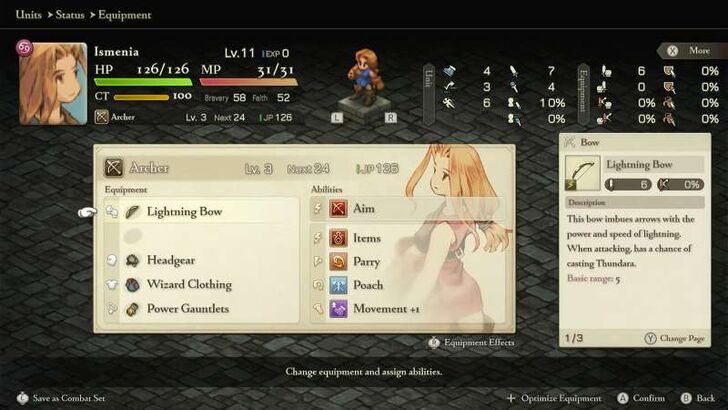 Coral Sword and Lightning Bow Since Thunder damage is boosted, it is best to have your Knight be equipped with a Coral Sword, this sword is imbued with the Thunder affinity and will inflict thunder damage. The Lightning Bow on the other hand, once equipped by your Archers, will have a chance to cast an additional Thundara, after their bow attacks. |
| 3 | 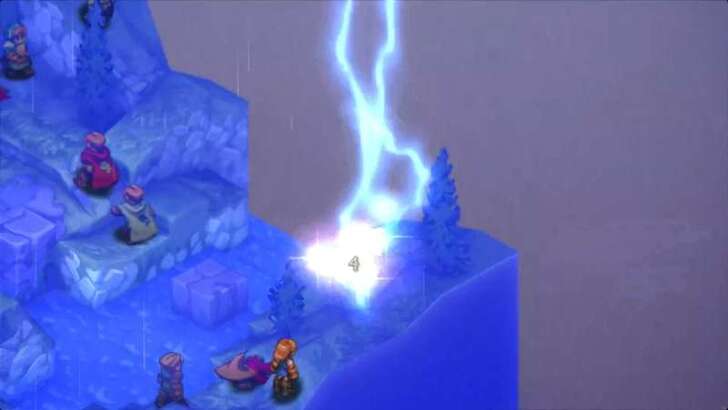 Attack the Remaining Enemies Agrias can actually stand on her own but she's still outnumbered, so have your first team close in to help her defeat the remaining enemies. Meanwhile your second team, the two Archers can actually hold the fort on their own, especially if they have the Lightning Bow equipped. Just make sure to prioritize killing the Black Mage on their side of the field first before the others. |
Battle 19: Golgollada Gallows
| # | Step by Step Objectives |
|---|---|
| 1 | 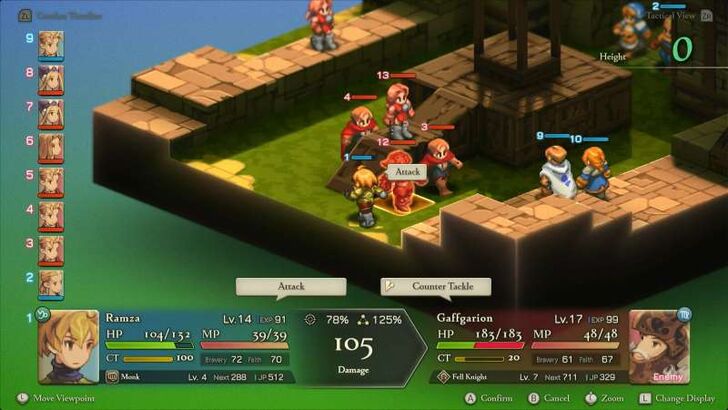 Deploy Your Strongest Units You can bring up to 5 characters into this fight. Agrias and Mustadio are ideal choices thanks to their powerful skillsets. Ramza as a Monk brings heavy melee damage and utility, while your Chemist provides consistent healing and ranged chip damage. A Knight rounds out the team with tankiness and the ability to Rend Gaffgarion’s weapon to weaken his Dark Knight arsenal. |
| 2 | 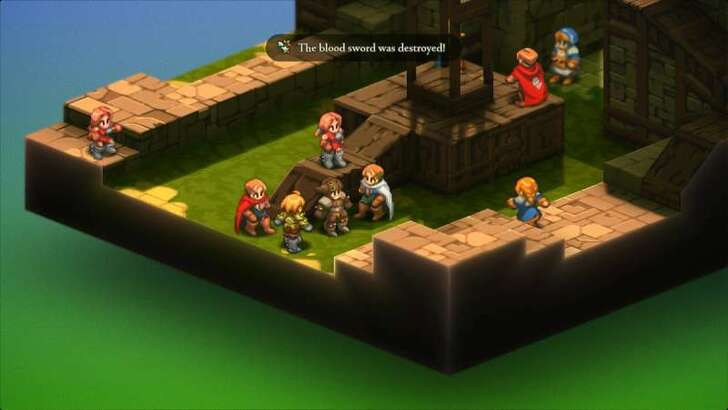 Focus Gaffgarion Early As soon as the cutscene ends, Gaffgarion will advance and try to pressure your frontline. He should always be your first target. Mustadio’s Arm Shot or Leg Shot can disable him, while a Knight’s Rend Weapon can completely neutralize his strongest Dark Knight skills. ► Is the Dark Knight in FFT Ivalice Chronicles? |
| 3 | 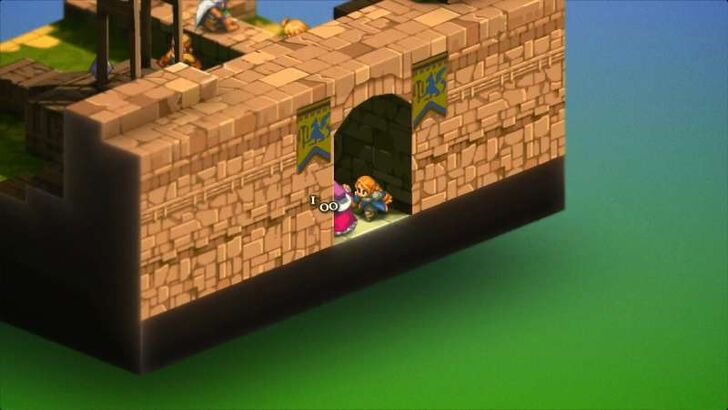 Take Out Gaffgarion, Then Clean Up Gang up on Gaffgarion until he retreats because he’s the biggest threat on the map. Once he’s gone, the rest of the enemies won’t pose much danger and can be cleaned up at your own pace. You can also consider Ability farming and wait for the enemies to crystallize so you can snatch their abilities! ►List of All Abilities |
Battle 19: Golgollada Gallows Guide
Battle 20: Lionel Castle Gate
| # | Step by Step Objectives |
|---|---|
| 1 |
Prepare for a Two-Part Battle This stage is immediately followed by another fight inside Lionel Castle Keep, so you won’t have the chance to resupply or change gear in between. Make sure everyone is stocked with items, Phoenix Downs, and correct equipment before you begin. |
| 2 | 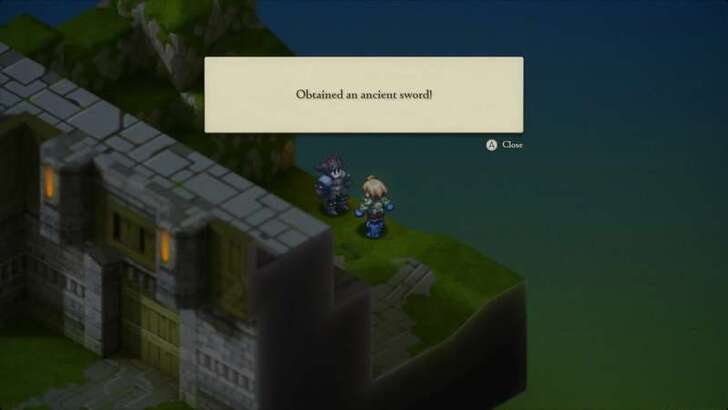 Disarm Gaffgarion by Stealing His Sword In this battle, Gaffgarion returns and Ramza starts alone, separated from the rest of the party. A top priority is stealing Gaffgarion's Ancient Sword so he can’t use Shadowblade. Ramza works best as a Monk here, since he can keep himself alive with Chakra while trying to swipe Gaffgarion’s weapon with the Thief’s Steal Weapon skill. Just make sure Ramza has the Steal command equipped beforehand. ►How to Steal Equipment |
| 3 |  Pull the Lever to Open the Gate Once Gaffgarion is disarmed, he becomes far less threatening. You can finish him off or head straight to the nearby lever to open the gate and let the rest of the party inside. |
| 4 |  Hold the Line With Team B While Ramza works on the gate, the rest of your squad has to fend off the enemies outside. Mustadio’s ranged pressure and Agrias’s Holy Sword skills pair perfectly with a Chemist’s support and a Black Mage nuking from the backline. |
| 5 |  Reunite and Clean Up the Remaining Enemies Once the gate is open, regroup Ramza with the rest of your team. If Gaffgarion is still standing, you can now overwhelm him with your full party. If not, shift focus to mopping up the remaining enemies inside and outside the castle gate. |
Battle 20: Lionel Castle Gate Guide
Battle 21: Lionel Castle Keep
| # | Step by Step Objectives |
|---|---|
| 1 |  Prepare for Status Heavy Attacks The Chapter 2 finale pits you against Cúchulainn, a Zodiac Demon whose skills inflict nasty status effects. Ramza’s Purification and Revive as a Monk help greatly, and your Chemist’s items ensure quick cures. ► All Status Effects Explained |
| 2 |  Spread Out Your Units Cúchulainn’s AoE skills can cripple your entire team if clumped. Spread out to reduce overlap while still staying within range to pressure him. Even with spacing, the arena is small enough that your ranged units can keep attacking safely. |
| 3 |  Immobilize the Boss Early Have Mustadio use Leg Shot right away to Immobilize Cúchulainn. Cutting his movement keeps him in place and buys your team breathing room. Though he can still cast, he can't move and attack you in close combat. |
| 4 |  Exploit Holy Weakness Cúchulainn is weak to Holy, making Agrias’ Holy Sword skills invaluable. Focus on spamming Hallowed Bolt while Ramza and your Chemist handle healing and remedies. Your Black Mage should have at least one -ga level spell (Firaga, Thundaga, or Blizzaga) for solid damage, but keep the Items job command ready as backup if your support is overwhelmed. |
Battle 21: Lionel Castle Oratory Guide
Chapter 3: The Valiant Walkthrough
| Jump to Walkthrough Section | |||
|---|---|---|---|
| 22 | Mining Town of Gollund | 23 | Lesalia Castle Postern |
| 24 | Monastery Vaults - Second Floor | 25 | Monastery Vaults - Third Floor |
| 26 | Monastery Vaults - First Floor | 27 | Grog Heights |
| 28 | Walled City of Yardrow | 29 | The Yuguewood |
| 30 | Riovanes Castle Gate | 31 | Riovanes Castle Keep |
| 32 | Riovanes Castle Roof | - | - |
Chapter 3: The Valiant Walkthrough
Battle 22: The Mining Town of Gollund
| # | Step by Step Objectives |
|---|---|
| 1 |  Pick Off Enemies While Orran Locks Them Down This fight features a large enemy group, but Orran helps by casting Celestial Stasis, which inflicts Stop, Disable, or Immobilize on multiple foes. Use this window to have Ramza, Agrias, and your Knight eliminate enemies one at a time. Make sure your frontline has Items or White Magick equipped so they can self-heal if needed. |
| 2 |  Reach the Roof Quickly Orran risks being surrounded early, so it’s crucial to gain the high ground fast. Deploy Boco (or any other variant of Chocobo) and mount him right away because his high Movement and Jump stats let you climb to the rooftop during your first turn. Pair this with a ranged ally like a Chemist with a gun to cover Orran and snipe from above. Once enemies crystallize or leave chests, Boco can also reach them much faster than your other units. |
| 3 | 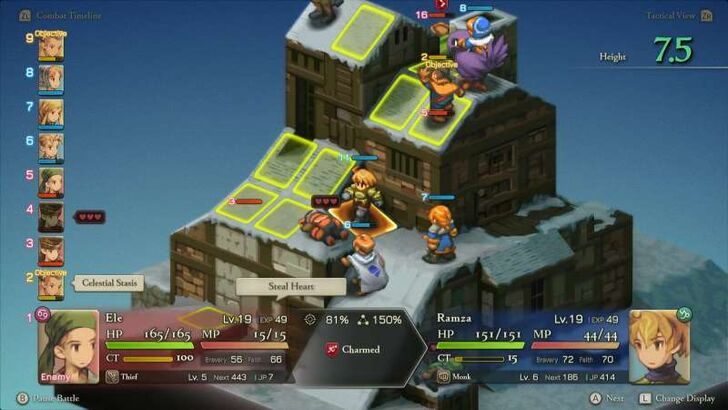 Watch Out for Thieves’ Steal Heart Enemy Thieves frequently use Steal Heart, which charms units of the opposite gender. Be cautious about which characters you move into their range, if you can’t one-shot them, keep your distance to avoid losing control of your units at key moments. ►Differences Between Male and Female Units |
Battle 22: Mining Town of Gollund Guide
Battle 23: Lesalia Castle Postern
| # | Step by Step Objectives |
|---|---|
| 1 |
Keep Alma Safe Alma’s Aegis buff can be very useful when cast on Ramza, so do everything you can to keep her alive during the fight. |
| 2 |  You begin near the gate. Don’t rush forward as the map is small and enemies cluster at the far side. Let them approach while you blast them from a distance. Mustadio, Agrias, your Archer, and Black Mage all shine here with strong ranged pressure. |
| * |
Cast Only Thunder Magic Enemies carry Flame Shields, nullifying Fire and halving Ice damage. Focus your Black Mage on Thundaga for reliable damage output. |
| 3 |  Place Ramza on the leftmost tile of the stairs. Enemies will line up as they push upward, letting you spam Shockwave to hit multiple units at once. Since it costs no MP, you can repeat this safely. |
| 4 |  Zalmour constantly revives and heals his allies. Use Agrias’ Hallowed Bolt, which can Silence him, preventing his spells and making the fight much easier. The fight ends once Zalmour takes enough damage. He’ll retreat even if other enemies are still alive. |
Battle 23: Lesalia Castle Postern Guide
Battle 24: Monastery Vaults - Second Floor
| # | Step by Step Objectives |
|---|---|
| 1 | 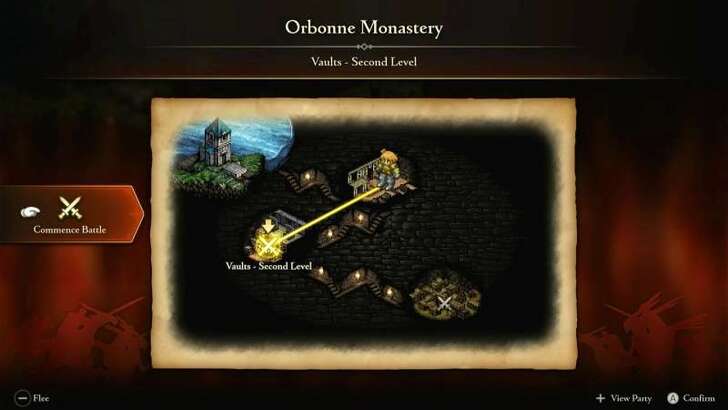 Prepare for Consecutive Battles This fight is directly followed by the Monastery Vaults: Third Floor battle. You won’t be able to resupply or change gear, so stock up on items, especially Phoenix Downs, before entering. Make sure you’ve unlocked stronger jobs like Ninja for fast dual-wield attacks and Mystic for status disruption as they’re both excellent for this series of battles. |
| * |
Set Up Flexible Job Commands Give Ramza the Martial Arts command for ranged Chakra, Revive, and ranged attacks. Meanwhile, equip your Mystic with the Items command to provide healing while crippling enemies. Pairing this with Throw Items lets them act as a long-range support hybrid. |
| 2 | 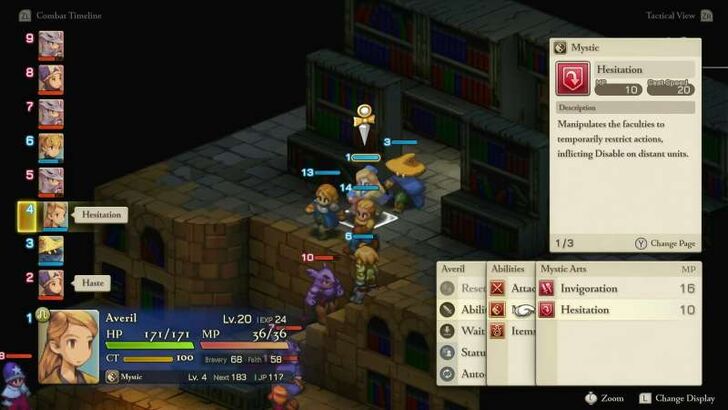 Take Down the Chemist First The enemy Chemist is the top priority as he can undo your progress instantly by reviving fallen units. Use your Black Mage or Agrias to deal burst damage from range. If you can’t drop them in one or two hits, have your Mystic cast Hesitation to disable him. |
| 3 | 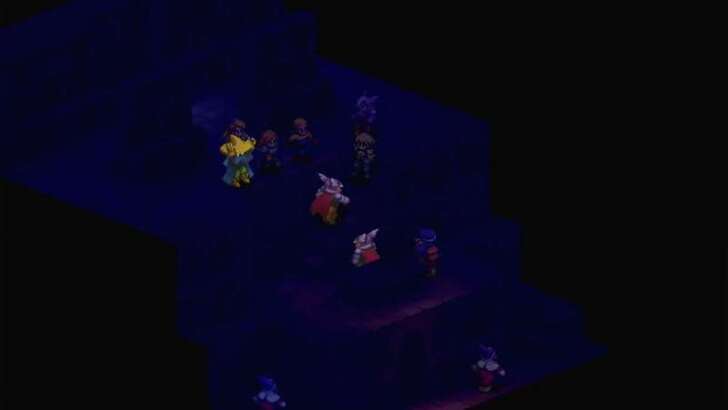 Shut Down the Dragoons Dragoons become dangerous if they start spamming Jump, since they disappear from the map until landing. Use Mustadio’s Arm Shot to disable them before they leave the ground. Once immobilized, they’re much easier to control. The battle ends when all enemies are defeated, immediately leading into the third floor showdown. ►Monastery Vaults: 3rd Floor Walkthrough |
Battle 24: Monastery Vaults: Second Floor Guide
Battle 25: Monastery Vaults - Third Floor
| # | Step by Step Objectives |
|---|---|
| 1 |
Raise Everyone’s Jump to 4+ The walls and bookshelves in this room are tall, so every unit should have at least Jump 4. Equip accessories like Spiked Boots (+1 Jump) and unlock the Archer’s Jump +1 to ensure mobility. Without this, your party risks being stuck on the floor while Isilude dominates the high ground. |
| 2 |  Prioritize Isilude Isilude is the battle’s win condition and defeating him ends the fight immediately. Once he positions himself on the shelves, send Ramza forward as a Ninja with the Martial Arts command and the Safeguard support ability equipped. His dual wield attacks, especially if equipped with two Flail of Flames for bonus Fira damage, can chunk Isilude fast. Back him up with Agrias’ Holy Sword abilities to deal consistent ranged damage. |
| 3 |  Control Enemy Disruptors While Ramza and Agrias focuses on Isilude, the rest of the squad should control the other enemies. Have your female Thief use Steal Heart on the Knights to prevent them from spamming Rend skills. Use your Mystic’s Quiescence to Silence the Summoner before she can unleash AoE magic while your Black Mage rains down -ga spells to clean up or soften clustered foes. Once Isilude falls, the fight ends, and you’ll be immediately thrown into the next battle on the vault’s first floor. ►Monastery Vaults: 1st Floor Walkthrough |
Battle 25: Monastery Vaults: Third Floor Guide
Battle 26: Monastery Vaults - First Level
| # | Step by Step Objectives |
|---|---|
| 1 | Re-Equip Your Items and Abilities Before the fight begins, make sure to swap out gear and commands from the previous battle. You no longer need Jump-boosting accessories or movement abilities here, so replace them with your best accessories, stat boosters, or support skills to maximize survivability. |
| 2 | 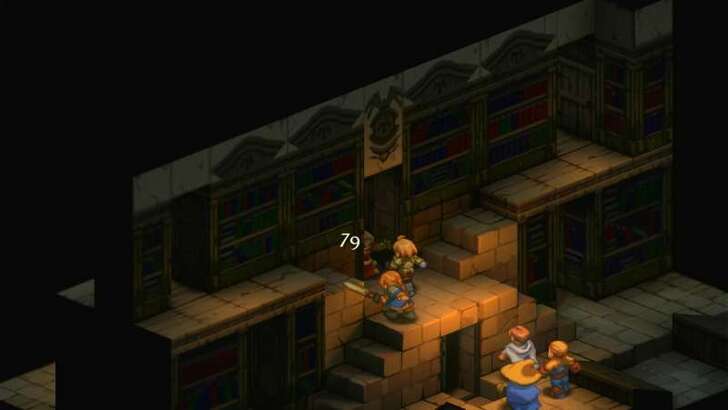 Head to the middle doorway up the stairs, this is where Wiegraf will go towards. Move Ramza there as a Monk with the Steal command, and try to steal his sword to prevent him from using his Holy Knight skills. If you succeed, you’ll cripple his offense immediately. Agrias should back Ramza with Holy Sword abilities for consistent ranged pressure. |
| * |
Rend Weapon as Backup If Steal Weapon keeps missing, let your Knight use Rend Weapon. It will destroy Wiegraf’s weapon outright, though this prevents you from acquiring it. |
| 3 | 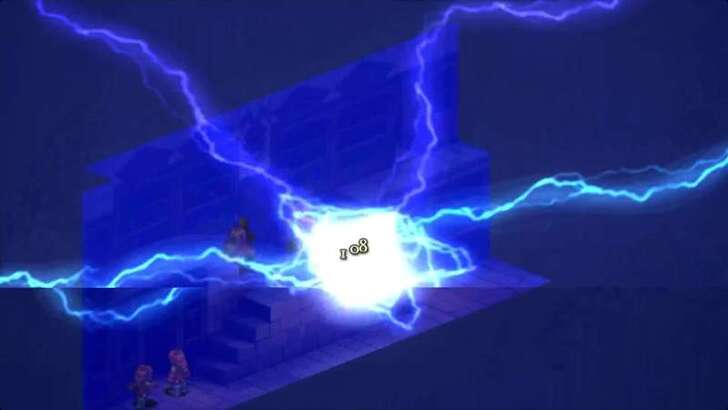 Control the Field The stage is divided by a tall wall with only five doorways: the center where Ramza fights Wiegraf, two at the upper sides, and two at the lower sides. Black Mages are excellent here since they can hit enemies through walls with AoE spells. Meanwhile, Mustadio and your Knight can guard the doors, using Aimed Shot and Rend skills to stop enemies from swarming in. |
Battle 26: Monastery Vaults: First Level Guide
Battle 27: Grogh Heights
| # | Step by Step Objectives |
|---|---|
| 1 | 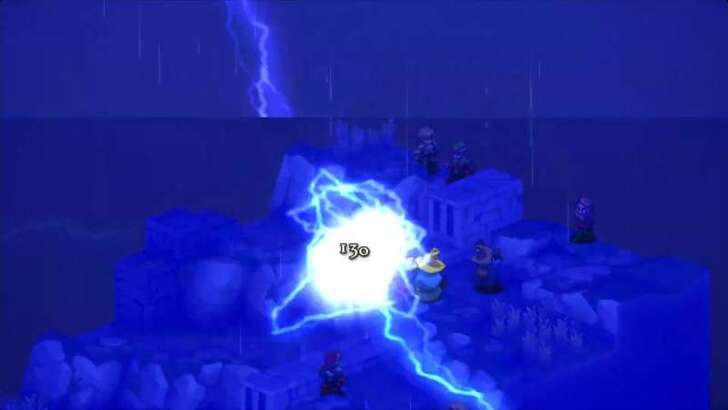 Exploit Rain With Thunder Spells The map is tight, the enemies are many, and it’s raining, these are the perfect conditions for lightning magic. Bring at least two Black Mages with Thundara or Thundaga to maximize the weather boost. An Archer equipped with a Lightning Bow is also a solid pick for ranged coverage, while Ramza and Agrias handle the melee frontline. ►List of Weather and Effects Explained |
| 2 |  Capitalize on Line Attacks Because of the narrow battlefield, enemies often bunch up in rows. Take advantage by having Agrias unleash Divine Ruination and Ramza use the Monk’s Shockwave to hit multiple foes in a line. Combine these with constant Thunder spells to wipe out clusters quickly and secure an easy win. |
Battle 27: Grogh Heights Guide
Battle 28: The Walled City of Yardrow
| # | Step by Step Objectives |
|---|---|
| 1 |
Prevent Rapha's Defeat This battle will be considered a defeat if Rapha gets taken out in battle, so make sure that you protect Rapha at all costs, as there will be Ninjas throwing weapons around.. ▶ How to Recruit Rapha |
| 2 | 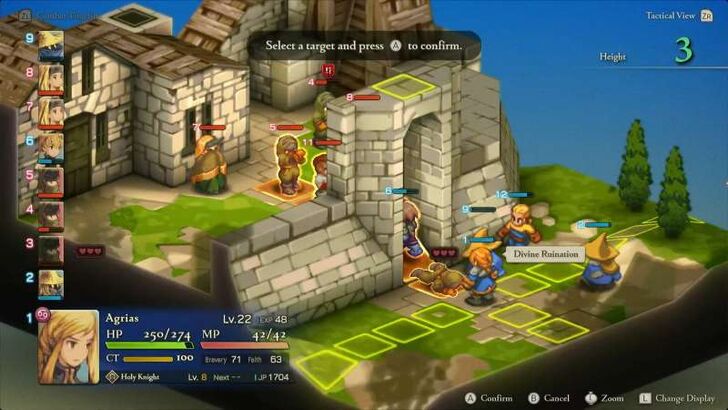 Capitalize on Line Attacks Just like the strategy used at Grogh Heights, the field has a huge wall between the two sides and there is only one door in the middle. This is where enemies will try to enter. Have Ramza block the entrance while Agrias uses Divine Ruination and Ramza uses the Monk’s Shockwave to hit multiple foes in a line. |
| 3 | 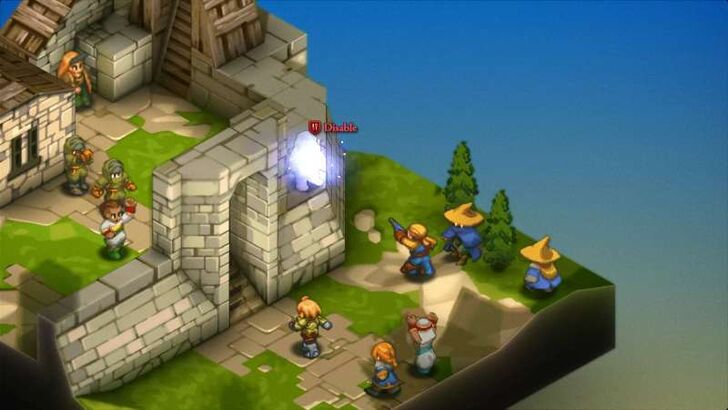 Use Mustadio to Disable Wall-Climbers Some enemies (mostly Ninjas) will try to climb the wall to get vantage points and throw weapons. Use Mustadio’s Arm Shot to disable them from a distance, then finish them off safely. Disabling those climbers prevents annoying poke damage from above. |
| 4 |  Black Mages Rain Spells From the Wall While Ramza, Agrias, and Mustadio handle the gate, position your two Black Mages along the wall so they can cast spells across to the enemy side. Hug the wall for range. Also note that even if Marach falls here, the battle continues until all enemies are defeated. |
Battle 28: Walled City of Yardrow Guide
Battle 29: The Yuguewood
| # | Step by Step Objectives |
|---|---|
| 1 | 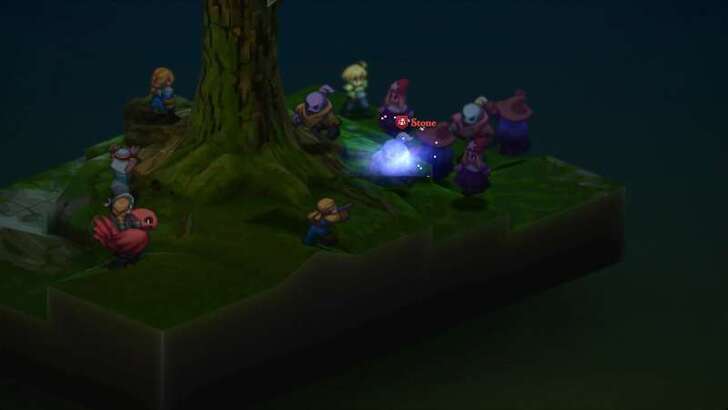 Utilize Mustadio's Abilities Since this battle consists mostly of undead enemies, Mustadio can shine by using his Seal Evil ability, which turns them into stone. Stoned units are removed from the fight until the end, and if all other enemies are defeated while some are still petrified, you still win. Additionally, Mustadio can also utilize his Arm Shot ability to deprive the mages of ever attempting an attack. |
| 2 |  Turn the Undead Against Themselves A great alternative strategy is to have an Orator ride Boco (or any Chocobo variant) for maximum mobility across the swampy terrain. Use Entice on undead units to brand them with Traitor status, making them fight for your side, and they may even join your party after the battle! If Entice fails, the Orator can fall back on the Items command with Throw Item to spam High Potions and Phoenix Downs, which deal damage to the undead and finish them off. |
| 3 |  Eliminate Enemy Mages Quickly The Time Mages and Black Mages in the backline are the real danger. Have Ramza, equipped as a Ninja, rush them down with dual attacks (or Martial Arts for ranged strikes), while Agrias supports with her powerful Holy Knight skills to quickly eliminate them. |
Battle 30: Riovanes Castle Gate
| # | Step by Step Objectives |
|---|---|
| 1 | 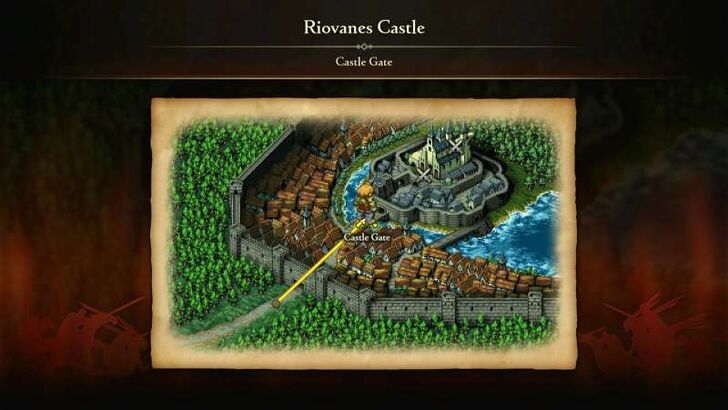 Prepare for Consecutive Battles This fight is directly followed by the Riovanes Castle Keep battle. You won’t be able to resupply or change gear, so stock up on items, especially Phoenix Downs, before entering. Make sure you’ve unlocked Auto-Potion ability, a good -ja elemental spell (Firaja, Blizzaja, Thundaja), and the best equipment the game can offer so far. |
| 2 | 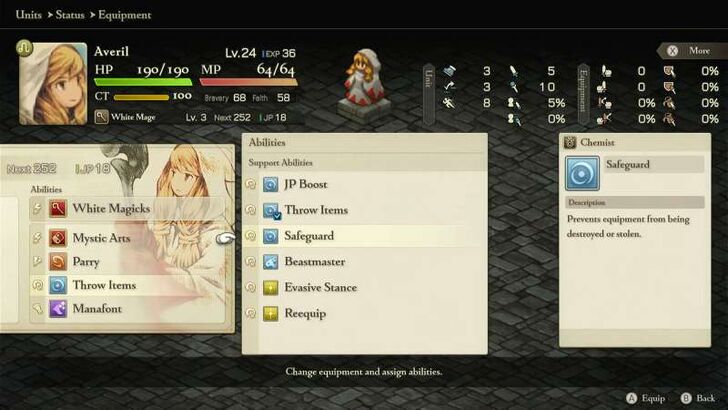 Equip Safeguard Before Starting Knights in this fight love spamming Rend abilities, which can destroy your weapons and armor. To avoid being crippled early, equip the Safeguard support ability on crucial units like Ramza and Agrias. |
| 3 | 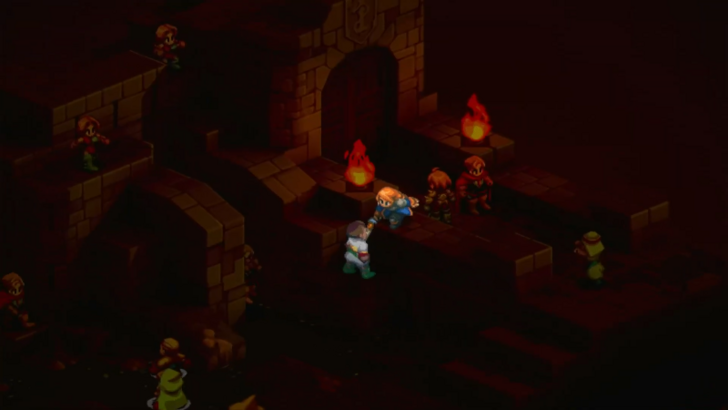 Team A Confronts Marach Marach will advance on the bridge, so use Ramza’s Ninja speed and Martial Arts ranged attacks alongside Agrias’ Holy Knight skills to pressure him quickly. Watch out for the Knights nearby as they’ll try to protect him, so disable or pick them off when possible. |
| 4 |  Team B Controls the Right Flank The rest of your party should secure the right side of the battlefield. Have your White Mage dual-role by keeping Mystic Arts equipped for utility (Disable, Confusion, Blindness) while still healing. Your Black Mage can target enemies on the high ground with -ga spells, while Mustadio pins down Archers with Leg Shot to prevent them from continually attacking your team. Once all enemies are defeated, the battle will end in your victory, launching you into the next battle inside the Castle Keep. ►Riovanes Castle Keep Walkthrough |
Chapter 3: The Valiant Walkthrough
Battle 31: Riovanes Castle Keep
| # | Step by Step Objectives |
|---|---|
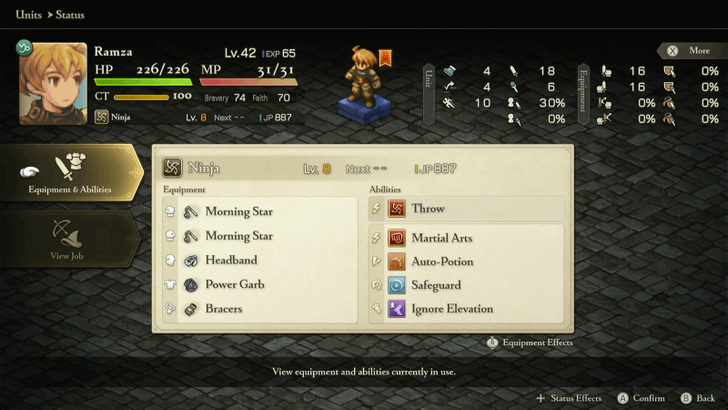
| 1 | 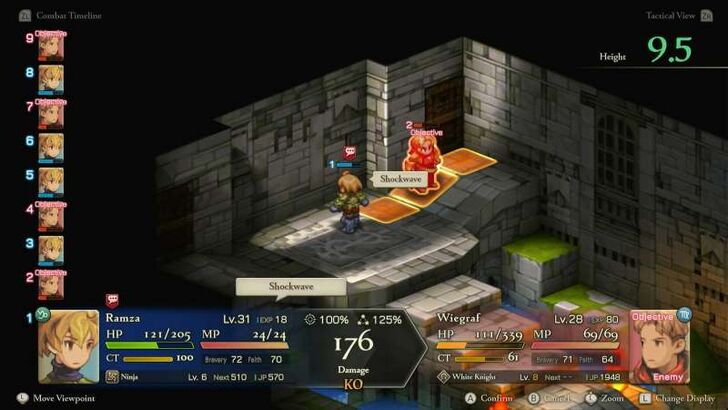 Prepare Ramza for the Duel Phase 1 is a solo fight with Ramza vs. Wiegraf. Gear Ramza as a Ninja with two Morning Stars, Power Garb, Headband, and Bracers (Bracers cost 50,000 gil).Equip Auto-Potion with High Potions and X-Potions in your inventory. Wiegraf’s Holy Knight skills can’t shut down your Martial Arts since it doesn't cost any MP, so stick to ranged Shockwave instead of melee to avoid his brutal Counter. Your HP carries into the next phase, so make sure to heal and end healthy. |
| 2 |  Survive Belias’ Transformation After Wiegraf falls, he transforms into Belias. This phase is rough as he has high stats, powerful AoEs, and spawns four Archaeodaemons. Ramza should immediately pressure Belias in melee as the Dual Wield makes him your best damage source. Agrias joins in with Holy Sword skills for strong bursts. |
| 3 |
Time Mage Provides Tempo Control Gravity or Graviga can chunk Belias for a percentage of HP, bypassing his tankiness. Keep Haste on allies and Slow on enemies whenever possible. Equip Items with Throw Items so your Time Mage can act as a secondary healer in emergencies. |
| 4 | 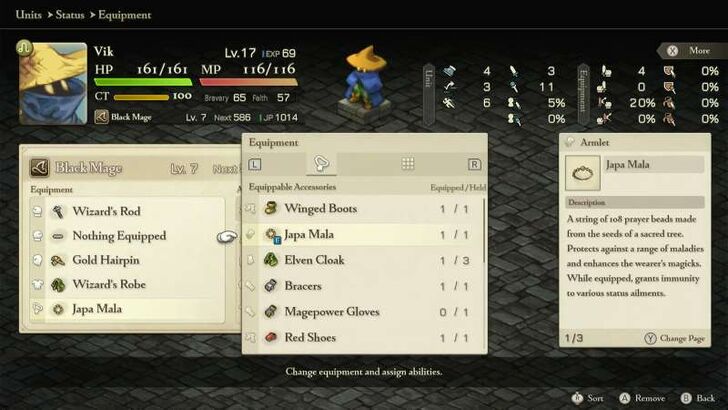 Black Mage Nukes the Field A Black Mage with at least one -ja spell (Firaja, Thundaja, Blizzaja) can devastate both Belias and the clustered demons. Target overlapping areas to maximize damage. Equip a Japa Mala to avoid Silence, keeping your casting reliable. |
| 5 | 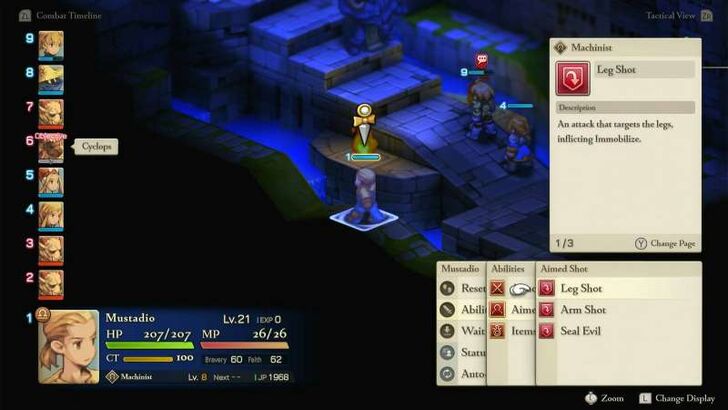 Mustadio Controls the Additional Enemies Use Leg Shot or Arm Shot to stop Archaeodaemons from moving or casting. This prevents them from backing Belias with dangerous spells. With them locked down, your casters can safely charge and your frontline can keep hitting the boss. The battle ends when Belias is defeated so once Mustadio is done crippling the enemies, he should focus his attacks on Belias. After the battle ends, you'll immediately head into the next battle at the Castle's Roof. ► Riovanes Castle Roof Walkthrough |
Riovanes Castle Gate Walkthrough (Battle 30)
Battle 32: Riovanes Castle Roof
| # | Step by Step Objectives |
|---|---|
| 1 | 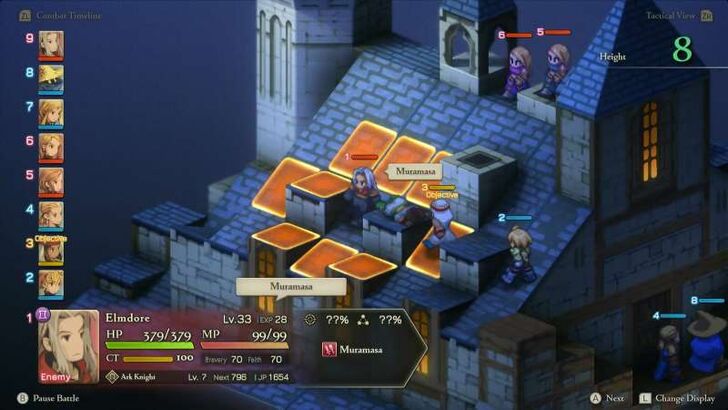 Protect Rapha at All Costs The mission fails if Rapha goes down. Park a tanky ally or healer near her to keep her safe while your main damage dealers move in. Don’t spread your damage to all the enemies available. Instead, tragert either Lettie or Celia until they drop into Critical status. Once one assassin is weakened enough, all three enemies will retreat, ending the fight instantly. |
| 2 |  Ignore Elmdore’s Tricks Elmdore is terrifying with debuffs and ailments, but he’s not your win condition so don’t waste time or resources attacking him. The only thing that matters is forcing the assassins to retreat. Once they escape, you’ll secure victory and recruit both Marach and Rapha. |
Battle 32: Riovanes Castle Roof Guide
Chapter 4: In the Name of Love Walkthrough
Chapter 4: In the Name of Love Walkthrough
Battle 33: Dugeura Pass
| # | Step-by-Step Objectives |
|---|---|
| 1 |  Prioritize the Black Mages First The two Black Mages are your top priority as they can hit multiple allies with high-level AoE spells and they are both wearing a Black Robe, which enhances elemental magic. Take them out quickly to reduce incoming damage. Using the Dual Wield ability of the Ninja job can help you finish them in a single turn. |
| 2 | 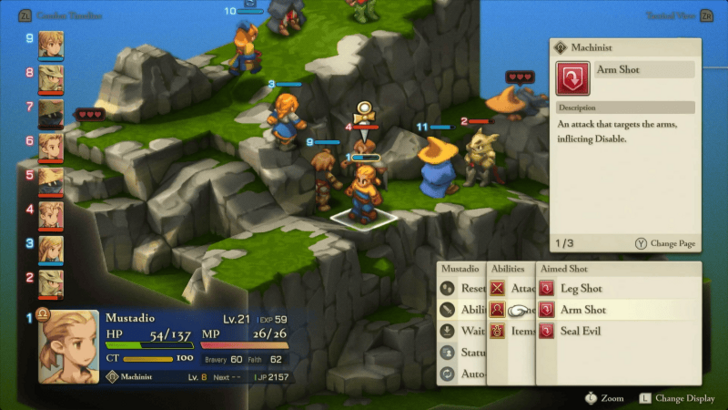 Watch Out for Dragoon Jump Attacks Dragoons can vanish off-screen with Jump and can’t be targeted until they land. If a unit is targeted, check turn order, then if your unit’s turn comes first, move them off the marked panel to avoid the hit completely. Alternatively you can use Mustadio's Arm Shot to disable their abilities beforehand. |
| 3 |  Use Mystic and Black Mage for Support Black Mages can damage multiple clustered enemies from a safe distance. Alternatively, use a Mystic to silence enemy Black Mages with Quiescencce so they won't perform any of their spells. Once the Black Mages are gone and the Dragoons’ threat is neutralized, mop up the remaining enemies at your own pace. |
Battle 34: Free City of Bervenia
| # | Step-by-Step Objectives |
|---|---|
| 1 | 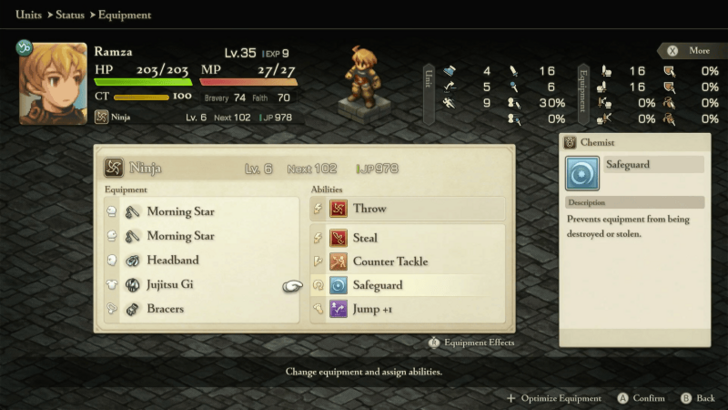 Rush Meliadoul Before She Rends Your Gear Meliadoul’s Unyielding Blade can shred your weapons and armor. Have Ramza equipped with Dual Wield and Ignore Elevation or Jump +1 so he can scale the map quickly, engage her, and keep her busy. Getting to her fast prevents the rest of your party from suffering too much equipment loss. |
| * | Safeguard Your Equipment If you have the Safeguard support ability, equip it to your units as it makes your gear immune to Meliadoul’s Rends. This is optional but highly recommended, especially if you don’t want to risk losing rare weapons or armor. |
| 2 | 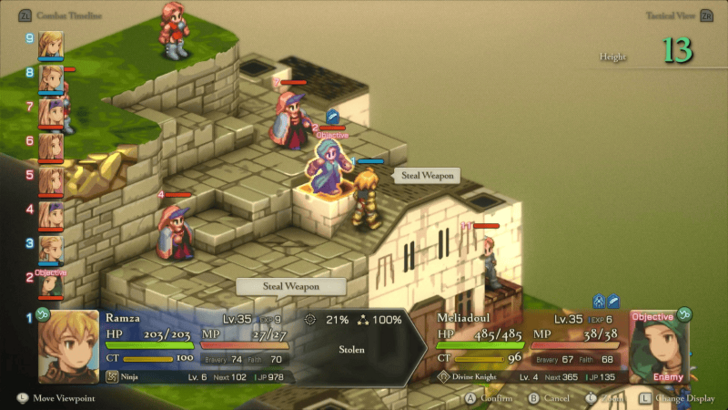 Steal Her Unique Gear Don’t defeat Meliadoul right away. Use the Steal Weapon and Steal Accessory commands on her to grab the Defender Sword and Chantage Perfume which are both unobtainable anywhere else. Equip Ramza with Auto-Potion to keep him alive while he attempts repeated steals. |
| 3 | 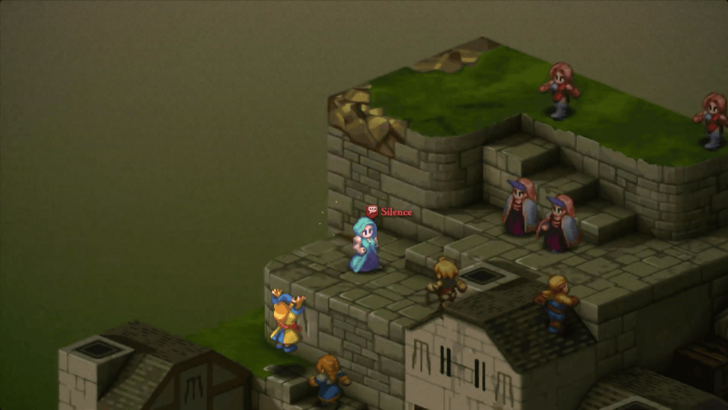 Keep the Enemy Squad Distracted While Ramza is busy stealing, have your other units control the battlefield. Mystic and Mustadio can Silence or Disable the Summoners, while Agrias handles the Archers. Your Chemist provides steady heals. |
| 4 | Finish Off Meliadoul Once you’ve secured her gear, defeat Meliadoul to end the battle. The mission ends immediately after she falls, regardless of how many enemies remain. |
Battle 34: Free City of Bervenia Guide
Battle 35: Finnath Creek
| # | Step by Step Objectives |
|---|---|
| 1 |
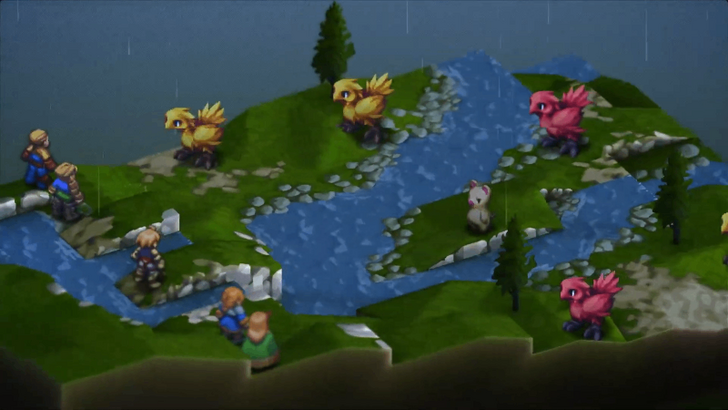 Identify the Chocobo Types At the start of the battle, check which Chocobos are present. Normal yellow Chocobos can heal allies with Choco Cure, while Red Chocobos and Black Chocobos have offensive attacks like Choco Pellets and Choco Meteor that can hit you from range. Knowing which types you’re up against will determine your battle pace. It’s best to save your game before this fight, then reset until you get an easier all-Yellow Chocobo lineup. |
| 2 |
 Do Not Kill the Pig If a Pig appears in your randomized enemy lineup, don’t kill it! It’s a rare monster that can provide high-tier accessories like Ribbons and Chantages when poached. Instead of poaching immediately, have your Summoner with both Speechcraft and Beastmaster commands, Entice the Pig so it can join your party. Once recruited, the Pig can lay eggs over time, giving you more of its kind to poach later. Always keep at least one alive to maintain your farm of free rare gear. |
| 3 |
 Focus Fire on One Chocobo at a Time When attacking, focus your fire on one Chocobo to ensure it goes down in a single turn. Ramza can easily handle two hits per round, so he can split off from the group to clean up solo targets. Meanwhile, Mustadio, your Archer, and your Summoner can deal damage safely from range, keeping them out of counterattack range. Once the last enemy falls, the battle ends. |
Battle 35: Finnath Creek Guide
Battle 36: Outlying Church
| # | Step by Step Objectives |
|---|---|
| 1 |  Use Spells That Ignore Elevation For a fast battle, your goal is to focus all attacks on Zalmour until he’s defeated. To do this, bring units with spells that ignore elevation, such as the Black Mage’s magic, the White Mage’s Holy, and Agrias’ Hallowed Bolt. Delita also uses Holy Knight skills that ignore elevation, so he can assist in ranged combat. As for Ramza, have him as a Ninja with Ignore Elevation equipped so he can rush Zalmour on turn one and hit him twice for immediate damage. |
| * |  Expect Slow Play Without Ignore Elevation Without the Ignore Elevation ability or elevation-ignoring spells, expect a slower battle as you’ll need to route around the building to reach the roof and engage Zalmour directly. |
Battle 36: Outlying Church Guide
Battle 37: Beddha Sandwaste
| # | Step by Step Objectives |
|---|---|
| 1 |  Cure the Starting Poison At the start of the battle, all allies are inflicted with Poison. Have your Chemist use Purification (from the Martial Arts command) to cleanse nearby units right away. Position them in the center to hit multiple party members at once, this setup clears Poison from up to three allies in a single turn. |
| 2 |
Beware of Barich’s Blaze Gun Barich’s Blaze Gun can fire random Ice-element spells from Blizzard up to Blizzaga, and the previewed damage only shows the weakest one. To counter it, equip Agrias (or another frontliner) with an Ice Shield to absorb his attacks while closing in. |
| 3 |
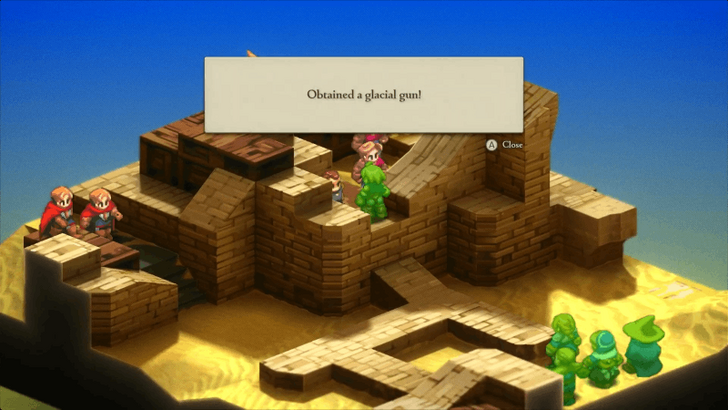 Attempt to Steal the Blaze Gun Ramza should equip the Thief command Steal Weapon to try and take Barich’s Blaze Gun before defeating him. It’s one of three rare magic guns in the game along with the Blast Gun and Glacial Gun, so it’s absolutely worth delaying the kill to secure it. |
| 4 |
Focus on Barich Once his gun is stolen, Barich becomes harmless and can only do attacks. Have Ramza and Agrias rush him down while Mustadio and your Black Mage clean up the rest of the enemies. When Barich falls, the battle ends so if you haven’t stolen his weapon yet, don’t finish him too early! |
Battle 37: Beddha Sandwaste Guide
Battle 38 A: Fort Besselat: South Wall
| # | Step by Step Objectives |
|---|---|
| 1 | 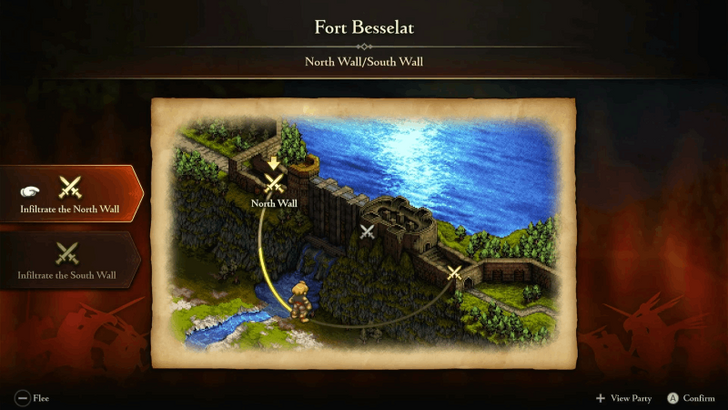 South Wall or North Wall? This battle is one of two possible entry points into Fort Besselat. You can either choose the South Wall or the North Wall and only one will be played in this chapter. Both lead directly to the Sluice Gate battle. ▶ Should You Pick the North Wall or the South Wall in Chapter 4? |
| 2 |  Split Your Party Enemies are spread out across both sides of the field, which means you can gain control faster by dividing your squad. Form two balanced teams and assign Ramza and Agrias to opposite flanks so they can move upward immediately. Take out the Ninja first as its elevated position, double attack, and high speed make them dangerous. The narrow path they stand on is perfect for AoE attacks like Shockwave or Divine Ruination to clear them fast. |
| 3 |  Have the Rest Deal With Other Enemies After eliminating the Ninja, turn your focus to the Thief. They can steal weapons and gear, so either bring the Safeguard support ability or use Mustadio’s Arm Shot to disable them before finishing the job. Your White Mage can pull double duty by casting Holy for big damage while patching up the team. Meanwhile, your Summoner’s AoE magic will shine here, dealing heavy damage to clustered foes without friendly fire, making cleanup fast and safe. |
Battle 38 A: Fort Besselat: South Wall Guide
Battle 38 B: Fort Besselat: North Wall
| # | Step by Step Objectives |
|---|---|
| 1 | South Wall or North Wall? This battle is one of two possible entry points into Fort Besselat. You can either choose the South Wall or the North Wall and only one will be played in this chapter. Both lead directly to the Sluice Gate battle. ▶ Should You Pick the North Wall or the South Wall in Chapter 4? |
| 2 |  Use Ignore Elevation for a Quick Assault Equip the Dragoon’s Ignore Elevation movement ability on Ramza so he can quickly reach enemies stationed on higher ground. This lets him bypass long stairways and strike first. Since a Ninja attacks twice per turn, Ramza can efficiently take down key enemies while the rest of your team advances. |
| 3 | 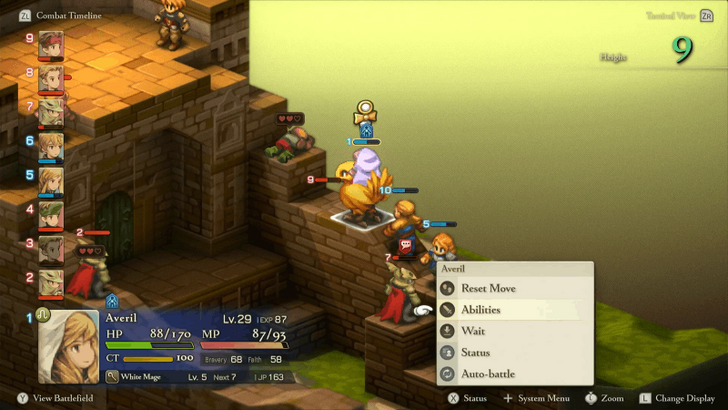 Focus on the Summoner First While Ramza handles enemies above, have the rest of your squad prioritize the Summoner since her wide-area spells can hit your units even from her starting position. Use Boco (or another Chocobo) to cross terrain and reach her side faster. Once across, dismount to fetch your other units so you can regroup inside and finish off remaining enemies efficiently. |
Battle 38 B: Fort Besselat: North Wall Guide
Battle 39: Fort Besselat Sluice
| # | Step by Step Objectives |
|---|---|
| 1 |  Defeat the Black Mages First Take out the Black Mages before anyone else, as they can deal heavy AoE damage. Use Mustadio on Team A and your Mystic on Team B to Disable the Black Mages with Arm Shot and Hesitation respectively, then follow up with attacks from Ramza or Agrias. Eliminating them early will make the rest of the fight much safer. Black Mages tend to stay near elevated spots so positioning your Black Mage to counter with its elevation ignoring spells can take them down even quicker. |
| 2 |  Clear the Other Knights and Archers Once the mages are gone, shift your attention to the Knights and Archers. The Knights near the floodgate levers will hold their ground, so you can isolate and eliminate the ranged units first. Although the mission’s main objective is to open the gate by pulling the levers, it’s easier and safer to defeat all enemies first. Doing so prevents counterattacks while interacting with the switches, and clears the field for a smooth finish. |
| 3 | 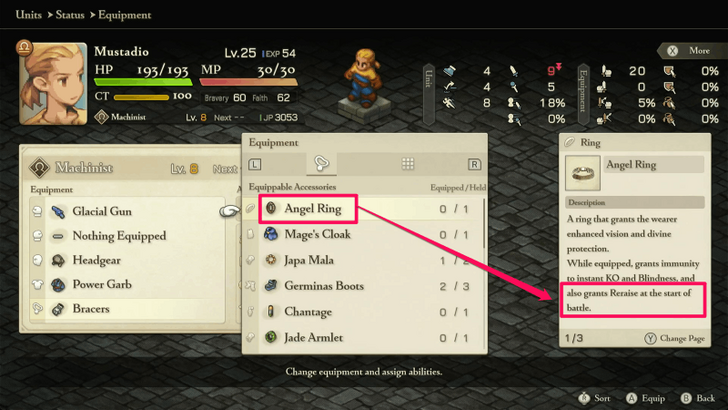 Protect Your Party This fight can get rough if you’re underleveled. Make sure everyone can heal themselves, especially Team B (Agrias and the Mystic) by equipping secondary abilities like White Magicks or Items. If you have Angel Rings, equip them for Reraise to survive sudden spell bursts or crits. Once all enemies are defeated, pull the floodgate levers to release the water and complete the battle. |
Battle 39: Fort Besselat Sluice Guide
Battle 40: Mount Germinas
| # | Step by Step Objectives |
|---|---|
| 1 | 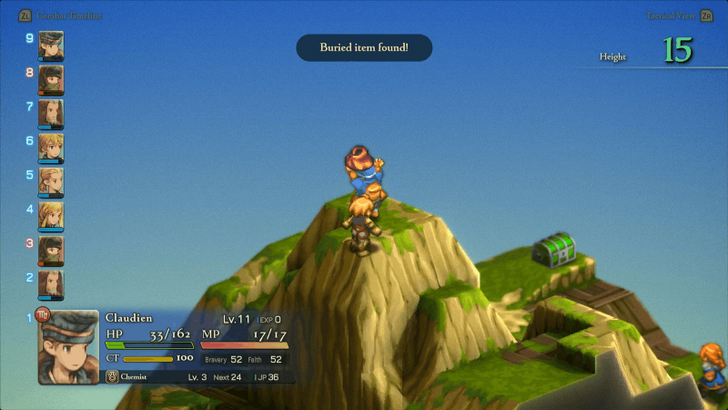 Scout and Secure the Invisibility Cloak Deploy a unit with the lowest Bravery and change their job to a Chemist with the Treasure Hunter ability. Their mission is to grab the Invisibility Cloak buried on the plateau above. Since the chance of getting the rare treasure equals 100 minus your Bravery, a low-Bravery Chemist has the best odds. If you pull an Ether instead, don’t hesitate to reset and retry. ► How to Raise or Lower Bravery |
| * | Invisibility Cloak Greatly Helps in Learning Ultima Later On The Invisibility Cloak is essential later when learning Ultima. This is the only map where you can get this cloak, so make sure to secure it. ►Invisibility Cloak Stats and How to Get |
| 2 |  Split the Party for Efficiency When the battle starts, your party will automatically split. Have Ramza, Agrias, and your Chemist on the right side near the buried treasure zone, while Mustadio and Orlandeau handle the right flank. Orlandeau can solo his side easily, so focus on protecting your Chemist with Ramza and Agrias while clearing out nearby Thieves or the Ninja that could interfere. Agrias’ Holy Sword skills can clear enemies from range, while Ramza’s Tailwind can help your Chemist take more turns between enemy attacks. |
| 3 |  Eliminate Remaining Enemies Once the Invisibility Cloak is secured, unleash your heavy hitters. Prioritize defeating the Ninja first since they’re fast and evasive, then move on to the Thieves, and finally the Archers. |
Mount Germinas Walkthrough (Battle 40)
Battle 41: Lake Poescas
| # | Step by Step Objectives |
|---|---|
| 1 |  Bring Two Chemists and Lots of Phoenix Downs Since all enemies here are undead, Chemists are your MVPs here as each Phoenix Down they throw will instantly one hit an enemy. Keep them at a safe distance behind your melee fighters. Meanwhile, Ramza should engage the Archers to draw fire away from your support units. |
| 2 |  Prioritize the Mystic and Summoner Have Orlandeau and Agrias take down the Mystic and Summoner first since they’re the biggest threats due to their ailment infliction and AoE spells. Their Holy Sword skills ignore elevation, letting them easily strike from higher ground. |
| 3 | 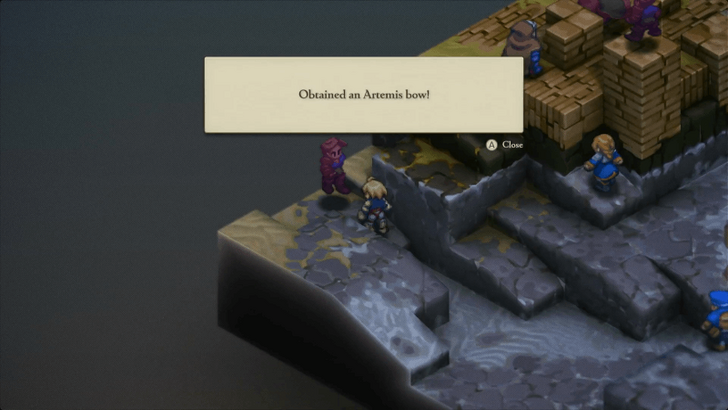 Once the spellcasters are down, focus on the Archers. Ramza should steal their weapons, the rare Artemis Bows, which aren’t available in shops. Monks’ high speed makes this easier. After you’ve secured the loot, you can freely end the battle either by tossing Phoenix Downs at remaining undead or finishing them off with standard attacks. |
| 4 | Beware of Undead Reviving Remember that undead enemies have a chance to resurrect when their heart counters reaches zero instead of turning into a crystal or treasure chest. If that happens, just repeat the same process, throw another Phoenix Down or hit them again until they stay down for good. |
Battle 42: Limberry Castle Gate
| # | Step by Step Objectives |
|---|---|
| * |  Prepare for Consecutive Battles The three battles at Limberry Castle, starting with Limberry Castle Gate, are consecutive, and will not allow returning to the outfitter between stages. Make sure to acquire all equipment and items you need before entering the first battle! You can also create a manual save before beginning in case you need to retry the full sequence. |
| 1 |  Defend Against Status Effects All the enemies here will use debilitating status effects. We recommend becoming immune to as many of the effects as possible through gear. Equip the rare Barrette accessory, find and use Ribbons, and wear the Jade Armlet to gain immunity to most status effects. If you can, bring no male units (except Ramza and Orlandeau) to prevent them from being Charmed by the enemy. |
| * | If you wish to learn the Ultima spell here, Ramza should also wear the Invisibility Cloak. This will make him invisible at the start of battle until he performs an action, preventing him from being targeted by enemy status spells for a short period. |
| 2 |  Be Immune to Bring Out Ultima Celia and Lettie will be more likely to target your party with Ultima if most of your members are immune to their status effects. Bring Ramza close to an Ultima-targeted ally so that he will be hit by the AOE. If he survives, he'll learn Ultima! |
| 3 | 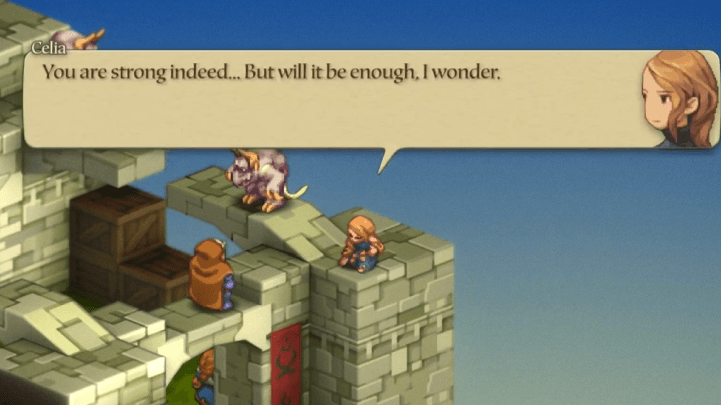 Focus Down One Assassin After learning Ultima (or if you just want to move on), simply focus your damage on either Celia or Lettie. Despite the objective saying to Defeat All Enemies, the battle will end when one Assassin is reduced to critical health. After the battle, you'll proceed directly into the next stage. ▶Limberry Castle Keep |
Battle 42: Limberry Castle Gate Guide
Battle 43: Limberry Castle Keep
| # | Step by Step Objectives |
|---|---|
| 1 | 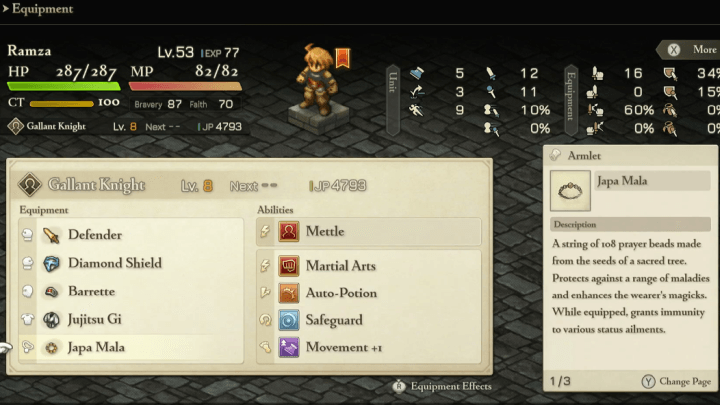 Equip Japa Malas Before Battle Before entering the battle, reequip your entire party with the Japa Mala accessory. This protects them from being turned into Vampires by Elmdore. |
| 2 | 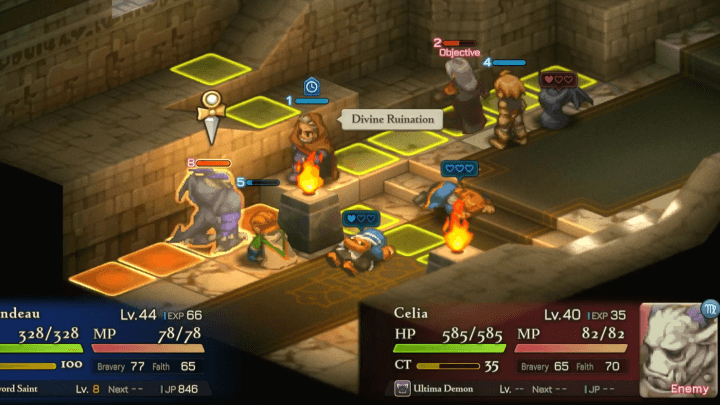 Defeat the Assassins and Ultima Demons Focus damage on the Assassins first. After they go down once, they'll turn into Ultima Demons. Taking them out early reduces chaos on the battlefield and prevents them from assisting Elmdore or using their potent status magic. |
| 3 | 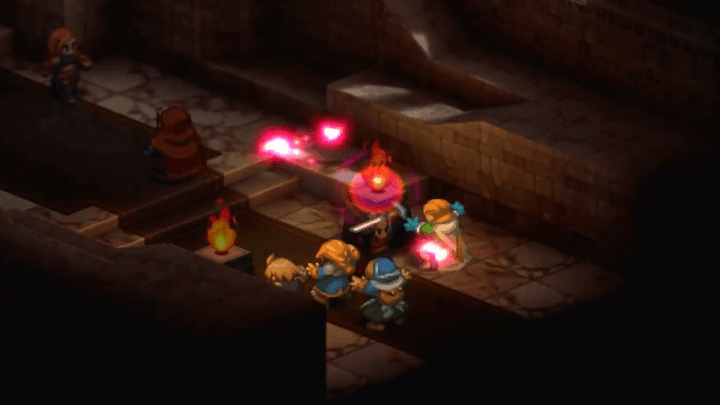 Focus on Elmdore Your main target is Elmdore, the bloodsucking Ark Knight. Use Sword Techniques to inflict damage, then repeatedly Steal from him to nab the Genji set. Lowering his Bravery will reduce his parry chance, making it easier to land hits and Steal attempts. Immobilizing Elmdore and Disabling Lettie and Celia makes this battle much easier. Use stuns, slow effects, or other control abilities to limit his movement and reduce the threat from Vampire. |
| * | Elmdore’s Vampire drains HP and turns characters into Vampires who act independently. Heal bitten characters with Holy Water if needed. |
| 4 | 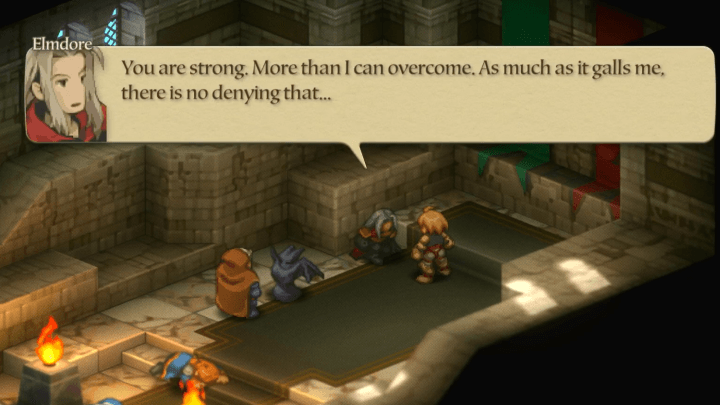 Take Down the Silver Prince Defeating Elmdore ends the battle, moving you on to the next stage. ▶Limberry Castle Undercroft |
Battle 43: Limberry Castle Keep Guide
Battle 44: Limberry Castle Undercroft
| # | Step by Step Objectives |
|---|---|
| 1 |  Watch Out for Undead Knights’ Break Abilities Zalera is flanked by a pair of undead Knights. These Knights can use Arts of War and break your precious equipment if allowed to run free. Take them out quickly, or use the Safeguard passive to defend your gear. |
| 2 |  Focus Orlandeau and Agrias on Zalera Use Orlandeau and Agrias to focus their ire on Zalera, with Ramza in support. Ramza can also use Purification and Chakra to cure ailments and heal and cure ailments. Keep the rest of the party out of his spell range, or spread them thin to force him to attack a single character instead of multiple. |
| 3 |  Beware of Status Ailments Zalera continuously casts status ailment spells, including ones that can inflict Stop, Doom, Sleep, Confuse, and Toad on multiple party members. Ensure that damage-dealers like Orlandeau have gear to prevent these effects, as the battle can slow considerably without Judgement Blade available to focus down Zalera. |
| 4 | 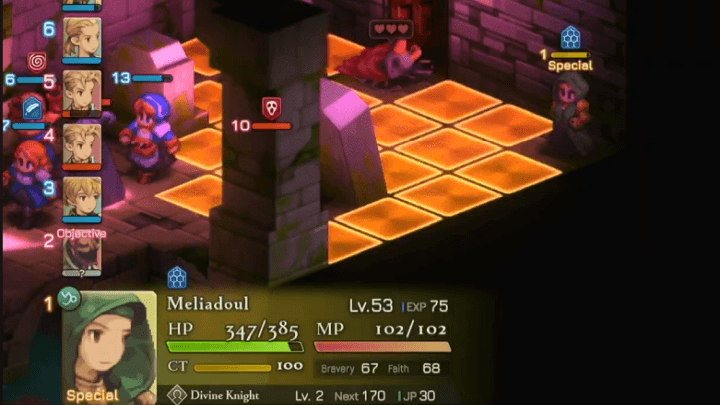 Get Help From Meliadoul Meliadoul participates in the battle, and is positioned to help attack the the undead skeletons that appear behind your party. Combine her Unyielding Blade with Mustadio and your Chemist's abilities to make short work of the minor foes.This will free up your main fighters to focus on Zalera! After beating Zalera and cleaning up the remaining undead, Meliadoul will join the party permanently, and you'll be ready for your next battle. ▶Eagrose Castle |
Battle 44: Limberry Castle Undercroft Guide
Battle 45: Eagrose Castle Keep
| # | Step by Step Objectives |
|---|---|
| 1 | 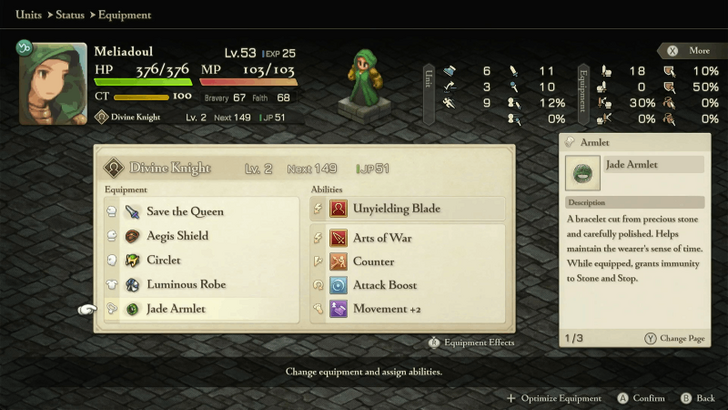 Prepare for a Two-Part Battle This fight against Dycedarg has two phases, his human form and his transformation into Adrammelech, the Wroth. Equip everyone with Jade Armlets to nullify Stone from Adrammelech's attacks. ►Dycedarg and Adrammelech Boss Guide |
| 2 | 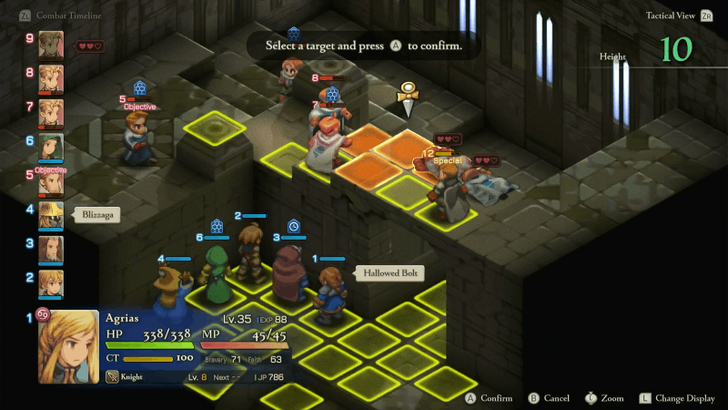 Avoid rushing up the stairs as five enemy Knights are waiting there with Rend abilities ready to destroy your gear. Instead, have your party, Orlandeau, Agrias, Meliadoul, and your Black Mage, attack from below using Holy Sword skills and spells that ignore height differences. Ramza as a Brawler Ninja can also help from below using Ultima (if you have it) or ranged attacks. Keep all your damage focused on Dycedarg; once he falls, the first phase ends regardless of remaining enemies. |
| * | Optional: Try Stealing Dycedarg’s Defender If you’re feeling bold, you can try stealing Dycedarg’s Defender Sword, but it’s risky. Equip Steal, Safeguard, Auto-Potion, and Ignore Elevation if you plan to attempt it. |
| 3 | 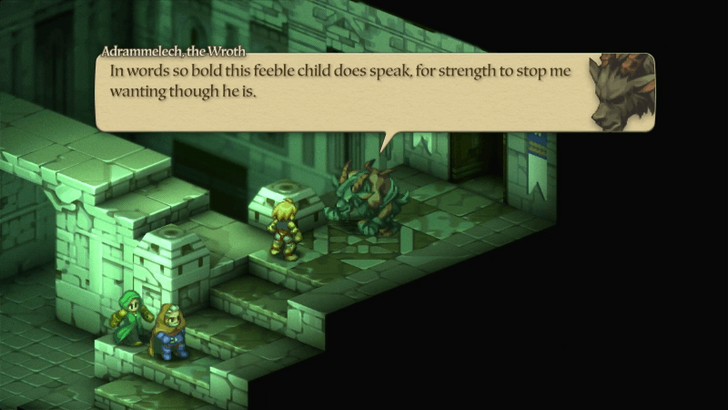 Defeat Adrammelech Once Dycedarg transforms into Adrammelech, the battle becomes far deadlier. He uses Bahamut, Leviathan, and can still inflict Confuse, though Stone will no longer be a problem thanks to your Jade Armlets. Avoid clustering your strongest units like Orlandeau and Meliadoul as Adrammelech’s AoE summons can devastate tight groups. Spread out your team, heal status effects immediately, and keep pressure on him with sword skills and magic until he falls. |
| * | 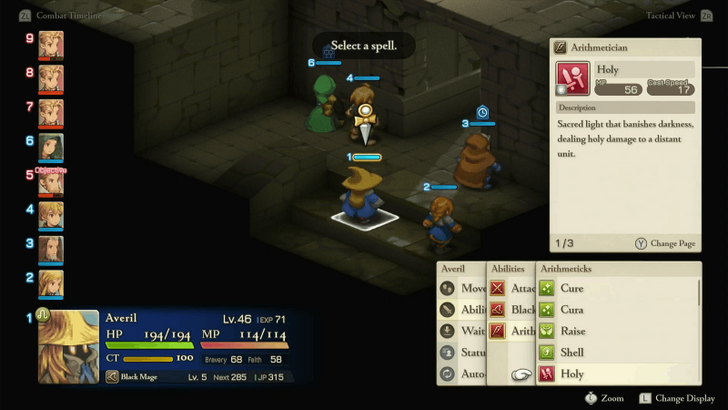 Your Black Mage with Arithmeticks can turn the tide of battle here as instant, MP-free casting makes them devastating against both Dycedarg and Adrammelech. Combine that with Auto-Potion support for survival, and you’ll have both offense and defense covered. |
Battle 45: Eagrose Castle Keep Guide
Battle 46: Mullonde Cathedral
| # | Step by Step Objectives |
|---|---|
| * |  Prepare for Consecutive Battles The battles at Mullonde Cathedral, starting here, are consecutive. You will not be able to return to the World Map or Outfitter until finished. Acquire any items or equipment you need before starting, and create a manual save in case you need to restart the sequence. |
| 1 | 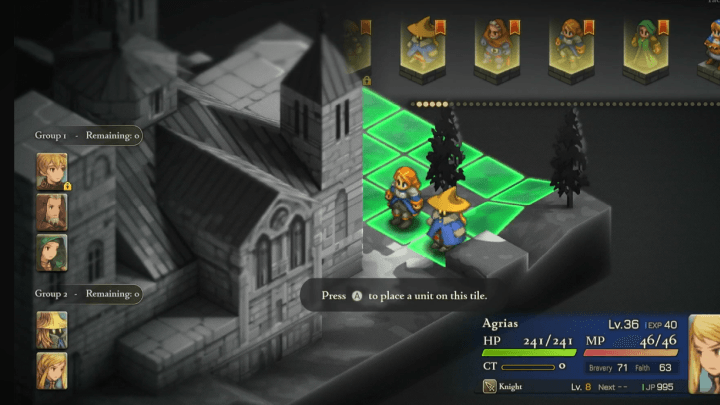 Deploy to Cover Both Sides Your team will deploy in two groups. Make sure you have a strong fighter like Orlandeau or Agrias on either side. Group 1 will face Geomancers and a Summoner, while Group 2 faces Orators. |
| 2 | 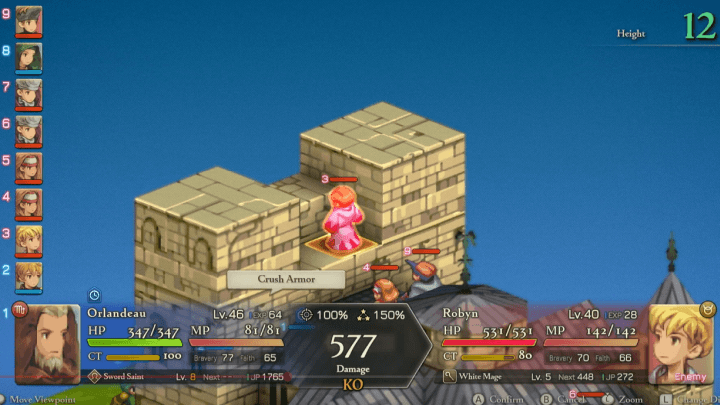 Eliminate the White Mage A sneaky White Mage hides on the Cathedral roof, between the two towers. He can heal and raise multiple enemies at once using Cure and Raise augmented with Arithmeticks. Take him out first to keep the battle under control. |
| 3 | 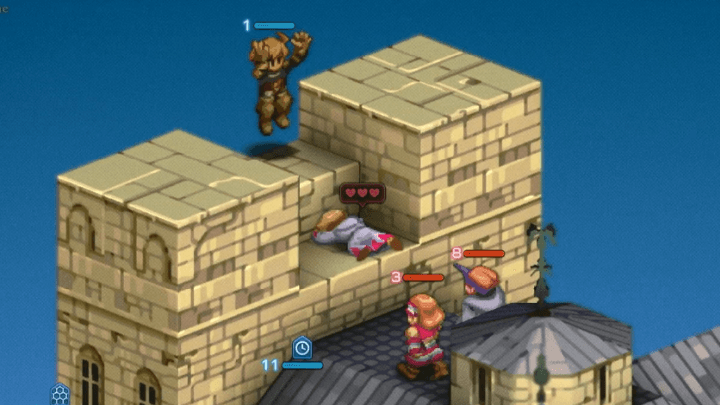 Get On Their Level Take advantage of height-ignoring abilties to deny your foes the safety of the rooftop. Fighters with Ignore Elevation can make quick work of the squishy spellcasters taking shelter atop the building. Agrias can also Silence the Orators thanks to the effect of Hallowed Bolt. ▶All Status Effects Explained |
| 4 | 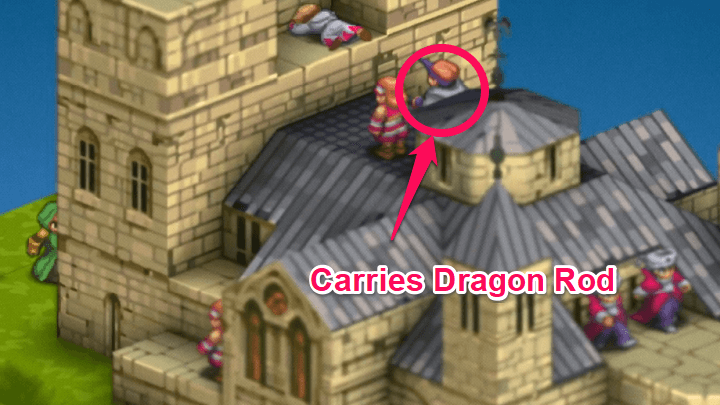 Steal the Dragon Rod The Summoner on the roof holds the valuable Dragon Rod weapon. If you have a unit with Steal, try taking it for yourself before eliminating the rest of the enemies. Once all enemies are down, you'll breach the Cathedral and move on. ▶Mullonde Cathedral Nave |
Battle 46: Mullonde Cathedral Guide
Battle 47: Mullonde Cathedral Nave
| # | Step by Step Objectives |
|---|---|
| 1 | 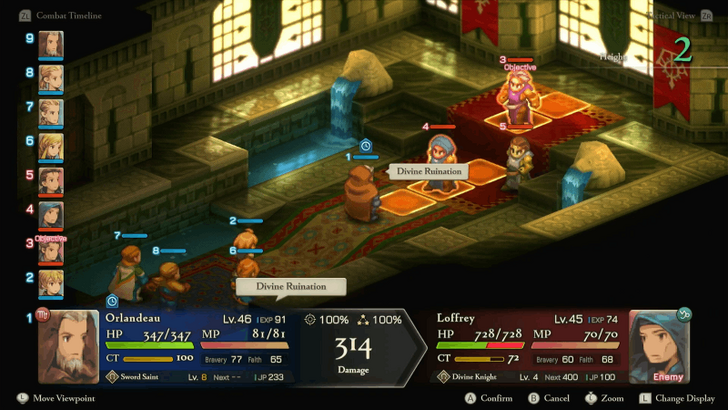 Focus Fire on Cletienne or Loffrey You’ll start the battle against Folmarv, Loffrey, and Cletienne, but you don’t actually need to defeat all three. Cletienne has the lowest HP, making him the easiest target, while Loffrey is the closest to your starting position. Choose whichever fits your team’s reach and damage output. Ramza as a Brawler Ninja can quickly close in for burst damage, Mustadio can use Aimed Shot while healing as a Chemist, and the rest of the team should use ranged Holy Sword or Crush abilities to wear enemies down fast. |
| 2 | 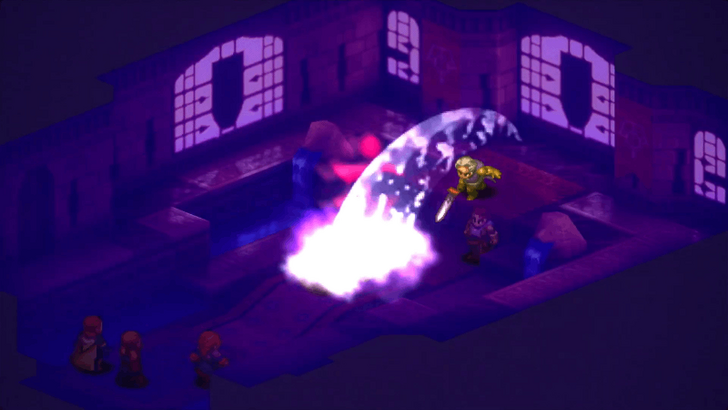 Break the Enemy's Weapons The enemies love using Unyielding Blade skills that can destroy your gear. To counter this. have Agrias use Rend Weapon, or let Orlandeau and Meliadoul use Crush Weapon to disable their swords. This prevents them from using sword skills and weakens their attacks. |
| 3 |  Battle Ends Once One Enemy Falls The fight automatically ends once any of the three enemies drops to critical HP or is defeated. Focus your strongest attacks to bring one down quickly, once they retreat, you’ll face them again later in the story. But first you must do one last battle on Mullonde's Sanctuary. ► Mullonde Sanctuary Walkthrough |
Battle 47: Mullonde Cathedral Nave Guide
Battle 48: Mullonde Cathedral Sanctuary
| # | Step by Step Objectives |
|---|---|
| 1 | 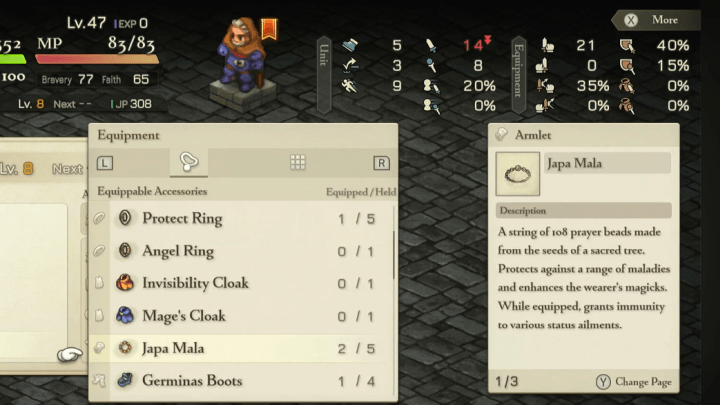 Defend Against Vampirism After your battles with Elmdore, a second vampire boss has hit the party. Zalbaag can turn your characters into vampires, so you'll want to equip Japa Malas and have Holy Water handy for any characters ready to mitigate this threat. ▶All Status Effects Explained |
| 2 |  Crush Zalbaag's Sword Zaalbag can whip out a powerful sword attack as an Ark Knight, but you can use Rend Weapon or Crush Weapon to destroy his sword, permanently denying this powerful ability. Don't worry about stealing the weapon: Zalbaag's Runeblade is available in stores. |
| 3 |  Disable the Ultima Demons In case you're getting hassled by Zalbaag's companion Ultima Demons, try using Mustadio's Arm Shot or other abilities that inflict Disable to prevent them from acting. |
| * | If you haven’t done so yet, this is a chance for Ramza to learn Ultima. Ensure Ramza is a Gallant Knight, positioned in range, and in good condition in case an Ultima Demon casts the spell. ▶How to Learn Ultima |
| 4 | 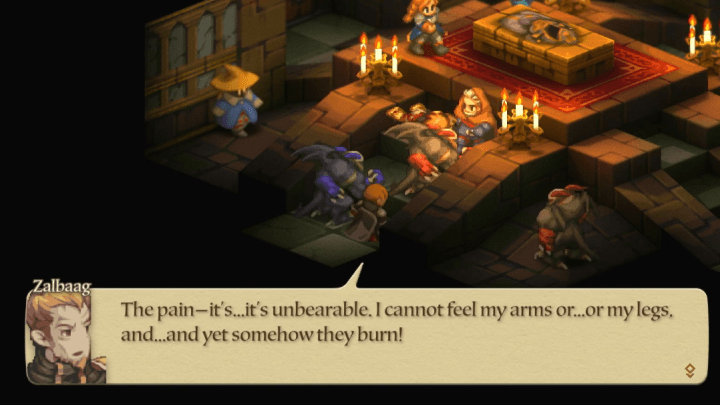 Beat Zalbaag to End the Fight Only Zalbaag needs to be defeated to end the battle. The Ultima Demons cannot be tamed or poached, so it's more efficient to focus your attacks on him, provided your party can weather the demons' damage. After you win, you'll return to the World Map and begin preparing for the final stretch of main story battles. You may also take up side quests like Secrets Beneath Goug before proceeding, if you haven't yet. |
Battle 48: Mullonde Cathedral Sanctuary Guide
Battle 49: Monastery Vaults Fourth Level
| # | Step by Step Objectives |
|---|---|
| 1 | 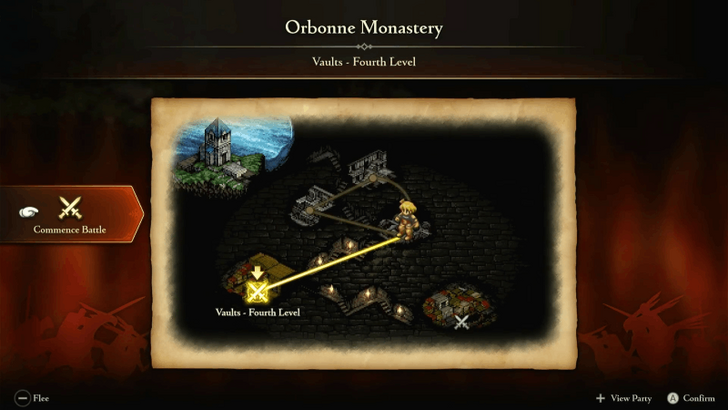 Prepare Before Entering Battle Starting this battle will lock you into the final five consecutive fights of the game. Before committing, complete the Cloud quest or challenge a few levels of Midlight's Deep to obtain rare items and gain additional experience. Purchase and equip your strongest armor, weapons, accessories, helms, and shields. Being fully equipped will help your party endure the upcoming gauntlet. |
| 2 |  Defeat All Enemy Units This is the last battle in the series where the objective is to defeat all enemies. The enemy composition includes powerful melee attackers and units capable of breaking equipment. Equip Safeguard to protect your gear from being destroyed by Rend skills. Orlandeau and Agrias should handle the frontlines, Meliadoul can weaken enemy defenses, and your Black Mage should stay elevated to avoid unnecessary movement while casting large-area spells. |
| 3 | 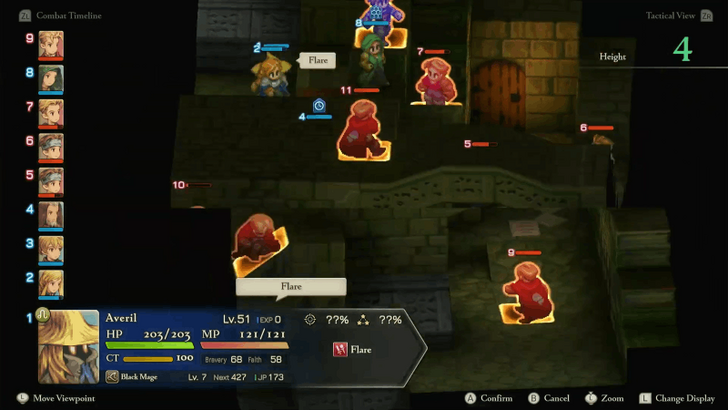 Unleash the Arithmeticks Black Mage The Black Mage has the highest Magick stat of any class, making them the ideal choice for the Arithmeticks command. Equip this skill to instantly cast high-tier spells such as Graviga, Holy, and Flare without consuming MP. If the Arithmetician job hasn’t been unlocked yet, consider obtaining it before attempting this fight as it will be invaluable in the upcoming battles. Pair this setup with Auto-Potion (preferably with X-Potions) to sustain your caster while they obliterate enemy formations. |
| * | Be aware that Arithmeticks can also target your allies depending on the formula used. To counter this, learn White Magic spells like Cura, Arise, and Wall, allowing your Black Mage to heal or buff teammates when no safe offensive targets are available. |
| 4 | Proceed to the Next Battle Once all enemies are defeated, the story immediately transitions into the next fight without any downtime, so make sure your party is healed and properly equipped before the final sequence begins. ► Monastery Vaults: Fifth Level Walkthrough |
Battle 55: Monastery Vaults: Fourth Floor Guide
Battle 50: Monastery Vaults Fifth Level
| # | Step by Step Objectives |
|---|---|
| 1 |  The battle starts with your team scattered across a wide area. If you rush forward, your units will easily get surrounded by the enemy. It’s safer to hold position and wait for Loffrey to advance first. While waiting, use this time to buff your team, have Ramza use Shout and Tailwind, and your White Mage to cast Haste or Wall. Once Loffrey moves into your range, move in together and corner him for a quick takedown. |
| 2 | 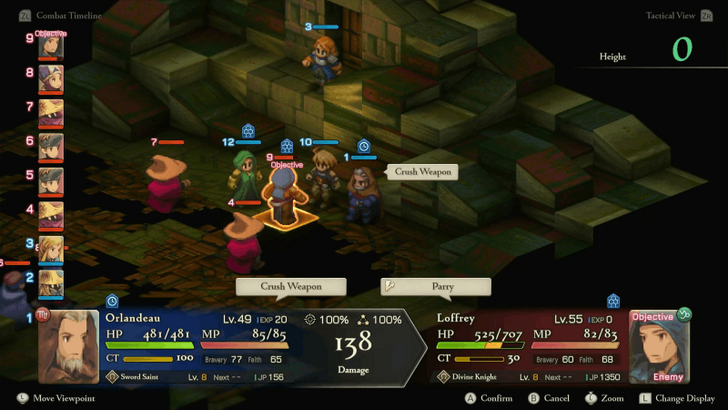 Loffrey’s Save the Queen gives him access to powerful Unyielding Blade attacks. Before launching an all-out offensive, make sure to neutralize his weapon with Steal Weapon, Rend Weapon, or Crush Weapon. Once disarmed, he becomes much easier to handle, focus all your attacks on him using strong physical strikes or spells like Holy to bring him down quickly. |
| 3 |  While your heavy hitters deal with Loffrey, have your other units control the battlefield. Target enemy Black Mages, Summoners, and Time Mages as they’re capable of heavy AoE damage and annoying debuffs like Slow. Clearing them early will prevent your team from getting overwhelmed. |
| 4 | Proceed to the Next Battle Once Loffrey and all enemies are defeated, the fight will automatically transition into the next battle, so make sure your team is in good shape before delivering the final blow. ►Necrohol of Mullonde Walkthrough |
Battle 56: Monastery Vaults: Fifth Level Guide
Battle 51: Necrohol of Mullonde
| # | Step-by-Step Objectives |
|---|---|
| 1 | Team A Offense, Team B Support Team A with Ramza as a Brawler Ninja with Auto-Potion, Agrias, and Orlandeau are your main attackers. Focus all efforts on damaging Cletienne. Meanwhile, Team B with Beowulf and Meliadoul should focus on debuffing the enemy. Beowulf can inflict Disable or Silence on enemies (especially Cletienne), while Meliadoul uses her Crush abilities to destroy their equipment and reduce their effectiveness. |
| 2 |  Most of the enemies here are Samurais and Ninjas, both dangerous at close range. Stay back and pick them off from a distance with spells and ranged skills. Ramza can go in for melee attacks since his Auto-Potion ensures survivability, but everyone else should play it safe and support from range. The enemy Time Mages can buff others with Haste, so take them down early to keep the tempo in your favor. |
| 3 |  Cletienne has a unique ability called Magick Surge that raises his Magick stat every time he takes damage. This can snowball quickly if unchecked, so have Beowulf cast Silence on him immediately. Even if his Magick skyrockets, he won’t be able to use any spells. Once Cletienne falls, the battle ends and the next encounter begins immediately, make sure to patch up your units before finishing him off. ►Lost Sanctuary Walkthrough |
Battle 57: Necrohol of Mullonde Guide
Battle 52: Lost Halidom
| # | Step by Step Objectives |
|---|---|
| 1 |  Prepare for Battle Before the fight begins, equip your party for maximum elemental protection. Use Flame Shields (Absorbs Fire, Halves Ice), White Robes (Halves Fire, Ice, and Lightning damage), Thief’s Cap (Speed +2, Immune to Disable and Immobilize), and Rubber Boots(Immune to Immobilize and Lightning). These will counter the Hydra and Tiamat’s elemental breath attacks and Barich’s Disable and Immobilize spells. |
| 2 | Do Not Have Everyone Cross to the Other Side Since most of your units can attack from a distance, let them stay on your starting side. Send only Ramza across the map to directly engage Barich. His Auto-Potion will help him stay alive while your backline dishes out damage safely from afar. |
| 3 |  Handle the Chemist First Before Other Enemies While your main attackers focus on Barich, make sure to eliminate the Chemist early. They can heal or revive allies with X-Potions and Phoenix Downs, prolonging the fight unnecessarily if ignored. |
| 4 | Use Mustadio to Disable Enemies The monster units can be relentless especially since Hydra and Tiamat attack up to three times per turn. Have Mustadio use his Arm Shot to inflict Disable, preventing them from acting and giving your team breathing room. Even with elemental resistance from gear, it’s safer to shut them down early. |
| 5 | 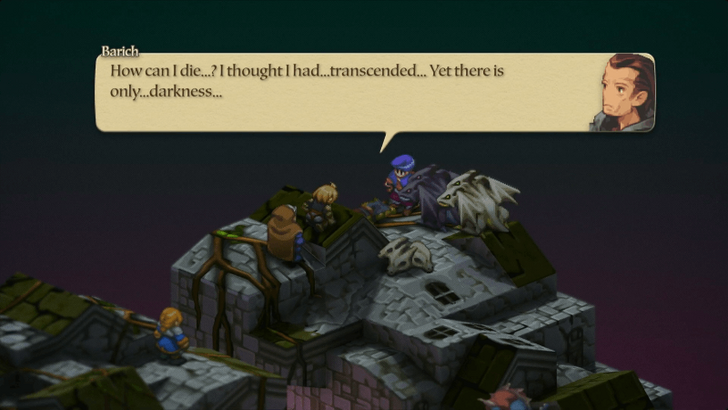 Conclude the Battle Once Barich is defeated, the battle ends even if other enemies remain. You can safely ignore the remaining monsters to conserve resources and move on to the next fight. |
Battle 53: Airship Graveyard
Walkthrough Guide Versus Hashmal
| # | Step by Step Objectives |
|---|---|
| 1 |  Prepare Your Party Before entering the Airship Graveyard, ensure your units are fully equipped with endgame weapons. Equip Black Garb or Jade Armlets to make your team immune to Hashmal’s Stop ability. The rest of your units should focus on high burst damage while using Auto-Potion to sustain through heavy hits. |
| 2 | Do Not Clump Together Hashmal uses wide-area attacks that can wipe clustered units. Keep your formation spread out and attack from a distance whenever possible. Let Ramza act as your close-range attacker to bait Hashmal’s strikes. Once Hashmal falls, you’ll receive Ragnarok as a reward and get the chance to reorganize your party before the final showdown against Ultima. ►How to Beat Ultima |
Walkthrough Guide Versus Ultima
| # | Step by Step Objectives |
|---|---|
| 1 | Reorganize Your Party After defeating Hashmal, your HP and MP will automatically be restored, giving you time to prepare before facing Ultima. Replace Meliadoul with Mustadio equipped as a Chemist he’ll be your main item support, supplying X-Potions, Elixirs, and High Ethers to your party. Don’t forget to equip Ragnarok, the sword you just earned from the previous battle, and make sure everyone still has Auto-Potion set for emergencies. Also, swap your Black Mage to a Time Mage with Arithmeticks, so they can cast Graviga when Arithmeticks cannot target the enemy. |
| 2 |  Defeat the Ultima Demons First The fight begins with Ultima and several Ultima Demons surrounding your team. These demons use powerful AoE skills like Almagest, which deals a percentage of your HP as damage. Prioritize eliminating them first to reduce incoming pressure. If any of them crystallize, do not let Ultima reach those crystals as she can absorb them to fully restore her HP. Keep Mustadio on standby to heal allies and use Arm Shot if possible to Disable the Demons’ offense. |
| 3 |  Go All Out on Ultima Once the Ultima Demons are defeated, focus all attacks on Ultima. Use Ramza, Orlandeau, and Agrias to unleash their strongest physical skills while your Time Mage casts Graviga through Arithmeticks to shave off a huge portion of her HP. Auto-Potion will keep your team standing through her powerful magic bursts, so maintain pressure and heal as needed until the next phase begins. |
| 4 | 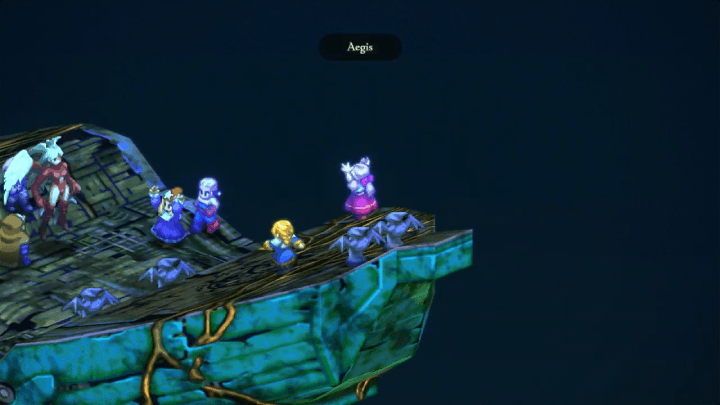 Prepare for the Second Phase When Ultima reaches low HP, the second phase begins, she’ll regain strength and access stronger spells. Stay close to Alma, who can cast Aegis for extra protection. You can also manipulate Ultima’s behavior by clustering your units as she’ll often waste turns casting Dispelja to remove buffs instead of using deadlier magic. Once she starts casting, spread your units out again to avoid further AoE damage. Keep the offensive going until she finally falls, concluding the main story battle. |
Battle 59: Airship Graveyard Guide
How Many Main Story Battles are There?
70 Total Battles
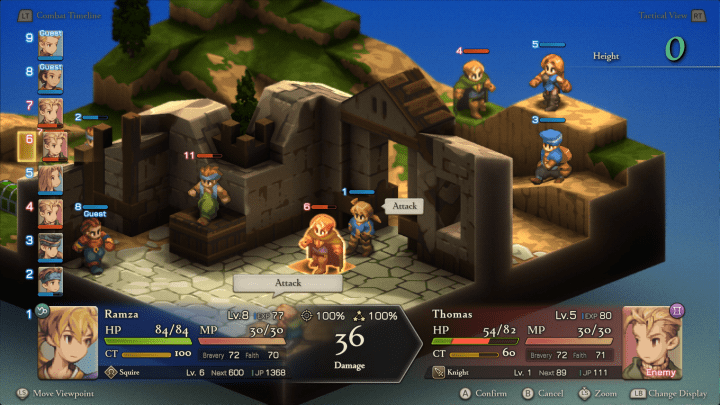
Across all four chapters, Final Fantasy Tactics - The Ivalice Chronicles features 70 story battles in total. This count includes both mandatory fights that push the narrative forward and optional side quests.
53 Without the Side Quest Battles
If you’re focusing strictly on the main storyline, you’ll face 54 battles from start to finish. These are the essential encounters that drive Ramza’s journey, leading through each chapter’s boss and ultimately to the game’s ending.
Final Fantasy Tactics - The Ivalice Chronicles Related Guides

Guides by Category
| List of Categories | |
|---|---|
 Walkthrough Walkthrough |
 Jobs Jobs |
 Characters Characters |
 Tips and Tricks Tips and Tricks |
 Builds Builds |
 Abilities Abilities |
 Errands Errands |
 Midlight's Deep Midlight's Deep |
 Weapons Weapons |
 Armor Armor |
 Accessories Accessories |
 Items Items |
 Bosses Bosses |
 Enemies Enemies |
 Summons Summons |
 Locations Locations |
 Chronicles Chronicles |
 Latest News Latest News |
Recommended Guides
 Best Job Tier List
 Best Character Tier List
 Best Weapons Tier List
 Best Zodiac Signs for Ramza
 Best Job Combinations
 Best Abilities to Learn
 Best Armor to Get
 Best Accessories to Get
 Best Party Setup and Team Composition
 Best Equipment to Steal
 Zodiac Signs and Compatibility Chart
 How to Farm Rare Weapons
 Missables and Points of No Return
 Money Farming Guide
 How to Steal Equipment
 North Wall or South Wall in Chapter 4?
 List of Trophies and Achievements
 Job Progression Guide
 Is the Dark Knight in the Game?
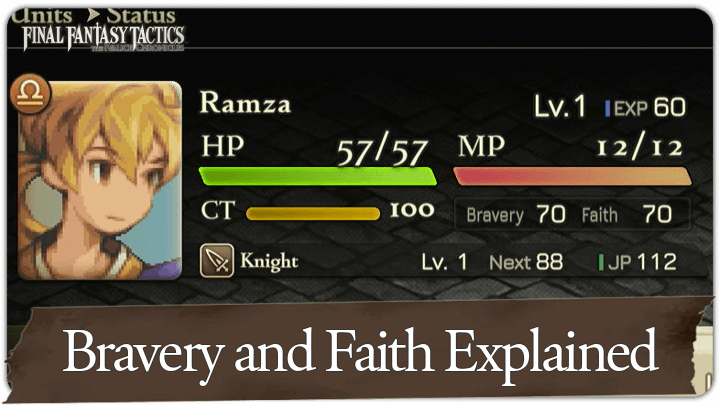 Bravery and Faith Explained
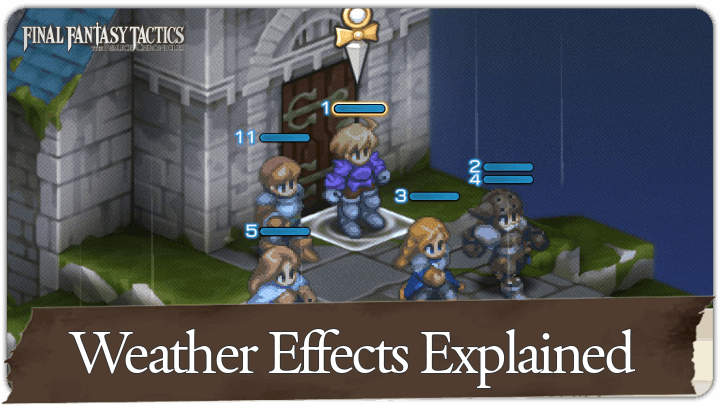 List of Weather and Effects Explained
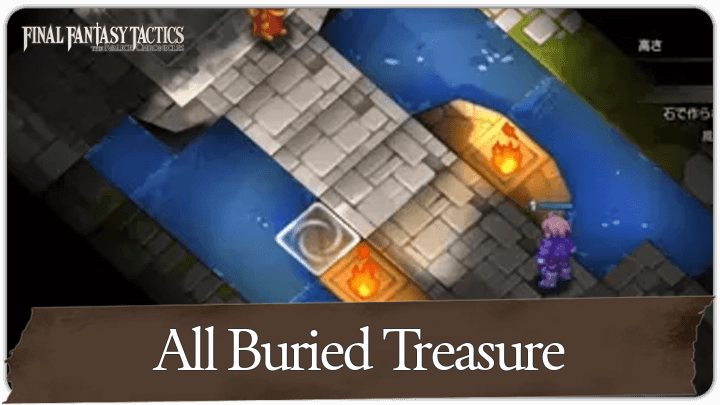 List of Buried Treasure
Author

Final Fantasy Tactics - The Ivalice Chronicles Walkthrough & Guides Wiki
100% Walkthrough Guide
Rankings
- We could not find the message board you were looking for.
Gaming News


Popular Games

Genshin Impact Walkthrough & Guides Wiki
Umamusume: Pretty Derby Walkthrough & Guides Wiki
Crimson Desert Walkthrough & Guides Wiki
Monster Hunter Stories 3: Twisted Reflection Walkthrough & Guides Wiki
Honkai: Star Rail Walkthrough & Guides Wiki
Pokemon Pokopia Walkthrough & Guides Wiki
The Seven Deadly Sins: Origin Walkthrough & Guides Wiki
Wuthering Waves Walkthrough & Guides Wiki
Zenless Zone Zero Walkthrough & Guides Wiki
Arknights: Endfield Walkthrough & Guides Wiki


Recommended Games
Fire Emblem Heroes (FEH) Walkthrough & Guides Wiki
Diablo 4: Vessel of Hatred Walkthrough & Guides Wiki
Cyberpunk 2077: Ultimate Edition Walkthrough & Guides Wiki
Yu-Gi-Oh! Master Duel Walkthrough & Guides Wiki
Super Smash Bros. Ultimate Walkthrough & Guides Wiki
Pokemon Brilliant Diamond and Shining Pearl (BDSP) Walkthrough & Guides Wiki
Elden Ring Shadow of the Erdtree Walkthrough & Guides Wiki
Monster Hunter World Walkthrough & Guides Wiki
The Legend of Zelda: Tears of the Kingdom Walkthrough & Guides Wiki
Persona 3 Reload Walkthrough & Guides Wiki


All rights reserved
© SQUARE ENIX
The copyrights of videos of games used in our content and other intellectual property rights belong to the provider of the game.
The contents we provide on this site were created personally by members of the Game8 editorial department.
We refuse the right to reuse or repost content taken without our permission such as data or images to other sites.
Esse guia é para platina ps5?