Chapter 3: The Valiant Walkthrough
★ Tier Lists: Characters | Jobs | Weapons
☆ Farming Guides: Gil | JP | Rare Weapons
★ All Missables and Points of No Return
☆ Optimal Job Progression Guide
★ Recruit All Secret Characters!
☆ All Hidden Treasure Locations
This is a complete walkthrough for Chapter 3: The Valiant of Final Fantasy Tactics - The Ivalice Chronicles. Read on for a detailed guide for this chapter, including all battles, side quests, as well as the bosses in this chapter!
| ◄ Previous Chapter | Next Chapter ► |
|---|---|
| The Manipulator and the Subservient | In the Name of Love |
List of Contents
Chapter 3: The Valiant Overview
| # | Missions | Information |
|---|---|---|
| 1 | A Visit to Zalbag | Ramza heads for the Imperial Capital to recruit his brother. Battles 22. Mining Town of Gollund 23. Lesalia Castle |
| 2 | The Race for the Virgo Stone | A race against time as Alma searches for the Virgo Stone before Wiegraf. Battles 24. Monastery Vaults - Second Level 25. Monastery Vaults - Third Level 26. Monastery Vaults - First Level |
| 3 | Rescuing Alma | Ramza gains new allies and faces off against an old rival. Battles 27. Grogh Heights 28. Walled City of Yardrow 29. The Yuguewood 30. Riovanes Castle Gate 31. Riovanes Castle Keep 32. Riovanes Castle Roof |
Chapter 3: The Valiant Walkthrough
| Jump to Walkthrough Section | |||
|---|---|---|---|
| 22 | Mining Town of Gollund | 23 | Lesalia Castle Postern Castle |
| 24 | Monastery Vaults - Second Level | 25 | Monastery Vaults - Third Level |
| 26 | Monastery Vaults - First Level | 27 | Grog Heights |
| 28 | Walled City of Yardrow | 29 | The Yuguewood |
| 30 | Riovanes Castle Gate | 31 | Riovanes Castle Keep |
| 32 | Riovanes Castle Roof | - | - |
Battle 22: The Mining Town of Gollund
| # | Step by Step Objectives |
|---|---|
| 1 | 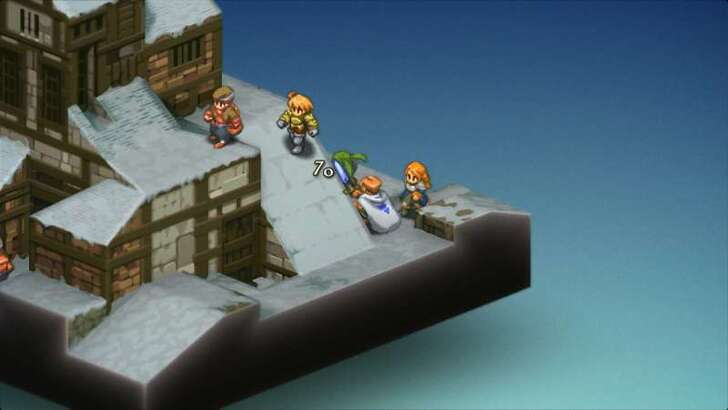 Pick Off Enemies While Orran Locks Them Down This fight features a large enemy group, but Orran helps by casting Celestial Stasis, which inflicts Stop, Disable, or Immobilize on multiple foes. Use this window to have Ramza, Agrias, and your Knight eliminate enemies one at a time. Make sure your frontline has Items or White Magick equipped so they can self-heal if needed. |
| 2 |  Reach the Roof Quickly Orran risks being surrounded early, so it’s crucial to gain the high ground fast. Deploy Boco (or any other variant of Chocobo) and mount him right away because his high Movement and Jump stats let you climb to the rooftop during your first turn. Pair this with a ranged ally like a Chemist with a gun to cover Orran and snipe from above. Once enemies crystallize or leave chests, Boco can also reach them much faster than your other units. |
| 3 | 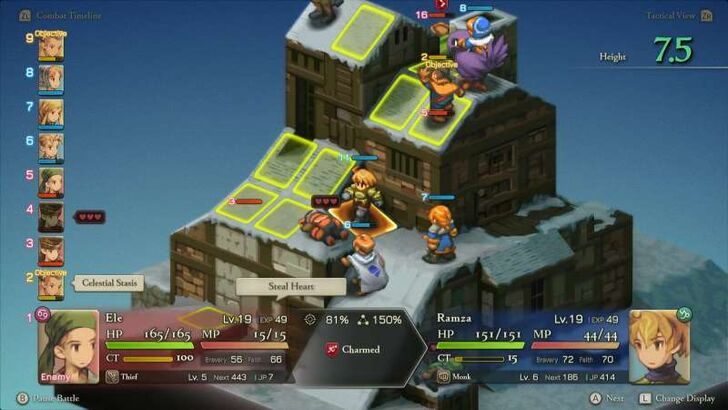 Watch Out for Thieves’ Steal Heart Enemy Thieves frequently use Steal Heart, which charms units of the opposite gender. Be cautious about which characters you move into their range, if you can’t one-shot them, keep your distance to avoid losing control of your units at key moments. ►Differences Between Male and Female Units |
Battle 22: Mining Town of Gollund Guide
Battle 23: Lesalia Castle Postern
| # | Step by Step Objectives |
|---|---|
| 1 |
Keep Alma Safe Alma’s Aegis buff can be very useful when cast on Ramza, so do everything you can to keep her alive during the fight. |
| 2 |  Hold Position Near the Entrance
You begin near the gate. Don’t rush forward as the map is small and enemies cluster at the far side. Let them approach while you blast them from a distance. Mustadio, Agrias, your Archer, and Black Mage all shine here with strong ranged pressure. |
| * |
Cast Only Thunder Magic Enemies carry Flame Shields, nullifying Fire and halving Ice damage. Focus your Black Mage on Thundaga for reliable damage output. |
| 3 |  Use Shockwave at the Stairs
Place Ramza on the leftmost tile of the stairs. Enemies will line up as they push upward, letting you spam Shockwave to hit multiple units at once. Since it costs no MP, you can repeat this safely. |
| 4 |  Shut Down Zalmour
Zalmour constantly revives and heals his allies. Use Agrias’ Hallowed Bolt, which can Silence him, preventing his spells and making the fight much easier. The fight ends once Zalmour takes enough damage. He’ll retreat even if other enemies are still alive. |
Battle 23: Lesalia Castle Postern Guide
Battle 24: Monastery Vaults - Second Level
| # | Step by Step Objectives |
|---|---|
| 1 | 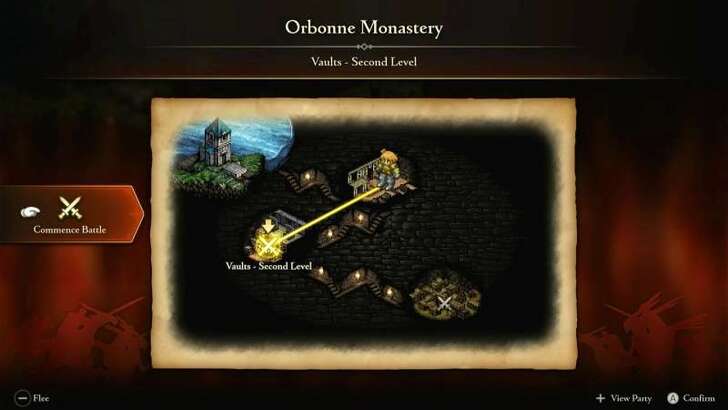 Prepare for Consecutive Battles This fight is directly followed by the Monastery Vaults: Third Floor battle. You won’t be able to resupply or change gear, so stock up on items, especially Phoenix Downs, before entering. Make sure you’ve unlocked stronger jobs like Ninja for fast dual-wield attacks and Mystic for status disruption as they’re both excellent for this series of battles. |
| * |
Set Up Flexible Job Commands Give Ramza the Martial Arts command for ranged Chakra, Revive, and ranged attacks. Meanwhile, equip your Mystic with the Items command to provide healing while crippling enemies. Pairing this with Throw Items lets them act as a long-range support hybrid. |
| 2 | 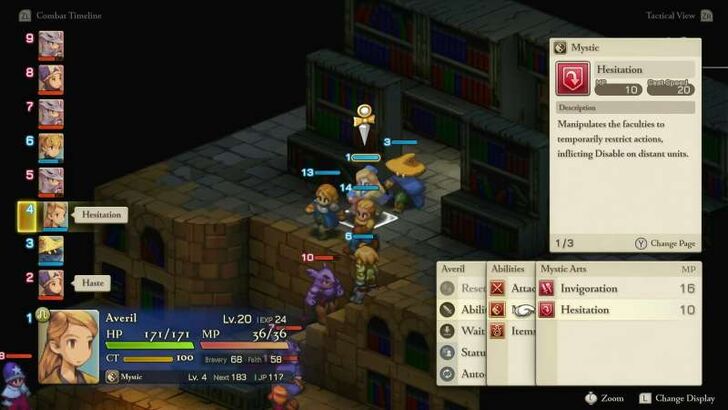 Take Down the Chemist First The enemy Chemist is the top priority as he can undo your progress instantly by reviving fallen units. Use your Black Mage or Agrias to deal burst damage from range. If you can’t drop them in one or two hits, have your Mystic cast Hesitation to disable him. |
| 3 | 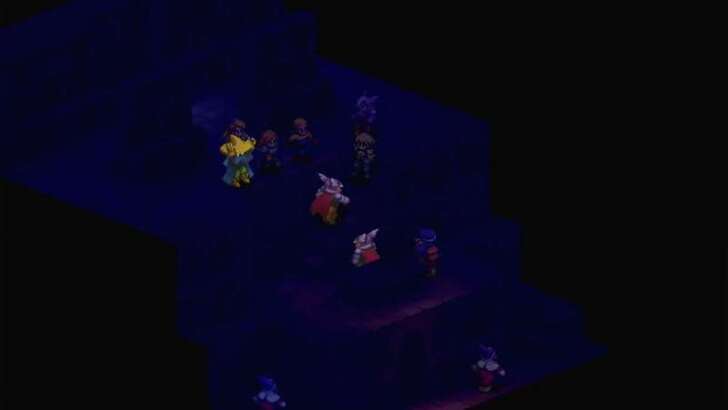 Shut Down the Dragoons Dragoons become dangerous if they start spamming Jump, since they disappear from the map until landing. Use Mustadio’s Arm Shot to disable them before they leave the ground. Once immobilized, they’re much easier to control. The battle ends when all enemies are defeated, immediately leading into the third floor showdown. ►Monastery Vaults: 3rd Floor Walkthrough |
Battle 24: Monastery Vaults: Second Level Guide
Battle 25: Monastery Vaults - Third Level
| # | Step by Step Objectives |
|---|---|
| 1 |
Raise Everyone’s Jump to 4+ The walls and bookshelves in this room are tall, so every unit should have at least Jump 4. Equip accessories like Spiked Boots (+1 Jump) and unlock the Archer’s Jump +1 to ensure mobility. Without this, your party risks being stuck on the floor while Isilude dominates the high ground. |
| 2 | 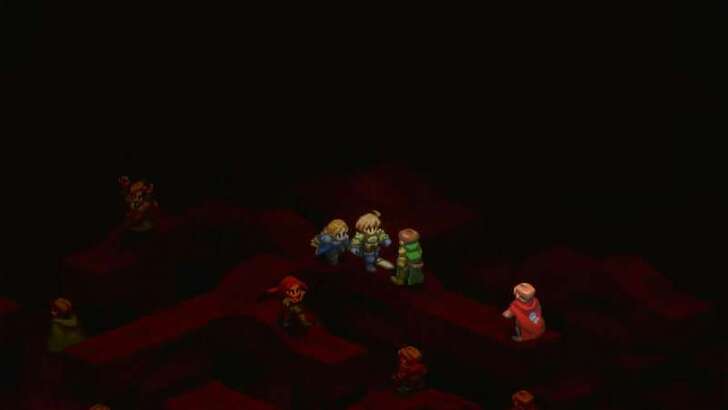 Prioritize Isilude Isilude is the battle’s win condition and defeating him ends the fight immediately. Once he positions himself on the shelves, send Ramza forward as a Ninja with the Martial Arts command and the Safeguard support ability equipped. His dual wield attacks, especially if equipped with two Flail of Flames for bonus Fira damage, can chunk Isilude fast. Back him up with Agrias’ Holy Sword abilities to deal consistent ranged damage. |
| 3 | 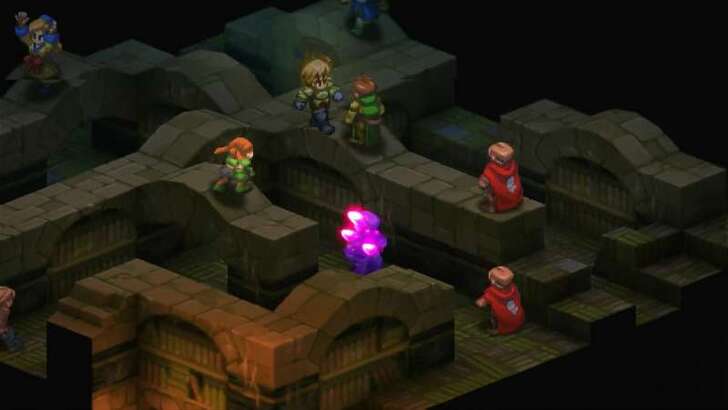 Control Enemy Disruptors While Ramza and Agrias focuses on Isilude, the rest of the squad should control the other enemies. Have your female Thief use Steal Heart on the Knights to prevent them from spamming Rend skills. Use your Mystic’s Quiescence to Silence the Summoner before she can unleash AoE magic while your Black Mage rains down -ga spells to clean up or soften clustered foes. Once Isilude falls, the fight ends, and you’ll be immediately thrown into the next battle on the vault’s first floor. ►Monastery Vaults: 1st Floor Walkthrough |
Battle 25: Monastery Vaults: Third Level Guide
Battle 26: Monastery Vaults - First Level
| # | Step by Step Objectives |
|---|---|
| 1 | Re-Equip Your Items and Abilities Before the fight begins, make sure to swap out gear and commands from the previous battle. You no longer need Jump-boosting accessories or movement abilities here, so replace them with your best accessories, stat boosters, or support skills to maximize survivability. |
| 2 | 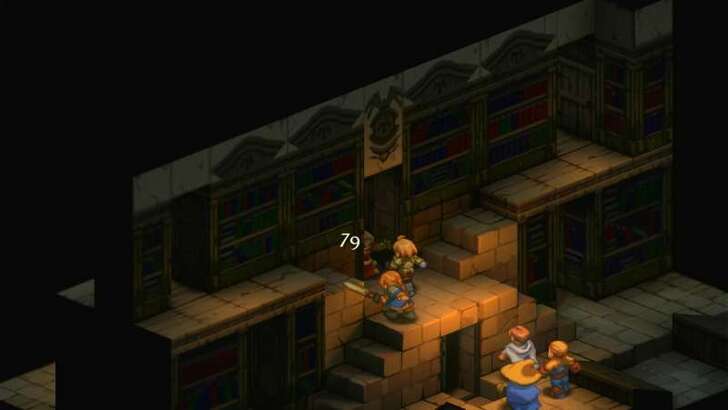 Head to the middle doorway up the stairs, this is where Wiegraf will go towards. Move Ramza there as a Monk with the Steal command, and try to steal his sword to prevent him from using his Holy Knight skills. If you succeed, you’ll cripple his offense immediately. Agrias should back Ramza with Holy Sword abilities for consistent ranged pressure. |
| * |
Rend Weapon as Backup If Steal Weapon keeps missing, let your Knight use Rend Weapon. It will destroy Wiegraf’s weapon outright, though this prevents you from acquiring it. |
| 3 | 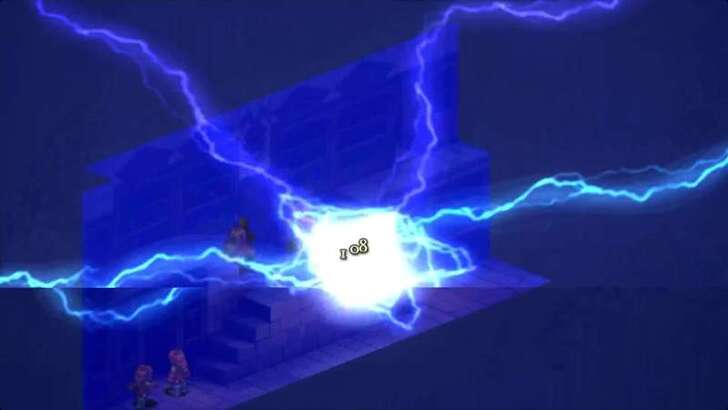 Control the Field The stage is divided by a tall wall with only five doorways: the center where Ramza fights Wiegraf, two at the upper sides, and two at the lower sides. Black Mages are excellent here since they can hit enemies through walls with AoE spells. Meanwhile, Mustadio and your Knight can guard the doors, using Aimed Shot and Rend skills to stop enemies from swarming in. |
Battle 26: Monastery Vaults: First Level Guide
Battle 27: Grogh Heights
| # | Step by Step Objectives |
|---|---|
| 1 | 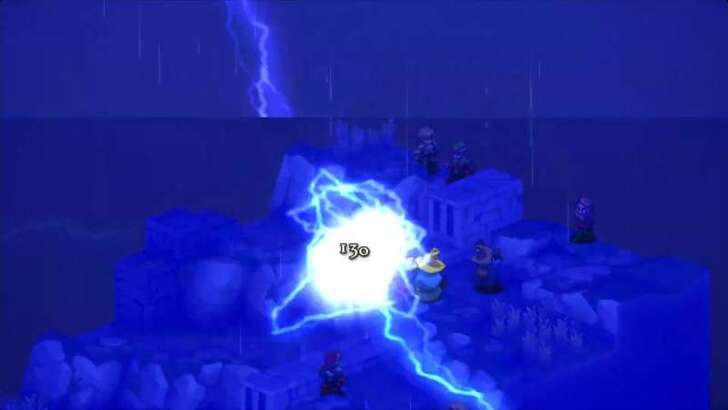 Exploit Rain With Thunder Spells The map is tight, the enemies are many, and it’s raining, these are the perfect conditions for lightning magic. Bring at least two Black Mages with Thundara or Thundaga to maximize the weather boost. An Archer equipped with a Lightning Bow is also a solid pick for ranged coverage, while Ramza and Agrias handle the melee frontline. ►List of Weather and Effects Explained |
| 2 | 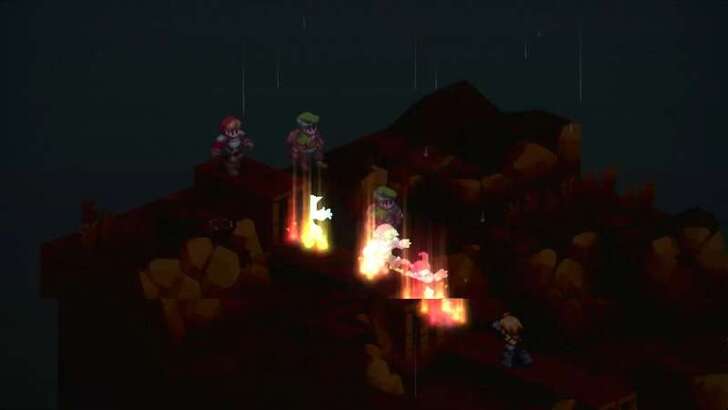 Capitalize on Line Attacks Because of the narrow battlefield, enemies often bunch up in rows. Take advantage by having Agrias unleash Divine Ruination and Ramza use the Monk’s Shockwave to hit multiple foes in a line. Combine these with constant Thunder spells to wipe out clusters quickly and secure an easy win. |
Battle 27: Grogh Heights Guide
Battle 28: The Walled City of Yardrow
| # | Step by Step Objectives |
|---|---|
| 1 |
Prevent Rapha's Defeat This battle will be considered a defeat if Rapha gets taken out in battle, so make sure that you protect Rapha at all costs, as there will be Ninjas throwing weapons around.. ▶ How to Recruit Rapha |
| 2 | 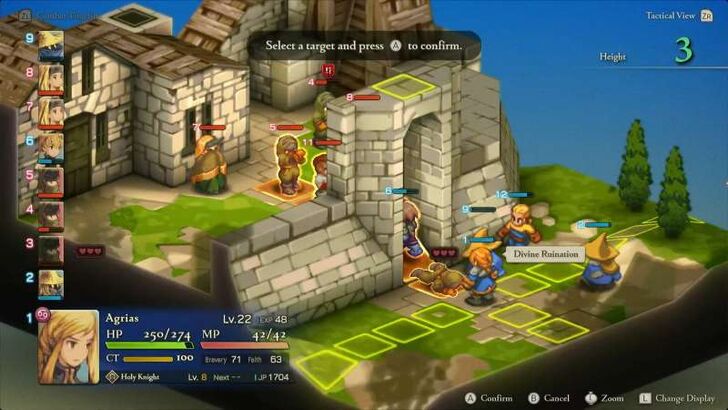 Capitalize on Line Attacks Just like the strategy used at Grogh Heights, the field has a huge wall between the two sides and there is only one door in the middle. This is where enemies will try to enter. Have Ramza block the entrance while Agrias uses Divine Ruination and Ramza uses the Monk’s Shockwave to hit multiple foes in a line. |
| 3 | 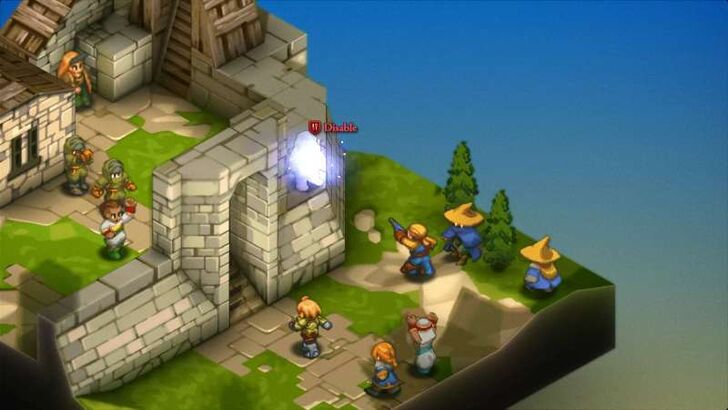 Use Mustadio to Disable Wall-Climbers Some enemies (mostly Ninjas) will try to climb the wall to get vantage points and throw weapons. Use Mustadio’s Arm Shot to disable them from a distance, then finish them off safely. Disabling those climbers prevents annoying poke damage from above. |
| 4 | 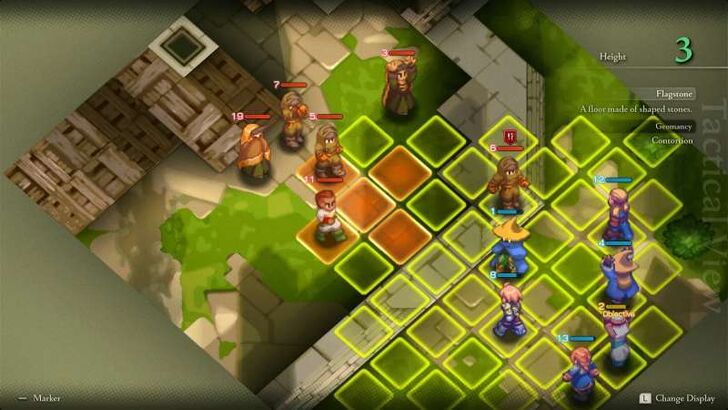 Black Mages Rain Spells From the Wall While Ramza, Agrias, and Mustadio handle the gate, position your two Black Mages along the wall so they can cast spells across to the enemy side. Hug the wall for range. Also note that even if Marach falls here, the battle continues until all enemies are defeated. |
Battle 28: Walled City of Yardrow Guide
Battle 29: The Yuguewood
| # | Step by Step Objectives |
|---|---|
| 1 | 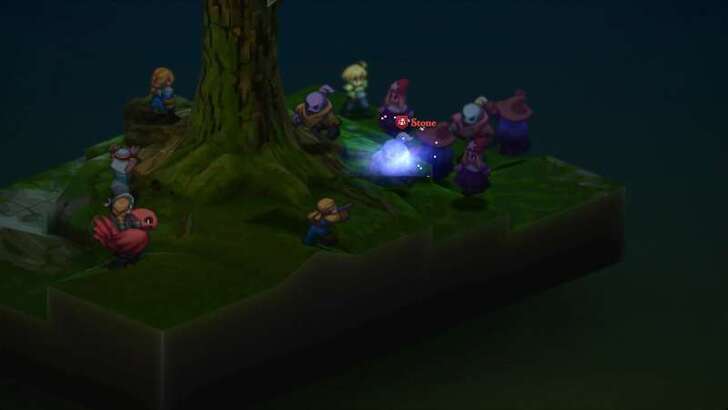 Utilize Mustadio's Abilities Since this battle consists mostly of undead enemies, Mustadio can shine by using his Seal Evil ability, which turns them into stone. Stoned units are removed from the fight until the end, and if all other enemies are defeated while some are still petrified, you still win. Additionally, Mustadio can also utilize his Arm Shot ability to deprive the mages of ever attempting an attack. |
| 2 | 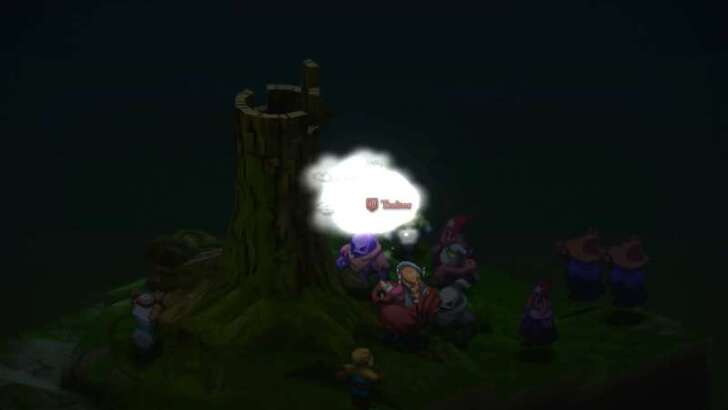 Turn the Undead Against Themselves A great alternative strategy is to have an Orator ride Boco (or any Chocobo variant) for maximum mobility across the swampy terrain. Use Entice on undead units to brand them with Traitor status, making them fight for your side, and they may even join your party after the battle! If Entice fails, the Orator can fall back on the Items command with Throw Item to spam High Potions and Phoenix Downs, which deal damage to the undead and finish them off. |
| 3 |  Eliminate Enemy Mages Quickly The Time Mages and Black Mages in the backline are the real danger. Have Ramza, equipped as a Ninja, rush them down with dual attacks (or Martial Arts for ranged strikes), while Agrias supports with her powerful Holy Knight skills to quickly eliminate them. |
Battle 30: Riovanes Castle Gate
| # | Step by Step Objectives |
|---|---|
| 1 | 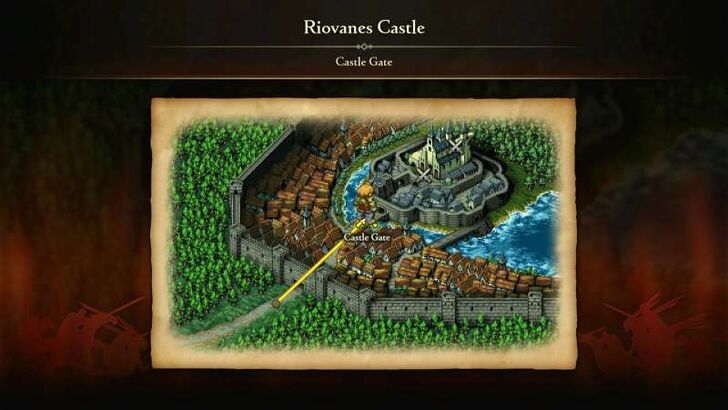 Prepare for Consecutive Battles This fight is directly followed by the Riovanes Castle Keep battle. You won’t be able to resupply or change gear, so stock up on items, especially Phoenix Downs, before entering. Make sure you’ve unlocked Auto-Potion ability, a good -ja elemental spell (Firaja, Blizzaja, Thundaja), and the best equipment the game can offer so far. |
| 2 | 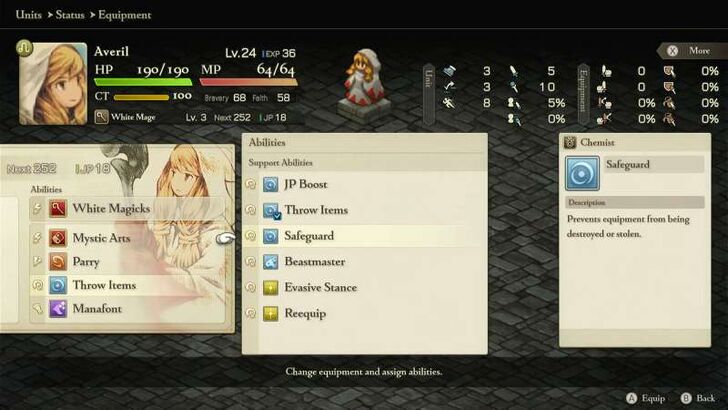 Equip Safeguard Before Starting Knights in this fight love spamming Rend abilities, which can destroy your weapons and armor. To avoid being crippled early, equip the Safeguard support ability on crucial units like Ramza and Agrias. |
| 3 | 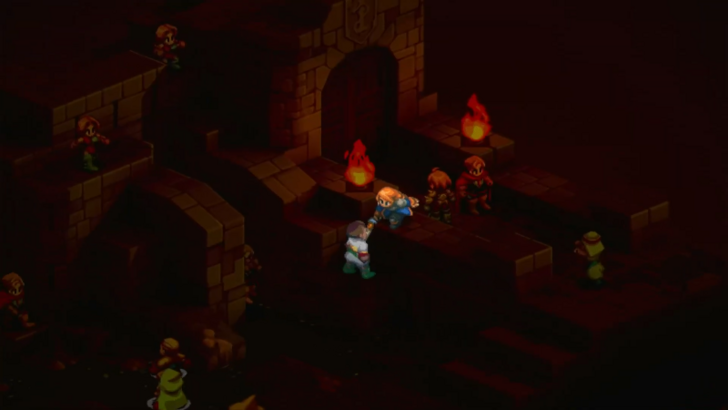 Team A Confronts Marach Marach will advance on the bridge, so use Ramza’s Ninja speed and Martial Arts ranged attacks alongside Agrias’ Holy Knight skills to pressure him quickly. Watch out for the Knights nearby as they’ll try to protect him, so disable or pick them off when possible. |
| 4 |  Team B Controls the Right Flank The rest of your party should secure the right side of the battlefield. Have your White Mage dual-role by keeping Mystic Arts equipped for utility (Disable, Confusion, Blindness) while still healing. Your Black Mage can target enemies on the high ground with -ga spells, while Mustadio pins down Archers with Leg Shot to prevent them from continually attacking your team. Once all enemies are defeated, the battle will end in your victory, launching you into the next battle inside the Castle Keep. ►Riovanes Castle Keep Walkthrough |
Battle 30: Riovanes Castle Gate Guide
Battle 31: Riovanes Castle Keep
| # | Step by Step Objectives |
|---|---|
| 1 | 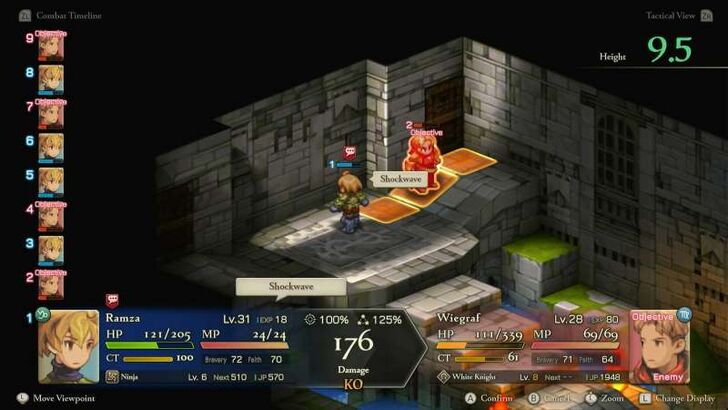 Prepare Ramza for the Duel Phase 1 is a solo fight with Ramza vs. Wiegraf. Gear Ramza as a Ninja with two Morning Stars, Power Garb, Headband, and Bracers (Bracers cost 50,000 gil).Equip Auto-Potion with High Potions and X-Potions in your inventory. Wiegraf’s Holy Knight skills can’t shut down your Martial Arts since it doesn't cost any MP, so stick to ranged Shockwave instead of melee to avoid his brutal Counter. Your HP carries into the next phase, so make sure to heal and end healthy. |
| 2 | 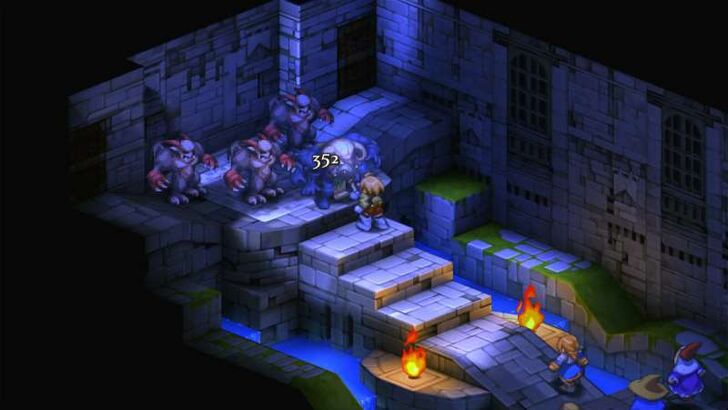 Survive Belias’ Transformation After Wiegraf falls, he transforms into Belias. This phase is rough as he has high stats, powerful AoEs, and spawns four Archaeodaemons. Ramza should immediately pressure Belias in melee as the Dual Wield makes him your best damage source. Agrias joins in with Holy Sword skills for strong bursts. |
| 3 |
Time Mage Provides Tempo Control Gravity or Graviga can chunk Belias for a percentage of HP, bypassing his tankiness. Keep Haste on allies and Slow on enemies whenever possible. Equip Items with Throw Items so your Time Mage can act as a secondary healer in emergencies. |
| 4 | 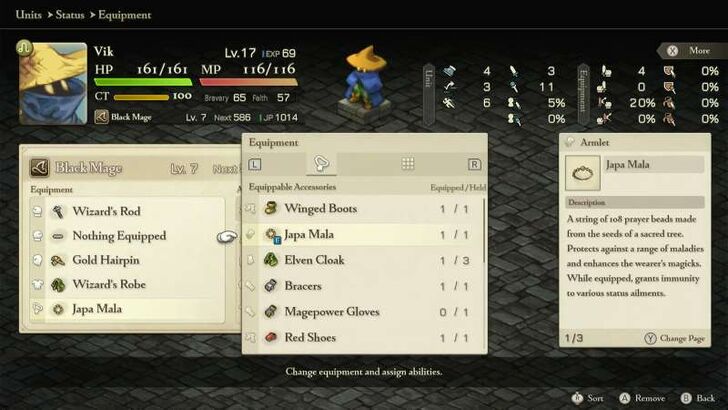 Black Mage Nukes the Field A Black Mage with at least one -ja spell (Firaja, Thundaja, Blizzaja) can devastate both Belias and the clustered demons. Target overlapping areas to maximize damage. Equip a Japa Mala to avoid Silence, keeping your casting reliable. |
| 5 | 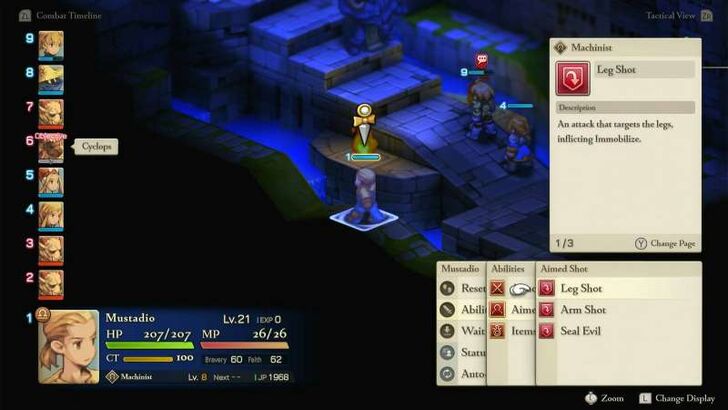 Mustadio Controls the Additional Enemies Use Leg Shot or Arm Shot to stop Archaeodaemons from moving or casting. This prevents them from backing Belias with dangerous spells. With them locked down, your casters can safely charge and your frontline can keep hitting the boss. The battle ends when Belias is defeated so once Mustadio is done crippling the enemies, he should focus his attacks on Belias. After the battle ends, you'll immediately head into the next battle at the Castle's Roof. ► Riovanes Castle Roof Walkthrough |
Battle 31: Riovanes Castle Keep Guide
Battle 32: Riovanes Castle Roof
| # | Step by Step Objectives |
|---|---|
| 1 | 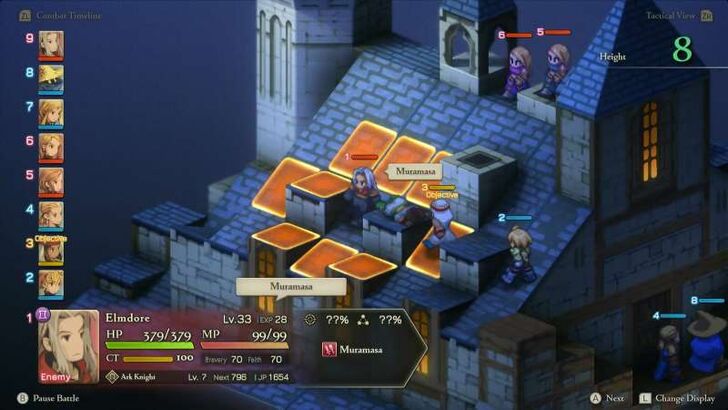 Protect Rapha at All Costs The mission fails if Rapha goes down. Park a tanky ally or healer near her to keep her safe while your main damage dealers move in. Don’t spread your damage to all the enemies available. Instead, tragert either Lettie or Celia until they drop into Critical status. Once one assassin is weakened enough, all three enemies will retreat, ending the fight instantly. |
| 2 |  Ignore Elmdore’s Tricks Elmdore is terrifying with debuffs and ailments, but he’s not your win condition so don’t waste time or resources attacking him. The only thing that matters is forcing the assassins to retreat. Once they escape, you’ll secure victory and recruit both Marach and Rapha. |
Battle 32: Riovanes Castle Roof Guide
Chapter 3: The Valiant Bosses
Wiegraf - Monastery Vaults
| Location | Monastery Vaults: First Level |
|---|---|
| Tips to Defeat Wiegraf | |
| ・Spread out to avoid multiple members getting hit by Wiegraf. ・Block the central doorway with one or two of your units. ・Focus down enemies on stairs with ranged attacks. |
|
Use Rend Weapon or Steal Weapon against Wiegraf when battling him at the Monastery Vaults to lessen his utility in dishing out damage against your party.
Wiegraf - Riovanes Castle Keep
| Location | Riovanes Castle Keep |
|---|---|
| Tips to Defeat Wiegraf | |
| ・This boss is fought solo with Ramza. ・Equip Ramza with high HP equipment and Auto Potion. ・Preserve MP and other resources for the Velius fight. |
|
Attack Wiegraf from afar to avoice heavy counterattack. Use the Martial Arts' abilities such as Shockwave or Aurablast.
Belias - Riovanes Castle Roof
| Location | Riovanes Castle Keep |
|---|---|
| Tips to Defeat Belias | |
| ・Use party members that hit hard and have a ton of HP. ・Focus killing Belias as soon as possible. ・Don't bother healing until Belias is dead. |
|
Perform an all out attack from all your units. Ramza should have the Ninja job equipped to attack twice every time, and have Agrias, Mustadio, and two of your best heavy hitters.
Final Fantasy Tactics - The Ivalice Chronicles Related Guides

All Chapter Walkthroughs
| # | Chapter Title |
|---|---|
| 1 | The Meager |
| 2 | The Manipulative and the Subservient |
| 3 | The Valiant |
| 4 | In the Name of Love |
Comment
Author

Final Fantasy Tactics - The Ivalice Chronicles Walkthrough & Guides Wiki
Chapter 3: The Valiant Walkthrough
Rankings
- We could not find the message board you were looking for.
Gaming News

![Death Stranding 2: On The Beach [PC] Review | A Port That Delivers](https://img.game8.co/4447392/15310a0c9aa1b6843bb713b2ea216930.jpeg/show)


Popular Games

Genshin Impact Walkthrough & Guides Wiki
Umamusume: Pretty Derby Walkthrough & Guides Wiki
Crimson Desert Walkthrough & Guides Wiki
Monster Hunter Stories 3: Twisted Reflection Walkthrough & Guides Wiki
Honkai: Star Rail Walkthrough & Guides Wiki
Pokemon Pokopia Walkthrough & Guides Wiki
The Seven Deadly Sins: Origin Walkthrough & Guides Wiki
Wuthering Waves Walkthrough & Guides Wiki
Zenless Zone Zero Walkthrough & Guides Wiki
Arknights: Endfield Walkthrough & Guides Wiki


Recommended Games
Fire Emblem Heroes (FEH) Walkthrough & Guides Wiki
Diablo 4: Vessel of Hatred Walkthrough & Guides Wiki
Cyberpunk 2077: Ultimate Edition Walkthrough & Guides Wiki
Yu-Gi-Oh! Master Duel Walkthrough & Guides Wiki
Super Smash Bros. Ultimate Walkthrough & Guides Wiki
Pokemon Brilliant Diamond and Shining Pearl (BDSP) Walkthrough & Guides Wiki
Elden Ring Shadow of the Erdtree Walkthrough & Guides Wiki
Monster Hunter World Walkthrough & Guides Wiki
The Legend of Zelda: Tears of the Kingdom Walkthrough & Guides Wiki
Persona 3 Reload Walkthrough & Guides Wiki


All rights reserved
© SQUARE ENIX
The copyrights of videos of games used in our content and other intellectual property rights belong to the provider of the game.
The contents we provide on this site were created personally by members of the Game8 editorial department.
We refuse the right to reuse or repost content taken without our permission such as data or images to other sites.