Siedge Weald Walkthrough (Battle 4)
★ Tier Lists: Characters | Jobs | Weapons
☆ Farming Guides: Gil | JP | Rare Weapons
★ All Missables and Points of No Return
☆ Optimal Job Progression Guide
★ Recruit All Secret Characters!
☆ All Hidden Treasure Locations
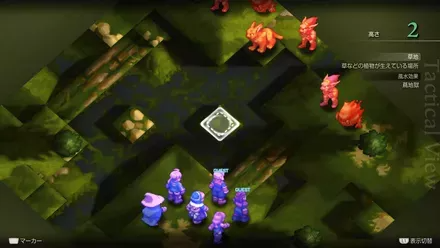
This is a guide for Battle 4: Siedge Weald in Chapter 1 of Final Fantasy Tactics - The Ivalice Chronicles. See a full walkthrough of this battle, as well as its overview, enemies, recruitable characters, treasure locations, and rewards for completing Siedge Weald.
| ◄ Previous Battle | Next Battle ► |
|---|---|
| Mandalia Plain | Dorter Slums |
List of Contents
Battle 4: Siedge Weald Overview
Battle Location and Information
| Field View | |
|---|---|
 |
|
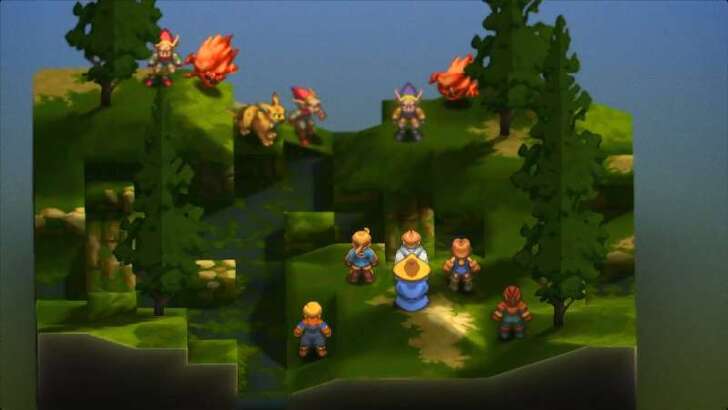
| Chapter | Chapter 1 |
| Rec. Level / Difficulty |
Level 2
✦✧✧✧✧ |
| Objective | Defeat all enemies! |
| Party Size | You can deploy up to 4 units. |
Battle 4: Siedge Weald Recruitable Characters
All Characters You Can Recruit
| There are no known characters that can be recruited in this stage. |
Battle 4: Siedge Weald Enemies
All Enemies in Siedge Weald
| All Stage Enemies |
|---|
|
・Red Panther x1
・Goblin x2
・Black Goblin x2
・Bomb x2
|
Battle 4: Siedge Weald Recommended Party Composition
Best Characters to Use For This Battle
| Best Characters to Use | |||
|---|---|---|---|
 Ramza Ramza |
 Knight Knight
|
 Black Mage Black Mage
|
 Chemist Chemist
|
At this point, the enemies you’ll face hit harder than the early game mobs, so you’ll want a balanced mix of offense and support.
A Knight provides durability and frontline damage, while a Black Mage can exploit elemental weaknesses against Goblins and Bombs. Keep a Chemist on standby for reliable healing, and Ramza should round out the team to adapt as needed.
Battle 4: Siedge Weald Walkthrough
Walkthrough Guide
| # | Step by Step Objectives |
|---|---|
| 1 | 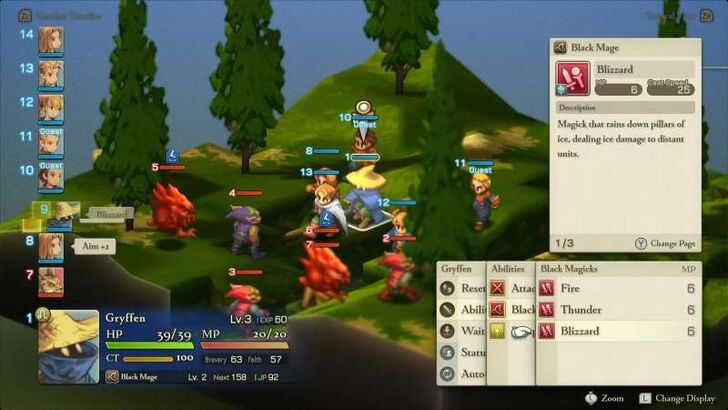 Deploy Knights, Black Mages, and a Chemist This battle introduces tougher enemies than before, so it’s best if your starting Squires and Chemists have already been promoted to stronger Jobs. Bring a Black Mage who knows Blizzard and Thunder, since Goblins are weak to Ice and Bombs are weak to Thunder. Pair this with a Knight for frontline damage and a Chemist for healing support. |
| * |
Avoid Overleveling a Single Character Don’t focus all your EXP into one unit as enemy levels scale to your strongest character, so relying on a single powerhouse can make battles harder than necessary. Keep your party evenly trained to avoid being outmatched. |
| 2 | 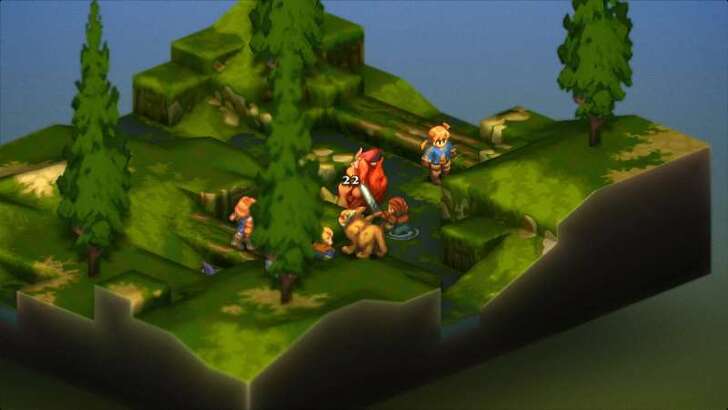 Prioritize Defeating the Bombs Bombs can be extremely dangerous, as they may use Self-Destruct when their HP gets low. Eliminate them quickly before they have the chance. Since they’re weak to Thunder, have your Black Mage target them with lightning spells for an efficient takedown. |
| 3 |
Limit Argath and Delita’s Contributions While they can still help in battle, it’s better not to let Argath and Delita handle most of the kills since they are just guest characters. Try to minimize their contributions so your core party members gain more EXP and JP instead. This way, your main team will stay stronger and more reliable for tougher battles ahead. |
Chapter 1: The Meager Walkthrough
Battle 4: Siedge Weald Buried Treasure Locations
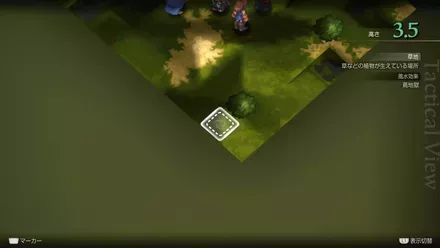
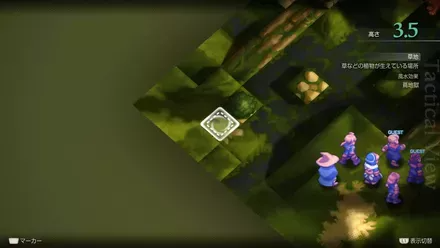
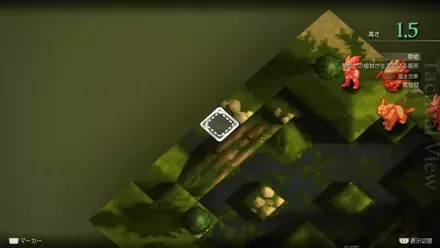
Location and Treasures
| Location | Treasures |
|---|---|
 |
Common: Rare: |
 |
Common: Rare: |
 |
Common: Rare: |
 |
Common: Rare: |
All Hidden Items and Treasure Locations
Battle 4: Siedge Weald Rewards
All Siedge WealdSpoils of War
| All Spoils of War |
|---|
|
・
|
Besides the treasures you can pick up during the fight, you’ll also receive Spoils of War once the battle ends. These are guaranteed rewards that drop after completing the objective!
Final Fantasy Tactics - The Ivalice Chronicles Related Guides

All Chapter Walkthroughs
| # | Chapter Title |
|---|---|
| 1 | The Meager |
| 2 | The Manipulative and the Subservient |
| 3 | The Valiant |
| 4 | In the Name of Love |
Chapter 1 Walkthrough
| # | Locations and Battles |
|---|---|
| 1 | Orbonne Monastery |
| 2 | Magick City of Gariland |
| 3 | Mandalia Plain |
| 4 | Siedge Weald |
| 5 | Dorter Slums |
| 6 | The Sand Rat's Sietch |
| 7 | Brigands' Den |
| 8 | Lenalian Plateau |
| 9 | Fovoham Windflats |
| 10 | Ziekden Fortress |
Chapter 2 Walkthrough
| # | Locations and Battles |
|---|---|
| 11 | Merchant City of Dorter |
| 12 | Araguay Woods |
| 13 | Zeirchele Falls |
| 14 | Castled City of Zaland |
| 15 | Balias Tor |
| 16 | Tchigolith Fenlands |
| 17 | Goug Lowtown |
| 18 | Balias Swale |
| 19 | Golgollada Gallows |
| 20 | Lionel Castle Gate |
| 21 | Lionel Castle Keep |
Chapter 3 Walkthrough
| # | Locations and Battles |
|---|---|
| 22 | Mining Town of Gollund |
| 23 | Lesalia Castle Postern |
| 24 | Monastery Vaults: Second Level |
| 25 | Monastery Vaults: Third Level |
| 26 | Monastery Vaults: First Level |
| 27 | Grogh Heights |
| 28 | Walled City of Yardrow |
| 29 | Yuguewood |
| 30 | Riovanes Castle Gate |
| 31 | Riovanes Castle Keep |
| 32 | Riovanes Castle Roof |
Chapter 4 Walkthrough
| # | Locations and Battles |
|---|---|
| 33 | Dugeura Pass |
| 34 | Free City of Bervenia |
| 35 | Finnath Creek |
| 36 | Outlying Church |
| 37 | Beddha Sandwaste |
| 38 A | Fort Besselat: South Wall |
| 38 B | Fort Besselat: North Wall |
| 39 | Fort Besselat Sluice |
| 40 | Mount Germinas |
| 41 | Lake Poescas |
| 42 | Limberry Castle Gate |
| 43 | Limberry Castle Keep |
| 44 | Limberry Castle Undercroft |
| 45 | Eagrose Castle Keep |
| 46 | Mullonde Cathedral |
| 47 | Mullonde Cathedral Nave |
| 48 | Mullonde Cathedral Sanctuary |
| 49 | Monastery Vaults: Fourth Level |
| 50 | Monastery Vaults: Fifth Level |
| 51 | Necrohol of Mullonde |
| 52 | Lost Halidom |
| 53 | Airship Graveyard |
| - | Mount Bervenia |
| - | Dorvauldar Marsh |
All Side Quest Locations
| # | Locations and Battles |
|---|---|
| 1 | Gollund Colliery Floor |
| 2 | Gollund Colliery Slope |
| 3 | Gollund Colliery Ridge |
| 4 | Gollund Coal Shaft |
| 5 | Nelveska Temple |
| 6 | Trade City of Sal Ghidos |
Comment
Author
Final Fantasy Tactics - The Ivalice Chronicles Walkthrough & Guides Wiki
Siedge Weald Walkthrough (Battle 4)
Rankings
- We could not find the message board you were looking for.
Gaming News
Popular Games

Genshin Impact Walkthrough & Guides Wiki

Umamusume: Pretty Derby Walkthrough & Guides Wiki

Crimson Desert Walkthrough & Guides Wiki

Monster Hunter Stories 3: Twisted Reflection Walkthrough & Guides Wiki

Honkai: Star Rail Walkthrough & Guides Wiki

Pokemon Pokopia Walkthrough & Guides Wiki

The Seven Deadly Sins: Origin Walkthrough & Guides Wiki

Wuthering Waves Walkthrough & Guides Wiki

Zenless Zone Zero Walkthrough & Guides Wiki

Arknights: Endfield Walkthrough & Guides Wiki
Recommended Games

Fire Emblem Heroes (FEH) Walkthrough & Guides Wiki

Diablo 4: Vessel of Hatred Walkthrough & Guides Wiki

Cyberpunk 2077: Ultimate Edition Walkthrough & Guides Wiki

Yu-Gi-Oh! Master Duel Walkthrough & Guides Wiki

Super Smash Bros. Ultimate Walkthrough & Guides Wiki

Pokemon Brilliant Diamond and Shining Pearl (BDSP) Walkthrough & Guides Wiki

Elden Ring Shadow of the Erdtree Walkthrough & Guides Wiki

Monster Hunter World Walkthrough & Guides Wiki

The Legend of Zelda: Tears of the Kingdom Walkthrough & Guides Wiki

Persona 3 Reload Walkthrough & Guides Wiki
All rights reserved
© SQUARE ENIX
The copyrights of videos of games used in our content and other intellectual property rights belong to the provider of the game.
The contents we provide on this site were created personally by members of the Game8 editorial department.
We refuse the right to reuse or repost content taken without our permission such as data or images to other sites.


