Pyramid Map and Strategy Guide
★ Best Personality | Best Equipment | Best Party
☆ Class Tier List | Vamp Guide | Monster Wrangler
★ Friendly Monsters | Sparkly Spots | Keys Guide
☆ EXP Farming | Money Farming | Seed Farming
★ Post Game (Spoilers!) | Missables | Trophy Guide
This is a map and strategy guide for the Pyramid dungeon in Dragon Quest 3 (DQ3). It includes the recommended level for Pyramid, the route to take, the location of treasure chests, obtainable items, and monsters that appear.
List of Contents
Pyramid Location
From Ibis, Head North of th Desert
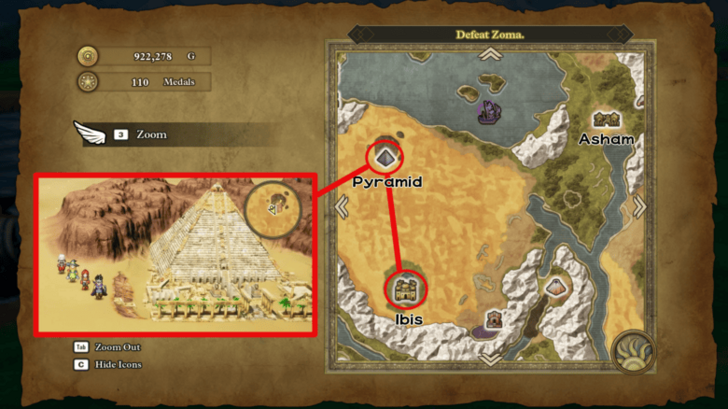
North of Ibis, is the Pyramid. Stock up in Ibis and head up to conquer the Pyramid.
Pyramid Map Overview (Recommended Level 15-17)
| Jump to a Pyramid Floor! | ||
|---|---|---|
| Pyramid Exterior | Pyramid 1F | Pyramid 2F |
| Pyramid 3F | Pyramid 4F | Pyramid 5F |
| Pyramid B1 | Pyramid B2 | - |
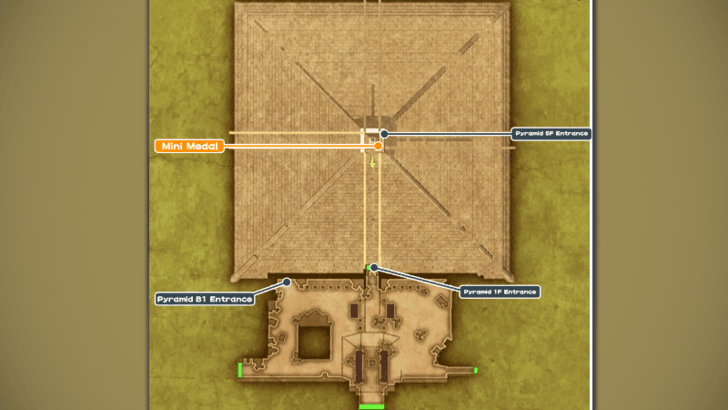
Pyramid Exterior
| Pyramid Exterior | ||
|---|---|---|
 |
||
| Treasures | ||
| Mini Medal | - | - |
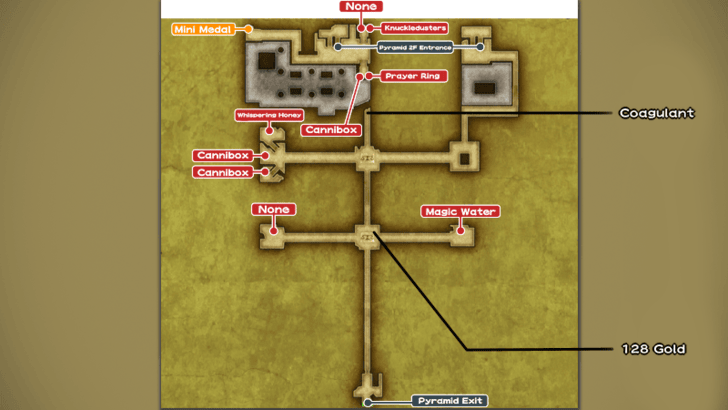
Pyramid Floor 1
| Pyramid 1F | ||
|---|---|---|
 |
||
| Treasures | ||
| Mini Medal | Whispering Honey | Cannibox |
| Cannibox | None | None |
| Knuckledusters | Prayer Ring | Cannibox |
| Magic Water | - | - |
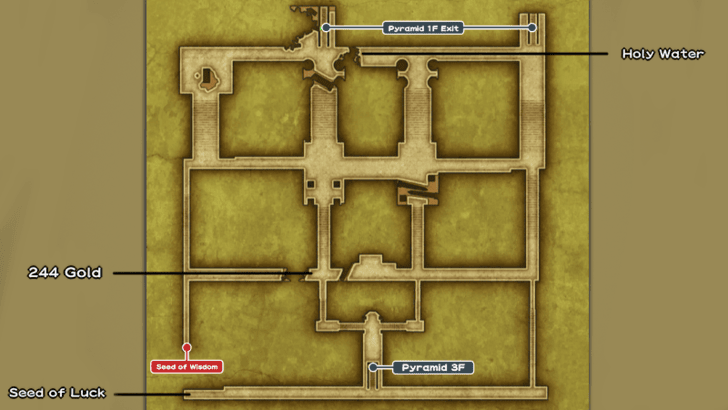
Pyramid Floor 2
| Pyramid 2F | ||
|---|---|---|
 |
||
| Treasures | ||
| 244 Gold | Seed of Luck | Seed of Wisdom |
| Holy Water | - | - |
Pyramid Floor 3
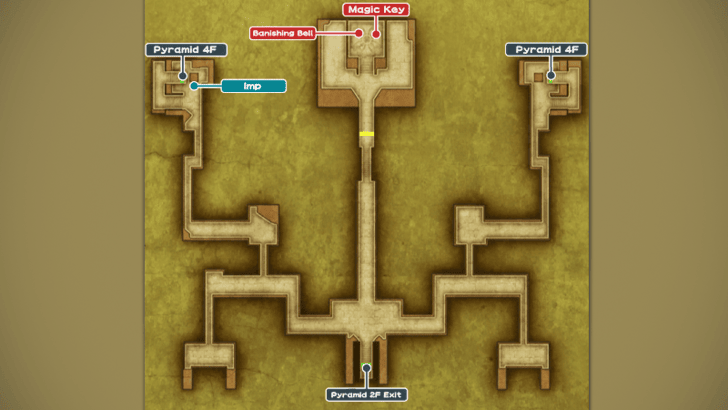
| Pyramid 3F | ||
|---|---|---|
 |
||
| Treasures | ||
| Imp | Banishing Bell | Magic Key |
Pyramid Floor 4
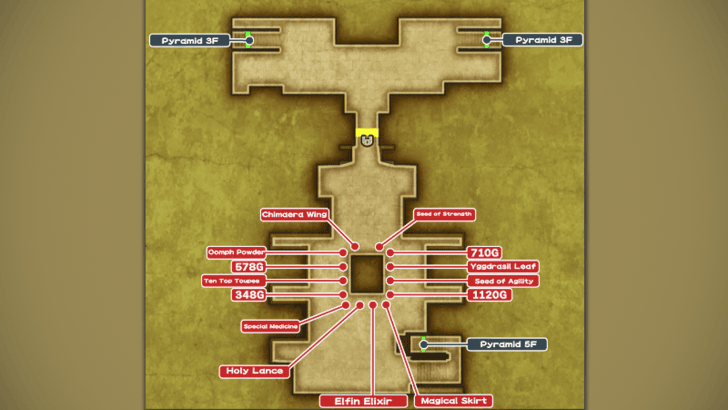
| Pyramid 4F | ||
|---|---|---|
 |
||
| Treasures | ||
| Chimaera Wing | Oomph Powder | 578 Gold |
| Ten Ton Toupee | 348 Gold | Special Medicine |
| Holy Lance | Elfin Elixir | Magical Skirt |
| 1120 Gold | Seed of Agility | Yggdrasil Leaf |
| 710 Gold | Seed of Strength | - |
Pyramid Floor 5
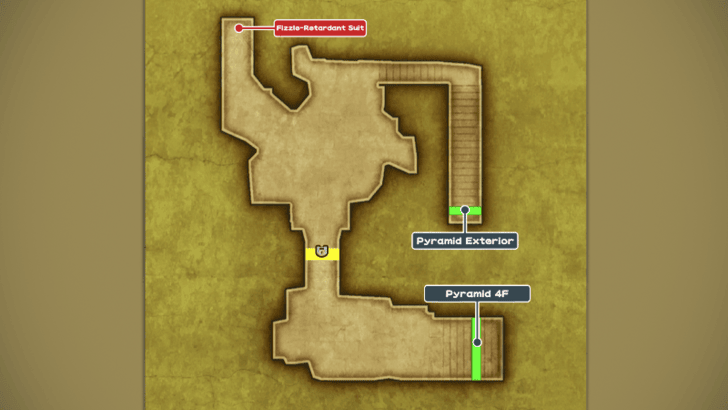
| Pyramid 5F | ||
|---|---|---|
 |
||
| Treasures | ||
| Fizzle-Retardant Suit | - | - |
Pyramid Basement 1
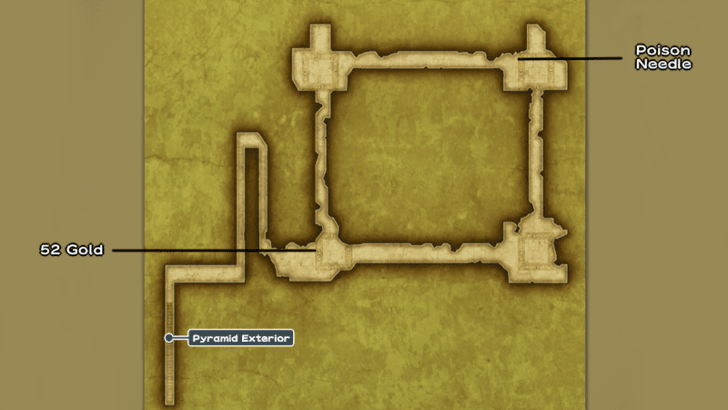
| Pyramid B1 | ||
|---|---|---|
 |
||
| Treasures | ||
| 52 Gold | Poison Needle | - |
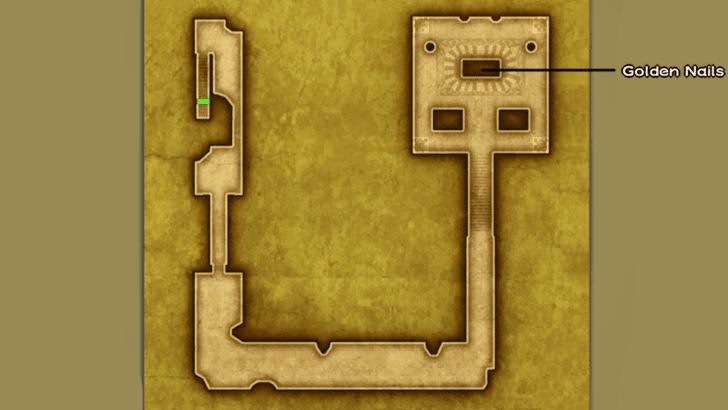
Pyramid Basement 2
| Pyramid B2 | ||
|---|---|---|
 |
||
| Treasures | ||
| Golden Nails | - | - |
Pyramid Walkthrough
| * | 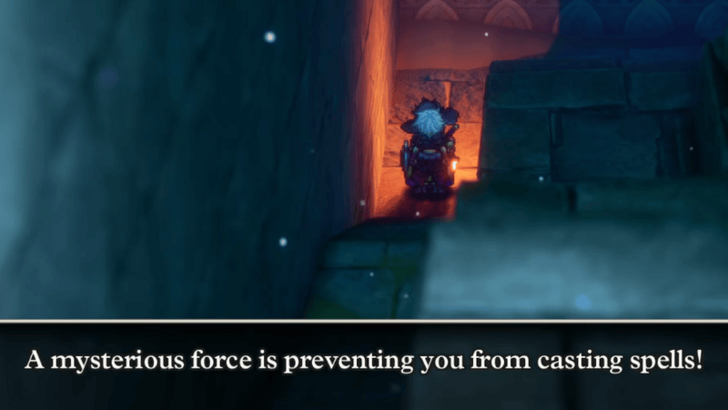 The basement of the pyramid will prevent any spells from being casted. Make sure that you don't step on the middle tiles with scales on the first floor so you don't fall below. If you do go down here to grab the treasures below, make sure you have party members with Abilities since they can still be used. |
|---|---|
| ** | 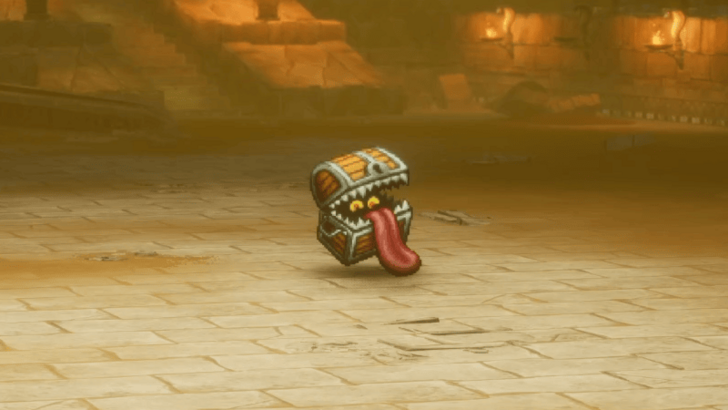 Another thing to be wary of are the Canniboxes disguised as treasure chests. If you have a Mage, use the Peep spell to check a chest's contents and avoid any unnecessary fights. |
| 1 | Climb the Pyramid and head to the third floor, where there'll be a large door in the center. As usual, make sure to grab any items and treasures on the way up. |
| 2 | 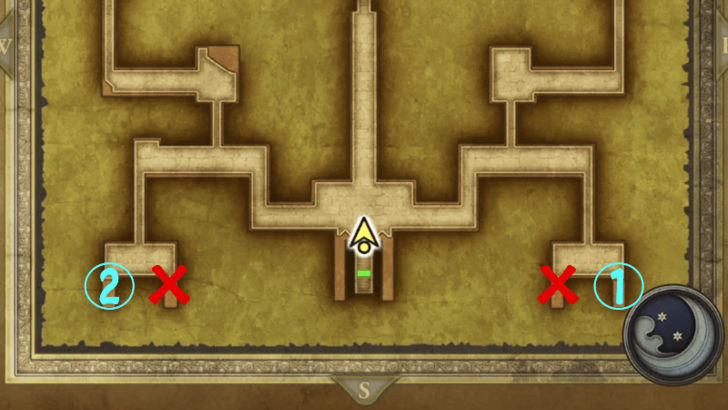 To open the door, press the buttons in the order from the children's rhyme in Ibis Castle. If you've missed this or don't want to figure it out yourself, then just press the right-most button followed by the left most one. |
| 3 | 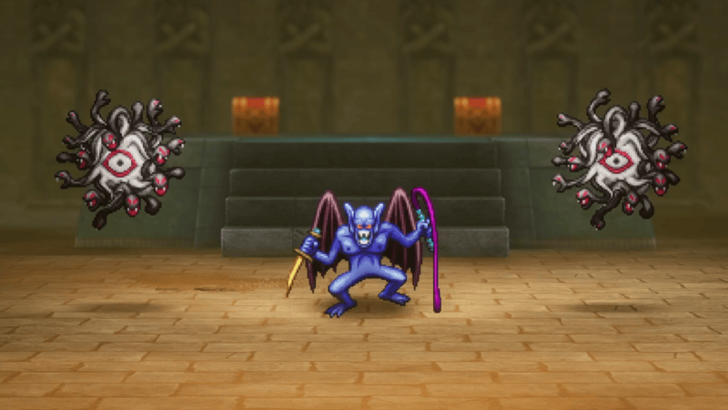 Once the door's open, prepare yourself to face the Ripper of the Rift. It will be accompanied by 2 Kyllas so make sure to take them down first to stop them from supporting the Ripper. ▶ How to Beat Ripper of the Rift |
| 4 | 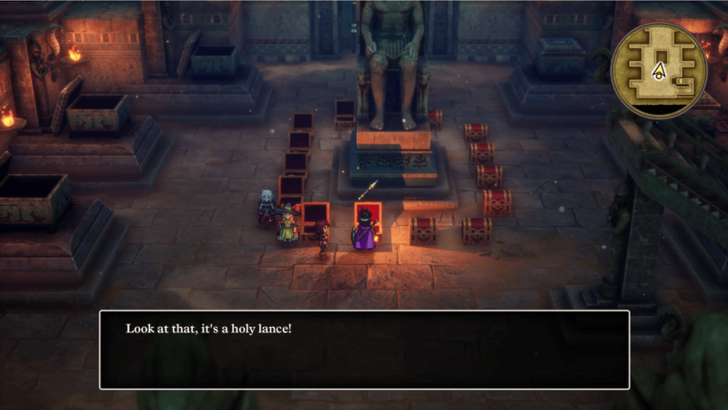 After the boss has been defeated, grab the Magic Key and Banishing Bell from the treasure chests. Continue exploring the upper floors of the Pyramid and teleport back to Romaria when you're done. Just be careful of the room with a lot of chests since opening each one will initiate a fight. |
| * | Now that you have the Magic Key, you can backtrack to areas that have blue doors that you couldn't unlock before. |
| 5 | 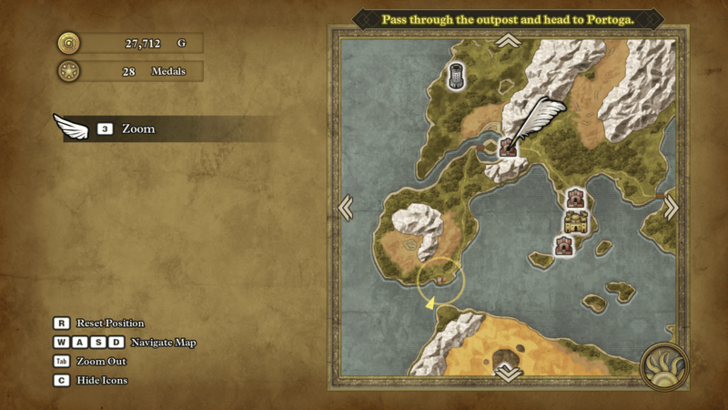 When you're ready, head west from Romaria and through the Romarian Outpost to get to Portoga. |
Pyramid Strategy Guide
Grab the Magic Key from Pyramid 3F
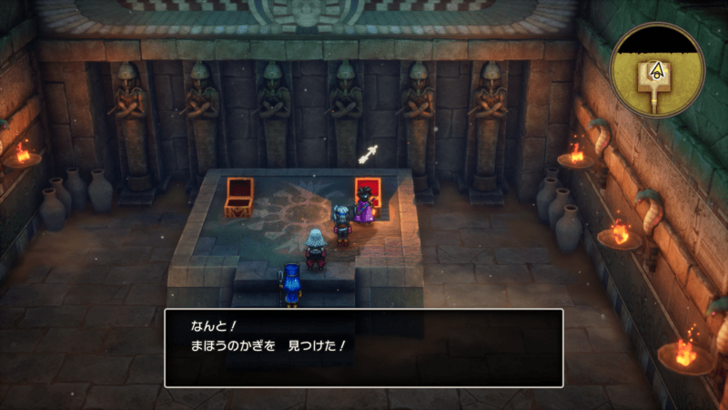
The Pyramid carries one of the game's key items, the Magic Key, that allows the player to unlock Silver Doors all over the map.
Silver Doors often carry valuable treasure so picking this item up before leaving the Pyramid is important for your journey.
Beware of Canniboxes
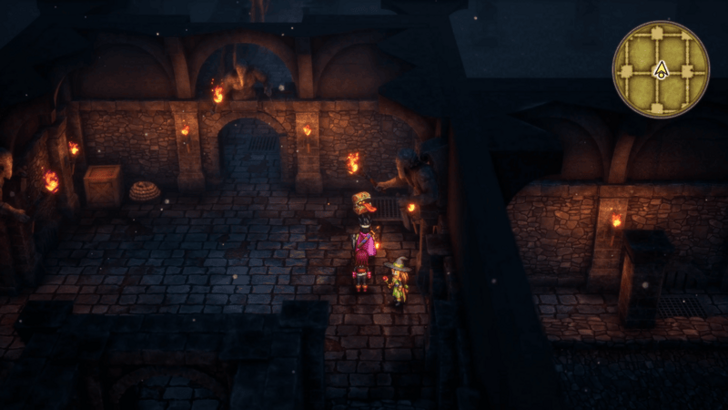
The Pyramid has a lot of loot and treasure in treasure chests. However, there is a lot of mimic Canniboxes around the dungeon, making it dangerous to carelessly pick up items.
Heal up between battles so that your party can be ready for the next ambush.
Pyramid Enemies
| List of Enemies |
|
|
|---|---|
|
|
|
|
|
|
|
|
|
Dragon Quest 3 HD-2D Remake Related Guides

List of All Towns
List of All Dungeons
Comment
Author
Pyramid Map and Strategy Guide
improvement survey
03/2026
improving Game8's site?

Your answers will help us to improve our website.
Note: Please be sure not to enter any kind of personal information into your response.

We hope you continue to make use of Game8.
Rankings
- We could not find the message board you were looking for.
Gaming News
Popular Games

Genshin Impact Walkthrough & Guides Wiki

Honkai: Star Rail Walkthrough & Guides Wiki

Umamusume: Pretty Derby Walkthrough & Guides Wiki

Pokemon Pokopia Walkthrough & Guides Wiki

Resident Evil Requiem (RE9) Walkthrough & Guides Wiki

Monster Hunter Wilds Walkthrough & Guides Wiki

Wuthering Waves Walkthrough & Guides Wiki

Arknights: Endfield Walkthrough & Guides Wiki

Pokemon FireRed and LeafGreen (FRLG) Walkthrough & Guides Wiki

Pokemon TCG Pocket (PTCGP) Strategies & Guides Wiki
Recommended Games

Fire Emblem Heroes (FEH) Walkthrough & Guides Wiki

Diablo 4: Vessel of Hatred Walkthrough & Guides Wiki

Yu-Gi-Oh! Master Duel Walkthrough & Guides Wiki

Super Smash Bros. Ultimate Walkthrough & Guides Wiki

Pokemon Brilliant Diamond and Shining Pearl (BDSP) Walkthrough & Guides Wiki

Elden Ring Shadow of the Erdtree Walkthrough & Guides Wiki

Monster Hunter World Walkthrough & Guides Wiki

The Legend of Zelda: Tears of the Kingdom Walkthrough & Guides Wiki

Persona 3 Reload Walkthrough & Guides Wiki

Cyberpunk 2077: Ultimate Edition Walkthrough & Guides Wiki
All rights reserved
© ARMOR PROJECT/BIRD STUDIO/SPIKE CHUNSOFT/SQUARE ENIX
© SUGIYAMA KOBO ℗ SUGIYAMA KOBO
The copyrights of videos of games used in our content and other intellectual property rights belong to the provider of the game.
The contents we provide on this site were created personally by members of the Game8 editorial department.
We refuse the right to reuse or repost content taken without our permission such as data or images to other sites.





![Slay the Spire 2 Review [Early Access] | Still the Deckbuilder to Beat](https://img.game8.co/4433115/44e19e1fb0b4755466b9e516ec7ffb1e.png/thumb)

![Resident Evil Village Review [Switch 2] | Almost Flawless Port](https://img.game8.co/4432790/e1859f64830960ce4248d898f8cd38d9.jpeg/thumb)


