Monster Arena Tournament Guide
★ Best Personality | Best Equipment | Best Party
☆ Class Tier List | Vamp Guide | Monster Wrangler
★ Friendly Monsters | Sparkly Spots | Keys Guide
☆ EXP Farming | Money Farming | Seed Farming
★ Post Game (Spoilers!) | Missables | Trophy Guide
The Monster Arena Tournament is a new feature in Dragon Quest 3 HD-2D Remake that aims to battle monsters you've recruited. Read on to learn more about Monster Arena locations, prizes, as well as how to beat the Monster Arena in the game.
List of Contents
Monster Arena Tournament Locations
Found Across 5 Different Towns
| Location | Monster Arena Ranks |
|---|---|
| Romaria | Ranks 1 & 2 |
| Ibis | Ranks 3 & 4 |
| Manoza | Ranks 5, 6, & 7 |
| Cantlin | Ranks 8 & 9 |
| Jipang (Post-Game) | Ranks 10 & 11 |
There are the various towns where you can find Monster Arena Tournaments. You'll come across most of them during the main storyline so it will be nearly impossible to miss them.
Monster Arena Tournament Fights
| Jump to Rank | ||||||||||
|---|---|---|---|---|---|---|---|---|---|---|
| 1 | 2 | 3 | 4 | 5 | 6 | 7 | 8 | 9 | 10 | 11 |
Rank 1 (Romaria) Overview
| Entrance Fee | Gold per Win | ||||
|---|---|---|---|---|---|
| 100 G | 80 G | ||||
| Rewards |
・Strong Medicine x3 ・Magic Water x3 ・Bronze Shield ・800 G |
||||
| Round 1 | |||||
|
|
|
- | |||
| Round 2 | |||||
|
|
|
- | |||
|
|
|
- | |||
| Round 3 | |||||
|
|
|
|
|||
Rank 2 (Romaria) Overview
| Entrance Fee | Gold per Win | ||||
|---|---|---|---|---|---|
| 200 G | 80 G | ||||
| Rewards |
・Seed of Strength × 3 ・Seed of Stamina × 3 ・Cloak of Evasion ・1,600 G |
||||
| Round 1 | |||||
|
|
|
- | |||
| Round 2 | |||||
|
|
|
- | |||
|
|
|
- | |||
|
|
|
- | |||
| Round 3 | |||||
|
|
|
|
|||
|
|
|
|
|||
| Round 4 | |||||
|
|
|
|
|||
Rank 3 (Ibis) Overview
| Entrance Fee | Gold per Win | ||||
|---|---|---|---|---|---|
| 300 G | 120 G | ||||
| Rewards |
・Musk x 3 ・Oomph Powder x 2 ・Beastly Bullwhip ・2,400 G |
||||
| Round 1 | |||||
|
|
|
- | |||
| Round 2 | |||||
|
|
|
|
|||
|
|
|
|
|||
|
|
|
- | |||
| Round 3 | |||||
|
|
|
|
|||
|
|
|
- | |||
|
|
|
- | |||
| Round 4 | |||||
|
|
|
|
|||
Rank 4 (Ibis) Overview
| Entrance Fee | Gold per Win | ||||
|---|---|---|---|---|---|
| 500 G | 200 G | ||||
| Rewards |
・Seed of Defense x3 ・Seed of Magic x3 ・Somatic Staff ・4,000 G |
||||
| Round 1 | |||||
|
|
|
- | |||
| Round 2 | |||||
|
|
|
- | |||
|
|
|
- | |||
|
|
|
|
|||
| Round 3 | |||||
|
|
|
|
|||
|
|
|
|
|||
|
|
|
- | |||
| Round 4 | |||||
|
|
|
|
|||
Rank 5 (Manoza) Overview
| Entrance Fee | Gold per Win | ||||
|---|---|---|---|---|---|
| 2,000 G | 800 G | ||||
| Rewards |
・Dieamend x3 ・Prayer Ring x2 ・Cat Suit ・16,000 G |
||||
| Round 1 | |||||
|
|
|
- | |||
| Round 2 | |||||
|
|
|
|
|||
|
|
|
|
|||
|
|
|
|
|||
| Round 3 | |||||
|
|
|
|
|||
|
|
|
|
|||
|
|
|
|
|||
| Round 4 | |||||
|
|
|
|
|||
Rank 6 (Manoza) Overview
| Entrance Fee | Gold per Win | ||||
|---|---|---|---|---|---|
| 3,500 G | 1,400 G | ||||
| Rewards |
・Seed of Agility x3 ・Seed of Wisdom x3 ・Seed of Luck x3 ・Dragonsbane Claws ・28,000 G |
||||
| Round 1 | |||||
|
|
- | - | |||
| Round 2 | |||||
|
|
|
|
|||
|
|
|
|
|||
|
|
|
|
|||
| Round 3 | |||||
|
|
|
|
|||
|
|
|
|
|||
|
|
|
|
|||
| Round 4 | |||||
|
|
|
|
|||
Rank 7 (Manoza) Overview
| Entrance Fee | Gold per Win | ||||
|---|---|---|---|---|---|
| 5,000 G | 2,000 G | ||||
| Rewards |
・The Champion's Code ・The Eureka Moment ・Guns 'n' Buns ・Flowing Dress ・40,000 G |
||||
| Round 1 | |||||
|
|
- | - | |||
| Round 2 | |||||
|
|
|
- | |||
|
|
|
- | |||
|
|
|
- | |||
| Round 3 | |||||
|
|
- | - | |||
|
|
- | - | |||
|
|
- | - | |||
| Round 4 | |||||
|
|
|
|
|||
Rank 8 (Cantlin) Overview
| Entrance Fee | Gold per Win | ||||
|---|---|---|---|---|---|
| 13,000 G | 5,200 G | ||||
| Rewards |
・Seed of Strength x3 ・Seed of Defense x3 ・Mod Rod ・Magic Bikini ・100,000 G |
||||
| Round 1 | |||||
|
|
|
- | |||
| Round 2 | |||||
|
|
- | - | |||
|
|
|
|
|||
|
|
|
|
|||
| Round 3 | |||||
|
|
|
- | |||
|
|
|
|
|||
|
|
|
|
|||
| Round 4 | |||||
|
|
|
|
|||
Rank 9 (Cantlin) Overview
| Entrance Fee | Gold per Win | ||||
|---|---|---|---|---|---|
| 20,000 G | 8,000 G | ||||
| Rewards |
・Elfin Elixir x3 ・Yggdrasil Leaf x3 ・Metal Wing Boomerang ・160,000 G |
||||
| Round 1 | |||||
|
|
|
|
|||
| Round 2 | |||||
|
|
|
|
|||
|
|
|
|
|||
|
|
|
|
|||
| Round 3 | |||||
|
|
|
|
|||
|
|
|
- | |||
|
|
|
|
|||
| Round 4 | |||||
|
|
|
|
|||
Rank 10 (Jipang Post-Game) Overview
| Entrance Fee | Gold per Win | ||||
|---|---|---|---|---|---|
| 36,000 G | 14,400 G | ||||
| Rewards |
・Meteorite Bracer ・Godbird Sceptre ・300,000 G |
||||
| Round 1 | |||||
|
|
|
|
|||
| Round 2 | |||||
|
|
|
|
|||
|
|
|
|
|||
|
|
|
|
|||
| Round 3 | |||||
|
|
|
|
|||
|
|
|
|
|||
|
|
|
|
|||
| Round 4 | |||||
|
|
|
- | |||
Rank 11 (Jipang Post-Game) Overview
| Entrance Fee | Gold per Win | ||||
|---|---|---|---|---|---|
| 99,999 G | 33,333 G | ||||
| Rewards |
・Hunter's Moon ・Yggdrasil Dress Coat ・War Drum ・395,963 G |
||||
| Round 1 | |||||
|
|
|
- | |||
| Round 2 | |||||
|
|
|
|
|||
|
|
|
|
|||
|
|
|
|
|||
| Round 3 | |||||
|
|
- | - | |||
|
|
- | - | |||
| Round 4 | |||||
|
|
|
- | |||
How to Beat Monster Arena Tournament
| How to Beat |
|---|
|
|
Recruit Monsters
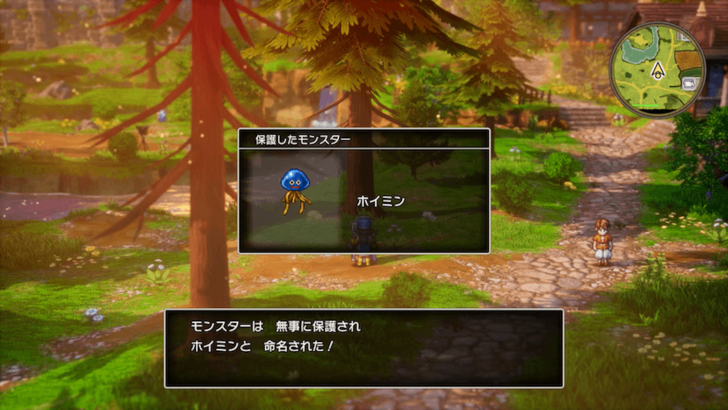
The Monster Arena is a battlefield for the monsters you've recruited in the game, so recruit the monsters you find and encounter during your journey.
Additionally, recruiting monsters will enable you to receive rewards from Monster Grandpa in the Monster Arena so recruit as many as you can.
Rewards From Number of Monsters Recruited
| No. of Monsters | Rewards |
|---|---|
| 10 Monsters | ・Magic Water x 5 |
| 30 Monsters | ・Agility Gilet |
| 50 Monsters |
・Seed of Strength x 2 ・Seed of Resilience x 2 ・Seed of Defense x 2 ・Seed of Agility x 2 ・Seed of Wisdom x 2 ・Goddess Ring |
| 100 Monsters |
・Empress's Whip ・Glombolero |
| 121 Monsters |
・Guns 'n' Buns ・Godbird Robe ・Orichalcum Claws |
All Friendly Monster Locations
Create a Party of 3 Monsters
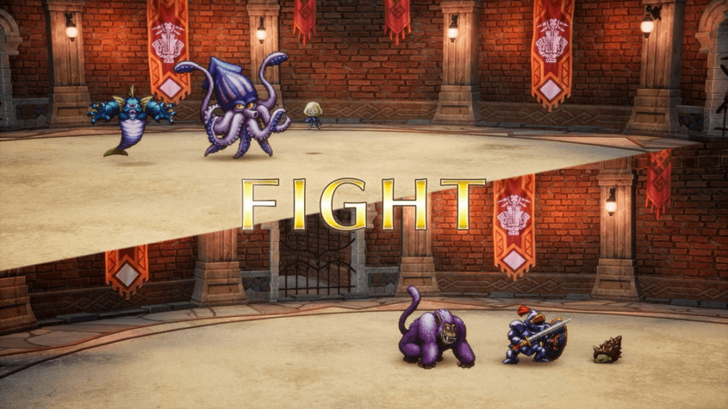
Once you've recruited a monster, you will be able to participate in the Monster Arena. You are allowed a minimum of 3 monsters to form a party, so make sure to check if these monsters are the one you'll have participate by checking their stats in the menu.
Change Strategies During Monster Arena
In the Monster Arena, you cannot give direct commands to your monsters. You can only change strategies which your monsters will follow, so make sure you employ a strategy that best corresponds to a situation.
Do note that HP and MP does not replenish after every match, so it is important that you take note of these when devising strategies for your monsters to employ.
Climb Up the Ranks and Win
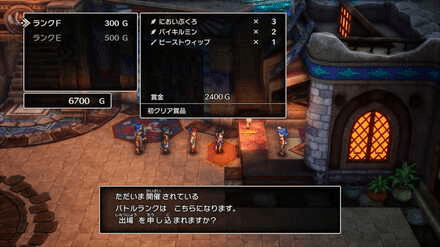
There are various Monster Arenas around the map, each with their own difficulty rank. Make sure to win and climb up the ranks so you can participate to higher ranks designated by other Monster Arenas in the game.
How to Recruit Monsters
| How to Recruit |
|---|
|
|
Track Down Monsters to Specific Locations
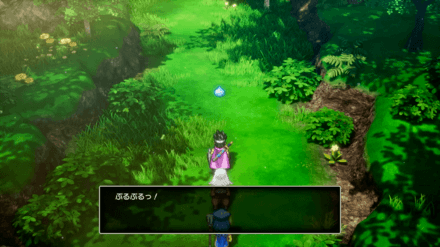
You can recruit monsters by approaching them, which can be accomplished if the monster does not flee from its current location. The location of these monsters are usually fixed, so finding them should not be too difficult.
Change the Time of Day for Specific Monsters
Some monsters might appear during the day, while others might appear at night time. If a monster you're trying to recruit does not appear, try changing the time of day to have them spawn in a specific location.
Use Skills and Items to Prevent Monsters From Fleeing
It is possible that monster might flee the scene if you're closing in on their proximity. Certain skills and items will allow you to conceal your presence so that you can become undetected to monsters you're trying to recruit.
Use Monster Wrangler to Prevent Monsters From Escaping
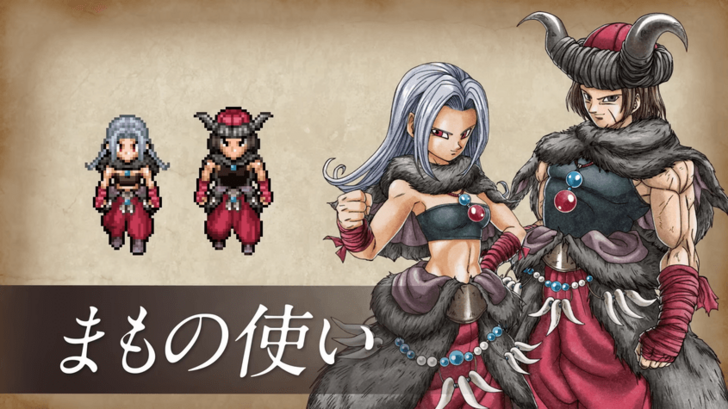
The Monster Wrangler vocation has a specific skill that allows them to search for monsters that are nearby, so it is recommended to have them in your party to look for monsters.
Additionally, monsters are unable to escape if you have a Monster Wrangler present in your party.
Monster Wrangler Job Class Guide
How to Increase Monster Level
Recruit Monsters of the Same Type
It is recommended that you recruit monsters of the same type to easily increase the levels of the monsters you've recruited. Once you have monsters of the same type, their levels will increase more compared to monster with different types in your party.
Additionally, you will also acquire new skills and abilities once you've increased the monsters you've recruited of the same type.
What is Monster Arena Tournament?
New Feature in Remake
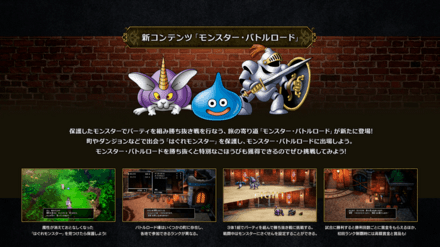
The Monster Arena Tournament is a new feature in Dragon Quest 3 HD-2D Remake that lets you battle the monsters you've captured and recruited in the game.
You will need to compose a party consisting of 3 monsters, and have them battle it out with other monsters in the arena.
This feature allows you to climb up the difficulty ranks of the Monster Arena, and receive rewards from winning the matches in the tournament.
New Features and Differences From the Original
Dragon Quest 3 HD-2D Remake Related Guides

Dragon Quest 3 HD-2D Remake Wiki Front
Dragon Quest 3 HD-2D Remake Guides
| List of Categories | |
|---|---|
 Walkthrough Walkthrough |
 Tips and Tricks Tips and Tricks |
 Personalities Personalities |
 Classes Classes |
 Bosses Bosses |
 Maps Maps |
 Spells and Abilities Spells and Abilities |
 Monsters Monsters |
 Monster Arena Monster Arena |
 Weapons Weapons |
 Armor Armor |
 Shields Shields |
 Helmets Helmets |
 Accessories Accessories |
 Items Items |
 Seeds Seeds |
 Books Books |
 News and Game Info News and Game Info |
Recommended Guides
Author
Monster Arena Tournament Guide
Rankings
- We could not find the message board you were looking for.
Gaming News
Popular Games

Genshin Impact Walkthrough & Guides Wiki

Umamusume: Pretty Derby Walkthrough & Guides Wiki

Crimson Desert Walkthrough & Guides Wiki

Monster Hunter Stories 3: Twisted Reflection Walkthrough & Guides Wiki

Honkai: Star Rail Walkthrough & Guides Wiki

Pokemon Pokopia Walkthrough & Guides Wiki

The Seven Deadly Sins: Origin Walkthrough & Guides Wiki

Wuthering Waves Walkthrough & Guides Wiki

Zenless Zone Zero Walkthrough & Guides Wiki

Arknights: Endfield Walkthrough & Guides Wiki
Recommended Games

Fire Emblem Heroes (FEH) Walkthrough & Guides Wiki

Diablo 4: Vessel of Hatred Walkthrough & Guides Wiki

Cyberpunk 2077: Ultimate Edition Walkthrough & Guides Wiki

Yu-Gi-Oh! Master Duel Walkthrough & Guides Wiki

Super Smash Bros. Ultimate Walkthrough & Guides Wiki

Pokemon Brilliant Diamond and Shining Pearl (BDSP) Walkthrough & Guides Wiki

Elden Ring Shadow of the Erdtree Walkthrough & Guides Wiki

Monster Hunter World Walkthrough & Guides Wiki

The Legend of Zelda: Tears of the Kingdom Walkthrough & Guides Wiki

Persona 3 Reload Walkthrough & Guides Wiki
All rights reserved
© ARMOR PROJECT/BIRD STUDIO/SPIKE CHUNSOFT/SQUARE ENIX
© SUGIYAMA KOBO ℗ SUGIYAMA KOBO
The copyrights of videos of games used in our content and other intellectual property rights belong to the provider of the game.
The contents we provide on this site were created personally by members of the Game8 editorial department.
We refuse the right to reuse or repost content taken without our permission such as data or images to other sites.
 Personality Quiz Answers
 Best Personalities
 Can You Change Gender?
 List of Equipment
 Trophy Guide
 All Mini Medal Locations
 How to Earn Gold Fast
 How to Change Personalities
 Best Party Setup
 How To Unlock Zoom
 Best Classes Tier List
 How to Level Up Fast
 All Secret Spot Locations
 Class Change Guide
 All Friendly Monsters
 Metal Slime Farming Guide
 Best Equipment for Each Class
 Best Friendly Monster Tier List
 All Sparkly Spot Locations
 All Stat and Growth Rate Explained
 All Missables and Points of No Return
 Best Starting Personality
 Best Abilities Tier List
 Best Spells Tier List


