This survey will take about 1 minute.
Your answers will help us to improve our website.
Skull and Bones
All UI Icons Explained
Skull and Bones uses UI inspired by old navigation maps and books for its menus. Learn how the Skull and Bones UI works and its different menu icons in this guide!
List of Contents
All UI and Menu Icons Explained
| Jump to a Section! | |||||
|---|---|---|---|---|---|
| HUD | Sailing | Ship | |||
| Map | Cargo | ||||
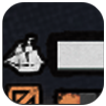
HUD UI and Icons
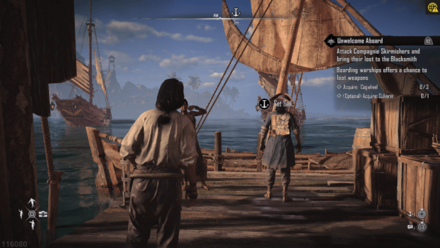
The HUD is the group of controls you can use while your ship is docked.
It allows you to be social with emotes, to find your way with the compass, and to dock wherever you are inland.
| Icon / Label | Explanation |
|---|---|
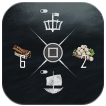
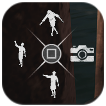 Emotes and Photos Wheel
 |
Editable Radial Menu where emotes and photo mode are found. |
 Compass
 |
Shows which dirrection NPC's are in the map. |
 Set Sail
 |
Quick Access Set Sail button to embark and to manage the ship and its cargo. |
 Chat
Chat |
Quick Access button to view text chat and edit chat and social settings. |
Sailing UI and Icons
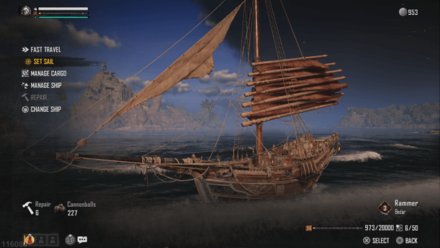
The Sailing group of UI displays quick information about you and your ship. You can repair, customize, change ship, and transfer cargo in this menu as well.
| Icon / Label | Explanation |
|---|---|
 Infamy
 |
Your current Infamy rank |
|
Cargo Meter |
How much weight from cargo your ship is holding. |
 Cargo Slots
 |
How much cargo your ship is holding |
 Hull Health
 |
How much Hull Health your ship has . |
 Crew Stamina
 |
How much stamina your crew has. |
 Repair
 |
How much Repair Kits you have |
 Ammunition
 |
How much ammunition for ship weapons equipped. |
 Ship Level
 |
Ship level influenced by ship equipment. |
Ship UI and Icons
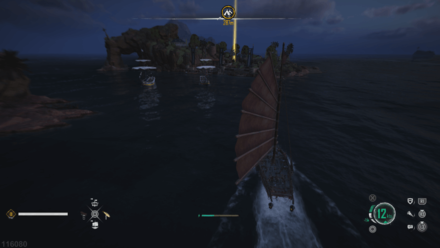
The Ship Menu displays helpful information as you navigate or fight in the seas.
You can also easily control your ship with the Ship Wheel Menu and the Sail Meter.
| Icon / Label | Explanation |
|---|---|
 Ship Level Ship Level |
Ship level influenced by ship equipment. |
| Hull Health |
How much Hull Health your ship has . |
 Flooding Flooding |
Your ship is Flooded. Your ship is slowed and receives damage over time. |
 Ablaze Ablaze |
Your ship is Ablaze. Your ship receives heavy damage over time. |
 Torn Sails Torn Sails |
Your ship's sails is torn. Your ship is slowed down significantly.. |
 Ship Wheel Menu Ship Wheel Menu |
Editable Radial Menu where controls such as Repair Kits, Food, Cameras, and Ship Cosmetics are found. |
 Crew Stamina Crew Stamina |
How much stamina your crew has. |
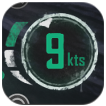
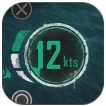 Ship Speed Ship Speed |
How fast the speed is in Knots. |
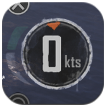
| Sail Meter |
Meter showing whether ship is trimming sails, has raised sails, or anchored. |
 White Arrow White Arrow |
The wind direction has no effect on your speed |
| Green Arrow |
The wind is blowing behind or by your sides, giving you more speed. |
 Red Arrow Red Arrow |
The wind is blowing against you, slowing you down. |
 Brace Brace |
Button for bracing against enemy fire. |
 Spyglass Spyglass |
Button for using the Spyglass. |
 Chat Chat |
Quick Access button to view text chat and edit chat and social settings. |
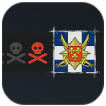 Faction Hostility Faction Hostility |
Meter showing how aggresive a faction is to you. |
List of All Ships and Ship Types
Map UI and Icons
The Map in Skull and Bones is big, and full of icons to lead the way to resources, key locations, and points of interest.
Mark them on the map to track them on your compass!
| Icon / Label | Explanation |
|---|---|
| Golden Paths are the main progression points in the game. Here you will meet pivotal characters that push the narrative forward. | |
| Much like side quests on your typical action-adventure game, Side Contracts offer additional loot and opportunity. These side contracts will most likely be one-time missions that do not hinder golden path progression. | |
| Repeatable Contracts will be your bread and butter as you pilfer and pillage for supplies. While these will be scattered throughout the map, it is always a delight to explore and find new contracts to fulfill. | |
| Bounties are challenges you can face in the open seas that offer lots of loot if your sea legs are up to the challenge. Collect information on a bounty's whereabout at port and hunt them down in the seas. | |
(Elite Captains) |
Elite Captains are deadlier bosses that will spawn as world events in the ocean. Team up with your friends in order to take down these scourges of the sea. |
(Merchant Convoys) |
Merchant Convoys are bountiful ships sailing home making them ripe for the taking. Gather your men and plunder these ship to raise your infamy and net you with considerable loot! |
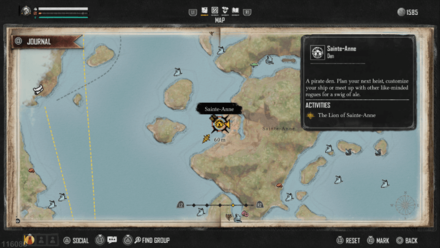
| A pirate den. Plan your next heist, customize your ship or meet up with other like-minded rogues for a swig of ale. | |
| These are scattered rest points, each having a cache where you can store your wares. Worry not, for all outposts caches are connected. These also serve as your Fast Travel Points after disembarking on them once. | |
| The capital city of a faction. It is a rich and well-defended place of trade. | |
| A small faction settlement and place of trade. Buy and sell your wares here... or try to take them by force? | |
| A heavily defended military base. The rewards are great but only the strongest pirate groups will pull off their assault. | |
| A small settlement focused on gathering and refining raw metals. Buy ingots or trade your wares here. | |
| A small settlement focused on gathering and refining jute. Buy cloth or trade your wares here. | |
| A small settlement focused on gathering and refining raw wood. Buy planks or trade your wares here. | |
 Supply Routes
 |
Used to transport refined resources to the settlements. |
 Trade Routes Trade Routes |
Used to transport refined resources to the settlements. |
 Shipwrecks Shipwrecks |
Sunk ships from different factions; Can be looted. |
 Shark Shark |
Location of shark that can be hunted. |
 Crocodile Crocodile |
Location of Crocodiles that can be hunted. |
 Ore Ore |
Location of Ore that can be harvested for metal. |
 Trees Trees |
Location of Trees that can be harvested for wood. |
 Plant Plant |
Location of plants that can be harvested for fiber. |
 Strange Sightings Strange Sightings |
Locations of Points of Interests. |
Full Interactive Map and Points of Interest
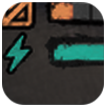
Cargo UI and Icons
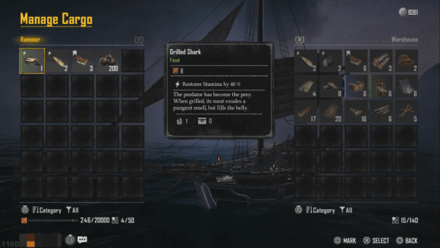
Consumable items in Skull and Bones have varying effects described by icons beside them.
This group of UI also shows if your ship is encumbered by how many or how heavy your plundered loot is!
| Icon / Label | Explanation |
|---|---|
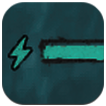
 Lightning Bolt
 |
This conumable restores your stamina. |
 Sails
Sails |
This consumable increases your sailing speed. |
 Hammer
 |
This item restores your ship's health. |
 Weight
 |
How much a specific cargo weighs. |
|
Cargo Slot |
How much inventory slots your ship or warehouse has. |
Skull and Bones Related Guides

Beginner's Guide: Tips and Tricks
All Tips and Tricks
Comment
Author
All UI Icons Explained
Please participate in our site
improvement survey
03/2026
improvement survey
03/2026
Would you assist in
improving Game8's site?
improving Game8's site?

×
We are listening to our users' valuable opinions and discussing how to act on them.
The information collected through this survey will be used for the purpose of improving our services. In addition, the information will only be disclosed a part of a statistic in a format that will not allow identification of personal information.
Begin Survey
Not Now
×
Please rate each item regarding Game8.co's Advertisements.
Amount of Ads
Very Dissatisfied
Somewhat Dissatisfied
Fine
Somewhat Satisfied
Highly Satisfied
Placement of Ads
Timing of Ad Display
Ad Loading Speed
Safeness of Ads
Content of Ads
×
Please rate each item regarding Game8.co's Quality of Articles.
Amount of information
Very Dissatisfied
Somewhat Dissatisfied
Fine
Somewhat Satisfied
Highly Satisfied
Frequency of updates
Speed of new information
Accuracy of articles
Understandibility of articles
Readability of sentences
×
Please rate each item regarding Game8.co's Usability of the Site.
Ease of finding information
Very Dissatisfied
Somewhat Dissatisfied
Fine
Somewhat Satisfied
Highly Satisfied
Loading Speed
Use of Color
Font Size
Visibility of Images
Easy to Understand Layout
×
Please rate each item regarding Game8.co's Message Boards, Comments.
Ease of Writing
Very Dissatisfied
Somewhat Dissatisfied
Fine
Somewhat Satisfied
Highly Satisfied
Readability
Ease in Finding Information
Comment Quality
Comment Quantity
Admin Response
×
Please rate each item regarding Game8.co's Site's new design.
Please rate our site's new design
Very Dissatisfied
Somewhat Dissatisfied
Fine
Somewhat Satisfied
Highly Satisfied
Do you think that the website's design change makes the site easier to use?
Has the new design made it easier for you to find information on the site?
Has the new design improved the overall visual appeal of the site?
How would you rate your overall satisfaction with the new design of the site?
×
How likely are you to recommend Game8 to someone you know?
Very Unlikely
0
1
2
3
4
5
6
7
8
9
10
Very Likely
If you have other opinions regarding potential improvement to the website, please share them with us. We would appreciate your honest opinion.
Note: This is a free response section, so you can proceed without entering anything.
Note: Please be sure not to enter any kind of personal information into your response.
Note: Please be sure not to enter any kind of personal information into your response.
×
Thank You
×
Thank you for participating in our survey! Your answers will help us to improve the quality of our website and services.
We hope you continue to make use of Game8.
We hope you continue to make use of Game8.
Close
Rankings
- We could not find the message board you were looking for.
Gaming News


![Everwind Review [Early Access] | The Shaky First Step to A Very Long Journey](https://img.game8.co/4440226/ab079b1153298a042633dd1ef51e878e.png/thumb)

![Monster Hunter Stories 3 Review [First Impressions] | Simply Rejuvenating](https://img.game8.co/4438641/2a31b7702bd70e78ec8efd24661dacda.jpeg/thumb)
Popular Games

Genshin Impact Walkthrough & Guides Wiki
Honkai: Star Rail Walkthrough & Guides Wiki
Umamusume: Pretty Derby Walkthrough & Guides Wiki
Pokemon Pokopia Walkthrough & Guides Wiki
Resident Evil Requiem (RE9) Walkthrough & Guides Wiki
Monster Hunter Wilds Walkthrough & Guides Wiki
Wuthering Waves Walkthrough & Guides Wiki
Arknights: Endfield Walkthrough & Guides Wiki
Pokemon FireRed and LeafGreen (FRLG) Walkthrough & Guides Wiki
Pokemon TCG Pocket (PTCGP) Strategies & Guides Wiki


Recommended Games
Diablo 4: Vessel of Hatred Walkthrough & Guides Wiki
Fire Emblem Heroes (FEH) Walkthrough & Guides Wiki
Yu-Gi-Oh! Master Duel Walkthrough & Guides Wiki
Super Smash Bros. Ultimate Walkthrough & Guides Wiki
Pokemon Brilliant Diamond and Shining Pearl (BDSP) Walkthrough & Guides Wiki
Elden Ring Shadow of the Erdtree Walkthrough & Guides Wiki
Monster Hunter World Walkthrough & Guides Wiki
The Legend of Zelda: Tears of the Kingdom Walkthrough & Guides Wiki
Persona 3 Reload Walkthrough & Guides Wiki
Cyberpunk 2077: Ultimate Edition Walkthrough & Guides Wiki


All rights reserved
© 2022 Ubisoft Entertainment. All Rights Reserved. Skull and Bones, Ubisoft, and the Ubisoft logo are registered or unregistered trademarks of Ubisoft Entertainment in the US and/or other countries.
The copyrights of videos of games used in our content and other intellectual property rights belong to the provider of the game.
The contents we provide on this site were created personally by members of the Game8 editorial department.
We refuse the right to reuse or repost content taken without our permission such as data or images to other sites.