What To Do When Stuck In An Area | Where to Go After An Upgrade
Check out our Metroid Prime 4: Beyond Walkthrough!
☆ Dread Rush | Boss Rush | Survival Rush | Practice
★ Speedrun and Sequence Breaks Guide
☆ Locations: Missile Tanks / Energy Tanks / Power Bomb Tanks
This is a guide on what to do and where to go if you get stuck in Metroid Dread for the Nintendo Switch. Read to find out what to do if you get stuck in Artaria, Cataris, Dairon, Ferenia, or another area, as well as where to go after getting an upgrade or defeating a boss.
List of Contents
What to Do If You Get Stuck
Check for Blocked Off Areas
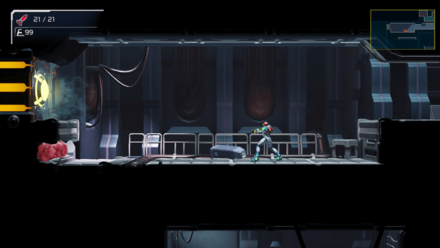
Some areas are designed in a way that will not let you backtrack or at least limit the areas you can backtrack to. If you run into doors or blocks marked with ??? on your map, this indicates an upgrade that has not been unlocked. You will likely need to head to a new area or defeat a boss to update the necessary ability.
How to Open All Doors and All Obstacle Blocks
Look for Hidden Areas
| Unmarked Breakable Wall | |
|---|---|
 |
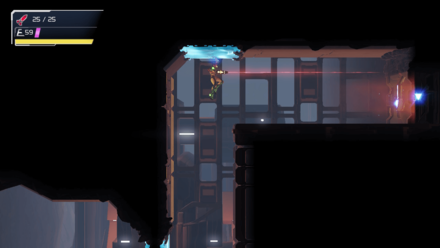 |
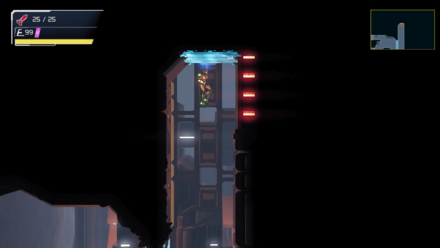
If you haven't played past or similar games to the Metroid series, there will usually be innocent-looking walls or floors that can be destroyed. Hidden blocks can be revealed when hit with a missile or bomb, so be sure to test out every suspicious looking wall you see in order to progress the game or find hidden items.
To help you with this, consider picking up the Pulse Radar Aeion Ability.
Stuck in Artaria
Where to Go After Phantom Cloak
Use Phantom Cloak on Sensor-Lock Doors
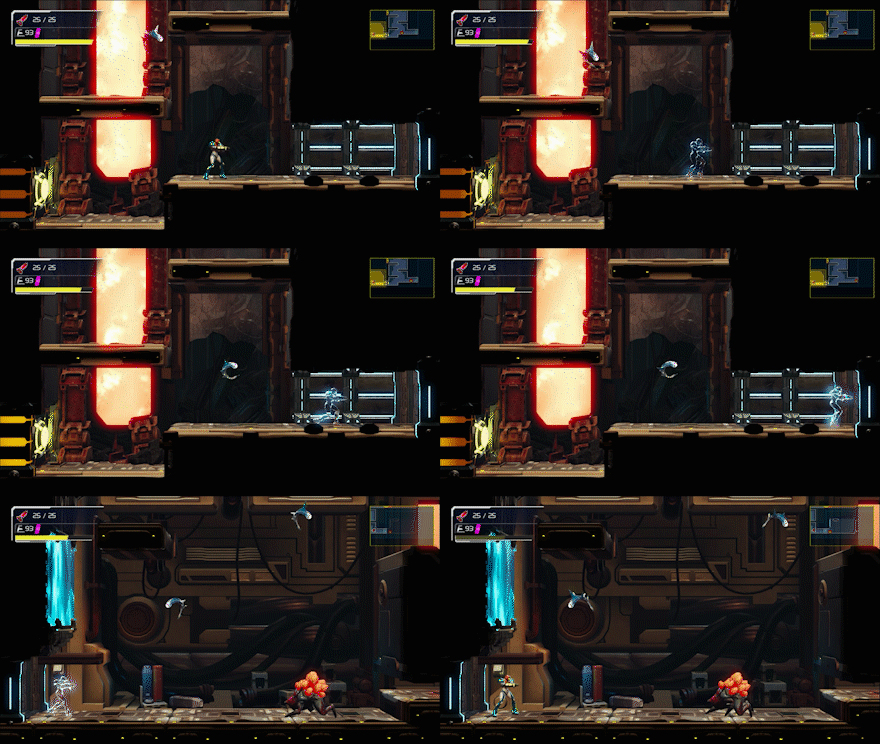
Once you defeat the first boss, Corpius, you will gain the Phantom Cloak ability, which allows Samus to sneak past Sensor-Lock Doors.
Before approaching a Sensor-Lock Door, activate your Phantom Cloak and walk through. Do not deactivate your Phantom Cloak until you make it safely across the door.
Head to the Cataris Elevator
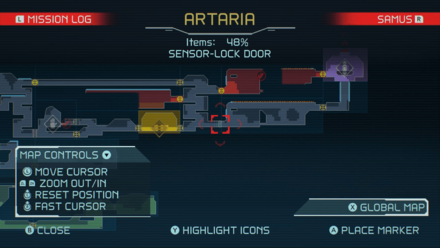
After obtaining the Phantom Cloak, travel to the top right section of the map and reach the Sensor-Lock Door underneath a heat-room, as shown on the image above. This will let you travel on to the next map, Cataris.
Stuck in Cataris
How to Leave the Elevator Room
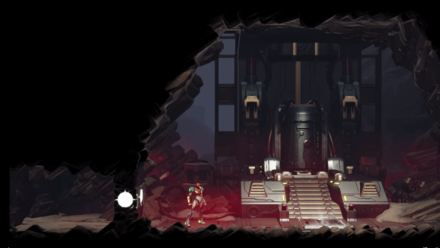
When you first enter Cataris, you will need to shoot through the hidden beam block to the left to proceed through the level.
How to Open Thermal Doors
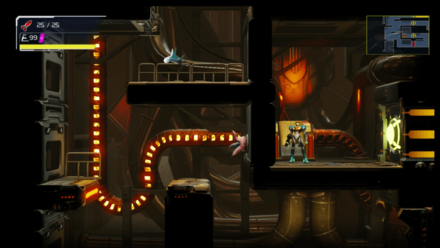
Thermal Fuel Switches allow you to open up new areas of the map by opening Thermal Doors. However, activating these switches also close off some areas of the map, which force you to find new paths. Once a switch is activated, it cannot be deactivated.
Cataris Area Map and 100% Items Guide
How to Get from Cataris to Dairon
Drain the Lava and Pull Down the Magnetic Platfrom
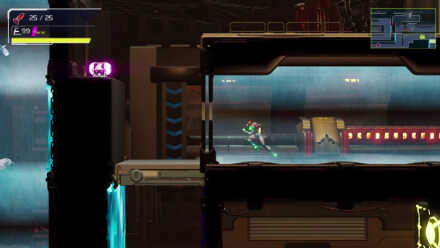
Cataris is one of the larger maps in the game, making progression sometimes difficult. To progress through the game, you will need to travel to Dairon by following the steps in the table.
| Step-By-Step Walkthrough | |
|---|---|
| 1 | 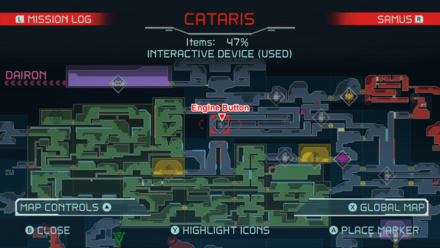 Inside the room indicated in the map above, you will find a button that will activate an engine. The engine will remove both the lava and the heat from the room outside. |
| 2 | 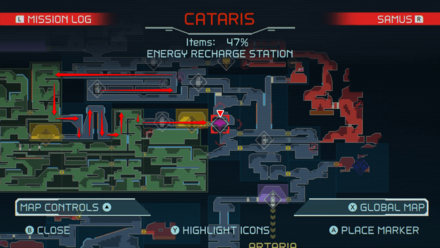 After activating the engine, you can return to the energy recharge station by following the path in the map. |
| 3 | 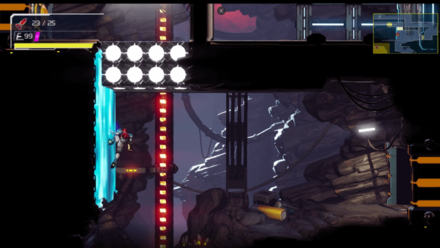 Above the Recharge Stations are a few hidden Beam Blocks. Climb up the ledge and hang on the magnetic strips to destroy the blocks above. |
| 4 | 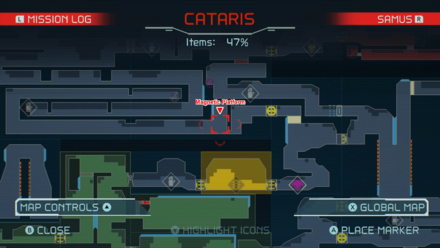 Once the blocks are destroyed, you can enter the room you just drained where you will find a magnetic platform. |
| 5 | 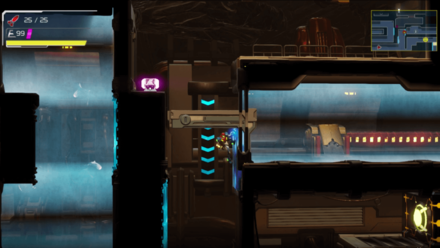 Use Spider Magnet to cling on to the platform and pull it downwards. |
| 6 |  Once the platform is lowered, you can now access the path to the room above. After activating the Thermal Fuel Switch, you can access the path to the shuttle to Dairon. |
Stuck in Dairon
How to Escape the First Area
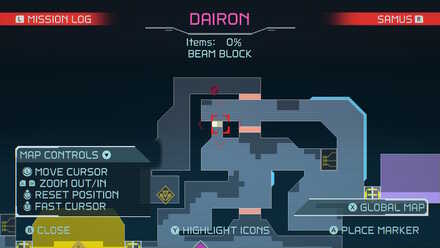
After entering Dairon, you may find yourself at a dead end in area surrounded by Speed Booster Blocks. Just past the blocks, there a few hidden beam blocks on the floor. Shoot the ground to continue through the path.
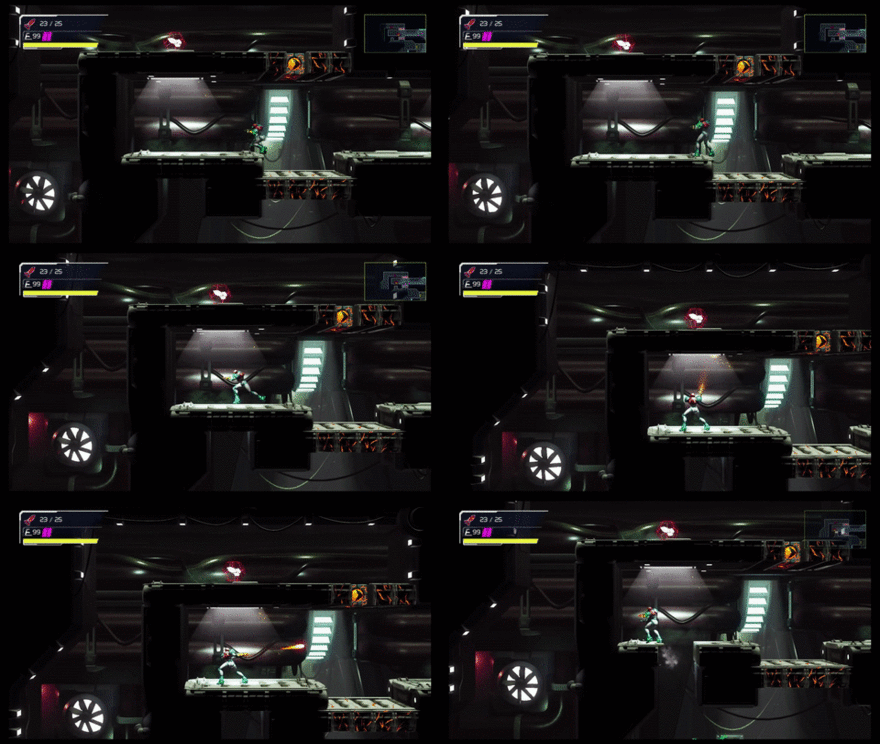
How to Turn On the Power
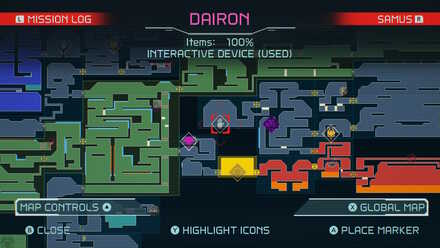
Once you reach Dairon for the first time, you will encounter a series of rooms without any power. To progress through the game, you will need to turn on the power in this area of the map by activating the generator.
| Step-By-Step Walkthrough | |
|---|---|
| 1 | 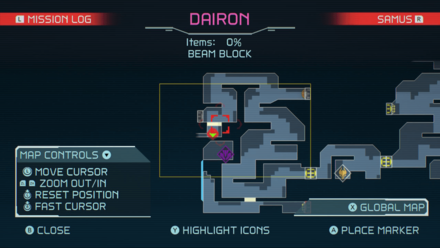 Travel through the dark rooms until you reach a dead end. |
| 2 | 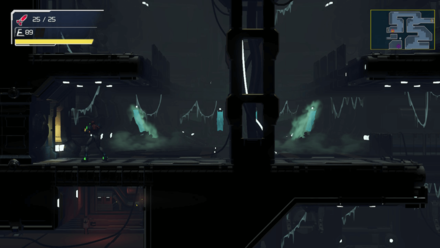 Destroy the Hidden Blocks Destroy the Hidden BlocksWhen you reach the dead end, shoot the blocks below your feet to destroy the hidden beam blocks. |
| 2 | 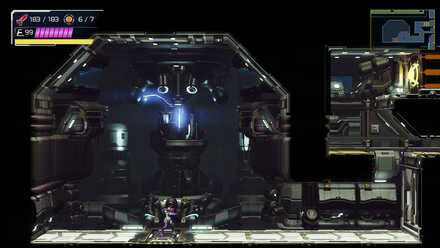 Turn on the Generator Turn on the GeneratorAfter breaking through the blocks, proceed through the next room where you will find a generator. Activate the generator to restore power to the area. |
Where to Go After Wide Beam
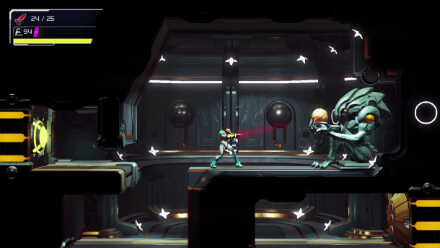
After getting the Wide Beam, you will now need to go back to Cataris and beat the Green EMMI to get the Morph Ball upgrade.
| Step-By-Step Walkthrough | |
|---|---|
| 1 | 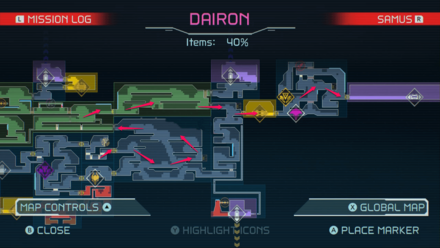 With the new Wide Beam upgrade, you will now be able to open new doors and remove Wide Beam Boxes. Use this to make your way back to the Cataris Shuttle. |
| 2 | 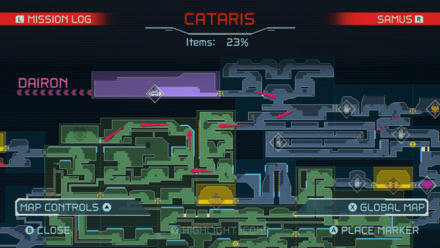 Again, you will need to use your new Wide Beam upgrade to access Wide Beam covered doors. |
| 3 | 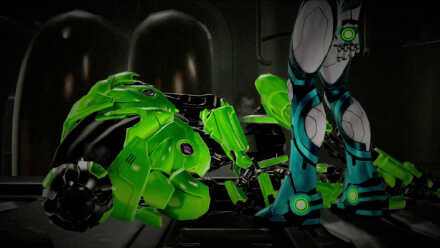 After this, you will unlock the Morph Ball upgrade. |
Dairon Area Map and 100% Items Guide
Stuck in Burenia
How to Escape the Bottom Area of Burenia

After getting the Space Jump upgrade, you will need to return to Burenia to obtain the Gravity Suit. The bottom areas of Burenia are vast and cavernous, making it difficult to navigate. Follow the instructions in the table to escape the bottom areas of Burenia and obtain the Gravity Suit.
| Step-By-Step Walkthrough | |
|---|---|
| 1 | 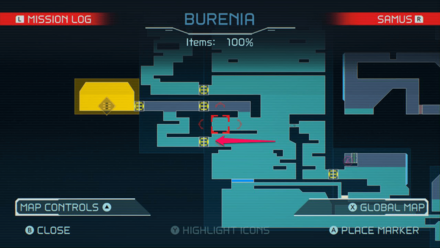 After first descending into the bottom areas of Burenia, you will first need to locate the Save Station. You can reach the Save Station by using your Space Jump upgrade to cross the short water section. |
| 2 |  Destroy the Alien Block and Grapple Block Destroy the Alien Block and Grapple BlockTo the right of the Save Station, you will run into an Alien Block. Destroy it with your Power Beam to open up the wall. Across the water, you can spot a Grapple Block. Pull on it with the Grapple Beam to destroy it. |
| 3 |  Travel through the Narrow Path Travel through the Narrow PathOnce the Grapple Block is destroyed, use your Space Jump to travel to the other side and go through the narrow passage. |
| 3 |  Open Up the Narrow Path Above the Cave Open Up the Narrow Path Above the CaveAs you continue through the path, it will eventually lead to a small cave at the very bottom of Burenia. At the top left corner, you can spot another alien block. Use your Diffusion Beam to destroy it and open up the path above. |
| 3 |  Get on the Bridge and Go Up Get on the Bridge and Go UpThrough the path, you will encounter a trench. Cross the trench and use Space Jump to get on the bridge. Once you're on the bridge, head upwards passing through the two Sensor-Lock Doors. |
| 3 |  Space Jump to the Other Side Space Jump to the Other SideAfter passing through the second Sensor-Lock Door, you will encounter a large gap. Use Space Jump to cross the large gap and make your way to the other side. If you accidentally fall, you can climb back up on the right side. |
| 3 |  Destroy the Alien Blocks to Expose the Grapple Block Destroy the Alien Blocks to Expose the Grapple BlockGo up the narrow passage and destroy the alien block to open up the wall and expose more alien blocks. Continue destroying the alien blocks until the wall is completely destroyed and the Grapple Block is exposed. |
| 3 |  Pull on the Grapple Block to Destroy the Bridge Below Pull on the Grapple Block to Destroy the Bridge BelowThe Grapple Block will be holding up a large underwater structure. Pull on the Grapple Block to cause the large structure to fall onto the bridge below and destroy it. |
| 3 |  Once the bridge is destroyed, you can enter the room containing the Gravity Suit to the left. With the Gravity Suit, you can freely travel through the water and escape the bottom area of Burenia. |
Stuck in Ferenia
How to Escape the Dead End Chamber
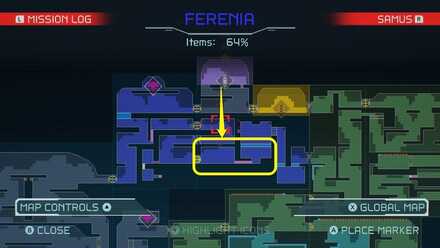
In the cold area to the north of Ferenia, you may find yourself stuck in a small room with no escape. There several hidden blocks in this area that you need to destroy in order to leave.
| Step-By-Step Walkthrough | |
|---|---|
| 1 | 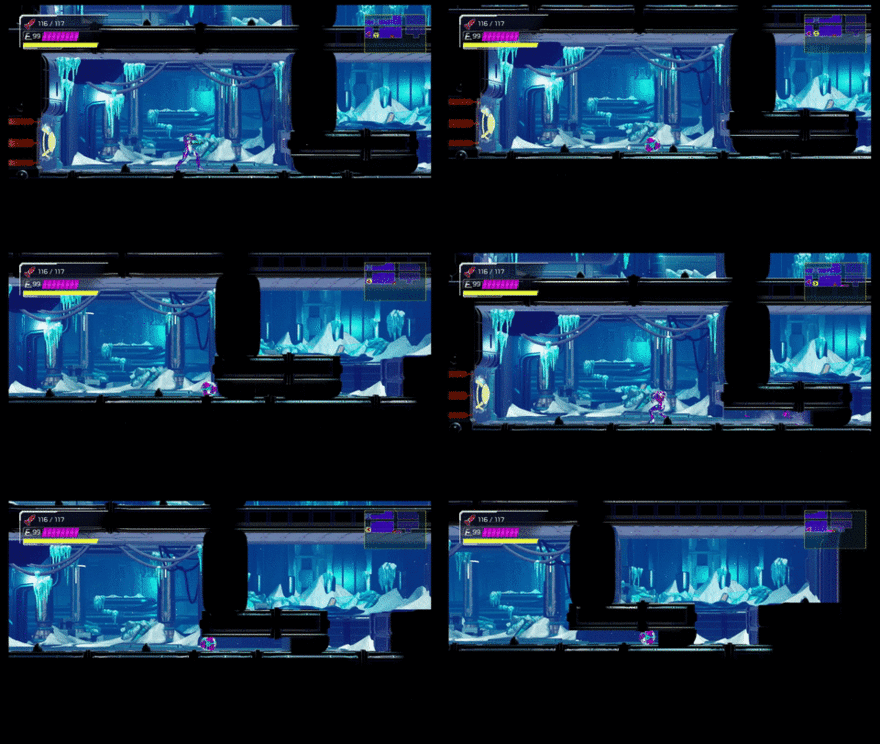 Destroy the Bomb Blocks Destroy the Bomb BlocksOn the southeast corner of the room are a row of hidden bomb blocks. Place a cross bomb next to the pillar to destroy them. |
| 2 |  Use Screw Attack to Destroy the Blocks Above Use Screw Attack to Destroy the Blocks AboveIn the next section of the chamber, you will need to destroy the hidden Screw Attack Blocks above to access the next area. |
| 3 | 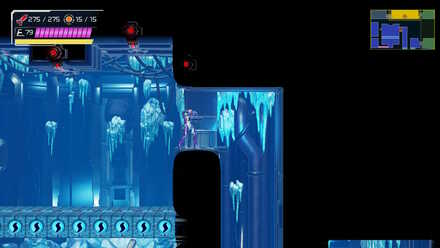 Open the Storm Missile Door Open the Storm Missile DoorThe final chamber will have a simple Storm Missile Door. To open the door, lock on to all the Storm Missile points in the room and launch missiles at them simultaneously. |
Ferenia Area Map and 100% Items Guide
Where to Go After Kraid
Get the Diffusion Beam
After defeating Kraid, Samus now has access to the Diffusion Beam in a nearby room. Through this path, Samus will also encounter a Purple Teleporal which leads to Dairon. She will need to take this Teleportal to continue with the story.
| Step-By-Step Walkthrough | |
|---|---|
| 1 | 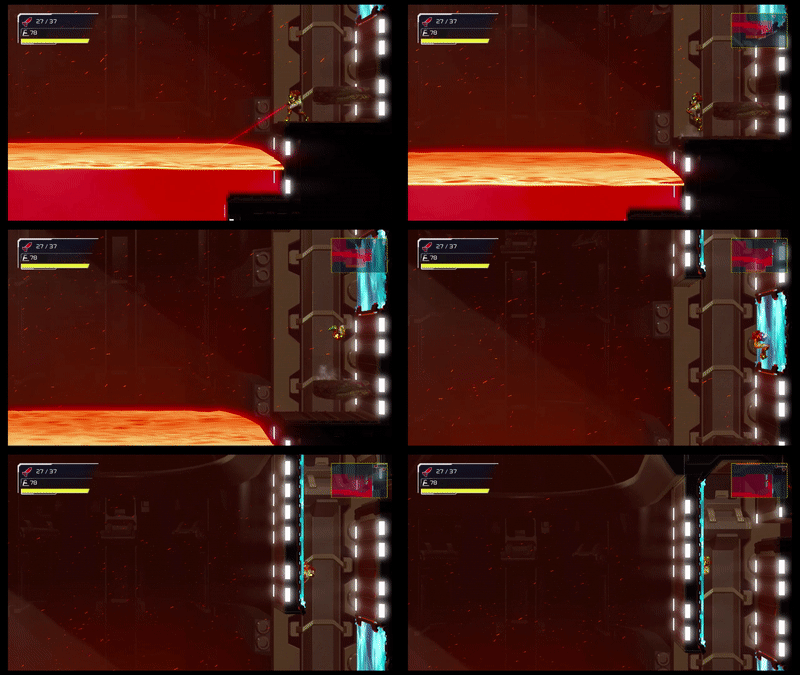 Use the Spider Magnet to Climb Up Use the Spider Magnet to Climb UpAfter defeating Kraid, you will find several blue magnetic strips above Samus leading to a new area of the map. Travel up this path to the next area. |
| 2 | 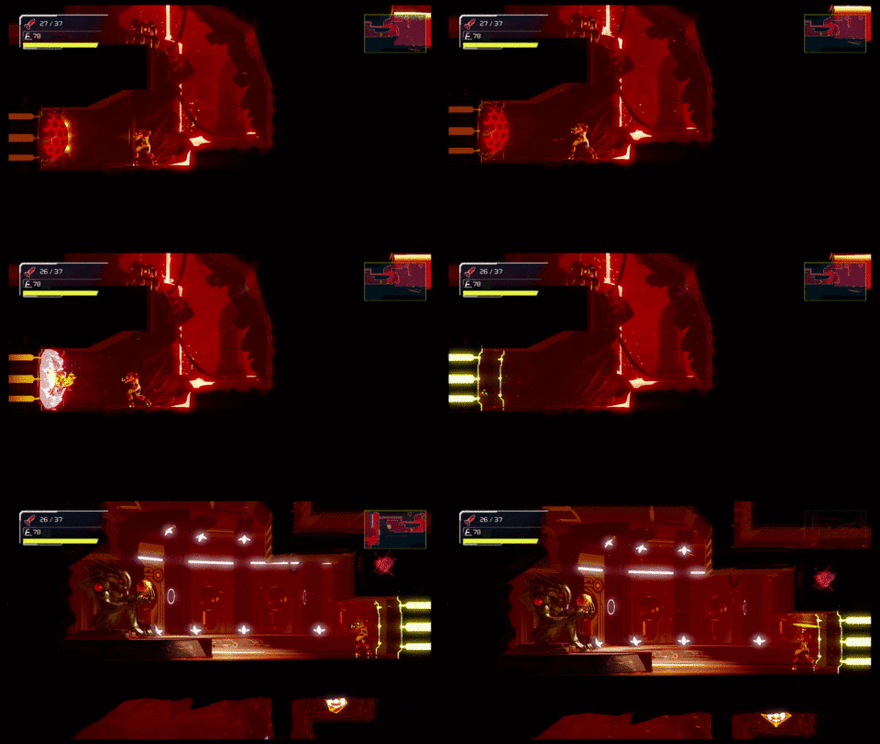 Destroy the Missile Cover Destroy the Missile CoverAfter taking the Morph Ball path, you will find a Missile Cover slightly south. Destroy the Missile Cover with a missile to enter the room. |
| 3 | 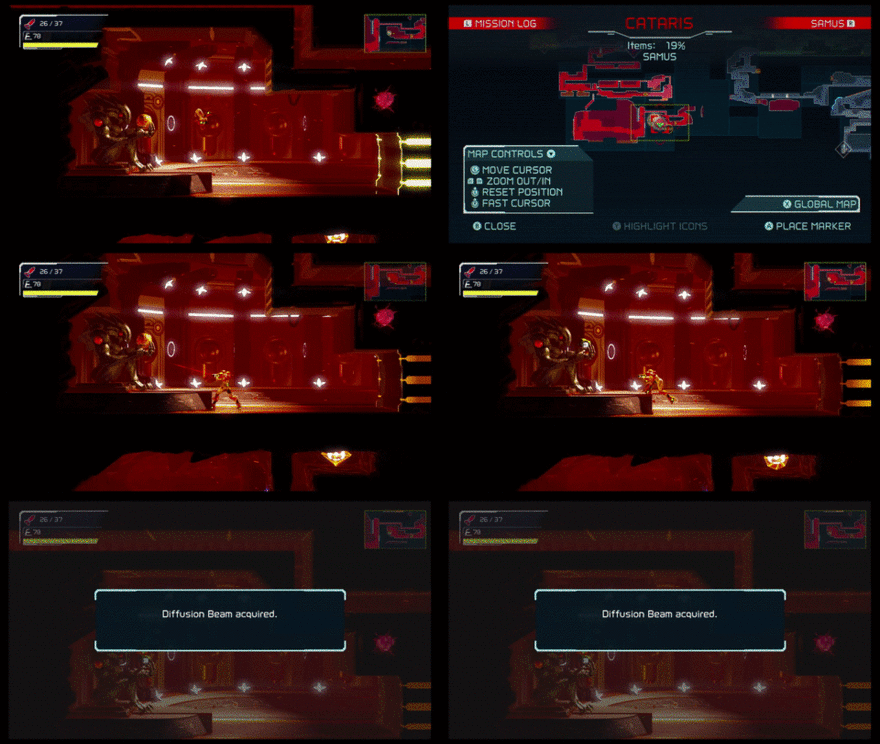 Obtain the Diffusion Beam Obtain the Diffusion BeamEnter the room and obtain the Diffusion Beam. |
| 4 | 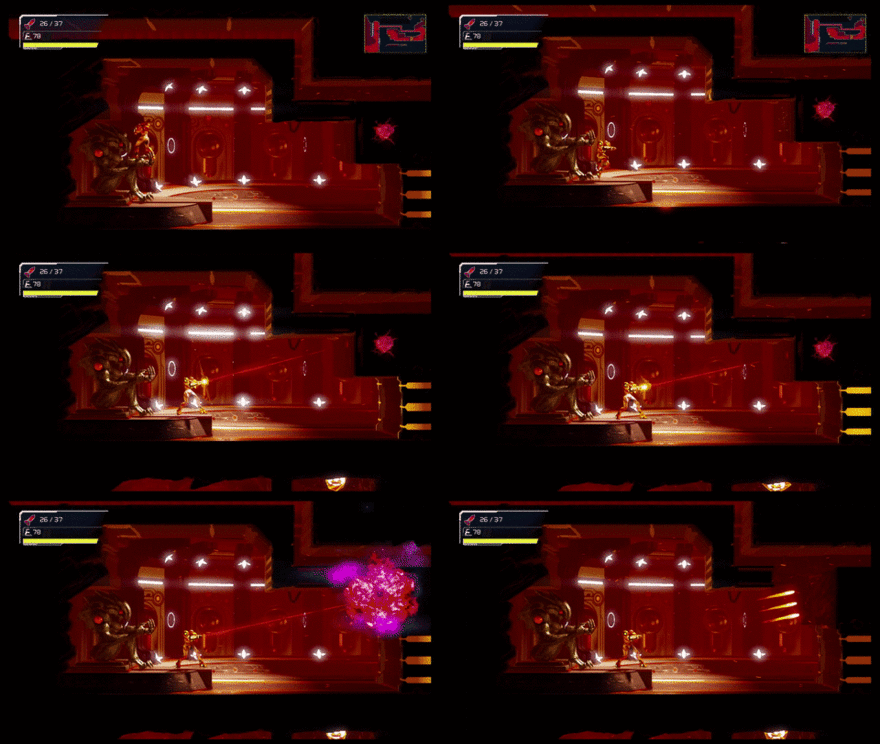 Shoot the Alien Block Shoot the Alien BlockWith the Diffusion Beam, you can escape the room by shooting the alien block to the upper right. |
| 5 | 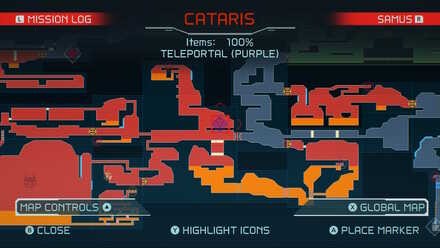 After escaping the room containing the Diffusion Beam, you will find another alien block to the north. Destroy this block and head to the Purple Teleportal to enter Dairon. |
Where to Go After Grapple Beam
Head to Ferenia
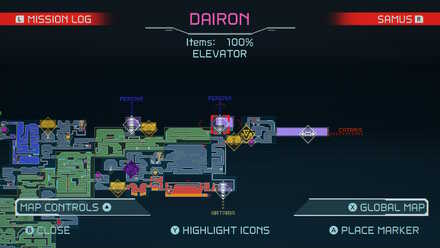
After obtaining the Grapple Beam Upgrade, you can head north and ride the elevator to Dairon. Once you reach Dairon, continue traveling north and use the Grapple Beam to remove the Grapple Beam Block and head to the elevator to Ferenia.
| Step-By-Step Walkthrough | |
|---|---|
| 1 | 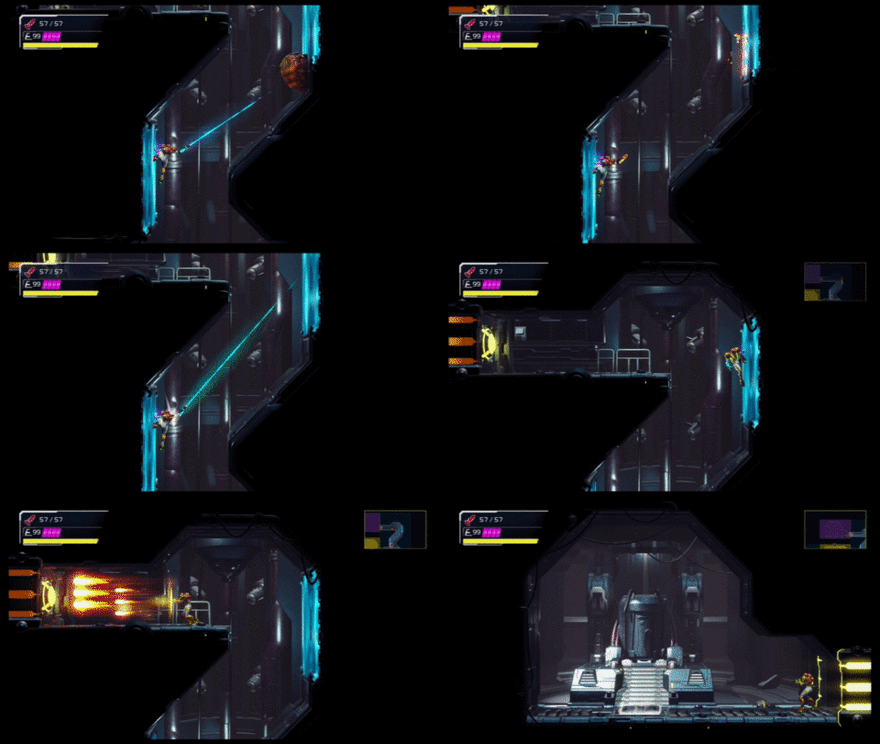 Use the Grapple Beam to Reach the Blue Magnetic Strips Use the Grapple Beam to Reach the Blue Magnetic StripsOnce you have obtained the Grapple Beam, you can travel north using the blue magnetic strips. This path leads to an elevator to Dairon. Ride the elevator and proceed to the next step. |
| 2 | 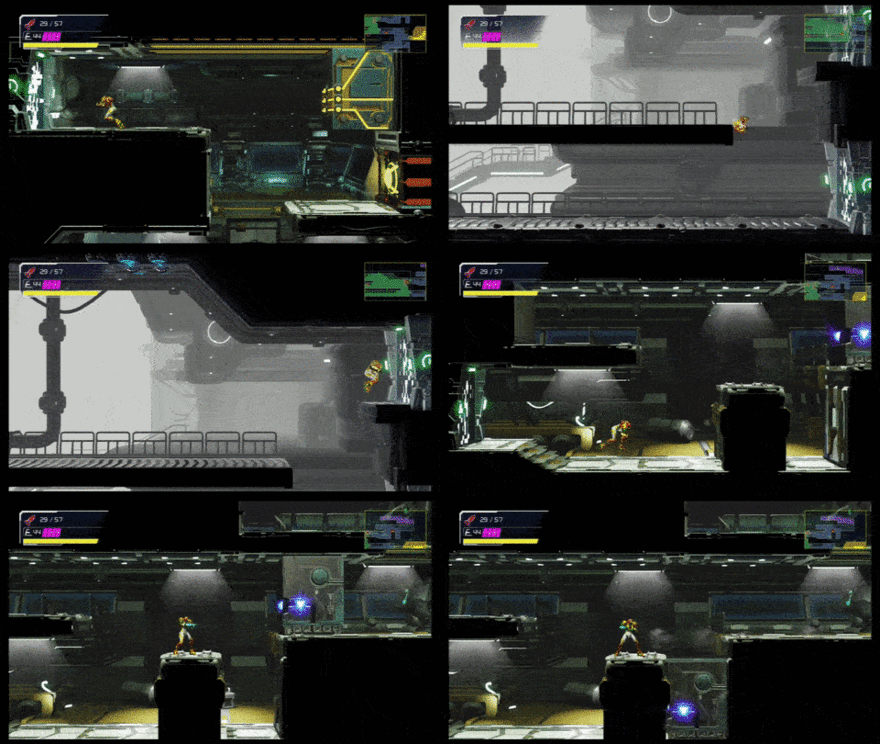 Head North to the Elevator to Ferenia Head North to the Elevator to FereniaAfter reaching Darion, take the Morph Ball Launcher on the right side of the room and continue north towards the elevator to Ferenia. Use your newly acquired Grapple Beam to pull the Grapple Beam Box out of your way. |
| 3 |  Ride the Elevator and Encounter the Purple EMMI Ride the Elevator and Encounter the Purple EMMIRide the elevator to Ferenia where you will first encounter the Purple EMMI and progress through the story. |
Stuck After Spin Boost
Defeat the Chozo Soldier and Head North
You may find yourself seemingly stuck after getting the Spin Boost upgrade. The following steps will lead you in the right direction torwards your next boss fight.
| Step-By-Step Walkthrough | |
|---|---|
| 1 |  Exit the Spin Boost Room Exit the Spin Boost RoomTo exit the room containing the Spin Boost upgrade, you will need to use the upgrade to get up the ledge. While standing beneath the ledge, jump to the left once and then to the right using the Spin Boost. |
| 2 |  Use Spin Boost to Get Out of the Water Use Spin Boost to Get Out of the WaterEven though you do not gain any height while using Spin Boost underwater, you can still use it to get out of the water area. |
| 2 | 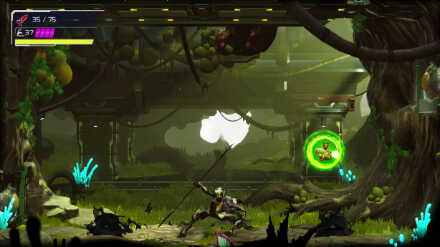 Defeat the Chozo Soldier Defeat the Chozo SoldierHead back the way you came. However, on your way back to the previous Save Station, you will first have to defeat a Chozo Soldier. |
| 3 | 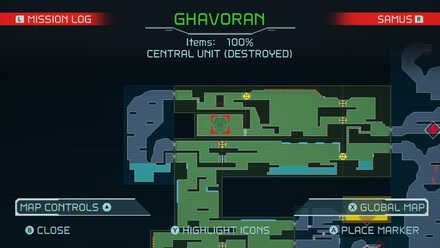 After defeating the Chozo Soldier, you can use the newly acquired Spin Boost to access the north section of the EMMI Zone and defeat the Blue EMMI. |
Where to Go After Space Jump
Obtain the Gravity Suit

With the new Space Jump Upgrade, Samus can now cross large gaps in the air or underwater to access previously unreachable areas, including a path in Burenia which leads to the Gravity Suit.
| Step-By-Step Walkthrough | |
|---|---|
| 1 |  Travel Back to Ghavoran Travel Back to GhavoranAfter getting Space Jump for the first time in Ferenia, you will have to go back to Ghavoran using the Shuttle. |
| 2 |  To access the Green Teleportal in Ghavoran, you will have to use your newly acquired Space Jump to cross the short water section. |
| 3 |  With Space Jump, you also gain access to the path on the west side of the map. Cross the deep water section using Space Jump and open the door with your Plasma Beam. |
| 4 |  Continue traveling this new path until you reach the southeast area of the map. |
| 5 |  Obtain the Gravity Suit Obtain the Gravity SuitTo obtain the Gravity Suit, you will first need to destroy the Grapple Beam Block holding up the large underwater structure. This will destroy the bridge below and open up the room to the Gravity Suit. |
| 6 |  After obtaining the Gravity Suit and opening up the area to the north, you can head to the nearby elevator and ride it back to Arataria. |
Where to Go After Morph Ball
Obtain the Varia Suit
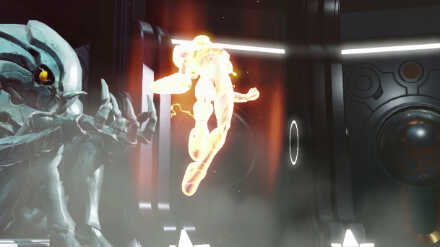
After obtaining the Morph Ball upgrade, Samus can now access several new areas around the map. To progress through the story, you will need to obtain the Varia Suit from Artaria so you can enter the warmer regions of the map.
| Step-By-Step Walkthrough | |
|---|---|
| 1 | 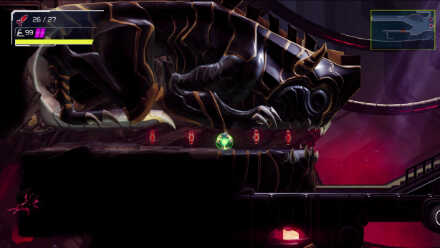 Access the Red Teleportal Access the Red TeleportalWith the Morph Ball upgrade, Samus can now take the narrow path through the alien statue leading to the Red Teleportal, which takes Samus back to Artaria. Alternatively, you can also take the elevator back to Artaria instead. |
| 2 | 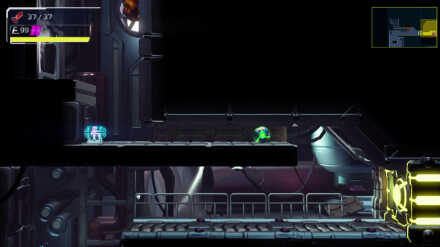 Take the Northwest Path Take the Northwest PathThe Morph Ball upgrade also opens up a new path to the northwest of Artaria. After following this path, you will find another Thermal Energy Switch. |
| 3 | 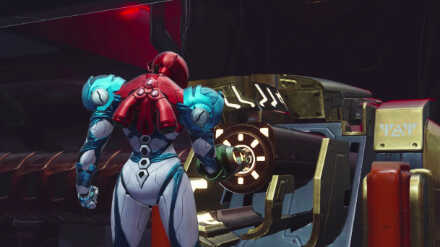 Activate the Thermal Fuel Switch Activate the Thermal Fuel SwitchAfter activating the switch, several traps will activate and the northern side of Artaria will start to crumble. A new path will also open up leading further north. |
| 4 | 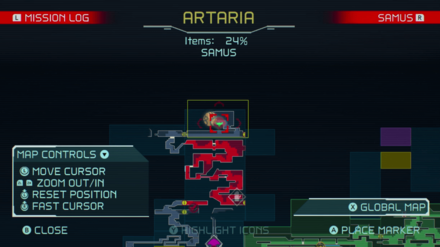 Follow the new path to a room containing the Varia Suit upgrade. The Varia Suit upgrade allows Samus to access the warmer areas of the map. |
| 5 | 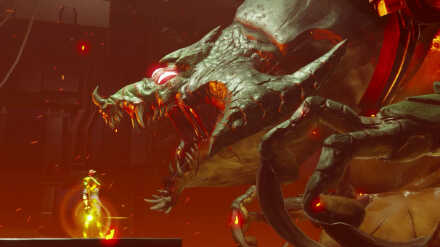 Return to Cataris and Defeat Kraid Return to Cataris and Defeat KraidWith the Varia Suit upgrade, Samus can take the Red Teleportal back to Cataris and head south to battle Kraid. |
Metroid Dread Related Guides

Author
What To Do When Stuck In An Area | Where to Go After An Upgrade
improvement survey
03/2026
improving Game8's site?

Your answers will help us to improve our website.
Note: Please be sure not to enter any kind of personal information into your response.

We hope you continue to make use of Game8.
Rankings
- We could not find the message board you were looking for.
Gaming News
Popular Games

Genshin Impact Walkthrough & Guides Wiki

Honkai: Star Rail Walkthrough & Guides Wiki

Umamusume: Pretty Derby Walkthrough & Guides Wiki

Pokemon Pokopia Walkthrough & Guides Wiki

Resident Evil Requiem (RE9) Walkthrough & Guides Wiki

Monster Hunter Wilds Walkthrough & Guides Wiki

Wuthering Waves Walkthrough & Guides Wiki

Arknights: Endfield Walkthrough & Guides Wiki

Pokemon FireRed and LeafGreen (FRLG) Walkthrough & Guides Wiki

Pokemon TCG Pocket (PTCGP) Strategies & Guides Wiki
Recommended Games

Diablo 4: Vessel of Hatred Walkthrough & Guides Wiki

Fire Emblem Heroes (FEH) Walkthrough & Guides Wiki

Yu-Gi-Oh! Master Duel Walkthrough & Guides Wiki

Super Smash Bros. Ultimate Walkthrough & Guides Wiki

Pokemon Brilliant Diamond and Shining Pearl (BDSP) Walkthrough & Guides Wiki

Elden Ring Shadow of the Erdtree Walkthrough & Guides Wiki

Monster Hunter World Walkthrough & Guides Wiki

The Legend of Zelda: Tears of the Kingdom Walkthrough & Guides Wiki

Persona 3 Reload Walkthrough & Guides Wiki

Cyberpunk 2077: Ultimate Edition Walkthrough & Guides Wiki
All rights reserved
© Nintendo. Metroid and Nintendo Switch are trademarks of Nintendo. © 2021 Nintendo.
The copyrights of videos of games used in our content and other intellectual property rights belong to the provider of the game.
The contents we provide on this site were created personally by members of the Game8 editorial department.
We refuse the right to reuse or repost content taken without our permission such as data or images to other sites.


![Monster Hunter Stories 3 Review [First Impressions] | Simply Rejuvenating](https://img.game8.co/4438641/2a31b7702bd70e78ec8efd24661dacda.jpeg/thumb)


