Agony And The Ant Hill (Priority Mission) Walkthrough and Chest Locations
Welcome to Game8's Marvel's Avengers Walkthrough Wiki! Our writers are putting out new guides as quickly as possible! Have a look at any of the guides below to get started!
- Reassemble Campaign Walkthrough | Story Missions
- Best Characters and Strike Team
- Best Builds For Every Character
- Guide to Weekly Challenges and Daily Missions
Version 1.08 Is here!
This is a walkthrough for the Mission Agony And The Ant Hill (Priority Mission) in Marvel's Avengers (game). See all mission objectives, chest locations, and tips and strategy for beating the boss.
List of Contents
Agony And The Anthill (Priority Mission) General Info
Mission Information
| Mission | Agony And The Ant Hill (Priority Mission) |
|---|---|
| Type | Priority Threat Sector |
| Mission Power | 151 |
| Reward | Guaranteed Reward Hero Specific Gear |
| Description | AIM is on the brink of discovering the Ant Hill. Dr. Pym has a wild plan to complete an impossible weapon that will save them. If the Avengers can assist, Pym is willing to help get the Starboost suit running. |
Agony And The Anthill (Priority Mission) Walkthrough
| Objectives | |
|---|---|
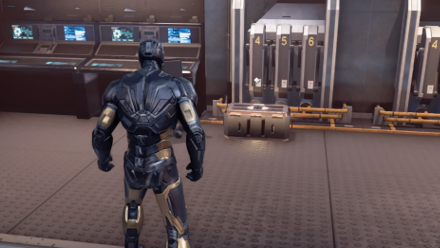
| 1 | 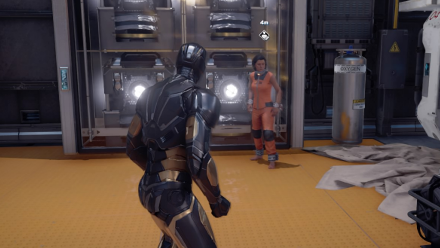 Go towards the first object marker but as you pass by a chasm to your left, look to the east to find an AIM depot with an agent inside and some special loot on the second floor. |
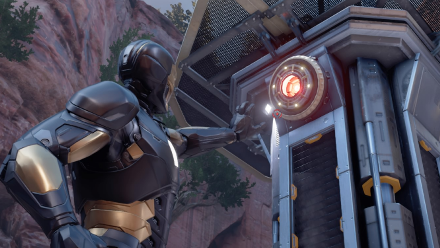
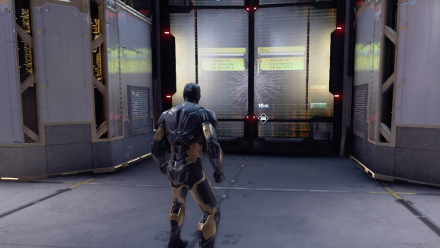
| 2 | 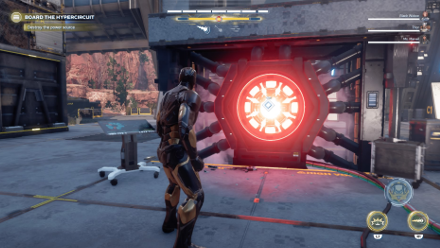 Head to the first objective marker and destroy the power source. Battle the enemies the appear after. |
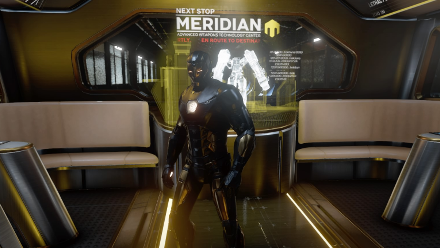
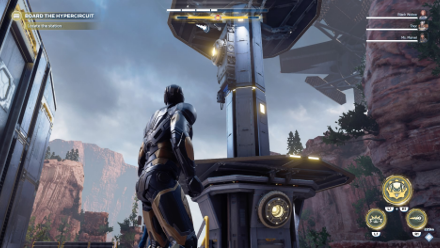
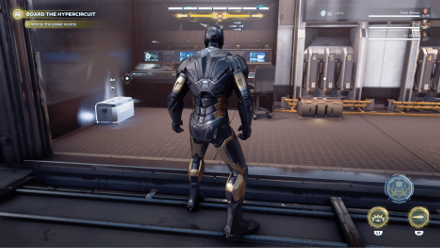
| 3 | Head to the next destination via the hypercircuit train. Defeat the enemies that spawn near the exit of the next station. |
| 4 | 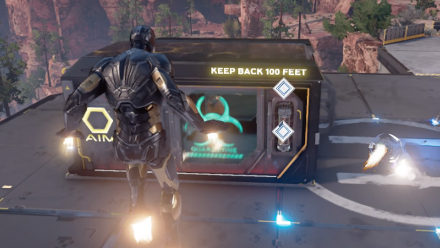 Head to the second objective marker but before reaching it, head west to find an AIM prisoner for you to set free. |
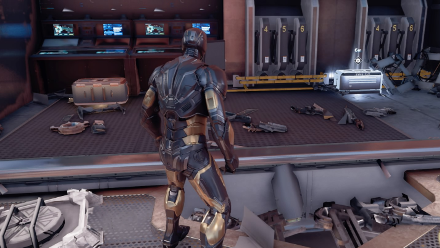
| 5 | 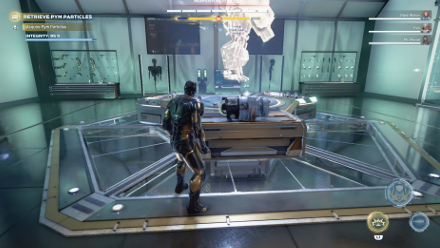 Battle through the enemies here until you reach the second objective marker. Gather the Pym particles at the northwestern corner of the room then defeat all enemies. |
| 6 | After, head to the next marker to be teleported into a secret Resistance room. Head outside and defeat the enemies. |
| 7 | Head to the next objective marker to defeat the boss of this stage, Warbot. |
Agony And The Anthill (Priority Mission) Tips and Strategy
Balance Your Attack
With the combination of ranged enemies like Drones and heavy hitters like Stiletto Riotbots, it is quite easy to get damaged heavily in this mission. Switch to ranged attacks to thin out the crowd and then attack when clear.
Have Moves With High Knockback
There is a high tendency here for enemies to swarm you. Use knockback attacks and focus on one enemy at a time. Power attacks work well here as well as your Assault Heroics.
Solving The Puzzle: AIM Depot
This puzzle is found at the AIM depot east of the first objective marker. This is where you rescue the AIM prisoner.
Here are their locations:
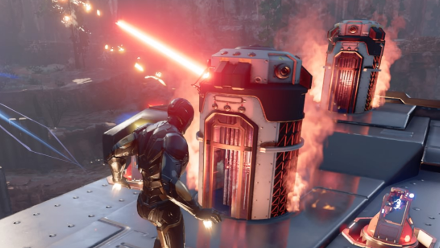
Circular Switch
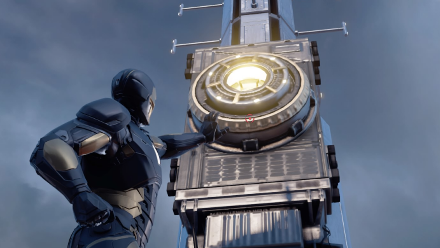
These switches are found on the tower nearby the AIM depot. Hit each switch with a sinlge ranged attack to activate them.
| Locations | |
|---|---|
 |
The first one is at the lower part of the tower. |
 |
Climb the steps nearby the tower so that your back is facing it. Turn around and and look up to see the 2nd and 3rd switch. |
 |
Climb the roof of the AIM depot and jump to the highest platform of the tower. The fourth switch is there facing away from the building. |
Agony And The Anthill (Priority Mission) Enemies
| Enemy | Strategy |
|---|---|
 Synthoid Synthoid
|
Basic enemy that can be easily dealt with by combos. |
 Prime Adept Synthoid Prime Adept Synthoid
|
They have uninterruptible attacks so time your dodge as they attack and counter back. |
 Elite Synthoid Elite Synthoid
|
They dodge and have uninterruptible laser attacks. Dodge and counter. |
 Proto-Synthoid Proto-Synthoid
|
Use combos to deal in damage then dodge when they execute their attacks. |
 Riotbot Riotbot
|
Use charged attacks to break their shields or vault over their back to attack their weak spot. |
 Stilleto Riotbot Stilleto Riotbot
|
Use charged attacks to break their shields or vault over their back to attack their weak spot. |
 Aero Keeper Aero Keeper
|
Use ranged attacks to defeat them quickly. |
 Aegis Keeper Aegis Keeper
|
Use charged attacks to break their shields or vault over their back to attack their weak spot. |
 Purge Keeper Purge Keeper
|
They fire poisonous projectiles so dodge it quickly. Close the gap and strike with combos. |
 Peacekeeper Peacekeeper
|
Be quick with your attacks since they teleport when you strike them from close range. When they charge their shots, time your dodges as it means they will unleash a wide-arcing multiple shots. |
 Elite Peacekeeper Elite Peacekeeper
|
Close the gap immediately to prevent them from using their attacks. They also have higher attack than most Keepers so time your dodge properly. |
 Monotronic Exo Monotronic Exo
|
Be careful of powerful attacks that may cause you to stagger. Dodge and counter its attacks. |
 Plague Drone Plague Drone
|
Dispose quickly by using ranged attacks. |
 Security Drone Security Drone
|
Dispose quickly by using ranged attacks. |
 Adaptoid Adaptoid
|
Use support heroics whenever possible as these enemies are sturdy. Alternate between quick attacks and dodging whenever they strike back. |
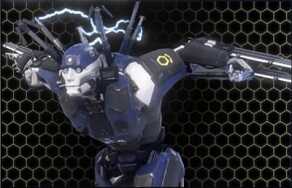
 Warbot Warbot
|
Avoid projectiles and attack all targets as quickly as possible. |
 Adept Keeper Adept Keeper
|
Close the gap in order to prevent them from using their homing attacks . |
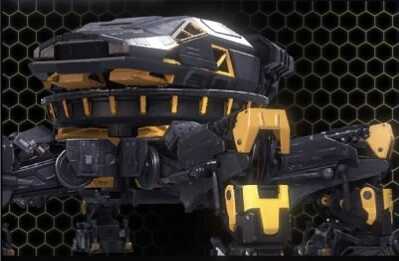
Agony And The Anthill (Priority Mission) Boss Guide
Warbot
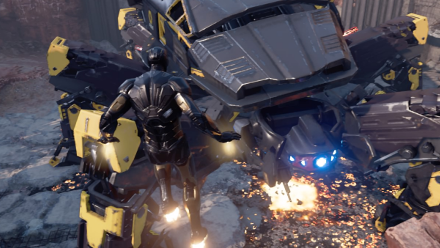
The Warbot battle will work in three stages here. It has turrets on its sides that can distract you from attacking its weak points. Destroy them first.

During the first part, attack the vents on the legs of the Warbot. Be careful when attacking as it can randomly stomp to knock you back.
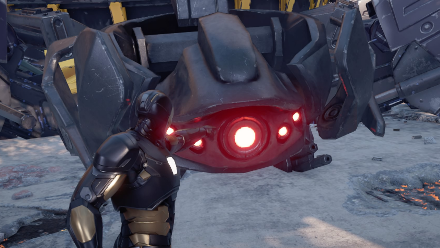
After destroying all of them, hit the Warbot's eye to deal major damage. At this point, enemies may spawn to interrupt you. Dispose of them quickly.
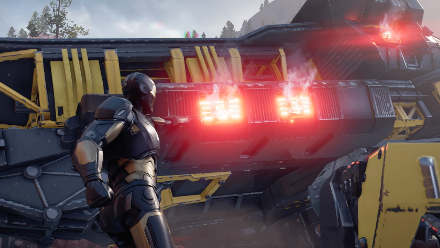
On the second stage, you have to destroy the next set of vents on the back of the legs as well as on the side of the Warbot. Then, attack its eye one more time.
At the last stage, all vents will repair with additional battery-looking targets on the back of the Warbot. Destroy all of them and attack its eye one last time to defeat it.
Agony And The Anthill (Priority Mission) Chest Locations
| Chest Locations | |
|---|---|
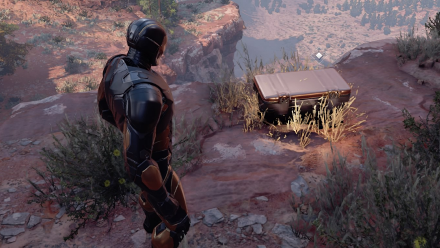 |
This chest is on a ledge just northwest of where you drop.. |
 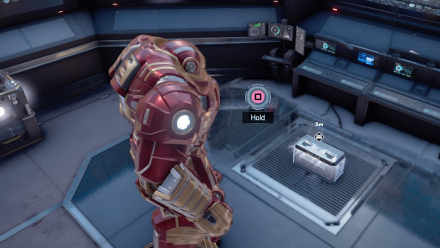 |
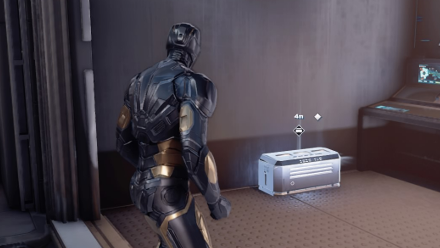
This chest is found in the AIM depot east of the first objective marker. You will need Iron Man or Black Widow to access this chest. |
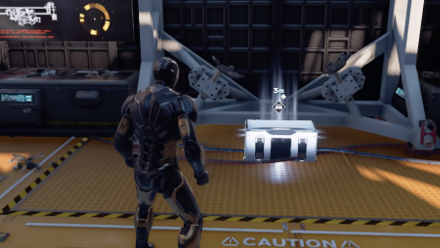
 |
This next chest is found to the east of the hypercircuit station in the first area. |
 |
The next chests are found to the west of the same hypercircuit station in the first area. |
 |
These chests are found just to the northeast of the hypercircuit station just above some containers. |
 |
The next chest is found in the area just beneath the hypercircuit station in the second area. |
 |
This one is found to the west of the hypercircuit station in the second area. |
 |
The next chest is found at the eastern end of the 2nd hypercircuit station. |
Note that dark brown / bronze colored chests may shift locations or not be present at all during a mission.
Marvel's Avengers Mission Walkthroughs
War Zone Missions
Author

Agony And The Ant Hill (Priority Mission) Walkthrough and Chest Locations
Rankings
- We could not find the message board you were looking for.
Gaming News


![Monster Hunter Stories 3 Review [First Impressions] | Simply Rejuvenating](https://img.game8.co/4438641/2a31b7702bd70e78ec8efd24661dacda.jpeg/thumb)
Popular Games

Genshin Impact Walkthrough & Guides Wiki
Umamusume: Pretty Derby Walkthrough & Guides Wiki
Pokemon Pokopia Walkthrough & Guides Wiki
Honkai: Star Rail Walkthrough & Guides Wiki
Monster Hunter Stories 3: Twisted Reflection Walkthrough & Guides Wiki
Arknights: Endfield Walkthrough & Guides Wiki
Wuthering Waves Walkthrough & Guides Wiki
Zenless Zone Zero Walkthrough & Guides Wiki
Pokemon TCG Pocket (PTCGP) Strategies & Guides Wiki
Monster Hunter Wilds Walkthrough & Guides Wiki


Recommended Games
Diablo 4: Vessel of Hatred Walkthrough & Guides Wiki
Cyberpunk 2077: Ultimate Edition Walkthrough & Guides Wiki
Fire Emblem Heroes (FEH) Walkthrough & Guides Wiki
Yu-Gi-Oh! Master Duel Walkthrough & Guides Wiki
Super Smash Bros. Ultimate Walkthrough & Guides Wiki
Pokemon Brilliant Diamond and Shining Pearl (BDSP) Walkthrough & Guides Wiki
Elden Ring Shadow of the Erdtree Walkthrough & Guides Wiki
Monster Hunter World Walkthrough & Guides Wiki
The Legend of Zelda: Tears of the Kingdom Walkthrough & Guides Wiki
Persona 3 Reload Walkthrough & Guides Wiki


All rights reserved
© 2020 MARVEL. Developed by Crystal Dynamics and Eidos Montréal. Development support provided by Nixxes. SQUARE ENIX and the SQUARE ENIX logo are registered trademarks or trademarks of Square Enix Holdings Co., Ltd. Crystal Dynamics, Crystal Northwest, Eidos Montréal and their respective logos are registered trademarks or trademarks of Square Enix Limited.
©2020 Sony Interactive Entertainment LLC. "PlayStation Family Mark", "PS4 logo" and "PS5 logo" are registered trademarks or trademarks of Sony Interactive Entertainment Inc. XBOX and Xbox logos are registered trademarks or trademarks of the Microsoft group of companies and are used under license. Stadia, the Stadia beacon, and related marks and logos, are trademarks of Google LLC. ©2020 Valve Corporation. Steam and the Steam logo are trademarks and/or registered trademarks of Valve Corporation in the U.S. and/or other countries. Nixxes and the Nixxes logo are trademarks of Nixxes Software BV. The ratings icon is a registered trademark of the Entertainment Software Association. All other trademarks are the property of their respective owners.
The copyrights of videos of games used in our content and other intellectual property rights belong to the provider of the game.
The contents we provide on this site were created personally by members of the Game8 editorial department.
We refuse the right to reuse or repost content taken without our permission such as data or images to other sites.