Faron Woods Walkthrough: All Maps, Kikwi Locations, Treasure Chests, Goddess Cubes, and Heart Pieces
★All Pieces of Heart & Goddess Cubes Locations
☆How to Get All Gratitude Crystals
★Empty Bottle Guide
A complete guide to Faron Woods in The Legend of Zelda: Skyward Sword HD for the Nintendo Switch. Learn how to get through Faron Woods, find where each Kikwi is hiding, see treasure chests, Goddess Cube, and Heart Piece locations, as well as Faron Woods enemies and more!
List of Contents
Faron Woods Maps and Treasure Chest Locations
Faron Woods Map
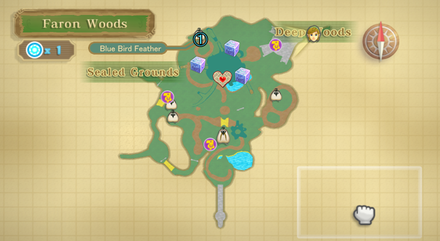
Treasure Chests - 1 Location Total
| Contents | |
|---|---|
| ① | Blue Bird Feather |
Deep Woods Map
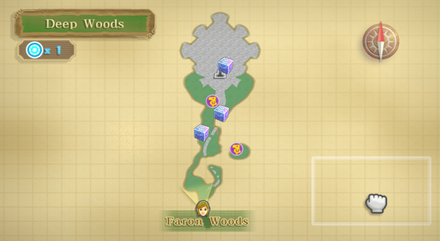
Inside the Great Tree - B1

Inside the Great Tree - 1F
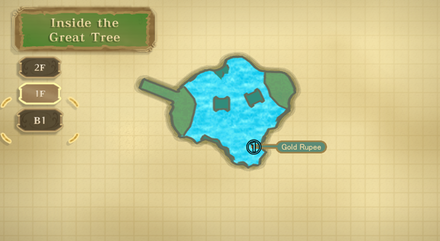
Treasure Chests - 1 Location Total
| Contents | |
|---|---|
| ① | Gold Rupee |
Inside the Great Tree - 2F

Faron Woods Goddess Cubes Locations
Faron Woods Goddess Cubes - 3 Locations Total
| Reward Required Item | Goddess Cube Location | Goddess Chest Location |
|---|---|---|
| Silver Rupee (100 Rupees) Water Dragon's Scale |
 Swim inside the Great Tree and once you reach the exit, jump down to the west side of the tree to reach the Goddess Cube. |
 Head south of the Knight Academy and glide down to the small floating island to reach the Goddess Chest. |
| Piece of Heart None |
 Climb to the top of the Great Tree. Once you are outside, go to the southeast part of the tree and drop down to the Goddess Cube using your Sailcloth. Alternatively, you can use the Clawshots to grapple onto the target next to the Goddess Cube. |
 Fly to the island east of the Lanayru beacon and land on the higher ledge to reach the Goddess Chest. |
| Rupee Medal Digging Mitts |
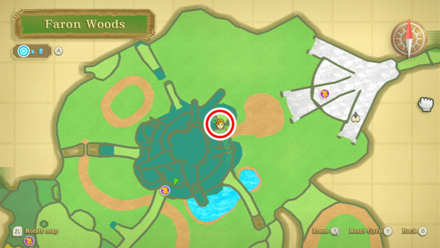 Climb to the top of the Great Tree. Go to the area near Kikwi, you'll see a platform that sticks out. Go south and by the ledge you should see a tightrope. Walk across the tightrope to reach the Goddess Cube. |
 Inside the Thunderhead, use the Digging Mitts on the soft soil spot to reach the other end with a regular chest. Kill the Walltulas on the vines and use the Clawshots to climb up and reach the Goddess Chest. |
Deep Woods Goddess Cubes - 3 Locations Total
| Reward Required Item | Goddess Cube Location | Goddess Chest Location |
|---|---|---|
| Adventure Pouch None |
 After crossing the tightropes, you can find this Goddess Cube next to Gorko. |
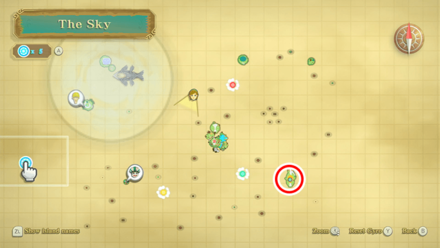 Find the chest outside the front door of Lumpy Pumpkin. |
| Piece of Heart None |
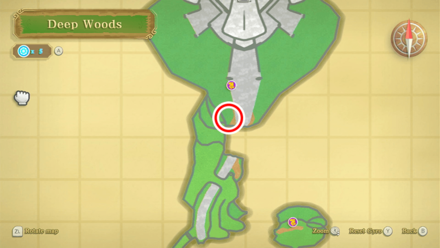 Outside Skyview Temple in Deep Woods. |
 Fly to the small island near the Lumpy Pumpkin to find the Goddess Chest. |
| Rupee Medal Clawshots |
 The Goddess Cube is above the entrance of Skyview Temple. Use your Clawshot on the vines to get on top of the Temple. |
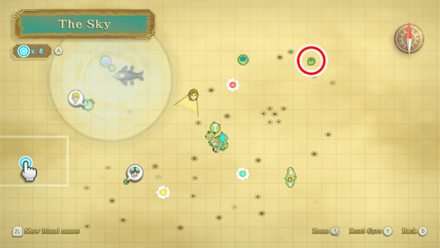 Enter Beddle's Shop and sleep on the bed until night. Climb the ladder and head to the area where he sleeps to find the Goddess Chest. |
Faron Woods Pieces of Heart Locations
Pieces of Heart - 2 Locations Total
| How to Get Heart Piece #1 | ||
|---|---|---|
 |
||
| Required Items | None | |
| Map Location |
 Faron Woods |
|
| How to Get | Found on a platform on the Great Tree at Faron Woods. | |
| How to Get Heart Piece #8 | ||
|---|---|---|
 |
||
| Required Items | Bombs | |
| Map Location |
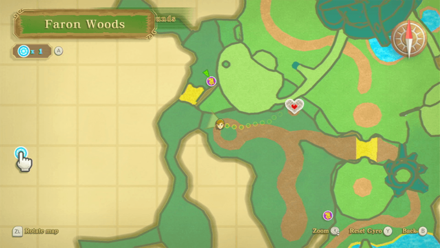 Faron Woods |
|
| How to Get | Use a bomb on the cracked wall at the southwestern part of Faron Woods. | |
How to Get All Pieces of Heart
Faron Woods (1st Visit) Story Walkthrough
| Objectives |
|---|
| 1. Help the Kikwi being attacked by Bokoblins. |
| 2. Chase after the fleeing Kikwi. |
| 3. Speak with the Kikwi Elder. |
| 4. Find the missing Kikwis. |
| 5. Report back to the Kikwi Elder and obtain the Slingshot. |
| 6. Head to the Deep Woods. |
| 7. Head to the temple north of the map. |
| 8. Shoot the Red Crystal with your Slingshot and enter Skyview Temple. |
Help the Kikwi being attacked by Bokoblins

Moving ahead, you'll find two Bokoblins harassing a Kikwi. Knock out the enemies before speaking to the Kikwi.
Chase after the fleeing Kikwi
Slash the red mushrooms to reveal the hiding Kikwi

A large, red mushroom to the left of the path will be sparkling. Strike it with your sword to startle the hiding Kikwi. The Kikwi will again run away, continue to follow it.
Past the Deku Baba, another large red mushroom can be found to the right of the path. Strike it to startle the hiding Kikwi again.
Speak with the Kikwi Elder

When you finally catch up to the fleeing Kikwi, he'll suggest that you speak with the Kikwi Elder. The Elder should be found near the center of the map. Make your way towards him.
Cut down the rope to swing across

Cut down the rope behind the Deku Baba. This will allow you to swing across to the Kikwi Elder.
Find the missing Kikwis
The Kikwi Elder will ask you to search for the other Kikwis hiding in Faron Woods. You can use your dowsing ability to track them down.
Kikwi Locations
| Kikwi Location | Details |
|---|---|
 |
Crawl through the hole near the Elder Kikwi. Climb the vines and cross the tightrope. After defeating the Red Bokoblins ahead, roll into the tree to knock Lopsa, the first Kikwi out of the tree. |
 |
Northwest of the woods, there should be some vines you can jump to which will let you climb the side of the wall. At the top, the second Kikwi, Erla, can be found hiding in the grass. Cut down all of the grass then talk to it. |
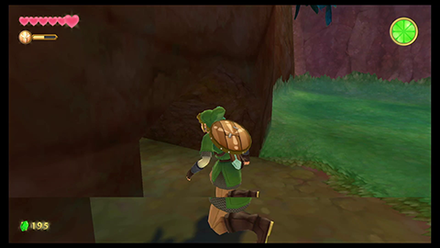 |
In the raised ledges west of the woods, search the grass next to the large tree for a hole you can drop down into. Follow the path and try to pick up the third Kikwi, Oolo, disguising as a shrub. |
Report back to the Kikwi Elder and obtain the Slingshot

After finding all three Kikwis, return to the Kikwi Elder and he will reward you with a Slingshot. This can be used to stun enemies, and interact with other objects in the environment. You can shoot at a nearby vine to let it drop allowing you to swing across.
Head to the temple north of the map

Armed with the Slingshot, make your way to the Deep Woods Once there, continue moving north to get to the temple.
Shoot the Red Crystal with your Slingshot and enter Skyview Temple
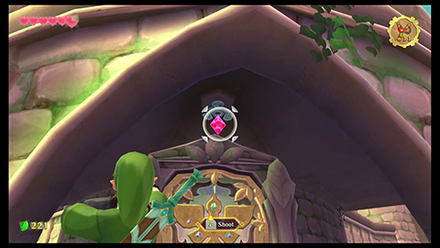
When you reach the temple, the doors will be locked. Using your slingshot aim at the red crystal overhead to open the doors.
Continue to the Skyview Temple Walkthrough
Faron Woods (2nd Visit) Story Walkthrough
| Objectives |
|---|
| 1. Go to the clearing near the Great Tree. |
| 2. Play the Goddess Harp. |
| 3. Enter the Silent Realm |
| 4. Dive into the water near the Great Tree. |
| 5. Make your way upward through the Great Tree. |
| 6. Wake up the Kikwi Hermit. |
| 7. Head to the South Gate and assume the Skyward Strike stance. |
| 8. Complete the pattern and continue to Lake Floria. |
Go to the clearing near the Great Tree.

Descend onto the Viewing Platform. From here, drop down to the clearing in front of it where the butterflies gather.
Play the Goddess Harp.

Stand near the glowing spot in the center. Take out the harp and strum.
Fi will appear. Strum in time with the glowing circle until the mark on the ground is fully formed.
Enter the Silent Realm

Thrust your sword into the middle of this mark and the environment will change bringing you into the Silent Realm. You will obtain the Spirit Vessel.
You'll have to collect 15 Tears of Farore to complete the trial. After collecting all of the Tears, make your way back to where you started to obtain the Water Dragon's Scale. You will then be transported out of the Silent Realm.
Check out the full Faron Woods Silent Realm Guide
Dive into the water near the Great Tree.
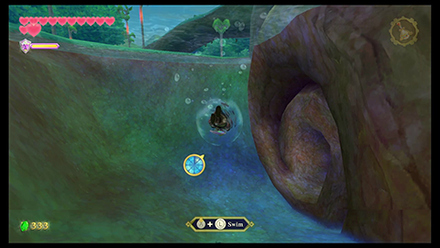
Back in Faron Woods, there should be a small body of water southeast of the large tree. Using your newly-acquired ability to swim, dive underwater and swim through the roots of the tree.
You should now find yourself inside the Great Tree. Navigate your way through the tree taking care of the enemies along the way.
Wake up the Kikwi Hermit.
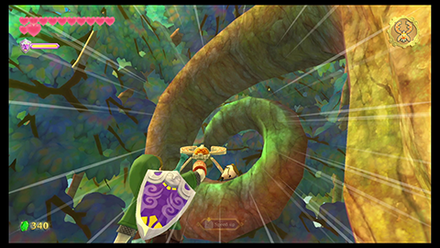
Once at the top-most part of the tree, try to shoot your Beetle towards the sleeping Kikwi. This will wake it up, it will introduce itself as Yerbal, the Kikwi hermit.
Head to the South Gate and assume the Skyward Strike stance.
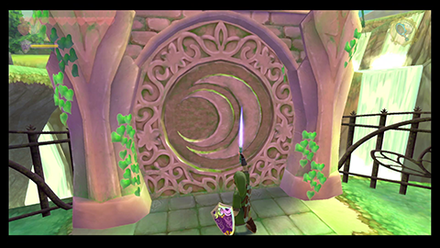
Head to the lake on the southern part of Faron Woods and approach the gate. Use Skyward Strike, and you'll have to draw the missing circle in the symbol. Be mindful of the size and avoid touching the crescent parts of the symbol.
Complete the pattern and continue to Lake Floria.
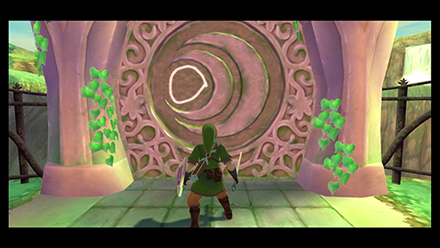
Once the door is open, follow the path and dive into Lake Floria.
Continue to the Lake Floria Walkthrough
Faron Woods (3rd Visit) Story Walkthrough
| Objectives |
|---|
| 1. Rematch with the Imprisoned. |
| 2. Seal the Imprisoned at the bottom of the pit. |
| 3. Return to the Sealed Temple. |
| 4. Ask Groose for help to enter the Faron Woods. |
| 5. Enter the tree and climb inside it. |
| 6. Collect the Tadtones. |
| 7. Speak with Faron. |
Rematch with the Imprisoned.

Descend into the Sealed Grounds and take on the imprisoned once again. Head to the bottom of the pit to start the battle.
The Imprisoned now has a tail, making slashing at its toes a bit more difficult due to the narrow paths. Use Groose's cannon to temporarily disable the Imprisoned.
After the first time you drive the sealing spike into its head, you'll learn that the Imprisoned can now fly. Use Groose's cannon to knock it back into the pit.
Head to the bottom and drive the sealing spike into its head once more. Groose has run out of bombs, so he will launch you instead. Head to his machine.
Launch yourself onto the top of its head, and from there drive the spike in for the third time.
Seal the Imprisoned at the bottom of the pit.

Head to the bottom of the pit and seal the imprisoned again.
Return to the Sealed Temple and speak with Impa.
Ask Groose for help to enter the Faron Woods.

Follow Groose out of the Temple and he will help you get to Faron Woods.
Enter the tree and climb inside it.
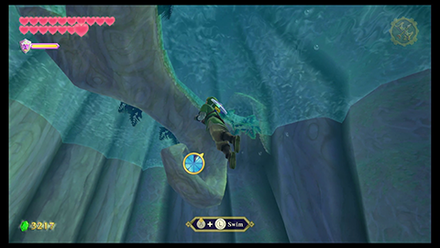
Swim underwater and into the opening at the base of the big tree.
Make your way through and resurface from the inside of the tree. You should now find yourself on 2F of the Great Tree. Walk towards the exit and a cutscene will play.
Collect the Tadtones.

Collect the Tadtones swimming around the flooded area of Faron Woods.
After collecting 7 groups of Tadtones, Craniocs will appear. After collecting 12 groups of Tadtones, you can use your Dowsing Ability to track them down.
How to Find all the Tadtones Guide
Speak with Faron

If you're following along with the guide, this should be your first Song, head to the Eldin Volcano for the second part of the Song of the Hero.
Continue to Eldin Volcano (3rd Visit) Walkthrough
Faron Woods Enemies
| List of Enemies | Strategy |
|---|---|
 Blue Bokoblin Blue Bokoblin
|
Blue Bokoblins use the same attack pattern as Red Bokoblins, but are tougher. Invite an attack and repel it with a Shield Bash, then strike. |
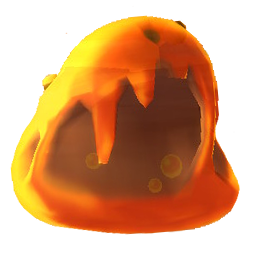 Chuchu Chuchu
|
A simple sword slash defeats it. When it merges, proceed to continue slashing until every Chuchu is defeated. |
 Cranioc Cranioc
|
Stun them by hitting it against a wall or with a spin attack. Once they flip over, attack them on their stomachs. |
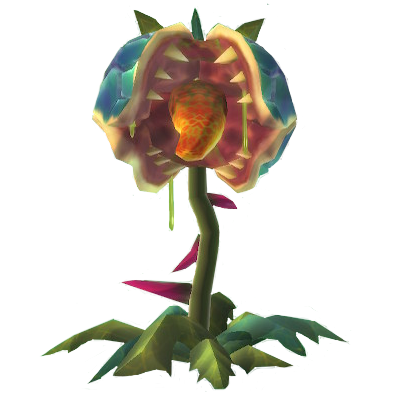 Deku Baba Deku Baba
|
Slash horizontally or vertically according to the orientation of its mouth. You can also cut off its stem with a Beetle to instantly defeat it. |
 Froak Froak
|
Froaks will explode if you blow it off with Gust Bellows or with a sword against terrain or enemies. Note that sword attacks do not work. |
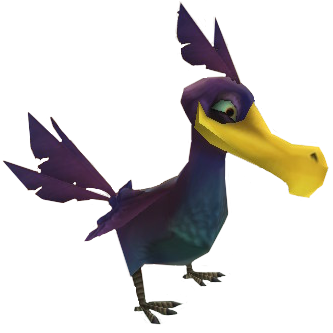 Guay Guay
|
Since the Guay can fly, it will have to be defeated with a projectile like Skyward Strike while it is airborne. When it swoops, you can use your melee sword attacks. |
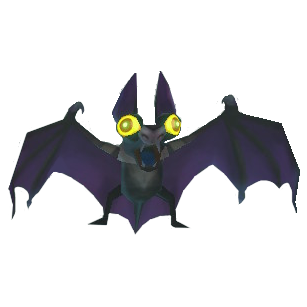 Keese Keese
|
Keese can simply be defeated by attacking it with a sword. Note that it won't drop rupees or treasure if you defeat it with a whip. |
 Octorok Octorok
|
Octorok can be defeated by repelling the rocks it spits with a Shield Bash. You can also use the Slingshot and strike it after stunning it. |
 Quadro Baba Quadro Baba
|
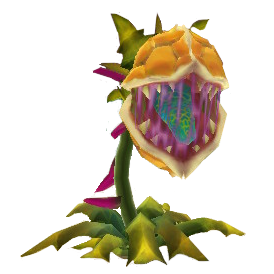
You can slash it across its mouth the moment it opens, or hit it when it is stunned by a shield attack. You may need multiple hits before downing it. Use the Beetle to instantly defeat it. |
 Red Bokoblin Red Bokoblin
|
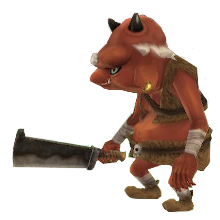
Red Bokoblin can be easily defeated with a sword or bow. Invite an attack and repel it with a Shield Bash, then strike. |
 Red Bokoblin (Leader) Red Bokoblin (Leader)
|
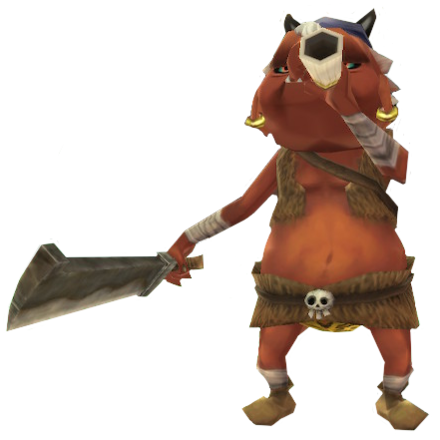
Leaders have the same attack pattern as Red Bokoblins, and can be defeated with a sword or bow. You can take away its Monster Horn with a whip to prevent it from alerting nearby Bokoblins. |
 Walltula Walltula
|
All weapons are effective, but it is best to shoot them down by using a Slingshot or Beetle. |
 Wooden Shield Moblin Wooden Shield Moblin
|
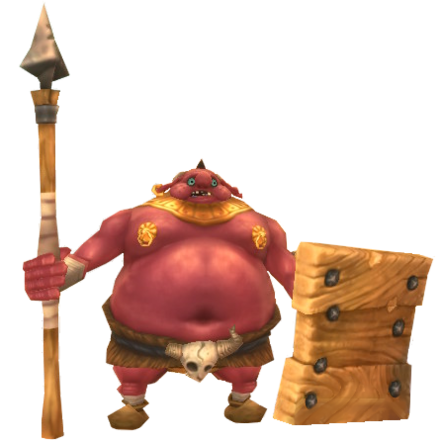
Slash away its shield first with a sword until it is destroyed, then you can freely hit it. Avoid its attacks indicated by its wind-ups. |
Skyward Sword HD Related Guides

| Skyward Sword Walkthough | |
|---|---|
| Complete Story Walkthrough | |
| Dungeons and Temples List | Silent Realm Guide |
Main Locations
| Three Ancient Tablets | |
|---|---|
 Skyloft Skyloft |
 Sealed Grounds Sealed Grounds |
 Faron Woods Faron Woods |
 Skyview Temple Skyview Temple |
 Eldin Volcano Eldin Volcano |
 Earth Temple Earth Temple |
 Lanayru Mine Lanayru Mine |
 Lanayru Desert Lanayru Desert |
 Lanayru Mining Facility Lanayru Mining Facility |
 Sealed Grounds (Second Visit) Sealed Grounds (Second Visit) |
| Three Sacred Flames | |
 Skyloft (Second Visit) Skyloft (Second Visit) |
 Inside Thunderhead (Isle of Songs) Inside Thunderhead (Isle of Songs) |
 Faron Woods (Second Visit) Faron Woods (Second Visit)
|
 Lake Floria Lake Floria |
 Skyview Temple (Second Visit) Skyview Temple (Second Visit) |
 Ancient Cistern Ancient Cistern |
 Lanayru Sand Sea Lanayru Sand Sea |
 Sandship Sandship |
 Volcano Summit Volcano Summit |
 Fire Sanctuary Fire Sanctuary |
| Song of the Hero | |
 Sealed Grounds (Third Visit) Sealed Grounds (Third Visit) |
 Skyloft (Third Visit) Skyloft (Third Visit) |
 Faron Woods (Third Visit) Faron Woods (Third Visit) |
 Eldin Volcano (Second Visit) Eldin Volcano (Second Visit) |
 Lanayru Gorge Lanayru Gorge |
 Sky Keep Sky Keep |
 Final Battle Final Battle |
|
Silent Realm Trials
| Silent Realm Trials | |
|---|---|
 Farore's Trial Farore's Trial |
 Nayru's Trial Nayru's Trial |
 Din's Trial Din's Trial |
 The Goddess's Trial The Goddess's Trial |
Author
The Legend of Zelda: Skyward Sword Walkthrough & Guides Wiki
Faron Woods Walkthrough: All Maps, Kikwi Locations, Treasure Chests, Goddess Cubes, and Heart Pieces
improvement survey
03/2026
improving Game8's site?

Your answers will help us to improve our website.
Note: Please be sure not to enter any kind of personal information into your response.

We hope you continue to make use of Game8.
Rankings
- We could not find the message board you were looking for.
Gaming News
Popular Games

Genshin Impact Walkthrough & Guides Wiki

Honkai: Star Rail Walkthrough & Guides Wiki

Umamusume: Pretty Derby Walkthrough & Guides Wiki

Pokemon Pokopia Walkthrough & Guides Wiki

Resident Evil Requiem (RE9) Walkthrough & Guides Wiki

Monster Hunter Wilds Walkthrough & Guides Wiki

Wuthering Waves Walkthrough & Guides Wiki

Arknights: Endfield Walkthrough & Guides Wiki

Pokemon FireRed and LeafGreen (FRLG) Walkthrough & Guides Wiki

Pokemon TCG Pocket (PTCGP) Strategies & Guides Wiki
Recommended Games

Diablo 4: Vessel of Hatred Walkthrough & Guides Wiki

Cyberpunk 2077: Ultimate Edition Walkthrough & Guides Wiki

Fire Emblem Heroes (FEH) Walkthrough & Guides Wiki

Yu-Gi-Oh! Master Duel Walkthrough & Guides Wiki

Super Smash Bros. Ultimate Walkthrough & Guides Wiki

Pokemon Brilliant Diamond and Shining Pearl (BDSP) Walkthrough & Guides Wiki

Elden Ring Shadow of the Erdtree Walkthrough & Guides Wiki

Monster Hunter World Walkthrough & Guides Wiki

The Legend of Zelda: Tears of the Kingdom Walkthrough & Guides Wiki

Persona 3 Reload Walkthrough & Guides Wiki
All rights reserved
© Nintendo. The Legend of Zelda, Nintendo Switch and amiibo are trademarks of Nintendo © 2021 Nintendo.
The copyrights of videos of games used in our content and other intellectual property rights belong to the provider of the game.
The contents we provide on this site were created personally by members of the Game8 editorial department.
We refuse the right to reuse or repost content taken without our permission such as data or images to other sites.





![Monster Hunter Stories 3 Review [First Impressions] | Simply Rejuvenating](https://img.game8.co/4438641/2a31b7702bd70e78ec8efd24661dacda.jpeg/thumb)


