This survey will take about 1 minute.
Your answers will help us to improve our website.
Zelda: Skyward Sword
Skyview Temple Walkthrough: Maps and How to Clear the First Temple
★All Pieces of Heart & Goddess Cubes Locations
☆How to Get All Gratitude Crystals
★Empty Bottle Guide
This is a complete guide to Skyview Temple for The Legend of Zelda: Skyward Sword HD for the Nintendo Switch. Read on to learn more about how to progress through the story, where to find treasure chests, Goddess Cubes, Heart Pieces, and other collectibles, as well as how to beat story bosses and more!
List of Contents
Skyview Temple Maps and Treasure Chest Locations
Skyview Temple Map
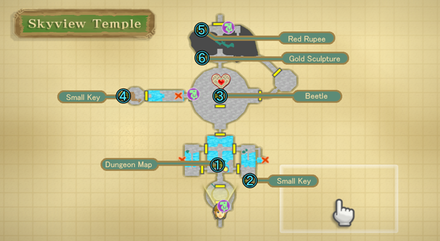
Treasure Chests - 6 Locations Total
| Contents | |
|---|---|
| ① | Dungeon Map |
| ② | Small Key |
| ③ | Beetle |
| ④ | Small Key |
| ⑤ | Red Rupee |
| ⑥ | Gold Sculpture |
Skyview Temple Goddess Cubes Locations
Goddess Cubes - 1 Location Total
| Reward Required Item | Goddess Cube Location | Goddess Chest Location |
|---|---|---|
| Gold Rupee (300 Rupees) None |
 Behind the Goddess Statue of Skyview Spring in Skyview Temple. |
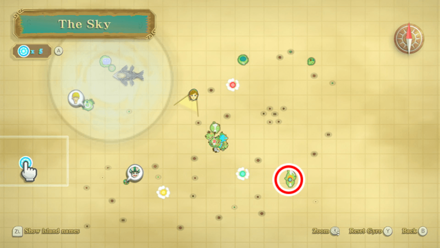 Fly to the Pumpkin Landing and land on top of the Lumpy Pumpkin to reach the Goddess Chest. |
Skyview Temple Pieces of Heart Locations
Pieces of Heart - 1 Location Total
| How to Get Heart Piece #4 | ||
|---|---|---|
 |
||
| Required Items | Beetle | |
| Map Location |
 Skyview Temple |
|
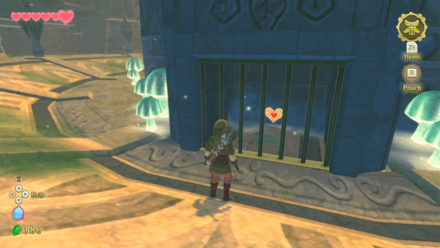
| How to Get | Activate the crystal switch inside the Bird Statue in Skyview Temple and open the chest to obtain the Piece of Heart. | |
How to Get All Pieces of Heart
Skyview Temple (1st Visit) Story Walkthrough
| Objectives |
|---|
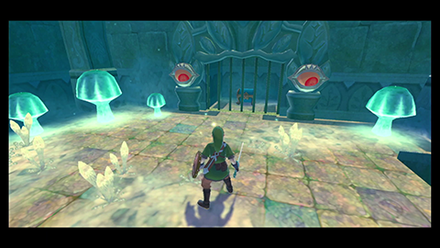
| 1. Head down the stairs then activate the Red Crystal. |
| 2. Unlock the one-eyed Eye Door to proceed. |
| 3. Activate the Red Crystal above the east door and enter the east room. |
| 4. Activate the Red Crystal in this room to raise the water level. |
| 5. Return to the central room. Activate the Red Crystal under the door of the west room. |
| 6. Activate the Red Crystal in this room to raise the water level more. |
| 7. Return to the central room. Climb up to the entrance of the southeast room. |
| 8. Unlock the two-eyed Eye Door to get the Small Key. |
| 9. Use the Small Key to unlock the door in the central room to proceed to the large chamber. |
| 10. Shoot the Red Crystal above the building. |
| 11. Defeat the Stalfos inside to get the Beetle. |
| 12. Guide the Beetle out of the room to reactivate the Red Crystal allowing you to exit back into the large chamber. |
| 13. Guide the Beetle through the alcoves above the western door to activate the Red Crystal. |
| 14. Head to the back of the room and unlock the three-eyed Eye Door to get a Small Key. |
| 15. Use the Beetle on the way back to activate the Red Crystal. |
| 16. Return to the large chamber. Use the Beetle to defeat the Deku Baba above the tightrope leading to the eastern door. |
| 17. Use the Small Key to enter the eastern room. |
| 18. Swing across the ropes and vines to get to the Golden Carving. |
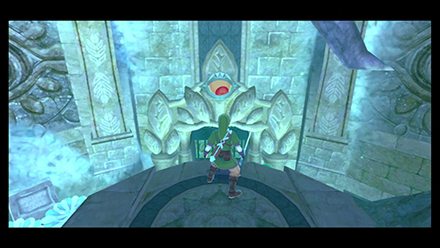
| 19. Open the Boss Door with the Golden Carving. |
| 20. Fight the boss, Demon Lord Ghirahim. |
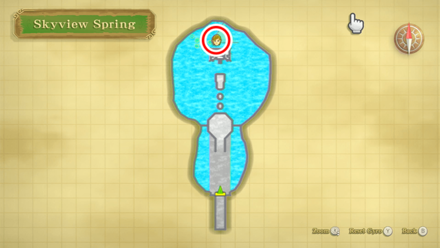
| 21. Perform a Skyward Strike on the crest in the Skyview Spring. |
| 22. Return to Skyloft and place the Ruby Tablet in the receptacle Inside the Statue of the Goddess. |
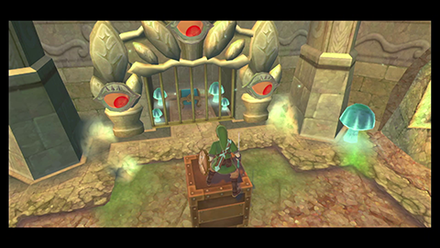
Head down the stairs then activate the Red Crystal
Strike the Red Crystal to open up the gate below. Head through the gate and climb the pedestal.
Unlock the one-eyed Eye Door to proceed
Rotate your sword quickly to make the eye dizzy
The eye above the gate will affix it's gaze at your sword. Swing the sword around to make the eye dizzy. Once successful, the eye will break and the gate below will open.
Activate the Red Crystal above the east door and enter the east room
Defeat the Green Bokoblin in this central room. Aim above the gate to your right to hit another Red Crystal with your Slingshot. The gate below will open; go through it.
Activate the Red Crystal in this room to raise the water level
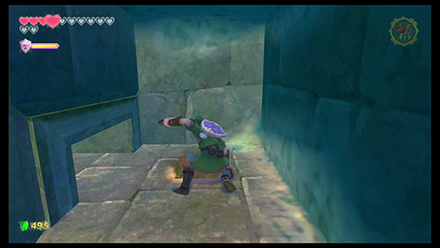
Crawl through the hole on the lower level to find the Red Crystal
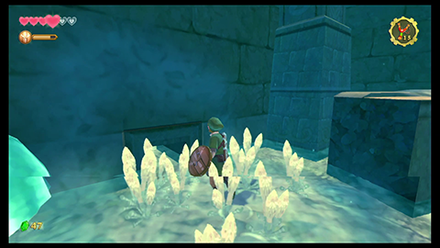
Proceed with caution as you cut down webs and defeat the Walltulas and Skulltulas in the room. On the lower level, look for an alcove you can crawl through on the left wall. On the other side, hit the Red Crystal above the statue.
Return to the central room. Activate the Red Crystal under the door of the west room
Go back to the central hall and head to the room opposite you. Drop down into the water to discover a passage under the door. Strike the Red Crystal found here to open the western door.
Activate the Red Crystal in this room to raise the water level more
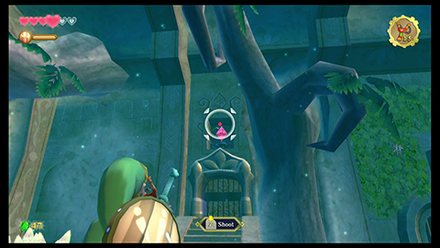
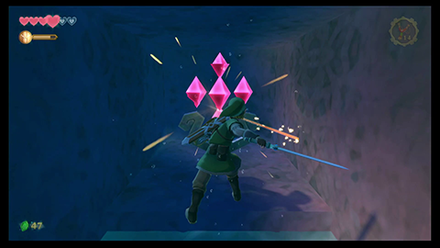
Lower the vines using your Slingshot then swing across

Defeat the Green Bokoblin found here, but ignore the Skulltula for now. Shoot the two vines down on the right side of the room to swing across. Get on the bridge, attack the Skulltula's bellies. Look to your left and shoot the Red Crystal to raise the water level even further.
Don't forget to climb the nearby stairs into the door. Follow the path to find a blue chest with a Dungeon Map inside.
Return to the central room. Climb up to the entrance of the southeast room
Head back to the central room and jump onto the floating log on the east side of the room. Cross it and climb up the vines on the wall. Follow the path and enter the door.
Unlock the two-eyed Eye Door to get the Small Key
Make both eyes dizzy at the same time
Defeat the Skulltula on this side of the room, then proceed to disable both eyes on the sides of the gate with the chest. Obtain a small key.
Eye Sentry Guide: How to Pass the Temple Eye Door
Shoot the Red Crystal above the building
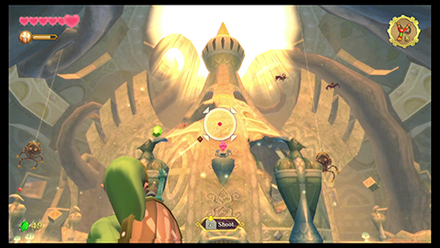
Shoot at the Red Crystal in front of you to open the gate beneath it. Prepare for a miniboss fight then enter the dome.
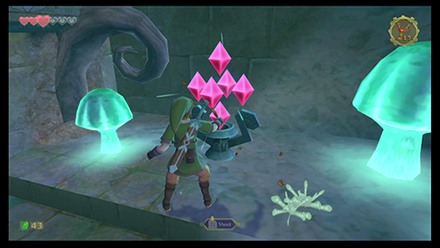
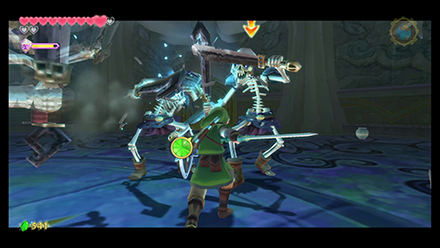
Defeat the Stalfos inside to get the Beetle
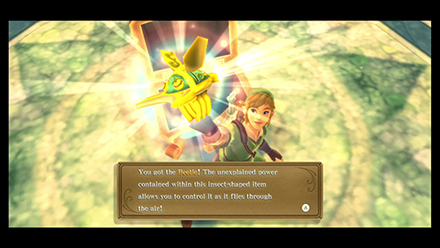
In the dome, you'll have to duel with a Stalfos. He wields two swords so it's best to attack it in the direction where the swords aren't. Alternatively, wait for him to strike before executing a Shield Bash to stun him. Then counterattack with slashes of your own.
After defeating the Stalfos, open the Blue Chest to obtain a Beetle.
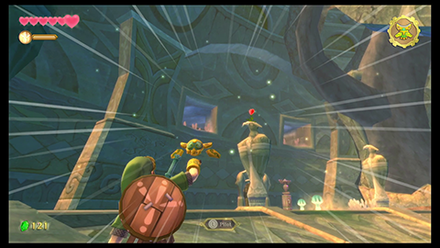
Guide the Beetle out of the room to reactivate the Red Crystal allowing you to exit back into the large chamber

Equip the Beetle and shoot it towards one of the openings in the ceiling. Guide the beetle to hit the Red Crystal outside of the room. This will allow you to exit back into the large chamber.
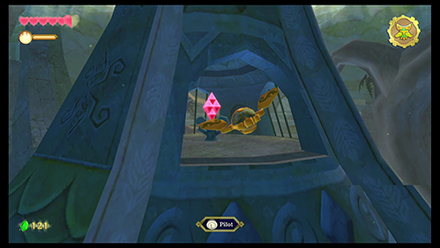
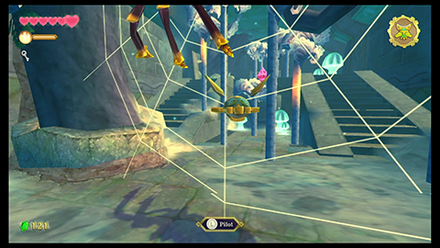
Guide the Beetle through the alcoves above the western door to activate the Red Crystal
Head towards the west part of the large chamber, near where the bird statue is. Guide the Beetle through the small openings on the wall to open the gate.
Get the Heart Piece in Skyview Temple
You may also guide the Beetle to the top of the Stalfos' dome where a Red Crystal can be found. Activating this Crystal will give you access to a Piece of Heart behind the dome.
Head to the back of the room and unlock the three-eyed Eye Door to get a Small Key
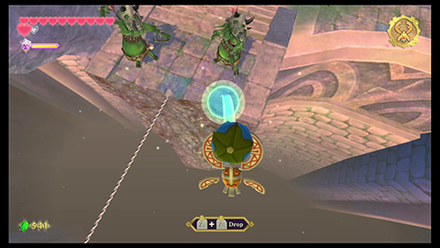
Use the box as a platform
This room has a Skulltula to beat and another eye puzzle. Standing in the center will catch the attention of two of the eyes, but to open the third, you'll need to be higher. Pilot the beetle to the upper part of the room to drop a crate.
Climb the vines on the right to get to the upper part of the room, then push the crate down. Jump back down to the lower part of the room, then push the crate to the middle then stand on top of it. You'll then be able to disable all three eyes at the same time. Gain access to the blue chest then obtain the small key.
Use the Beetle on the way back to activate the Red Crystal
Head back through where you came in, but this time, send a beetle to the opposite direction and past the Skulltula to hit the Red Switch. The water level will rise. Allowing you to swim across to the steps on your left.
Continue along by cutting down the web and defeating the Skulltula. Then proceed up the stairs, cut down the skinny trees, then crawl through the passageway. This should lead you back to the main chamber.
Return to the large chamber. Use the Beetle to defeat the Deku Baba above the tightrope leading to the eastern door
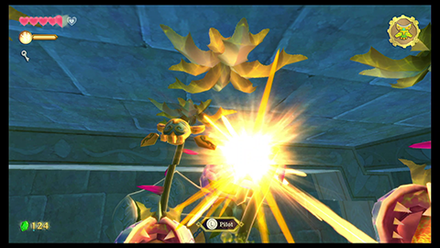
Head to the Eastern room where a locked door can be found beyond a tightrope. The path will be blocked by 5 Deku Babas from the ceiling. Use the Beetle to cut down the stems of these Deku Babas before proceeding.
Use the Small Key to enter the eastern room
Defeat the Staldra by slashing across its heads at the same time
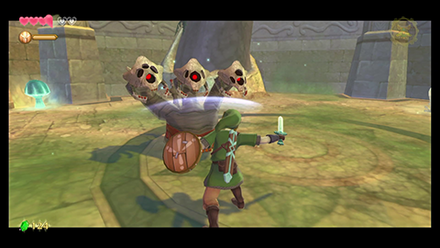
Unlock the door and go through it. Proceed through the hallway cutting down the boards in your way. You'll find yourself in a small room with a Staldra. Defeat it by striking all three heads in one slice.
Swing across the ropes and vines to get to the Golden Carving

Traverse the branches then swing from one vine to another to get to the corner of the room with the silver chest. Here you'll obtain a Golden Carving which you'll need to open the boss door.
Fight the boss, Demon Lord Ghirahim
Strike Ghirahim's hand
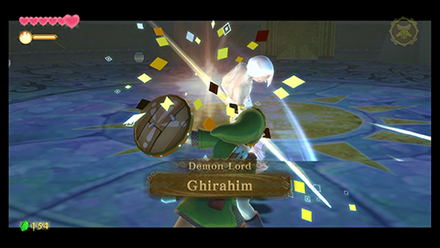
Battle Ghirahim. For his first sequence, he will approach you as if reaching for your sword. Attack in the direction opposite of his hand to avoid getting your sword grabbed.
Shield Bash and counterattack
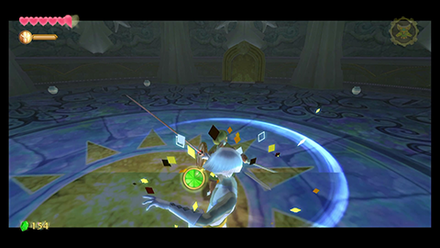
For his next sequence, he will equip himself with a sword. With proper timing, you may shield bash his attack then counterattack. He may also attack you with projectiles which you can reflect with your shield, or by slashing in the same direction as how the projectiles form. Whenever he teleports close to you, we recommend using a spin attack to catch him off guard.
Continue to Eldin Volcano Walkthrough
Skyview Temple (2nd Visit) Story Walkthrough
Remember to acquire an Empty Bottle to collect the Sacred Water.
| Objectives |
|---|
| 1. Find a Small Key in a hole on the eastern room |
| 2. Defeat the Archer Bokoblins across the tightrope |
| 3. Defeat the 3 Stalfos in the Boss Room |
| 4. Retrieve Sacred Water in the Skyview Spring |
| 5. Give Faron the Sacred Water |
| 6. Head to the Ancient Cistern |
Find a Small Key in a hole on the eastern room
Once in the large room with the bird statue, go to the room on the right. Dive into the water and swim through the small opening and into the next room.
Swim to the surface then climb up the vines on the wall to find the hole with a small key buried in the ground.
Head back to the main room and use the small key to unlock the door. Continue forward to the deepest part of the temple.
Defeat the Archer Bokoblins across the tightrope
You should find two archer Bokoblins across the tightrope. It would be really difficult to cross with the two of them firing at you. We recommend going back out of sight into the previous room first.
From here, use a beetle to fly in, grab a bomb flower from beneath the branch and dropping it onto the Archers. Now you can safely cross the tightrope.
Defeat the 3 Stalfos in the Boss Room
Go through the boss door to find yourself battling 3 Stalfos. They will have the same attack patterns as before, but now there are more of them. Do your best to strike them at an angle where they cannot block your strike.
Alternatively, we recommend using Bombs. When caught in an explosion, their arms will drop leaving them unarmed. During this brief moment, they will be vulnerable to all manners of attacks.
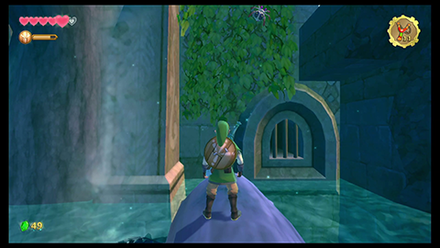
Retrieve Sacred Water in the Skyview Spring
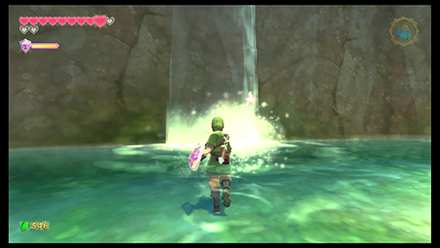
With the Stalfos defeated, enter the golden door to access the Skyview Spring and collect the Sacred Water. Remember: an empty bottle is required to collect the Sacred Water.
Bring the Sacred Water back to Faron and pour it in her basin. As a reward for your help, she will lead you to the location of the Sacred Flame, the Ancient Cistern.
Continue to the Ancient Cistern Walkthrough
Skyview Temple Boss
Ghirahim (1st Visit)
Ghirahim is the boss you will face at the end of Skyview Temple. Use your sword and shield to defeat him in a one on one battle.
Stalfos (1st Visit)
While navigating Skyview Temple, you'll face against a Stalfos miniboss. Defeating it rewards you with the Beetle.
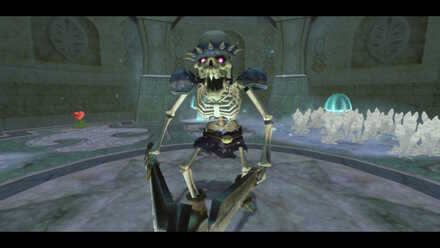
Three Stalfos (2nd Visit)

During the quest to obtain the Sacred Water for Faron, you'll face against three Stalfos in the room where you first fought Ghirahim. Defeating them allows you to access Skyview Spring and collect the Sacred Water.
Skyview Temple Enemies
| List of Enemies | Strategy |
|---|---|
 Deku Baba Deku Baba
|
Slash horizontally or vertically according to the orientation of its mouth. You can also cut off its stem with a Beetle to instantly defeat it. |
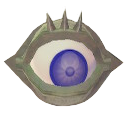 Eye Sentry Eye Sentry
|
Daze the eye by rotating your sword in a circular manner. |
 Froak Froak
|
Froaks will explode if you blow it off with Gust Bellows or with a sword against terrain or enemies. Note that sword attacks do not work. |
 Green Bokoblin Green Bokoblin
|
Green Bokoblins attack exactly the same as Red Bokoblins. Invite an attack and repel it with a Shield Bash, then strike. |
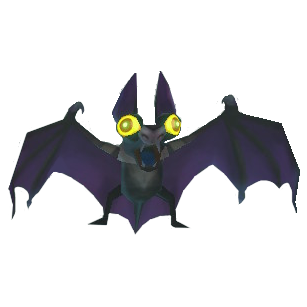 Keese Keese
|
Keese can simply be defeated by attacking it with a sword. Note that it won't drop rupees or treasure if you defeat it with a whip. |
 Quadro Baba Quadro Baba
|
You can slash it across its mouth the moment it opens, or hit it when it is stunned by a shield attack. You may need multiple hits before downing it. Use the Beetle to instantly defeat it. |
 Skulltula Skulltula
|
While it is hanging from the ceiling, cut down the thread to make it fall. Use vertical spin attack to make it fall on its back, then use Fatal Blow. You can also turn it around while it is hanging then strike the purple orb behind it. |
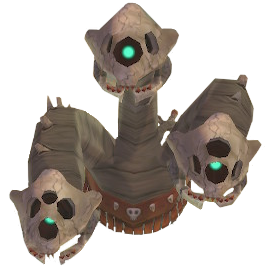 Staldra Staldra
|
Destroy all 3 heads at the same time. If you break only one head, the heads will line up in a straight line at the moment of regeneration, this will give you an opportune time to slash them all at once. |
 Stalfos Stalfos
|
Attack the side it is not protecting, or repel its attack with a Shield Bash to open a gap to its defenses. You can also use Bombs to stun it. |
 Walltula Walltula
|
All weapons are effective, but it is best to shoot them down by using a Slingshot or Beetle. |
Skyward Sword HD Related Guides
Main Locations
| Three Ancient Tablets | |
|---|---|
 Skyloft Skyloft |
 Sealed Grounds Sealed Grounds |
 Faron Woods Faron Woods |
Skyview Temple |
 Eldin Volcano Eldin Volcano |
 Earth Temple Earth Temple |
 Lanayru Mine Lanayru Mine |
 Lanayru Desert Lanayru Desert |
 Lanayru Mining Facility Lanayru Mining Facility |
Sealed Grounds (Second Visit) |
| Three Sacred Flames | |
| Skyloft (Second Visit) |
 Inside Thunderhead (Isle of Songs) Inside Thunderhead (Isle of Songs) |
| Faron Woods (Second Visit)
|
 Lake Floria Lake Floria |
| Skyview Temple (Second Visit) |
 Ancient Cistern Ancient Cistern |
 Lanayru Sand Sea Lanayru Sand Sea |
 Sandship Sandship |
 Volcano Summit Volcano Summit |
 Fire Sanctuary Fire Sanctuary |
| Song of the Hero | |
| Sealed Grounds (Third Visit) |
Skyloft (Third Visit) |
| Faron Woods (Third Visit) |
Eldin Volcano (Second Visit) |
 Lanayru Gorge Lanayru Gorge |
 Sky Keep Sky Keep |
 Final Battle Final Battle |
|
Silent Realm Trials
| Silent Realm Trials | |
|---|---|
 Farore's Trial Farore's Trial |
 Nayru's Trial Nayru's Trial |
 Din's Trial Din's Trial |
 The Goddess's Trial The Goddess's Trial |
Author
The Legend of Zelda: Skyward Sword Walkthrough & Guides Wiki
Skyview Temple Walkthrough: Maps and How to Clear the First Temple
Please participate in our site
improvement survey
03/2026
improvement survey
03/2026
Would you assist in
improving Game8's site?
improving Game8's site?

×
We are listening to our users' valuable opinions and discussing how to act on them.
The information collected through this survey will be used for the purpose of improving our services. In addition, the information will only be disclosed a part of a statistic in a format that will not allow identification of personal information.
Begin Survey
Not Now
×
Please rate each item regarding Game8.co's Advertisements.
Amount of Ads
Very Dissatisfied
Somewhat Dissatisfied
Fine
Somewhat Satisfied
Highly Satisfied
Placement of Ads
Timing of Ad Display
Ad Loading Speed
Safeness of Ads
Content of Ads
×
Please rate each item regarding Game8.co's Quality of Articles.
Amount of information
Very Dissatisfied
Somewhat Dissatisfied
Fine
Somewhat Satisfied
Highly Satisfied
Frequency of updates
Speed of new information
Accuracy of articles
Understandibility of articles
Readability of sentences
×
Please rate each item regarding Game8.co's Usability of the Site.
Ease of finding information
Very Dissatisfied
Somewhat Dissatisfied
Fine
Somewhat Satisfied
Highly Satisfied
Loading Speed
Use of Color
Font Size
Visibility of Images
Easy to Understand Layout
×
Please rate each item regarding Game8.co's Message Boards, Comments.
Ease of Writing
Very Dissatisfied
Somewhat Dissatisfied
Fine
Somewhat Satisfied
Highly Satisfied
Readability
Ease in Finding Information
Comment Quality
Comment Quantity
Admin Response
×
Please rate each item regarding Game8.co's Site's new design.
Please rate our site's new design
Very Dissatisfied
Somewhat Dissatisfied
Fine
Somewhat Satisfied
Highly Satisfied
Do you think that the website's design change makes the site easier to use?
Has the new design made it easier for you to find information on the site?
Has the new design improved the overall visual appeal of the site?
How would you rate your overall satisfaction with the new design of the site?
×
How likely are you to recommend Game8 to someone you know?
Very Unlikely
0
1
2
3
4
5
6
7
8
9
10
Very Likely
If you have other opinions regarding potential improvement to the website, please share them with us. We would appreciate your honest opinion.
Note: This is a free response section, so you can proceed without entering anything.
Note: Please be sure not to enter any kind of personal information into your response.
Note: Please be sure not to enter any kind of personal information into your response.
×
Thank You
×
Thank you for participating in our survey! Your answers will help us to improve the quality of our website and services.
We hope you continue to make use of Game8.
We hope you continue to make use of Game8.
Close
Rankings
- We could not find the message board you were looking for.
Gaming News


![Monster Hunter Stories 3 Review [First Impressions] | Simply Rejuvenating](https://img.game8.co/4438641/2a31b7702bd70e78ec8efd24661dacda.jpeg/thumb)
Popular Games

Genshin Impact Walkthrough & Guides Wiki
Honkai: Star Rail Walkthrough & Guides Wiki
Umamusume: Pretty Derby Walkthrough & Guides Wiki
Pokemon Pokopia Walkthrough & Guides Wiki
Resident Evil Requiem (RE9) Walkthrough & Guides Wiki
Monster Hunter Wilds Walkthrough & Guides Wiki
Wuthering Waves Walkthrough & Guides Wiki
Arknights: Endfield Walkthrough & Guides Wiki
Pokemon FireRed and LeafGreen (FRLG) Walkthrough & Guides Wiki
Pokemon TCG Pocket (PTCGP) Strategies & Guides Wiki


Recommended Games
Diablo 4: Vessel of Hatred Walkthrough & Guides Wiki
Cyberpunk 2077: Ultimate Edition Walkthrough & Guides Wiki
Fire Emblem Heroes (FEH) Walkthrough & Guides Wiki
Yu-Gi-Oh! Master Duel Walkthrough & Guides Wiki
Super Smash Bros. Ultimate Walkthrough & Guides Wiki
Pokemon Brilliant Diamond and Shining Pearl (BDSP) Walkthrough & Guides Wiki
Elden Ring Shadow of the Erdtree Walkthrough & Guides Wiki
Monster Hunter World Walkthrough & Guides Wiki
The Legend of Zelda: Tears of the Kingdom Walkthrough & Guides Wiki
Persona 3 Reload Walkthrough & Guides Wiki


All rights reserved
© Nintendo. The Legend of Zelda, Nintendo Switch and amiibo are trademarks of Nintendo © 2021 Nintendo.
The copyrights of videos of games used in our content and other intellectual property rights belong to the provider of the game.
The contents we provide on this site were created personally by members of the Game8 editorial department.
We refuse the right to reuse or repost content taken without our permission such as data or images to other sites.