Complete Story Walkthrough
★All Pieces of Heart & Goddess Cubes Locations
☆How to Get All Gratitude Crystals
★Empty Bottle Guide
This is the complete story walkthrough for The Legend of Zelda: Skyward Sword HD for the Nintendo Switch. Read on to learn how to progress each part of the story and see a detailed walkthrough below!
List of Contents
Complete Story Walkthrough
Skyloft

| Objectives | |
|---|---|
| 1 | Exit the Knight Academy and pick up Mia. |
| 2 | Obtain the Practice Sword and find your Loftwing. |
| 3 | Win the race and use the Sailcloth to land on the circle to complete the Wing Ceremony. |
| 4 | Follow the floating figure to enter inside the Statue of the Goddess. |
| 5 | Run to a wooden platform to jump off. Summon your Loftwing and head towards the green beam of light. |
Sealed Grounds
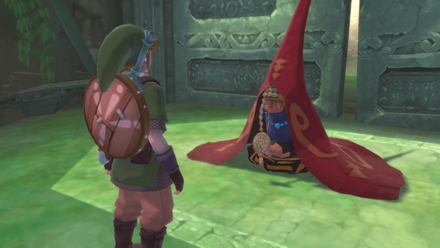
| Objectives | |
|---|---|
| 1 | Follow the path and reach the lowest point of the spiraling path. Perform a Skyward Strike on the evil-infested pillar. |
| 2 | Enter the Sealed Temple and open the chest next to the old woman to obtain a Revitalizing Potion. |
| 3 | Exit the Sealed Temple and follow the path. Defeat the enemies harassing the Goron. Talk to the Goron for a Bird Statue to appear. |
| 4 | Move past the bird statue and push the log towards the high ledge. Climb up the ledge to enter Faron Woods. |
Faron Woods
| Objectives | |
|---|---|
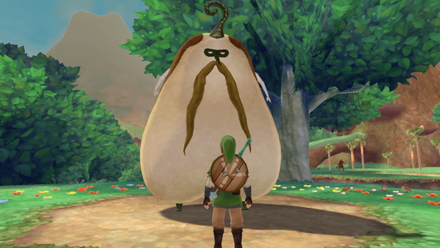
| 1 | Find all three Kikwis in the woods and obtain the Slingshot. |
| 2 | Use the Slingshot to hit the red gem on the ceiling at temple's entrance to open the doors. Head inside to enter the Skyview Temple. |
Skyview Temple

| Objectives | |
|---|---|
| 1 | Proceed through the dungeon and obtain the Beetle. |
| 2 | Defeat Ghirahim and head to the Skyview Spring. Perform a Skyward Strike at the pedestal to obtain the Ruby Tablet. |
| 3 | Return to Skyloft and head inside the Statue of the Goddess. Place the Ruby Tablet inside. |
Eldin Volcano

| Objectives | |
|---|---|
| 1 | Purchase an Iron Shield from the Bazaar and fly towards the red beam of light to enter the Eldin Volcano. |
| 2 | Make your way through the volcano and clear the chamber of enemies to obtain the Digging Mitts. |
| 3 | Collect the five pieces of the key to open the gates to enter the Earth Temple. |
Earth Temple
| Objectives | |
|---|---|
| 1 | Head inside the temple and pick up the Bomb Bag. Defeat the two miniboss. |
| 2 | Defeat Scaldera at the end of the dungeon to obtain the Amber Tablet. |
| 3 | Return to Skyloft and head inside the Statue of the Goddess. Place the Amber Tablet inside. |
Lanayru Mine

| Objectives | |
|---|---|
| 1 | Fly towards the yellow beam of light to enter the Lanayru Mine. |
| 2 | Use the minecart to proceed through the area and enter the Lanayru Desert. |
Lanayru Desert

| Objectives | |
|---|---|
| 1 | Free the LD-301 from the cage to have the Beetle upgraded to the Hook Beetle. |
| 2 | Activate the three generators to reveal the Lanayru Mining Facility. |
Lanayru Mining Facility

| Objectives | |
|---|---|
| 1 | Make your way inside the facility and obtain the Gust Bellows. |
| 2 | Pick up the Ancient Circuit to enter the boss room. |
| 3 | Defeat Moldarach at the end of the dungeon and obtain the Goddess's Harp. |
Lanayru Mining Facility Walkthrough
Sealed Grounds (Second Visit)
| Objectives | |
|---|---|
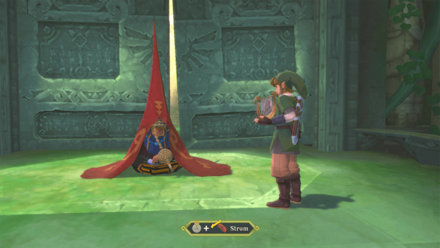
| 1 | Fly towards the green beam of light to enter Faron Woods. |
| 2 | Learn the Ballad of the Goddess and jump down to the bottom of the pit outside the Sealed Temple. |
| 3 | Defeat The Imprisoned and head back to Skyloft to find the three Sacred Flames. |
Sealed Grounds (Second Visit) Walkthrough
Skyloft (Second Visit)

| Objectives | |
|---|---|
| 1 | Head to the Knight Academy and ask for the lyrics to the Ballad of the Goddess from Headmaster Gaepora. |
| 2 | Head to the Scrap Shop and talk to Gondo. Give him an Ancient Flower to repair the robot. |
| 3 | Find the missing windmill propeller at Eldin Volcano and rotate the two windmills to face the Light Tower at Skyloft. |
| 4 | Play the Ballad of the Goddess on top of the Light Tower to reveal a beam of light passing through the Thunderhead. |
Skyloft (Second Visit) Walkthrough
Inside Thunderhead (Isle of Songs)
| Objectives | |
|---|---|
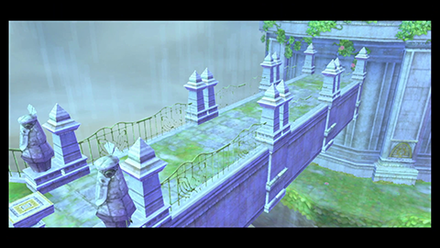
| 1 | Head north towards the blue beam of light to enter the Thunderhead. |
| 2 | Solve the puzzle to form the bridge and crawl through the tunnel to proceed to the next area. |
| 3 | Head to the end of the path and perform a Skyward Strike at the crest to learn Farore's Courage. Exit the room and head to Faron Woods. |
Thunderhead (Isle of Songs) Walkthrough
Faron Woods (Second Visit)

| Objectives | |
|---|---|
| 1 | Land on the Faron Woods Entry and head towards the temple ruins northeast of the map. |
| 2 | Approach the open area with Blessed Butterflies and play the Goddess's Harp. Walk to the circle and thrust the sword downward to activate the Trial Gate. |
| 3 | Complete Farore's Silent Realm to obtain the Water Dragon's Scale. |
| 4 | Head to the top of the Great Tree and talk to the old Kikwi, Yerbal to learn the location of the gate. |
| 5 | Head to the south end of Faron Woods to reach the gate. Perform a Skyward Strike and approach the gate while it is charged. Draw a circle on the empty space to open the gate to Lake Floria. |
Faron Woods (Second Visit) Walkthrough
Farore's Silent Realm Walkthrough
Lake Floria

| Objectives | |
|---|---|
| 1 | Follow the Parella as you swim your way towards the Water Dragon's room. |
| 2 | Talk to the Water Dragon and agree to bring her a bottle with Sacred Water. |
| 3 | Head back to Faron Woods and enter Skyview Temple. |
Skyview Temple (Second Visit)

| Objectives | |
|---|---|
| 1 | Make use of the shortcuts you have opened up and head towards the boss room. Defeat the three Stalfos in the room. |
| 2 | Head to the Skyview Spring and use the Empty Bottle to scoop up some water from the waterfall to pick up some Sacred Water. |
| 3 | Go back to the Water Dragon and give her the Sacred Water. Head to the new location that the dragon opened up to enter the Ancient Cistern. |
Skyview Temple (Second Visit) Walkthrough
Ancient Cistern
| Objectives | |
|---|---|
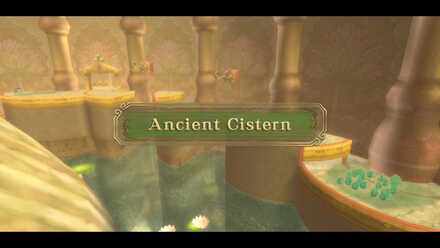
| 1 | Defeat the Stalmaster miniboss to obtain the Whip. |
| 2 | Pick up the Blessed Idol and activate all four wind-up keys to enter the boss room. |
| 3 | Defeat Koloktos at the end of the dungeon. Perform a Skyward Strike at the crest to obtain the Sacred Flame and upgrade the Goddess Sword to the Goddess Longsword. |
Lanayru Sand Sea

| Objectives | |
|---|---|
| 1 | Fly to the Isle of Songs in the Thunderhead and head to the altar. Perform a Skyward Strike on the crest to learn Nayru's Wisdom. |
| 2 | Land on the North Desert Bird Statue at the Lanayru Desert. Find the spot with Blessed Butterflies east of the statue and use the Goddess's Harp to enter the Silent Realm. |
| 3 | Complete Nayru's Silent Realm to obtain the Clawshots. |
| 4 | Use the Clawshots to make your way to Lanayru Sand Sea. |
| 5 | Find the old boat and the ancient robot and hit the Timeshift Stone to activate it. Use the boat to head over to Skipper's Retreat and obtain the Ancient Sea Chart. |
| 6 | Head to the Shipyard and use the minecart to travel to the Shipyard Construction Bay. |
| 7 | Defeat Moldarach to open the gate leading to the Pirate Stronghold. Activate the main structure of the stronghold to unlock the Sandship as a dowsing target. |
| 8 | Use Dowsing to locate the Sandship and fire the cannon repeatedly to reveal the ship. |
Sandship

| Objectives | |
|---|---|
| 1 | Defeat the miniboss, Scervo, to obtain the Bow. |
| 2 | Pick up the Squid Carving from the captain's cabin and head to the engine room. |
| 3 | Defeat Tentalus at the engine room. Perform a Skyward Strike at the crest to obtain the Sacred Flame and upgrade the Goddess Longsword to the Goddess White Sword. |
Volcano Summit

| Objectives | |
|---|---|
| 1 | Fly to the Isle of Songs in the Thunderhead and head to the altar. Perform a Skyward Strike on the crest to learn Din's Power. |
| 2 | Land on the Volcano Ascent Bird Statue at the Eldin Volcano. Use Dowsing to find the location of the Silent Realm. |
| 3 | Complete Din's Silent Realm to obtain the Fireshield Earrings. |
| 4 | Use the Empty Bottle to fill it up with water. Pour the water on the two frog statues to remove the fiery gates. |
| 5 | Head back to Lake Floria and land on the Floria Waterfall Bird Statue. Talk to the Water Dragon to borrow the water basin. This allows you to pour water on the large frog statue at the entrance of the Fire Sanctuary. |
| 6 | Eliminate all the enemies while ascending back to the volcano and Scrapper should automatically pour water on the large frog statue. Head inside to enter the Fire Sanctuary. |
Fire Sanctuary
| Objectives | |
|---|---|
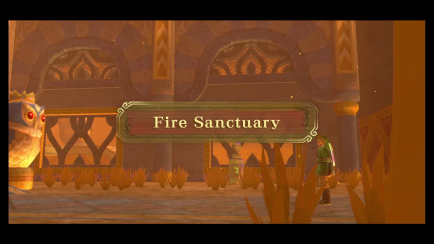
| 1 | Defeat the two miniboss, Dark Lizalfos and the two Magmanos. |
| 2 | Free the Mogma from the chains to obtain the Mogma Mitts. |
| 3 | Light up the bird statues in a certain order to obtain the Mysterious Crystals. Use it to open the door leading to the boss room. |
| 4 | Defeat Ghirahim for the second time and perform a Skyward Strike at the crest to obtain the Sacred Flame. This will upgrade the Goddess Longsword to the Master Sword. |
Sealed Grounds (Third Visit)
| Objectives | |
|---|---|
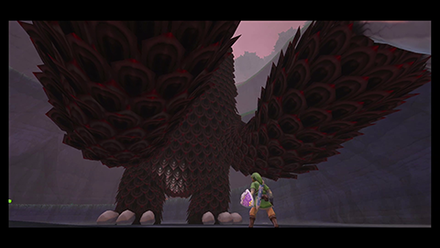
| 1 | Fly to the green beam of light and land at the "Behind the Temple" Bird Statue. |
| 2 | Head over to the old woman at the Sealed Temple. Stand on the pedestal and perform a Skyward Strike. |
| 3 | Jump to the bottom of the pit to defeat The Imprisoned for the second time. |
| 4 | After defeating the boss, perform a Skyward Strike at the temple to open the gate. Head into the Gates of Time to have the Master Sword achieve its ultimate form. |
Sealed Grounds (Third Visit) Walkthrough
Skyloft (Third Visit)

| Objectives | |
|---|---|
| 1 | Head inside the Knight Academy and talk to Headmaster Gaepora about the Triforce. |
| 2 | Talk to Instructor Owlan to learn the Spiral Charge attack and complete the practice course in under 120 seconds. |
| 3 | Fly to the Pumpkin Landing and get a special batch of pumpkin soup from Pumm. With the pumpkin soup, head inside the Thunderhead. |
| 4 | Fly into the Thunderhead region and look for the island with a rainbow. Land on the island and wait for Scrapper to deliver the pumpkin soup. This will start a boss fight with Levias. |
| 5 | Perform a Spiral Charge to knock out all four eyes on Levias. Land on the whale after defeating the eyes. |
| 6 | Defeat Bilocyte and head to Faron Woods to learn the four parts of the Song of the Hero. |
Skyloft Walkthrough (Third Visit)
Faron Woods (Third Visit)

| Objectives | |
|---|---|
| 1 | Land on the Sealed Grounds and jump down to the bottom of the pit to face The Imprisoned for the third time. |
| 2 | After defeating The Imprisoned, talk to the old woman to learn what happened to Faron Woods. |
| 3 | Hop on to the catapult to launch yourself towards Faron Woods. |
| 4 | Head inside the Great Tree and talk to the Water Dragon. |
| 5 | Collect all seventeen Tadnotes scattered in the woods to learn a part of the Song of the Hero. |
| 6 | Head back to Skyloft and fly towards Eldin Volcano. |
Faron Woods Walkthrough (Third Visit)
Eldin Volcano (Second Visit)

| Objectives | |
|---|---|
| 1 | Fly over to Eldin Volcano to find that the volcano is erupting. You will automatically land on the area. |
| 2 | Retrieve all your items as you make your way through the volcano to learn a part of the Song of the Hero. |
| 3 | Head back to Skyloft and fly towards Lanayru Desert. |
Eldin Volcano (Second Visit) Walkthrough
Lanayru Gorge

| Objectives | |
|---|---|
| 1 | Fly over to Lanayru Desert and talk to the Thunder Dragon. |
| 2 | Plant the Life Tree Seedling to turn it into a Life Tree Fruit. Give the fruit to the Thunder Dragon to have him teach you a part of the Song of the Hero. |
| 3 | Fly back to Skyloft and talk to Levias to complete the Song of the Hero. |
Sky Keep

| Objectives | |
|---|---|
| 1 | Fly towards the Thunderhead and speak with Levias to learn the last part of the Song of the Hero. |
| 2 | Head to the Light Tower in Skyloft. Look for the area with Blessed Butterflies and play the Goddess's Harp. Walk to the circle and thrust the sword downward to activate the Trial Gate. |
| 3 | Complete The Goddess's Silent Realm trial to obtain the Stone of Trials. |
| 4 | After passing all the trials, head to the northeast part of Skyloft and examine the bird statue near the entrance of the Waterfall Cave. |
| 5 | Use the Clawshots to grapple on the targets to reach the entrance of the temple. |
| 6 | Defeat Dreadfuse and make your way through the dungeon to obtain the Triforce of Courage, Triforce of Wisdom, and Triforce of Power. |
Final Battle

| Objectives | |
|---|---|
| 1 | Defeat the hordes of enemies that Ghirahim summons and proceed down the pathway. |
| 2 | Defeat Ghirahim for the third time and watch the cutscene that follows. |
| 3 | Approach the dark pit in the center of the area to face the final boss. |
| 4 | Defeat Demise. |
Related Guides

Zelda: Skyward Sword HD Wiki Top
| Zelda: Skyward Sword HD Guides | |
|---|---|
 Walkthrough Walkthrough |
 Bosses Bosses |
 Tips & Tricks Tips & Tricks |
 Mini Games Mini Games |
 Side Quests Side Quests |
 Enemies Enemies |
 Items Items |
 Materials Materials |
 Characters Characters |
 News and Updates News and Updates |
Author
The Legend of Zelda: Skyward Sword Walkthrough & Guides Wiki
Complete Story Walkthrough
improvement survey
03/2026
improving Game8's site?

Your answers will help us to improve our website.
Note: Please be sure not to enter any kind of personal information into your response.

We hope you continue to make use of Game8.
Rankings
- We could not find the message board you were looking for.
Gaming News
Popular Games

Genshin Impact Walkthrough & Guides Wiki

Honkai: Star Rail Walkthrough & Guides Wiki

Umamusume: Pretty Derby Walkthrough & Guides Wiki

Pokemon Pokopia Walkthrough & Guides Wiki

Resident Evil Requiem (RE9) Walkthrough & Guides Wiki

Monster Hunter Wilds Walkthrough & Guides Wiki

Wuthering Waves Walkthrough & Guides Wiki

Arknights: Endfield Walkthrough & Guides Wiki

Pokemon FireRed and LeafGreen (FRLG) Walkthrough & Guides Wiki

Pokemon TCG Pocket (PTCGP) Strategies & Guides Wiki
Recommended Games

Diablo 4: Vessel of Hatred Walkthrough & Guides Wiki

Cyberpunk 2077: Ultimate Edition Walkthrough & Guides Wiki

Fire Emblem Heroes (FEH) Walkthrough & Guides Wiki

Yu-Gi-Oh! Master Duel Walkthrough & Guides Wiki

Super Smash Bros. Ultimate Walkthrough & Guides Wiki

Pokemon Brilliant Diamond and Shining Pearl (BDSP) Walkthrough & Guides Wiki

Elden Ring Shadow of the Erdtree Walkthrough & Guides Wiki

Monster Hunter World Walkthrough & Guides Wiki

The Legend of Zelda: Tears of the Kingdom Walkthrough & Guides Wiki

Persona 3 Reload Walkthrough & Guides Wiki
All rights reserved
© Nintendo. The Legend of Zelda, Nintendo Switch and amiibo are trademarks of Nintendo © 2021 Nintendo.
The copyrights of videos of games used in our content and other intellectual property rights belong to the provider of the game.
The contents we provide on this site were created personally by members of the Game8 editorial department.
We refuse the right to reuse or repost content taken without our permission such as data or images to other sites.




![Monster Hunter Stories 3 Review [First Impressions] | Simply Rejuvenating](https://img.game8.co/4438641/2a31b7702bd70e78ec8efd24661dacda.jpeg/thumb)


I’m up to the point where I need to play the harp at the top of the tower but I can’t get it out? How do I equip the harp button or motion controls?