Lanayru Gorge Walkthrough: All Maps, Treasure Chests, Goddess Cubes, and Heart Pieces
★All Pieces of Heart & Goddess Cubes Locations
☆How to Get All Gratitude Crystals
★Empty Bottle Guide
This is a complete guide to Lanayru Gorge for The Legend of Zelda: Skyward Sword HD for the Nintendo Switch. Read on to learn more about how to progress through the story, where to find treasure chests, Goddess Cubes, Heart Pieces, and other collectibles, as well as how to beat story bosses and more!
List of Contents
Lanayru Gorge Maps and Treasure Chest Locations
Lanayru Gorge Map

Lanayru Gorge Goddess Cubes Locations
Goddess Cubes - 1 Location Total
| Reward Required Item | Goddess Cube Location | Goddess Chest Location |
|---|---|---|
| Small Quiver Mogma Mitts |
 By the Lanayru Gorge, you'll find the Goddess Cube at the northeast corner of the map. |
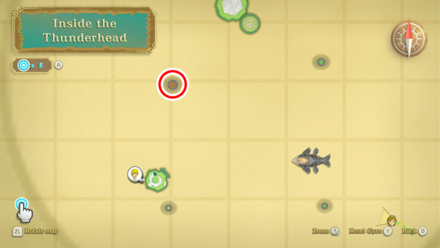 Fly to the island southwest of the Isle of Songs. Use the Mogma Mitts to enter the underground cavern and climb out of the upper hole to reach the Goddess Chest. |
Lanayru Gorge Pieces of Heart Locations
Pieces of Heart - 1 Location Total
| How to Get Heart Piece #24 | ||
|---|---|---|
 |
||
| Required Items | None | |
| Map Location |
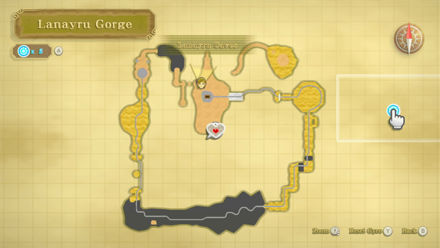 Lanayru Gorge |
|
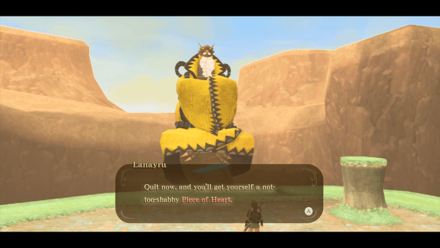
| How to Get | Defeat four bosses in the Thunder Dragon's Lightning Round. Note that you must stop the challenge after beating the four bosses to obtain the Heart Piece. | |
How to Get All Pieces of Heart
Lanayru Gorge Story Walkthrough
| Objectives |
|---|
| 1. Take the south path of the Lanayru Caves to get to Lanayru Gorge. |
| 2. Use the Hook Beetle to clear the rocks east of the map. |
| 3. Use the Hook Beetle to fetch the Small Key |
| 4. Use the Clawshots to make your way through the chasms. |
| 5. Step on the pressure plates to let the minecart pass. |
| 6. Climb the vines and press the pressure plate above. |
| 7. Traverse the vines to make it through the chasms. |
| 8. Use your Whip to pull down the lever. |
| 9. Use your Whip to swing across the gaps. |
| 10. Run up the sinksand ledge and pull down the lever. |
| 11. Defeat the Beamos on the tracks. |
| 12. Use the Hook Beetle to clear the rocks in the way. |
| 13. Speak to Lanayru, the thunder Dragon. |
| 14. Go to the northeast part of the gorge. Reveal and activate the timeshift stone here. |
| 15. Unearth the Tree of Life sapling. |
| 16. Head to the Sealed Temple. |
| 17. Go through the Gate of Time |
| 18. Harvest the fruit from the Tree of Life. |
| 19. Deliver the fruit to Lanayru. |
| 20. Speak to Levias. |
Take the south path of the Lanayru Caves to get to Lanayru Gorge.
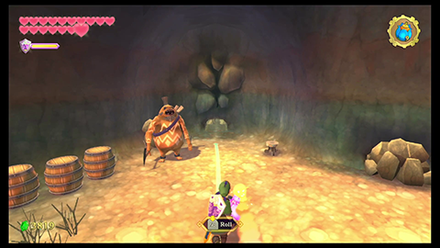
Descend into the West Desert and get into the Lanayru Caves.
From here, roll a bomb towards the south path to clear the way. Take the exit to find yourself in Lanayru Gorge.
Use the Hook Beetle to clear the rocks east of the map.

Use a bomb to clear the rubble to jump across the gap towards the locked door to your right.
Use the Hook Beetle to fetch the Small Key

Walk towards the bottom of the ramp, and you should spot the key on a rock formation in the middle of the abyss. Use a Beetle to retrieve the key for you.
Unlock the door and go through. On the other side, use your clawshots to traverse the chasm.
Step on the pressure plates to let the minecart pass.

Strike the timeshift stone on the minecart. Speak with the robot here and the minecart will begin to move. Move with the minecart, taking care of the enemies along the way.
Climb the vines and press the pressure plate above.

Once outside, navigate through the bridges that will appear within the timeshifts influence. At the end, climb the vines on your right to press the button to open the gate.
Traverse the vines to make it through the chasms.

Back inside, walk on the platforms the appear and climb the vines when necessary. You will also have to use your clawshot to access a higher platforms and proceed.
Use your Whip to pull down the lever.
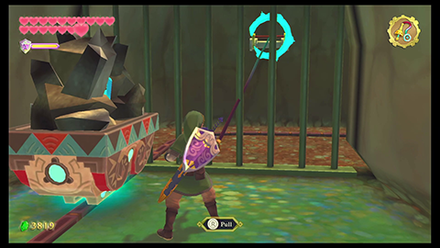
You'll soon come across a lever behind a barred gate. Use your Whip to pull it down and let the cart through.
Run up the sinksand ledge and pull down the lever.

Continue along with the cart avoiding enemies and traps along the way. At the end, wait till the electric gate Is outside the timeshift stone's range of influence. Then run across the sand to reach and pull down the lever.
Defeat the Beamos on the tracks.

The next room will have a lot of enemies that use electricity. Be careful when taking them out. Defeat one of the Beamos that has a lever behind it. Pull it down to progress.
Use the Hook Beetle to clear the rocks in the way.

Back outside, use your Beetle to grab a bomb from a bomb flower and clear the path for the minecart. You'll soon find yourself back at the start of the Gorge. Speak with Lanayru.
Go to the northeast part of the gorge. Reveal and activate the timeshift stone here.

Head to the Northeast part of the map, activate the timestone, and acquire the Life Tree Seedling.
Head to the Sealed Temple.

Make your way back to the Bird Monument, return to the sky, and fly to the Sealed Temple. You can use the Beetle to reactivate the central timeshift stone.
Once at the Sealed Temple, go through the Gate of Time to go back to the past. Plant the Seedling here.
Return to the present and harvest the fruit.
Deliver the fruit to Lanayru.
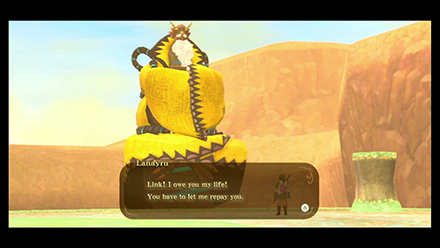
Deliver the fruit to Lanayru back at Lanayru Gorge and you'll be rewarded with the Lightning Dragon's song. If you've been following along with our guide, congratulations! You should now have all three parts of the Song of the Hero. Return to Levias to complete the song.
Continue to the Sky Keep Walkthrough
Lanayru Gorge Enemies
| List of Enemies | Strategy |
|---|---|
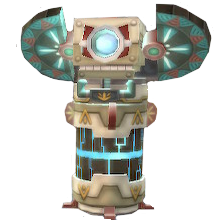 Beamos Beamos
|
Slash through each of the line with a horizontal sword attack. When only the head remains, stab it with a forward thrust. You can also Shield Bash to deflect the laser back to stun them. |
 Chuchu Chuchu
|
A simple sword slash defeats it. When it merges, proceed to continue slashing until every Chuchu is defeated. |
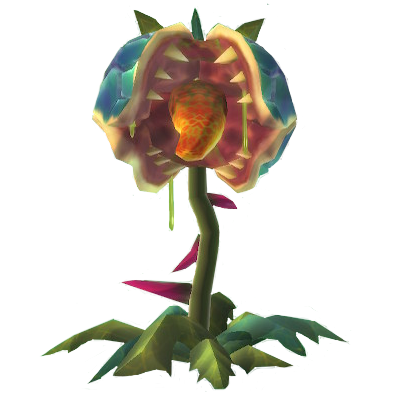 Deku Baba Deku Baba
|
Slash horizontally or vertically according to the orientation of its mouth. You can also cut off its stem with a Beetle to instantly defeat it. |
 Electro Spume Electro Spume
|
Throw a bomb or attack with a Skyward Strike. |
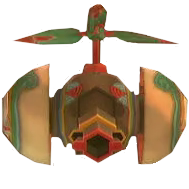 Sentrobe Sentrobe
|
Repel its missile attack twice with a Shield Bash or a sword strike. Slice the flying bombs according to its orientation. |
 Technoblin Technoblin
|
Use Skyward Strike to down it and use Fatal Blow. Attack it strategically to avoid being electrocuted from its weapon. If it doesn't work, you can easily defeat it by stunning it with a slingshot. Avoid using Iron Shields. |
 Thunder Keese Thunder Keese
|
Block and stun its swoop, then attack it just the same as with normal Keese. Do not use Iron Shields while doing this. |
Skyward Sword HD Related Guides

| Skyward Sword Walkthough | |
|---|---|
| Complete Story Walkthrough | |
| Dungeons and Temples List | Silent Realm Guide |
Main Locations
Silent Realm Trials
| Silent Realm Trials | |
|---|---|
 Farore's Trial Farore's Trial |
 Nayru's Trial Nayru's Trial |
 Din's Trial Din's Trial |
 The Goddess's Trial The Goddess's Trial |
Author
The Legend of Zelda: Skyward Sword Walkthrough & Guides Wiki
Lanayru Gorge Walkthrough: All Maps, Treasure Chests, Goddess Cubes, and Heart Pieces
improvement survey
03/2026
improving Game8's site?

Your answers will help us to improve our website.
Note: Please be sure not to enter any kind of personal information into your response.

We hope you continue to make use of Game8.
Rankings
- We could not find the message board you were looking for.
Gaming News
Popular Games

Genshin Impact Walkthrough & Guides Wiki

Honkai: Star Rail Walkthrough & Guides Wiki

Umamusume: Pretty Derby Walkthrough & Guides Wiki

Pokemon Pokopia Walkthrough & Guides Wiki

Resident Evil Requiem (RE9) Walkthrough & Guides Wiki

Monster Hunter Wilds Walkthrough & Guides Wiki

Wuthering Waves Walkthrough & Guides Wiki

Arknights: Endfield Walkthrough & Guides Wiki

Pokemon FireRed and LeafGreen (FRLG) Walkthrough & Guides Wiki

Pokemon TCG Pocket (PTCGP) Strategies & Guides Wiki
Recommended Games

Diablo 4: Vessel of Hatred Walkthrough & Guides Wiki

Cyberpunk 2077: Ultimate Edition Walkthrough & Guides Wiki

Fire Emblem Heroes (FEH) Walkthrough & Guides Wiki

Yu-Gi-Oh! Master Duel Walkthrough & Guides Wiki

Super Smash Bros. Ultimate Walkthrough & Guides Wiki

Pokemon Brilliant Diamond and Shining Pearl (BDSP) Walkthrough & Guides Wiki

Elden Ring Shadow of the Erdtree Walkthrough & Guides Wiki

Monster Hunter World Walkthrough & Guides Wiki

The Legend of Zelda: Tears of the Kingdom Walkthrough & Guides Wiki

Persona 3 Reload Walkthrough & Guides Wiki
All rights reserved
© Nintendo. The Legend of Zelda, Nintendo Switch and amiibo are trademarks of Nintendo © 2021 Nintendo.
The copyrights of videos of games used in our content and other intellectual property rights belong to the provider of the game.
The contents we provide on this site were created personally by members of the Game8 editorial department.
We refuse the right to reuse or repost content taken without our permission such as data or images to other sites.
 Skyloft
 Sealed Grounds
 Faron Woods
 Skyview Temple
 Eldin Volcano
 Earth Temple
 Lanayru Mine
 Lanayru Desert
 Lanayru Mining Facility
 Inside Thunderhead (Isle of Songs)
 Lake Floria
 Ancient Cistern
 Lanayru Sand Sea
 Sandship
 Volcano Summit
 Fire Sanctuary
 Sky Keep
 Final Battle


![Monster Hunter Stories 3 Review [First Impressions] | Simply Rejuvenating](https://img.game8.co/4438641/2a31b7702bd70e78ec8efd24661dacda.jpeg/thumb)


