 Skyloft
 Sealed Grounds
 Faron Woods
 Skyview Temple
 Eldin Volcano
 Earth Temple
 Lanayru Mine
 Lanayru Desert
 Lanayru Mining Facility
 Inside Thunderhead (Isle of Songs)
 Lake Floria
 Ancient Cistern
 Lanayru Sand Sea
 Volcano Summit
 Fire Sanctuary
 Lanayru Gorge
 Sky Keep
 Final Battle
This survey will take about 1 minute.
Your answers will help us to improve our website.
Zelda: Skyward Sword
Sandship Walkthrough: All Maps, Treasure Chests, and Heart Pieces
★All Pieces of Heart & Goddess Cubes Locations
☆How to Get All Gratitude Crystals
★Empty Bottle Guide
This is a complete guide to Sandship for The Legend of Zelda: Skyward Sword HD for the Nintendo Switch. Read on to learn more about how to progress through the story, where to find treasure chests, Goddess Cubes, Heart Pieces, and other collectibles, as well as how to beat story bosses and more!
List of Contents
Sandship Maps and Treasure Chest Locations
Sandship Map - 1F
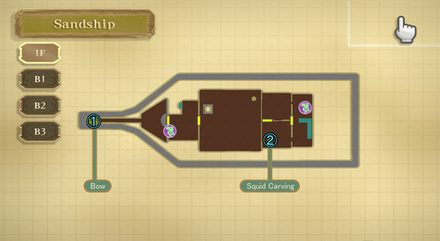
Treasure Chests - 2 Locations Total
| Contents | |
|---|---|
| ① | Bow |
| ② | Squid Carving |
Sandship Map - B1

Treasure Chests - 1 Locations Total
| Contents | |
|---|---|
| ① | Dungeon Map |
Sandship Map - B2
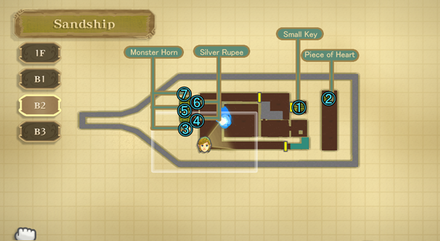
Treasure Chests - 7 Locations Total
| Contents | |
|---|---|
| ① | Small Key |
| ② | Piece of Heart |
| ③ | Monster Horn |
| ④ | Silver Rupee |
| ⑤ | Monster Horn |
| ⑥ | Silver Rupee |
| ⑦ | Monster Horn |
Sandship Map - B3

Sandship Goddess Cubes Locations
No Goddess Cubes
| There are no Goddess Cubes in the Sandship. |
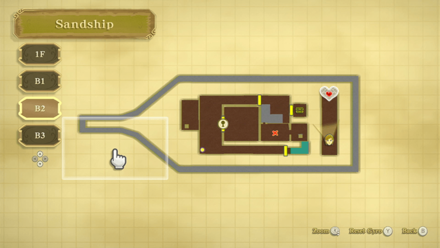
Sandship Pieces of Heart Locations
Pieces of Heart - 1 Location Total
| How to Get Heart Piece #16 | ||
|---|---|---|
 |
||
| Required Items | Clawshots | |
| Map Location |
 Sandship |
|
| How to Get | Inside the Sandship, use the Timeshift Stone on the central mast and climb the ladder. Use the pulleys to make your way to the stern side and use the Clawshot to grapple on the target to drop down. Drop down to the back of the ship to reach a chest that contains a Piece of Heart. | |
How to Get All Pieces of Heart
Sandship Story Walkthrough
| Objectives |
|---|
| 1. Head below deck and get to B2. |
| 2. Blow away the sand in the prison to reveal the combination needed for the lock. |
| 3. Unlock the door and get the Small Key. |
| 4. Go back to 1F and use the small key to get to the front of the ship. |
| 5. Defeat Scervo and obtain the Bow. |
| 6. Go out on the deck and shoot the target on the mast. |
| 7. Shoot the timeshift stone that has been revealed atop the mast. |
| 8. Climb the mast and shoot the target switch to ride the pulleys across. |
| 9. Ride the pulley across and use your sword to deactivate the locks on the gates. |
| 10. Shoot the target switch that will lower the side boat. |
| 11. Head to B1 and enter the previously wired off room. |
| 12. Shoot the timeshift stone through the gap in the ceiling. |
| 13. Get the Dungeon Map in the next room. |
| 14. Return to the prison below and speak with the Skipper's crew. |
| 15. Enter the northeast room on B1 and place the iron box on the pressure plate. |
| 16. Exit through the right window and onto the lowered boat. |
| 17. Deactivate the Timeshift stone and return to the room you were just in. |
| 18. Enter the next room and reactivate the timeshift stone. |
| 19. Thrust your sword into the engine and activate it. |
| 20. Deactivate the timeshift stone. |
| 21. Shoot the target switch seen from the stopped fan in the hallway. |
| 22. Enter the room and move the iron box out of the way of the gap. |
| 23. Stand on the pressure plate and shoot the target switch in the other room. |
| 24. Reactivate the timeshift stone and enter the last room. |
| 25. Thrust your sword into the engine and activate it. |
| 26. Go to the northeast room and exit through the left window this time. |
| 27. Follow the path, avoiding to get crushed by the pistons. |
| 28. Speak with Skipper's crew in the prison to receive the Small Key. |
| 29. Return above deck and use the small key. Deactivate the timeshift stone before entering. |
| 30. Once inside the room, reactivate the timeshift stone through the gap in the ceiling. |
| 31. Defeat the Beamos to clear the path. |
| 32. Stand on the pressure plate and shoot the target switch across the room. |
| 33. Defeat all of the Beamos to unlock the Silver Chest with the Squid Carving. |
| 34. Head to B2 and unlock the Boss Door with the Squid Carving. |
| 35. Make your way back to the deck, slicing the tentacles along the way. |
| 36. Back on deck, fight the Abyssal Leviathan, Tentalus. |
| 37. Perform a Skyward Strike on the crest to receive Nayru's Flame. |
| 38. Return to the Isle of Songs and learn Din's Power. |
| 39. Head to Eldin Volcano |
Blow away the sand in the prison to reveal the combination needed for the lock.
After going through a set of double doors, you'll find yourself in a room largely covered in sand. Use your Gust Bellows to clear some of the sand away revealing a pattern below.
Sandship Lock Combo: Secret Order for Door Puzzle
Unlock the door and get the Small Key.

Following the pattern, you'll learn the combination needed for the locked door. Strike the lock from the bottom, then the top, then bottom, then right side, to unlock the door.
Entering the room, you'll find a Blue Chest with a Small Key.
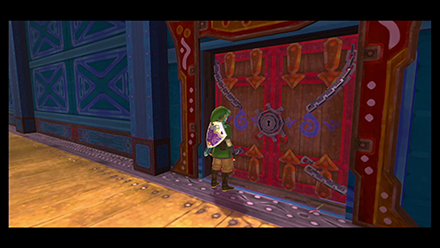
Go back to 1F and use the small key to get to the front of the ship.
Head back up to 1F. Use the Small Key on the door next to the bird statue and prepare for a battle with LD-002S Scervo.
Defeat Scervo and obtain the Bow.
Focus on thrusting your sword forward to push Scervo back this narrow space. Be ready to Shield Bash or step back when he counter-attacks.
Repeat this for three sequences till he falls off the ship. Once victorious, a Blue Chest with a Bow will be yours for the taking.
Go out on the deck and shoot the target on the mast.
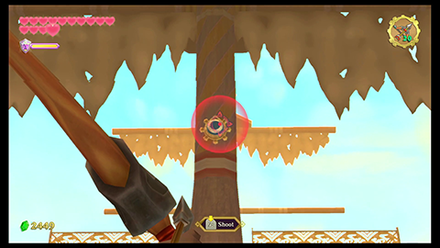
Head back to the deck and shoot at the blue mark on the mast. This will reveal a timeshift stone on the central mast of the ship.
Shoot an arrow at it to activate its field of effect. **Bokoblins will now be found on board the ship. Take care of them as you make your way up the central mast.
Climb the mast and shoot the target switch to ride the pulleys across.
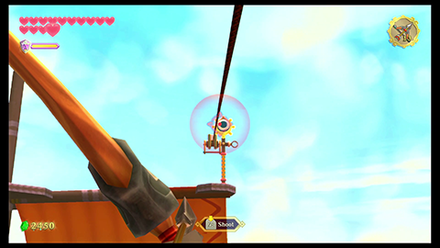
From the top of the mast, you should spot a target above the front-right sail. Shoot it with an arrow. This will let you access a zipline to cross the tops of the ship.
Make your way to the other side of the front sails and look back to the top of the mast. Shoot down another zipline and ride it back to the main mast.
Take out the Bokoblin in your way, and thrust the sword into the contraption. Unlock the cage blocking the Timeshift Stone and this should also unlock the door back into the ship.
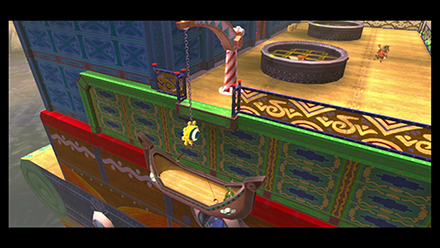
Shoot the target switch that will lower the side boat.
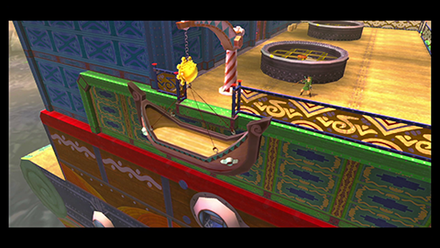
On the north side of the ship, there should be a boat hanging on a rope. Shoot the target above it to lower the boat.
Head to B1 and enter the previously wired off room.
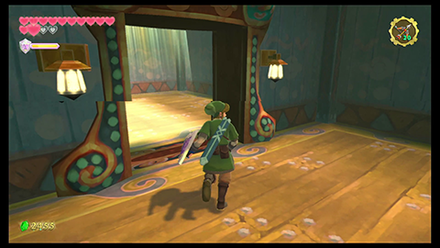
With the timeshift stone still activated, head to where the sand pit was in B1. One of the rooms that were previously blocked off should now be open. Enter this room.
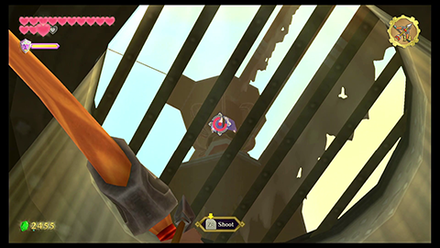
Shoot the timeshift stone through the gap in the ceiling.
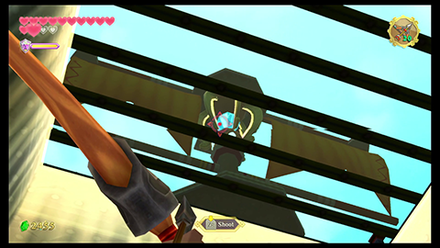
Note how the sun shines into this part of the ship. The central mast is actually visible from this spot. Shoot the timeshift stone to deactivate it.
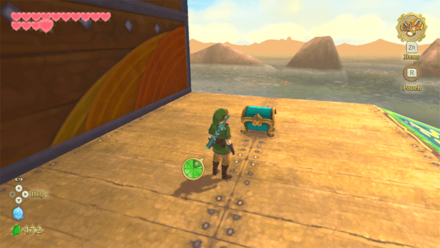
Get the Dungeon Map in the next room.
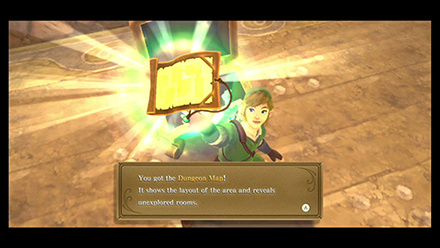
With the ship back in the present, go to the next room to access the Blue Chest with a Dungeon Map. Pull down the lever here to leave this room.
Return to the prison below and speak with the Skipper's crew.
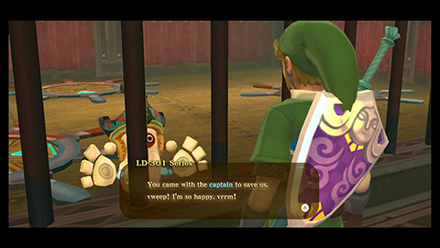
Head down to B2 and to speak with Skipper's imprisoned crewmates. They'll tell you that two generators need to be activated and mark their spots on the map.
Enter the northeast room on B1 and place the iron box on the pressure plate.
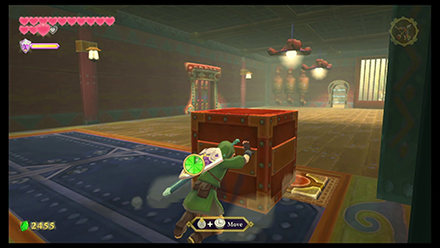
Reactivate the timeshift stone. Enter the northeast room on B1 and, take out the Technoblins, then move the iron box onto the pressure plate.
Exit through the right window and onto the lowered boat.
Crawl out of the right window, onto the boat you lowered earlier. Shoot the target above to raise the boat back to the deck.
From the boat, deactivate the timeshift stone. Then lower the boat to go back through the window and into the next room.
Enter the next room and reactivate the timeshift stone.
Reactivate the timeshift stone by shooting through the gaps in the ceiling. Once its influence reaches the room you're in, thrust your sword into the generator and twist to turn it on.
Shoot the target switch seen from the stopped fan in the hallway.
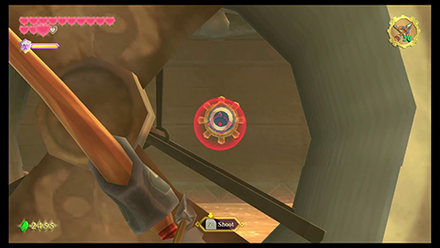
Exit the room to be back in the hallway. Walk slightly towards the east of the ship to spot a stopped fan on the wall to your right. You should spot a target inside. Shoot it with an arrow.
Stand on the pressure plate and shoot the target switch in the other room.

The door should now be unlocked. Once inside, move the iron box away from blocking the vent. Step on the pressure plate to reveal a target in the next room. Shoot it with an arrow.
Reactivate the timeshift stone and enter the last room.

The last door in this hall should be unlocked. Reactivate the timeshift stone then enter this door. Thrust your sword into the generator and twist to turn it on.
Go to the northeast room and exit through the left window this time.
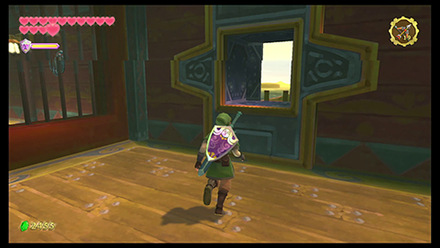
Go to the north-east room of the ship and exit the left window. Descend the ladder to find yourself in B3.
Follow the path, avoiding to get crushed by the pistons.

Continue along the path being careful not to be trampled by the pistons.
Crawl through the vent and up the ladder to where the crew is. Pull down the lever to free the crew. As thanks, they will give you a Small Key to the captain's cabin.
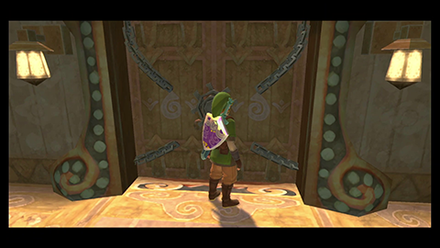
Return above deck and use the small key. Deactivate the timeshift stone before entering.
Head up back to the deck and unlock the captain's cabin. Deactivate the timeshift stone then head inside.
Defeat the Beamos to clear the path.
Reactivate the timeshift stone from a gap in the ceiling. Then, defeat the Beamos here.
Step on the pressure plate then shoot an arrow at the target on the other side. This should unlock the door to the next room.
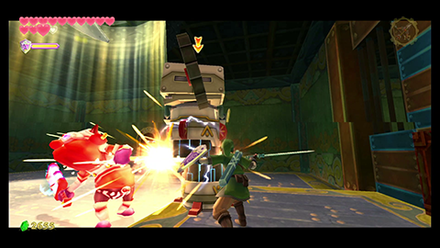
Defeat all of the Beamos to unlock the Silver Chest with the Squid Carving.
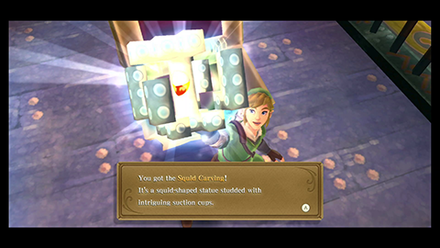
Defeat the Beamos here to unlock the Silver chest. Open it to obtain the Squid Carving.
Head to B2 and unlock the Boss Door with the Squid Carving.

Head to the control room on B2 and use the Squid Carving to unlock the door. Once you do, a tentacled monster will attack the ship.
Head towards the deck using Skyward Strike on the tentacles in your way. When you get out on the deck, you'll be pit against the Abyssal Leviathan, Tentalus.
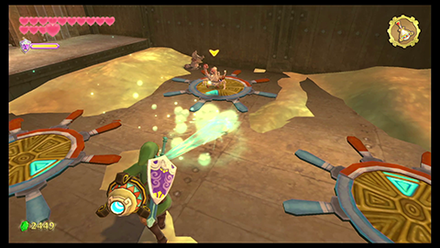
Back on deck, fight the Abyssal Leviathan, Tentalus.
For the first sequence, Tentalus will have its tentacles grab you from beneath the floorboords. Slash them down with horizontal Skyward Strikes to cut them off.
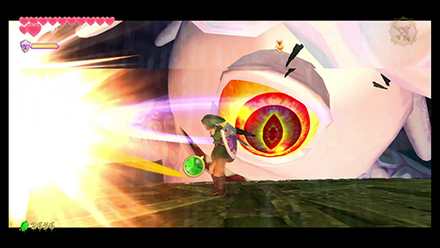
After four tentacles have been slashed off, Tentalus will appear from the water. Shoot it's eye with an arrow.
With a successful shot, Tentalus will collapse onto the ship. Slash its head tentacles out of the way, and strike its eye as much as you can.
After the third repetition of the first sequence, Tentalus will go on a rampage and destroy a large part of the lower platform. Use the Iron Box to climb up to the higher section.
Once on the higher section, Tentalus' second attack sequence will begin. The hair tentacles will now have mouths that will try to bite at you. Slash these away until Tentalus' eye is revealed.
When the eye is revealed, shoot at it with a bow. This will stun Tentalus allowing you to come closer to stab it more with your sword. Continue dealing damage till Tentalus is slain.
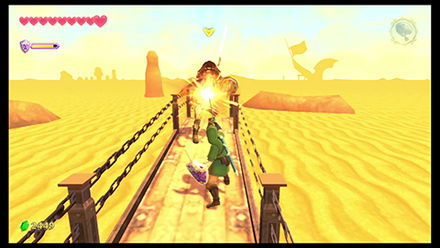
Return to the Isle of Songs and learn Din's Power.
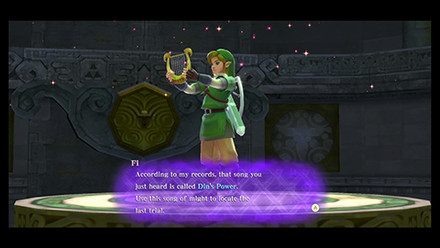
Pick up the Heart Container and hit the crest with a Skyward Strike. Earn the Goddess White Sword.
Fly back to the Isle of Songs, hit the crest with a Skyward Strike. After a short sequence of dialogues, you'll learn Din's Power.
Continue to the Volcano Summit Walkthrough
Sandship Bosses
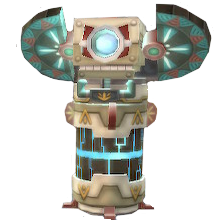
Tentalus
Tentalus is the boss you must defeat at the end of the Sandship. You must perform a Skyward Strike to cut the tentacles inside the ship.
LD-002G Scervo

|
LD-002G Scervo is the miniboss that you'll face in the Sandship. Defeating the miniboss earns you the Bow as a reward.
Sandship Enemies
| List of Enemies | Strategy |
|---|---|
 Aracha Aracha
|
As it is weak, a simple slash is enough to defeat it. However, multiple Arachas can grab on to you. Simple roll away and defeat all with a spin attack. |
 Beamos Beamos
|
Slash through each of the line with a horizontal sword attack. When only the head remains, stab it with a forward thrust. You can also Shield Bash to deflect the laser back to stun them. |
 Red Bokoblin (Archer) Red Bokoblin (Archer)
|
Bokoblin Archers attack from a long distance, so it is effective to use the bow and arrow as well. If they attack with fire arrows, try not to guard wth a wooden shield. |
 Red Bokoblin (Leader) Red Bokoblin (Leader)
|
Leaders have the same attack pattern as Red Bokoblins, and can be defeated with a sword or bow. You can take away its Monster Horn with a whip to prevent it from alerting nearby Bokoblins. |
 Technoblin Technoblin
|
Use Skyward Strike to down it and use Fatal Blow. Attack it strategically to avoid being electrocuted from its weapon. If it doesn't work, you can easily defeat it by stunning it with a slingshot. Avoid using Iron Shields. |
 Thunder Keese Thunder Keese
|
Block and stun its swoop, then attack it just the same as with normal Keese. Do not use Iron Shields while doing this. |
Skyward Sword HD Related Guides

| Skyward Sword Walkthough | |
|---|---|
| Complete Story Walkthrough | |
| Dungeons and Temples List | Silent Realm Guide |
Main Locations
Silent Realm Trials
| Silent Realm Trials | |
|---|---|
 Farore's Trial Farore's Trial |
 Nayru's Trial Nayru's Trial |
 Din's Trial Din's Trial |
 The Goddess's Trial The Goddess's Trial |
Author
The Legend of Zelda: Skyward Sword Walkthrough & Guides Wiki
Sandship Walkthrough: All Maps, Treasure Chests, and Heart Pieces
Please participate in our site
improvement survey
03/2026
improvement survey
03/2026
Would you assist in
improving Game8's site?
improving Game8's site?

×
We are listening to our users' valuable opinions and discussing how to act on them.
The information collected through this survey will be used for the purpose of improving our services. In addition, the information will only be disclosed a part of a statistic in a format that will not allow identification of personal information.
Begin Survey
Not Now
×
Please rate each item regarding Game8.co's Advertisements.
Amount of Ads
Very Dissatisfied
Somewhat Dissatisfied
Fine
Somewhat Satisfied
Highly Satisfied
Placement of Ads
Timing of Ad Display
Ad Loading Speed
Safeness of Ads
Content of Ads
×
Please rate each item regarding Game8.co's Quality of Articles.
Amount of information
Very Dissatisfied
Somewhat Dissatisfied
Fine
Somewhat Satisfied
Highly Satisfied
Frequency of updates
Speed of new information
Accuracy of articles
Understandibility of articles
Readability of sentences
×
Please rate each item regarding Game8.co's Usability of the Site.
Ease of finding information
Very Dissatisfied
Somewhat Dissatisfied
Fine
Somewhat Satisfied
Highly Satisfied
Loading Speed
Use of Color
Font Size
Visibility of Images
Easy to Understand Layout
×
Please rate each item regarding Game8.co's Message Boards, Comments.
Ease of Writing
Very Dissatisfied
Somewhat Dissatisfied
Fine
Somewhat Satisfied
Highly Satisfied
Readability
Ease in Finding Information
Comment Quality
Comment Quantity
Admin Response
×
Please rate each item regarding Game8.co's Site's new design.
Please rate our site's new design
Very Dissatisfied
Somewhat Dissatisfied
Fine
Somewhat Satisfied
Highly Satisfied
Do you think that the website's design change makes the site easier to use?
Has the new design made it easier for you to find information on the site?
Has the new design improved the overall visual appeal of the site?
How would you rate your overall satisfaction with the new design of the site?
×
How likely are you to recommend Game8 to someone you know?
Very Unlikely
0
1
2
3
4
5
6
7
8
9
10
Very Likely
If you have other opinions regarding potential improvement to the website, please share them with us. We would appreciate your honest opinion.
Note: This is a free response section, so you can proceed without entering anything.
Note: Please be sure not to enter any kind of personal information into your response.
Note: Please be sure not to enter any kind of personal information into your response.
×
Thank You
×
Thank you for participating in our survey! Your answers will help us to improve the quality of our website and services.
We hope you continue to make use of Game8.
We hope you continue to make use of Game8.
Close
Rankings
- We could not find the message board you were looking for.
Gaming News


![Monster Hunter Stories 3 Review [First Impressions] | Simply Rejuvenating](https://img.game8.co/4438641/2a31b7702bd70e78ec8efd24661dacda.jpeg/thumb)
Popular Games

Genshin Impact Walkthrough & Guides Wiki
Honkai: Star Rail Walkthrough & Guides Wiki
Umamusume: Pretty Derby Walkthrough & Guides Wiki
Pokemon Pokopia Walkthrough & Guides Wiki
Resident Evil Requiem (RE9) Walkthrough & Guides Wiki
Monster Hunter Wilds Walkthrough & Guides Wiki
Wuthering Waves Walkthrough & Guides Wiki
Arknights: Endfield Walkthrough & Guides Wiki
Pokemon FireRed and LeafGreen (FRLG) Walkthrough & Guides Wiki
Pokemon TCG Pocket (PTCGP) Strategies & Guides Wiki


Recommended Games
Diablo 4: Vessel of Hatred Walkthrough & Guides Wiki
Cyberpunk 2077: Ultimate Edition Walkthrough & Guides Wiki
Fire Emblem Heroes (FEH) Walkthrough & Guides Wiki
Yu-Gi-Oh! Master Duel Walkthrough & Guides Wiki
Super Smash Bros. Ultimate Walkthrough & Guides Wiki
Pokemon Brilliant Diamond and Shining Pearl (BDSP) Walkthrough & Guides Wiki
Elden Ring Shadow of the Erdtree Walkthrough & Guides Wiki
Monster Hunter World Walkthrough & Guides Wiki
The Legend of Zelda: Tears of the Kingdom Walkthrough & Guides Wiki
Persona 3 Reload Walkthrough & Guides Wiki


All rights reserved
© Nintendo. The Legend of Zelda, Nintendo Switch and amiibo are trademarks of Nintendo © 2021 Nintendo.
The copyrights of videos of games used in our content and other intellectual property rights belong to the provider of the game.
The contents we provide on this site were created personally by members of the Game8 editorial department.
We refuse the right to reuse or repost content taken without our permission such as data or images to other sites.
I can’t see the time shift stone from the room.