Earth Temple Walkthrough: All Maps, Treasure Chests, and Heart Pieces
★All Pieces of Heart & Goddess Cubes Locations
☆How to Get All Gratitude Crystals
★Empty Bottle Guide
A complete guide to the Earth Temple in The Legend of Zelda: Skyward Sword. Learn how to beat the Earth Temple, treasure chest, Goddess Cube, and Heart Piece locations, as well as how to beat the Earth Temple boss and more!
List of Contents
Earth Temple Maps and Treasure Chest Locations
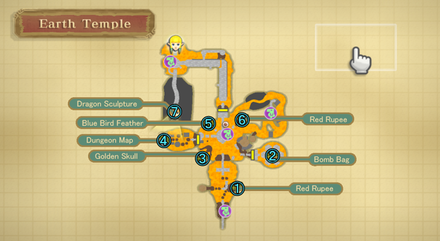
Earth Temple Map
Treasure Chest Contents
| Contents | |
|---|---|
| ① | Red Rupee |
| ② | Bomb Bag |
| ③ | Golden Skull |
| ④ | Dungeon Map |
| ⑤ | Blue Bird Feather |
| ⑥ | Red Rupee |
| ⑦ | Dragon Sculpture |
Earth Temple Goddess Cubes Locations
No Goddess Cubes
| There are no Goddess Cubes in the Earth Temple. |
Earth Temple Pieces of Heart Locations
No Pieces of Heart
| There are no Pieces of Heart in the Earth Temple. |
How to Get All Pieces of Heart
Earth Temple Story Walkthrough
| Objectives |
|---|
| 1. Cut the three ropes to lower the bridge. |
| 2. Trigger the bomb flowers on the Dragon Head. |
| 3. Ride the Stone Eye across the lava to the east room. Clear the rubble blocking the door using the nearby Bomb Flowers. |
| 4. Defeat the 2 Lizalfos to obtain the Bomb Bag. |
| 5. Clear the path to the west room. |
| 6. Get the Dungeon Map in the back of the west room. |
| 7. Ride the ball across the lava to press the button on the west side of the bridge. |
| 8. Ride the ball across the lava over to the northeast side of the room. Toss bombs at the crack in the wall to go through. |
| 9. Ride the ball forward. Toss bombs at the crack in the wall in front of the second lava fountain. |
| 10. Use the Beetle to cut the rope in front, and at the back of the gate. |
| 11. Ride the ball across the lava and back into the main room. Push the button on the east side of the bridge. |
| 12. With the bridge raised, enter the next room. |
| 13. Dash up the ramp avoiding the rocks. Use the alcove on the left as a resting point to restore stamina. |
| 14. Crawl through the hole at the foot of the second ramp. |
| 15. Refill your Bomb Bag. Unearth an updraft and walk to the end of the platform. |
| 16. Toss a bomb from the end of the platform to clear the rocks blocking the alcove on the opposite wall. |
| 17. Dash up the second ramp avoiding the rocks, Use the alcove on the left as a resting point to restore stamina. |
| 18. Get the Dragon Sculpture from the Silver Chest at the top of the winding path. Run back down escaping the rolling boulder behind you. |
| 19. Open the Boss Door with the Dragon Sculpture. |
| 20. Fight the boss, Pyroclastic Fiend Scaldera. |
| 21. Perform a Skyward Strike on the Crest in the Earth Spring. |
| 22. Return to Skyloft and place the Amber Tablet in the receptacle Inside the Statue of the Goddess. |
Cut the three ropes to lower the bridge
Use the Beetle to cut the third rope

Two of the ropes will be on either side of the bridge. Cut them down with your sword. The third one will be across the lava which you can reach with your Beetle.
Trigger the bomb flowers on the Dragon Head
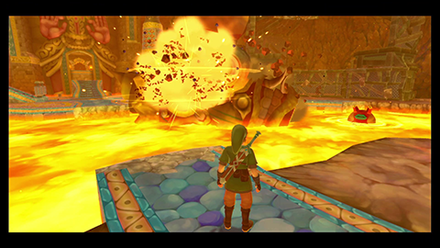
In the large lava pool, a Dragon Head Statue should be floating nearby. Trigger the bomb flowers on it to detonate the structure. An eye ball will be left behind which you can ride across the lava.
Ride the Stone Eye across the lava to the east room. Clear the rubble blocking the door using the nearby Bomb Flowers
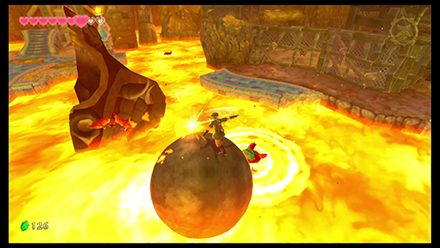
In the southeast part of the room, you'll find a troubled Mogma. He asks you to retrieve his Bomb Bag from the next room. Use the nearby Bomb Flowers to clear the path.
Defeat the 2 Lizalfos to obtain the Bomb Bag
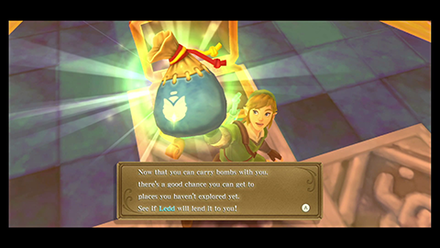
Lizalfos can be tricky to battle, even by facing them one at a time, so battling two can be even more difficult. We recommend taking down one Lizalfo at a time.
Clear the path to the west room
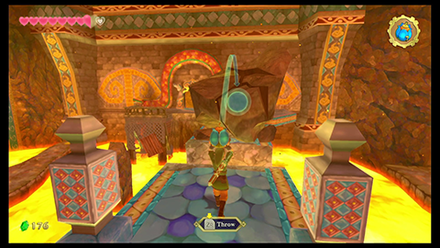
Now equipped with the bomb bag, you should be able to clear the path to the west room. Throw bombs at the rocks to get them out of the way.
Ride the ball across the lava to press the button on the west side of the bridge
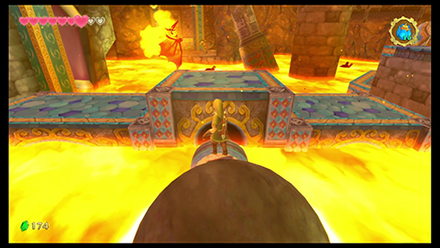
Use the stone ball to push in the button on the west side of the bridge. Doing so will raise a section of the bridge.
Ride the ball across the lava over to the northeast side of the room. Toss bombs at the crack in the wall to go through
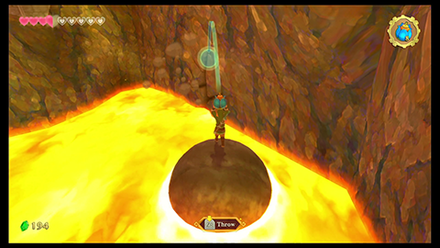
Head back to the central platform and use the stone sphere to navigate to the east side of the room. There will be a Magma Spume here you can roll over. After which, look for a crack in the wall which you can detonate with bombs from your bomb bag.
With the path clear, use your stone sphere to continue forward, being careful of the lava fountains to your right. Keep moving forward till just before the platform with the Bokoblin.
Just in front of the second lava fountain should be another crack in the wall that you can bomb open. Be ready to defeat some Fire Keese as soon as the wall breaks open.
Use the Beetle to cut the rope in front, and at the back of the gate
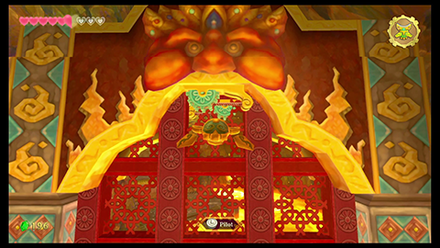
Navigate forward on the stone sphere until you reach a red gate. There is a rope you can cut with your beetle which will raise the gate a bit
Guide another Beetle through the entryway on the left to cut the other side of the rope. This should fully raise the gate allowing you to go through.
Ride the ball across the lava and back into the main room. Push the button on the east side of the bridge
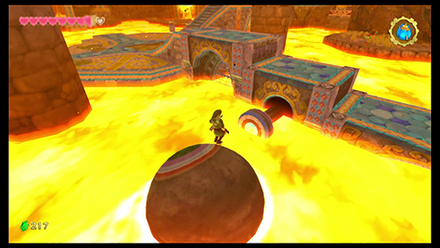
Hop on the stone sphere again and use it to push against the button here to raise the platforms more. You may now hop down to the central platform before making your way up the platforms you raised then enter the Northern door.
Dash up the ramp avoiding the rocks.
Use the alcove on the left as a resting point to restore stamina
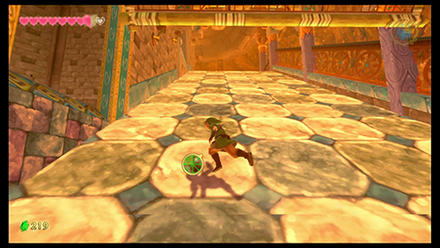
In the next room, head forward and run up the ramp. Be quick to avoid the stones that will roll down. Hug the left wall so that you can have time to restore your stamina.
Crawl through the hole at the foot of the second ramp
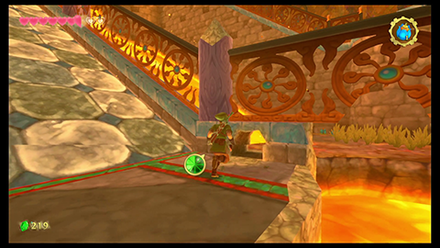
At the base of the second ramp should be an opening you can crawl through on your right. Go through it.
Dig the rightmost hole to unearth an updraft. Go up the steps and follow the path.
Toss a bomb from the end of the platform to clear the rocks blocking the alcove on the opposite wall
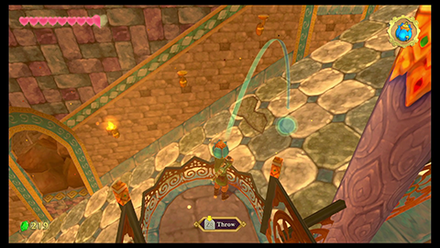
From here you should toss a bomb across the ramp to clear the rocks. This will allow you to have a spot to restore your stamina.
Head back to the base of the second ramp and you should now be able to run up it, taking a rest at the spot you cleared.
Get the Dragon Sculpture from the Silver Chest at the top of the winding path. Run back down escaping the rolling boulder behind you
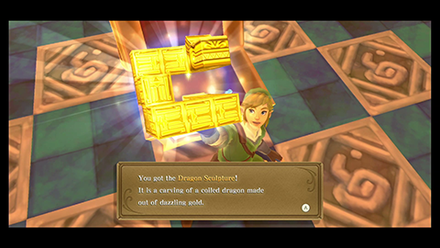
Head up the path on your left. At the top will be a Silver Chest with the Dragon Sculpture. This will be used to unlock the door to the boss.
As you head back to the direction of the door, be ready to dash straight down. A boulder will roll down after you and you'll have to outrun it. After successfully doing so, it will clear the path to the door to the boss.
Fight the boss, Pyroclastic Fiend Scaldera
Hit Scaldra with bombs
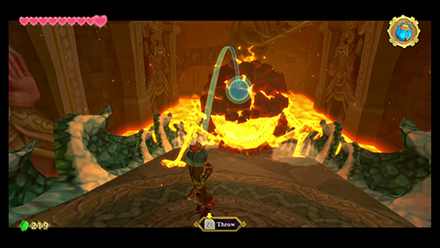
For his first attack sequence he will slowly climb up the ramp towards you. Back away slowly keeping your focus on him, then throw a Bomb Flower at him when his flames dissipate. This will knock him down to the bottom of the ramp.
Let Scaldra inhale the bombs
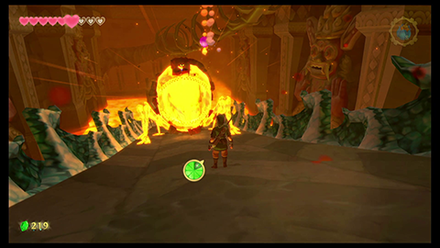
From the bottom of the ramp, he will first inhale before trying to shoot fireballs at you from a distance. Strafe side to side to keep your focus on Scaldera. Toss a bomb into his mouth as he is inhaling.
Attack his weakness with your sword
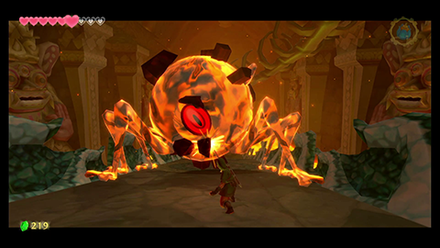
With each successful bomb thrown in his mouth, more and more of his hard outer shell will be removed. While he is recovering, take this opportunity to strike his eye in the revealed sections of his body.
Avoid getting rolled on
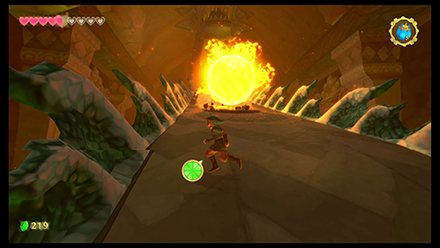
When all of his armor is removed he will now stretch his legs and run past you before dropping down to roll on you. Stick to the sides to avoid getting rolled over.
As he reaches the bottom of the ramp, he will once again inhale before shooting fireballs at you. Take this chance to disable him further by throwing a bomb as he inhales, followed by a flurry of slashes at his exposed eye. Keep doing this and soon enough you will slay Scaldera.
Continue to the Lanayru Mine Walkthrough
Earth Temple Boss
Scaldera
Scaldera is the boss you will face at the end of the Earth Temple. Use your newly acquired bombs to take him out!
Two Lizalfos
You'll face two Lizalfos as the miniboss of the Earth Temple. Defeating them rewards you with the Bomb Bag.
Earth Temple Enemies
| List of Enemies | Strategy |
|---|---|
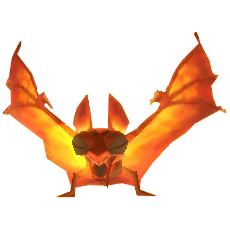 Fire Keese Fire Keese
|
Defeat it like normal Keese. Do not use Wooden Shields when fighting it. |
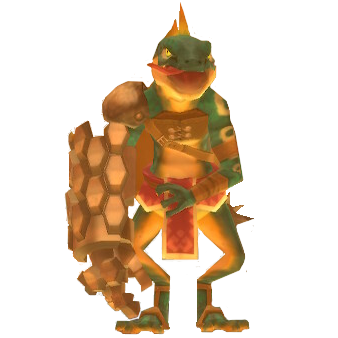 Lizalfos Lizalfos
|
Repel the attack with a shield attack and aim and attack when you get the chance. |
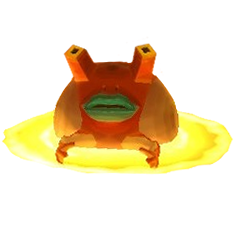 Magma Spume Magma Spume
|
Throw a bomb or attack with a Skyward Strike. |
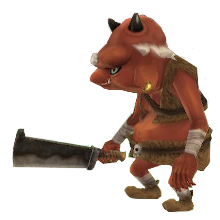 Red Bokoblin Red Bokoblin
|
Red Bokoblin can be easily defeated with a sword or bow. Invite an attack and repel it with a Shield Bash, then strike. |
The Legend of Zelda: Skyward Sword Related Guides

| Skyward Sword Walkthough | |
|---|---|
| Complete Story Walkthrough | |
| Dungeons and Temples List | Silent Realm Guide |
Main Locations
Silent Realm Trials
| Silent Realm Trials | |
|---|---|
 Farore's Trial Farore's Trial |
 Nayru's Trial Nayru's Trial |
 Din's Trial Din's Trial |
 The Goddess's Trial The Goddess's Trial |
Author
The Legend of Zelda: Skyward Sword Walkthrough & Guides Wiki
Earth Temple Walkthrough: All Maps, Treasure Chests, and Heart Pieces
improvement survey
03/2026
improving Game8's site?

Your answers will help us to improve our website.
Note: Please be sure not to enter any kind of personal information into your response.

We hope you continue to make use of Game8.
Rankings
- We could not find the message board you were looking for.
Gaming News
Popular Games

Genshin Impact Walkthrough & Guides Wiki

Honkai: Star Rail Walkthrough & Guides Wiki

Umamusume: Pretty Derby Walkthrough & Guides Wiki

Pokemon Pokopia Walkthrough & Guides Wiki

Resident Evil Requiem (RE9) Walkthrough & Guides Wiki

Monster Hunter Wilds Walkthrough & Guides Wiki

Wuthering Waves Walkthrough & Guides Wiki

Arknights: Endfield Walkthrough & Guides Wiki

Pokemon FireRed and LeafGreen (FRLG) Walkthrough & Guides Wiki

Pokemon TCG Pocket (PTCGP) Strategies & Guides Wiki
Recommended Games

Diablo 4: Vessel of Hatred Walkthrough & Guides Wiki

Fire Emblem Heroes (FEH) Walkthrough & Guides Wiki

Yu-Gi-Oh! Master Duel Walkthrough & Guides Wiki

Super Smash Bros. Ultimate Walkthrough & Guides Wiki

Pokemon Brilliant Diamond and Shining Pearl (BDSP) Walkthrough & Guides Wiki

Elden Ring Shadow of the Erdtree Walkthrough & Guides Wiki

Monster Hunter World Walkthrough & Guides Wiki

The Legend of Zelda: Tears of the Kingdom Walkthrough & Guides Wiki

Persona 3 Reload Walkthrough & Guides Wiki

Cyberpunk 2077: Ultimate Edition Walkthrough & Guides Wiki
All rights reserved
© Nintendo. The Legend of Zelda, Nintendo Switch and amiibo are trademarks of Nintendo © 2021 Nintendo.
The copyrights of videos of games used in our content and other intellectual property rights belong to the provider of the game.
The contents we provide on this site were created personally by members of the Game8 editorial department.
We refuse the right to reuse or repost content taken without our permission such as data or images to other sites.
 Skyloft
 Sealed Grounds
 Faron Woods
 Skyview Temple
 Eldin Volcano
 Lanayru Mine
 Lanayru Desert
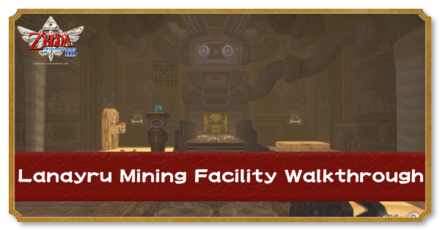 Lanayru Mining Facility
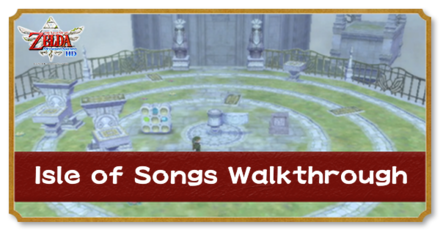 Inside Thunderhead (Isle of Songs)
 Lake Floria
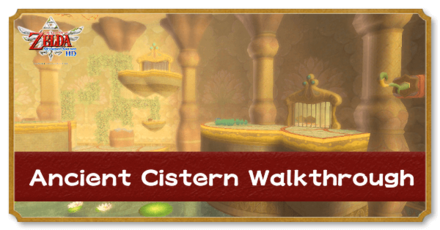 Ancient Cistern
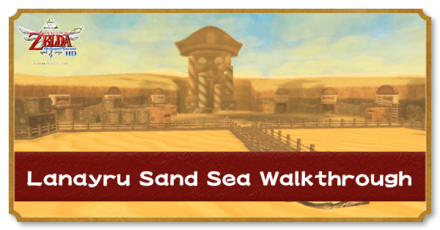 Lanayru Sand Sea
 Sandship
 Volcano Summit
 Fire Sanctuary
 Lanayru Gorge
 Sky Keep
 Final Battle




![Everwind Review [Early Access] | The Shaky First Step to A Very Long Journey](https://img.game8.co/4440226/ab079b1153298a042633dd1ef51e878e.png/thumb)

![Monster Hunter Stories 3 Review [First Impressions] | Simply Rejuvenating](https://img.game8.co/4438641/2a31b7702bd70e78ec8efd24661dacda.jpeg/thumb)


