Lanayru Sand Sea Walkthrough: All Maps, Treasure Chests, Goddess Cubes, and Heart Pieces
★All Pieces of Heart & Goddess Cubes Locations
☆How to Get All Gratitude Crystals
★Empty Bottle Guide
This is a complete guide to Lanayru Sand Sea for The Legend of Zelda: Skyward Sword HD for the Nintendo Switch. Read on to learn more about how to progress through the story, where to find treasure chests, Goddess Cubes, Heart Pieces, and other collectibles, as well as how to beat story bosses and more!
List of Contents
Lanayru Sand Sea Maps and Treasure Chest Locations
Lanayru Caves Map
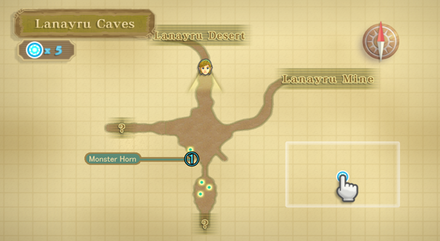
Treasure Chests - 1 Locations Total
| Contents | |
|---|---|
| ① | Monster Horn |
Lanayru Sand Sea Map - Port Side
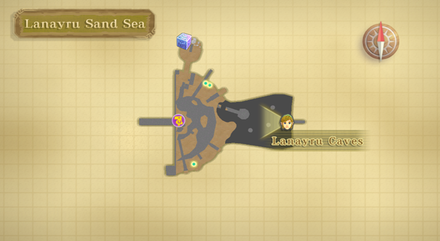
Lanayru Sand Sea Map - Sea Side
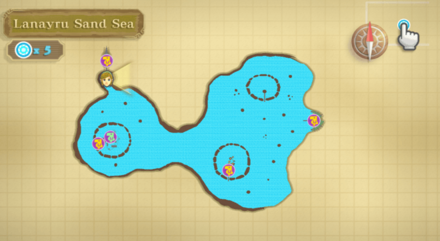
Skipper's Retreat Map - Outside
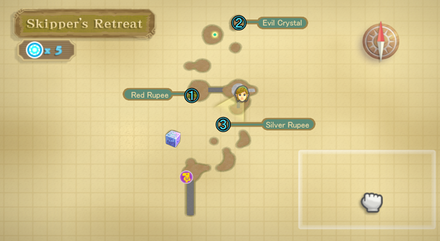
Treasure Chests - 3 Locations Total
| Contents | |
|---|---|
| ① | Red Rupee |
| ② | Evil Crystal |
| ③ | Silver Rupee |
Skipper's Retreat Map - Inside
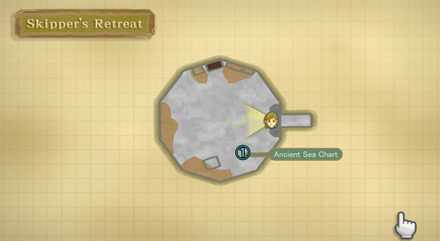
Treasure Chest - 1 Location Total
| Contents | |
|---|---|
| ① | Ancient Sea Chart |
Shipyard Map - Outside
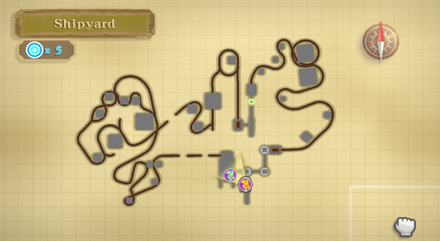
Shipyard Map - Inside
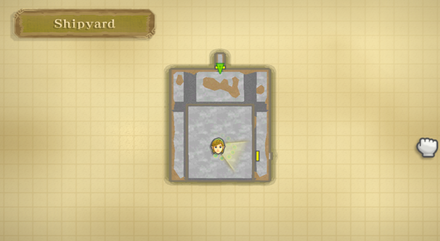
Pirate Stronghold Map - Outside
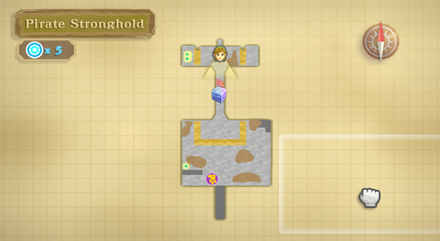
Pirate Stronghold Map - Inside
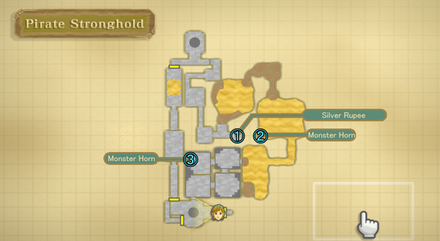
Treasure Chests - 3 Locations Total
| Contents | |
|---|---|
| ① | Silver Rupee |
| ② | Monster Horn |
| ③ | Monster Horn |
Lanayru Sand Sea Goddess Cubes Locations
Lanayru Sand Sea Goddess Cubes - 1 Location Total
| Reward Required Item | Goddess Cube Location | Goddess Chest Location |
|---|---|---|
| Gold Rupee (300 Rupees) Clawshots |
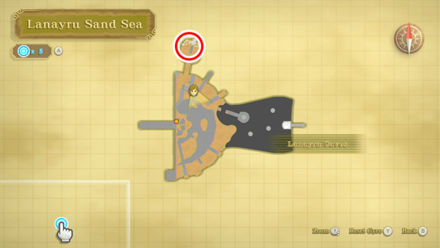 At the Entrance of Lanayru Sand Sea, near where you first met Skipper, use your Clawshots on one of the boxes to reach the cavern. |
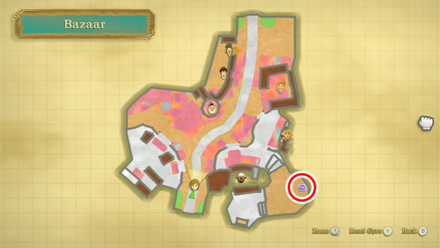 Head behind Gondo's Scrap Shop at the Bazaar to find this Goddess Chest. |
Skipper's Retreat Goddess Cubes - 1 Location Total
| Reward Required Item | Goddess Cube Location | Goddess Chest Location |
|---|---|---|
| Potion Medal Clawshots |
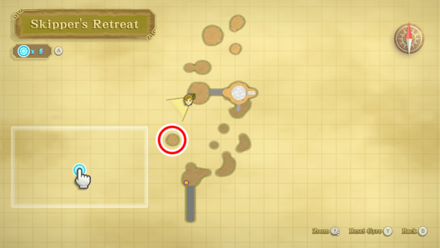 On a pillar in Skipper's Retreat, just ahead of the bridge, look to the left and you'll see a pillar with covered in vines. Use your Clawshots to reach the Goddess Cube. |
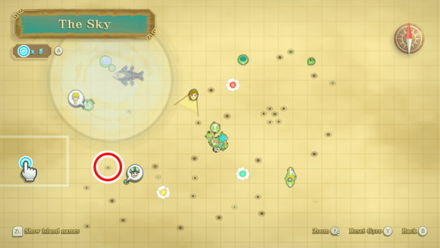 Head northwest of Fun Fun Island and land on the small platform. Use the Clawshot to grapple over to the other island with the gate to reach the Goddess Chest. |
Pirate Stronghold Goddess Cubes - 1 Location Total
| Reward Required Item | Goddess Cube Location | Goddess Chest Location |
|---|---|---|
| Piece of Heart Clawshots |
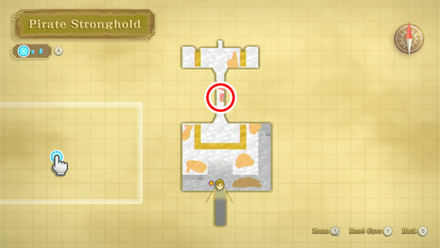 After completing the Pirate Stronghold dungeon go outside by the entrance. You should see a target above the door. Use your Clawshots. This leads to the Goddess Cube on a ledge. |
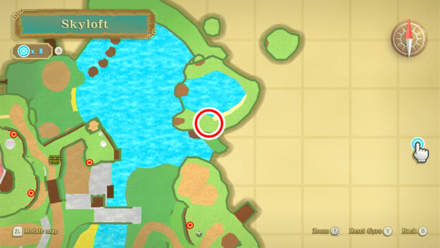 Head to the eastern side of Skyloft and use the Clawshots to climb up the floating rock near the Waterfall cave to reach the Goddess Chest. |
Lanayru Sand Sea Pieces of Heart Locations
Shipyard Pieces of Heart - 1 Location Total
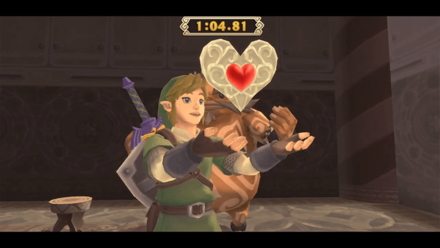
| How to Get Heart Piece #21 | ||
|---|---|---|
 |
||
| Required Items | None | |
| Map Location |
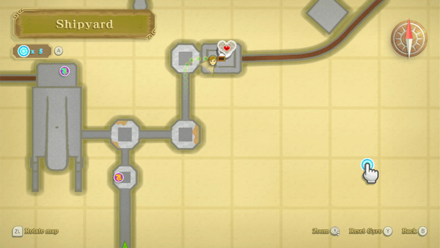 Shipyard |
|
| How to Get | Complete the "Heart Stopping!" course of the Rickety Coaster minigame in under 65 seconds. | |
How to Get All Pieces of Heart
Lanayru Sand Sea Story Walkthrough
| Objectives |
|---|
| 1. Clear Nayru's Trial in Lanayru Desert |
| 2. Obtain the Clawshot |
| 3. Use the Clawshots to enter the Lanayru Caves |
| 4. Get the Small Key from Golo the Goron. |
| 5. Use the Small Key to go through the West door to reach the Lanayru Sand Sea. |
| 6. Activate the timeshift stone on the boat. Speak to Skipper the LD301N Robot. |
| 7. Head to Skipper's Retreat. |
| 8. Use your clawshots on the floating plants to make your way across the stone pillars. |
| 9. Use a bomb to clear the rocks in your way. |
| 10. Use the Whip to pull out a plant from the ground. |
| 11. Use the Beetle to cut down the Deku Baba blocking the clawshot target. |
| 12. Enter Skipper's House. Use your Gust Bellows to blow the sand away to reveal the chest with the Ancient Sea Chart. |
| 13. Head to the Shipyard. |
| 14. Ride the minecart to find the shipyard's entrance. |
| 15. Clear the sand here to reveal and battle the Moldarach. |
| 16. Return to Skipper and head to the Pirate Stronghold. |
| 17. Enter the Pirate Stronghold through the east entrance. |
| 18. Retrieve the Timeshift Orb in the northern part of the Pirate Stronghold. |
| 19. Bring the Beamos into the range of the Timeshift Orb to revive and defeat them. |
| 20. Jump across the tops of the sand structures that appear when in range of the timeshift orb. |
| 21. Leave the timeshift orb in front of the gate, make your way to its other side before pulling down the lever. |
| 22. Push the iron box onto the pressure plate. |
| 23. Place the timeshift orb on the other side of the wall with the lever, then pull the lever down. |
| 24. Retrieve the timeshift orb and defeat the 2 Armos. |
| 25. Place the timeshift orb on its receptacle. |
| 26. Use dowsing to locate the Sandship. |
Clear Nayru's Trial in Lanayru Desert
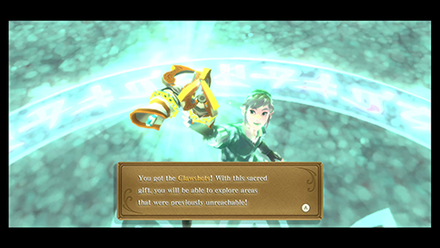
After descending to the North Desert section of the Lanayru Desert, you should be able to spot some Blessed Butterflies fluttering in front of the northern warehouse. Go to that spot and play the Goddess Harp.
The starting point of the trial should appear. Perform the Ballad of the Goddess to enter the Silent Realm. Acquire the Spirit Vessel.
As with before, you'll have to collect the 15 Tears of Nayru fast enough to not be caught by the Guardians. You will be rewarded with Clawshots allowing you to explore areas that were previously unreachable.
Use the Clawshots to enter the Lanayru Caves
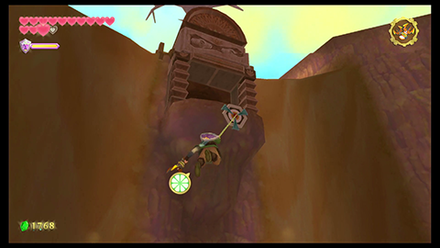
Head to the southwest part of the map that is currently marked with a question mark. It should be a short walk from the West Desert Bird Monument. Use the Clawshot to get up to the entrance.
Get the Small Key from Golo the Goron.
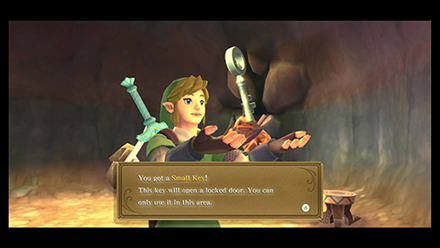
You'll find yourself in the Lanayru Caves. Speak with Golo the Goron. He will give you the Small Key that lets you access the Lanayru Sand Sea.
Use the Small Key to go through the West door to reach the Lanayru Sand Sea.
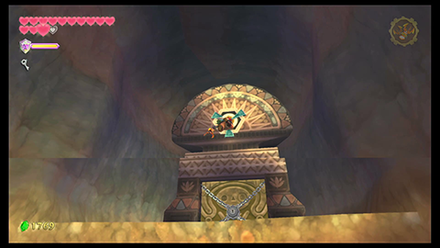
Grapple up to where the locked door is. Open it with the Small Key to reach the Lanayru Sand Sea.
Activate the timeshift stone on the boat. Speak to Skipper the LD301N Robot.
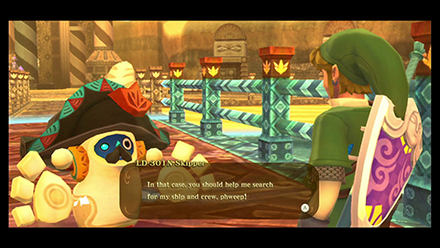
Use your Clawshots to traverse across the pillars until you reach the Ancient Harbor on the other side.
Walk on the narrow walkway past the bird monument. Activate the time shift stone on the boat and speak with the LD-301 here. Agree to help him and go to Skipper's Retreat.
Head to Skipper's Retreat
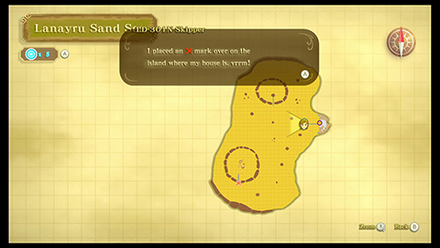
Upon arriving at Skipper's Retreat, you'll be tasked to retrieve the sea chart from his shack. Use your Clawshots and slowly make your way up across the platforms. Taking care of the enemies along the way.
Use the Whip to pull out a plant from the ground.
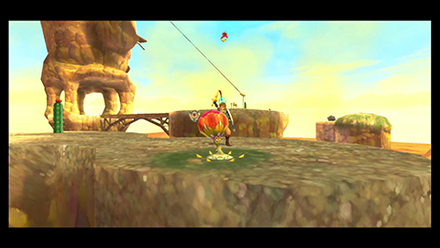
Use your whip to pull out the flying plant which you'll need to zip to the next higher platform.
Use the Beetle to cut down the Deku Baba blocking the clawshot target.
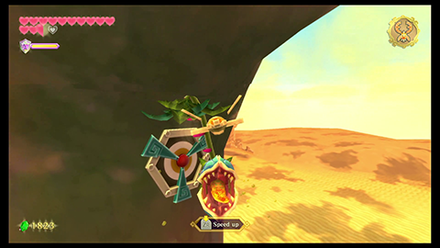
One of the grappling spots has a Deku Baba blocking it. Use the Beetle to cut its stem before zipping to it.
Enter Skipper's House. Use your Gust Bellows to blow the sand away to reveal the chest with the Ancient Sea Chart.
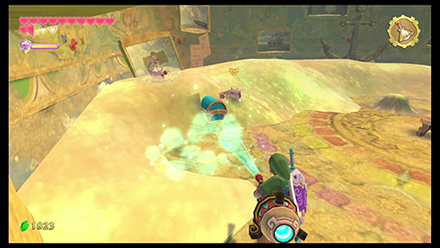
Once you reach Skipper's Retreat, head inside the house. Keep in mind there is a zipline nearby allowing for easier backtracking later on.
Inside Skipper's Retreat, use the Gust Bellows to clear the sand away. You'll soon reveal a Blue Chest with the Ancient Sea Chart. With chart in hand, head outside and take the zipline down back to Skipper.
Head to the Shipyard.
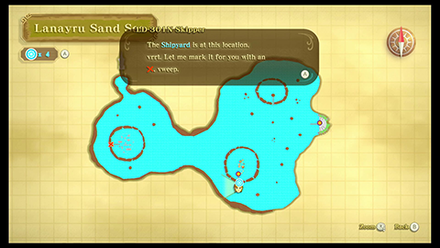
Speak with Skipper and agree to set sail in search for his ship. He will mark the destination on the updated map. Head to the marked spot.
Ride the minecart to find the shipyard's entrance.
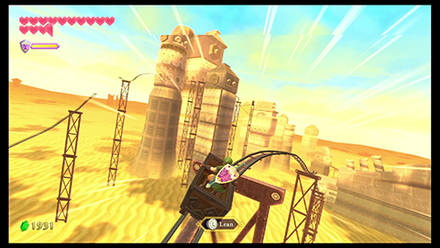
Once you reach the Shipyard, head towards the mine-cart station. Take out the 2 Lizalfos along the way.
Ride the minecart being careful not to fly off the tracks. Once you reach the other side, you can use a nearby zipline for easier backtracking. For now, ride the next minecart.
This second track will require you to tilt your minecart onto the proper rails to progress further. Steer the cart right to exit the loop, then right again to avoid flying off, and finally hop up just before the gap to land properly on the rail.
On the other side of the rail, steer left to avoid flying off, then right, then maintain your balance for the rest of the track. Remember to slow down when you get too fast.
When you get to the end of the line, get out of the cart and enter the door here.
Clear the sand here to reveal and battle the Moldarach.
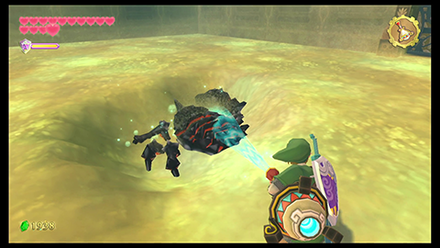
Once inside the shipyard, use the Gust Bellows to blow away the sand here. You will unearth a Moldarach in the process, so get ready to defeat it.
Return to Skipper and head to the Pirate Stronghold.
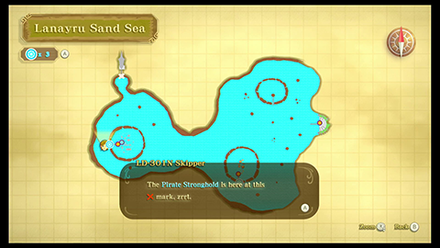
Return to Skipper and agree to investigate the Pirate's Stronghold. He will mark the destination on the map. Head to the marked spot.
Enter the Pirate Stronghold through the east entrance.
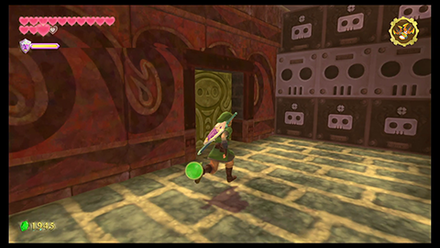
Once you reach the Pirate Stronghold, head up the steps and down the boxes on the right. Enter the Stronghold through the east entrance.
Retrieve the Timeshift Orb in the northern part of the Pirate Stronghold.

Head to the northern-most part of the Pirate Stronghold to grab a Timeshift Orb.
Bring the Beamos into the range of the Timeshift Orb to revive and defeat them.
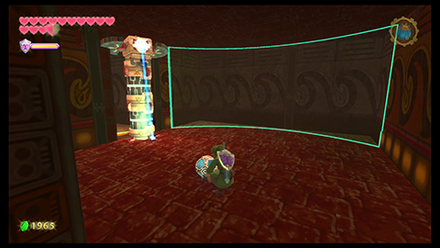
Carry this Timeshift Orb back to the receptacle at the entrance. You'll have to defeat several Technoblins and a Beamos along the way.
Jump across the tops of the sand structures that appear when in range of the timeshift orb.
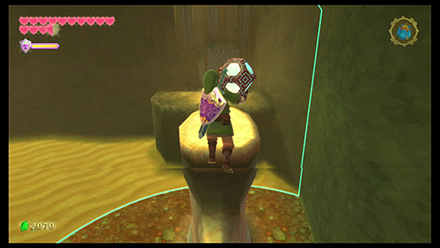
As you follow along the path, you'll come across a sand pit with rising platforms. Continue carrying the Timeshift Orb as you jump across the tops.
Leave the timeshift orb in front of the gate, make your way to its other side before pulling down the lever.
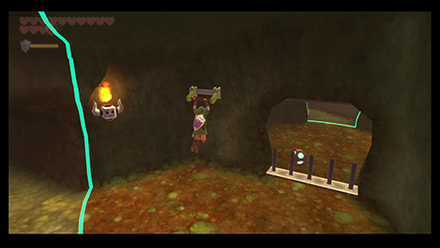
Drop the Timeshift Orb just before the barred gate. Walking around to the other side to pull a lever opening the gate and picking up the Timeshift Orb again.
Push the iron box onto the pressure plate.
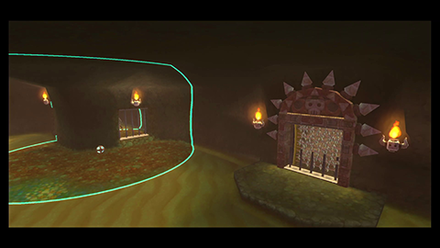
In the next room, drop the Timeshift Orb temporarily and step out of its' influence. Go into the smaller room and push the iron box onto the pressure plate. This will open the gate allowing you to proceed.
Place the timeshift orb on the other side of the wall with the lever, then pull the lever down.
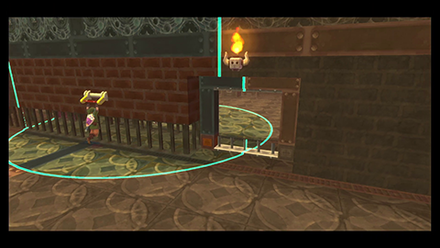
In the next room, place the Timeshift Orb in a position where it will give you access to the lever.
Retrieve the timeshift orb and defeat the 2 Armos.
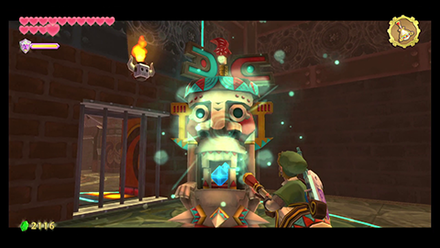
Take out the Armos in the way before entering the next room.
Place the timeshift orb on its receptacle.
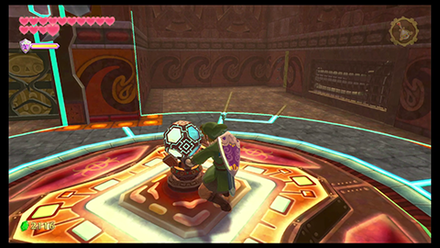
You'll find yourself back near the entrance. Here you can place the Timeshift Orb and a cutscene will play.
Use dowsing to locate the Sandship.
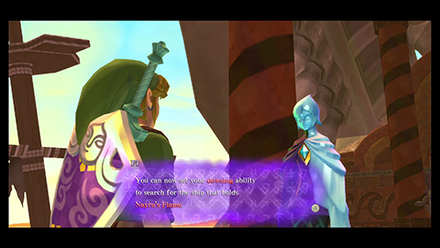
Head outside and join Skipper. Use your Dowsing to track and shoot the Sandship. After hitting it three times, it will be fully revealed and will come to a stop. Link will climb on board allowing you to explore the Sandship
.
Continue to the Sandship Walkthrough
Lanayru Sand Sea Boss
Moldarach
While technically a miniboss, you'll encounter a second Moldarach after blowing away the sand inside the Shipyard. Use the same strategy from the previous encounter to defeat this miniboss!
Lanayru Sand Sea Enemies
| List of Enemies | Strategy |
|---|---|
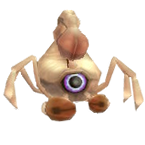 Aracha Aracha
|
As it is weak, a simple slash is enough to defeat it. However, multiple Arachas can grab on to you. Simple roll away and defeat all with a spin attack. |
 Chuchu Chuchu
|
A simple sword slash defeats it. When it merges, proceed to continue slashing until every Chuchu is defeated. |
 Cranioc Cranioc
|
Stun them by hitting it against a wall or with a spin attack. Once they flip over, attack them on their stomachs. |
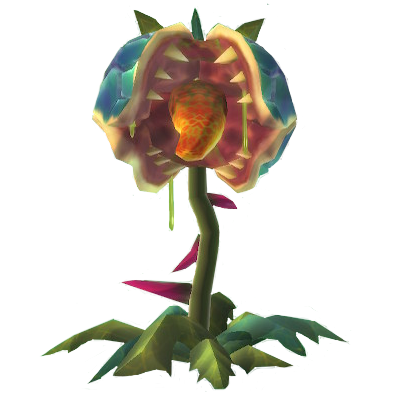 Deku Baba Deku Baba
|
Slash horizontally or vertically according to the orientation of its mouth. You can also cut off its stem with a Beetle to instantly defeat it. |
 Electro Spume Electro Spume
|
Throw a bomb or attack with a Skyward Strike. |
 Quadro Baba Quadro Baba
|
You can slash it across its mouth the moment it opens, or hit it when it is stunned by a shield attack. You may need multiple hits before downing it. Use the Beetle to instantly defeat it. |
 Red Bokoblin (Archer) Red Bokoblin (Archer)
|
Bokoblin Archers attack from a long distance, so it is effective to use the bow and arrow as well. If they attack with fire arrows, try not to guard wth a wooden shield. |
 Thunder Keese Thunder Keese
|
Block and stun its swoop, then attack it just the same as with normal Keese. Do not use Iron Shields while doing this. |
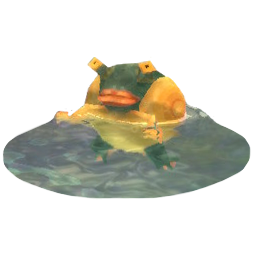 Water Spume Water Spume
|
Throw bombs by using the ship's cannons, or crash it with the ship's body. |
Skipper's Retreat
| List of Enemies | Strategy |
|---|---|
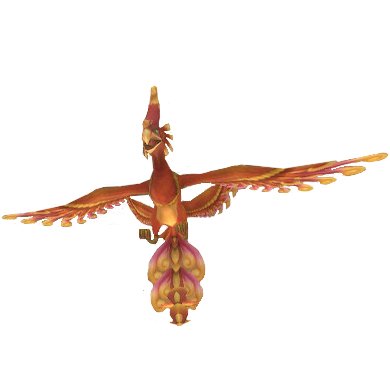 Furnix Furnix
|
Hit the ring on the tail with a whip and pull it. This will knock it down to the ground, allowing you to use Fatal Blow. |
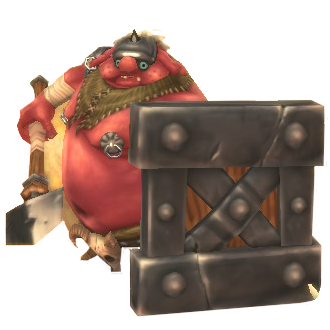 Metal Shield Moblin Metal Shield Moblin
|
Metal Shields are impervious to sword attacks unlike its wooden variant. Climb up the shield by dashing, then slash it down from behind. |
Shipyard
| List of Enemies | Strategy |
|---|---|
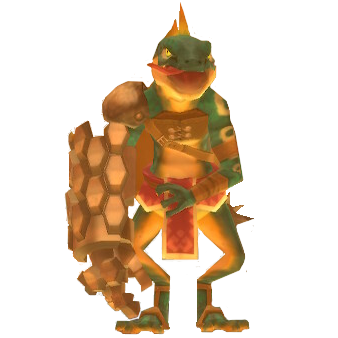 Lizalfos Lizalfos
|
Repel the attack with a shield attack and aim and attack when you get the chance. |
Pirate Stronghold
| List of Enemies | Strategy |
|---|---|
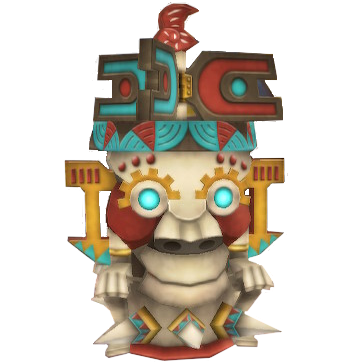 Armos Armos
|
Use Gust Bellows to make the propeller on the top of its head spin, which will then expose two gems. One gem can be slashed, the other must be stabbed. Using Gust Bellows on its body in this state will cause it to turn around, which allows you to stab the other gem. |
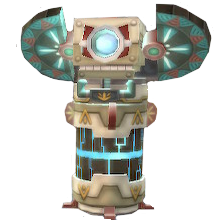 Beamos Beamos
|
Slash through each of the line with a horizontal sword attack. When only the head remains, stab it with a forward thrust. You can also Shield Bash to deflect the laser back to stun them. |
 Technoblin Technoblin
|
Use Skyward Strike to down it and use Fatal Blow. Attack it strategically to avoid being electrocuted from its weapon. If it doesn't work, you can easily defeat it by stunning it with a slingshot. Avoid using Iron Shields. |
Skyward Sword HD Related Guides
Main Locations
Silent Realm Trials
| Silent Realm Trials | |
|---|---|
 Farore's Trial Farore's Trial |
 Nayru's Trial Nayru's Trial |
 Din's Trial Din's Trial |
 The Goddess's Trial The Goddess's Trial |
Author
The Legend of Zelda: Skyward Sword Walkthrough & Guides Wiki
Lanayru Sand Sea Walkthrough: All Maps, Treasure Chests, Goddess Cubes, and Heart Pieces
improvement survey
03/2026
improving Game8's site?

Your answers will help us to improve our website.
Note: Please be sure not to enter any kind of personal information into your response.

We hope you continue to make use of Game8.
Rankings
- We could not find the message board you were looking for.
Gaming News
Popular Games

Genshin Impact Walkthrough & Guides Wiki

Honkai: Star Rail Walkthrough & Guides Wiki

Umamusume: Pretty Derby Walkthrough & Guides Wiki

Pokemon Pokopia Walkthrough & Guides Wiki

Resident Evil Requiem (RE9) Walkthrough & Guides Wiki

Monster Hunter Wilds Walkthrough & Guides Wiki

Wuthering Waves Walkthrough & Guides Wiki

Arknights: Endfield Walkthrough & Guides Wiki

Pokemon FireRed and LeafGreen (FRLG) Walkthrough & Guides Wiki

Pokemon TCG Pocket (PTCGP) Strategies & Guides Wiki
Recommended Games

Diablo 4: Vessel of Hatred Walkthrough & Guides Wiki

Cyberpunk 2077: Ultimate Edition Walkthrough & Guides Wiki

Fire Emblem Heroes (FEH) Walkthrough & Guides Wiki

Yu-Gi-Oh! Master Duel Walkthrough & Guides Wiki

Super Smash Bros. Ultimate Walkthrough & Guides Wiki

Pokemon Brilliant Diamond and Shining Pearl (BDSP) Walkthrough & Guides Wiki

Elden Ring Shadow of the Erdtree Walkthrough & Guides Wiki

Monster Hunter World Walkthrough & Guides Wiki

The Legend of Zelda: Tears of the Kingdom Walkthrough & Guides Wiki

Persona 3 Reload Walkthrough & Guides Wiki
All rights reserved
© Nintendo. The Legend of Zelda, Nintendo Switch and amiibo are trademarks of Nintendo © 2021 Nintendo.
The copyrights of videos of games used in our content and other intellectual property rights belong to the provider of the game.
The contents we provide on this site were created personally by members of the Game8 editorial department.
We refuse the right to reuse or repost content taken without our permission such as data or images to other sites.
 Skyloft
 Sealed Grounds
 Faron Woods
 Skyview Temple
 Eldin Volcano
 Earth Temple
 Lanayru Mine
 Lanayru Desert
 Lanayru Mining Facility
 Inside Thunderhead (Isle of Songs)
 Lake Floria
 Ancient Cistern
 Sandship
 Volcano Summit
 Fire Sanctuary
 Lanayru Gorge
 Sky Keep
 Final Battle




![Monster Hunter Stories 3 Review [First Impressions] | Simply Rejuvenating](https://img.game8.co/4438641/2a31b7702bd70e78ec8efd24661dacda.jpeg/thumb)


