Lanayru Mining Facility Walkthrough: All Maps, Treasure Chests, Goddess Cubes, and Heart Pieces
★All Pieces of Heart & Goddess Cubes Locations
☆How to Get All Gratitude Crystals
★Empty Bottle Guide
This is a complete guide to Lanayru Mining Facility for The Legend of Zelda: Skyward Sword HD for the Nintendo Switch. Read on to learn more about how to progress through the story, where to find treasure chests, Goddess Cubes, Heart Pieces, and other collectibles, as well as how to beat story bosses and more!
List of Contents
Lanayru Mining Facility Maps and Treasure Chest Locations
Lanayru Mining Facility Map
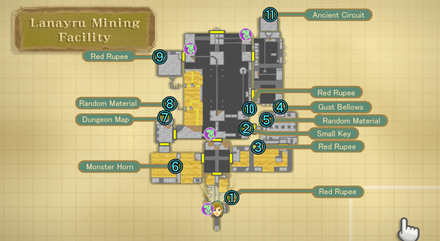
Treasure Chest Contents
| Contents | |
|---|---|
| ① | Red Rupee |
| ② | Small Key |
| ③ | Red Rupee |
| ④ | Gust Bellows |
| ⑤ | Blue Bird Feather |
| ⑥ | Monster Horn |
| ⑦ | Dungeon Map |
| ⑧ | Goddess Plume |
| ⑨ | Red Rupee |
| ⑩ | Red Rupee |
| ⑪ | Ancient Circuit |
Lanayru Mining Facility Goddess Cubes Locations
No Goddess Cubes
| There are no Goddess Cubes in the Lanayru Mining Facility. |
Lanayru Mining Facility Pieces of Heart Locations
No Pieces of Heart
| There are no Pieces of Heart in the Lanayru Mining Facility. |
How to Get All Pieces of Heart
Lanayru Mining Facility Story Walkthrough
| Objectives |
|---|
| 1. Topple over the wall statue using the Hook Beetle. |
| 2. Pull down the lever and go to the next room. |
| 3. Move the Iron Box ahead to climb up to the door going to the next room. |
| 4. Using the Hook Beetle, grab a bomb and clear the boxes on the east side of the room. |
| 5. Go east and get the Small Key from the chest. |
| 6. Go back to the previous room and use the small key to enter the eastern room. |
| 7. Use the Hook Beetle to grab a bomb and clear the box at the top of the southwest ladder. |
| 8. Step on the pressure plate and use the beetle to activate the timeshift stone. |
| 9. Run across the conveyor belts and pull the lever down |
| 10. Go through the newly-opened door and get to the next room. |
| 11. Jump across the tops of the boxes and head for the back of the room. |
| 12. Obtain the Gust Bellows from the Treasure Chest. |
| 13. Climb the ladder on the west side of the room. |
| 14. You'll find yourself back in the large room. Go back to the room with the crossroads. |
| 15. Blow away the sand mounds on the northeast part of the room to freely move the iron box. |
| 16. Move the iron box onto the pressure plate. |
| 17. Go through the west door. |
| 18. Dash across the sinksand and make your way to the southwest part of the room. Reveal the Timeshift stone hidden in the sand |
| 19. Use the Gust Bellows to control the movement of the platform. |
| 20. Use the Gust Bellows on the pinwheel above the gate to open it. |
| 21. Follow the path and head for the northwest door. |
| 22. Move the iron box to use it as a platform. |
| 23. Reveal the timeshift stone hidden in the sand and activate it, |
| 24. Defeat the Armos to unlock the chest with the Dungeon Map. Go through the door to find yourself back in the large room. |
| 25. Check your map to find the safe walkways hidden in the sinksand. |
| 26. Clear the sand mound blocking a crawlspace along the west wall. |
| 27. Use the Gust Bellows to clear the sand and look for the pressure plate. |
| 28. Use the Gust Bellows to clear the sand covering the minecart with the timeshift stone. |
| 29. Walk along with the minecart to stay within the timeshift stone's influence. Open the gate using your Gust Bellows. |
| 30. Activate the eastern minecart and walk along with it. |
| 31. Halfway along the path is a pinwheel. Use your Gust Bellows quickly to open the nearby gate. |
| 32. Enter the room and use bombs to topple down the wall statues on the south side. |
| 33. Reveal the timeshift stone hidden in the sand and activate it. |
| 34. Run across the conveyor belts and pull down the lever |
| 35. Use your Gust Bellows to move the platform and move towards the back of the room. |
| 36. Topple over more of the wall statues. Note the number of patterns on the wall. |
| 37. Topple over the wall statues on the opposite wall to reveal Red Crystals. Activate them in the same order that the patterns suggest. |
| 38. Defeat the 2 Armos in the next room. |
| 39. Obtain the Ancient Circuit from the Silver Chest. |
| 40. Climb down the ladder, head west and back into the large room. |
| 41. Along the northern wall is another timeshift stone minecart. Activate it and use your Gust Bellows to move the platform with it. |
| 42. Open the Boss Door with the Ancient Circuit. |
| 43. FIght the boss, the Thousand-Year Arachnid, Moldarach. |
| 44. Use the Beetle to activate the Timeshift stone above the hall. |
| 45. Ride the minecart out to the Temple of Time. |
| 46. After the cutscene, return to the Sealed Temple. |
Topple over the wall statue using the Hook Beetle.
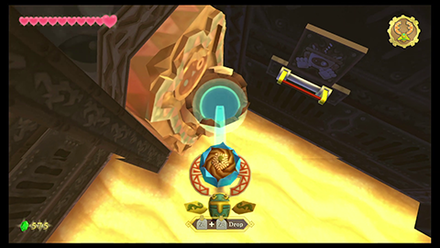
Use the Hook Beetle to grab the Bomb above the pillar and over to the statue on the northwest corner of the room. This will topple the statue over creating a platform for you to stand on.
Rush across the sinksand to the northwest corner of the room to pull down another lever here. This should open up the gate allowing you to progress to the next room.
Move the Iron Box ahead to climb up to the door going to the next room.
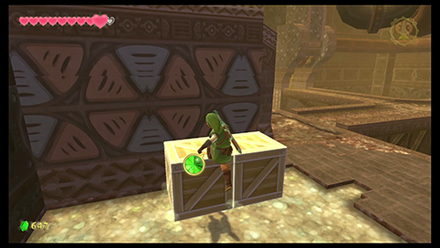
Defeat the Arachas here before rearranging the boxes to climb up to the higher platform.
Using the Hook Beetle, grab a bomb and clear the boxes on the east side of the room.
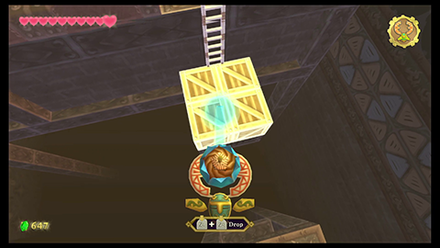
Use your Hook Beetle to take a Bomb and drop it on the crates to your right. This should clear the way for you to jump across and climb the ladder.
At the top of the ladder, defeat the Thunder Keese before opening the Blue Chest with the Small Key.
Head back to the previous room and use the small key to unlock the eastern door.
Use the Hook Beetle to grab a bomb and clear the box at the top of the southwest ladder.
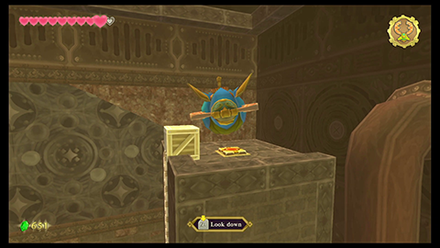
Once in the next room, follow along the path dealing with the Froaks along the way. Keep in mind it's best to shoot at them from a distance since they will use defensive spikes when you are too close.
Climb up the wall then face the direction where you came from. You should spot a pillar with a bomb atop it. Use the Hook Beetle to bomb the crate blocking the top of the southeast ladder.
Step on the pressure plate and use the beetle to activate the timeshift stone.

With the path now clear, climb the ladder and step on the pressure plate to open the bars where the Timeshift stone is. While still stepping on the pressure plate, activate the Timeshift stone with your Hook Beetle.
Run across the conveyor belts and pull the lever down
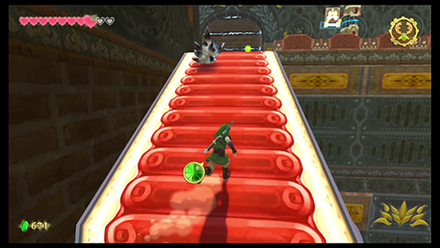
Run past the conveyor belt being careful not to be swept away, then descend the ladder on the other side.
There will be another conveyor belt here which you will have to sprint across. Avoid the spiky rocks and collect the Stamina Fruit to make all your way to the right platform at the end.
Climb up the steps and you'll find another conveyor belt. Sprint through this and defeat the Beamo at the top before pulling down the lever. This will open a door on the opposite wall.
Jump across the tops of the boxes and head for the back of the room.
You can let the Froaks explode to clear the rocks on top of the boxes.
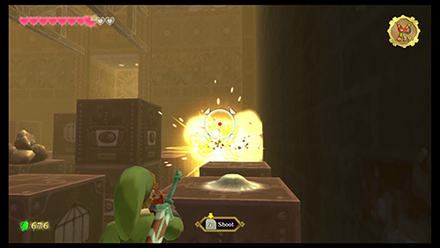
Jump down and climb up the ladder to your right. This will allow you to jump across the tops of these cubes. You may also defeat the Froaks which will cause them to explode, clearing up some of the paths.
Make your way towards the northmost platform and climb the ladder. A Blue Chest with the Gust Bellows can be found here. You can use the Gust Bellows to clear away mounds of dust and sand.
Climb the ladder on the west side of the room.
Use the Gust Bellows to clear sand mounds and smaller enemies like the Aracha

Once again, jump across the tops of the cubes and make your way towards the western wall where another ladder can be found. But before climbing the ladder, push down the crate on this platform for easier backtracking later on.
Climb up the ladder and use the Gust Bellows to clear the path. Go through the door.
Blow away the sand mounds on the northeast part of the room to freely move the iron box.
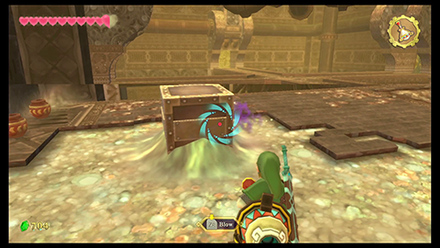
You'll now be back in the huge room. Move the box to the side and go down the ladder. Move towards the bird statue in this room and go back to the room where the Staldras were.
Using your Gust Bellows, clear away the sand in the northeastern part of the room. You should spot a pressure plate, and clear enough sand to freely move the steel box. Push the steel box onto the pressure plate.
Dash across the sinksand and make your way to the southwest part of the room. Reveal the Timeshift stone hidden in the sand
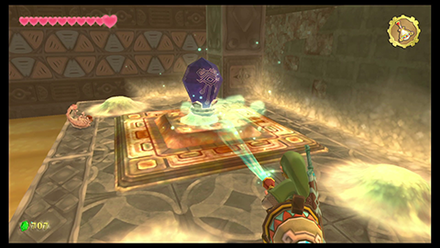
The gate to the western door should unlock. Go through it. You should find yourself in a large room with a lot of sink sand.
Run ahead crossing the platforms as you make your way to the southwest corner of the room. Use your Gust Bellows to clear away the large mound of sand to reveal a timeshift stone inside.
Use the Gust Bellows to control the movement of the platform.
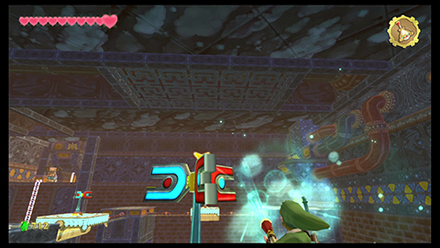
Activate the timeshift stone. The sinksand will recede and you'll be left with floating platforms. These platforms require wind from the Gust Bellows to move. Hop on the first platform to head back to where a gate is.
Use the Gust Bellows on the pinwheel above the gate to open it.
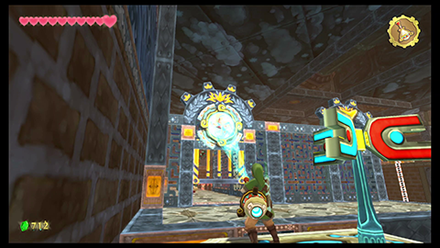
Notice a pinwheel on top of the gate. Use your Gust Bellows to blow air into this windmill to open it.
Follow the path and head for the northwest door.
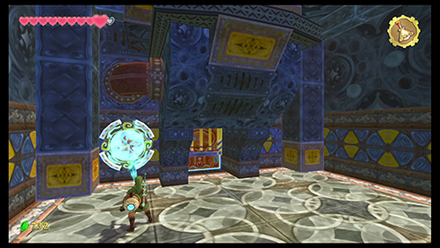
Once open, go through and defeat the Beamo inside. To your right will be a ladder you can descend.
From here, you'll have to blow wind at the platform to get it to a point you can jump to it. But you'll have to avoid the bombs and missiles sent by the Sentrobe.
After making it across, climb up the ladder and defeat the Beamo. Use your Gust Bellows on the windmill to open the gate.
Go through the gate and you'll have to battle against two Staldra.
Move the iron box to use it as a platform.
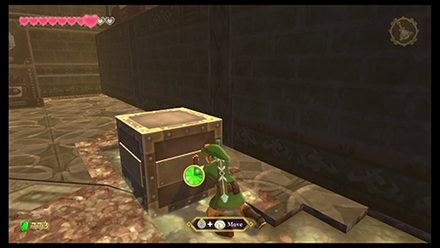
After you take them out, use your Gust Bellows to clear the sand around the box. Once free, push it over to the left so that you can climb up the higher platforms.
Reveal the timeshift stone hidden in the sand and activate it.
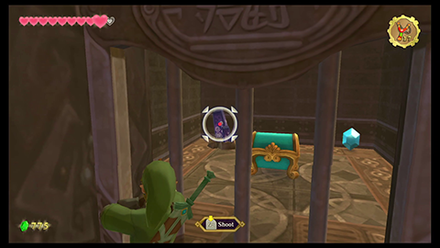
From here peer into the gate aim your Gust Bellows to clear the sand on the back left mound to reveal a timeshift stone. Hit it with a Slingshot to activate it.
Defeat the Armos to unlock the chest with the Dungeon Map. Go through the door to find yourself back in the large room.
Use the Gust Bellows on its head to reveal its weak point.
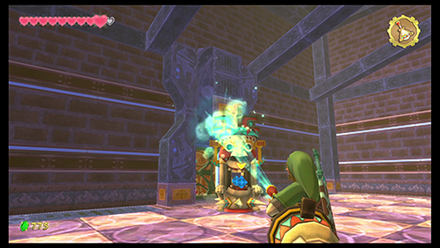
Drop down back to where you were and battle against the Armos. Use your Gust Bellows and aim it at the top of its head. This will cause its mouth to open where you can stab a Blue Crystal inside. Do this for both of its mouths.
After beating the Armos you can now access the gate where the timeshift stone was. Open the Blue Chest to get the Dungeon Map.
Check your map to find the safe walkways hidden in the sinksand.
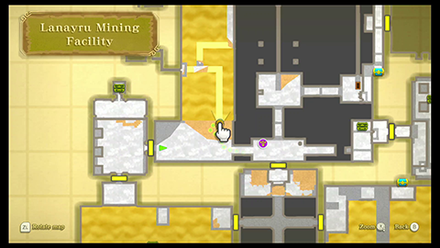
You'll notice a large length of sinksand that appears impossible to run through. However if you check your map, there is actually a path you can safely cross without sinking.
About two-thirds of the way through, there will be a sand mound hiding a crawl space behind it. Go through this crawl space.
Use the Gust Bellows to clear the sand and look for the pressure plate.
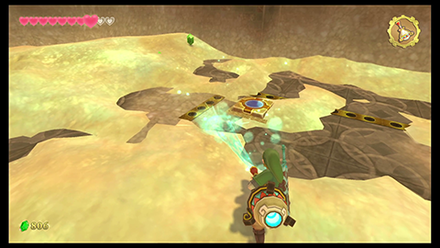
When you get to the other side you'll find yourself in a square room with a lot of sand. Drop down and slowly make your way around the room being careful of the spikes. You can use your Gust Bellows to clear the sand to see where the spikes are coming from.
Clear the sand slightly south to where the stairs are to reveal the pressure plate needed to open the gate. Press it, climb the stairs and go through the newly opened door.
Use the Gust Bellows to clear the sand covering the minecart with the timeshift stone.
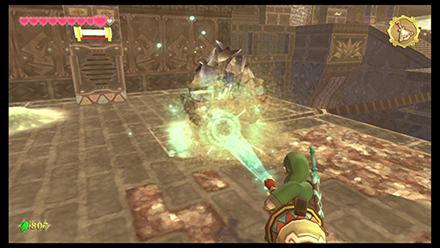
You are once again back in the huge room. Blow away the sand on the large mound in front of you to reveal a minecart with a timeshift stone. Strike the stone.
Walk along with the minecart to stay within the timeshift stone's influence. Open the gate using your Gust Bellows.
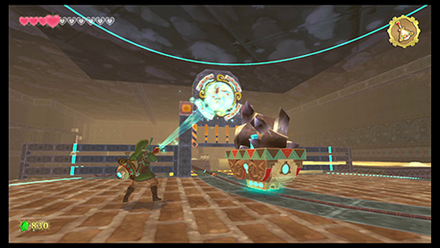
Since the timeshift stone is on a cart, the cart will move along the track, meaning the area of influence will also move. Pace along with the cart until it stops by the gate.
Use the Gust Bellows on the pinwheel on the gate to let the cart pass through. As you do, you'll have to pace along with the minecart while also hiding from the Beamo's line of sight.
Activate the eastern minecart and walk along with it.
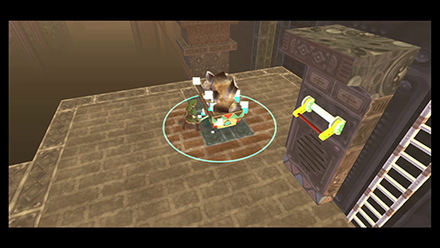
East of where the cart stopped is another mound of sand with a timeshift stone minecart hidden beneath. Clear out the sand and strike the timeshift stone before pacing along with this minecart.
Pace along the right side of the cart, preparing to slash at the Beamo once it gets in range of the timeshift stone.
Halfway along the path is a pinwheel. Use your Gust Bellows quickly to open the nearby gate.
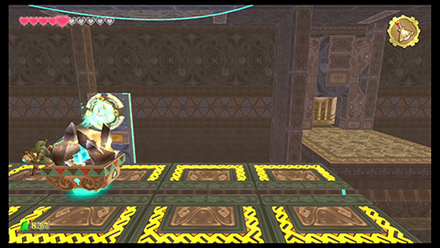
Likewise, you'll want to aim your Gust Bellows at the windmill to the right to open up the gate on the eastern door.
Run across the conveyor belts and pull down the lever
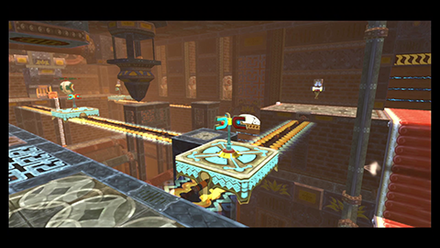
Pull the lever down to bring a platform near you. Ride it and use your Gust Bellows to move across the room.
Topple over more of the wall statues. Note the number of patterns on the wall.

Along the west wall are several statues you can topple over. Doing so reveals several pictures of LD-301s. This serves as a clue for what order to topple the statues on the opposite wall.
Topple over the wall statues on the opposite wall to reveal Red Crystals.
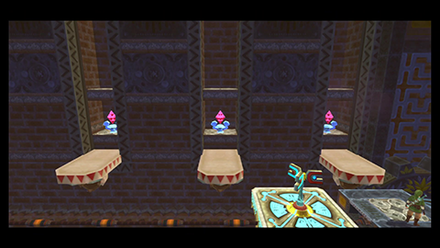
Head to the east wall where another platform will be. Use your Gust Bellows to move back and forth, toppling over the statues revealing Red Crystals behind them.
Activate them in the same order that the patterns suggest.
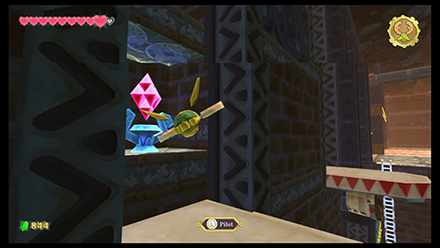
Use your slingshot to shoot the left crystal, then the right, then the middle one. Doing this in proper sequence will open up the gate on the northern-most wall.
Climb down the ladder, head west and back into the large room.
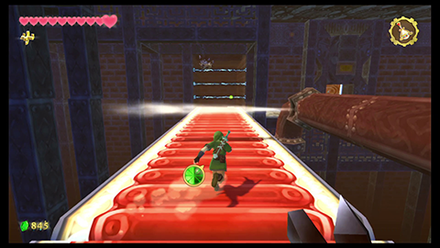
Entering the northern-most room, you'll have to face two Armos. After defeating them, you'll gain access to the Silver Chest with the Ancient Circuit. This will also open a door back into the huge room.
Drop down the ladder and make your way past the conveyor belt to get into the recently-opened door.
Along the northern wall is another timeshift stone minecart. Activate it and use your Gust Bellows to move the platform with it.
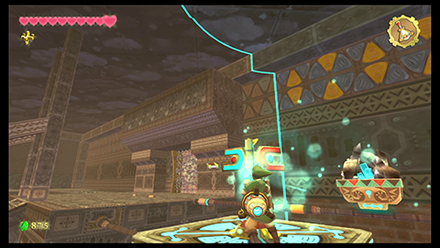
Climb up the stairs towards the northeastern point of the room. Activate the timeshift stone on a cart here and get ready to pace with it on the nearby gust platform.
Open the Boss Door with the Ancient Circuit.
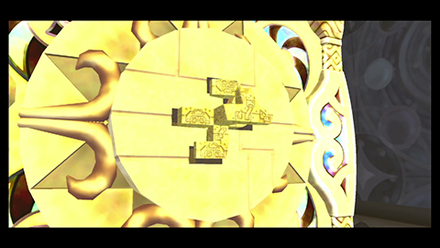
Once you get to the end, the boss door will be revealed. Place the Ancient Circuit to enter the Boss Room.
FIght the boss, the Thousand-Year Arachnid, Moldarach.
Slash at the eyes on it's pincers.
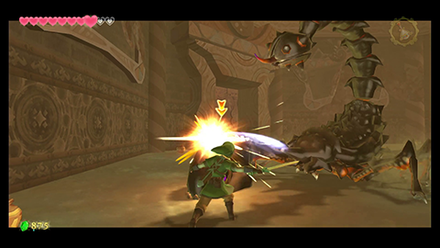
For its first attack sequence, Moldarach will attempt to grab you with its claws. Be quick to avoid these while slashing at the eyes in them. After enough slashes, you'll be able to take out both claws.
Use the Gust Bellows to reveal it from the sand when it hides.
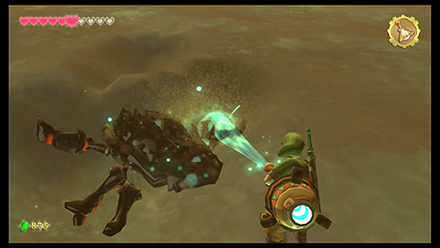
With both of its pincers gone, it will bury itself beneath the sand. Use your Gust Bellows to get Moldarach out of hiding.
Thrust your sword forward into its central eye
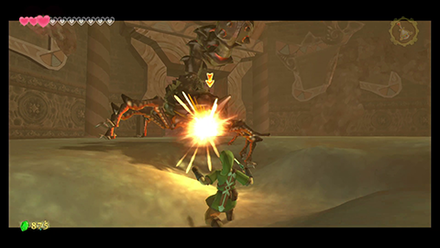
Once it pops out, stab it's central eye. Continue to do this until he's slain.
Use the Beetle to activate the Timeshift stone above the hall.
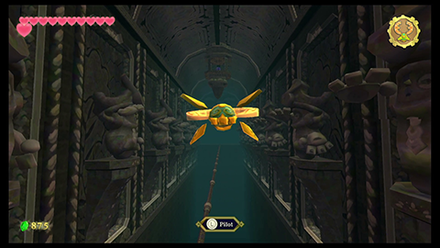
In the next room, you'll find a lone minecart on a track. Use your Hook Beetle to fly over the chasm and activate the timeshift stone in this area before riding the minecart across it.
Continue to the Sealed Grounds (2nd Visit) Walkthrough
Lanayru Mining Facility Boss
Moldarach
Moldarach is the boss you'll face at the end of the Lanayru Mining Facility. You must use your newly acquired Gust Bellows to take out this boss.
Lanayru Mining Facility Enemies
| List of Enemies | Strategy |
|---|---|
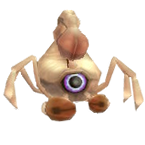 Aracha Aracha
|
As it is weak, a simple slash is enough to defeat it. However, multiple Arachas can grab on to you. Simple roll away and defeat all with a spin attack. |
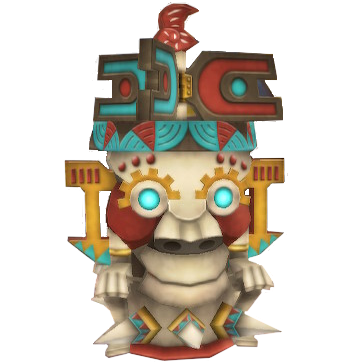 Armos Armos
|
Use Gust Bellows to make the propeller on the top of its head spin, which will then expose two gems. One gem can be slashed, the other must be stabbed. Using Gust Bellows on its body in this state will cause it to turn around, which allows you to stab the other gem. |
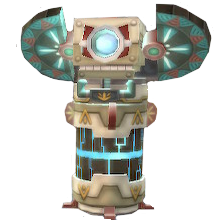 Beamos Beamos
|
Slash through each of the line with a horizontal sword attack. When only the head remains, stab it with a forward thrust. You can also Shield Bash to deflect the laser back to stun them. |
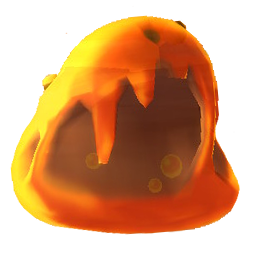 Chuchu Chuchu
|
A simple sword slash defeats it. When it merges, proceed to continue slashing until every Chuchu is defeated. |
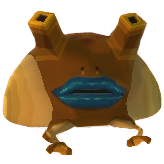 Electro Spume Electro Spume
|
Throw a bomb or attack with a Skyward Strike. |
 Froak Froak
|
Froaks will explode if you blow it off with Gust Bellows or with a sword against terrain or enemies. Note that sword attacks do not work. |
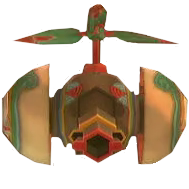 Sentrobe Sentrobe
|
Repel its missile attack twice with a Shield Bash or a sword strike. Slice the flying bombs according to its orientation. |
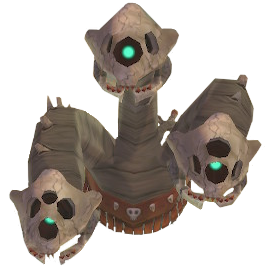 Staldra Staldra
|
Destroy all 3 heads at the same time. If you break only one head, the heads will line up in a straight line at the moment of regeneration, this will give you an opportune time to slash them all at once. |
 Thunder Keese Thunder Keese
|
Block and stun its swoop, then attack it just the same as with normal Keese. Do not use Iron Shields while doing this. |
Skyward Sword HD Related Guides

| Skyward Sword Walkthough | |
|---|---|
| Complete Story Walkthrough | |
| Dungeons and Temples List | Silent Realm Guide |
Main Locations
Silent Realm Trials
| Silent Realm Trials | |
|---|---|
 Farore's Trial Farore's Trial |
 Nayru's Trial Nayru's Trial |
 Din's Trial Din's Trial |
 The Goddess's Trial The Goddess's Trial |
Author
The Legend of Zelda: Skyward Sword Walkthrough & Guides Wiki
Lanayru Mining Facility Walkthrough: All Maps, Treasure Chests, Goddess Cubes, and Heart Pieces
improvement survey
03/2026
improving Game8's site?

Your answers will help us to improve our website.
Note: Please be sure not to enter any kind of personal information into your response.

We hope you continue to make use of Game8.
Rankings
- We could not find the message board you were looking for.
Gaming News
Popular Games

Genshin Impact Walkthrough & Guides Wiki

Honkai: Star Rail Walkthrough & Guides Wiki

Umamusume: Pretty Derby Walkthrough & Guides Wiki

Pokemon Pokopia Walkthrough & Guides Wiki

Resident Evil Requiem (RE9) Walkthrough & Guides Wiki

Monster Hunter Wilds Walkthrough & Guides Wiki

Wuthering Waves Walkthrough & Guides Wiki

Arknights: Endfield Walkthrough & Guides Wiki

Pokemon FireRed and LeafGreen (FRLG) Walkthrough & Guides Wiki

Pokemon TCG Pocket (PTCGP) Strategies & Guides Wiki
Recommended Games

Diablo 4: Vessel of Hatred Walkthrough & Guides Wiki

Cyberpunk 2077: Ultimate Edition Walkthrough & Guides Wiki

Fire Emblem Heroes (FEH) Walkthrough & Guides Wiki

Yu-Gi-Oh! Master Duel Walkthrough & Guides Wiki

Super Smash Bros. Ultimate Walkthrough & Guides Wiki

Pokemon Brilliant Diamond and Shining Pearl (BDSP) Walkthrough & Guides Wiki

Elden Ring Shadow of the Erdtree Walkthrough & Guides Wiki

Monster Hunter World Walkthrough & Guides Wiki

The Legend of Zelda: Tears of the Kingdom Walkthrough & Guides Wiki

Persona 3 Reload Walkthrough & Guides Wiki
All rights reserved
© Nintendo. The Legend of Zelda, Nintendo Switch and amiibo are trademarks of Nintendo © 2021 Nintendo.
The copyrights of videos of games used in our content and other intellectual property rights belong to the provider of the game.
The contents we provide on this site were created personally by members of the Game8 editorial department.
We refuse the right to reuse or repost content taken without our permission such as data or images to other sites.
 Skyloft
 Sealed Grounds
 Faron Woods
 Skyview Temple
 Eldin Volcano
 Earth Temple
 Lanayru Mine
 Lanayru Desert
 Inside Thunderhead (Isle of Songs)
 Lake Floria
 Ancient Cistern
 Lanayru Sand Sea
 Sandship
 Volcano Summit
 Fire Sanctuary
 Lanayru Gorge
 Sky Keep
 Final Battle




![Monster Hunter Stories 3 Review [First Impressions] | Simply Rejuvenating](https://img.game8.co/4438641/2a31b7702bd70e78ec8efd24661dacda.jpeg/thumb)


So either the goddess plume and blue bird feather are randomly placed or you guys got it wrong, because I was using this guide to decide whether to go back or not, and I saw 8 being the goddess plume and it gave me the bird feather. If someone else can confirm or debunk I'd be much obliged.