Lanayru Desert Walkthrough: All Maps, Treasure Chests, Goddess Cubes, and Heart Pieces
★All Pieces of Heart & Goddess Cubes Locations
☆How to Get All Gratitude Crystals
★Empty Bottle Guide
This is a complete guide to Lanayru Desert for The Legend of Zelda: Skyward Sword HD for the Nintendo Switch. Read on to learn more about how to progress through the story, where to find treasure chests, Goddess Cubes, Heart Pieces, and other collectibles, as well as how to beat story bosses and more!
List of Contents
Lanayru Desert Maps and Treasure Chest Locations
Lanayru Desert Map

Treasure Chest Contents
| Contents | |
|---|---|
| ① | Blue Bird Feather |
| ② | Tumbleweed |
| ③ | Heart Fragment |
| ④ | Red Rupee (Accessible after obtaining the Claw shot) |
| ⑤ | Red Rupee (Accessible after obtaining the Claw shot) |
| ⑥ | Random Material (Accessible after obtaining the Claw shot) |
North Warehouse Map

Treasure Chest Contents
| Contents | |
|---|---|
| ① | Red Rupee |
| ② | Blue Rupee |
| ③ | Golden Skull |
Stone Cache Map

Treasure Chest Contents
| Contents | |
|---|---|
| ① | Blue Rupee |
| ② | Blue Rupee |
| ③ | Eldin Ore |
| ④ | Blue Rupee |
| ⑤ | Monster Horn |
Lanayru Desert Goddess Cubes Locations
Goddess Cubes - 3 Locations Total
| Reward Required Item | Goddess Cube Location | Goddess Chest Location |
|---|---|---|
| Heart Medal Hook Beetle |
 Head to the southwestern part of the Lanayru and use a Hook Beetle to kill the Ampilus. Run and stand on its shell to recover stamina and run towards the Goddess Cube. |
 Head east of the beam of light at Lanayru and land on the volcano island to reach the Goddess Chest. |
| Heart Medal Clawshots, Water Dragon's Scale |
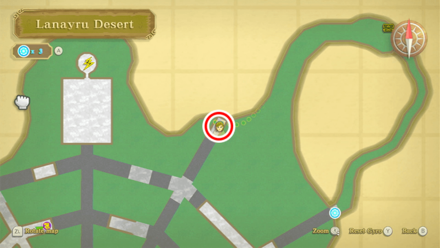 Northeast of Lanayru Desert, you will see a crack on the wall. Blow up the crack and use your Clawshots then pass through a narrow corridor to reach the Goddess Cube. |
 Fly to the island west of Beedle's Island and land on the lower area. Dive down and swim until you reach the Goddess Chest. |
| Life Medal Clawshots |
 On one of the ledges southwest of Lanayru Mining Facility, use your Clawshots to get up the ledge and reach the Goddess Cube. |
 Fly to the small island northwest of Fun Fun Island and climb down the vines to reach the chest at the bottom of the island. |
Lanayru Desert Pieces of Heart Locations
Pieces of Heart - 1 Location Total
| How to Get Heart Piece #7 | ||
|---|---|---|
 |
||
| Required Items | Bombs | |
| Map Location |
 Lanayru Desert |
|
| How to Get | Use a bomb on the cracked wall at the northeastern corner of the Lanayru Desert. | |
How to Get All Pieces of Heart
Lanayru Desert Story Walkthrough
| Objectives |
|---|
| 1. Toss a bomb into the hole on top of the cage to reveal and activate the timeshift stone. |
| 2. Defeat the Technoblin to help the LD-301 Robot. |
| 3. Obtain the Hook Beetle as thanks. |
| 4. Utilize your newly acquired Hook Beetle to get to the western part of the map. |
| 5. Activate the timeshift stones to make your way across the gorge. |
| 6. Activate the timeshift stone in front of the temple and help the Robot. |
| 7. Make your way to the Lanayru Quarry to find a way to enter the temple. |
| 8. Locate the 3 remote power nodes required to power the generator. |
| 9. Find the first Power Node in the west part of the quarry. |
| 10. Use bombs to break the cracked wall and activate the timeshift stone inside. |
| 11. Topple over the wall statue next to it to reveal the power node. |
| 12. Thrust your sword into the power node. |
| 13. Break the wall in the northern part of the desert to reveal a warehouse. |
| 14. Use a bomb on a pile of rocks to reveal the timeshift stone in this warehouse. |
| 15. Activate the timeshift stone. Use the Hook Beetle to carry an Ampilus Egg to the machine on the north end of the warehouse. |
| 16. Thrust your sword into the power node. |
| 17. Head to the stone cache in the southeast part of the quarry. |
| 18. Enter the stone cache and use bombs to reveal the timeshift stone in this warehouse. |
| 19. Defeat an Ampilus and ride its shell to get to the other end of the warehouse. |
| 20. Climb the boxes on the west wall of the warehouse and push the smaller box down. |
| 21. Activate the timeshift stone. Note how the Ampilus revert to Ampilus Eggs. |
| 22. Use the Hook Beetle to carry an Ampilus Egg to the machine on the north end of the cache. |
| 23. Thrust your sword into the power node. |
| 24. Return to the generator near the center of the quarry. |
| 25. Activate the nearby timeshift stone. |
| 26. Thrust your sword into the generator. |
| 27. Enter the Lanayru Mining Facility |
Toss a bomb into the hole on top of the cage to reveal and activate the timeshift stone.

Continue forward into the large open space, and find your way atop one of the walkways where you can find a Blue Chest with a Tumbleweed.
From the platform with the blue chest, jump atop the cube cage closest to you. Then use a Bomb and toss it into the cube cage with an opening on top of it. This will break the rubble inside revealing a Timeshift Stone.
Defeat the Technoblin to help the LD-301 Robot.

Activate this Timeshift stone to reveal a small area of influence around it. It will also revive the nearby fallen Technoblins. Take these enemies out, being careful not to strike their electric weapons. Once defeated, the cages will open.
Utilize your newly acquired Hook Beetle to get to the western part of the map.

Speak to the the LD-301 who is now free from its cage. As thanks, he will upgrade your Beetle to a Hook Beetle.
Using your newly acquired Hook Beetle, you may now grab the Bombs from atop the trees and drop them into the statues. Do this on the west set of statues to create platforms that will help you traverse the sinksand.
Activate the timeshift stones to make your way across the gorge.

Soon you'll find yourself in the Desert Gorge. There are several timeshift stones on the peaks of the rocky structures which you can activate.
Take out the nearby Technoblin then ride the cart across the gap.
There is a timeshift stone hidden in the central tree

Use your Hook Beetle to take a bomb from the tip of the cactus and drop it into the trunk of the tree stump to your left. This will activate a Timeshift stone in this part.
Activate the timeshift stone in front of the temple and help the Robot.

To your right, there are 4 stone pillars. Use your Hook Beetle to bomb the rocks atop one of them to reveal a timeshift stone. Defeat the Technoblins nearby then speak to the LD-301.
Find the first Power Node in the west part of the quarry.

Now that you are at the quarry, move towards the west part of the invisible paths. You'll find two statues you can topple over, the left one of which will have the second terminal we're looking for.
Use a bomb to open up the crack on the left wall to reveal a timeshift stone. Now you can interact with the terminal by thrusting your sword into it. Turn your sword 90 degrees counterclockwise to activate this terminal.
Break the wall in the northern part of the desert to reveal a warehouse.
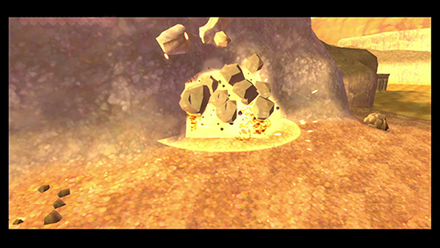
Head to the northmost part of the quarry and you'll find a crack in the wall. Blow it up with a bomb and go through.
Use a bomb on a pile of rocks to reveal the timeshift stone in this warehouse.
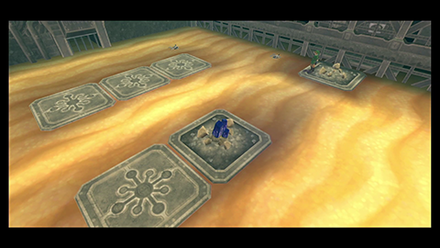
In this room, you'll have to roll bombs across the sinksand to destroy groups of rocks. In the middle is a hidden timeshift stone. Activating it will reveal the past form of this warehouse.
Activate the timeshift stone. Use the Hook Beetle to carry an Ampilus Egg to the machine on the north end of the warehouse.
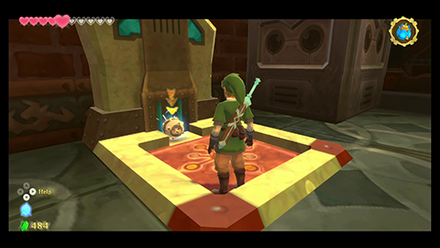
Take an Ampilus Egg and roll it into the machine near the North end of the warehouse. This should open the gate next to it.
Thrust your sword into the power node.

Head inside and thrust your sword into the machine inside. Turn your sword 90 degrees counterclockwise to activate this terminal.
Head to the stone cache in the southeast part of the quarry.

The final terminal will be at the southeast portion of the map.
Enter the Cache and make your way through it. Just like the warehouse, you'll have to look for the timeshift stone to revert this cache to how it was in the past.
Climb up one of the boxes along the north wall just before the gap before deactivating the timeshift stone. Defeat an Ampilus and ride its shell across the sand.
Climb the boxes on the west wall of the warehouse and push the smaller box down.
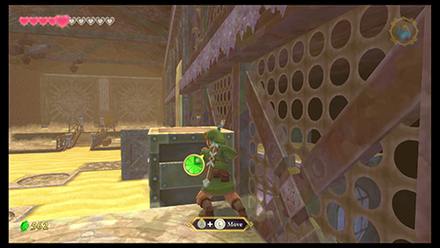
Once across the path you can climb the boxes along the west wall to get to a Blue Chest with an Eldin Ore inside. Afterwards you can push down the nearby iron box.
Activate the timeshift stone. Note how the Ampilus revert to Ampilus Eggs.

Activate the nearby timeshift stone.With the cache back in the past, send a Hook Beetle to bring an Ampilus egg for you to place in the machine by the gate.
Return to the generator near the center of the quarry.
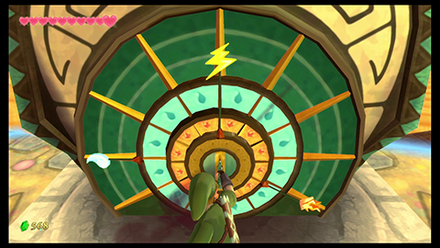
Exit the Cache and return to the large machine near the center of the mining facility. Rotate the water symbol to point in the 9 o'clock direction, then push in.
Rotate the fire symbol to point in the 4 o'clock direction, then push in.
Finally, rotate the lightning symbol to point in the 12 o'clock direction, then push in. A cutscene will play revealing the entrance to the mining facility.
Continue to the Lanayru Mining Facility Walkthrough
Lanayru Desert Enemies
| List of Enemies | Strategy |
|---|---|
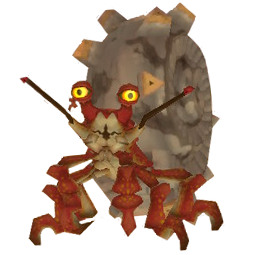 Ampilus Ampilus
|
You can defeat it by hitting it with a shield attack to stun it and then slash at it several times. |
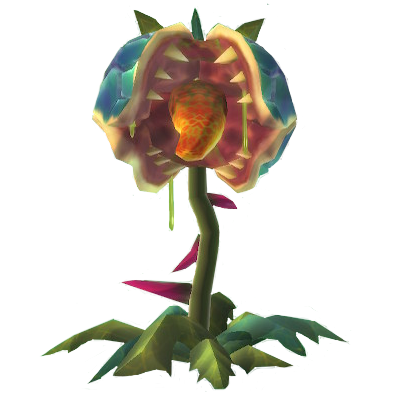 Deku Baba Deku Baba
|
Slash horizontally or vertically according to the orientation of its mouth. You can also cut off its stem with a Beetle to instantly defeat it. |
 Electro Spume Electro Spume
|
Throw a bomb or attack with a Skyward Strike. |
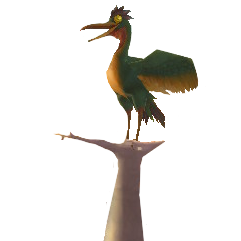 Hrok Hrok
|
Hook a bomb with the Hook Beetle, then carry it to the Hrok, which will instantly defeat it. |
 Octorok Octorok
|
Octorok can be defeated by repelling the rocks it spits with a Shield Bash. You can also use the Slingshot and strike it after stunning it. |
 Technoblin Technoblin
|
Use Skyward Strike to down it and use Fatal Blow. Attack it strategically to avoid being electrocuted from its weapon. If it doesn't work, you can easily defeat it by stunning it with a slingshot. Avoid using Iron Shields. |
 Thunder Keese Thunder Keese
|
Block and stun its swoop, then attack it just the same as with normal Keese. Do not use Iron Shields while doing this. |
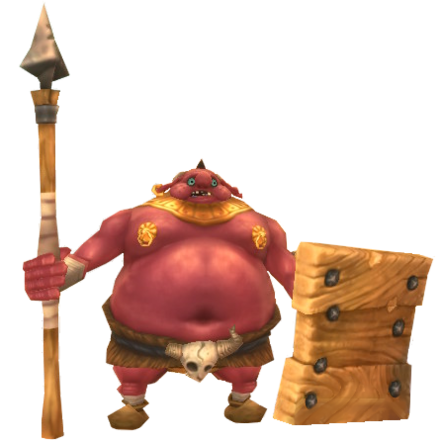 Wooden Shield Moblin Wooden Shield Moblin
|
Slash away its shield first with a sword until it is destroyed, then you can freely hit it. Avoid its attacks indicated by its wind-ups. |
Skyward Sword HD Related Guides

| Skyward Sword Walkthough | |
|---|---|
| Complete Story Walkthrough | |
| Dungeons and Temples List | Silent Realm Guide |
Main Locations
Silent Realm Trials
| Silent Realm Trials | |
|---|---|
 Farore's Trial Farore's Trial |
 Nayru's Trial Nayru's Trial |
 Din's Trial Din's Trial |
 The Goddess's Trial The Goddess's Trial |
Author
The Legend of Zelda: Skyward Sword Walkthrough & Guides Wiki
Lanayru Desert Walkthrough: All Maps, Treasure Chests, Goddess Cubes, and Heart Pieces
improvement survey
03/2026
improving Game8's site?

Your answers will help us to improve our website.
Note: Please be sure not to enter any kind of personal information into your response.

We hope you continue to make use of Game8.
Rankings
- We could not find the message board you were looking for.
Gaming News
Popular Games

Genshin Impact Walkthrough & Guides Wiki

Honkai: Star Rail Walkthrough & Guides Wiki

Umamusume: Pretty Derby Walkthrough & Guides Wiki

Pokemon Pokopia Walkthrough & Guides Wiki

Resident Evil Requiem (RE9) Walkthrough & Guides Wiki

Monster Hunter Wilds Walkthrough & Guides Wiki

Wuthering Waves Walkthrough & Guides Wiki

Arknights: Endfield Walkthrough & Guides Wiki

Pokemon FireRed and LeafGreen (FRLG) Walkthrough & Guides Wiki

Pokemon TCG Pocket (PTCGP) Strategies & Guides Wiki
Recommended Games

Diablo 4: Vessel of Hatred Walkthrough & Guides Wiki

Cyberpunk 2077: Ultimate Edition Walkthrough & Guides Wiki

Fire Emblem Heroes (FEH) Walkthrough & Guides Wiki

Yu-Gi-Oh! Master Duel Walkthrough & Guides Wiki

Super Smash Bros. Ultimate Walkthrough & Guides Wiki

Pokemon Brilliant Diamond and Shining Pearl (BDSP) Walkthrough & Guides Wiki

Elden Ring Shadow of the Erdtree Walkthrough & Guides Wiki

Monster Hunter World Walkthrough & Guides Wiki

The Legend of Zelda: Tears of the Kingdom Walkthrough & Guides Wiki

Persona 3 Reload Walkthrough & Guides Wiki
All rights reserved
© Nintendo. The Legend of Zelda, Nintendo Switch and amiibo are trademarks of Nintendo © 2021 Nintendo.
The copyrights of videos of games used in our content and other intellectual property rights belong to the provider of the game.
The contents we provide on this site were created personally by members of the Game8 editorial department.
We refuse the right to reuse or repost content taken without our permission such as data or images to other sites.
 Skyloft
 Sealed Grounds
 Faron Woods
 Skyview Temple
 Eldin Volcano
 Earth Temple
 Lanayru Mine
 Lanayru Mining Facility
 Inside Thunderhead (Isle of Songs)
 Lake Floria
 Ancient Cistern
 Lanayru Sand Sea
 Sandship
 Volcano Summit
 Fire Sanctuary
 Lanayru Gorge
 Sky Keep
 Final Battle


![Monster Hunter Stories 3 Review [First Impressions] | Simply Rejuvenating](https://img.game8.co/4438641/2a31b7702bd70e78ec8efd24661dacda.jpeg/thumb)


Unless I'm blind you missed a chest with a goddess plume in the small room with the "electricity" symbol generator. It's left up on a platform right when you enter after opening the door with that little electric ball. Sloppy job! Again, unless I don't see it.