Skyloft Walkthrough: All Maps, Treasure Chests, and Heart Pieces
★All Pieces of Heart & Goddess Cubes Locations
☆How to Get All Gratitude Crystals
★Empty Bottle Guide
This is a complete guide to Skyloft in The Legend of Zelda: Skyward Sword HD for the Nintendo Switch. Read on for a full Skyloft walkthrough and see where to find treasure chests, Heart Pieces, as well as other collectibles!
List of Contents
Skyloft Maps and Treasure Chest Locations
Skyloft Map
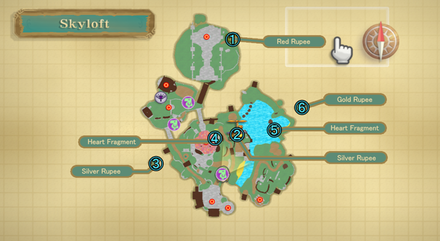
Treasure Chest Contents
| Contents | |
|---|---|
| ① | Red Rupee |
| ② | Silver Rupee (Available after getting the Scales of the Water Dragon) |
| ③ | Silver Rupee (Goddess Chest) |
| ④ | Heart Fragment (Available after getting the Goddess Chest and the Scales of the Water Dragon) |
| ⑤ | Heart Fragment (Goddess Chest, after getting the Clawshots) |
| ⑥ | Gold Rupee (Goddess Chest, after getting the Clawshots) |
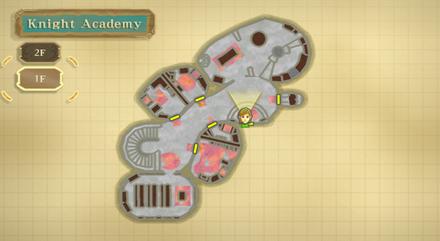
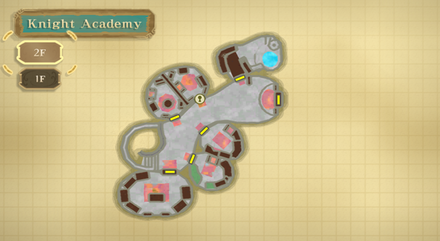
Knight Academy Map
| Knight Academy 1F |
|---|
 |
| Knight Academy 2F |
 |
Sparring Hall Map
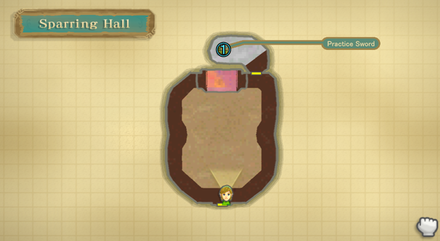
Treasure Chest Contents
| Contents | |
|---|---|
| ① | Practice Sword |
Bazaar Map
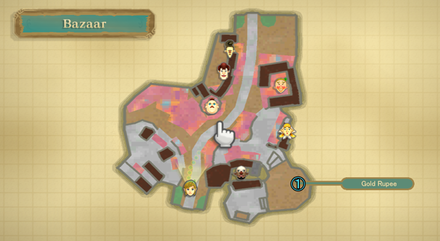
Treasure Chest Contents
| Contents | |
|---|---|
| ① | Gold Rupee (Goddess Chest) |
Waterfall Map
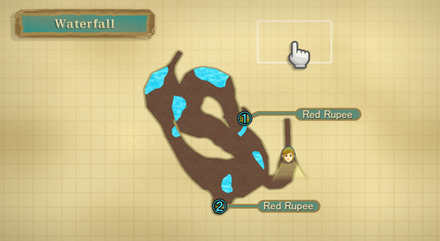
Treasure Chest Contents
| Contents | |
|---|---|
| ① | Red Rupee |
| ② | Red Rupee |
Inside the Statue of the Goddess Map
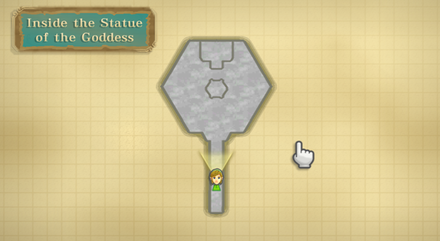
Skyloft Piece of Heart Locations
Skyloft Pieces of Heart - 6 Locations Total
Heart Pieces #5, #12, #14
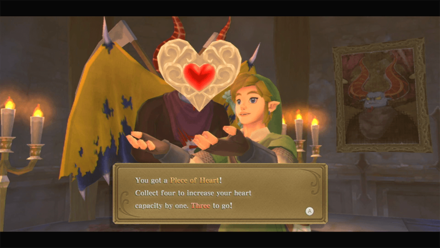
| How to Get Heart Piece #5 | ||
|---|---|---|
 |
||
| Required Items | 10 Gratitude Crystals | |
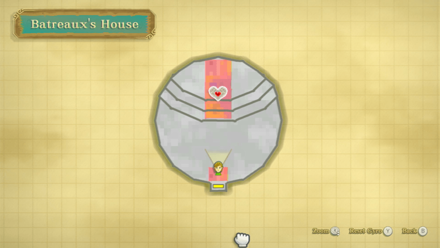
| Map Location |
 Skyloft |
|
| How to Get | Talk to Batreaux after collecting 10 Gratitude Crystals. | |
| How to Get Heart Piece #14 | ||
|---|---|---|
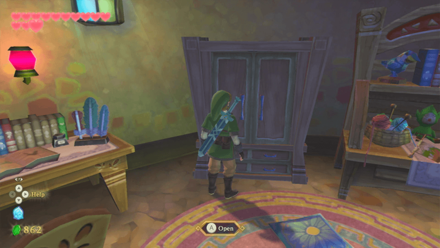 |
||
| Required Items | Clawshots | |
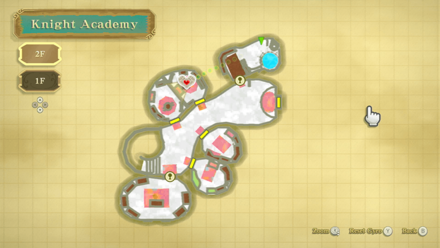
| Map Location |
 Skyloft |
|
| How to Get | Climb on top of the Knight Academy and use a Clawshot on the chimney to drop down in the hole. Crawl through the narrow space to reach Zelda's room and open the cupboard to obtain the Piece of Heart. | |
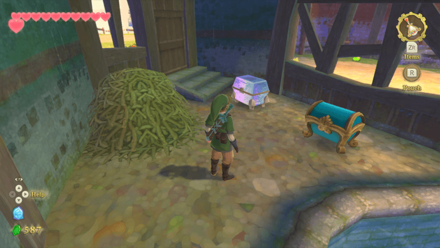
| How to Get Heart Piece #12 | ||
|---|---|---|
 |
||
| Required Items | Water Dragon's Scale | |
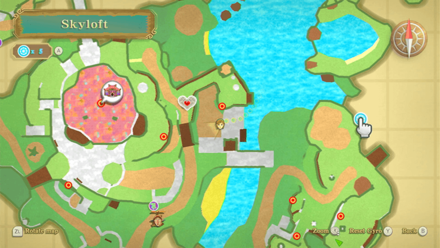
| Map Location |
 Skyloft |
|
| How to Get | Activate the Goddess Cube on the northeastern side of the Eldin Volcano. Slide down the sandslide and into the left gyser to reach the cube. Dive underwater in the main river on Skyloft to reach the chest that contains the Piece of Heart. | |
Heart Pieces #16, #17, #23
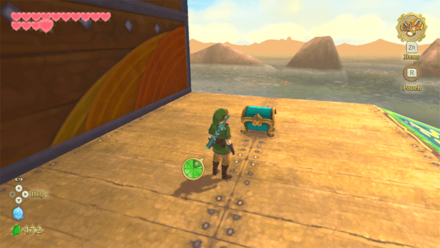
| How to Get Heart Piece #16 | ||
|---|---|---|
 |
||
| Required Items | Clawshots | |
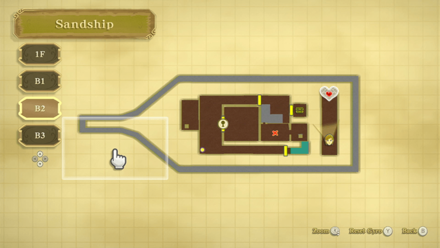
| Map Location |
 Sandship |
|
| How to Get | Inside the Sandship, use the Timeshift Stone on the central mast and climb the ladder. Use the pulleys to make your way to the stern side and use the Clawshot to grapple on the target to drop down. Drop down to the back of the ship to reach a chest that contains a Piece of Heart. | |
| How to Get Heart Piece #17 | ||
|---|---|---|
 |
||
| Required Items | Bow, 2 Stamina Potions | |
| Map Location |
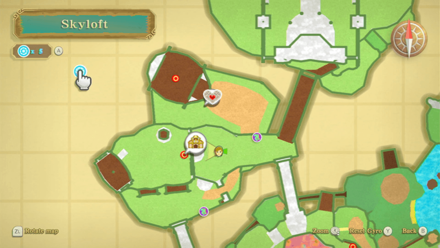 Skyloft |
|
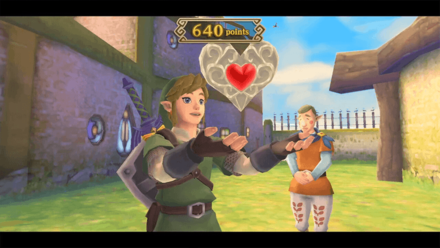
| How to Get | Play Fledge's minigame and score more than 600 points to obtain the Piece of Heart | |
| How to Get Heart Piece #23 | ||
|---|---|---|
 |
||
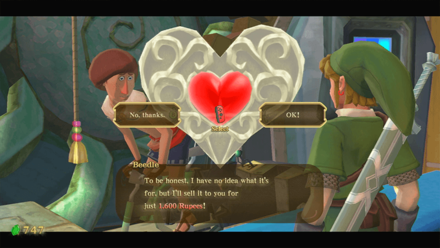
| Required Items | 1600 Rupees | |
| Map Location |
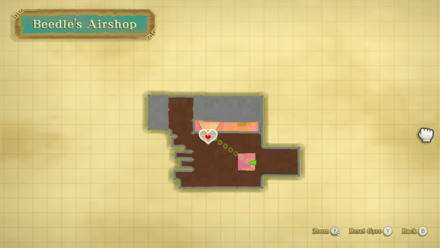 Skyloft |
|
| How to Get | Purchase from Beedle for 1600 Rupees. If you have completed his sidequest, you can purchase the Heart Piece for only 800 Rupees. | |
The Sky Pieces of Heart - 3 Locations Total
| How to Get Heart Piece #11 | ||
|---|---|---|
 |
||
| Required Items | None | |
| Map Location |
 The Sky |
|
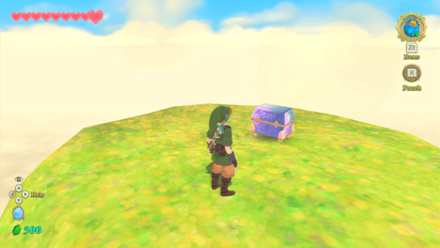
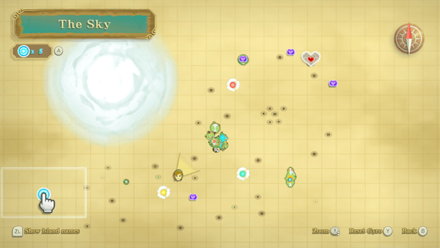
| How to Get | Use the minecart at the northwestern part of the Temple of Time and activate the Goddess Cube. Open the Goddess Chest in Beedle's Island to obtain the Piece of Heart. | |
| How to Get Heart Piece #13 | ||
|---|---|---|
 |
||
| Required Items | None | |
| Map Location |
 The Sky |
|
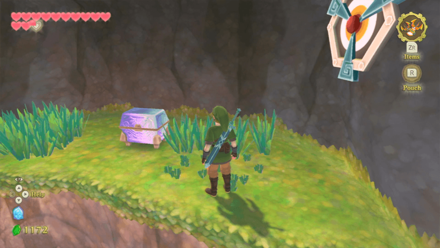
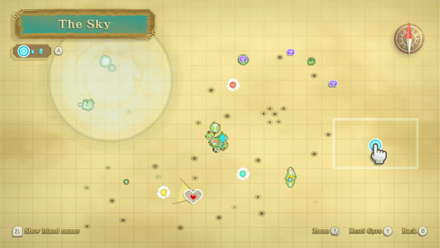
| How to Get | Warp to the Great Tree Bird Statue in Faron Woods and glide down to reach the Goddess Cube below. Head to the volcano island east of the Lanayru beacon to find the Goddess Chest. You need to land on the upper ledge of the island to reach the chest. | |
| How to Get Heart Piece #3 | ||
|---|---|---|
 |
||
| Required Items | None | |
| Map Location |
 The Sky |
|
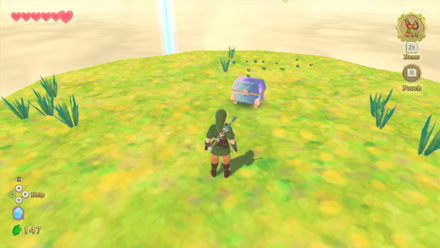
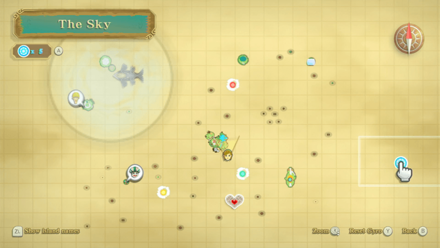
| How to Get | Activate the Goddess Cube outside the Skyview Temple and open the chest on an island south of Skyloft. | |
How to Get All Pieces of Heart
Skyloft (1st Visit) Story Walkthrough
| Objectives |
|---|
| 1. Exit the Knight Academy. |
| 2. Speak with Instructor Horwell on the roof. |
| 3. Retrieve Mia, Headmaster Gaepora's pet. |
| 4. Head north towards the Statue of the Goddess. |
| 5. Explain the situation to Instructor Horwell. |
| 6. Speak with Groose at the Plaza. |
| 7. Speak with Fledge and Pipit just outside of the Sparring Hall. |
| 8. Obtain the Training Sword from the Sparring Hall. |
| 9. Head to the cave behind the waterfall northeast of Skyloft. Cut down the wooden stakes that block your path. |
| 10. Free your Loftwing. |
| 11. Learn how to pilot your Loftwing. |
| 12. Win the Wing Ceremony by taking the Bird Statuette. |
| 13. Receive the Sailcloth from Zelda. Jump off the statue and land in the middle of the courtyard. |
| 14. After a long set of cutscenes, leave your room. |
| 15. Follow the mysterious figure all the way to the Inside of the Goddess Statue. |
| 16. Pull out the Goddess' Sword and raise it Skyward. |
| 17. Perform a Skyward Strike on the crest. Place the Emerald Tablet on the receptacle. |
| 18. After a few cutscenes, exit your room. Receive the Adventure Pouch from Fledge. Exit the Academy. Speak with Instructor Horwell to receive a Wooden Shield. |
| 19. Ride your Loftwing to the green pillar of light before jumping off to descend in that area. |
Speak with Instructor Horwell on the roof
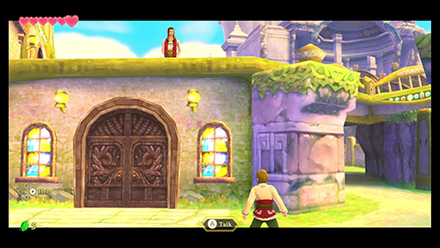
When you first leave the academy, Instructor Horwell will call to you from the roof. Make your way up to him.
Retrieve Mia, Headmaster Gaepora's pet
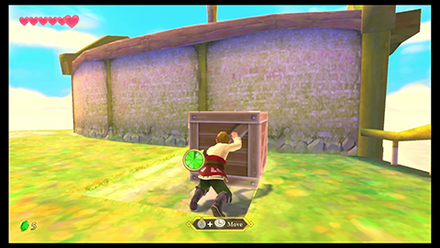
Instructor Horwell will ask you to look for Headmaster Gaepora's pet. You'll have to jump across the academy's rooftops to get to Mia.
Bring Mia back to Instructor Horwell
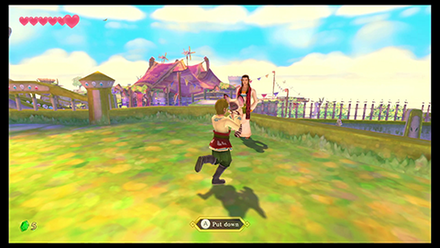
After catching Mia, bring her back to Instructor Horwell.
Head north towards the Statue of the Goddess

After delivering Mia back to Instructor Horwell, head to north towards the Statue of the Goddess to meet Headmaster Gaepora and Zelda.
Speak with Groose at the Plaza

After explaining the situation to Instructor Horwell, head south to get to the Plaza and ask Groose about the whereabouts of your Loftwing.
Obtain the Training Sword from the Sparring Hall

When the cutscenes with Groose are over, you should be able to enter the Sparring Hall, which is found just northwest of the Knight's Academy. Take the Practice Sword from the Blue Chest in the back room.
Learn how to wield the sword with Knight Commander Eagus
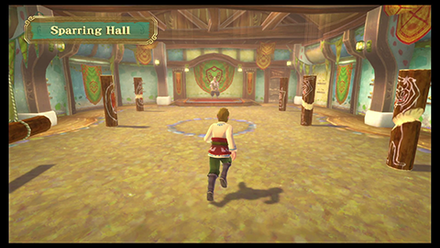
There are several logs here that will let you practice the different sword techniques. Be sure to practice them well as they'll be useful for the rest of your adventure.
Free your Loftwing
Cut the rope, not the boards

After making your way through the cave, you should find your Loftwing trapped behind some boards. Cut the rope to set your Loftwing free.
Learn how to pilot your Loftwing
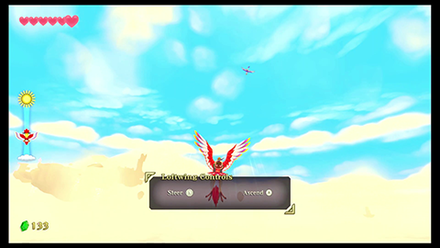
With your Loftwing free, Zelda will invite you to practice riding the Loftwing. Take this time to familiarize yourself with how to pilot your Loftwing since the Wing Ceremony will be up next.
Win the Wing Ceremony by taking the Bird Statuette
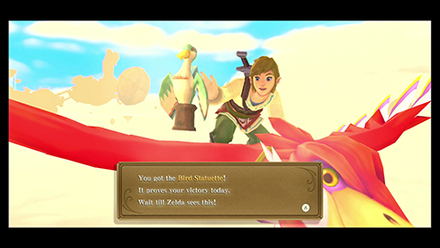
Once the Wing Ceremony starts, you'll have to chase after the Yellow Loftwing. When you get close enough, you can press A to grab the statuette. After your first attempt, Groose and his crew will try to interfere with your flight. Avoid their projectiles and you'll eventually reach the statuette.
Follow the mysterious figure all the way to the Inside of the Goddess Statue
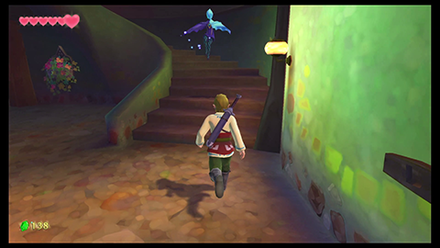
After the Wing Ceremony, you'll wake up in your room at night. Exit your room and follow the mysterious figure as she guides you to the Inside of the Goddess Statue.
Ride your Loftwing to the green pillar of light before jumping off to descend in that area
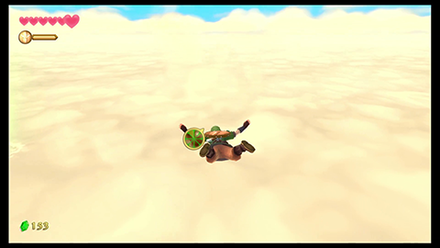
When you are ready to leave Skyloft, look for a wooden jump-off point before dashing and leaping off. Head for the green pillar of light and descend in that area.
Continue to the Sealed Grounds Walkthrough
Skyloft (2nd Visit) Story Walkthrough
| Objectives |
|---|
| 1. Learn more about the lyrics of the Goddess song at the Knight Academy. |
| 2. Use your Gust Bellows on the southwest windmill. |
| 3. Inspect the southeast windmill to trigger a cutscene. |
| 4. Go to the Scrap Shop in the Bazaar and give him an Ancient Flower. |
| 5. Find the missing propeller in Eldin Volcano. |
| 6. Return to Skyloft. |
| 7. Use your Gust Bellows on the southeast windmill. |
| 8. Play the Harp at the Light Tower |
| 9. Observe the beam of light that is now shining onto the large cloud formation. Follow this light to find yourself in the Thunderhead. |
Learn more about the lyrics of the Goddess song at the Knight Academy.
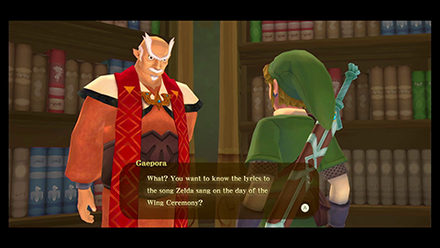
Once back at Skyloft, head to the Knight Academy and speak with Headmaster Gaepora.
Use your Gust Bellows on the southwest windmill.
Let the windmill face the Tower of Light

From the Knight Academy, walk towards the plaza, you should find a windmill to your right. You'll want to use your Gust Bellows to blast air at the propeller to rotate the windmill and point it at the Light tower.
Inspect the southeast windmill to trigger a cutscene.
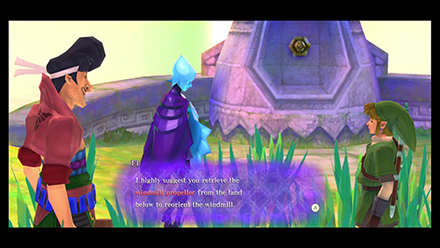
Head to the second windmill at the southeast portion of Skyloft. When you get near enough a dialogue will play out and you'll discover that its pinwheel is missing.
Go to the Scrap Shop in the Bazaar and give him an Ancient Flower.
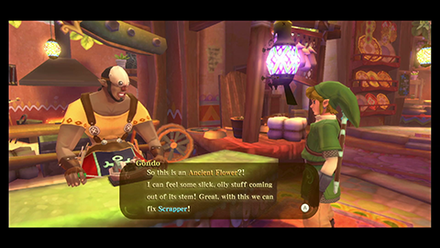
Speak to Gondo at the Bazaar's Scrap Shop. Give him an Ancient Flower when he asks for it.
Find the missing propeller in Eldin Volcano.
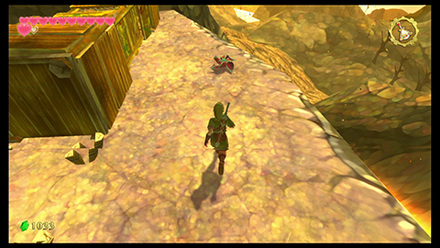
Head to the Eldin Region and descend to the temple's entrance.
Once you land, head west to where the bomb flowers are and slide down the slope. Examine the propeller next to the fallen tower and Scrapper will retrieve it.
Use your Gust Bellows on the southeast windmill.

Return to Skyloft. Use the Gust Bellows to blast air at the propeller to rotate the windmill and point it at the Light Tower.
Play the Harp at the Light Tower
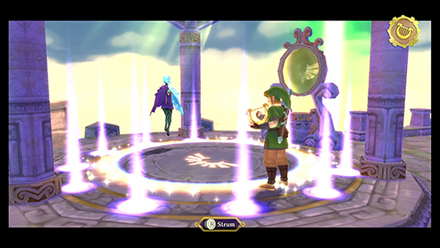
Climb up the Light Tower and play the Ballad of the Goddess. Follow the light and fly into the cloud the light is shining on.
Continue to the Isle of Songs Walkthrough
Skyloft (3rd Visit) Story Walkthrough
| Objectives |
|---|
| 1. Ask Headmaster Gaepora about the Triforce. |
| 2. Ask Instructor Owlan about Levias. |
| 3. Learn the Spin Charge. |
| 4. Get some Pumpkin Soup. |
| 5. Head to the Rainbow Island. |
| 6. Free Levias from Bilocyte. |
| 7. Listen to Levias' knowledge. |
| 8. Seek out the three dragons. |
Ask Headmaster Gaepora about the Triforce.
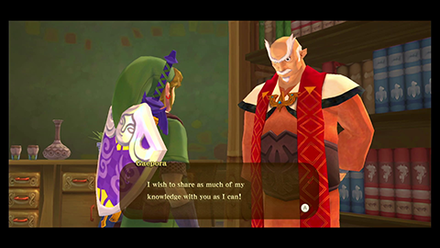
Head to the Knight Academy and speak with Headmaster Gaepora.
Ask Instructor Owlan about Levias.
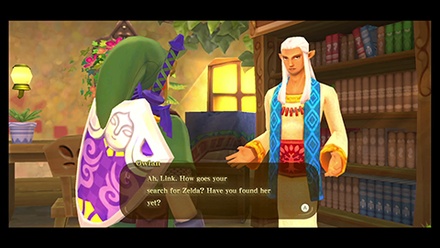
Exit Headmaster Gaepora's Office and enter the door right next to it. Speak with Instructor Owlan.
Learn the Spin Charge.
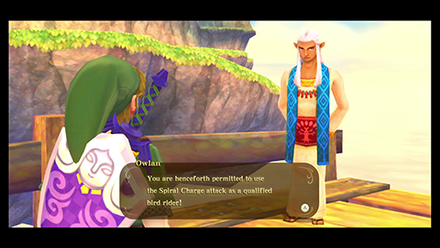
Complete Instructor Owlan's Spin Charge challenge.
Get some Pumpkin Soup.
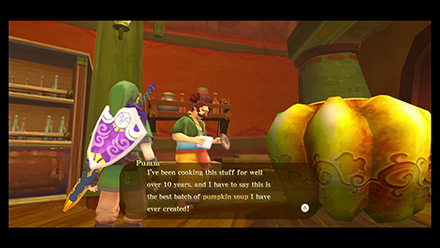
Head to the Lumpy Pumpkin and speak with the owner.
Head to the Rainbow Island.
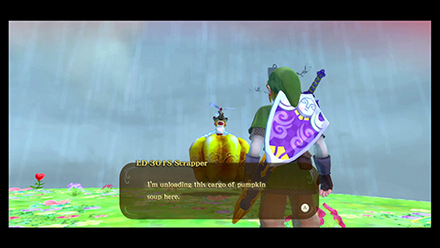
Fly over to the Thunderhead and search for the island with the rainbow. Land onto this island.
Free Levias from Bilocyte.
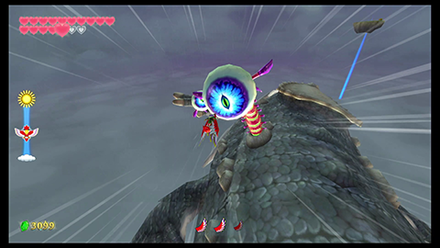
A battle with Levias, the Great Spirit of the Skies will commence. Call your Loftwing and chase after Levias. Use the Spin Charge to attack the eyeball-tentacles near its tail.
After the tentacles are destroyed, a new malice formation will appear on its head. Land on Levias' head and a battle with the Ocular Parasite, Bilocyte will commence.
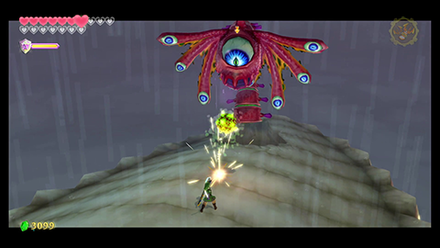
Keep some distance between you and Bilocyte. He will launch balls of malice towards you. Swipe your sword to the left or right to redirect these balls and damage his fins.
Once both fins are damaged, deflect the ball straight at him. He will collapse allowing you to continuously slash at him while he's down.
Repeat this sequence three times to defeat Bilocyte. This should free Levias.
Listen to Levias' knowledge.

You'll obtain information on how to find the Triforce. You'll have to seek out the dragons of each region to learn parts of the Song of the Hero.
You are free to seek out each dragon in whatever order you like. For the purposes of this guide let's start with Faron Woods.
Continue to Faron Woods (3rd Visit)
Skyloft Enemies
The enemies in Skyloft only appear in certain locations at night and will permanently disappear after collecting all 80 Gratitude Crystals for Batreaux.
| List of Enemies | Strategy |
|---|---|
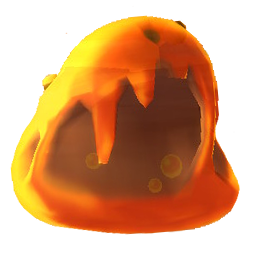 Chuchu Chuchu
|
A simple sword slash defeats it. When it merges, proceed to continue slashing until every Chuchu is defeated. |
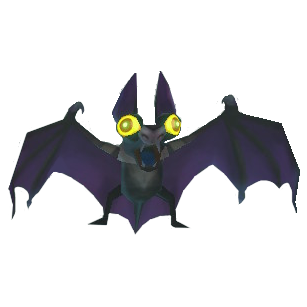 Keese Keese
|
Keese can simply be defeated by attacking it with a sword. Note that it won't drop rupees or treasure if you defeat it with a whip. |
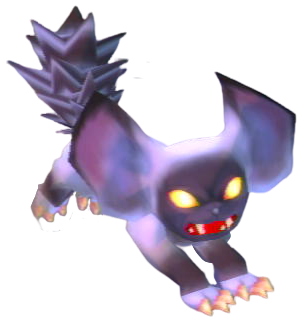 Remlit Remlit
|
It cannot be defeated. It becomes docile when hit by an attack, but after a while it begins to rampage again. Remlit at day is not dangerous. |
Skyward Sword HD Related Guides

| Skyward Sword Walkthough | |
|---|---|
| Complete Story Walkthrough | |
| Dungeons and Temples List | Silent Realm Guide |
Main Locations
| Three Ancient Tablets | |
|---|---|
 Skyloft Skyloft |
 Sealed Grounds Sealed Grounds |
 Faron Woods Faron Woods |
 Skyview Temple Skyview Temple |
 Eldin Volcano Eldin Volcano |
 Earth Temple Earth Temple |
 Lanayru Mine Lanayru Mine |
 Lanayru Desert Lanayru Desert |
 Lanayru Mining Facility Lanayru Mining Facility |
 Sealed Grounds (Second Visit) Sealed Grounds (Second Visit) |
| Three Sacred Flames | |
 Skyloft (Second Visit) Skyloft (Second Visit) |
 Inside Thunderhead (Isle of Songs) Inside Thunderhead (Isle of Songs) |
 Faron Woods (Second Visit) Faron Woods (Second Visit)
|
 Lake Floria Lake Floria |
 Skyview Temple (Second Visit) Skyview Temple (Second Visit) |
 Ancient Cistern Ancient Cistern |
 Lanayru Sand Sea Lanayru Sand Sea |
 Sandship Sandship |
 Volcano Summit Volcano Summit |
 Fire Sanctuary Fire Sanctuary |
| Song of the Hero | |
 Sealed Grounds (Third Visit) Sealed Grounds (Third Visit) |
 Skyloft (Third Visit) Skyloft (Third Visit) |
 Faron Woods (Third Visit) Faron Woods (Third Visit) |
 Eldin Volcano (Second Visit) Eldin Volcano (Second Visit) |
 Lanayru Gorge Lanayru Gorge |
 Sky Keep Sky Keep |
 Final Battle Final Battle |
|
Silent Realm Trials
| Silent Realm Trials | |
|---|---|
 Farore's Trial Farore's Trial |
 Nayru's Trial Nayru's Trial |
 Din's Trial Din's Trial |
 The Goddess's Trial The Goddess's Trial |
Author
The Legend of Zelda: Skyward Sword Walkthrough & Guides Wiki
Skyloft Walkthrough: All Maps, Treasure Chests, and Heart Pieces
improvement survey
03/2026
improving Game8's site?

Your answers will help us to improve our website.
Note: Please be sure not to enter any kind of personal information into your response.

We hope you continue to make use of Game8.
Rankings
- We could not find the message board you were looking for.
Gaming News
Popular Games

Genshin Impact Walkthrough & Guides Wiki

Honkai: Star Rail Walkthrough & Guides Wiki

Umamusume: Pretty Derby Walkthrough & Guides Wiki

Pokemon Pokopia Walkthrough & Guides Wiki

Resident Evil Requiem (RE9) Walkthrough & Guides Wiki

Monster Hunter Wilds Walkthrough & Guides Wiki

Wuthering Waves Walkthrough & Guides Wiki

Arknights: Endfield Walkthrough & Guides Wiki

Pokemon FireRed and LeafGreen (FRLG) Walkthrough & Guides Wiki

Pokemon TCG Pocket (PTCGP) Strategies & Guides Wiki
Recommended Games

Diablo 4: Vessel of Hatred Walkthrough & Guides Wiki

Fire Emblem Heroes (FEH) Walkthrough & Guides Wiki

Yu-Gi-Oh! Master Duel Walkthrough & Guides Wiki

Super Smash Bros. Ultimate Walkthrough & Guides Wiki

Pokemon Brilliant Diamond and Shining Pearl (BDSP) Walkthrough & Guides Wiki

Elden Ring Shadow of the Erdtree Walkthrough & Guides Wiki

Monster Hunter World Walkthrough & Guides Wiki

The Legend of Zelda: Tears of the Kingdom Walkthrough & Guides Wiki

Persona 3 Reload Walkthrough & Guides Wiki

Cyberpunk 2077: Ultimate Edition Walkthrough & Guides Wiki
All rights reserved
© Nintendo. The Legend of Zelda, Nintendo Switch and amiibo are trademarks of Nintendo © 2021 Nintendo.
The copyrights of videos of games used in our content and other intellectual property rights belong to the provider of the game.
The contents we provide on this site were created personally by members of the Game8 editorial department.
We refuse the right to reuse or repost content taken without our permission such as data or images to other sites.




![Everwind Review [Early Access] | The Shaky First Step to A Very Long Journey](https://img.game8.co/4440226/ab079b1153298a042633dd1ef51e878e.png/thumb)

![Monster Hunter Stories 3 Review [First Impressions] | Simply Rejuvenating](https://img.game8.co/4438641/2a31b7702bd70e78ec8efd24661dacda.jpeg/thumb)


