Fire Sanctuary Walkthrough: All Maps, Treasure Chests, and Heart Pieces
★All Pieces of Heart & Goddess Cubes Locations
☆How to Get All Gratitude Crystals
★Empty Bottle Guide
This is a complete guide to Fire Sanctuary for The Legend of Zelda: Skyward Sword HD for the Nintendo Switch. Read on to learn more about how to progress through the story, where to find treasure chests, Goddess Cubes, Heart Pieces, and other collectibles, as well as how to beat story bosses and more!
List of Contents
Fire Sanctuary Maps and Treasure Chest Locations
Fire Sanctuary 1F Map

Treasure Chests - 11 Locations Total
| Contents | |
|---|---|
| ① | Small Key |
| ② | Red Rupee |
| ③ | Small Key |
| ④ | Red Rupee |
| ⑤ | Monster's Horn |
| ⑥ | Mogma Glove |
| ⑦ | Dungeon Map |
| ⑧ | Small Key |
| ⑨ | Piece of Heart |
| ⑩ | Empty Bottle |
| ⑪ | Mysterious Crystals |
Fire Sanctuary B1 Map

Treasure Chests - 1 Locations Total
| Contents | |
|---|---|
| ① | Evil Crystal |
Fire Sanctuary Goddess Cubes Locations
No Goddess Cubes
| There are no Goddess Cubes in the Fire Sanctuary. |
Fire Sanctuary Pieces of Heart Locations
Pieces of Heart - 1 Location Total
| How to Get Heart Piece #18 | ||
|---|---|---|
 |
||
| Required Items | Mogma Mitts | |
| Map Location |
 Fire Sanctuary |
|
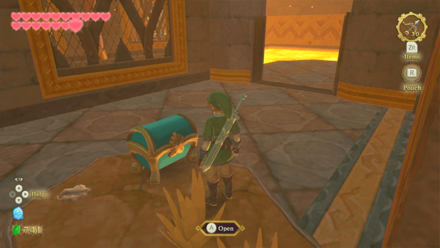
| How to Get | Find the soil spot inside the Fire Sanctuary and use the Mogma Mitts to dig underground. Catch the Mogma and it will reward you with a Piece of Heart. | |
How to Get All Pieces of Heart
Fire Sanctuary Story Walkthrough
| Objectives |
|---|
| 1. Drop the fruit of the water plant to from a stone platform on the lava. |
| 2. Defeat the Bokoblins to get the Small Key |
| 3. Use the Small Key to open the door and continue. |
| 4. Let Magmanos lift the stone platform. |
| 5. Traverse the vines to make your way across the room. |
| 6. Defeat the Dark Lizalfos on the bridge. |
| 7. Enter the West Room |
| 8. Use the Hook Beetle to remove the rocks blocking the lava. |
| 9. Drop the water fruit to form a stone platform and ride it to the other side of the room. |
| 10. Use the Gust Bellows to clear the hot rocks and access the chest with the small key. |
| 11. Go back to the previous room and unlock the door to proceed. |
| 12. Thrust your sword into a water fruit to carry it over to the Frog Statue. |
| 13. Defeat the 2 Magmanos. |
| 14. Pull the lever to free the hanging Mogma. |
| 15. Burrow underground to get to the next room. |
| 16. Use the Gust Bellows to blow away the hot rocks to reveal another burrow spot. Press the button underground. |
| 17. Use the Clawshots to cross the broken bridge. |
| 18. Burrow underground and press both buttons. |
| 19. Thrust your sword into a water fruit and carry it over to the Frog Statue. |
| 20. Flip the lever to lower the Mogma. |
| 21. Obtain the Dungeon Map. |
| 22. Detonate the wall to uncover the hidden room. Use the Dungeon Map as a guide. |
| 23. Burrow over to the next room to get the Small Key. |
| 24. Return to the room where you fought the two Magmanos, and unlock the door here. |
| 25. Drop a water fruit into the lava to cross the river. Head to the northwest room. |
| 26. Corner the Mogma hiding underground. |
| 27. Obtain a Piece of Heart and go through the door. |
| 28. Drop a water fruit into the lava to get to the other side. |
| 29. Burrow into the ground near the bird statue and use a bomb to clear the lava. |
| 30. Swiftly resurface while rushing away from the lava. |
| 31. Drop a water fruit into the lava below and ride the platform to the other end of the lava river. |
| 32. Dive towards the left monument, a path will appear beneath. |
| 33. Defeat the two Dark Lizalfos. |
| 34. Climb the spiral staircase. |
| 35. Press the underground buttons that correspond to the bird statues with the least to the most wings. |
| 36. Defeat the Moldorm to resurface. |
| 37. Obtain the Mysterious Crystals from the Silver Chest |
| 38. Open the Boss Door with the Mysterious Crystals. |
| 39. Rematch the boss, Demon Lord Ghirahim. |
| 40. Perform a Skyward Strike on the crest to receive Din's Flame. |
| 41. Head to the Sealed Temple. |
Drop the fruit of the water plant to from a stone platform on the lava.
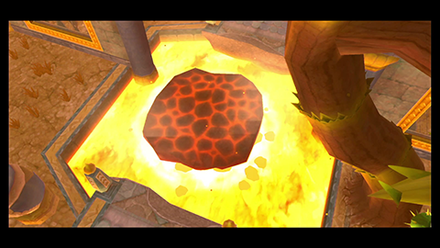
Notice the plants growing near the ceiling. When struck, these plants will drop water. When water plant lands on lava, it will create rock platforms that enables you to cross lava pools. Do this to cross the first lava pit.
Defeat the Bokoblins to get the Small Key
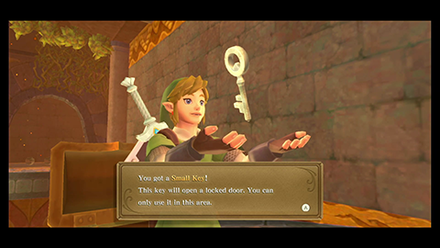
Create another stone platform, and ride it down the lava stream while avoiding the arrows from the Archer Bokoblins.
Jump onto the platform at the end and defeat all of the Bokoblins here to access the Blue Chest with the Small Key.
Drop down and a cutscene with Guld the Mogma will play. Use the Small Key to open the door and enter the next room of the Fire Sanctuary.
Let Magmanos lift the stone platform.

Following the path, you'll come across an octagonal room with a wire-mesh floor and bubbling lava beneath it. Run to the stone platform and the Magmanos will push you up. Jump onto the ledge.
Traverse the vines to make your way across the room.

Climb up the vines and defeat the Bokoblins here. You'll want to use your bow to shoot down the other Bokoblins in the area too so that you can safely climb the vines without being shot down.
Defeat the Dark Lizalfos on the bridge.
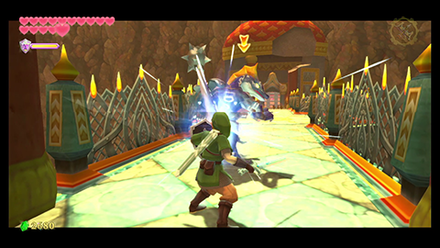
Once you've made your way around, drop down to the platform below. The door beyond will have a Dark Lizalfos, so be sure to save at the bird statue nearby before going through.
Defeating the Dark Lizalfos is not that much different from facing a regular Lizalfos. Just be careful not to get cursed or else you won't be able to attack with your sword for a short while.
Use the Hook Beetle to remove the rocks blocking the lava.

Cross the bridge and enter the door on the other side. Climb up the steps on your right, and you'll notice the statue has rocks blocking the flow of lava.
Use your Beetle to fly into one of the upper rock formations to pick up a Bomb Flower and use it to clear these rocks.
Drop the water fruit to form a stone platform and ride it to the other side of the room.

Now you can create a stone platform that will let you cross the lava. Head up the steps and into the unlocked door.
Use the Gust Bellows to clear the hot rocks and access the chest with the small key.

Ignore the trapped Mogma for now and proceed along the stone path. Use your clawshot to get past the molten rock. Open the Blue Chest to get the Small Key.
Head back to the previous room and use your Small Key on the locked door. Navigate your way around the room, cutting down plants to safely proceed.
Thrust your sword into a water fruit to carry it over to the Frog Statue.

Once you get to the raised platform, thrust your sword onto a nearby water plant for its fruit to stick to your sword. You can then thrust in the direction of the frog statue to quench its thirst.
Defeat the 2 Magmanos.
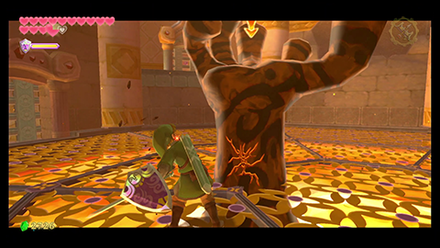
Continue along the now-opened path, defeating the Bokoblins and Keese inside. The next room will pit you against 2 Magmanos, so we recommend saving at the bird statue here.
Ride up the left stone platform and stick a water fruit to your sword. You'll use this to throw at the Magmanos causing it to harden. Once solidified, strike it 4 times to defeat it. Do this for each Magmanos.
After defeating both Magmanos, the lava in this area will recede. Proceed to the room where the Mogma is hanging from.
Pull the lever to free the hanging Mogma.
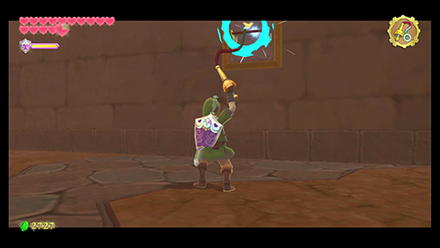
Pull the lever down to rescue him and he'll reward you with the Mogma Mitts. This will let you burrow underground and travel between holes.
Burrow underground to get to the next room.

Go underground in a nearby hole and head for the northern exit.
Use the Gust Bellows to blow away the hot rocks to reveal another burrow spot. Press the button underground.
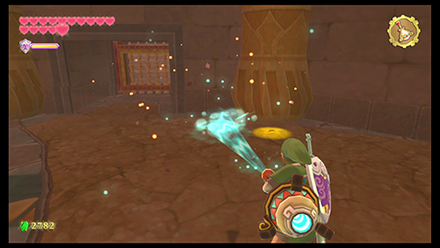
Once above ground, use your Gust Bellows to clear the molten rock here.
One of the holes under the molten rock should allow you to burrow underground again. For this section, you'll want to activate the switch in the middle of the tunnels.
Approach it from the left and attack it to open up a gate.
Return above ground and go through the recently-opened path. Head up the steps and through the door.
Use your clawshots to cross the broken bridge, then enter the door on the other side.
Burrow underground and press both buttons.

You'll find another Mogma trapped here. Head to the back-right part of the room and burrow into the hole. There will be two switches that you have to activate. Start with the north switch.
Thrust your sword into a water fruit and carry it over to the Frog Statue.
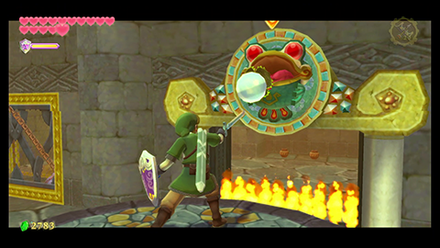
After hitting both switches, head back above ground and the path to the water fruit should be open. Thrust it onto your sword and quench the thirst of the frog statue.
Flip the lever to lower the Mogma.

Pull the lever down to free the Mogma. You'll be rewarded with a Dungeon Map.
Detonate the wall to uncover the hidden room. Use the Dungeon Map as a guide.
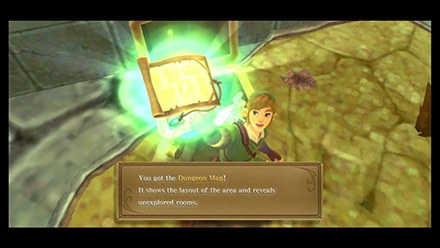
Place a bomb on the wall directly opposite of the Chest with the Dungeon Map to reveal the secret room. Burrow underground in the hole in the secret room.
On the other side of the hole should be a Blue Chest with a Small Key.
Return to the room where you fought the two Magmanos, and unlock the door here.

Head back to the room you burrowed into after helping the first Mogma. Unlock the door here and go through.
Drop a water fruit into the lava to cross the river. Head to the northwest room.

Follow along the path and cross the lava river. Head up the steps and through the door.
Defeat the enemies inside and follow the path till you get to the burrowing hole.
Corner the Mogma hiding underground.

Once in the hole, you'll have to corner a Mogma. Once you catch up to it, you'll earn a Blue Chest with a Piece of Heart.
Drop a water fruit into the lava to get to the other side.

With the gate now open, you can create a stone platform which you can ride down the lava river. Jump on the platform on the other side. Step on the pressure plate for easier backtracking.
Burrow into the ground near the bird statue and use a bomb to clear the lava.

Burrow into the hole next to the bird statue. You'll have to let the lava flow, while also returning to the surface safely. Once you do, the lava will flow out of the statues.
You can now head down to the lava, create a stone platform and ride it down the lava river and onto the next safe path.
Dive towards the left monument, a path will appear beneath.
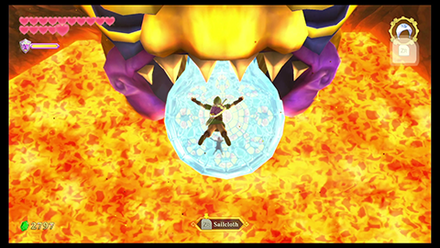
Go onto the walkway directly opposite of the bird monument and jump off the left and into the lava. A platform will appear where you can land safely.
Follow the path and you'll enter a room with two Dark Lizalfos. Take them out then go through the door on the upper ledge.
Climb up the spiraling staircase, using the Clawshots when necessary. Enter the door at the top of the steps to find the room where the Silver Chest is.
Press the underground buttons that correspond to the bird statues with the least to the most wings.
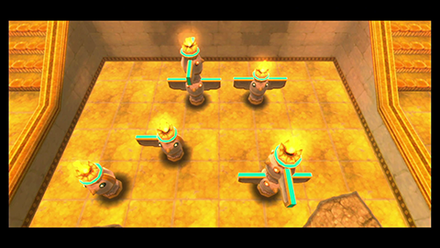
Burrow underground and you'll find switches that correspond to a bird statue above it. Hit them in the sequence of the one from least wings to most wings.
Defeat the Moldorm to resurface.

After hitting all 5 switches in the right order, the gate to the Silver Chest should open, but you'll have to defeat the enemy here before returning above ground.
Get the Mysterious Crystals from the Silver Chest.
Open the Boss Door with the Mysterious Crystals.

Return to the Bird Monument in front of the Boss Gate and use the Mysterious Crystals to unlock it. Prepare for a battle with Ghirahim.
Rematch the boss, Demon Lord Ghirahim.
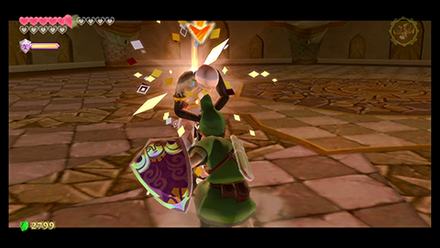
Much like the first time you fought him, strike Ghirahim in a way where he won't grab your sword. Take out his daggers first before striking him. He will start out with 2 daggers at a time, then 4.
For his second sequence, he will bring out two swords. Strike at an angle he isn't blocking.
Every now and then he will send multiple daggers at you. Counter-attack with the appropriate sword slash to take them out.
Ghirahim may also sometimes blink into invisibility before shortly dropping at you from above. When he disappears, hop backwards and prepare to perform a jump strike on him after he lands.
When you've damaged Ghirahim enough, he will leave and you can obtain a Heart Container for your reward. Enter the glowing door ahead.
Head to the Sealed Temple.

Hit the crest in the next room with a Skyward Strike. Earn the Master Sword. Return to the Sealed Temple.
Continue to the Sealed Grounds (3rd Visit) Walkthrough
Fire Sanctuary Bosses
Ghirahim
Ghirahim is the boss you will face at the end of Fire Sanctuary. Similar to the first encounter, you need to attack him at the opposite direction to deal damage.
Dark Lizalfos

|
The Dark Lizalfos is one of the Fire Sanctuary's minibosses. They move faster than the usual Lizalfos and can inflict curse, which prevents you from using items.
Moldorm
|
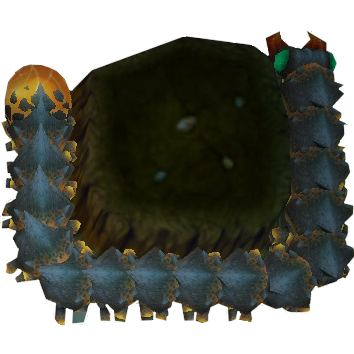
The Moldorm is a miniboss that can only be fought while inside the underground tunnel. Use the Mogma Mitts to strike its tail and destory the rear segments.
Two Magmanos

|
You will battle against two Magmanos as the Fire Sanctuary's miniboss. Use a Water Fruit and toss it over to the miniboss or pour water from a bottle. This cools and hardens the enemy, allowing to deal damage.
Fire Sanctuary Enemies
| List of Enemies | Strategy |
|---|---|
 Blue Bokoblin Blue Bokoblin
|
Blue Bokoblins use the same attack pattern as Red Bokoblins, but are tougher. Invite an attack and repel it with a Shield Bash, then strike. |
 Chuchu Chuchu
|
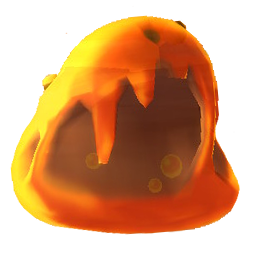
A simple sword slash defeats it. When it merges, proceed to continue slashing until every Chuchu is defeated. |
 Cursed Spume Cursed Spume
|
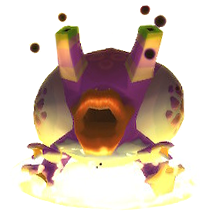
You can safely defeat it by shooting with a bow, or using Skyward Sword from afar. Take care not to be in contact with it as it disables your equipment. |
 Dark Keese Dark Keese
|
Note that if you hit the same as normal Keese, you will not be able to use your weapon for a while. |
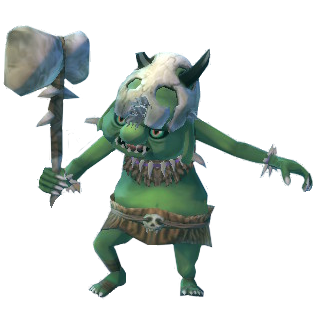 Green Bokoblin Green Bokoblin
|
Green Bokoblins attack exactly the same as Red Bokoblins. Invite an attack and repel it with a Shield Bash, then strike. |
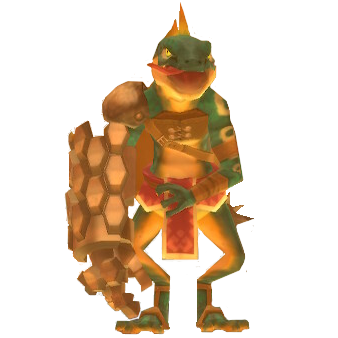 Lizalfos Lizalfos
|
Repel the attack with a shield attack and aim and attack when you get the chance. |
Skyward Sword HD Related Guides

| Skyward Sword Walkthough | |
|---|---|
| Complete Story Walkthrough | |
| Dungeons and Temples List | Silent Realm Guide |
Main Locations
Silent Realm Trials
| Silent Realm Trials | |
|---|---|
 Farore's Trial Farore's Trial |
 Nayru's Trial Nayru's Trial |
 Din's Trial Din's Trial |
 The Goddess's Trial The Goddess's Trial |
Author
The Legend of Zelda: Skyward Sword Walkthrough & Guides Wiki
Fire Sanctuary Walkthrough: All Maps, Treasure Chests, and Heart Pieces
improvement survey
03/2026
improving Game8's site?

Your answers will help us to improve our website.
Note: Please be sure not to enter any kind of personal information into your response.

We hope you continue to make use of Game8.
Rankings
- We could not find the message board you were looking for.
Gaming News
Popular Games

Genshin Impact Walkthrough & Guides Wiki

Honkai: Star Rail Walkthrough & Guides Wiki

Umamusume: Pretty Derby Walkthrough & Guides Wiki

Pokemon Pokopia Walkthrough & Guides Wiki

Resident Evil Requiem (RE9) Walkthrough & Guides Wiki

Monster Hunter Wilds Walkthrough & Guides Wiki

Wuthering Waves Walkthrough & Guides Wiki

Arknights: Endfield Walkthrough & Guides Wiki

Pokemon FireRed and LeafGreen (FRLG) Walkthrough & Guides Wiki

Pokemon TCG Pocket (PTCGP) Strategies & Guides Wiki
Recommended Games

Diablo 4: Vessel of Hatred Walkthrough & Guides Wiki

Fire Emblem Heroes (FEH) Walkthrough & Guides Wiki

Yu-Gi-Oh! Master Duel Walkthrough & Guides Wiki

Super Smash Bros. Ultimate Walkthrough & Guides Wiki

Pokemon Brilliant Diamond and Shining Pearl (BDSP) Walkthrough & Guides Wiki

Elden Ring Shadow of the Erdtree Walkthrough & Guides Wiki

Monster Hunter World Walkthrough & Guides Wiki

The Legend of Zelda: Tears of the Kingdom Walkthrough & Guides Wiki

Persona 3 Reload Walkthrough & Guides Wiki

Cyberpunk 2077: Ultimate Edition Walkthrough & Guides Wiki
All rights reserved
© Nintendo. The Legend of Zelda, Nintendo Switch and amiibo are trademarks of Nintendo © 2021 Nintendo.
The copyrights of videos of games used in our content and other intellectual property rights belong to the provider of the game.
The contents we provide on this site were created personally by members of the Game8 editorial department.
We refuse the right to reuse or repost content taken without our permission such as data or images to other sites.
 Skyloft
 Sealed Grounds
 Faron Woods
 Skyview Temple
 Eldin Volcano
 Earth Temple
 Lanayru Mine
 Lanayru Desert
 Lanayru Mining Facility
 Inside Thunderhead (Isle of Songs)
 Lake Floria
 Ancient Cistern
 Lanayru Sand Sea
 Sandship
 Volcano Summit
 Lanayru Gorge
 Sky Keep
 Final Battle




![Everwind Review [Early Access] | The Shaky First Step to A Very Long Journey](https://img.game8.co/4440226/ab079b1153298a042633dd1ef51e878e.png/thumb)

![Monster Hunter Stories 3 Review [First Impressions] | Simply Rejuvenating](https://img.game8.co/4438641/2a31b7702bd70e78ec8efd24661dacda.jpeg/thumb)


