Eldin Volcano Walkthrough: Maps, Key Pieces, Goddess Cubes, and Heart Pieces
★All Pieces of Heart & Goddess Cubes Locations
☆How to Get All Gratitude Crystals
★Empty Bottle Guide
A complete guide to Eldin Volcano in The Legend of Zelda: Skyward Sword HD for the Nintendo Switch. Learn how to get through Eldin Volcano, Key Pieces to open the Earth Temple, Goddess Cube, and Heart Piece locations, as well as Eldin Volcano enemies and more!
List of Contents
Eldin Volcano Maps and Treasure Chest Locations
Eldin Volcano Map

Treasure Chest Contents
| Contents | |
|---|---|
| ① | Red Rupee |
| ② | Red Rupee |
| ③ | Red Rupee |
| ④ | Red Rupee |
Eldin Volcano Underground Map

Treasure Chest Contents
| Contents | |
|---|---|
| ① | Eldin Ore |
| ② | Golden Skull Stone |
| ③ | Eldin Ore |
| ④ | Silver Rupee |
Eldin Volcano Goddess Cubes Locations
Goddess Cubes - 6 Locations Total
| Reward Required Item | Goddess Cube Location | Goddess Chest Location |
|---|---|---|
| Small Seed Satchel None |
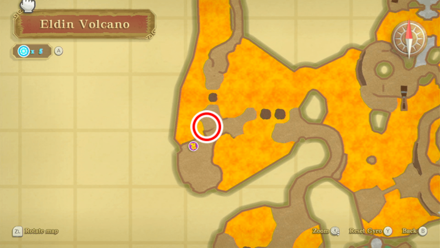 On a small ledge right of the Eldin Volcano entrance. |
 Fly to the island west of Fun Fun Island to find the Goddess Chest. |
| Silver Rupee (100 Rupees) None |
 After passing the Bird Statue, there are three pathways. Drop to the ledge on the left and turn right. Head straight until you find the Goddess Cube. |
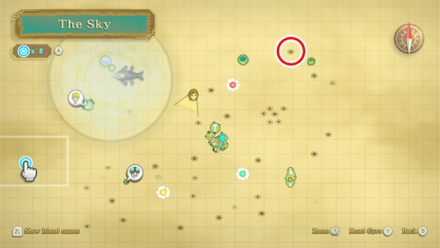 Fly to the upper part of the island in between Beedle's Island and Bamboo Island to find the Goddess Chest. |
| Gold Rupee (300 Rupees) None |
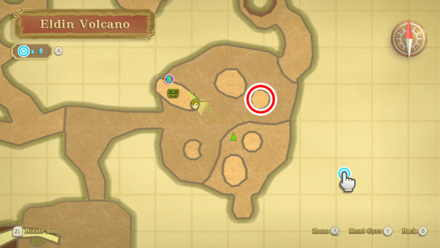 Use the Sailcloth to drop down on the small volcano and land on the pillar with the cube. |
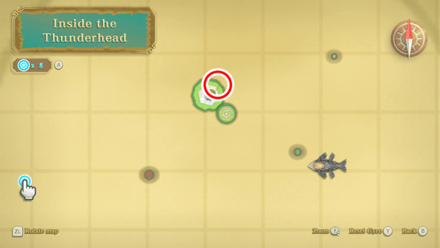 Head to the right side of the Isle of Songs to find the Goddess Chest. |
| Gold Rupee (300 Rupees) Digging Mitts |
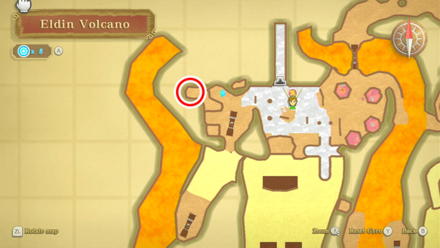 Head west of the Earth Temple entrance and dig up the soft soil spots to reveal an air geyser. Throw a bomb at the gyser to blow up the boulder and reveal the Goddess Cube. |
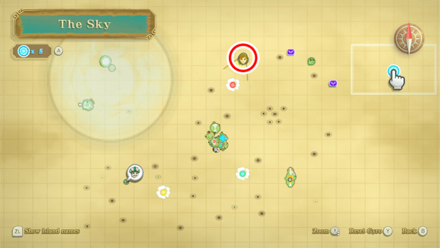 Fly to Bamboo Island northeast of Skyloft and go behind the building to find the Goddess Chest. |
| Treasure Medal None |
 Head east of the Earth Temple entrance and go behind the Bokoblins and small huts to find a ramp leading to the Goddess Cube. |
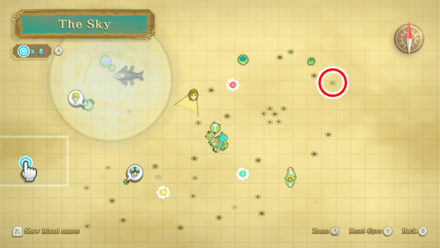 Fly to the top part of the small island southeast of Beedle's island and use the vines to drop down to find the Goddess Chest. |
| Piece of Heart Water Dragon's Scale |
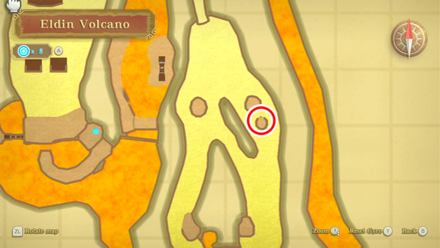 Head to the northeastern corner of the Eldin Volcano and slide down on the sand slide. Slide into the left gyser and head to the lower platform with the Goddess Cube |
 Dive to the main river of Skyloft and swim towards the underwater passageway until you reach a small pond with the Goddess Chest. |
Eldin Volcano Piece of Heart Locations
Pieces of Heart - 1 Location Total
| How to Get Heart Piece #6 | ||
|---|---|---|
 |
||
| Required Items | None | |
| Map Location |
 Eldin Volcano |
|
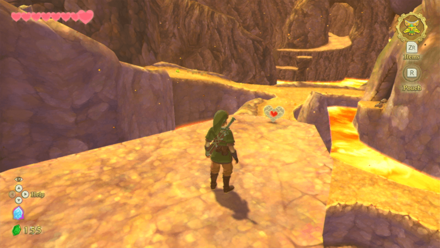
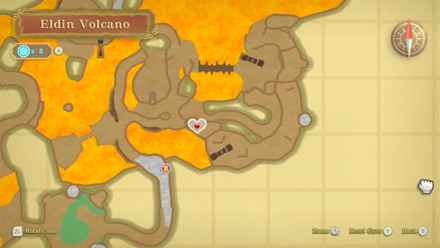
| How to Get | Find the bone bridge at Eldin Region and head right. Climb up the platforms and reach the ledge that lead you to a Piece of Heart. | |
How to Get All Pieces of Heart
Eldin Volcano (1st Visit) Story Walkthrough
Before heading to Eldin Volcano, we recommend gearing yourself up with an Iron Shield which you can purchase from the Skyloft Bazaar.
| Objectives |
|---|
| 1. Follow the path and clear the way with bomb flowers. |
| 2. Use bomb flowers to clear the blockage and let the lava flow. |
| 3. Underground, help the Mogma by defeating the Bokoblins. |
| 4. Obtain the Digging Mitts. |
| 5. Cross the bridge. |
| 6. Continue to climb the mountain defeating Bokoblins along the way. |
| 7. Upon reaching the front of the Earth Temple, listen to the Mogma's conversation. |
| 8. Find the 5 Key Pieces. |
| 9. Enter the Earth Temple. |
Follow the path and clear the way with bomb flowers

Follow along the path to progress. In parts where lava might be in the way, wait for the lava to recede before continuing. You'll soon come across a bomb flower field. You may toss and roll the Bomb Flowers to destroy nearby rocks to open up different passages. These can also be used to damage enemies, and open up sections with cracks in the wall.
Use bomb flowers to clear the blockage and let the lava flow
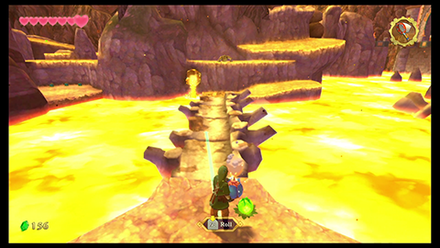
Grab a Bomb Flower and roll it across the bone bridge. This should let the lava flow and reveal a path.
Get the Piece of Heart on Eldin Volcano

Before crossing the bone bridge, climb up the nearby ledges. You can grab the Piece of Heart on a lower ledge just past a lone Pyrup.
Obtain the Digging Mitts

Jump down into underground section. As you pace forward, a distressed Mogma will speak to you. Enter the chamber up ahead where several Bokoblin can be found. A continuous wave of them will keep appearing. We recommend taking advantage of the Spin Attack if you ever get overwhelmed with Bokoblins from all directions.
After clearing the chamber of all the Bokoblins, go back and speak to the Mogma again. He'll reward you with the Digging Mitts as thanks. Use your newly acquired Digging Mitts to uncover some updrafts so that you can climb up to the higher platforms.
Continue to climb the mountain defeating Bokoblins along the way
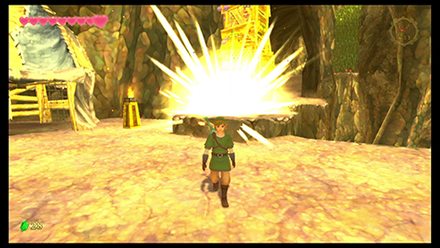
At the summit will be a Bokoblin camp. Clear out the enemies here. Take another Bomb Flower and use it to topple over the wooden tower one of the Bokoblins is on. This will serve as a way for you to cross the nearby chasm.
Access the Thrill Digger Minigame
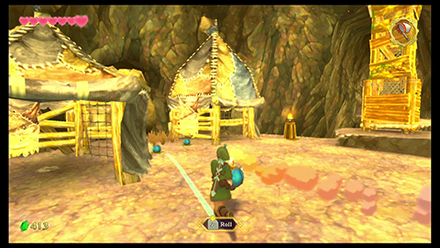
There will also be a cave which has its entrance blocked with boulders. Clearing the path will grant you access to the Thrill Digger minigame.
Thrill Digger Guide
Find the 5 Key Pieces
The Mogmas mention that the Key Pieces are buried nearby. You can use your dowsing ability to track them down.
| Key Piece Location | Details |
|---|---|
 |
You'll have to dig around to look for 5 pieces of the key that will open the door leading to the temple. When facing the temple, look to the dig spots on the left, one of them will contain the first piece. |
 |
Near where the Bomb Flowers are, you should spot a slope with a wooden tower at the bottom. Roll a Bomb Flower down and knock over the wooden tower to reveal a dig spot which contains the second piece of the key. |
 |
Back in front of where the temple doors are, you should find a pair of bomb flowers near the ledge. Try to roll them towards the bombable rocks about halfway down the ramp. Doing so will reveal the location of the third piece of the key. |
 |
As you slide down the long ramp in the northwest side of the volcano, take the rightmost path of the slide. While sliding down, stick to the left wall so that you can get on a ledge. From this ledge there will be two updrafts you'll have to use to get to another ledge across the chasm. The fourth piece of the key will be in the hole on this platform. |
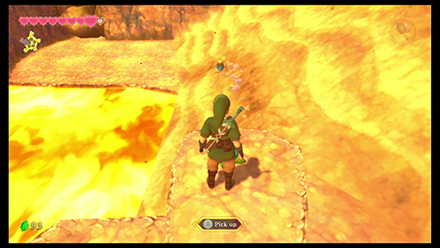 |
At the bottom of the slide, head forward and autojump across the platforms. From where the Stamina Flower is take the fork in the path. You'll find a Bomb Flower in the next room. Use this bomb flower to clear the rocks that will let the lava flow out of this room. Once you do, the lava will recede opening up the path ahead.
With the lava receded, take another bomb flower and roll it across the slope to blow up the rocks ahead. You'll uncover a small chamber with a hole where the fifth piece of the key will be. |
Continue to the Earth Temple Walkthrough
Eldin Volcano (2nd Visit) Story Walkthrough
| Objectives |
|---|
| 1. Obtain your Mogma Mitts from Plats. |
| 2. Burrow underground to escape the prison. |
| 3. Learn the other Item Locations from Plats. |
| 4. Evade detection from the Bokoblins |
| 5. Obtain the Gust Bellows. |
| 6. Obtain the Clawshots. |
| 7. Clawshot across the lava river. |
| 8. Ride the stone platform to the next section. |
| 9. Clawshot over to the vines. |
| 10. Use bombs on the wooden tower. |
| 11. Pull out the plant on the other side of the gate. |
| 12. Use bombs to clear the rocks. |
| 13. Ride the updraft to the top and move towards the Earth Temple's entrance. |
| 14. Head west of the fallen tower. |
| 15. Ride the stone platform down the lava river. |
| 16. Use bombs on the wooden tower. |
| 17. Obtain the Slingshot. |
| 18. Clawshot your way back up. |
| 19. Stun the Bokoblins with the Slingshot. |
| 20. Stun the Bokoblin in the wooden tower then burrow into the nearby hole. |
| 21. Obtain the Bomb Bag. |
| 22. Make your way towards the Volcano's Summit. |
| 23. Obtain the True Master Sword. |
| 24. Ride the stone platform across the lava pool. |
| 25. Use the water fruit to cross the lava gap. |
| 26. Defeat the monsters and obtain the adventure pouch. |
| 27. Use bombs to clear the path back to the entrance. |
| 28. Ride the stone platform across the pool again to enter the next room. |
| 29. Cut the ropes to lower the bridge. |
| 30. Receive Eldin's part of the Song of the Hero. |
Obtain your Mogma Mitts from Plats.

As you descend to Eldin, it seems the volcano has become more active than usual. This causes you to fall out of the sky, but you'll be captured by Bokoblins.
Now unarmed and locked up, speak to Plats the Mogma in this room. He'll give you back your Mogma Mitts.
Burrow underground to escape the prison.

Burrow yourself out of this room and head towards the Volcano East monument.
Learn the other Item Locations from Plats.
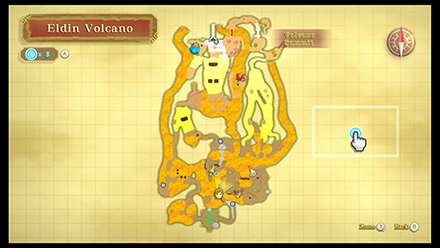
Continue along the path. Plats will explain that you should avoid getting seen by the Bokoblins while you are still unarmed.
Obtain the Gust Bellows.

Move ahead and drop to the ledge on the left. There will be a burrow spot here. Use the Bomb Flowers to clear the rocks in the path then resurface on the other side.
Continue along the path burrowing when necessary, avoiding detection along the way. The first chest you'll get to will have the Gust Bellows.
Obtain the Clawshots.
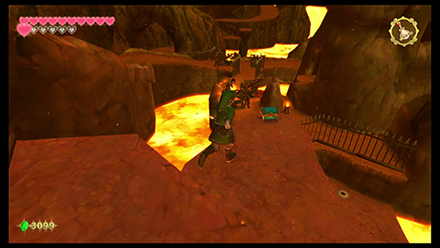
You may now once again blow away bits of molten rock. Continue to move forward evading detection. The next chest you'll find will have the Clawshot.
Clawshot across the lava river.
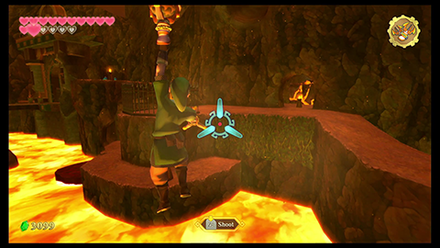
You'll now be able to swing across above the mazes thanks to the Clawshot and the floating plants. Cross the lava and keep an eye on a moving stone platform.
Ride the stone platform to the next section.

Ride this stone platform till you get to another section on your right.
Clawshot over to the vines.
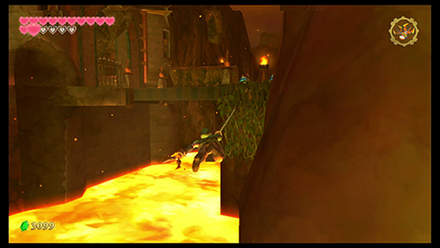
Follow the path sticking on the left side. You should be able to use your clawshot to climb up some vines here.
Use bombs on the wooden tower.

Use the bombs to topple over the Bokoblin Tower with a chest nearby. This chest will have the Whip.
Pull out the plant on the other side of the gate.
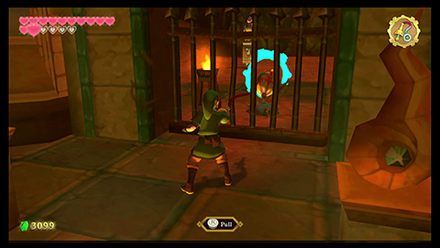
From where the bombs were, cross the bridge and use the Whip to unearth the plant on the other side of the gate. You can then use your Clawshot to get to the other side.
Use bombs to clear the rocks.
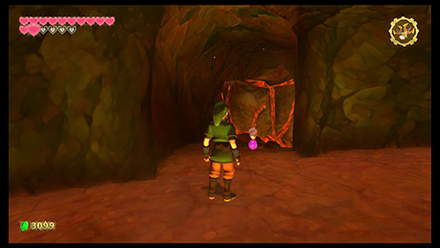
Use the Bomb Flowers to the east to clear away the rubble and to remove the debris blocking the updraft.
Ride the updraft to the top and move towards the Earth Temple's entrance.
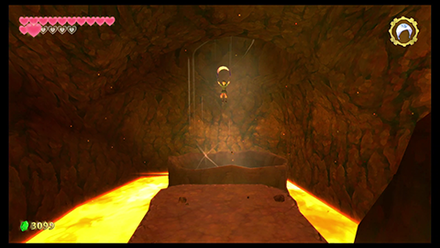
Ride the updraft and make your way towards the direction of the Earth Temple. When you get near the camp, stick to the left side.
Ride the stone platform down the lava river.
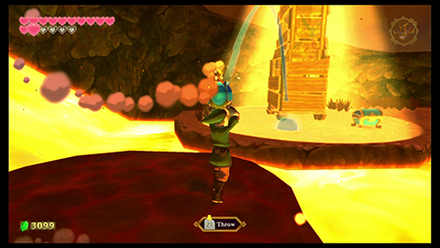
Drop onto the stone platform and then jump to your right where the bombs are. Grab a bomb and use it to topple over the Bokoblin tower to retrieve your slingshot.
Stun the Bokoblins with the Slingshot.
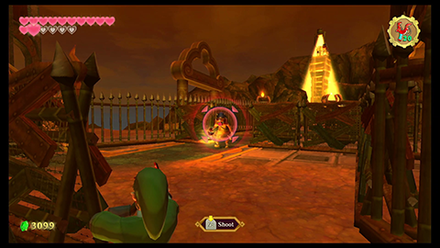
Using the clawshots, climb back up the way you came and move towards the entrance of the Earth Temple. Stun the Bokoblin in the way with your Slingshot.
Stun the Bokoblin in the wooden tower then burrow into the nearby hole.
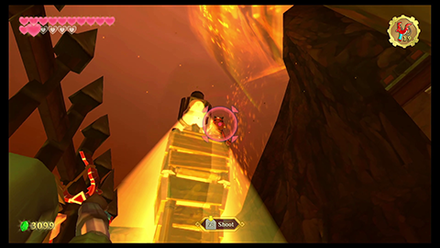
Make your way towards the northwest corner of the map. Once there, stun the Bokoblin on top of the watchtower and quickly burrow into the hole that was within the light's range.
Obtain the Bomb Bag.
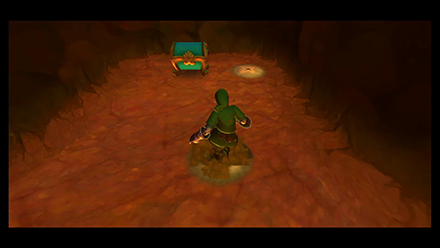
On the other side of the hole is your Bomb Bag. Now that you have it back, make your way back to where Plats was.
Make your way towards the Volcano's Summit.
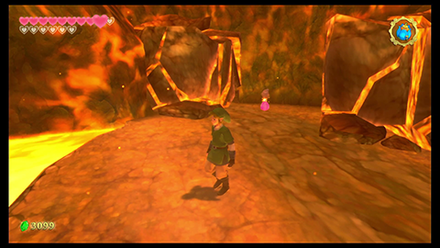
Clear the path with a bomb and head towards the volcano's summit.
Obtain the True Master Sword.

Once inside, you can be reunited with the Master Sword. Pull it out of the ground.
Ride the stone platform across the lava pool.
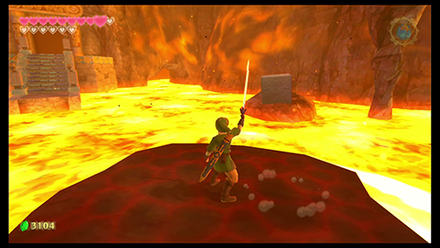
Head to the room on your right and ride the stone platform across the lava. Climb up the steps and jump across the gap on your left.
Use the water fruit to cross the lava gap.
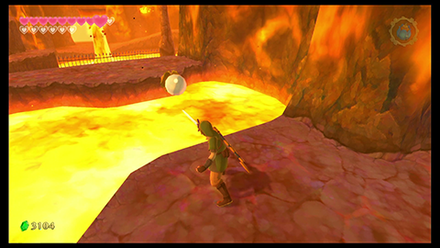
Continue along the path and you'll come across a chamber with the water plant. Thrust your sword into one and carry it with you.
Up ahead is a lava gap. Use the water fruit you carried to form a stone platform and jump across.
Defeat the monsters and obtain the adventure pouch.
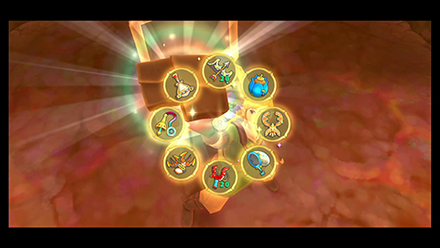
Jump down into the pit, take care of the enemies, and open the Blue Chest to get your Adventure Pouch back.
Use bombs to clear the path back to the entrance.
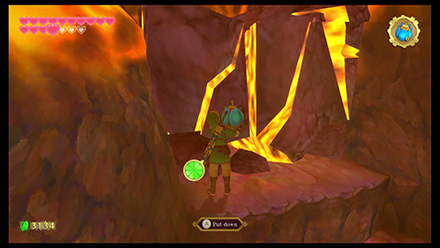
Climb up the ledges and use a bomb to clear the path back to the entrance.
Ride the stone platform across the pool again to enter the next room.
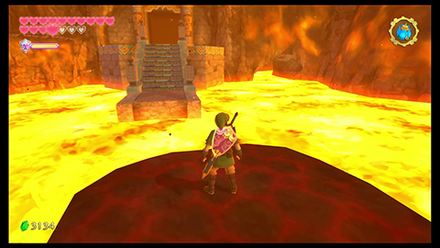
Head to the lava room again. Ride the stone platform and head deeper east into the volcano's summit.
Cut the ropes to lower the bridge.

Here, cut the ropes on either side of the bridge, and the one on your right, to lower the bridge and make your way across.
Receive Eldin's part of the Song of the Hero.
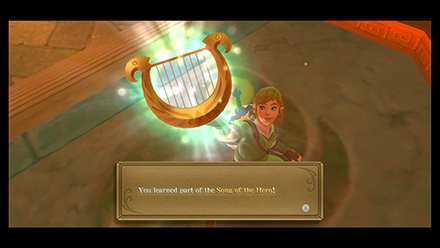
Once inside the deepest chamber, obtain the Fire Dragon's song. If you've been following along with our guide, we have one Dragon's song left!
Continue to Lanayru Gorge Walkthrough
Eldin Volcano Enemies
| List of Enemies | Strategy |
|---|---|
 Blue Bokoblin Blue Bokoblin
|
Blue Bokoblins use the same attack pattern as Red Bokoblins, but are tougher. Invite an attack and repel it with a Shield Bash, then strike. |
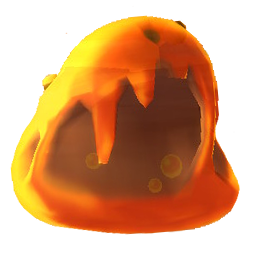 Chuchu Chuchu
|
A simple sword slash defeats it. When it merges, proceed to continue slashing until every Chuchu is defeated. |
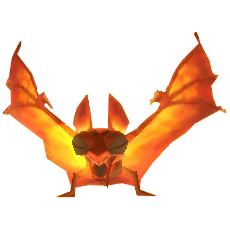 Fire Keese Fire Keese
|
Defeat it like normal Keese. Do not use Wooden Shields when fighting it. |
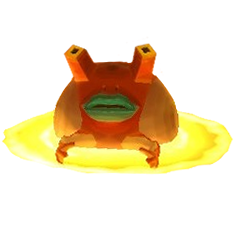 Magma Spume Magma Spume
|
Throw a bomb or attack with a Skyward Strike. |
 Pyrup Pyrup
|
The quickest way to defeat it is to throw a bomb, especially when it is breathing fire. Another option is to shoot it with a bow from a distance, or stun with a slingshot and then slash. |
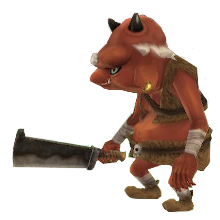 Red Bokoblin Red Bokoblin
|
Red Bokoblin can be easily defeated with a sword or bow. Invite an attack and repel it with a Shield Bash, then strike. |
 Red Bokoblin (Archer) Red Bokoblin (Archer)
|
Bokoblin Archers attack from a long distance, so it is effective to use the bow and arrow as well. If they attack with fire arrows, try not to guard wth a wooden shield. |
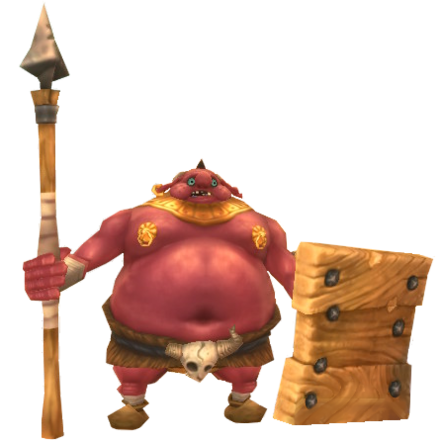 Wooden Shield Moblin Wooden Shield Moblin
|
Slash away its shield first with a sword until it is destroyed, then you can freely hit it. Avoid its attacks indicated by its wind-ups. |
Skyward Sword HD Related Guides

| Skyward Sword Walkthough | |
|---|---|
| Complete Story Walkthrough | |
| Dungeons and Temples List | Silent Realm Guide |
Main Locations
| Three Ancient Tablets | |
|---|---|
 Skyloft Skyloft |
 Sealed Grounds Sealed Grounds |
 Faron Woods Faron Woods |
 Skyview Temple Skyview Temple |
 Eldin Volcano Eldin Volcano |
 Earth Temple Earth Temple |
 Lanayru Mine Lanayru Mine |
 Lanayru Desert Lanayru Desert |
 Lanayru Mining Facility Lanayru Mining Facility |
 Sealed Grounds (Second Visit) Sealed Grounds (Second Visit) |
| Three Sacred Flames | |
 Skyloft (Second Visit) Skyloft (Second Visit) |
 Inside Thunderhead (Isle of Songs) Inside Thunderhead (Isle of Songs) |
 Faron Woods (Second Visit) Faron Woods (Second Visit)
|
 Lake Floria Lake Floria |
 Skyview Temple (Second Visit) Skyview Temple (Second Visit) |
 Ancient Cistern Ancient Cistern |
 Lanayru Sand Sea Lanayru Sand Sea |
 Sandship Sandship |
 Volcano Summit Volcano Summit |
 Fire Sanctuary Fire Sanctuary |
| Song of the Hero | |
 Sealed Grounds (Third Visit) Sealed Grounds (Third Visit) |
 Skyloft (Third Visit) Skyloft (Third Visit) |
 Faron Woods (Third Visit) Faron Woods (Third Visit) |
 Eldin Volcano (Second Visit) Eldin Volcano (Second Visit) |
 Lanayru Gorge Lanayru Gorge |
 Sky Keep Sky Keep |
 Final Battle Final Battle |
|
Silent Realm Trials
| Silent Realm Trials | |
|---|---|
 Farore's Trial Farore's Trial |
 Nayru's Trial Nayru's Trial |
 Din's Trial Din's Trial |
 The Goddess's Trial The Goddess's Trial |
Author
The Legend of Zelda: Skyward Sword Walkthrough & Guides Wiki
Eldin Volcano Walkthrough: Maps, Key Pieces, Goddess Cubes, and Heart Pieces
improvement survey
03/2026
improving Game8's site?

Your answers will help us to improve our website.
Note: Please be sure not to enter any kind of personal information into your response.

We hope you continue to make use of Game8.
Rankings
- We could not find the message board you were looking for.
Gaming News
Popular Games

Genshin Impact Walkthrough & Guides Wiki

Honkai: Star Rail Walkthrough & Guides Wiki

Umamusume: Pretty Derby Walkthrough & Guides Wiki

Pokemon Pokopia Walkthrough & Guides Wiki

Resident Evil Requiem (RE9) Walkthrough & Guides Wiki

Monster Hunter Wilds Walkthrough & Guides Wiki

Wuthering Waves Walkthrough & Guides Wiki

Arknights: Endfield Walkthrough & Guides Wiki

Pokemon FireRed and LeafGreen (FRLG) Walkthrough & Guides Wiki

Pokemon TCG Pocket (PTCGP) Strategies & Guides Wiki
Recommended Games

Diablo 4: Vessel of Hatred Walkthrough & Guides Wiki

Fire Emblem Heroes (FEH) Walkthrough & Guides Wiki

Yu-Gi-Oh! Master Duel Walkthrough & Guides Wiki

Super Smash Bros. Ultimate Walkthrough & Guides Wiki

Pokemon Brilliant Diamond and Shining Pearl (BDSP) Walkthrough & Guides Wiki

Elden Ring Shadow of the Erdtree Walkthrough & Guides Wiki

Monster Hunter World Walkthrough & Guides Wiki

The Legend of Zelda: Tears of the Kingdom Walkthrough & Guides Wiki

Persona 3 Reload Walkthrough & Guides Wiki

Cyberpunk 2077: Ultimate Edition Walkthrough & Guides Wiki
All rights reserved
© Nintendo. The Legend of Zelda, Nintendo Switch and amiibo are trademarks of Nintendo © 2021 Nintendo.
The copyrights of videos of games used in our content and other intellectual property rights belong to the provider of the game.
The contents we provide on this site were created personally by members of the Game8 editorial department.
We refuse the right to reuse or repost content taken without our permission such as data or images to other sites.




![Everwind Review [Early Access] | The Shaky First Step to A Very Long Journey](https://img.game8.co/4440226/ab079b1153298a042633dd1ef51e878e.png/thumb)

![Monster Hunter Stories 3 Review [First Impressions] | Simply Rejuvenating](https://img.game8.co/4438641/2a31b7702bd70e78ec8efd24661dacda.jpeg/thumb)


