This survey will take about 1 minute.
Your answers will help us to improve our website.
Dead Space Remake (2023)
Chapter 5: Lethal Devotion Walkthrough, Interactive Map, and Collectibles
★ Update 1.04 is out on all platforms as of Feb. 3, 2023!
★ Check our Beginner's Guide for the best tips and tricks!
★ See all Bugs and Exploits for Dead Space!
★ Perform a ritual for a secret text log and more!
★ How to Unlock Master Override: All RIG Locations
┗Marker Locations | Master Override Doors
Lethal Devotion is the fifth chapter of Dead Space Remake (2023)'s main story. Read on for a detailed walkthrough, list of rewards, tips for completion, Lethal Devotion Schematic Locations, as well as other strategies!
| Previous Chapter | Next Chapter |
|---|---|
| Obliteration Imminent | Environmental Hazard |
List of Contents
Chapter 5: Lethal Devotion Collectible Locations
Interactive Collectibles Map
Weapon and Upgrade Locations
| Weapon/Upgrade | Location |
|---|---|
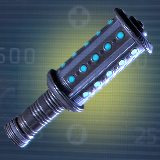
 Line Gun Line Gun
|
Found inside the Emergency Equipment Storage at the Medical Deck. |
 Pulse Rifle Pulse Rifle
|
Dropped by a dying security officer once you reach the Tram Station in the Medical Deck. |
 Kinesis Module Kinesis Module
|
Found on top of a crate as you enter the Medical Cargo Depot at the start of Chapter 2. |
 Stasis Pack Stasis Pack
|
Schematic found in the Main Lab Changing Room in Chapter 2, after clearing the quarantine. |
 Pulse Rounds Pulse Rounds
|
Schematic found inside the Coolant Pipelines room in Chapter 2, to your immediate left after leaving the oxygenless area. |
 Line Racks Line Racks
|
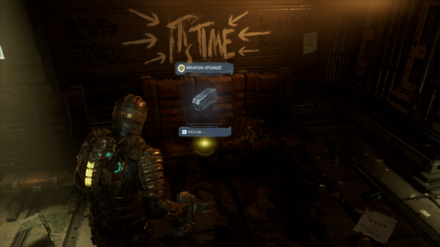
Schematic found inside the Dr. B. Warwick - CPO room in the hallway leading to Zero-G Therapy in Chapter 5. Requires Security Clearance Level 2. |
 Cartridge Rack Cartridge Rack
|
Found inside the Ishimura Clinic in Chapter 2, on top of the seats on the left side of the room. |
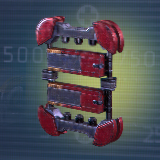
 Portable Heliotron Portable Heliotron
|
Found inside the Bioprosthetics Locker Room past the Main Lab Changing Room in Medical. Requires Security Clearance Level 3. |
 Photon Energizer Photon Energizer
|
Found inside the Lab Storage room near Cryogenics in Medical. Requires Security Clearance Level 3. |
 Marker Fragment 2 Marker Fragment 2
|
|
|
Marker Fragment 5
|
|
|
Marker Fragment 6
|
| Related Guides | |
|---|---|
| All Weapon Locations | All Weapon Upgrade Locations |
Log Locations
| Log | Event Trigger |
|---|---|
|
|
Found on top of a surgical bed inside the Medical Deck Observation Room. |
|
|
Found in a bathroom cubicle at the lower level of the Medical Deck’s Main Lab. |
|
|
Found on top of a table inside Dr. T. Kyne’s Office. |
|
|
Found on the desk inside Dr. Nicole Brennan’s Office in the Main Lab of the Medical Deck. |
|
|
Found on a shelf inside Dr. Nicole Brennan’s Office in the Main Lab of the Medical Deck. |
|
|
Found on a desk inside the Biological Prosthetics Center of the Medical Deck. |
|
|
Found on one of the medical beds inside the Emergency Room. |
|
|
Found on an operating table hidden behind the shower in the Emergency Room. |
|
|
Found by interacting with the mail terminal just beside the door to the Intensive Care Unit in ER Hallway B. |
|
|
Found at the end of ER Hallway B, just beside the O2 station. |
|
|
Found on a desk inside the Morgue. |
|
|
Found on a desk inside the Consultation Room of the Imaging Diagnostics Room. |
|
|
Found on a desk inside the Medical Deck Observation Room. |
|
|
Found in the ER Hallway A, just in front of the room that needs a Leve 2 Security Clearance. |
|
|
Found at the end of ER Hallway B, on a gurney near the O2 Station. |
|
|
Found on a desk in the Intensive Care Unit. |
|
|
Found inside Dr. Challus Mercer’s Office. |
|
|
Triggers after you pick up the Hunter’s tissue sample in Cryogenics. |
|
|
|
|
|
|
|
|
Chapter 5: Lethal Devotion Walkthrough
Lethal Devotion Summary
| 1 | Return to the Medical Deck. |
|---|---|
| 2 | Locate the Source of the Broadcast. |
| 3 | Escape the Creature. |
| 4 | Lift the Lockdown. |
| 5 | Stop the Poison Gas. |
| 6 | Acquire the Liquid Nitrogen. |
| 7 | Defeat the Hunter and Return to the Tram Station. |
Lethal Devotion Detailed Walkthrough
| Objectives | |
|---|---|
| 1 | 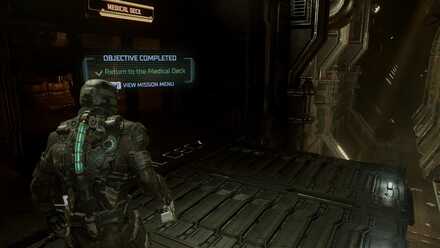 |
| 2 | 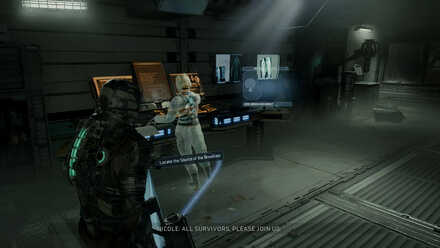 Pass through the door to Zero-G Therapy but take a left towards the Cryogenics Lab. Take the eleveator down and go into the Chemical Lab to stop the broadcast. |
| 3 | 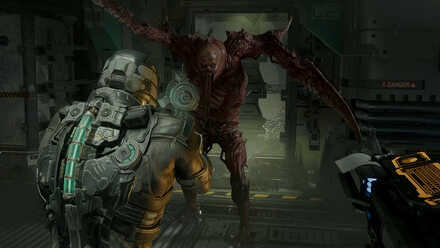 Once Kendra has the doors unlocked, bolt straight out. Go to Imaging Diagnostic directly from the Chemical Lab and straight to the Security Station. |
| 4 | 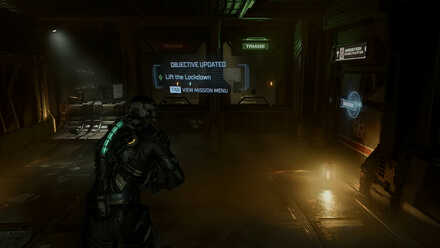 |
| 5 | 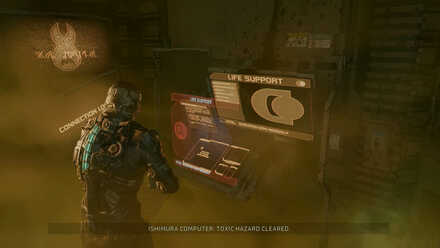 |
| 6 | 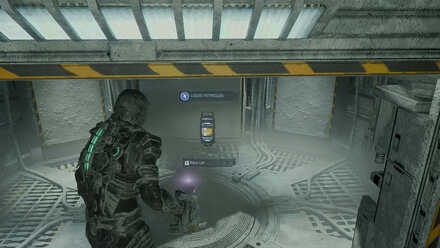 |
| 7 | 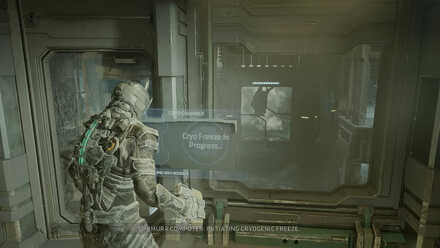 Much like the original game, your best bet against the Hunter in this situation is to make the most of your environment. Use stasis on the Hunter, while you shoot off its limbs. As it tries to regenerate from within the cryogenic chamber, run to the console to activate the Cryo Freeze process. Afterwards, pick up the Tissue Sample and return to the Medical Tram Station. ►Premeditated Malpractice Side Mission Guide |
Chapter 5: Lethal Devotion Tips and Strategies
Do Not Approach Guardians
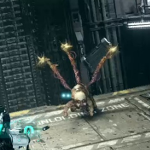
Guardians usually appear attached to walls or hallways, and fire ranged Necromorphs that will use a tentacle to attack you. Getting too close to a Guardian is certain death. Instead, use your Kinesis Module to throw explosives at its stomach to kill it.
Do Not Engage the Hunter
Once you reach the Chemical Research Lab, this will be the first time you face the Hunter. It may look like a Slasher on steroids, but this is a Necromorph like no other. It has regenerative abilities so you cannot kill it. Shooting off its limbs only slows it down momentarily. Your only option is to hit it with your Stasis Module to slow its regeneration process, and run while you can.
Use Stasis to Conserve Ammo
Once the Life Support System is compromised, you will be prompted to run to the Security Station to turn it back on. You will have to go back through Medical and face the Hunter along with two Pregnants. Don't bother shooting the Necromorphs as it will only consume time you don't have. Instead use stasis to slow them down and make your way to the other side of the room.
Lure the Hunter into the Cryo Chamber
After dealing with the other Necromorphs, lure the Hunter into the Cryo Chamber and begin dismembering its legs. When it goes down, use Kinesis to slow it down as you race to the control panel and jumpstart the Cryo Chamber.
Chapter 5: Lethal Devotion Enemies Encountered
| List of Necromorphs | |
|---|---|
 Guardian Guardian
|
Weak Spots: Tentacles
Weaknesses: Explosives |
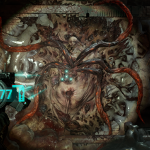
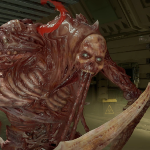 Hunter Hunter
|
Weak Spots: None Specific
Weaknesses: Stasis |
 Lurker Lurker
|
Weak Spots: Tentacles
Weaknesses: None |
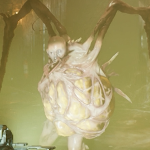 Pregnants Pregnants
|
Weak Spots: Limbs
Weaknesses: Stasis |
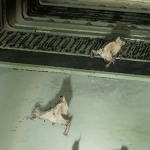 Swarmers Swarmers
|
Weak Spots: None Specific
Weaknesses: Stasis, Explosives, Fire |
Dead Space Remake Related Guides

Full Story Walkthrough: All Chapters
Main Missions
| All Story Chapters |
 New Arrivals New Arrivals (Chapter 1) |
 Intensive Care Intensive Care (Chapter 2) |
|---|---|
 Course Correction Course Correction (Chapter 3) |
 Obliteration Imminent Obliteration Imminent (Chapter 4) |
|
Lethal Devotion (Chapter 5) |
 Environmental Hazard Environmental Hazard (Chapter 6) |
 Into the Void Into the Void (Chapter 7) |
 Search and Rescue Search and Rescue (Chapter 8) |
 Dead on Arrival Dead on Arrival (Chapter 9) |
 End of Days End of Days (Chapter 10) |
 Alternate Solutions Alternate Solutions (Chapter 11) |
 Dead Space Dead Space (Chapter 12) |
Author

Chapter 5: Lethal Devotion Walkthrough, Interactive Map, and Collectibles
Please participate in our site
improvement survey
03/2026
improvement survey
03/2026
Would you assist in
improving Game8's site?
improving Game8's site?

×
We are listening to our users' valuable opinions and discussing how to act on them.
The information collected through this survey will be used for the purpose of improving our services. In addition, the information will only be disclosed a part of a statistic in a format that will not allow identification of personal information.
Begin Survey
Not Now
×
Please rate each item regarding Game8.co's Advertisements.
Amount of Ads
Very Dissatisfied
Somewhat Dissatisfied
Fine
Somewhat Satisfied
Highly Satisfied
Placement of Ads
Timing of Ad Display
Ad Loading Speed
Safeness of Ads
Content of Ads
×
Please rate each item regarding Game8.co's Quality of Articles.
Amount of information
Very Dissatisfied
Somewhat Dissatisfied
Fine
Somewhat Satisfied
Highly Satisfied
Frequency of updates
Speed of new information
Accuracy of articles
Understandibility of articles
Readability of sentences
×
Please rate each item regarding Game8.co's Usability of the Site.
Ease of finding information
Very Dissatisfied
Somewhat Dissatisfied
Fine
Somewhat Satisfied
Highly Satisfied
Loading Speed
Use of Color
Font Size
Visibility of Images
Easy to Understand Layout
×
Please rate each item regarding Game8.co's Message Boards, Comments.
Ease of Writing
Very Dissatisfied
Somewhat Dissatisfied
Fine
Somewhat Satisfied
Highly Satisfied
Readability
Ease in Finding Information
Comment Quality
Comment Quantity
Admin Response
×
Please rate each item regarding Game8.co's Site's new design.
Please rate our site's new design
Very Dissatisfied
Somewhat Dissatisfied
Fine
Somewhat Satisfied
Highly Satisfied
Do you think that the website's design change makes the site easier to use?
Has the new design made it easier for you to find information on the site?
Has the new design improved the overall visual appeal of the site?
How would you rate your overall satisfaction with the new design of the site?
×
How likely are you to recommend Game8 to someone you know?
Very Unlikely
0
1
2
3
4
5
6
7
8
9
10
Very Likely
If you have other opinions regarding potential improvement to the website, please share them with us. We would appreciate your honest opinion.
Note: This is a free response section, so you can proceed without entering anything.
Note: Please be sure not to enter any kind of personal information into your response.
Note: Please be sure not to enter any kind of personal information into your response.
×
Thank You
×
Thank you for participating in our survey! Your answers will help us to improve the quality of our website and services.
We hope you continue to make use of Game8.
We hope you continue to make use of Game8.
Close
Rankings
- We could not find the message board you were looking for.
Gaming News


![Monster Hunter Stories 3 Review [First Impressions] | Simply Rejuvenating](https://img.game8.co/4438641/2a31b7702bd70e78ec8efd24661dacda.jpeg/thumb)


Popular Games

Genshin Impact Walkthrough & Guides Wiki
Honkai: Star Rail Walkthrough & Guides Wiki
Umamusume: Pretty Derby Walkthrough & Guides Wiki
Pokemon Pokopia Walkthrough & Guides Wiki
Resident Evil Requiem (RE9) Walkthrough & Guides Wiki
Monster Hunter Wilds Walkthrough & Guides Wiki
Wuthering Waves Walkthrough & Guides Wiki
Arknights: Endfield Walkthrough & Guides Wiki
Pokemon FireRed and LeafGreen (FRLG) Walkthrough & Guides Wiki
Pokemon TCG Pocket (PTCGP) Strategies & Guides Wiki


Recommended Games
Diablo 4: Vessel of Hatred Walkthrough & Guides Wiki
Fire Emblem Heroes (FEH) Walkthrough & Guides Wiki
Yu-Gi-Oh! Master Duel Walkthrough & Guides Wiki
Super Smash Bros. Ultimate Walkthrough & Guides Wiki
Pokemon Brilliant Diamond and Shining Pearl (BDSP) Walkthrough & Guides Wiki
Elden Ring Shadow of the Erdtree Walkthrough & Guides Wiki
Monster Hunter World Walkthrough & Guides Wiki
The Legend of Zelda: Tears of the Kingdom Walkthrough & Guides Wiki
Persona 3 Reload Walkthrough & Guides Wiki
Cyberpunk 2077: Ultimate Edition Walkthrough & Guides Wiki


All rights reserved
© 2023 Electronic Arts Inc.
The copyrights of videos of games used in our content and other intellectual property rights belong to the provider of the game.
The contents we provide on this site were created personally by members of the Game8 editorial department.
We refuse the right to reuse or repost content taken without our permission such as data or images to other sites.