Perfect Bride Fang Ling Weakness and How to Beat
☆ NEW: 1.7 Patch Notes
★ New to Shu? Check our Beginner's Guide
┗ Combat Guide | Full Skill Tree | Difficulty
☆ Meta: Builds | Best Weapons | Best Armor
★ Walkthrough | Bosses | NPCs
☆ Missables | Game Length | Trophies
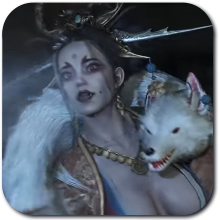
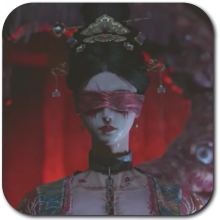
Perfect Bride Fang Ling is a Main Boss in Wuchang: Fallen Feathers. Check out Fang Ling's weaknesses and resistances, its location, tips on how to beat the boss, and the drops and achievements after defeating Fang Ling!
List of Contents
Perfect Bride Fang Ling Weakness
Basic Information
 |
||
| Type | Attacks | Status Ailment |
|---|---|---|
| Medium / Large | Slash, Stab | Poise Break Poise Break deals an instance of damage to both you and enemies.
|
Damage Type Weakness
|
Paralysis Damage output is reduced while affected by Paralysis.
Paralysis |
Blight Anyone affected by Blight will continue to lose maximum health for the duration.
Blight |
Burn Anyone affected by Burn will continuously take Fire damage and also suffer increased damage.
Burn |
|||||||||
|---|---|---|---|---|---|---|---|---|---|---|---|
| ★ | ★ | ★★ | |||||||||
|
Poise Break Poise Break deals an instance of damage to both you and enemies.
Poise Break |
Corruption Anyone afflicted by Corruption continuously takes damage.
Corruption |
||||||||||
| ★ | ★ | ||||||||||
Enemy weaknesses are rated from 1 to 3, with 3 being extremely effective. An X mark means the enemy is immune against the status effect.
How to Beat Perfect Bride Fang Ling
- Follow Our Build Guide
- Equip the Dracolich Pendant to Prevent Flinching from Roars
- Wear Armor to Resist Slash, Stab, and Poise Break
- Use Skills that Deflect and Clash Sword Attacks
- Deflect Her Attacks With theTwin Bandits Block
- Use Her Opening Attack to Stack Skyborn Might
- Chimera Opening During Sideward Beams
Follow Our Build Guide
 Stagger Longsword Stagger Longsword |
 Flame Spear Flame Spear |
 Immortal Axe Immortal Axe |
|||||||||
 Clash Dual Blades Clash Dual Blades |
 Magic Shortsword Magic Shortsword |
||||||||||
These are our recommended builds that we used to defeat Fang Ling. Clashes are the most effective technique against her, making the Clash Dual Blades Build good to use, since she doesn't get staggered from Deflects like Honglan does. Clashes lessen her damage, and allows you to continue your combo while trading attacks with her without getting flinched.
Equip the Dracolich Pendant to Prevent Flinching from Roars
Fang Ling roars on both of her phases, causing you to flich when you get caught in the radius. Equipping the Dracolich Pendant you get from the Mercury Workshop will prevents flinching from roars, allowing you to stay close and deal damage during her roar.
Dracolich Pendant Effects and How to Get
Wear Armor to Resist Slash, Stab, and Poise Break
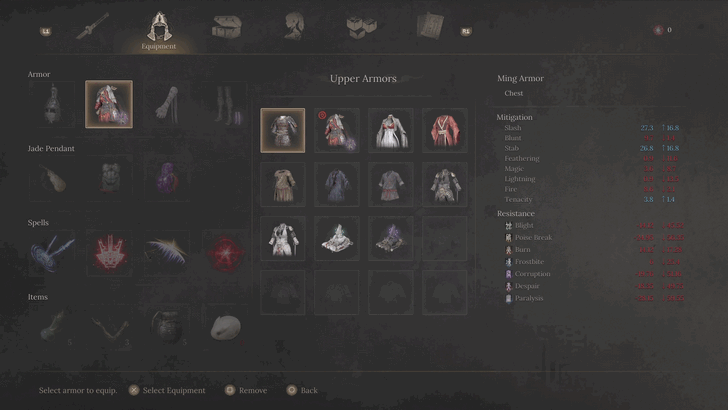
Fang Ling uses her dual blades for most of her attacks during the first phase, with occasional strikes from the monstrous extension on her shoulders. Defeat Ai Nengqi to obtain the Seven Treasure Rosary, which you can give to Tao Qing to unlock the ability to purchase the North General Armor set. The full set offers the highest combined Stab and Slash mitigation in your current progress. Other good alternatives are the Ming Armor set and the Centipede Armor set.
Use Skills that Deflect and Clash Sword Attacks
It is recommended to deflect or clash against Fang Ling's blade strikes. Clashing your weapons with hers reduces the damage you receive while allowing you to continue your attack combo, gradually breaking her Poise and opening her up for Obliterate Strikes.
Weapons and Moves with Clash or Deflect
| Weapon Type | Moves with Clashes and Deflect |
|---|---|
| Longswords |
• Sword Counter Discipline • Sword Savant Passive |
| One-Handed Swords |
•
Phantom Flurry Phantom Flurry Unleash a rappid barrage of slashes (has the Clash effect). Use with Skyborn Might for greater potency, sending forth multiple Magical blade forces to strike at faraway enemies.
Weapon Skill • Swift Lunge Discipline Variant II • Flickering Blade Discipline (Pseudo-Deflect) |
| Axes |
• Axe and Hook Passive • Chop and Weave Passive |
| Dual Blades |
•
Fearless Cleave Fearless Cleave Deliver a powerful strike with both blades (has the Clash effect). Use with Skyborn Might for greater potency and a stronger Clash effect.
Weapon Skill • Block Block Swing both blades while retreating to block the enemy's move. Block at the perfect moment to Deflect the attack instead. After Deflecting, subsequent attacks become increasingly faster. Succesful hits heal the user on hit.
Weapon Skill • Blade Dance Discipline Variant I • Sudden Strike Discipline Variant I • Whirling Flurry Discipline Variant I • Feather Chaser Passive • Leaf Slasher Passive • Wave Breaker Passive • Deadly Shadow Passive |
| Spears |
•
Ebb and Flow Ebb and Flow Lunge the spear forward in a swift thrust, inflicting multiple instances of damage. Use with Skyborn Might to trigger the Clash effect and cause Frostbite buildup. The final hit causes a frost exploation that sends nearby enemies flying.
Weapon Skill • Vortex Thrust Vortex Thrust Spin, before lungin forward in a swift thrust, inflicting multiple instances of damage. Use with Skyborn Might to trigger the Clash effect and cause Frostbite buildup. The final hit causes a frost exploation that sends nearby enemies flying.
Weapon Skill • Spear Flurry Discipline • Spearveil Discipline |
Deflect Her Attacks With the Twin Bandits Block
Fang Ling can be briefly staggered if you deflect her blade attacks using the Twin Bandits' block skill, once you've unlocked the Steel Edge node in the Dual Blades skill tree in the Impetus Repository.
This makes it a perfect opportunity to get behind her and do a heavy attack to open her up for Obliterate Strikes.
Use Her Opening Attack to Stack Skyborn Might
Fang Ling hangs from the ceiling and fires projectiles at you, which you can do Perfect Dodges to gain up to five stacks of Skyborn Might. It's best to keep your distance to let her continue firing before she eventually drops down.
Chimera Opening During Sideward Beams
The Chimera fires beams starting from its left side to the right, then sweeps back to the left, remaining stationary throughout the attack. Move in and stay near its right side to safely deal damage during this window. If you're having trouble getting some hits, stay on the defensive until it uses this move.
Perfect Bride Fang Ling Movesets
| Jump to a Moveset! | |
|---|---|
| Phase 1 | Phase 2 |
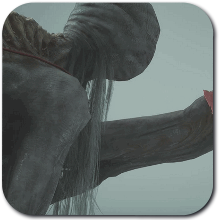
Phase 1 Attack Patterns
Fang Ling will mostly use her dual blades that inflict Poise Break buildup during the first phase, with a few attacks from her monstrous extension.
| Moves | Details |
|---|---|
| Hanging Blood Shots |
Fang Ling's opening attack. She hangs from the ceiling and fires four blood shots at you before dropping down, dealing damage to anyone caught in her landing. Simply dodge the blood shots and stay away from the center of the arena to avoid her landing spot. |
| Aerial Arc Spin |
Fang Ling executes a spinning motion in the air with her two blades to deliver multiple hits. Dodge to the side to avoid getting hit. |
| Dashing Stab |
Fang Ling readies her blade and dashes toward you with a stab after her blade shines. You can dodge forward to get behind her and counterattack, or dodge in any direction if you anticipate a follow-up. |
| Charged Stab |
Similar to the Dashing Stab, but this one readies both of her blades and has a longer charge before executing the stab after the flash of light. This can be dodged the same way with the Dashing Stab. |
| Blade Strikes |
Fang Ling enters a semi-crouching stance, then attacks with her blades. This attack is easy to deflect if you have the skill, or you can dodge in any direction to avoid it. |
| Triple Stabs |
Fang Ling builds momentum and delivers a stab attack. The stab on her left hand has longer reach, but they can easily be dodged, as the timing between them matches the interval between your dodges. |
| Scissor Cuts |
Fang Ling readies her blades, then performs three quick scissor-like snap attacks, followed by a slash at the end. Focus on dodging backward with each attack. |
| Whip Slash |
Fang Ling temporarily floats and spins with her blade, extending its range on the second spin. You can clash or deflect the attack, but it's also possible to dodge behind her to avoid it entirely. |
| Twirling Blades |
Fang Ling spins multiple times while attacking. Dodge each strike backward to keep her in view and pepare for her follow-up attacks. |
| Monstrous Roar |
The monster connected to her lets out a roar. Mitigate its effects using the Dracolich Pendant, or simply move out of rage to avoid the attack. |
| Blood Shot |
The monster on her back charges a bit before shooting blood at you. Dodge in any direction to avoid it. |
| Blood Beam |
The monster fires a beam of blood along the ground toward your location, which explodes after the attack ends. Simply dodge to the sides to avoid both the beam and the explosion. |
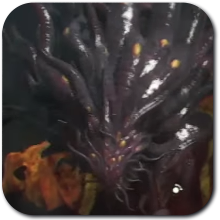
Phase 2 Attack Patterns
Fang Ling changes her whole moveset during phase two, since she transforms into a monstrous form, losing her blades in the process.
| Moves | Details |
|---|---|
| Beastly Roar |
This move is her opening attack after entering phase 2. This can be easily mitigated by equipping the Dracolich Pendant, which prevents flinching from roars, as this will allow you to land a few hits before she starts her other moves. You can avoid the move by keeping your distance and using Spells or Throwables instead to deal damage from afar. |
| Ground Pound |
The Chimera raises her hand and slams it into the ground. This is best dodged to the side or backward to maintain distance, but be careful for possible follow-up attacks. |
| Ferocious Bites |
The Chimera builds momentum and lunges its head at you for a bite, followed by two quick bites, and ends a final charged bite. This can be dodged to the side for you to get some attacks during the move. |
| Side Claw Strikes |
The Chimera launches a claw strike from her side to the front. Just be mindful to which side attack is coming from. This is usually followed by a tail whip, so be ready to dodge again after avoiding the claw strike. |
| Tail Whip |
After a side claw strike, the Chimera follows up with a tail attack. Dodge in any direction to avoid it. |
| Relentless Strikes |
The Chimera pounds the ground multiple times, finishing with a combined slam using both hands. Stay near its side to avoid the pounding attacks, then dodge the leap attack at the end. |
| Forward Carge |
The Chimera quickly charges to your location, dealing damage along its path. Dodge when it gets close to either sides to avoid the attack. |
| Lunge Attack |
The Chimera lunges its whole body towards you. Dodge in any direction except backward to avoid the attack. |
| Spinning Beams |
The Chimera lets out a blood beam while it is spinning that explodes upon contact with the ground. It's best to go outside the attack range to avoid the move entirely. |
| Sideward Beams |
The Chimera lets out a beam attack sweeping from her left to right, then right to left, followed by an upward blast. Dodge in the opposite direction of the beam's path to avoid damage. You can sprint to the Chimera's right side and safely deal damage during the duration of this move. |
| Explosive Blast |
The Chimera breathes fire into the ground, concentrating its power before relasing a powerful blast. It's best to run away and create distance from the Chimera to avoid the explosion. |
| Falling Crimson |
The Chimera lets out a roar (without causing flinches) that triggers falling debris with a crimson glow. You can receive damage and be knocked down even if the debris lands near you. Always keep moving while this attack is active to avoid getting hit. |
Perfect Bride Fang Ling Location
Reach the Bottom of the Shaft Through Bride's Boudoir
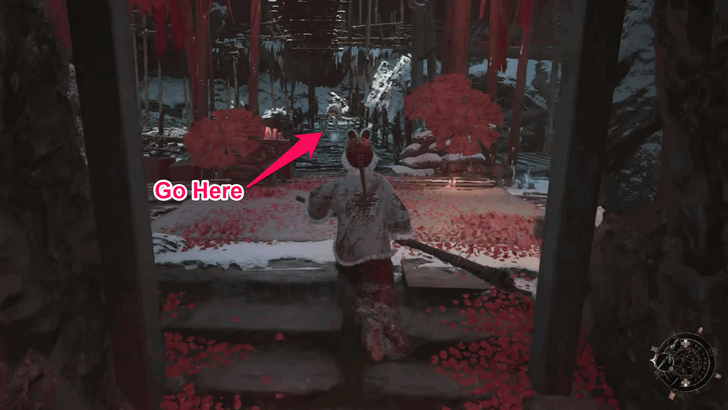
From the Shaft Entrance shrine, descend to the bottom of the shaft through the Bride's Boudoir area. You'll exit Bride's Boudoir at the bottom of the shaft, then move to the middle part of the bridge to collapse it and fall into Fang Ling's arena.
Perfect Bride Fang Ling Rewards and Armor
Perfect Bride Fang Ling Drops
|
|
Fang Ling Items from Shu Silk Fan
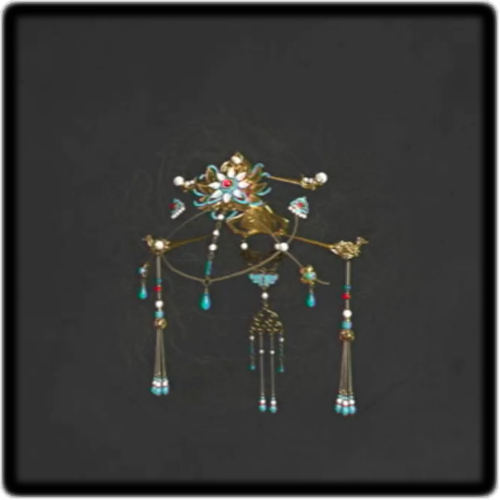 Fang Ling's Hairpin Fang Ling's Hairpin
|
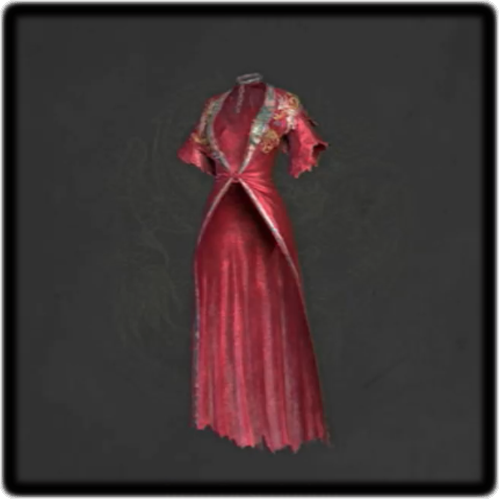 Fang Ling's Wedding Dress Fang Ling's Wedding Dress
|
 Fang Ling's Bracelet Fang Ling's Bracelet
|
 Fang Ling's Undergarments Fang Ling's Undergarments
|
Give the Shu Silk Fan to Tao Qing after defeating Perfect Bride Fang Ling to unlock the pendants, items, or armor related to the boss in Tao Qing's shop.
Tao Qing Location and Questline
Trophies and Achievements
 Silver Silver |
Perfect Bride - Fang Ling |
|---|---|
| Defeat Perfect Bride - Fang Ling |
Complete Trophy and Achievement Guide
Wuchang: Fallen Feathers Related Guides

| List of Boss Guides |
|---|
| Top 10 Hardest Bosses |
All Main Bosses
| Main Bosses | |||||||||||
|---|---|---|---|---|---|---|---|---|---|---|---|
 Man-eating Dhutanga Man-eating Dhutanga |
 Soulwood Soulwood |
 Honglan Honglan |
|||||||||
 Liu Cheng'en Liu Cheng'en |
 Huang Yan Huang Yan |
 Fang Ling Fang Ling |
|||||||||
 Zhang Xianzhong Zhang Xianzhong |
 Zhu Youjian Zhu Youjian |
 Xuanyangzi Xuanyangzi |
|||||||||
All Optional Bosses
 Bai Kru
 Tang Palace Maid
 Lu Bingzhang
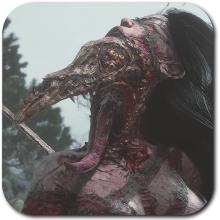 Lu Hongliu
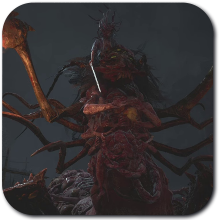 Great Centipede
 Ai Nengqi
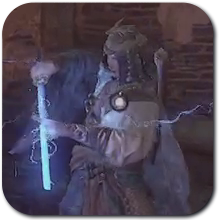 Liu Wenxiu
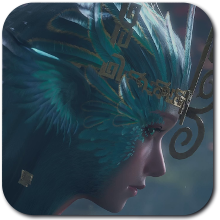 Bo Sorcerer
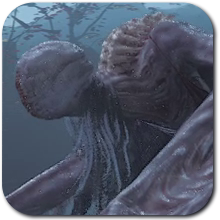 Monstrous Toddler Bai Kru
 Nightmare Demon
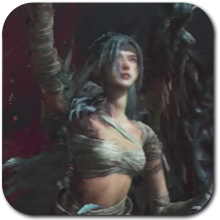 Vermilion Feathers Honglan
 Bo Magus
 Zhao Yun
 Demon of Obsession
Comment
Author
Perfect Bride Fang Ling Weakness and How to Beat
Rankings
- We could not find the message board you were looking for.
Gaming News


Popular Games

Genshin Impact Walkthrough & Guides Wiki
Umamusume: Pretty Derby Walkthrough & Guides Wiki
Pokemon Pokopia Walkthrough & Guides Wiki
Honkai: Star Rail Walkthrough & Guides Wiki
Monster Hunter Stories 3: Twisted Reflection Walkthrough & Guides Wiki
Arknights: Endfield Walkthrough & Guides Wiki
Wuthering Waves Walkthrough & Guides Wiki
Zenless Zone Zero Walkthrough & Guides Wiki
Pokemon TCG Pocket (PTCGP) Strategies & Guides Wiki
Monster Hunter Wilds Walkthrough & Guides Wiki


Recommended Games
Fire Emblem Heroes (FEH) Walkthrough & Guides Wiki
Diablo 4: Vessel of Hatred Walkthrough & Guides Wiki
Cyberpunk 2077: Ultimate Edition Walkthrough & Guides Wiki
Yu-Gi-Oh! Master Duel Walkthrough & Guides Wiki
Super Smash Bros. Ultimate Walkthrough & Guides Wiki
Pokemon Brilliant Diamond and Shining Pearl (BDSP) Walkthrough & Guides Wiki
Elden Ring Shadow of the Erdtree Walkthrough & Guides Wiki
Monster Hunter World Walkthrough & Guides Wiki
The Legend of Zelda: Tears of the Kingdom Walkthrough & Guides Wiki
Persona 3 Reload Walkthrough & Guides Wiki


All rights reserved
© 2025 505 Games. Developed by Leenzee. Published by 505 Games.
The copyrights of videos of games used in our content and other intellectual property rights belong to the provider of the game.
The contents we provide on this site were created personally by members of the Game8 editorial department.
We refuse the right to reuse or repost content taken without our permission such as data or images to other sites.