Chapter 1: Worship's Rise Walkthrough and Secrets
☆ NEW: 1.7 Patch Notes
★ New to Shu? Check our Beginner's Guide
┗ Combat Guide | Full Skill Tree | Difficulty
☆ Meta: Builds | Best Weapons | Best Armor
★ Walkthrough | Bosses | NPCs
☆ Missables | Game Length | Trophies
This is a walkthrough for Chapter 1: Worship's Rise in Wuchang: Fallen Feathers. See a detailed guide on how to complete Worship's Rise, along with all secrets, missables, and bosses in this chapter.
Chapter 1 Complete Walkthrough
- Reverent Temple
- Buddha Cliffs
- Lightzen Temple
- Shu Sanctum
- Mercury Workshop
- Bandit Cave
- Doomwillow Beach
- Tang Emperor's Palace
1. Reverent Temple
| Step | Objective |
|---|---|
| 1.1 | 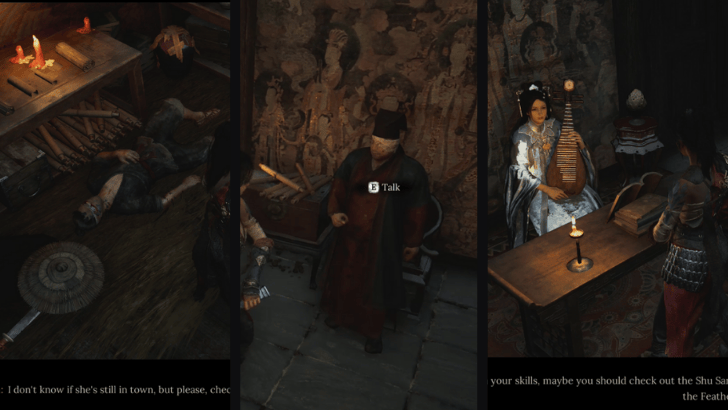 Once you arrive in Reverent Temple, go down the temple stairs and talk to Xuanyangzi, Qiao Lin, Tao Qing, and Yu Xia. They all give you a quest to accomplish in Shu Sanctum. |
| 1.2 | 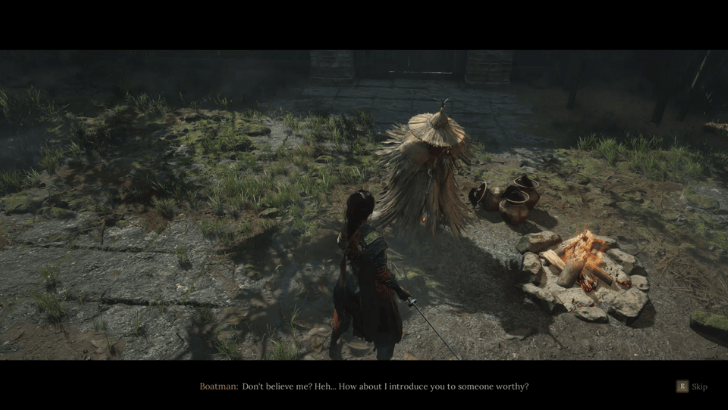 Talk to the Boatman outside of the temple. You will be sent to a dream, where you will fight Bai Kru. You fight this boss only once, and you should not worry about defeating it since it is the game's tutorial boss. |
| 1.3 |  Exit the Reverent Temple, turn right, and follow the river to the scaffolding. Meet the Young Boy, He Youzai, and Red-Clad Lady along the way. You will also encounter an enemy camp that will drop your first pendant upon defeat. Continue going up the scaffolding until you reach the Buddha Cliffs shrine at the top. |
Reverent Temple 100% Completion Guide
2. Buddha Cliffs
| 2.1 |  Go down the ladder next to the shrine and go into the cave. You will obtain your first Spell and then do your first Plunging Attack. |
| 2.2 | 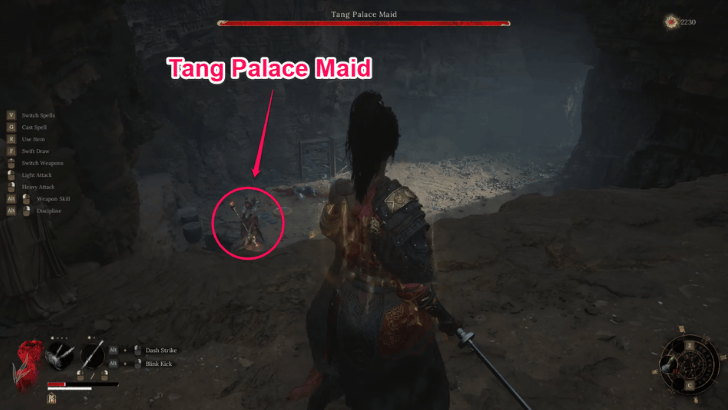 In the following area, you must face the Tang Palace Maid. Make sure to attack from behind to set up Obliterate attacks to defeat her quickly. She will drop your first Benediction, the Bu - Skyborn Ward, upon defeat |
| 2.3 | 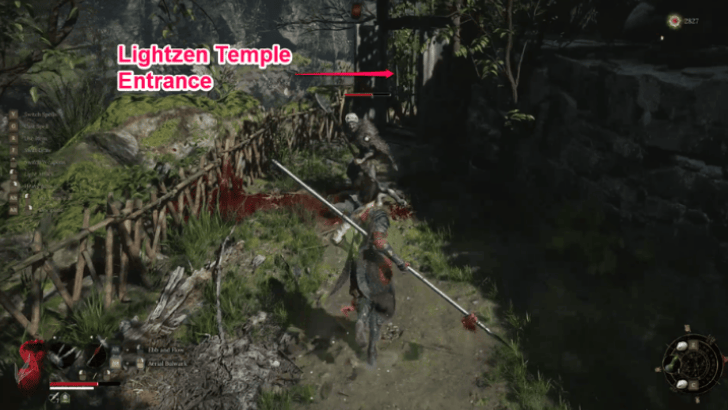 Follow the forest path onwards, eventually reaching the Lightzen Temple entrance. The entrance is guarded by an enemy hidden behind it, so prepare yourself. Along the way you can get the Delicate armor set, Red-Tasseled Spear, Lost Package, and the Entwined Legend Pendant. |
Buddha Cliffs 100% Completion Guide
3. Lightzen Temple
| 3.1 | 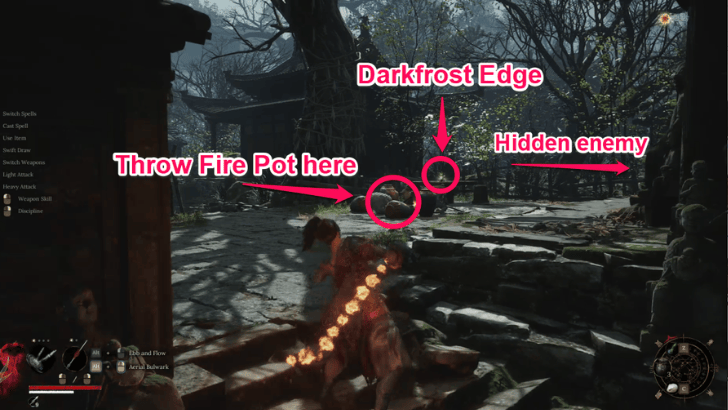 Once you enter Lightzen Temple, throw a Fire Pot at the bunched up explosives to take out enemies within range. Make sure to pick up the gold item on the table nearby, which will give you Darkfrost Edge. Watch out for the hidden enemy on the right! |
| 3.2 | 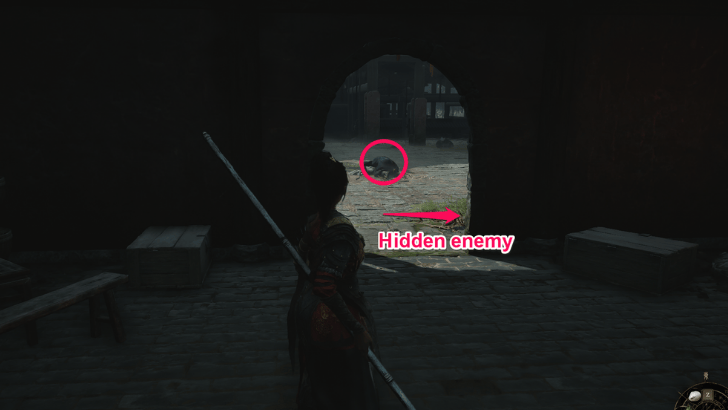 Go through the area behind the Shrine and watch out for the hidden enemy by the entrance. Go around the temple ahead and pick up the Golden Bowl inside the temple. After that, go through the door on the other side to fight Man-Eating Dhutanga. |
| 3.3 | 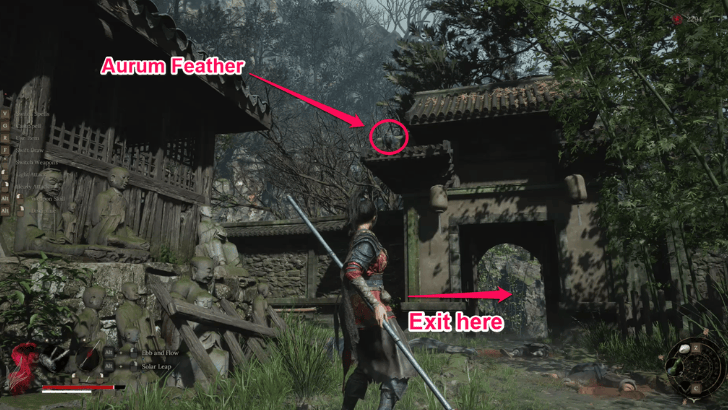 After defeating Dhutanga, go to the door across the area's Shrine and use the Lightzen Key to unlock it. Exit the temple and follow the path towards the Narrow Stretch. |
| 3.4 | 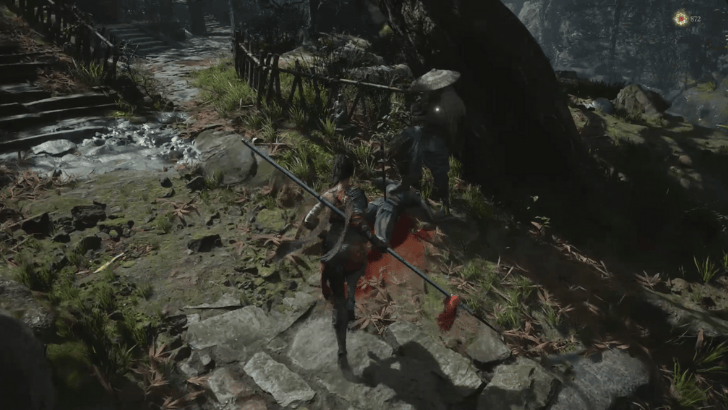 Talk to Nian Suichang along the way. He will tell you about the rumors surrounding Shu Sanctum, and ask you to bring him elixirs for his brother. If you accept the quest, he will give you a Bone Whistle, allowing you to summon him while fighting against certain enemies. |
Lightzen Temple 100% Completion Guide
4. Shu Sanctum
| 4.1 |  Go up the stairs near Nian Suichang. At the top, we recommend going to the right to avoid any challenging fights before unlocking the Shu Sanctum Shrine. |
| 4.2 | 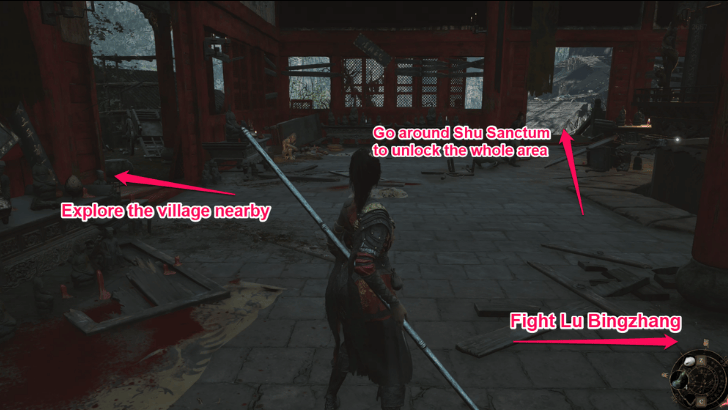 Once you unlock the Shu Sanctum Shrine, you have 2 main choices when deciding what to do next. You can either go around and unlock areas in Shu Sanctum first for additional content or you can go up Shu Sanctum to immediately fight Lu Bingzhang. It is recommended to explore the area first before fighting the main boss so you have ample time to level up. |
| 4.3 | 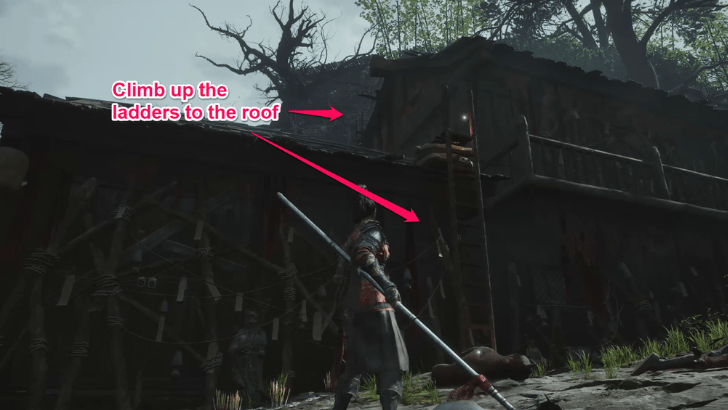 Towards the front of Shu Sanctum, fight the Ming Soldier to clear the area and obtain the Ming Armor Set. Near the area where you fought the Ming Soldier, climb up the ladders and cross over to the settlement on the other side. |
| 4.4 | 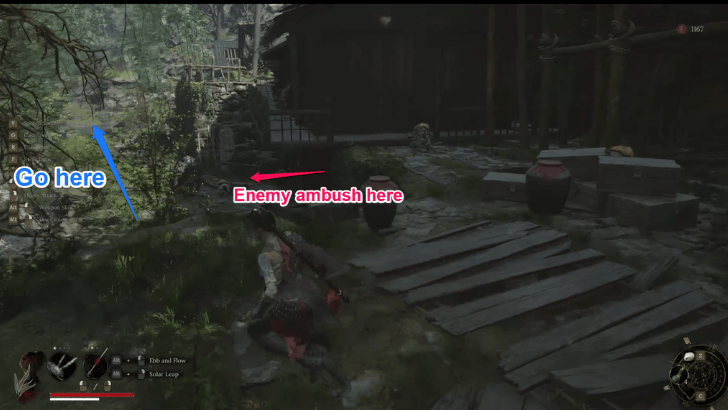 Once you are on the other side, explore the houses within the area and make your way to the bottom. Go down the path on the left and look for a carriage in the middle of the path. You can pick up the gold item near the carriage, which will give you the Un-Equilibrium Blades. |
| 4.5 | 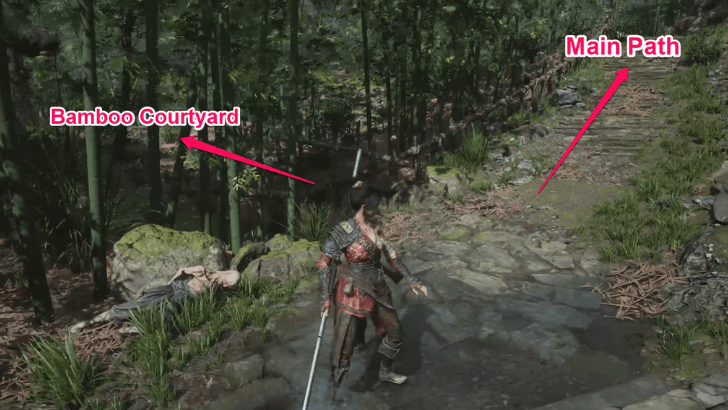 When you are past the area with the enemies, there is a path across the nearby staircase. This leads to the Bamboo Courtyard. In the house on the left, you can talk to an Actress who knows Tao Qing, and will ask you to beat him up. In the other house, you can talk to a woman looking for her family, and will give you a Courtyard Key to go to the Courtyard in Worship's Rise. |
| 4.6 | 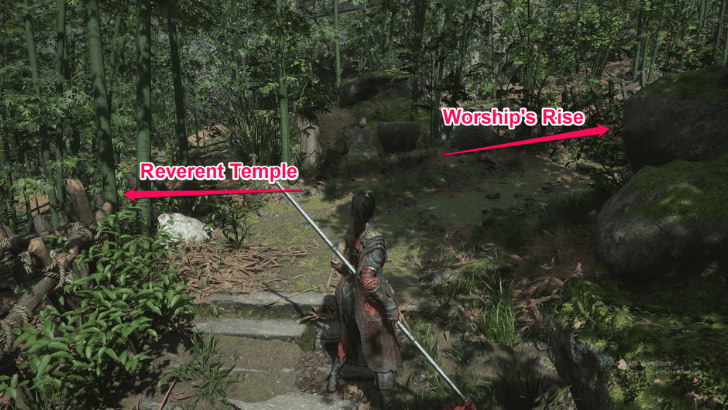 Go back to the main path and make your way to the end. You can either go left and return to Reverent Temple, where you can unlock the other gate, or go right, which leads to Worship's Rise. When unlocking the door to Reverent Temple, there is a house nearby where you can obtain the Bu - Blocking Clash Benediction. |
| 4.7 |  Go through the opposite path and enter Worship's Rise. The Courtyard you are looking for can be found through the door on your left. Inside the Courtyard, you will find the Militia Armor Set and Damaged Letter |
| 4.8 |  Go back out onto the Worship's Rise entrance and go through the left side of the building. You can avoid directly dealing with the cannon enemy in the main alley by going up to the roof through the house on your left. Once you get back down, you will be behind the cannon enemy, giving you an advantage. |
| 4.9 | 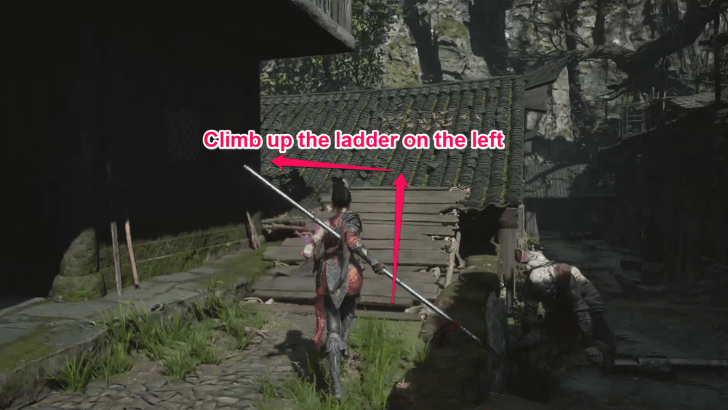 Go up the ramp on your right and turn left to climb up the nearby ladder. Once you are on the roof, go to the other end and pass by the walkway on your left to pick up the Wei - Plunging Force Benediction. Go back to the ladder at the end then open the door on your right leading to the Sanctum. |
| 4.10 | 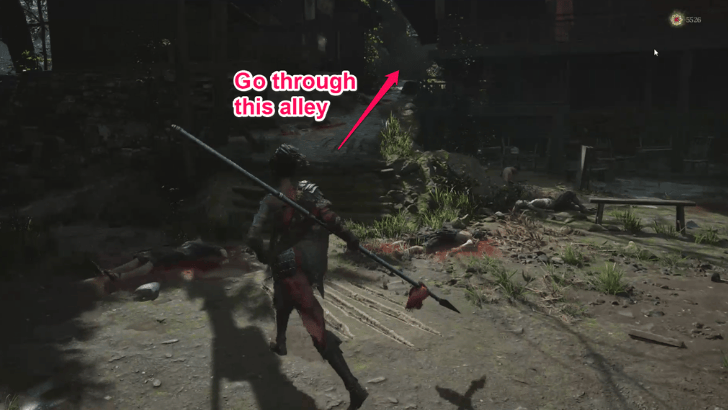 Defeat the optional enemy on your left to obtain the Infernal Flames Spell and Dough Figurine of Yang Zongbao. After that, head down the alley on your left. You can also go down the mountain through a path next to the alley. This leads to the Annalum, where you can obtain the Scenic Painting, Bo Blood, Shadow Stone Needle - Agility, and the Pixiu Pendant. |
| 4.11 | 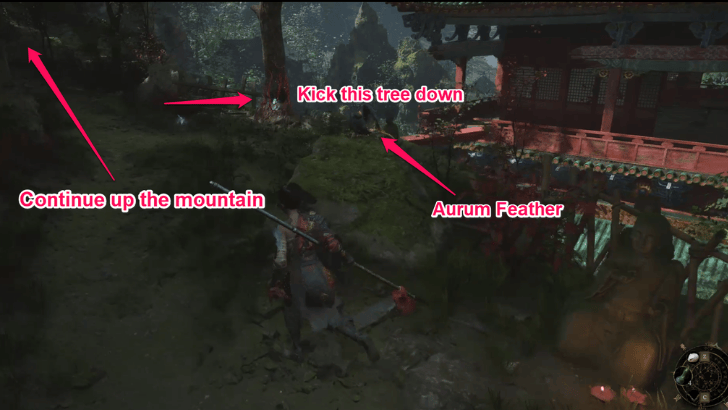 When going back to Shu Sanctum, continue up the mountain and kick the tree down on your right. This will open a direct path from the sanctum. When going up the mountain and turning left, you reach the peak of the mountain and can defeat a guard to obtain a Brilliant Red Feather and the Wei - Vitality Power Benediction. Go through the other path to make your way back to Shu Sanctum |
| 4.12 | 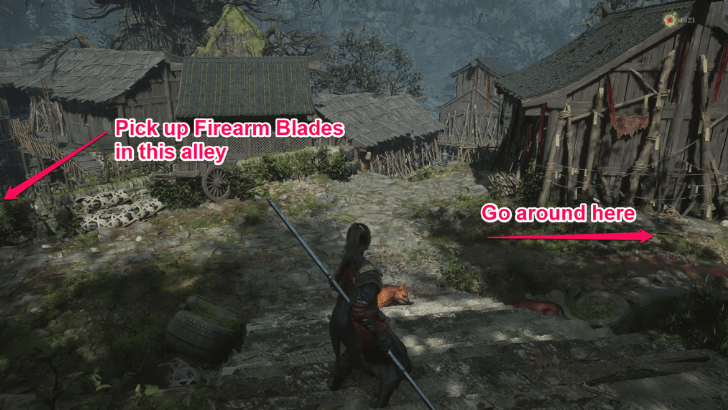 If you turn right and go back to Shu Sanctum, follow the ramp down the mountain and enter the village nearby. Turn right and go around near the back of Shu Sanctum. You can also go down to the alley on the left to defeat several enemies and pick up a gold item that gives you the Firearm Blades. |
| 4.13 |  At the end of the path, you can open a door on the right, which leads back to the side entrance of Shu Sanctum, and the door straight ahead, which leads to the edge of the area near Narrow Stretch. |
| 4.14 | 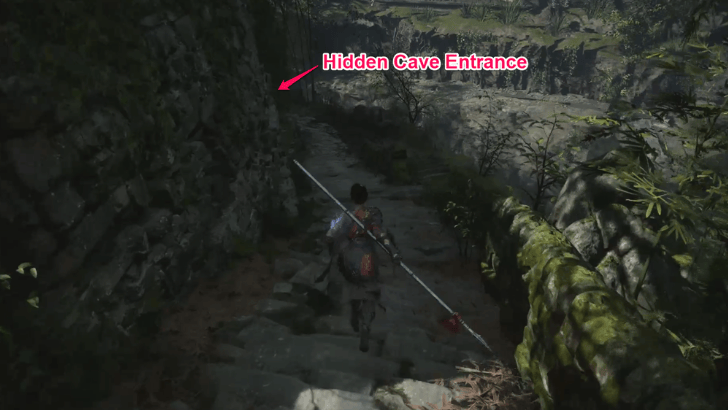 Once you open the door leading to the edge of Shu Sanctum, go down the path on the left and enter the cave at the end. You will find the Storyteller and Panda NPC here. Make sure to get the Bamboo Shoot near the cave entrance as well! |
| 4.15 |  Keep going down the mountain and cross the bridge to your left. Once you are on the other side of the bridge, turn left and enter the cave ahead. Go all the way to the end to obtain the Wei - Skyborn Magic Benediction. |
| 4.16 | 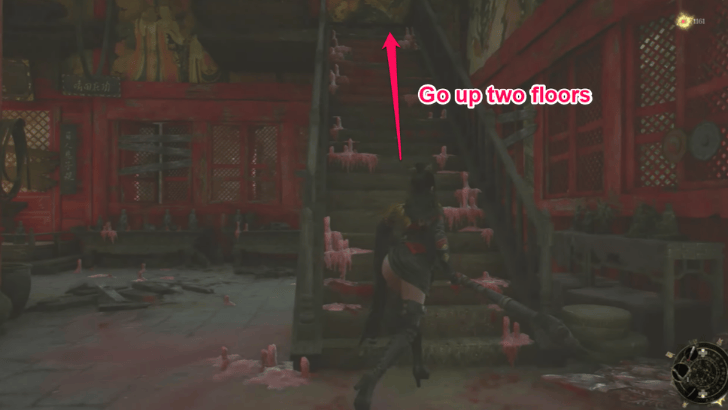 To progress the main story, go back to Shu Sanctum and go up the stairs next to the Shrine. Proceed to the top-most floor and enter the door on your right to fight Lu Bingzhang and obtain the Shu Sanctum Key. |
| 4.17 |  Once you defeat Lu Bingzhang, use the Shu Sanctum Key to rotate the central pillar at the bottom floor of the Sanctum. |
Shu Sanctum 100% Completion Guide
5. Mercury Workshop
| 5.1 | 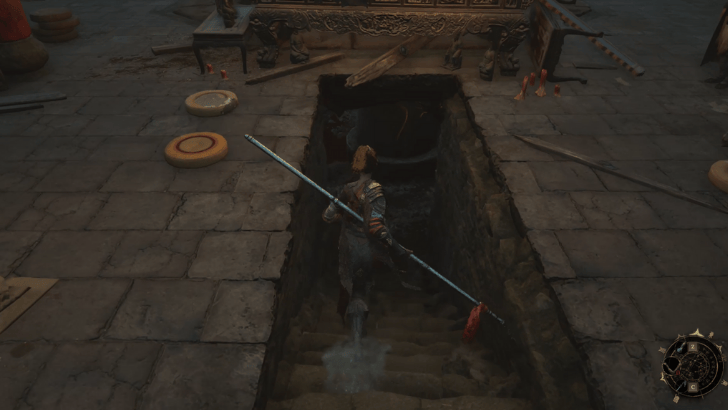 Towards the front of Shu Sanctum, go down the newly opened entrance and proceed further into the tunnels. Keep following the ramp downwards and watch out for the violet clouds around, as these inflict Corruption. |
| 5.2 | 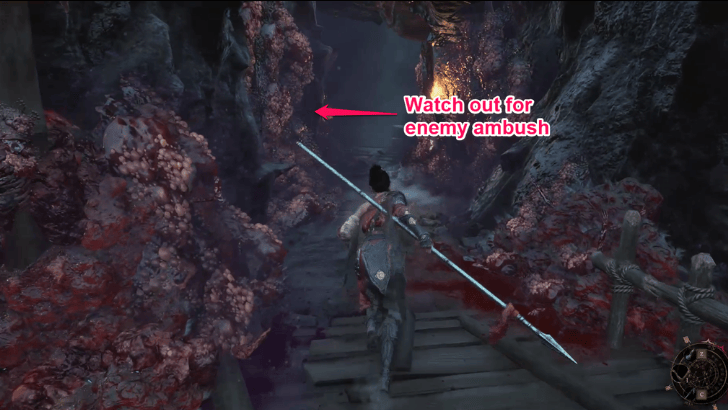 At the bottom of the ramp, go into the nearby tunnel and turn right, where you can see the area's Shrine right ahead. Watch out for an enemy ambush on your left! |
| 5.3 | 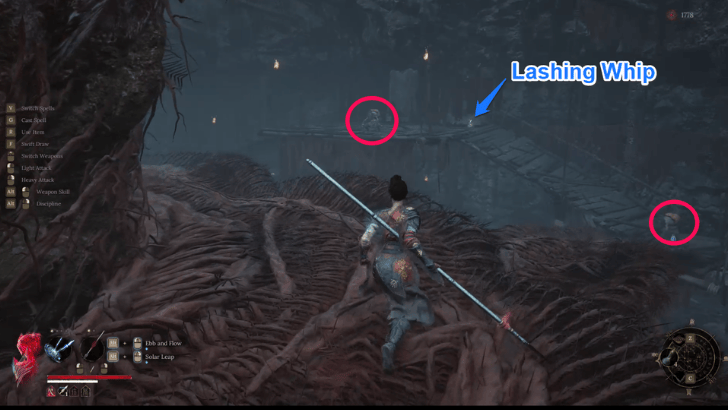 Before, you progress, it is recommended to first release the ladder nearby the Mercury Workshop Shrine to obtain the Dracolich Pendant. To progress, o down the central structure to the right of the Shrine and go right. Keep going until you see a platform with two enemies with guns. Go through this platform and follow it to the other side. |
| 5.4 | 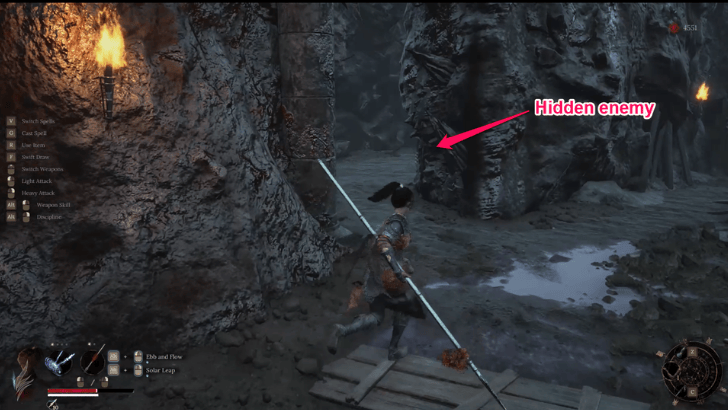 Follow the narrow path onwards until you see the tunnel entrance on your left. Take caution when going through here because there is an enemy waiting nearby. In that tunnel, you will see a Dancing Enemy you must defeat to obtain a Faint Red Feather. |
| 5.5 | 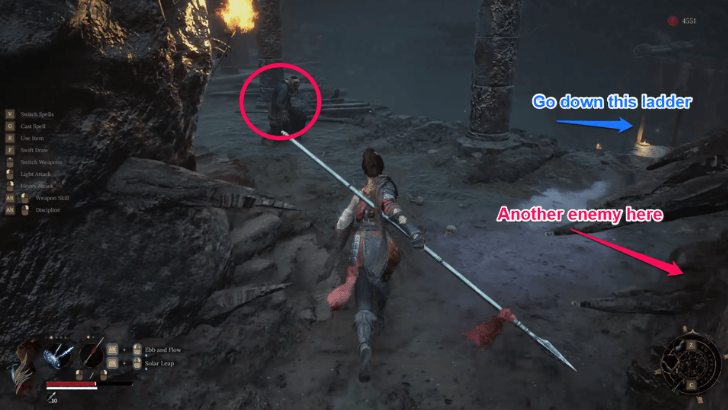 Exit that tunnel and go down the ladder in front of you. Once you are at the bottom of the ladder, follow the platform ahead towards the area's central structure. Turn right and fall down the withered branch, leading to another area. |
| 5.6 |  Follow the wooden ramp towards a tunnel that has the Pheonix Pendant and a big door at the end. Open this door and continue going down the central structure until you reach ladders that lead to the lowest floor of the area. |
| 5.7 |  Go through the path behind the ladder. Keep going until you see a bridge to the left and cross over to the other side of the area. Make sure to pick up the Twin Infant Pendant and Lost Remains in the central island. Cross over to the area through the nearby bridge. |
| 5.8 | 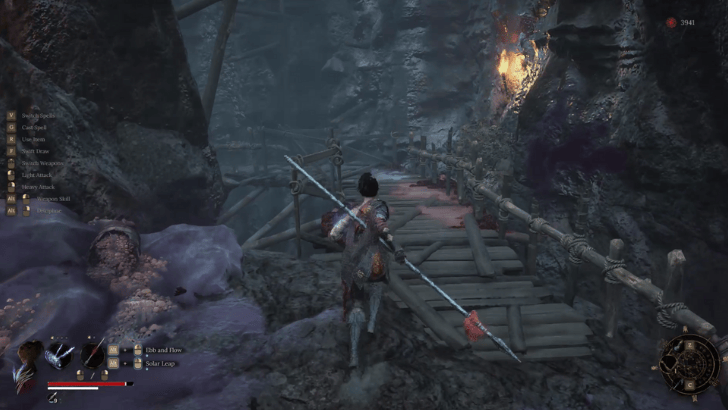 Continue following this path and go through the entrance to your left. |
Mercury Workshop 100% Completion Guide
6. Bandit Cave
| 6.1 | 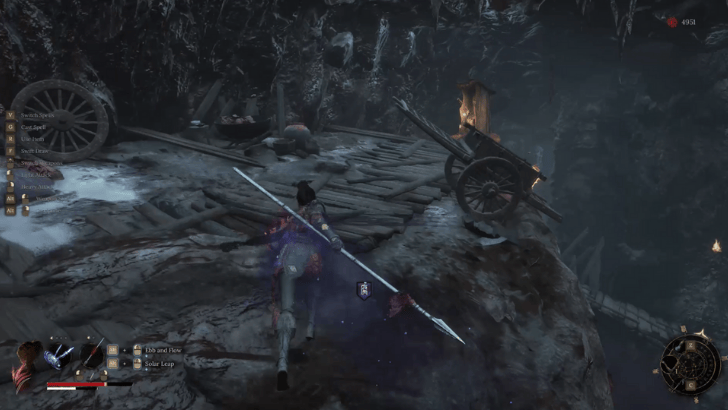 Follow the path you are on up to the top of a small hill, where you can unlock the Bandit Cave shrine. |
| 6.2 | 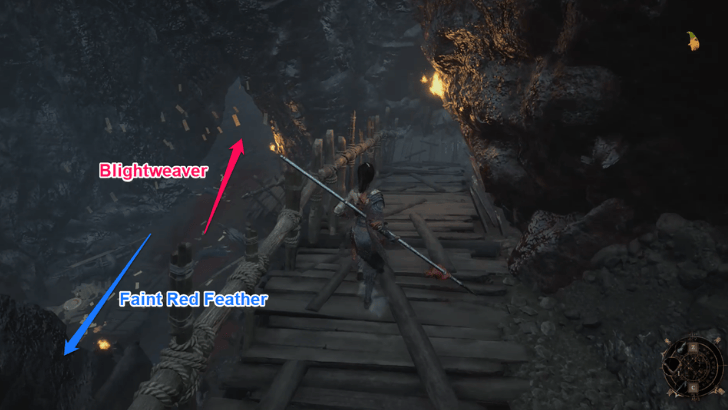 Go down the ramp in front of the Bandit Cave shrine all the way until the bottom. On your right, enter the following area to fight Blightweaver. |
| 6.3 | 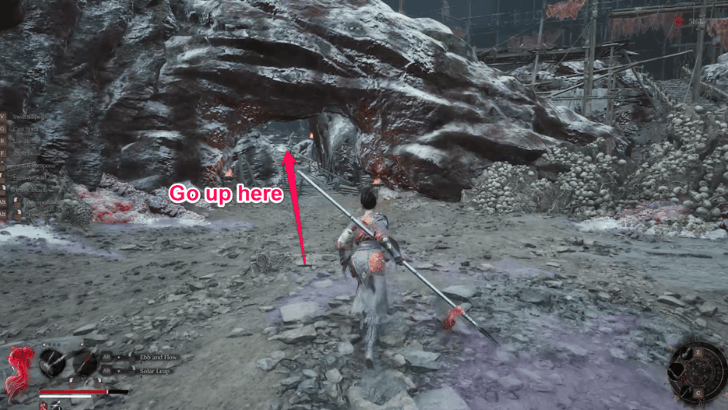 Go up the slope to the left of the boss area, which will lead you to the Tower of Sacrifice. Use the elevator to go up. Make sure to explore the platforms at the sides of the tower to pick up the Shi - Vitality Ward and a Faint Red Feather. |
Bandit Cave 100% Completion Guide
7. Doomwillow Beach
| 7.1 | 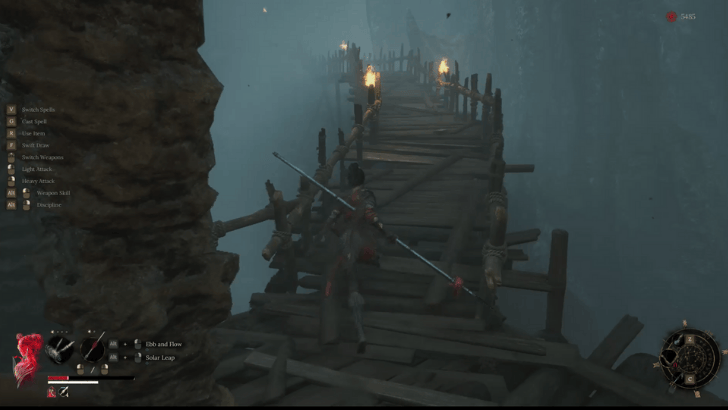 Proceed forward and go up the platform ahead. This leads you directly to Doomwillow Beach. You can talk to He Youzai on your way to the Doomwillow Beach shrine to obtain the Record of the Southern Archipelago and Pirate Armor Set. |
| 7.2 |  As you enter the main area, you will see a mimic shrine on your left. Interacting with it right away will cause you to get grappled and take damage. Attack and defeat the mimic shrine first to reveal and activate the real shrine. |
| 7.3 |  It is recommended to pass by Lu Mansion first to pick up valuable items. From the Doomwillow Beach shrine, go up the path on the right. and keep going up the mountain until you see burnt buildings at the top. |
| 7.4 | 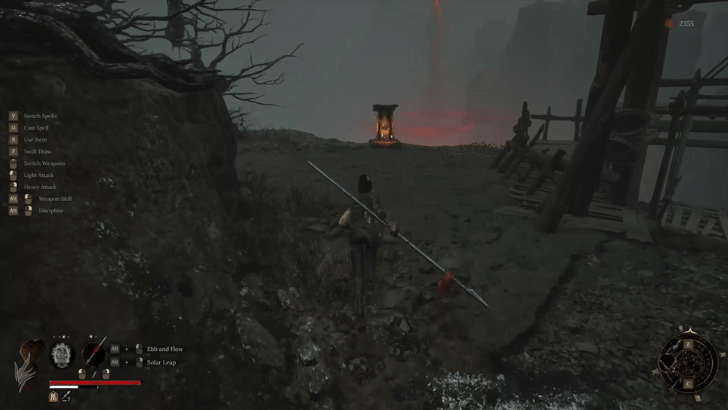 From the Lu Mansion shrine, explore the cave on the opposite side of the area and defeat the vase mimic to obtain a Faint Red Feather and the Shi - Rising Defense Benediction. |
| 7.5 | 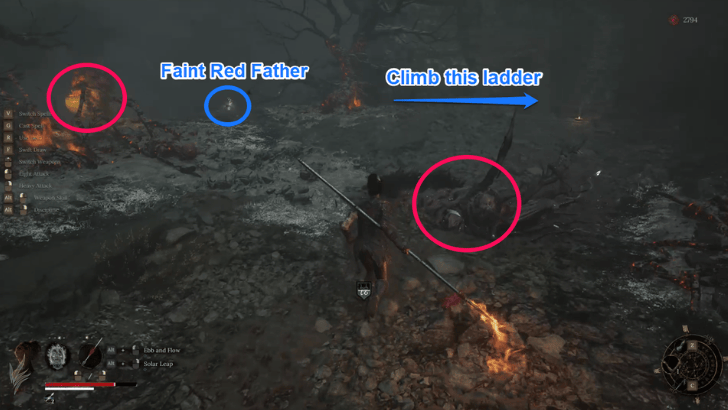 Continue to the end of the path you are on and pick up the Bamboo Shoot along the way. Go up the ladder in the right corner of the path. At the top, you will see a tall structure you can kick down to create a bridge. |
| 7.6 |  This leads directly to the Red-Clad Lady. Pick up the Divine Might Spell to her left and then talk to her to get the Sheng - Backstab Rejuvination Benediction. Go down the path on your right to progress. |
| 7.7 | 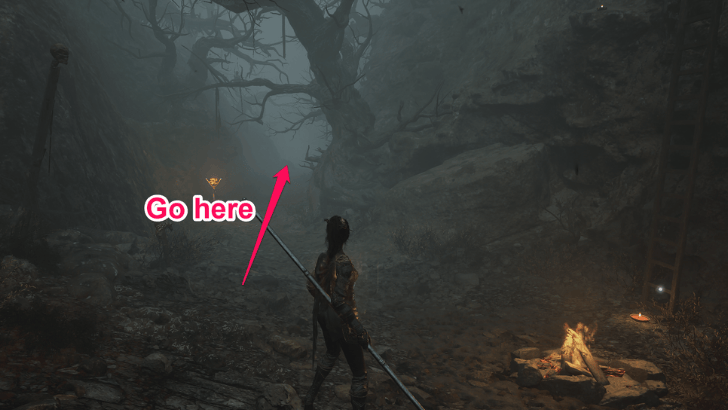 At the bottom of the path, turn right to obtain a Bamboo Shoot at the end of the path. After that, go through the small entrance in front of the earlier slope and turn left to obtain a Forgotten Remembrance from a big chest. Turn right and go up the ladder on your right. This leads to a bridge back to the Doomwillow Beach and, upon defeating an enemy on the opposite area, the Burning Flames Spell. Go back down the ladder and follow the long path to your right, which leads you straight to the Corpse Pits, where you must defeat Soulwood. |
| 7.8 | 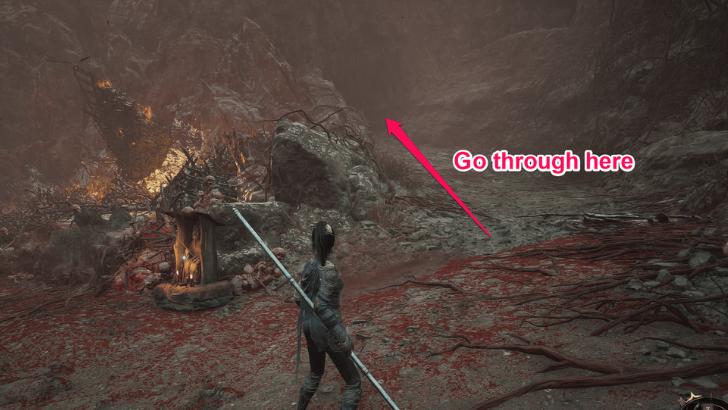 Once Soulwood is defeated, activate the Corpse Pits shrine and then go up the path nearby. This slope will lead to Palace Pass. |
Doomwillow Beach 100% Completion Guide
8. Tang Emperor's Palace
| 8.1 | 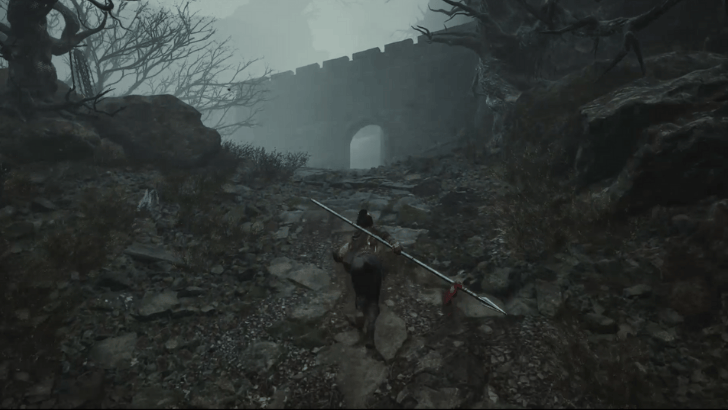 At the top of the slope, you will see the entrance to Palace Pass. Go through the area and unlock the big door at the end. Go across the bridge on the second floor and follow the mountainpath to the top. Go up the ladder on your right in a small cave. |
| 8.2 | 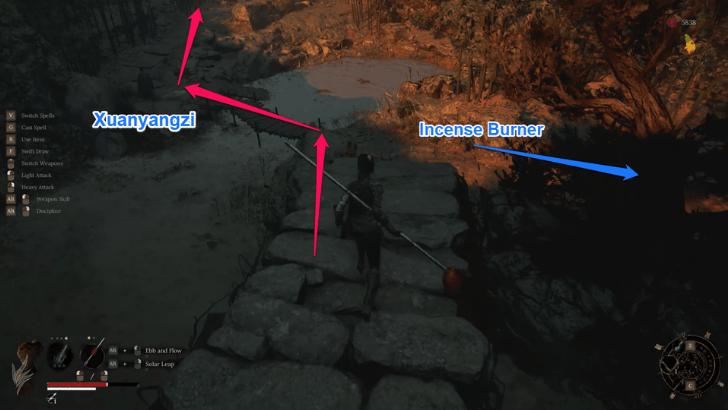 Once you exit the cave, go down the slope and turn right to pick up the Incense Burner. Talk to Xuanyangzi on the other side, who will ask you to do research for him. Continue down that path to progress. |
| 8.3 | 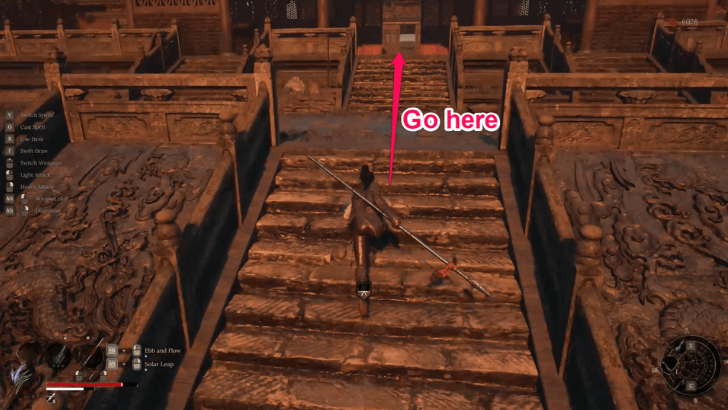 Enter the Tang Emperor's Palace and proceed into the next area up ahead. You will have to defeat the Dual-Wielding Ming Guard patrolling around the area. Keep going straight ahead to obtain the Eagle Pendant from a small chest guarded by a Ming Guard. From here, enter through the opening in the wall on your right. |
| 8.4 |  Go up the ramp on your right leading to the roof, but defeat the vase mimic behind the ramp first. From the roof, go down the ladder on the other side. Once you are at the bottom, proceed forward and defeat the Ming Guard ahead. Open the big door on your left connected to Shu Sanctum then go up the stairs on your left. |
| 8.5 | 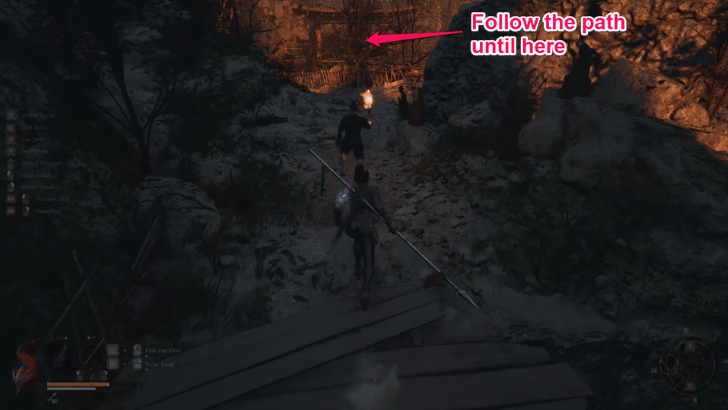 Follow that path until you reach a snowy path with a small gazebo at the end. Watch out for the Ming Swordsman guarding the area! Go down the staircase on your left. |
| 8.6 | 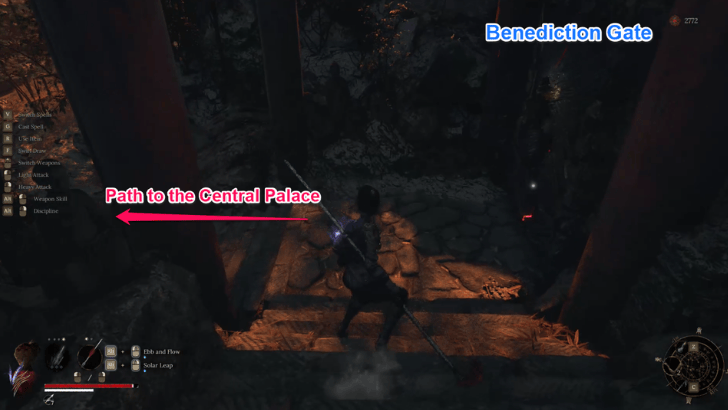 As you go down the stairs, you will see a Benediction Gate for the first time. Upon interacting with it, the correct choice would be to pick the The winged Ascension, which would give you the Sheng - Lasting Alacrity Benediction. Continue down the path to your left and enter the central palace to progress. |
| 8.7 | 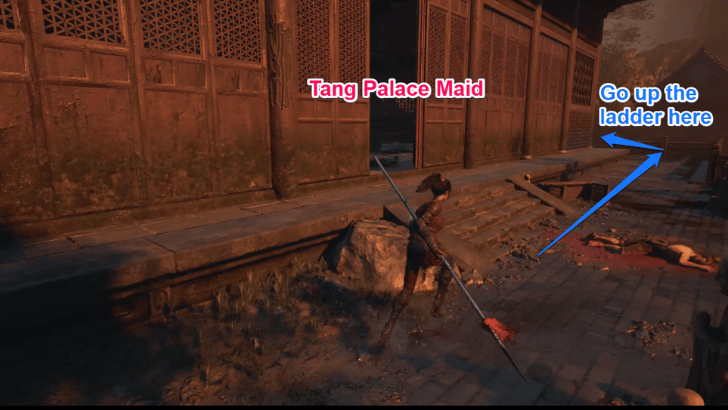 On the entrance to your left, you can fight the Tang Palace Maid again, who will drop the Palace Maid Armor Set, Brilliant Red Feather, and Hall of Music Key upon defeat. Pick up a Lost Remains from the big chest inside as well. From there, turn left and turn the corner. Climb up the ladder nearby leading to the roof, leading to the Palace Hill shrine. |
| 8.8 | 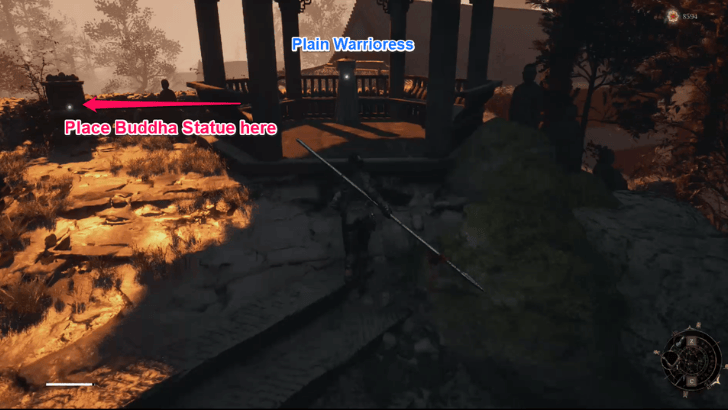 From the Palace Hill shrine, head down the left path to get the Buddha Statue. Pick up the Bamboo Shoot and Aurum Feather Force along the way. Return to the shrine, go up the hill on your right, and place it in the nearby statue to drain the water and unlock the area in front of the central palace. You can also talk to the Plain Warrioress and get a Plumed Branch. |
| 8.9 | 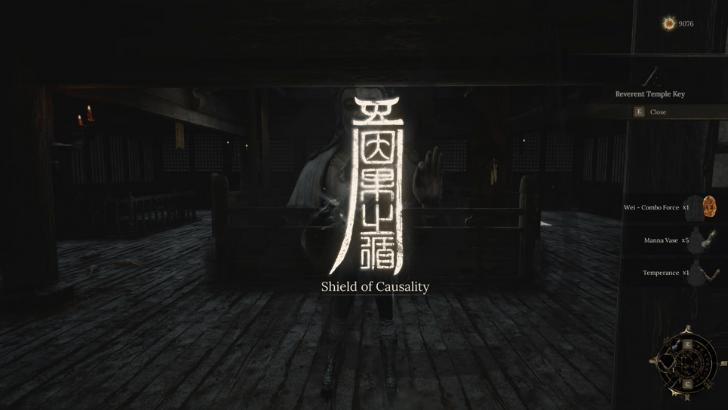 Go down to the central area, where you will fight Honglan. After the fight, you wake up back in Reverent Temple and obtain the Wei - Combo Force and Reverent Temple Key. |
Tang Emperor's Palace 100% Completion Guide
Chapter 1 Secrets and Missables
All Valuables
| ✔️ | Items | How to Get |
|---|---|---|
 Peachwood Amulet Peachwood Amulet
|
You obtain this Amulet upon talking to Qiao Lin in the Reverent Temple. | |
 Bamboo Lantern Bamboo Lantern
|
This item can be obtained after talking to He Youzai right outside the temple door, along the river. | |
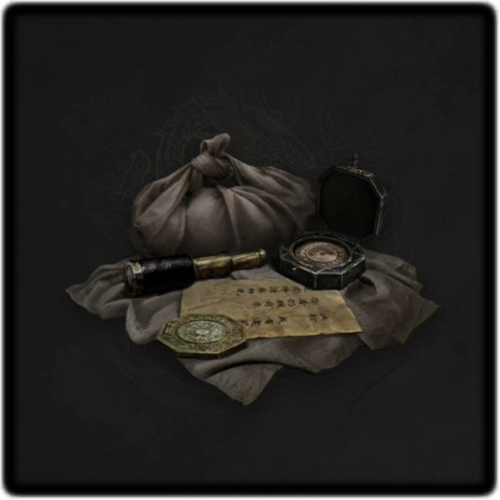 Lost Package Lost Package
|
This valuable may be found hidden in the plants across the cave exit near where you fought the Tang Palace Maid. | |
 Dough Figurine of Mu Guiyang Dough Figurine of Mu Guiyang
|
This can be found on the floor nearby two enemies around the Lightzen Temple exit. | |
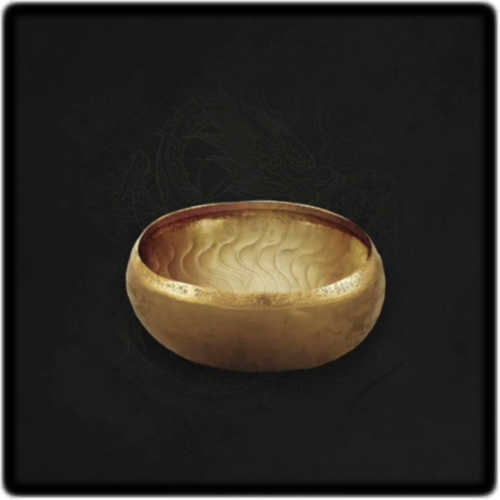 Golden Bowl Golden Bowl
|
This valuable can be found right across the door leading to Dhutanga. | |
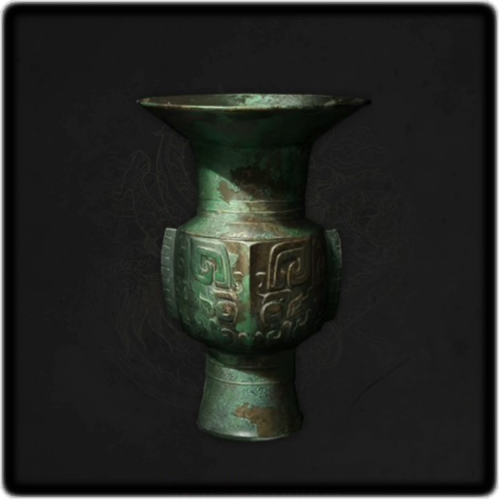 Copper Jug Copper Jug
|
This is obtained upon defeating Dhutanga. | |
 Lightzen Key Lightzen Key
|
This is obtained upon defeating Dhutanga. | |
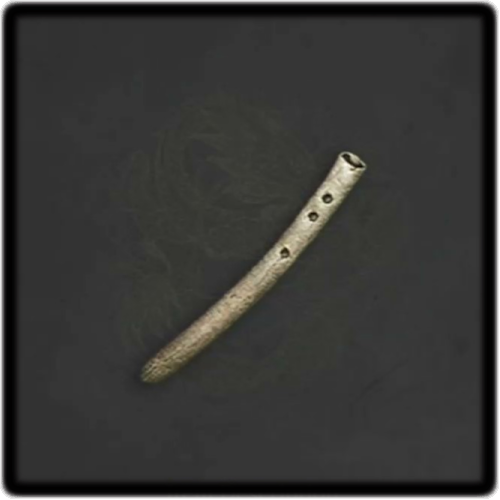 Bone Whistle Bone Whistle
|
You must accept Nian Suichang's request in Narrow Stretch. | |
 Courtyard Key Courtyard Key
|
Talk to one of the NPCs found in the Bamboo Courtyard houses. | |
 Damaged Letter Damaged Letter
|
Can be picked up in the second floor room at the Worship's Rise area. | |
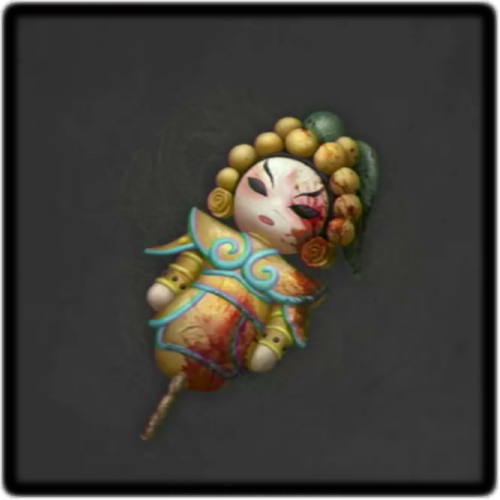 Dough Figurine of Yang Zongbao Dough Figurine of Yang Zongbao
|
Obtained upon defeating the fire bird enemy in the Worship's Rise area. | |
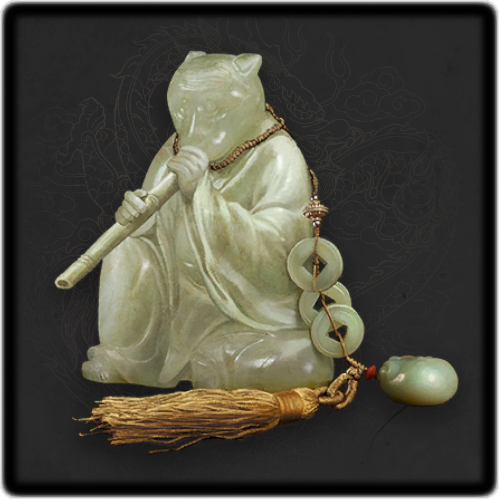
 Jade Cicada Jade Cicada
|
Obtained upon defeating Lu Hongliu. | |
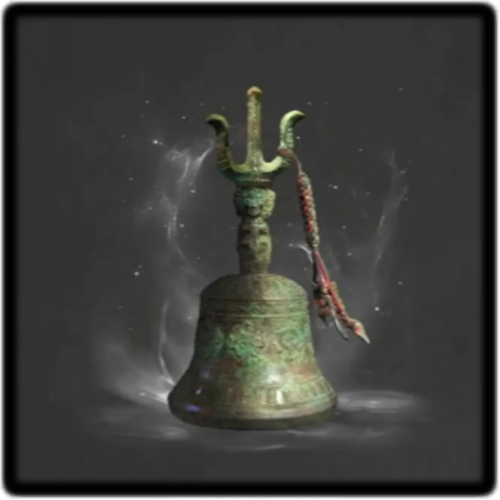 Trinity Bell Trinity Bell
|
Obtained upon defeating Lu Hongliu. | |
 White Jade Dumpling White Jade Dumpling
|
Obtained upon defeating Lu Hongliu. | |
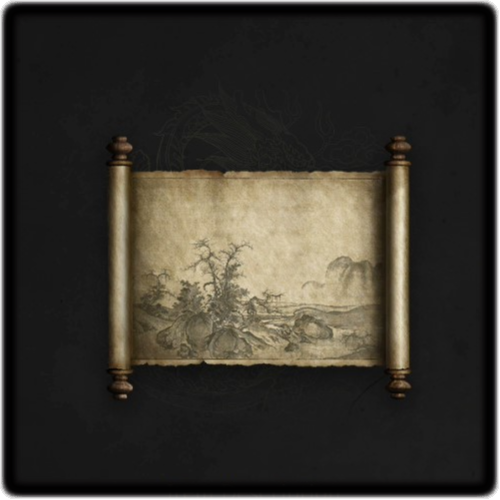 Scenic Painting Scenic Painting
|
Defeating the red-eyed enemy in the Annalum. | |
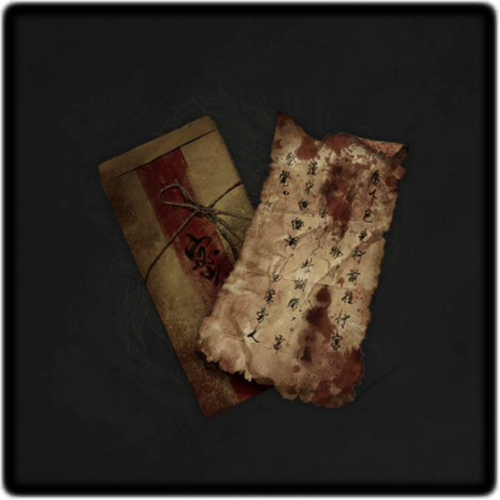 Bloodstained Letter Bloodstained Letter
|
Picked up near a dead body in the top floor of Shu Sanctum. | |
 Shu Sanctum Key Shu Sanctum Key
|
Obtained after defeating Lu Bingzhang. | |
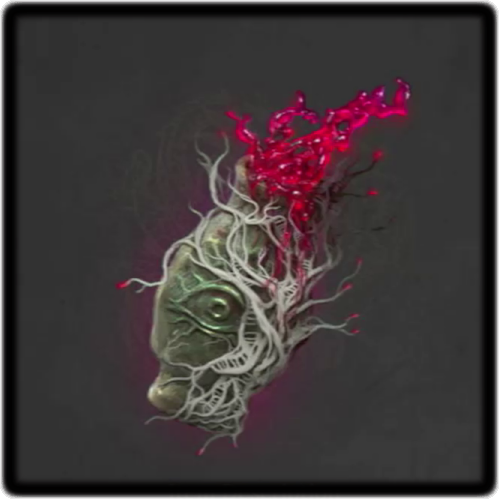
 Mercurial Blood Mercurial Blood
|
Obtained after defeating Lu Bingzhang. | |
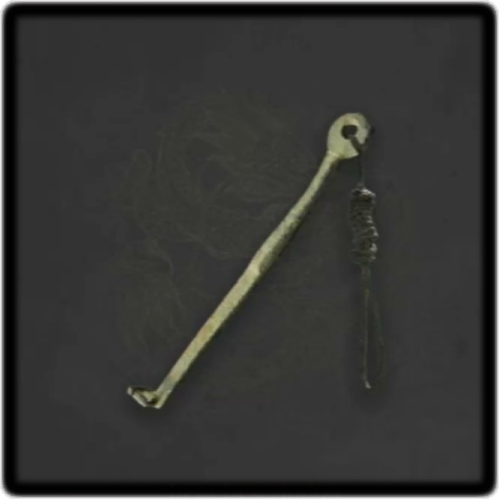
 Priest's Broken Cane Priest's Broken Cane
|
Obtained after defeating Lu Bingzhang. | |
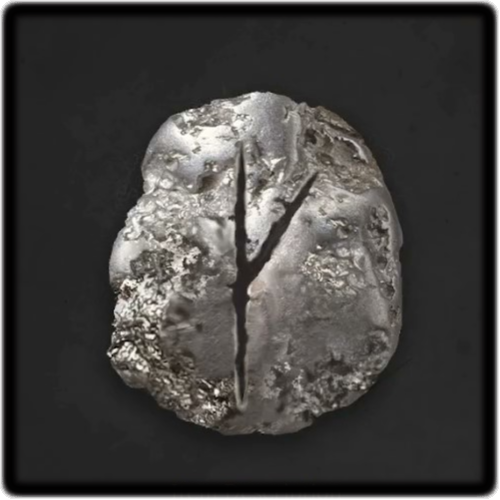
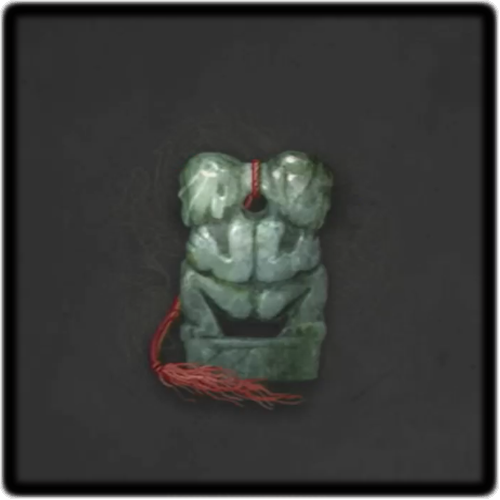
 Taoist Token Taoist Token
|
Defeat the Great Centipede in Bandit Cave. | |
 Believer's Statue Believer's Statue
|
Defeat the Great Centipede in Bandit Cave. | |
 Records of the Southern Archipelago Records of the Southern Archipelago
|
Give He Youzai the Lost Package in Doomwillow Beach. | |
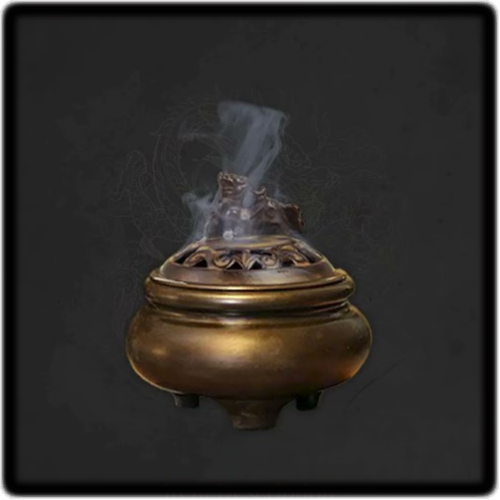 Incense Burner Incense Burner
|
Once you exit the cave leading to the Tang Emperor's Palace, turn right. This can be found on top of a statue. | |
 Hall of Music Key Hall of Music Key
|
Defeat the Tang Palace Maid in Tang Emperor's Palace. | |
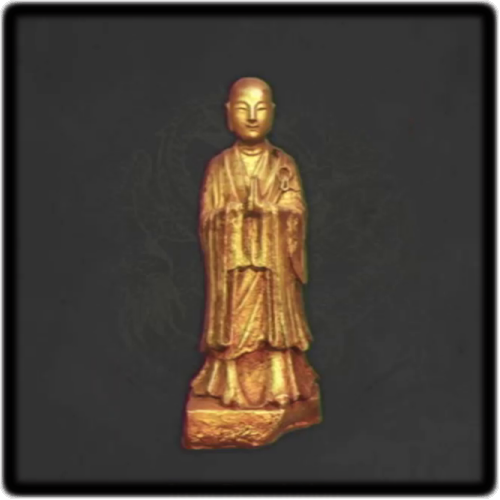 Buddha Statue Buddha Statue
|
From the Palace Hill shrine, follow the path downwards and go to the very end. This can be found near a woman's body on the ground. | |
 Reverent Temple Key Reverent Temple Key
|
Defeat Commander Honglan in Tang Emperor's Palace. |
All Red Feathers
| ✔️ | Items | How to Get |
|---|---|---|
| Faint Red Feather 1 | Once you exit the cave, turn left. It is at the end of the path, tucked near the wall. | |
| Faint Red Feather 2 | This can be found in the house to the right of the Lightzen Temple exit. | |
| Faint Red Feather 3 | Obtained after defeating a vase mimic in the enemy settlement along the mountainside. | |
| Faint Red Feather 4 | Defeating the red-eyed enemy in the Annalum. | |
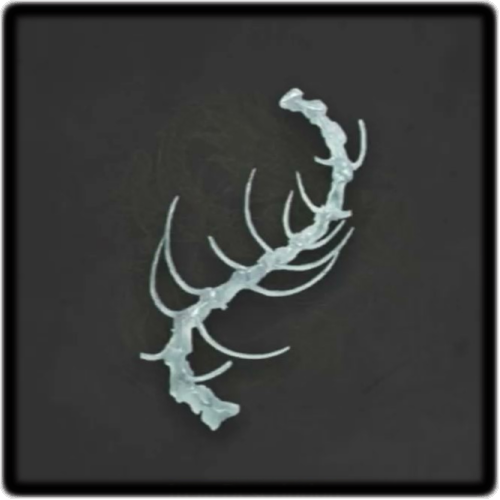
| Brilliant Red Feather 1 | Defeat the guard in the mountain peak next to Shu Sanctum. | |
| Faint Red Feather 5 | Found next to a cannon ogre and door ogre behind Shu Sanctum. | |
| Faint Red Feather 6 | Found in the cave where an imp ambushes you in the area before getting to the Mercury Workshop shrine. | |
| Faint Red Feather 7 | Found in a tunnel at the top portion of the Mercury Workshop central structure. | |
| Faint Red Feather 8 | Defeat the vase mimic next to the elevator nearby the Mercury Workshop shrine. | |
| Faint Red Feather 9 | Defeat the dancing enemy within a cave inside Mercury Workshop. | |
| Faint Red Feather 10 | Go down the hill from the Bandit Cave shrine and turn left. Defeat the crowhead enemy in the following area. | |
| Faint Red Feather 11 | This can be picked up on the platform at the side of the Tower of Sacrifice in Bandit Cave. | |
| Faint Red Feather 12 | Dropped by an enemy disguised as a vase within the Lu Mansion cave. | |
| Faint Red Feather 13 | Found nearby bridge leading to Red-Clad Lady. | |
| Faint Red Feather 14 | Defeat the vase mimic behind the ramp leading to a roof in Tang Emperor's Palace. | |
| Brilliant Red Feather 2 | Defeat the Tang Palace Maid in Tang Emperor's Palace. | |
| Faint Red Feather 15 | This can be found on the leftmost pathway in Tang Emperor's Palace. |
| All Faint Red Feathers | All Brilliant Red Feathers |
All Benedictions
| ✔️ | Items | How to Get |
|---|---|---|
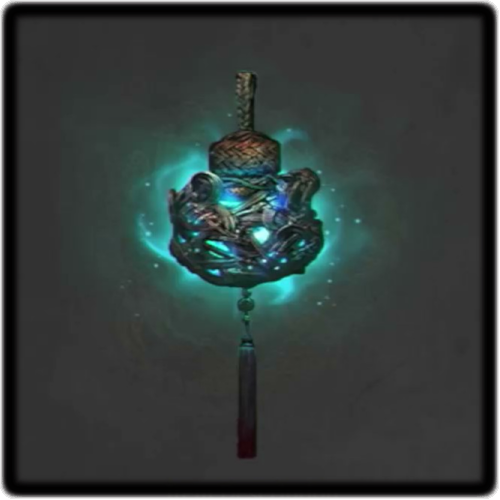
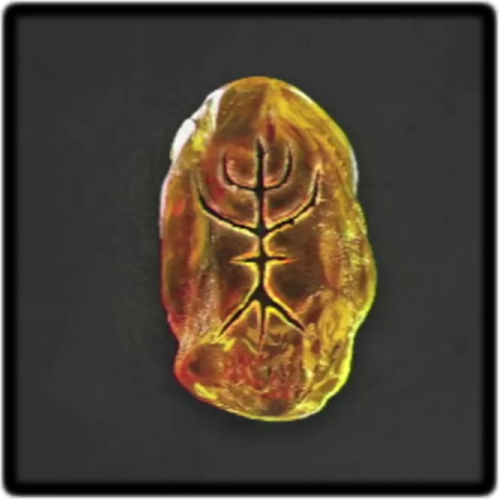
 Bu - Skyborn Ward Bu - Skyborn Ward
|
This Benediction can be obtained by defeating the Tang Palace Maid. | |
 Wei - Counter Force Wei - Counter Force
|
This is found in a house by the edge of Shu Sanctum, right by where an enemy bursts out of a wall. | |
 Bu - Blocking Clash Bu - Blocking Clash
|
Found in an abandoned house near the door connected Shu Sanctum and Reverent Temple. | |
|
Wei - Skyborn Discipline
|
Can be picked up along the way to the Worship's Rise area. | |
|
Wei - Plunging Force
|
Found in the middle of an overpass in the left side of the Worship's Rise area. | |
|
Wei - Vitality Power
|
Found in a small chest next to the guard in the mountain peak next to Shu Sanctum. | |
|
Wei - Skyborn Magic
|
Found near a dead tree by the burning path leading to Doomwillow Beach. | |
|
Wei - Vitality Ferocity
|
Obtained after defeating Lu Bingzhang. | |
 Shi - Vitality Ward Shi - Vitality Ward
|
This can be found at the side of the Tower of Sacrifice in Bandit Cave. | |
|
Shi - Rising Defense
|
This benediction can be found inside the Lu Mansion cave. | |
 Sheng - Backstab Rejuvenation Sheng - Backstab Rejuvenation
|
This can be obtained after talking to Red-Clad Lady in Doomwillow Beach. | |
|
Bu - Plunging Ward
|
Go to the top of the initial wall in Palace Pass. | |
 Sheng - Lasting Alacrity Sheng - Lasting Alacrity
|
Answer The winged Ascension in the Tang Emperor's Palace Benediction Gate. | |
|
Wei - Combo Force
|
Defeat Commander Honglan in Tang Emperor's Palace. |
All Weapons
| ✔️ | Items | How to Get |
|---|---|---|
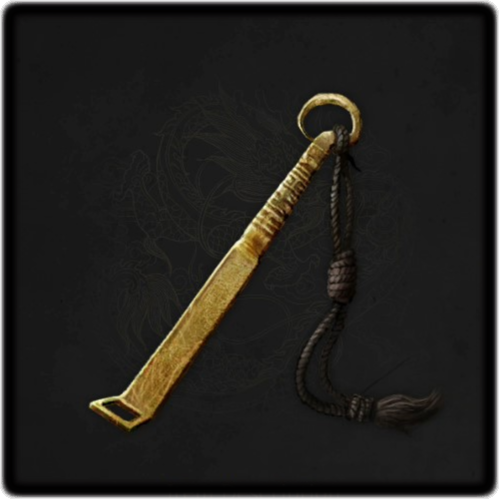
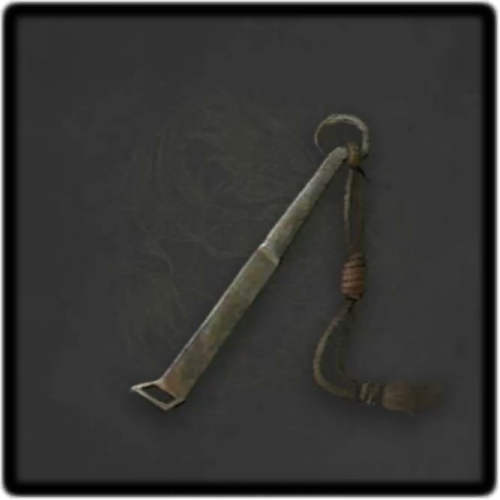
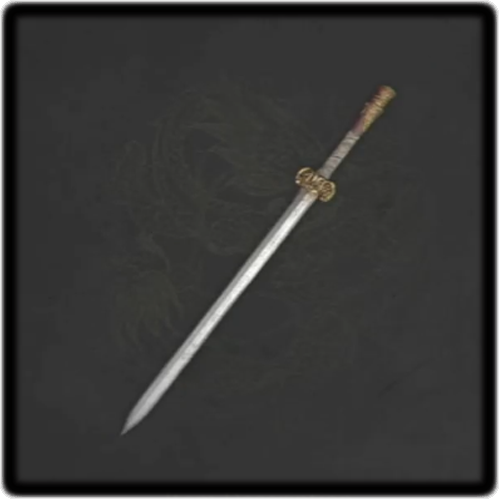
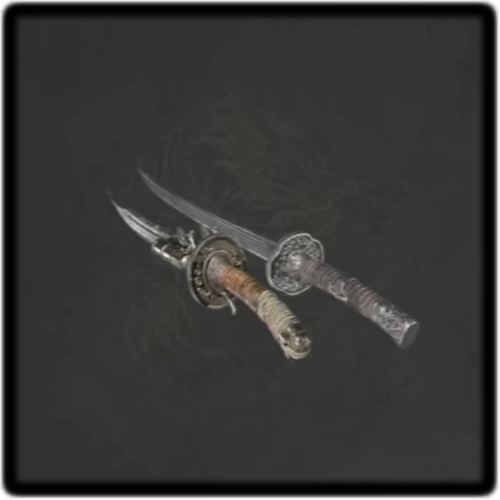
 Halberd Halberd
|
This axe can be found near the body right outside the temple door when you first exit. | |
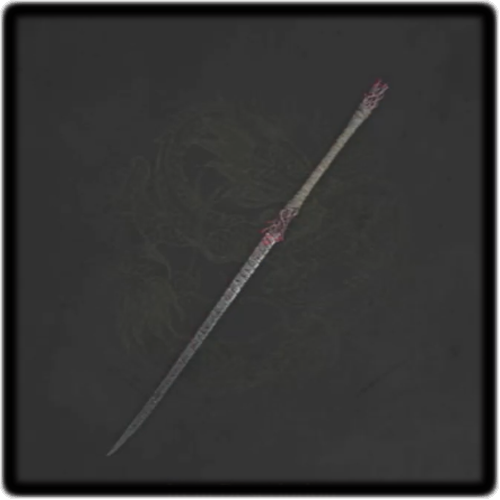
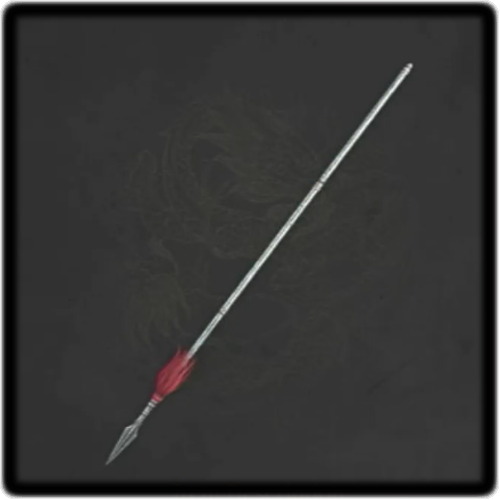 Red-Tasseled Spear Red-Tasseled Spear
|
Upon exiting the cave, turn right and go towards a statue area. This spear can be found near a woman's body. | |
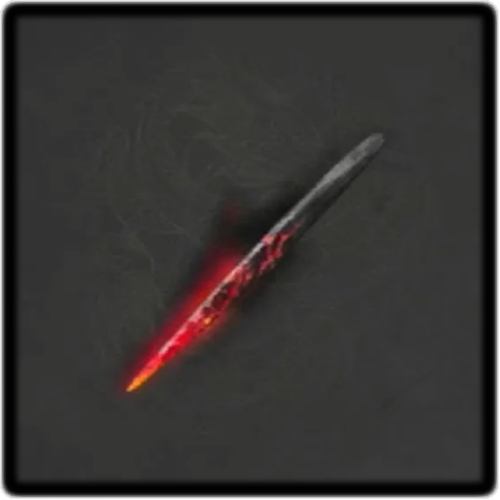
 Darkfrost Edge Darkfrost Edge
|
Can be found on a table nearby the Lightzen Temple entrance. | |
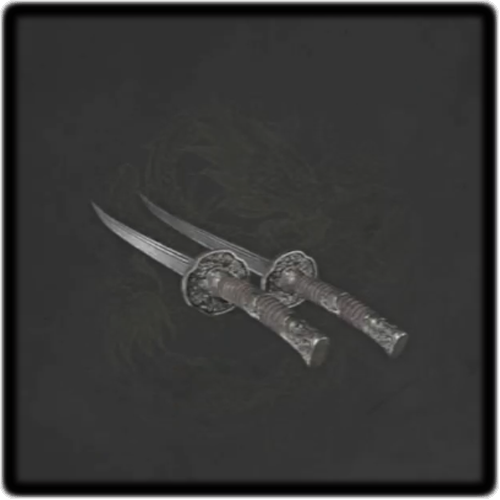 Un-Equilibrium Blades Un-Equilibrium Blades
|
When you cross the bridge over to the enemy settlement in Shu Sanctum, this can be found near a carriage in the middle of the path. | |
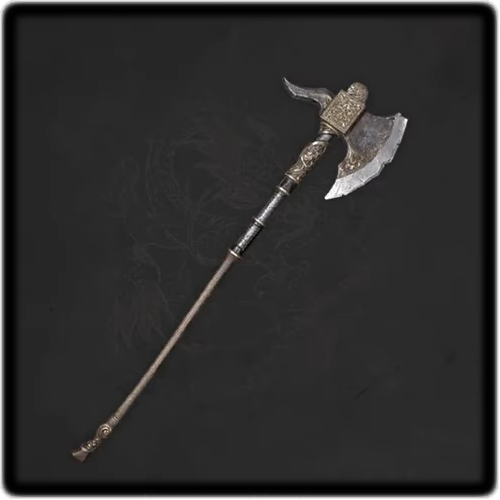 Empyrean Greataxe Empyrean Greataxe
|
Found on the edge of a roof near the optional enemy in the Worship's Rise area. | |
 Firearm Blades Firearm Blades
|
Found in an alley in the village next to Shu Sanctum. | |
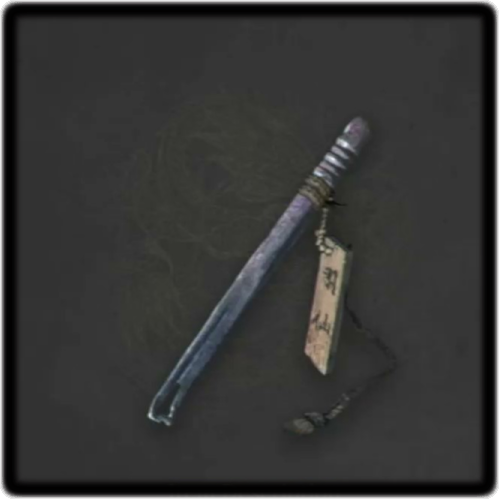
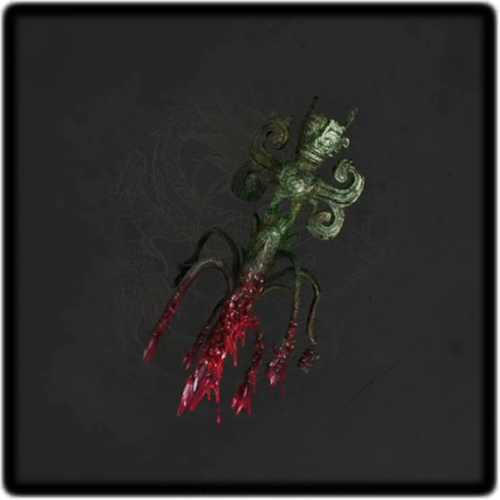
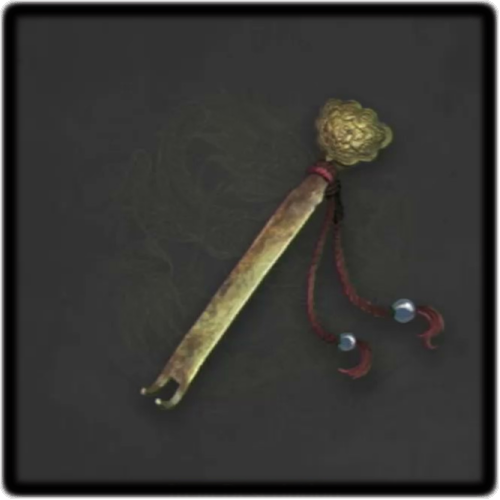
 Lashing Whip Lashing Whip
|
From the Mercury Workshop shrine, go across the central structure and pick up this weapon on a platform with two enemies with guns. |
All Pendants
| ✔️ | Items | How to Get |
|---|---|---|
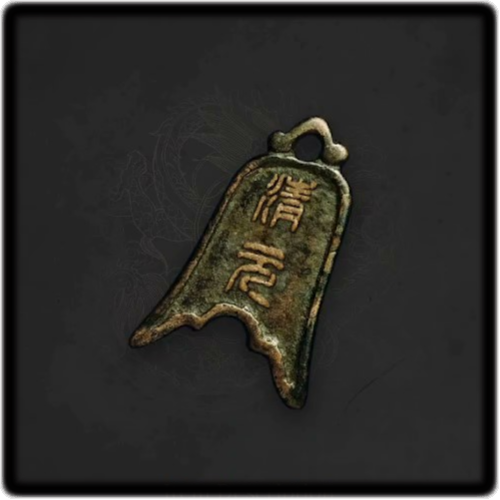
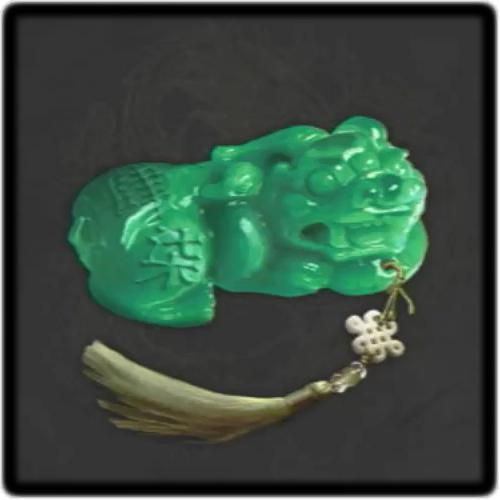
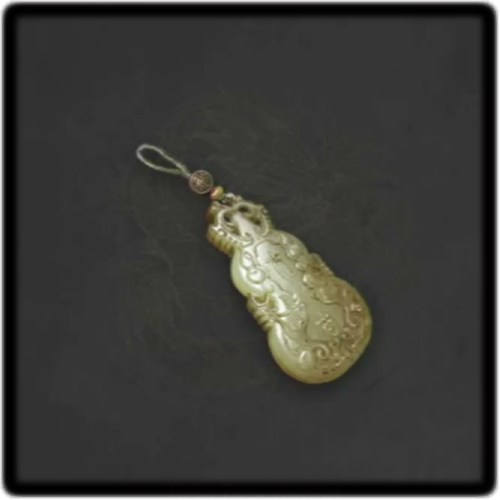 Gourd Pendant Gourd Pendant
|
Defeat the enemy in a camp at the end of the river near Buddha Cliffs. | |
 Entwined Legend Pendant Entwined Legend Pendant
|
Follow the path across the Lightzen Temple entrance. This Pendant can be found at the end, guarded by two enemies. | |
 Monkey Pendant Monkey Pendant
|
Found in an abandoned house to the left of the Lightzen Temple entrance. | |
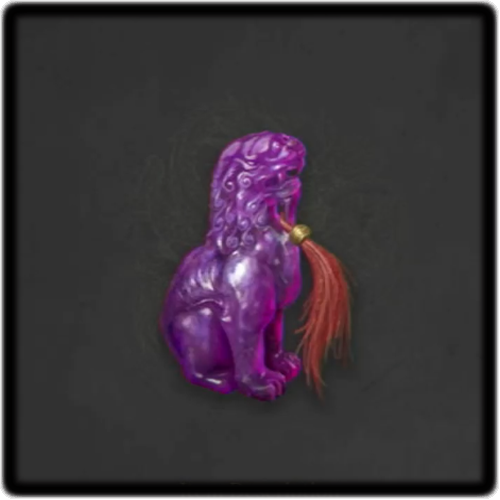
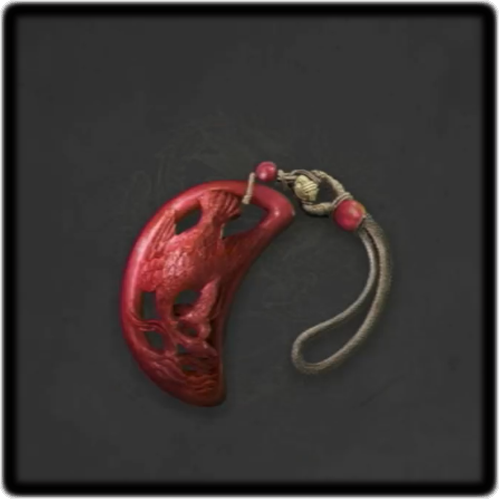
 Pixiu Pendant Pixiu Pendant
|
Found in a small chest in the back area of the Annalum. | |
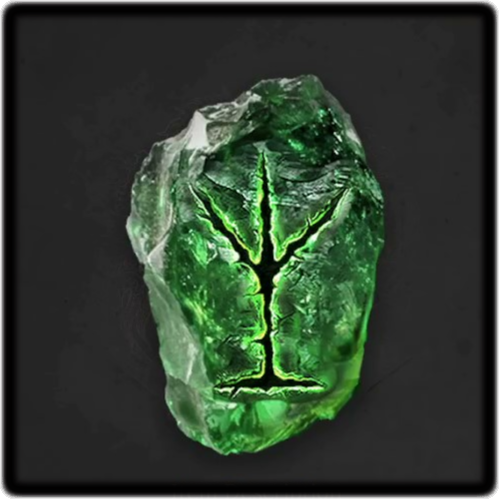
 Dracolich Pendant Dracolich Pendant
|
Found in a small chest by the ladder you release nearby the Mercury Workshop shrine. | |
 Phoenix Pendant Phoenix Pendant
|
Found behind the big door in the lower section of Mercury Workshop. | |
 Twin Infant Pendant Twin Infant Pendant
|
Found in the central island at the bottom level of Mercury Workshop. | |
 Eagle Pendant Eagle Pendant
|
Upon entering Tang Emperor's Palace, keep going straight ahead until you find a small chest with a Ming Guard patrolling nearby. This can be found near the middle of the Tang Emperor's Palace. |
All Armor Sets
| ✔️ | Items | How to Get |
|---|---|---|
 Delicate Set Delicate Set
|
Found in a hidden camp right after the Tang Palace Maid boss area. | |
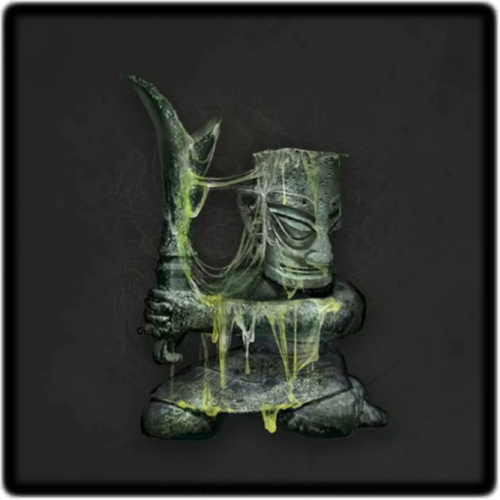
 Ming Set Ming Set
|
Defeat the Ming Soldier in front of Shu Sanctum. | |
 Militia Set Militia Set
|
Found in the second floor of the Courtyard at the Worship's Rise area. | |
 Pirate Set Pirate Set
|
Give He Youzai the Lost Package in Doomwillow Beach. | |
 Palace Maid's Set Palace Maid's Set
|
Defeat the Tang Palace Maid in Tang Emperor's Palace. |
All Spells
| ✔️ | Items | How to Get |
|---|---|---|
 Vorpal Blade Vorpal Blade
|
This spell can be obtained near the cave entrance of Buddha Cliffs. | |
 Echo of Dhutanga Echo of Dhutanga
|
This is obtained upon defeating Dhutanga in Lightzen Temple. | |
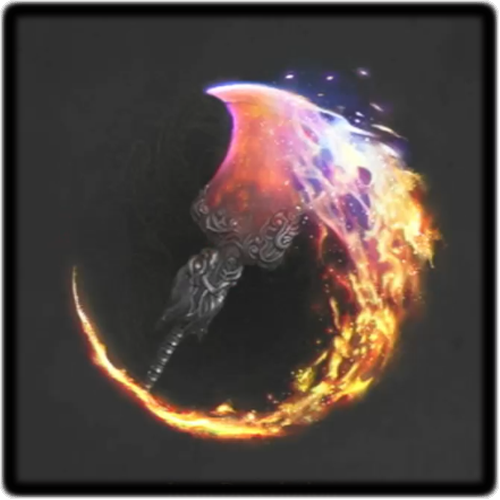
 Infernal Flames Infernal Flames
|
Obtained upon defeating the fire bird enemy in the Worship's Rise area. | |
 Echo of Lu Bingzhang Echo of Lu Bingzhang
|
Obtained after defeating Lu Bingzhang. | |
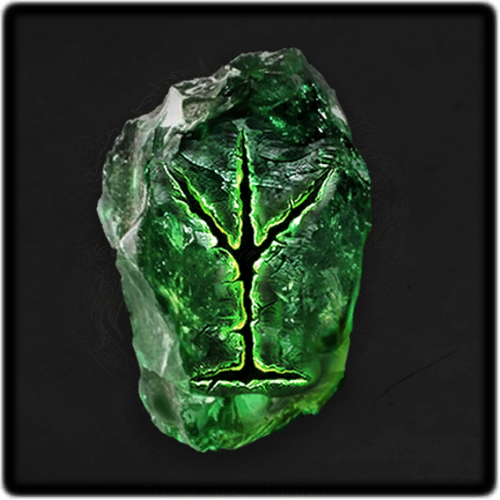
 Echo of the Great Centipede Echo of the Great Centipede
|
Defeat the Great Centipede in Bandit Cave. | |
 Divine Might Divine Might
|
This spell can be picked up right beside Red-Clad Lady in Doomwillow Beach. | |
 Burning Flames Burning Flames
|
This spell can be obtained upon defeating the crowhead enemy across the bridge leading to the Doomwillow Beach shrine. | |
 Aurum Feather Force Aurum Feather Force
|
Pick up this spell from a body near the Palace Hill shrine. |
All Materials
| ✔️ | Items | How to Get |
|---|---|---|
 Forgotten Remembrance 1 Forgotten Remembrance 1 |
This material cam be found in the big chest near the waterfall in Buddha Cliffs. | |
 Lost Remains 1 Lost Remains 1 |
This can be found in a big chest to the right of the area behind the Lightzen Temple shrine. | |
 Bo Blood Bo Blood |
Defeat the inner demon in the back area of the Annalum. | |
| Lost Remains 2 |
Found in the central island at the bottom level of Mercury Workshop. | |
| Bo Blood 2 |
Defeat the inner demon in the Demon Manifest location in Doomwillow Beach. | |
| Forgotten Remembrance 2 |
From the ladder leading to the bridge connected to the Doomwillow Beach shrine, turn right and turn the corner. This can be obtained from a big chest at the end of the path. | |
| Lost Remains 3 |
Answer The winged Ascension in the Tang Emperor's Palace Benediction Gate. | |
| Lost Remains 4 |
This can be found in the chest within the central palace where you fight the Tang Palace Maid in Tang Emperor's Palace. |
| All Forgotten Remembrances | All Lost Remains | All Bo Bloods |
All Temper Stone Needles
| ✔️ | Items | How to Get |
|---|---|---|
 Bone Needle - Flame Bone Needle - Flame
|
This is obtained upon defeating Dhutanga. | |
 Shadow Stone Needle - Agility Shadow Stone Needle - Agility
|
Defeat the inner demon in the back area of the Annalum. | |
 Shadow Stone Needle - Strength Shadow Stone Needle - Strength
|
Defeat the inner demon in the Demon Manifest location in Doomwillow Beach. |
All Bamboozlings
| ✔️ | Items | How to Get |
|---|---|---|
| Bamboo Shoot 1 | This can be found just outside Lightzen Temple, along the path to Narrow Stretch. | |
| Bamboo Shoot 2 | Hit the Bamboozling found outside the cave entrance where you can find the Storyteller and Panda NPC in Shu Sanctum. | |
| Bamboo Shoot 3 | Talk to the Storyteller in the cave at Shu Sanctum's edge. | |
| Bamboo Shoot 4 | Found on your way to a tunnel at the top portion of the Mercurt Workshop central structure. | |
| Bamboo Shoot 5 | This can be obtained in front of a corpse trap after going down the mountain from the Red-Clad Lady in Doomwillow Beach. | |
| Bamboo Shoot 6 | This can be found along the path across the Palace Hill shrine. |
Chapter 1 Main and Optional Bosses
Bai Kru in Reverent Temple
 |
||||||||||||||
| TBD | TBD | TBD | TBD | |||||||||||
| TBD | TBD | TBD | ||||||||||||
| Bai Kru Fight Tips | ||||||||||||||
|
|
||||||||||||||
Bai Kru Weakness and How to Beat
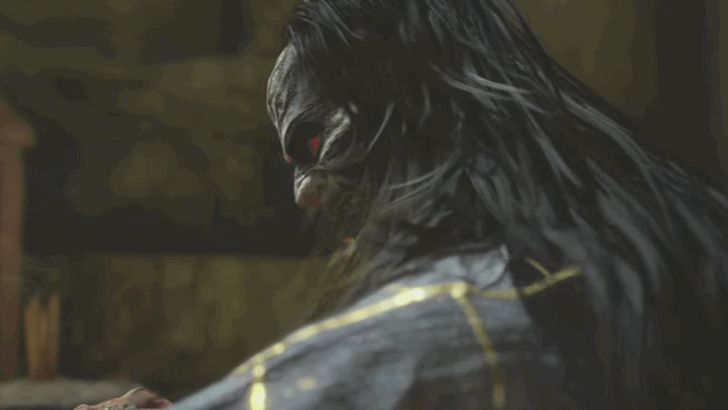
Tang Palace Maid in Buddha Cliffs and Tang Emperor's Palace
| Tang Palace Maid Fight Tips | ||||||||||||||
|---|---|---|---|---|---|---|---|---|---|---|---|---|---|---|
|
|
Tang Palace Maid Weakness and How to Beat
Dhutanga in Lightzen Temple
 |
||||||||||||||
| ★ | ★★★ | - | ★ | |||||||||||
| - | ★★ | ★ | ||||||||||||
| Dhutanga Fight Tips | ||||||||||||||
|
|
||||||||||||||
Man-Eating Dhutanga Weakness and How to Beat
Lu Hongliu in Shu Sanctum
 |
||||||||||||||
| ★★★ | ★ | - | ★ | |||||||||||
| - | ★★★ | ★ | ||||||||||||
| Lu Hongliu Fight Tips | ||||||||||||||
|
|
||||||||||||||
Lu Hongliu Weakness and How to Beat
Lu Bingzhang in Shu Sanctum
 |
||||||||||||||
| ★★★ | ★★★ | - | ★ | |||||||||||
| - | ★ | ★ | ||||||||||||
| Lu Bingzhang Fight Tips | ||||||||||||||
|
|
||||||||||||||
Lu Bingzhang Weakness and How to Beat
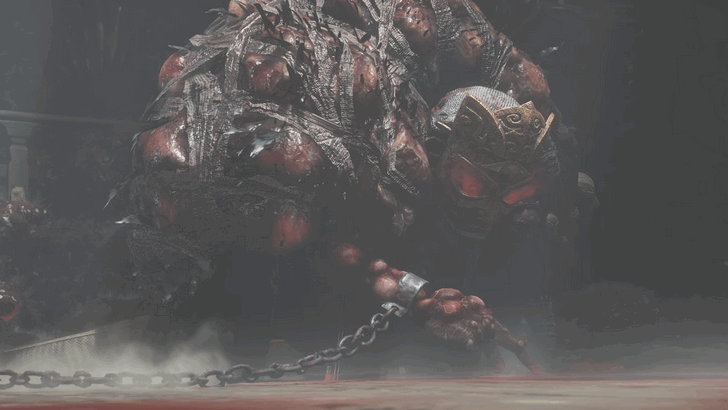
Great Centipede in Bandit Cave
 |
||||||||||||||
| ★★ | ★★★ | - | ★ | |||||||||||
| - | ★★★ | ★★ | ||||||||||||
| Great Centipede Fight Tips | ||||||||||||||
|
|
||||||||||||||
Blightweaver Great Centipede Weakness and How to Beat
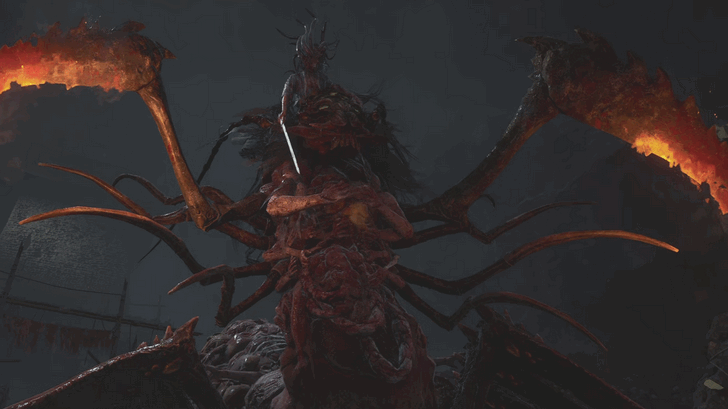
Soulwood in Doomwillow Beach
 |
||||||||||||||
| ★★★ | - | - | ★ | |||||||||||
| - | ★ | ★ | ||||||||||||
| Soulwood Fight Tips | ||||||||||||||
|
|
||||||||||||||
Reborn Treant Soulwood Weakness and How to Beat
Honglan in Tang Emperor's Palace
 |
||||||||||||||
| ★ | ★ | - | ★★ | |||||||||||
| - | ★★ | ★★ | ||||||||||||
| Honglan Fight Tips | ||||||||||||||
|
|
||||||||||||||
Commander Honglan Weakness and How to Beat
Wuchang: Fallen Feathers Related Guides

Author
Chapter 1: Worship's Rise Walkthrough and Secrets
Rankings
- We could not find the message board you were looking for.
Gaming News


Popular Games

Genshin Impact Walkthrough & Guides Wiki
Umamusume: Pretty Derby Walkthrough & Guides Wiki
Pokemon Pokopia Walkthrough & Guides Wiki
Honkai: Star Rail Walkthrough & Guides Wiki
Monster Hunter Stories 3: Twisted Reflection Walkthrough & Guides Wiki
Arknights: Endfield Walkthrough & Guides Wiki
Wuthering Waves Walkthrough & Guides Wiki
Zenless Zone Zero Walkthrough & Guides Wiki
Pokemon TCG Pocket (PTCGP) Strategies & Guides Wiki
Monster Hunter Wilds Walkthrough & Guides Wiki


Recommended Games
Fire Emblem Heroes (FEH) Walkthrough & Guides Wiki
Diablo 4: Vessel of Hatred Walkthrough & Guides Wiki
Cyberpunk 2077: Ultimate Edition Walkthrough & Guides Wiki
Yu-Gi-Oh! Master Duel Walkthrough & Guides Wiki
Super Smash Bros. Ultimate Walkthrough & Guides Wiki
Pokemon Brilliant Diamond and Shining Pearl (BDSP) Walkthrough & Guides Wiki
Elden Ring Shadow of the Erdtree Walkthrough & Guides Wiki
Monster Hunter World Walkthrough & Guides Wiki
The Legend of Zelda: Tears of the Kingdom Walkthrough & Guides Wiki
Persona 3 Reload Walkthrough & Guides Wiki


All rights reserved
© 2025 505 Games. Developed by Leenzee. Published by 505 Games.
The copyrights of videos of games used in our content and other intellectual property rights belong to the provider of the game.
The contents we provide on this site were created personally by members of the Game8 editorial department.
We refuse the right to reuse or repost content taken without our permission such as data or images to other sites.
I appreciate the Walkthrough and every little detail in your guides. Very, very well done, and very useful! This site reminds me of guide websites of old, all good and no bad!