Chapter 2: Cloudspire Walkthrough and Secrets
☆ NEW: 1.7 Patch Notes
★ New to Shu? Check our Beginner's Guide
┗ Combat Guide | Full Skill Tree | Difficulty
☆ Meta: Builds | Best Weapons | Best Armor
★ Walkthrough | Bosses | NPCs
☆ Missables | Game Length | Trophies
This is a walkthrough for Chapter 2 in Wuchang: Fallen Feathers. Learn more about how to complete Chapter 2, along with all secrets, missables, and bosses in this chapter.
Chapter 2 Complete Walkthrough
1. Hillswatch
| Step | Objective |
|---|---|
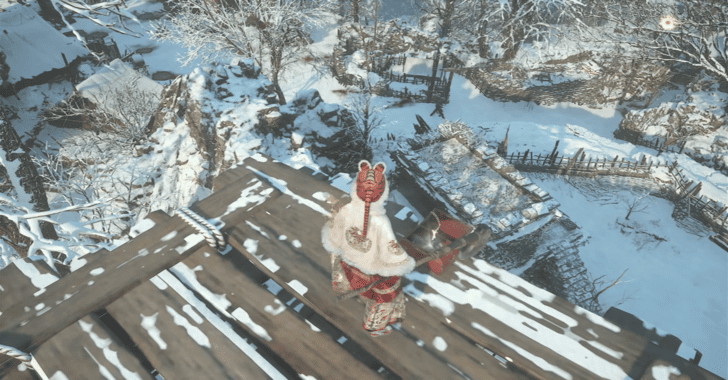
| 1.1 |  Before crossing the bridge, activate the Benediction Gate on your right and answer Challenge the Threads of Fate to obtain the Bride Armor Set. After that, activate the Hillswatch Shrine, then climb the hill from the left path and continue through the village. Defeat the mimic vase in a house on your way up to get a Faint Red Feather. |
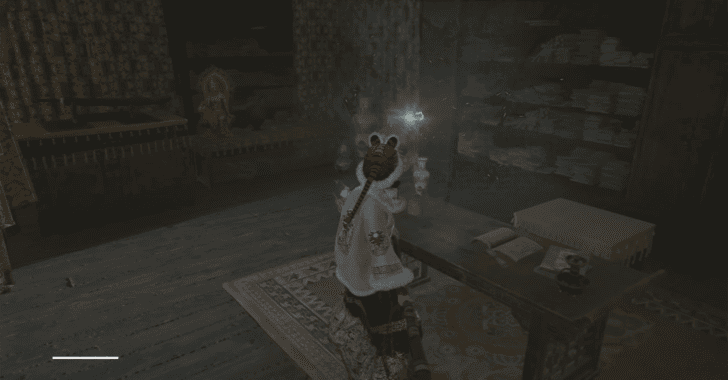
| 1.2 |  After passing through a series of houses cross the bridge to your left, then obtain the Coral Bracelet by defeating the enemy straight ahead, then go on the path to the left to unlock a ladder leading straight to the Hillswatch shrine. Do the Examine pose in front of the statue near the ladder to get the Shu Silk Scarf. |
| 1.3 |  Back at the hill, continue up ahead until you reach a passage at the top. You can talk to Nian Suichang and give him the Tattered Pack in the next step to progress his questline. |
| 1.4 | 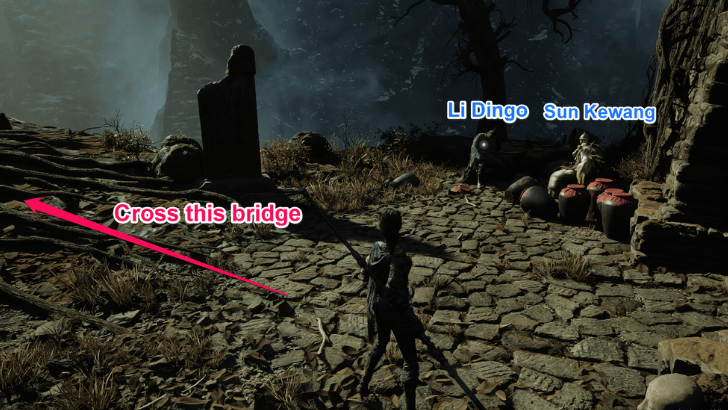 At the top, you can talk to Li Dingo and Sun Kewang to your right, who will give you Kong Wine and Spicy Soup. Cross the bridge in front of you and defeat the enemy on your left to get a Faint Red Feather . Proceed onwards and make sure to pick up the Tattered Pack along the snowy path. Defeat the enemy archer to obtain Rebel Orders then go straight to the Snowy Passage Shrine. |
2. Mort Grotto
| 2.1 |  From the Snowy Passage shrine, exit the cave and go down the snowy path on the right. Afterwards, cross the bridge leading to Mort Grotto. You can also obtain the Vitality Bowl from an NPC on top of a ramp to your left. |
| 2.2 | 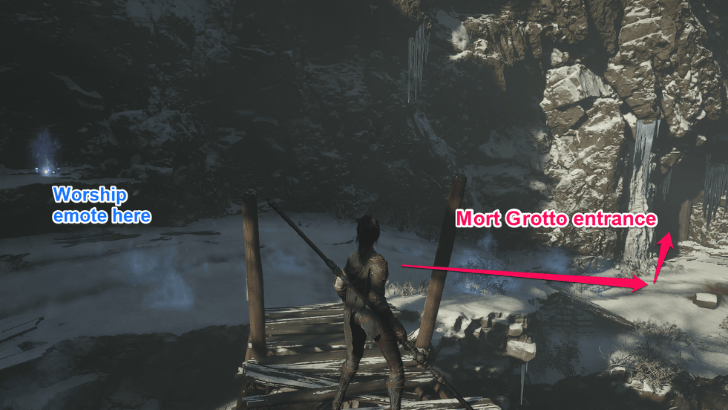 Once you cross the bridge, you can do the Worship emote in front of the nearby statue to obtain a Soulgrass. From there, proceed to the right and go through the cave entrance. |
| 2.3 |  You will see an area with several enemies mining at the side. In the middle of the passage, you will see a glowing enemy that drops the Overseer's Armor Set and a Red Mercury Essence upon its defeat. From there, go up the ladder on your left. |
| 2.4 |  At the top of the ladder, turn right and follow the platform until you reach the other end. Going through here will allow you to avoid further Despair buildup from the rocks below. Go down the ladder at the other end. From there, turn right and use the Elevator nearby |
| 2.5 | 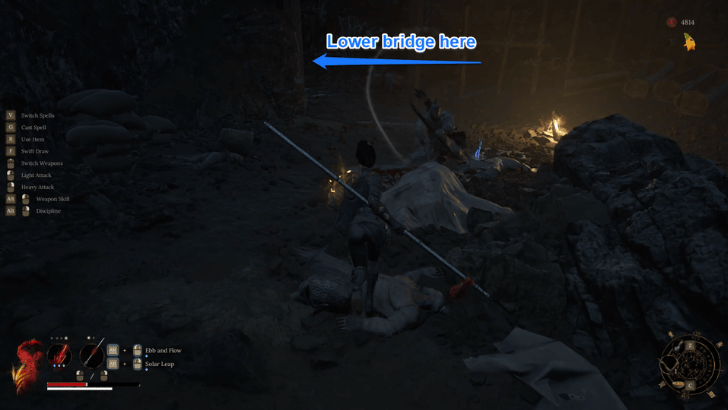 Get off the elevator and follow the path onwards. At the end, you will see a camp with three enemies and a bridge you can lower, leading to the Cloudspire Outskirts. On the other side of the bridge, you can pick up a Faint Red Feather. |
| 2.6 |  Go back to the elevator and ride it down then use the path to the right. Pick up the pink item that gives you an Oil Lamp. After that, go through the bridge and unlock the Mort Grotto shrine on the other side. |
| 2.7 |  Pass through the cave near Mort Grotto Shrine. Once you are outside, you will find a small chest containing the Fa - Combo Ignition Benediction on your right, along with a tree enemy nearby. The elevator leading to the Rebel Camp is on your left. |
3. Cloudspire Outskirts
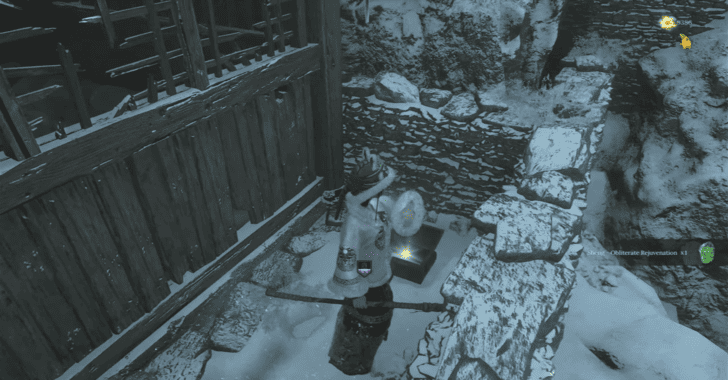
| 3.1 | 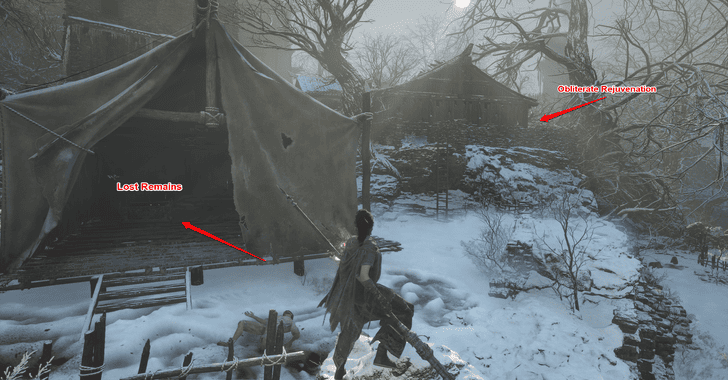 Turn left from the village entrance and continue climbing the staris until you see a tent to your right. Defeat all enemies that try to attack you and open the treasure chest to obtain Lost Remains. Proceed to the right and climb the ladder, behind the shack with you can loot the Obliterate Rejuvenation benediction. |
| 3.2 |  Exit the shack and go back to the staircase until you reach a Butcher (one carrying bodies) and head towards the highest building on the right. |
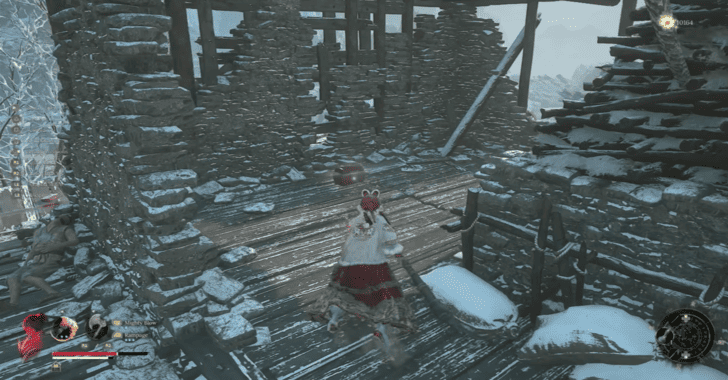
| 3.3 | 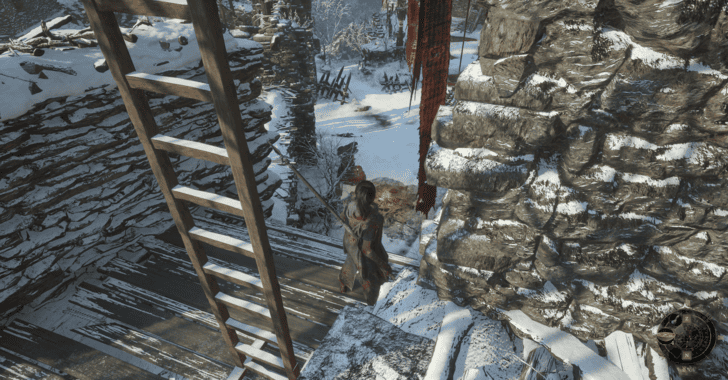 Climb the tower and light the fire to burn the Red Tree below the area. You can obtain the Gunpowder Spear from a nearby chest. You can also go to the area of the first Red Tree and activate the Cloudspire Outskirts Shrine to save it as your checkpoint. |
| 3.4 | 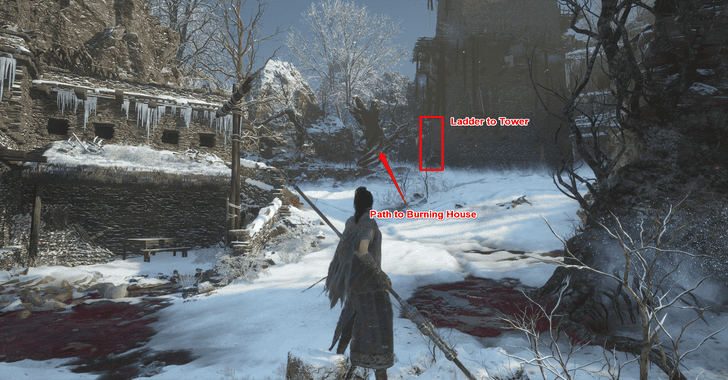 Climb the ladder in front of the first tower to reach the second red tree. From there, take the left path and stick to the walls on the right until you reach a ladder that leads you to the second tower. Climb the tower and light the fire to burn the second red tree. Kill the Ming Guard to obtain a Brilliant Red Feather and open the nearby chest to obtain a Forgotten Remembrance. |
| 3.5 | 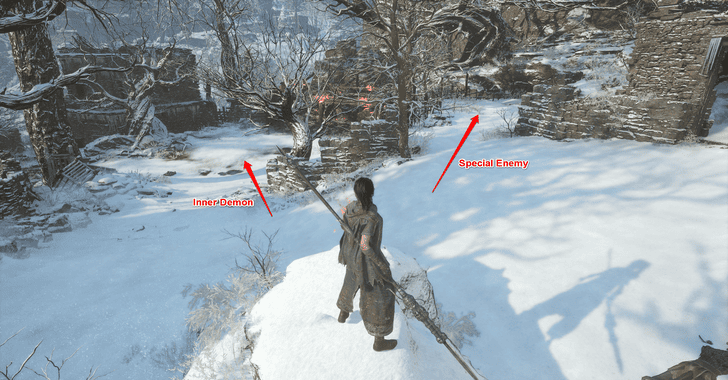 Go back down from the second tower and go to the right until you reach a burning house. On the right of the burning house you will encounter a special enemy that drops the Darkfrost Flames Spell. In front of the burning house you can pick up a Brilliant Red Feather and encounter an inner demon that drops Bo Blood. |
| 3.6 |  Go back to the second tower and go to the left (back to the red tree) and stick to the wall on the left until you reach a forking path. Take the path on the right to reach the third tower and unlock the shortcut. |
| 3.7 | 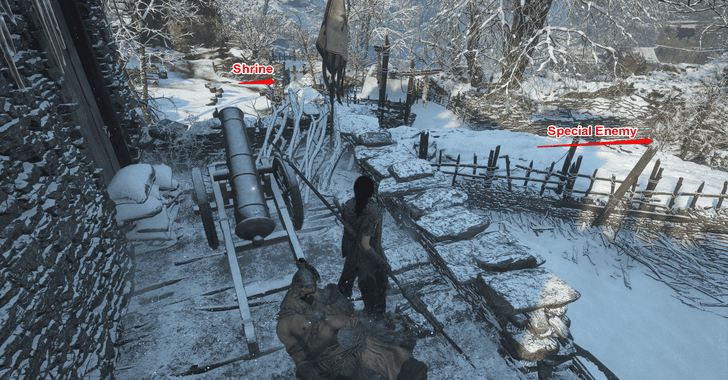 Kill the Rebel manning the cannon then proceed to the red tree. Take a right on the first corner to kill a special enemy and obtain a Brilliant Red Feather and a Red Mercury Essence, a nearby chest will also grant you the Twin Bandit Blades. Make a right to the second corner and reach the gate and unlock it to create a shortcut from the Shrine. Before you reach the gate, you'll encounter a Gold Benediction Gate that leads to the Rebel Camp. |
| 3.8 |  On the right of the Shrine take the path of the left to reach a special enemy that drops a Brilliant Red Feather and a Red Mercury Essence. You can also pickup the item on the broken bridge to jump down to a Shrine leading to Mort Grotto. |
| 3.9 | 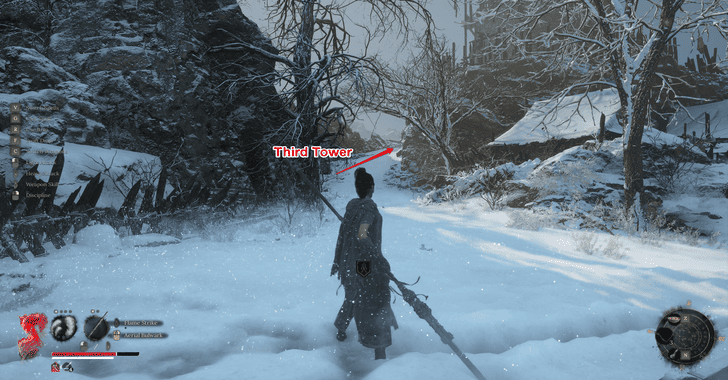 From the Cannon, turn left towards the cliff until you reach the third tower. Climb the tower and light the fire to burn the third red tree and lower the bridge to Snowfall Palace. You can also pickup the Backstab Force Benediction in a nearby chest. |
| 3.10 | 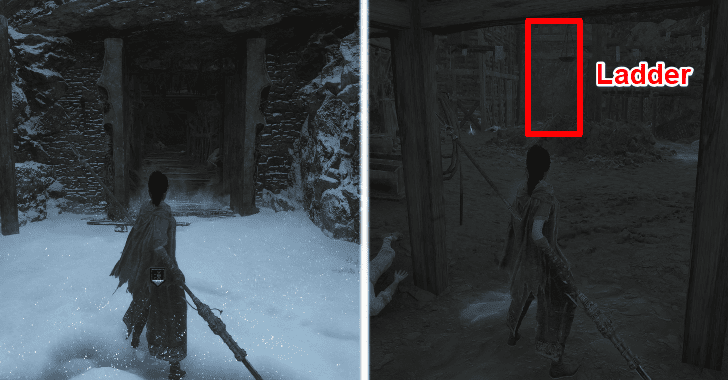 Use the Golden Benediction Gate near the Cloudspire Outskirts Shrine to reach the rebel camp. Make your way through the mine until you reach and obtain the Child's Hope Pendant. Hug the wall to your left until you reach a ladder that leads up to the well. |
| 3.11 | 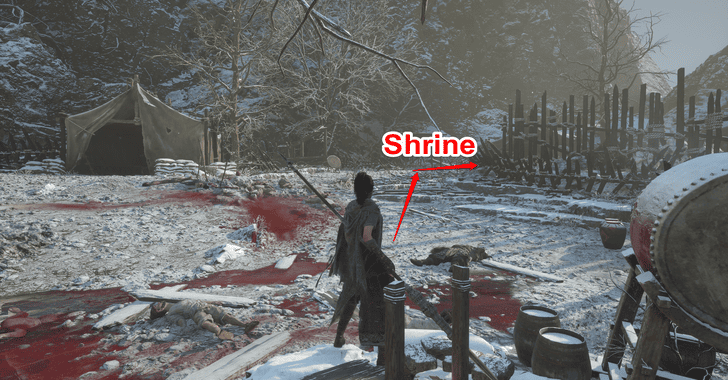 Climb the ladder and kill all enemies that attack you. On your right, there will be a Brilliant Red Feather below the archer's tower. Afterwards, take the path to the right to reach the Rebel Camp Shrine. |
|---|---|
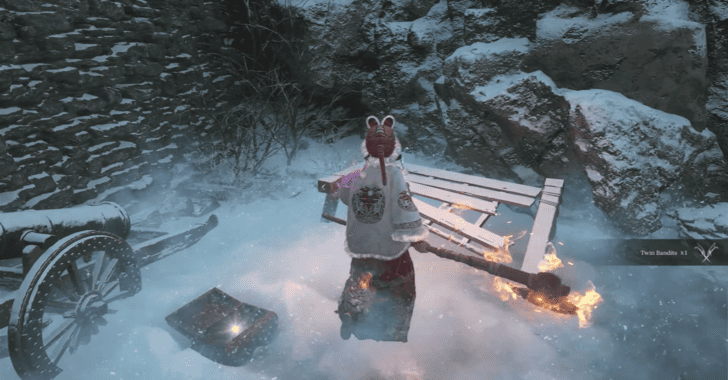
| 3.12 |  On your way to the Shrine, the last tent on your left will have a cannon that will shoot you as soon as you pass through. Dodge through the cannon fire and kill the Rebel inside the tent. You'll also find the Bravery Pendant inside the nearby chest. |
| 3.13 |  Kill the enemy near the Rebel Camp Shrine to obtain the Rebel Camp Key in order to unlock Ai Nengqi's boss fight area. The enemy will also drop the Thunderstorm Spell as well as the Secret Letter valuable item. |
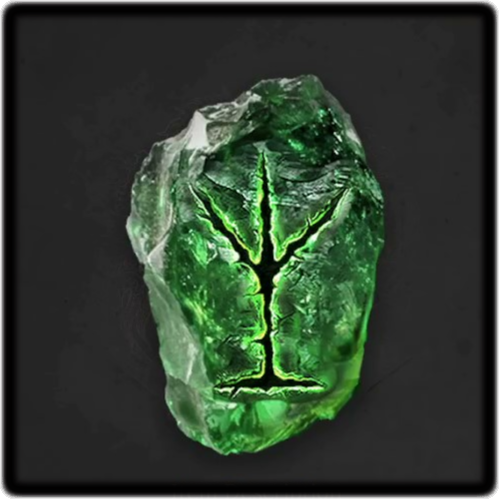
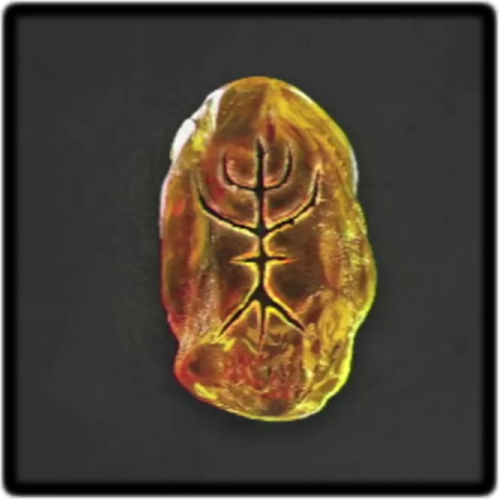
| 3.14 | 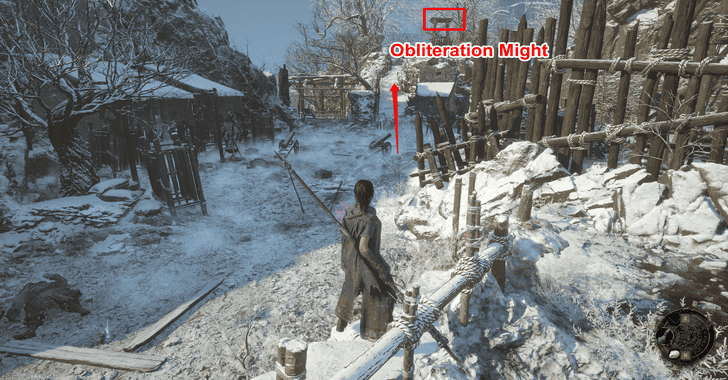 From the Shrine, take the hillpath to the right and climb the watchtower to get the Obliteration Might benediction. |
| 3.15 |  Return to the Rebel Camp Shrine and take the hillpath on the left to reach the gate to the General of the North, Ai Nengqi. Defeat the General to light all towers and lower the bridge to Snowfall City. |
| 3.16 | Cross the bridge and defeat Ming General Liu Cheng'en to pass through the city. |
4. Cloudspire City
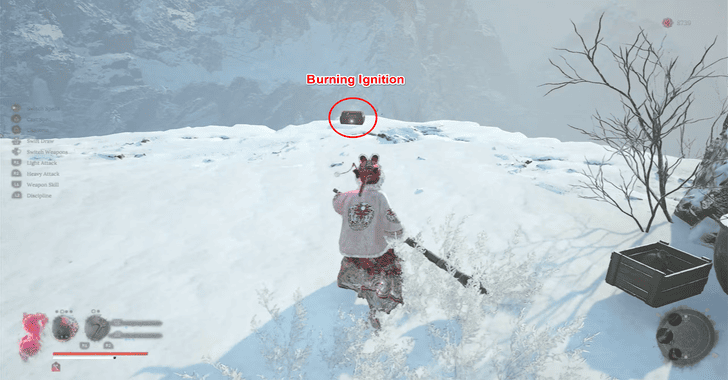
| 4.1 |  After beating Liu Cheng'en, continue crossing the bridge and turn left from the courtyard to pass through an open building. Exit the building and turn left to obtain the Burning Ignition benediction. |
|---|---|
| 4.2 |  Turn around and go to the open building (Sword and Shield enemy), and go to the second floor. Follow the building ramparts until you reach He Youzai. |
| 4.3 |  Turn left from He Youzai's location, then take the uphill path on the right until you reach another courtyard where you have to give the Shu Silk Scarf to Fang Yao (door with the Butcher) then proceed to the end of the road from the Courtyard until you reach the Cloudspire City Shrine. If you gave the Trinity Bell to Huang Jian'e, you will find Treasurer Li will be on the hillpath leading to the second courtyard. |
| 4.4 |  Go up to the highest floor of the building and cross the bridge to the next one. Make your way down to the lowest floor and open the door to the right to unlock the shortcut to the Shrine. |
| 4.5 |  Exit the building through the opposite door (narrow path), and turn right to the cave that leads down. Follow the cave path until it leads you to another ladder going up to Cloudspire Bazaar. Make a U-turn on the hillpath with the Ming Soldier (Spear and Shield) and unlock the shortcut to the higher level of Cloudspire City. You can also obtain a Brilliant Red Feather in one of the tents near Glut's location in the Bazaar. |
| 4.6 | 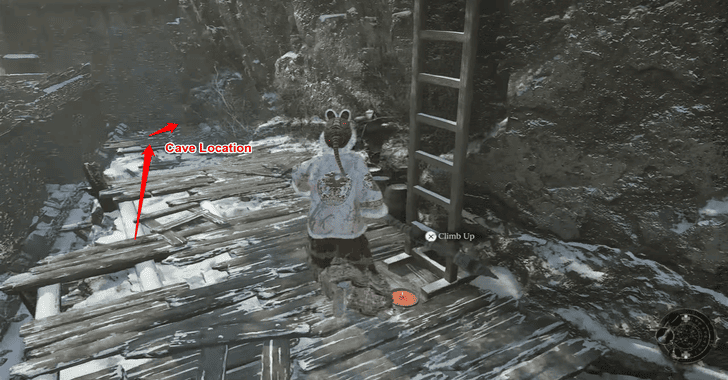 Make your way down the shortcut near the Yonder Gang and continue down the path until you see Butler Shen to the left. Use the first set of ladders to go down, then turn left until you reach another cave. Follow the cave path and take the Brilliant Red Feather on the way, then take Glacial Frostbite at the very top of the building you exit into. |
| 4.7 | 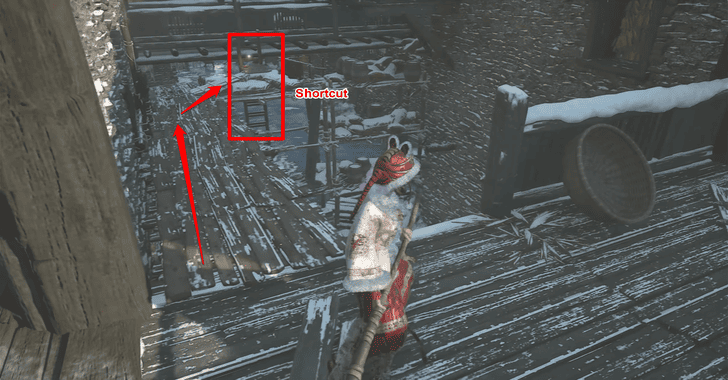 Go back to the second floor and unlock the shortcut to Butler Shen's location on the left scaffolding. After unlocking the shortcut, cross the rampart and go down the building. Make your way past the Ming Soldier fighting until you reach the staircase with the Rifleman. Climb the building on the left, right next to the staircase, then keep climbing until you reach the Rooftops. |
| 4.8 | 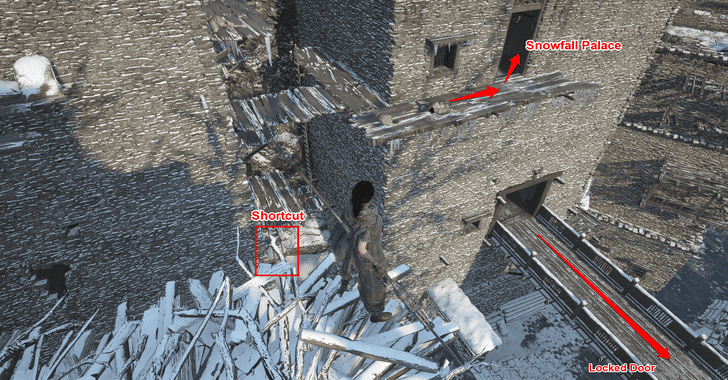 Cross the bridge and take the ladder on the left, then drop down to the lowest rampart until you unlock the shortcut to the lowest floor. Climb back up and use the ramparts to enter the building next to the Rifleman. Go to the lowest floor of the building and cross the bridge to reach the building containing a Large Chest that rewards a Forgotten Remembrance. |
| 4.9 | 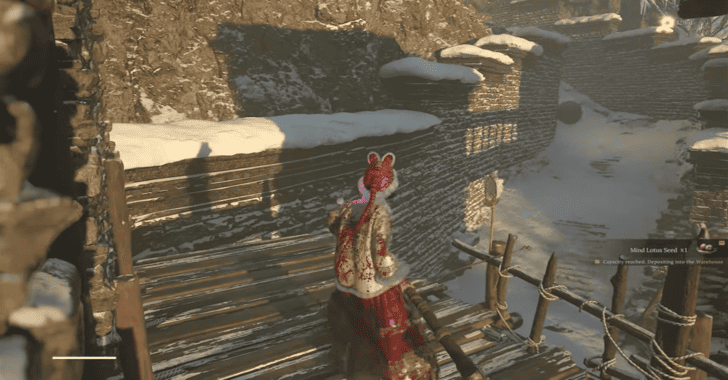 Go back to the highest floor of the building or use the newly opened shortcut from outside to go back to the path towards Snowfall Palace. On the snow path to the palace, stick to the left to avoid the boulder rolling towards you. Then follow the path to the stairs until you reach the Snowfall Palace shrine. |
| 4.10 |  Between the stairs and the Shrine, there's an alley that leads to a collectible back down to the city. Follow the path and scale the scaffolding down until you reach a small chest that contains the Burning Might benediction. |
Cloudspire City Full Walkthrough
5. Snowfall Palace
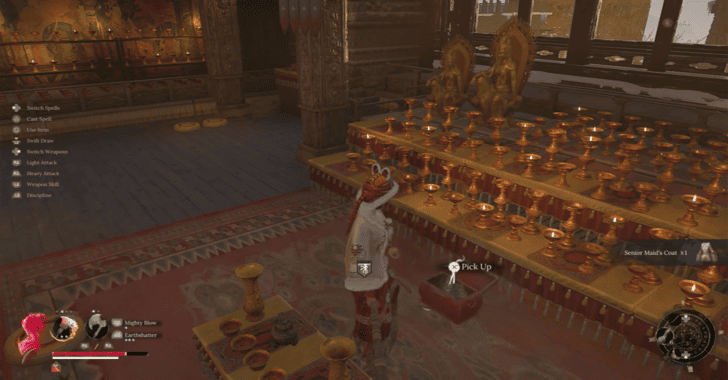
| 5.1 | 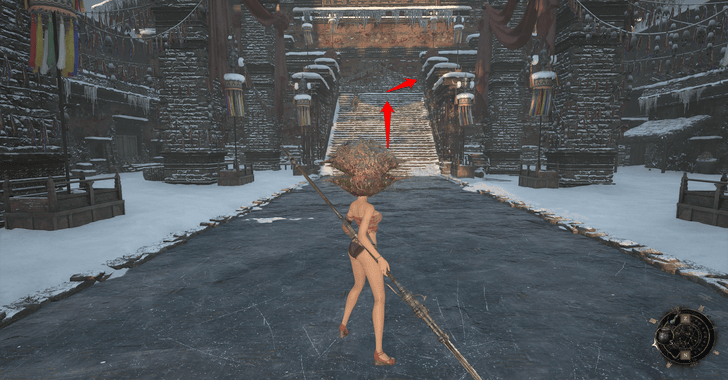 From the Shrine, take the stairs and head to the right until you enter the Palace. Turn left and kill the Senior Palace Maiden, then open the small chest to get the Dragonling Pendant. You can obtain a Bamboo Shoot on the left alley before going up the stairs to the palace. |
|---|---|
| 5.2 | 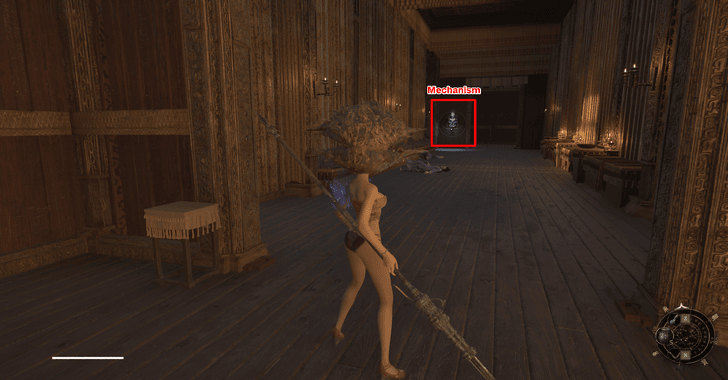 Go back to the entrance and open the door on the left (if you're coming from the small chest), then follow the path until you reach a mechanism. Use the Mechanism to reveal the room elevator going to the second level and the treasury. You can also open the large door as a shortcut to the palace entrance. |
| 5.3 |  Step on the pedestal on the elevator to reach the second level. From there, you can speak to the Plain Warrioress, then loot the Bloodied Letter on the left. You can also obtain the Swift Frostbite benediction and Waspomancy spell to the right. |
| 5.5 |  Use the elevator to go back down again, and reactivate it, but step outside the elevator. You'll see a compartment inside which you can use to reach the treasury. Once you reach the treasury, you'll need to fight an Inner Demon that guards the chest that contains the Boreal Abyss weapon. You'll also obtain the Bo Blood and Feathering Needle upon defeating the demon. You can also obtain a Red Jade Wine and encounter Panda on the opposite side of the room. |
| 5.6 |  Return to the Snowfall Palace Shrine and head to the door on the right of the stairs, then use the elevator to reach the lower level and open the huge door on the right to reach the Mistress of the Night and unlock the Shaft. |
Snowfall Palace 100% Completion Guide
6. Shaft
| 6.1 | 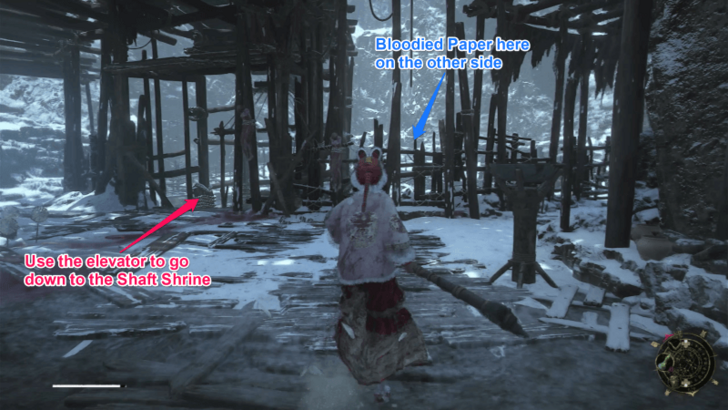 After defeating the Mistress of the Night - Huang Yan, proceed through the newly unlocked area. Circle around the top floor before proceeding down the shaft to get the Bloodied Paper. After that, use the elevator going down to unlock the Shaft Shrine and agree to help Fang Yao, who is nearby. |
|---|---|
| 6.2 | 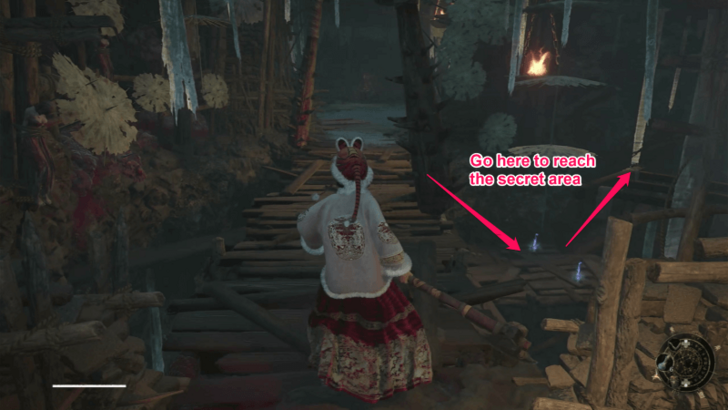 Pass by the secret area by crossing the bridge with a Pendulum Hammer and jumping down the ledge on your right. Keep going until you reach a room containing the Bamboo Shoot and the Used Mortar. After collecting them, exit the room and pick up the Brilliant Red Feather on your way out. This path will lead you back to the locked door from earlier, and reveal a ladder that grants access to the lower section of the Shaft. |
| 6.3 | 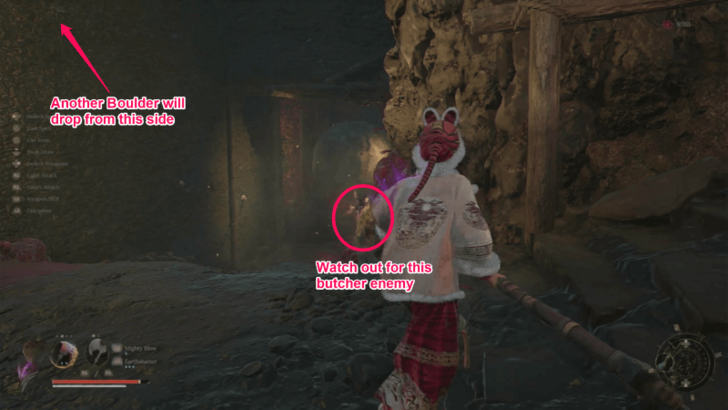 Return to the bridge with the Pendulum Hammer then proceed through the tunnel where boulders fall from above. Wait for two boulders to drop before continuing down the path. Note: You can jump down the end of the tunnel to pick up a Lost Remains and skip to the Boudoir's shrine immediately, but it is still recommended to go through the areas you skip to pick up valuable loot. |
| 6.4 |  Progress through the area and pass by a broken wal, which leads to a mimic vase that drops a Brilliant Red Feather upon its defeat. Back in the main path, continue past the Spike Traps to reach the walkway that will take you to the next area, the Mad Doctor's Lair. Open the small chest on your right to get the Wei - Poise Force Benediction. |
| 6.5 | 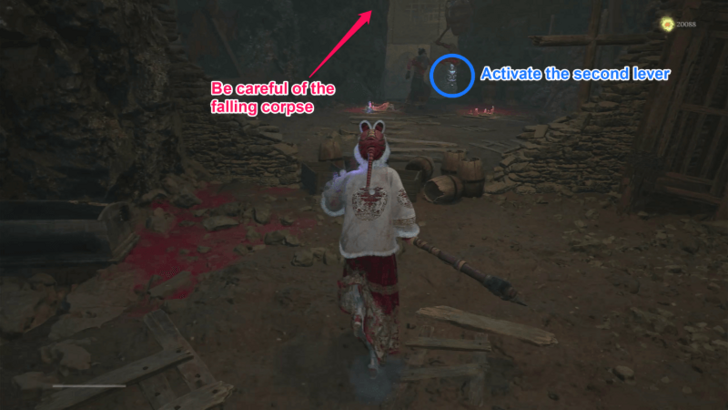 As you enter the mad doctor's lair, eliminate the mad doctors waiting to engage you. Once they’re defeated, activate the lever at the end of the hallway to unlock a path that will take you around the area. Activate the second lever to open the adjacent door. Turn right and head down to the first room to get the Mad Doctor's Research Notes. This can later be shown to He Youzai and Xuanyangzi. Continue forward, passing through the broken jail cell to get a Brilliant Feather. |
| 6.6 | 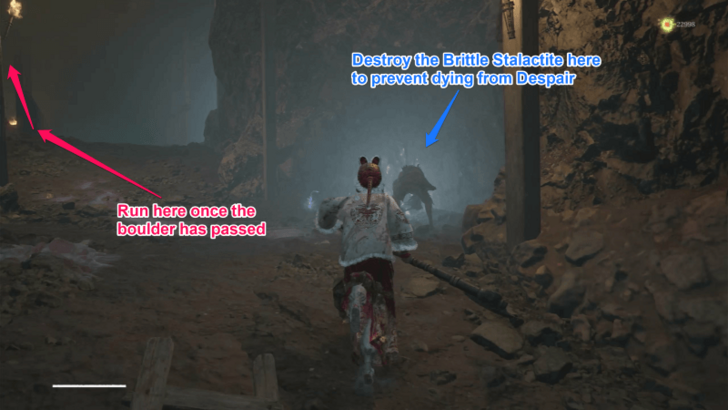 In the next room, head left and drop down the ledges to reach a tunnel that leads to the next area. Before reaching the next lever, turn right first to open the locked door leading to the room with the mad doctor's Research Notes. Once you activate the next lever, avoid the boulder rolling down the path by going to the sides. Continue toward the left side, where you’ll find a ladder leading to the Crimson Pendant and the final lever in the area. |
| 6.7 | 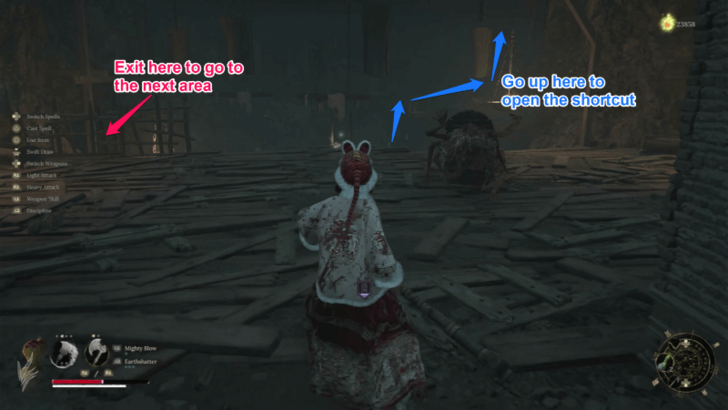 After opening the last lever, go left and watch out for the exploding enemy at the end of the hallway. Eliminate the coffin enemies in the room to your right, then unlock the nearby door, which provides a shortcut back to the floor’s entrance. Speak with He Youzai just outside the room and show him the Mad Doctor's Research Notes and Research Journal - Scrap 1. After that, proceed to the opposite side of the bridge to unlock the Bride's Boudoir Shrine. |
| 6.8 | 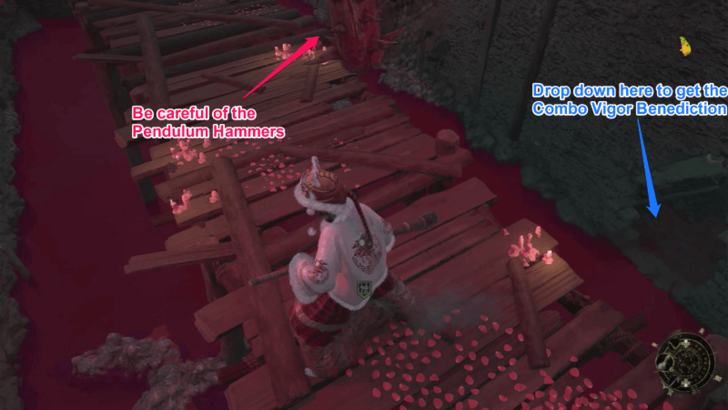 From the Bride's Boudoir shrine, make your way through the area with the Pendulum Hammer, then drop down to the sides to reach a hidden area leading to a small chest with the Ren - Combo Vigor Benediction inside. Make your way back to the first area by jumping to the hole on the right. From there, make your way through the other end of the Pendulum Hammer bridge and look for a jail cell past that area holding Honglan. She will ask you to get rid of the guards around the area. |
| 6.9 | 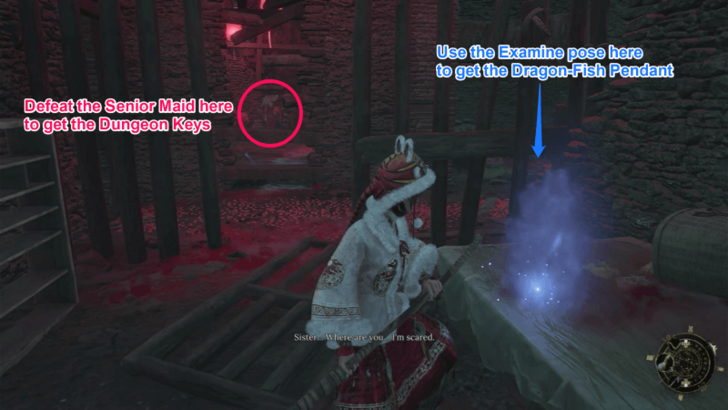 After speaking with Honglan, proceed further down the boudoir. Usse the Examine Pose on a glowing point of interest to get the Dragon-Fish Pendant. Defeat the rest of the enemies to open the Dungeon Key, which you can give to Honglan to help her escape. Giving the key to her will get you the Coiled Dragon Pendant. Proceed to the last area of the boudoir, where you can activate the elevator going back to the first shrine. Crossing the bridge in front of you, as this will take you directly to Fang Ling! |
| 6.10 | 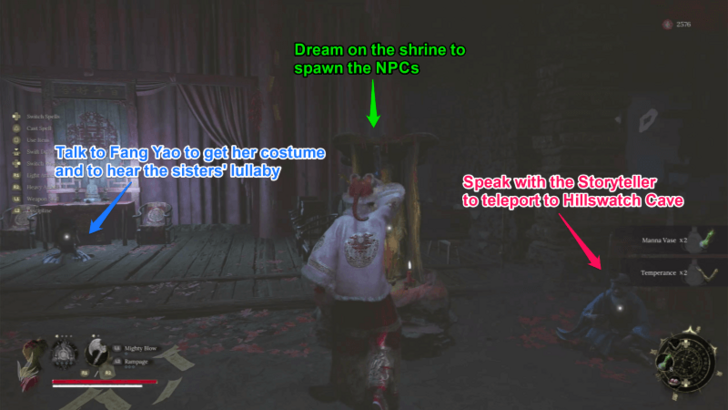 Save Fang Ling from her fate to unlock the Wedding Hall Shrine. After dreaming at the shrine, speak with Fang Yao nearby to get Fang Yao’s Hairband and Fang Yao’s Light Gown. Finally, speak to the Storyteller beside the shrine. He will teleport you to Hillswatch Cave, the path leading onward to Mt. Zhenwu. |
Chapter 2 Secrets and Missables
All Valuables
| ✔️ | Items | How to Get |
|---|---|---|
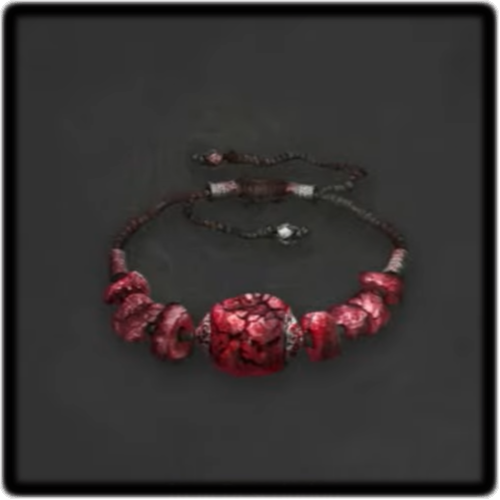 Coral Bracelet Coral Bracelet
|
Rewarded for killing the Butcher in the village in Hillswatch. | |
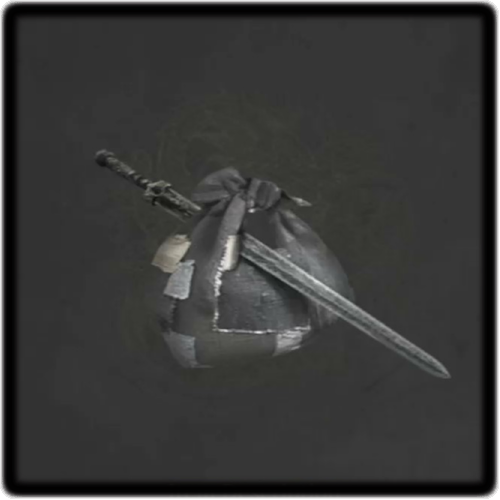 Tattered Pack Tattered Pack
|
If you progress Nian Suichang's questline, you will find the Tattered Pack along the snowy path on your way to the Snowy Passage Shrine. | |
 Rebel Orders Rebel Orders
|
Defeat the enemy guarding the entrance to Snowy Passage shrine. | |
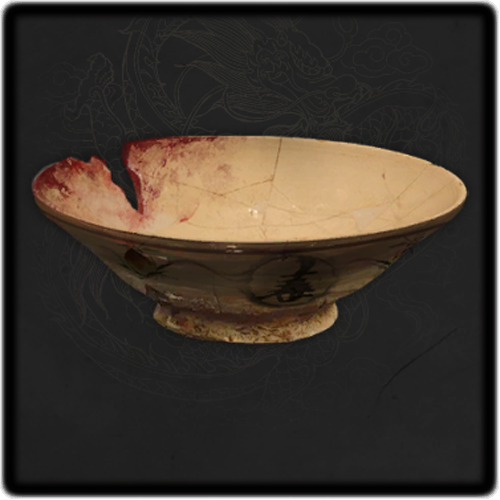 Vitality Bowl Vitality Bowl
|
Go up the ramp on the left, across the bridge to Mort Grotto and talk to the NPC. | |
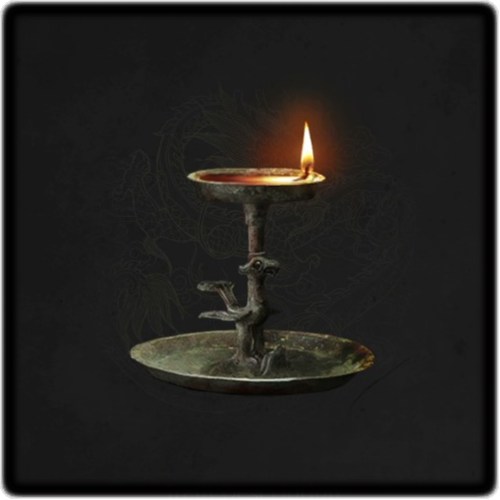 Oil Lamp Oil Lamp
|
This can be obtained from a body nearby the Mort Grotto shrine. | |
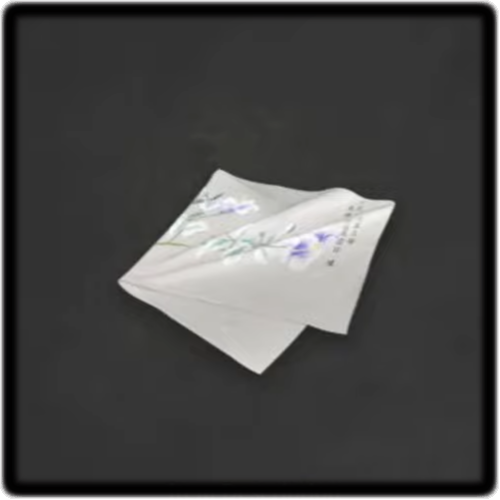 Shu Silk Scarf Shu Silk Scarf
|
Rewarded by a glowing interactable in Hillswatch by doing the Examine emote . | |
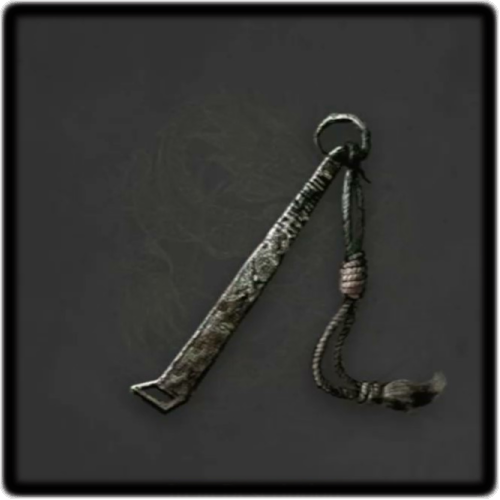 Rebel Camp Key Rebel Camp Key
|
 Dropped by the enemy nearest to the Rebel Camp shrine. |
|
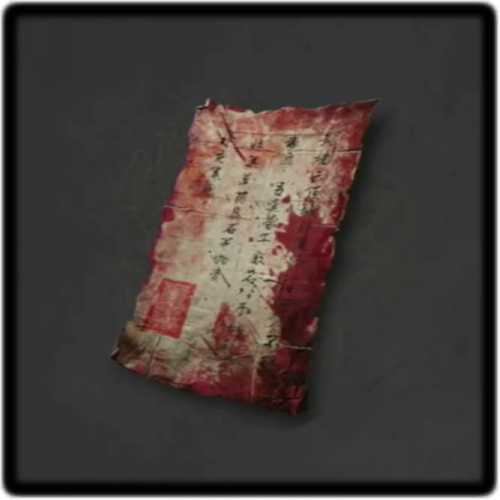
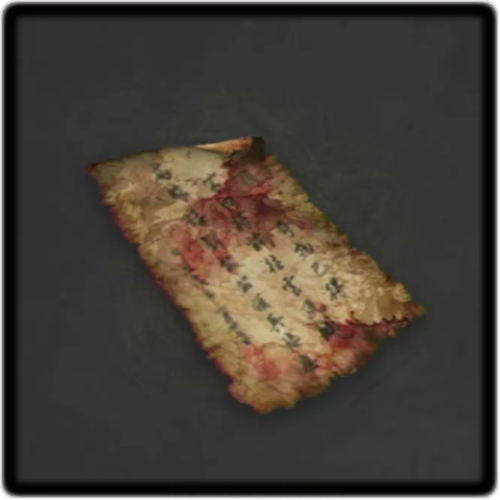
 Secret Letter (Rebel Camp) Secret Letter (Rebel Camp)
|
Dropped by the enemy nearest to the Rebel Camp shrine. |
|
 Bloodied Letter Bloodied Letter
|
 Found to the left of the Plain Warioress, on the second level of Snowfall Palace. |
|
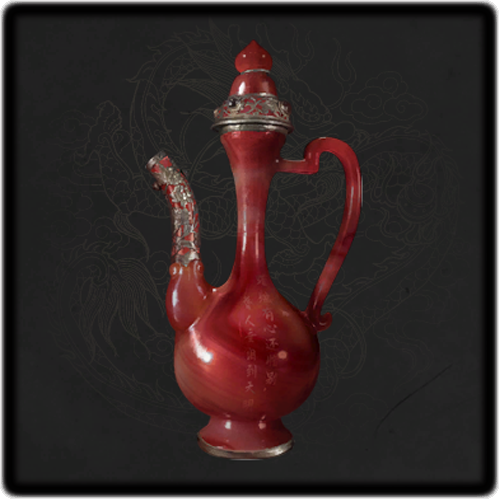 Red Jade Wine Red Jade Wine
|
 Found near the altar close to Panda. |
All Red Feathers
| ✔️ | Items | How to Get |
|---|---|---|
| Faint Red Feather 1 | Defeat the mimic vase in a house on your way up Hillswatch. | |
| Faint Red Feather 2 | In the path on your way to the Snowy Passage shrine, turn left and defeat the enemy at the end. | |
| Faint Red Feather 3 | Pick this up across the bridge you lower in Mort Grotto. | |
| Faint Red Feather 4 |  Rewarded by the pot enemy next to the first tower in Cloudspire Outskirts. |
|
| Brilliant Red Feather 1 |  Rewarded for killing the Ming Guard on the second tower. |
|
| Brilliant Red Feather 2 |  Located in front of the burning house. |
|
| Brilliant Red Feather 3 |  Dropped by a special enemy located near the cannon on the way to the third tower. |
|
| Brilliant Red Feather 4 |  Dropped by a special enemy near the Mort Grotto shrine. |
|
| Brilliant Red Feather 5 | 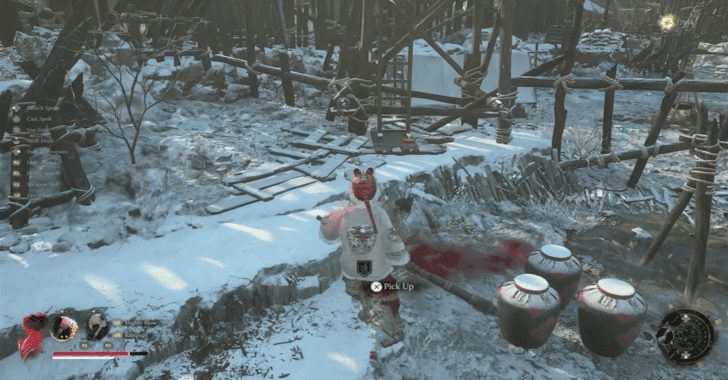 Located under the Archer''s tower near the well. |
|
| Brilliant Red Feather 6 |  Found in one of the tents near the Imperial Guard in Cloudspire Bazaar. |
|
| Brilliant Red Feather 7 |  Found inside the second cave that leads to the second part of Cloudspire City. |
| All Faint Red Feathers | All Brilliant Red Feathers |
All Benedictions
| ✔️ | Items | How to Get |
|---|---|---|
 Fa - Combo Ignition Fa - Combo Ignition
|
Go through the cave near the Mort Grotto Shrine. This can be obtained in a small chest in the snowy area nearby. | |
 Sheng - Obliterate Rejuvenation Sheng - Obliterate Rejuvenation
|
 Located in a small chest behind the shack near the large chest containing the Lost Remains. |
|
 Wei - Backstab Force Wei - Backstab Force
|
 Found in a chest near the beacon of the third tower . |
|
|
Sheng - Obliteration Might
|
 Found in a small chest on top of a watchtower on the hill to the right of the Rebel Camp shrine. |
|
|
Fa - Burning Ignition
|
 Found in a small chest near a cliff after passing through the large courtyard in Cloudspire City. |
|
 Ta - Glacial Frostbite Ta - Glacial Frostbite
|
 Located at the highest floor of the building where you exit from the cave containing the Brilliant Red Feather. |
|
|
Sheng - Burning Might
|
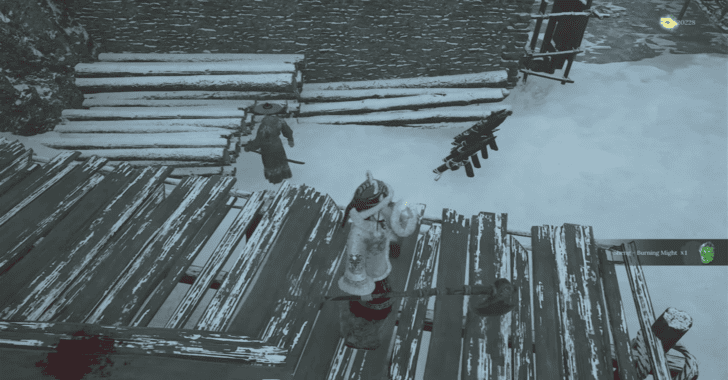 Found in a small chest at the bottom of the scaffolding from Snowfall Palace. |
|
| Swift Frostbite | 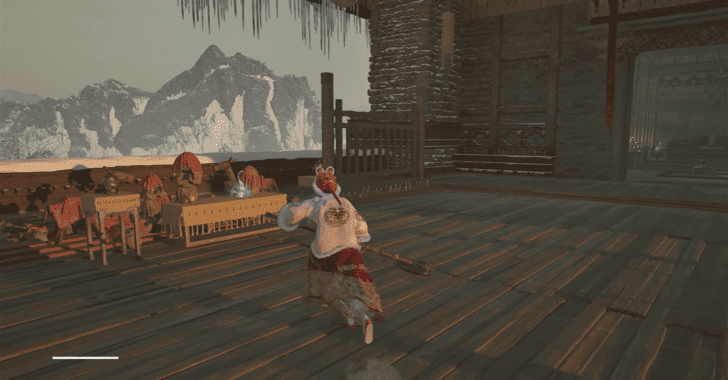 Found on a table on the right of the Plain Warioress. |
All Weapons
| ✔️ | Items | How to Get |
|---|---|---|
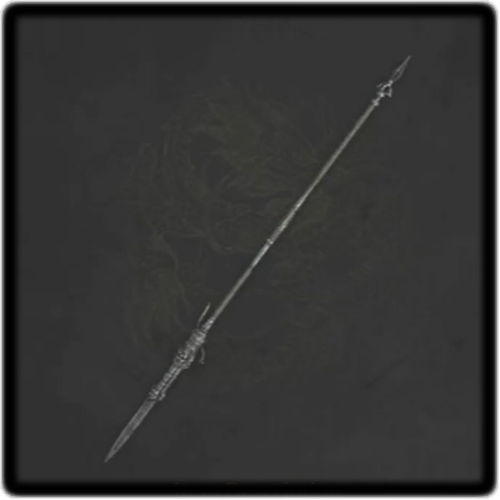 Gunpowder Spear Gunpowder Spear
|
 Found in a Large Chest near the beacon on the first tower. |
|
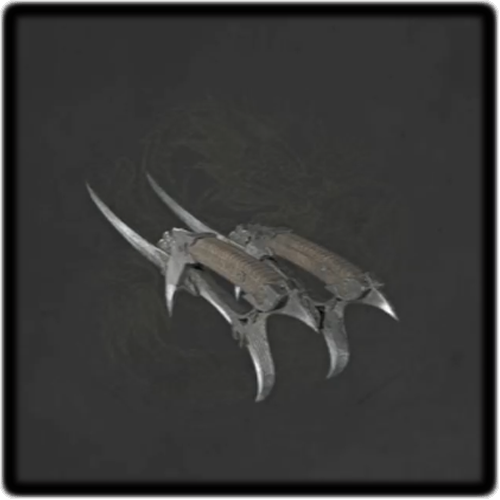 Twin Bandits Twin Bandits
|
 Found in a chest behind the special enemy that drops Brilliant Red Feather 3. |
|
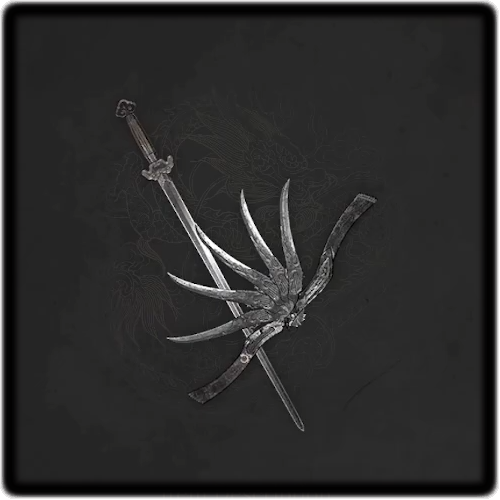 Boreal Abyss Boreal Abyss
|
 Found in a small chest in the treasury, right where the Inner Demon spawns. |
All Pendants
| ✔️ | Items | How to Get |
|---|---|---|
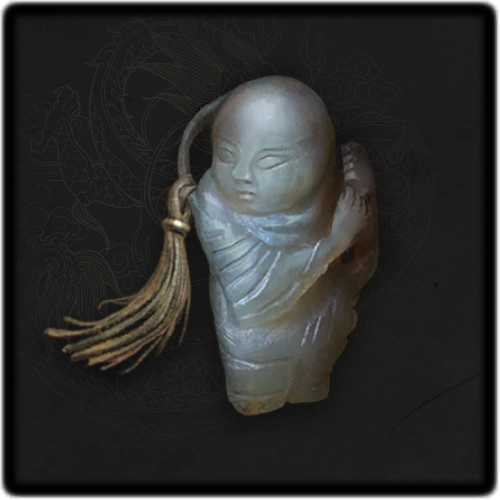 Child's Hope Pendant Child's Hope Pendant
|
 Found in the middle of the mines under Rebel Camp, near the large pile of rocks in the middle. |
|
 Bravery Pendant Bravery Pendant
|
 Found in a small chest in the nearest tent to the Rebel Camp shrine. |
|
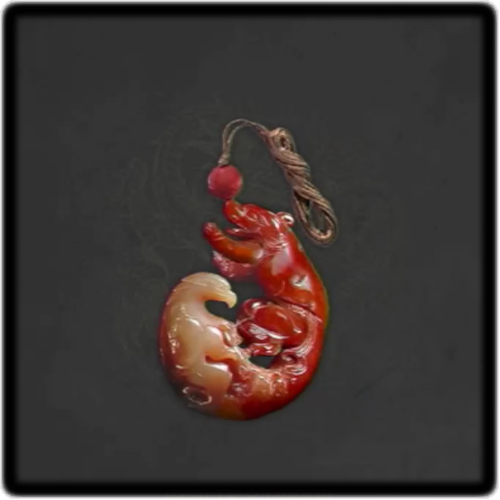
 Dragonling Pendant Dragonling Pendant
|
 Found in a small chest guarded by a Senior Palace maiden in the first level of Snowfall Palace. |
All Armor Sets
| ✔️ | Items | How to Get |
|---|---|---|
 Bridal Set Bridal Set
|
Answer Challenge the Threads of Fate in the Benediction Gate across the Hillswatch shrine | |
 Overseer's Set Overseer's Set
|
Rewarded from Treasurer Li if you gave the Trinity Bell to Huang Jian'e. | |
| Treasurer Armor Set | Rewarded from Treasurer Li if you gave the Trinity Bell to Huang Jian'e. |
All Spells
| ✔️ | Items | How to Get |
|---|---|---|
 Darkfrost Flames Darkfrost Flames
|
 Rewarded by a special enemy located near the burning house. |
|
 Thunderstorm Thunderstorm
|
Dropped by the enemy nearest to the Rebel Camp shrine. |
|
 Waspomancy Waspomancy
|
 Located in a room near the Swift Frostbite benediction. |
All Materials
| ✔️ | Items | How to Get |
|---|---|---|
| Lost Remains 1 | 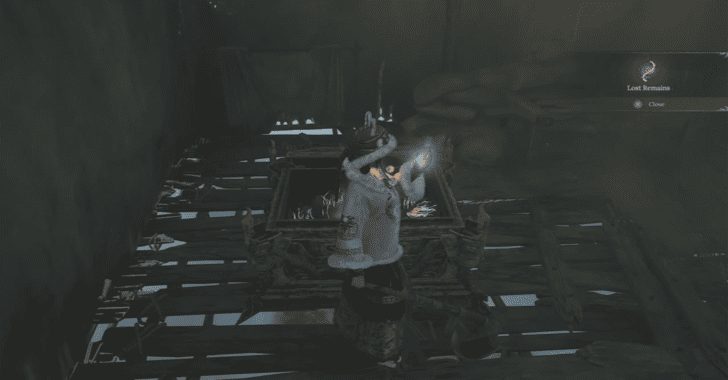 Found in a Large chest guarded by an Ogre near the staircase. |
|
| Forgotten Remembrance 1 | 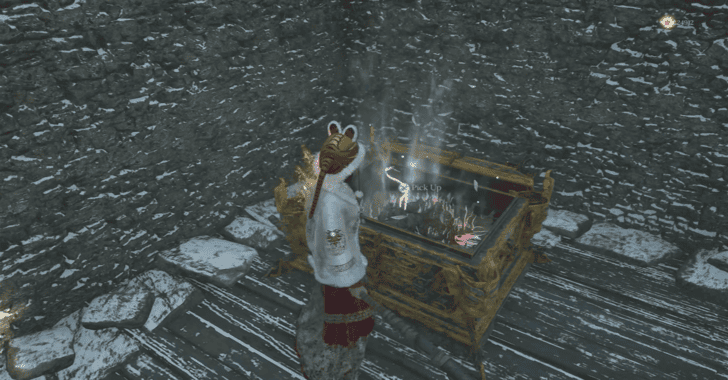 Found in a small chest near the beacon on the second tower.. |
|
| Forgotten Remembrance 1 | 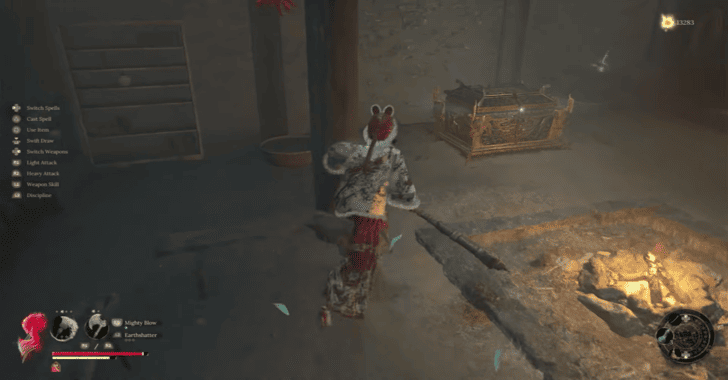 Found inside a large chest in a locked building. You can reach the chest by climbing through the ramparts and taking the bridge from the opposite side of the building. |
|
| Bo Blood 1 | 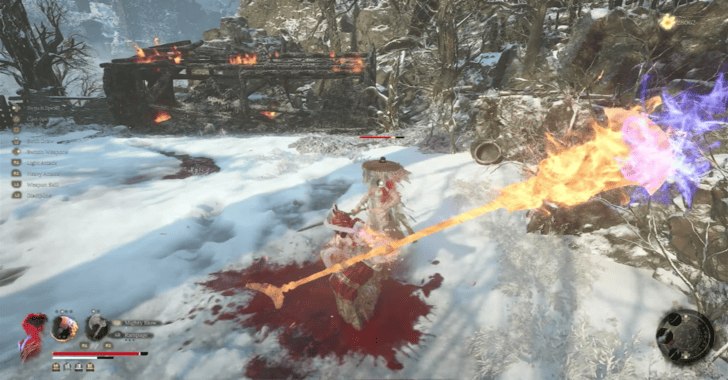 Rewarded by an Inner Demon that appears in front of the burning house. |
|
| Bo Blood 2 | 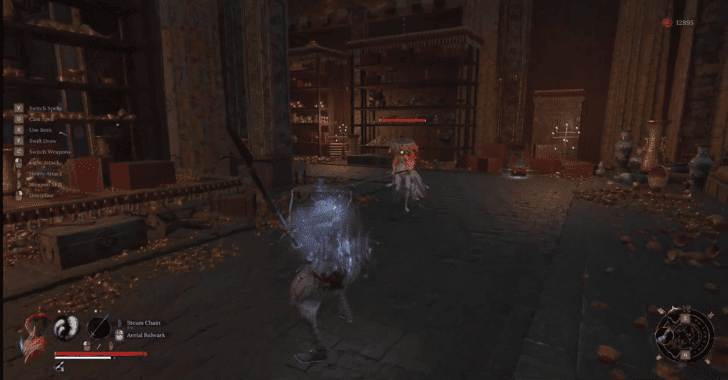 Rewarded by the Inner Demon found in the treasury. |
| All Forgotten Remembrances | All Lost Remains | All Bo Bloods |
All Bamboozlings
| ✔️ | Items | How to Get |
|---|---|---|
| Bamboo Shoot 1 | This can be found in an alley on the lower left side of the staircase outside the Snowfall Palace. | |
| Bamboo Shoot 2 | Obtained from the Bamboozling in the hidden area accessible when you jump to the ledge beside the first bridge with the Pendulum Hammer. |
All Temper Stone Needles
| ✔️ | Items | How to Get |
|---|---|---|
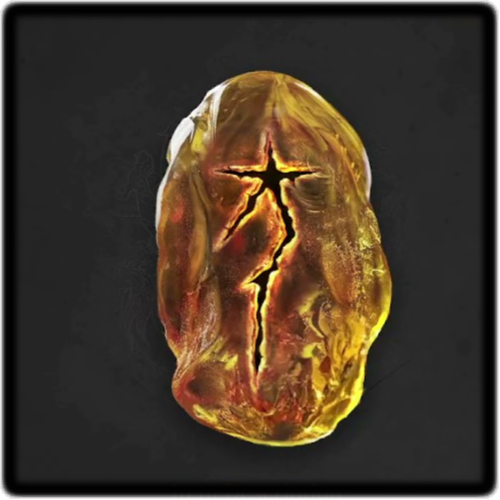
 Shadow Stone Needle - Magic Shadow Stone Needle - Magic
|
Rewarded by an Inner Demon that appears in front of the burning house in Cloudspire Outskirts. |
|
 Shadow Stone Needle - Feathering Shadow Stone Needle - Feathering
|
Rewarded by the Inner Demon found in the treasury in Snowfall Palace. |
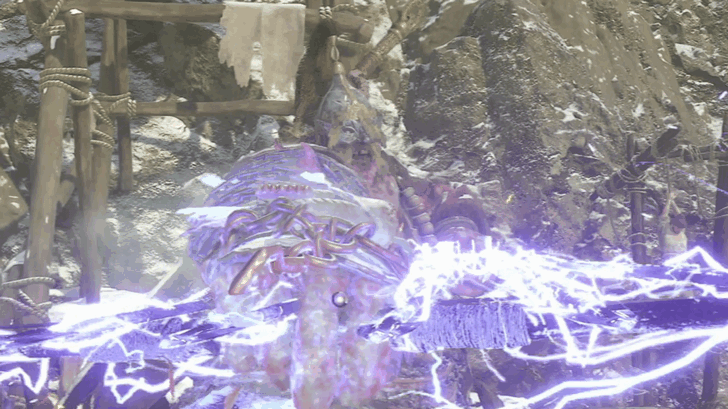
Chapter 2 Main and Optional Bosses
General of the North, Ai Nengqi in Rebel Camp
 |
||||||||||||||
| TBD | TBD | TBD | TBD | |||||||||||
| TBD | TBD | TBD | ||||||||||||
| Ai Nenqi Fight Tips | ||||||||||||||
|
|
||||||||||||||
General of the North Ai Nengqi Weakness and How to Beat
Ming General Liu Cheng'en in Cloudspire Outskirts
 |
||||||||||||||
| TBD | TBD | TBD | TBD | |||||||||||
| TBD | TBD | TBD | ||||||||||||
| Liu Cheng'en Fight Tips | ||||||||||||||
|
|
||||||||||||||
Ming General Liu Cheng'en Weakness and How to Beat
Empress of the Night Huang Yan in Snowfall Palace
 |
||||||||||||||
| TBD | TBD | TBD | TBD | |||||||||||
| TBD | TBD | TBD | ||||||||||||
| Huang Yan Fight Tips | ||||||||||||||
|
|
||||||||||||||
Mistress of the Night Huang Yan Weakness and How to Beat
Perfect Bride - Fang Ling in Shaft
 |
||||||||||||||
| TBD | TBD | TBD | TBD | |||||||||||
| TBD | TBD | TBD | ||||||||||||
| Fang Ling Fight Tips | ||||||||||||||
|
|
||||||||||||||
Perfect Bride Fang Ling Weakness and How to Beat
Wuchang: Fallen Feathers Related Guides
Comment
Author
Chapter 2: Cloudspire Walkthrough and Secrets
Rankings
- We could not find the message board you were looking for.
Gaming News


Popular Games

Genshin Impact Walkthrough & Guides Wiki
Umamusume: Pretty Derby Walkthrough & Guides Wiki
Pokemon Pokopia Walkthrough & Guides Wiki
Honkai: Star Rail Walkthrough & Guides Wiki
Monster Hunter Stories 3: Twisted Reflection Walkthrough & Guides Wiki
Arknights: Endfield Walkthrough & Guides Wiki
Wuthering Waves Walkthrough & Guides Wiki
Zenless Zone Zero Walkthrough & Guides Wiki
Pokemon TCG Pocket (PTCGP) Strategies & Guides Wiki
Monster Hunter Wilds Walkthrough & Guides Wiki


Recommended Games
Fire Emblem Heroes (FEH) Walkthrough & Guides Wiki
Diablo 4: Vessel of Hatred Walkthrough & Guides Wiki
Cyberpunk 2077: Ultimate Edition Walkthrough & Guides Wiki
Yu-Gi-Oh! Master Duel Walkthrough & Guides Wiki
Super Smash Bros. Ultimate Walkthrough & Guides Wiki
Pokemon Brilliant Diamond and Shining Pearl (BDSP) Walkthrough & Guides Wiki
Elden Ring Shadow of the Erdtree Walkthrough & Guides Wiki
Monster Hunter World Walkthrough & Guides Wiki
The Legend of Zelda: Tears of the Kingdom Walkthrough & Guides Wiki
Persona 3 Reload Walkthrough & Guides Wiki


All rights reserved
© 2025 505 Games. Developed by Leenzee. Published by 505 Games.
The copyrights of videos of games used in our content and other intellectual property rights belong to the provider of the game.
The contents we provide on this site were created personally by members of the Game8 editorial department.
We refuse the right to reuse or repost content taken without our permission such as data or images to other sites.