How to Summon

This is a guide to Summons and how to use them in Final Fantasy 7 Remake (FF7R). Read on to learn more about the Summons in the game, their attacks, and how to invoke them to help you in battle!
List of Contents
How to Summon in Battle
Equip Summon Materia

The Summons that you can use in battle depends on what Summon materia you have equipped on your characters. Each character only has one slot for Summon materias, so equip those who you think will work best against your next opponents!
List of Summon Materia and How to Get Them
Fill Summon Gauge During Battle

In the Remake, you cannot just invoke Summons at will. You will only be able to summon once the Summon Gauge is full.
The Summon Gauge usually appears when fighting against strong opponents like bosses and mini-bosses, or taking significant damage. Though in Easy difficulty, the Summon Gauge appears much more frequently.

The player will need to wait until the Summon Gauge is completely filled after it appears. Once it is full, Summon command will now be available in the Commands Menu. You can only invoke one summon per battle so choose wisely.
Each summon has different required amount of ATB bars to be used before you can invoke them and only the members who have Summon materias equipped will be able to use them.
The player should also note that the area size where the fight is taking place also affects the availability of summons such as Leviathan not being able to be summoned in small areas.
Use Summon Abilities

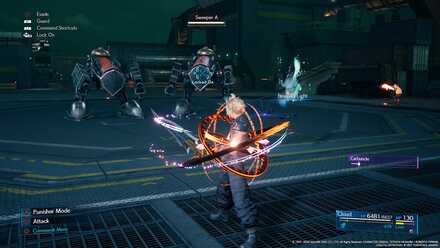
Now that your Summon is active, it will act as a temporary party member and attack by itself. Summons do not have HP bars so you do not need to worry about them getting caught in enemy area attacks.
Like on other party members, you can also issue commands to your active summon by using Summon Ability, which will be available to all your party members regardless of who invoked the Summon.
Summon Abilities also consume a certain amount of ATB bars each use and have different effects like the usual commands.
Ultimate Attack

After you invoke a Summon, the Summon Gauge will start to drain. This indicates the duration of which the Summon will fight beside you.

Once it is completely depleted, your active Summon will execute its Ultimate Attack before it leaves the battle.
List of Summons
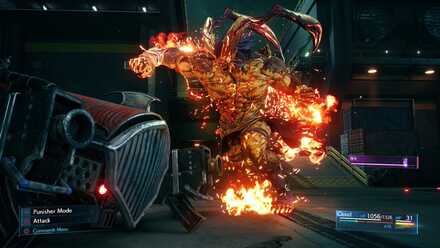
Ifrit

| Role | Ultimate Attack | ||||
|---|---|---|---|---|---|
| Deals damage | Hellfire | ||||
| Required ATB Gauge | Element | Size | |||
| 1 | Fire | Medium | |||
Chocobo & Moogle

| Role | Ultimate Attack | ||||
|---|---|---|---|---|---|
| Deals damage | Stampede | ||||
| Required ATB Gauge | Element | Size | |||
| 1 | Wind | Medium | |||
How to Get the Chocobo & Moogle Materia
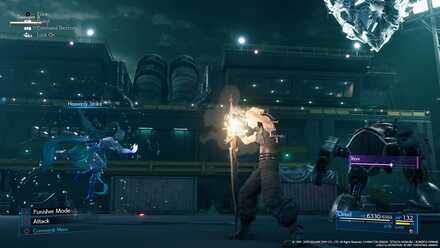
Shiva

| Role | Ultimate Attack | ||||
|---|---|---|---|---|---|
| Deals damage | Diamond Dust | ||||
| Required ATB Gauge | Element | Size | |||
| 1 | Ice | Medium | |||
Fat Chocobo

| Role | Ultimate Attack | ||||
|---|---|---|---|---|---|
| Deals damage | Kerplunk | ||||
| Required ATB Gauge | Element | Size | |||
| 2 | None | Medium | |||
How to Get the Fat Chocobo Materia
Leviathan

| Role | Ultimate Attack | ||||
|---|---|---|---|---|---|
| Deals damage | Tidal Wave | ||||
| Required ATB Gauge | Element | Size | |||
| 2 | None | Large | |||
How to Get the Leviathan Materia
Bahamut

| Role | Ultimate Attack | ||||
|---|---|---|---|---|---|
| Deals damage | Megaflare | ||||
| Required ATB Gauge | Element | Size | |||
| 2 | None | Large | |||
How to Get the Bahamut Materia
Carbuncle

| Role | Ultimate Attack | ||||
|---|---|---|---|---|---|
| Heals / Supports | Diamond Dazzle | ||||
| Required ATB Gauge | Element | Size | |||
| 1 | None | Small | |||
How to Get the Carbuncle Materia
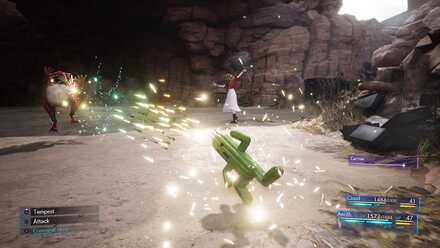
Cactuar

| Role | Ultimate Attack | ||||
|---|---|---|---|---|---|
| Deals fixed damage | 10,000 Needles? | ||||
| Required ATB Gauge | Element | Size | |||
| 1 | None | Small | |||
How to Get the Cactuar Materia
Chocobo Chick

| Role | Ultimate Attack | ||||
|---|---|---|---|---|---|
| Deals damage | Chocoflare | ||||
| Required ATB Gauge | Element | Size | |||
| 1 | Fire / Ice / Lightning / Wind | Small | |||
How to Get the Chocobo Chick Materia
Related Links
Author
How to Summon
improvement survey
03/2026
improving Game8's site?

Your answers will help us to improve our website.
Note: Please be sure not to enter any kind of personal information into your response.

We hope you continue to make use of Game8.
Rankings
- We could not find the message board you were looking for.
Gaming News
Popular Games

Genshin Impact Walkthrough & Guides Wiki

Honkai: Star Rail Walkthrough & Guides Wiki

Umamusume: Pretty Derby Walkthrough & Guides Wiki

Pokemon Pokopia Walkthrough & Guides Wiki

Resident Evil Requiem (RE9) Walkthrough & Guides Wiki

Monster Hunter Wilds Walkthrough & Guides Wiki

Wuthering Waves Walkthrough & Guides Wiki

Arknights: Endfield Walkthrough & Guides Wiki

Pokemon FireRed and LeafGreen (FRLG) Walkthrough & Guides Wiki

Pokemon TCG Pocket (PTCGP) Strategies & Guides Wiki
Recommended Games

Fire Emblem Heroes (FEH) Walkthrough & Guides Wiki

Diablo 4: Vessel of Hatred Walkthrough & Guides Wiki

Yu-Gi-Oh! Master Duel Walkthrough & Guides Wiki

Super Smash Bros. Ultimate Walkthrough & Guides Wiki

Pokemon Brilliant Diamond and Shining Pearl (BDSP) Walkthrough & Guides Wiki

Elden Ring Shadow of the Erdtree Walkthrough & Guides Wiki

Monster Hunter World Walkthrough & Guides Wiki

The Legend of Zelda: Tears of the Kingdom Walkthrough & Guides Wiki

Persona 3 Reload Walkthrough & Guides Wiki

Cyberpunk 2077: Ultimate Edition Walkthrough & Guides Wiki
All rights reserved
© SQUARE ENIX CO., LTD. All Rights Reserved.
CHARACTER DESIGN:TETSUYA NOMURA/ROBERTO FERRARI
The copyrights of videos of games used in our content and other intellectual property rights belong to the provider of the game.
The contents we provide on this site were created personally by members of the Game8 editorial department.
We refuse the right to reuse or repost content taken without our permission such as data or images to other sites.


![Slay the Spire 2 Review [Early Access] | Still the Deckbuilder to Beat](https://img.game8.co/4433115/44e19e1fb0b4755466b9e516ec7ffb1e.png/thumb)

![Resident Evil Village Review [Switch 2] | Almost Flawless Port](https://img.game8.co/4432790/e1859f64830960ce4248d898f8cd38d9.jpeg/thumb)


why does everything have to be gauge dependent in this game?