Mastering Control of Time Quest Walkthrough and Rewards
☆ Get 100,000 Haze with our Haze Farming Guide!
★ Story Walkthrough | Requests
☆ Gear up with our best Weapons | Partners | Blood Codes | Jails | Formae!
★ Obtain the best outcomes with our Choices Guide!
This is a walkthrough for the Mastering Control of Time quest in Code Vein 2. See this detailed guide to check out quest objectives and what rewards you receive upon completion.
List of Contents
How to Unlock Mastering Control of Time
Complete Follow Lou's Instructions
| Location | MagMell Island |
|---|---|
| Unlock Requirements | ・Complete Follow Lou's Instructions |
Mastering Control of Time quest triggers after the completion of Follow Lou's Instructions and exhausting Lavinia Voda's dialogue. After you travel back in time, Mastering Control of Time will automatically start.
Follow Lou's Instructions Quest Walkthrough
Related Quests
| Main Story | ・Timeline Shift Decision: Noah
・Vanquishing the Heroes |
|---|
After you complete this quest, you can interact with Noah's Bond to start Timeline Shift Decision: Noah or you can head straight to MagMell to continue the Vanquishing the Heroes quest.
Mastering Control of Time Walkthrough
| Mastering Control of Time Objectives | |
|---|---|
| 1 | Arriving in MagMell of the Past |
| 2 | Rescue Noah's Companion |
| 3 | Inside MagMell Forma Institute |
| 3 | Mechanic's Requests ┗ Boss Battle: Edward the Lost Corporal |
| 4 | Builder's Requests ┗ Boss Battle: Resurgence Abomination |
| 5 | To the Forma Storage Tower |
Click on any of the links above to jump to the section!
Arriving in MagMell of the Past
| Step | Objectives |
|---|---|
| 1 | 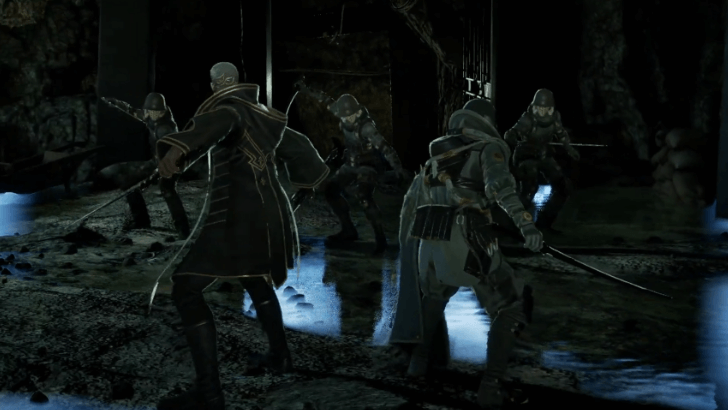 Defeat the raiders alongside Noah in the cave. He will then ask for your help to rescue his companion deeper in the cave in exchange for a reward. |
| 2 | 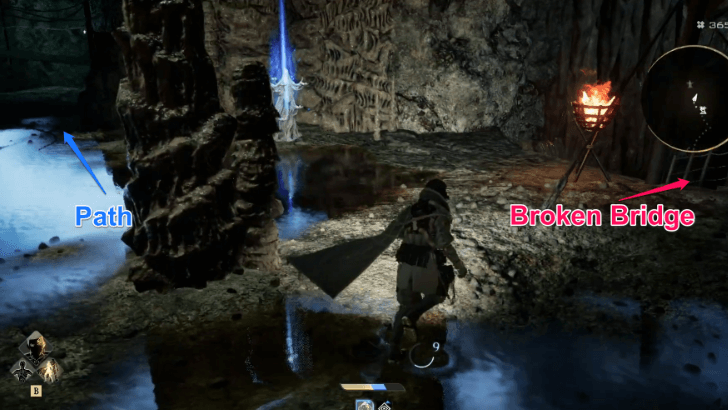 Follow the path of the cave until you go down a ladder. You will find a broken bridge to the right with a blue item on the other side. You cannot get it from this side, proceed on the path straight ahead for now. |
| 3 | 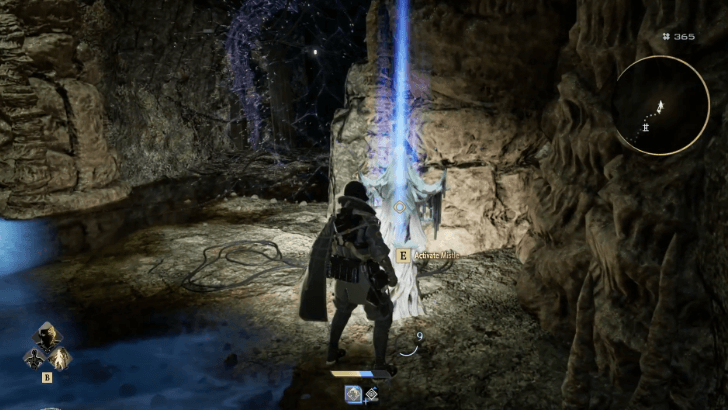 Approach the nearby glowing statue called a Mistle. Activate the statue to enter a dialogue with Lou. |
| 4 |  Interact with the Mistle again, and select the option to Talk to Lou to be teleported to The Confluence. Pick up the gold item in front of Lou, then interact with the mirror to leave The Confluence. Bat Jail Formae: Can be found in front of Lou in The Confluence.
|
Rescue Noah's Companion
| Step | Objectives |
|---|---|
| 1 | 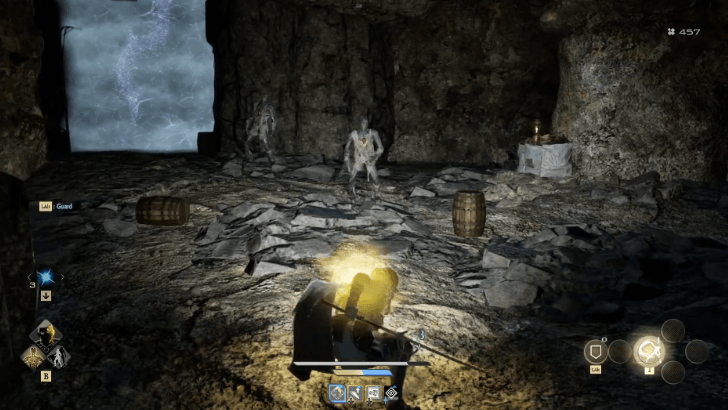 Defeat the enemies in the next couple of rooms along the path. Get the chest before proceeding further into the cave. Ancient Hunter's Twin Blades: Obtained from a chest along the path of the cave. |
| 2 | 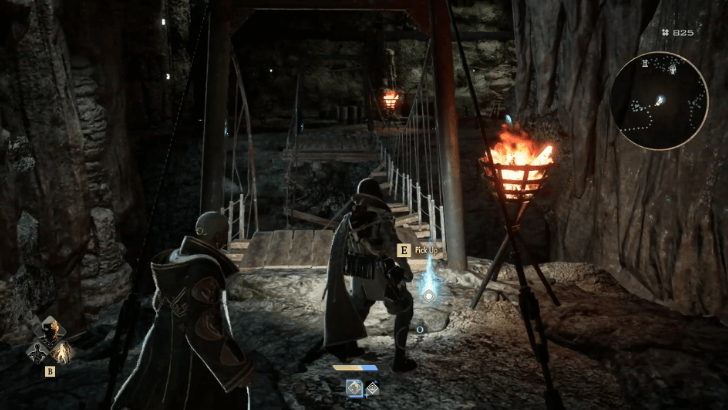 The next room will lead to the other side of the broken bridge earlier. Defeat the enemies and go up the small ramp to get the blue item beside the brazier. Chemical Light: Can be found next to the broken bridge. |
| 3 | 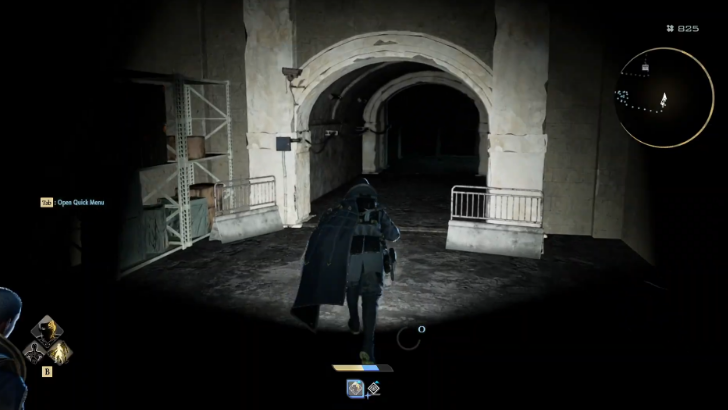 Keep following the path deeper into the cave and turn on your Light via the Quick Menu to see in the dark. Get the purple item on the shelves in the hallway towards the inner chamber. Tender Crimson Stone 1: Can be found on the shelves before arriving at Noah's Companion's location. |
| 4 | 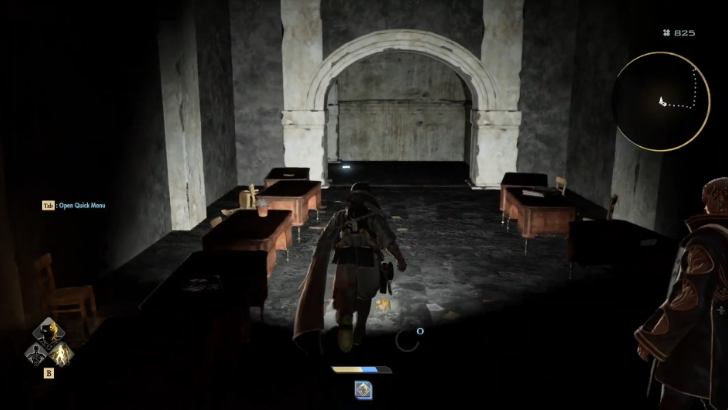 Follow the path ahead to arrive at the inner chamber where Noah's Companion is located. Entering the inner chamber will trigger a cutscene. |
| 5 | 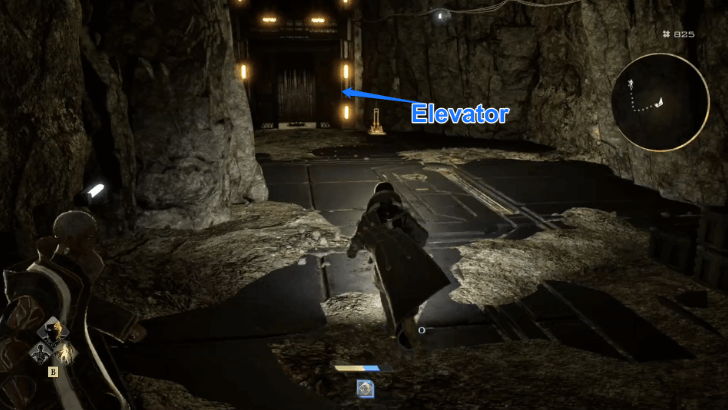 After the cutscene, exit the inner chamber towards an elevator leading you to the upper level of the Clifftop Cavern. |
| 6 | 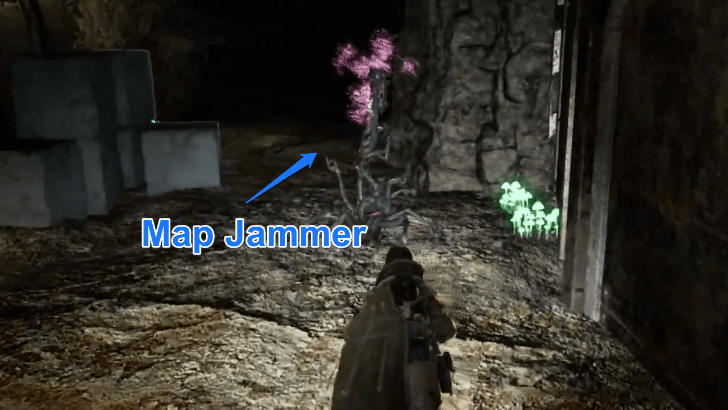 Exit the elevator, then open the door to find the Clifftop Cave's Map Jammer. Clearing the Map Jammer will unlock the map for Clifftop Cavern. From here, walk forward to find a blue item. Jumping down the edge will lead to the first room of the cave. Windfall Stimulant: Can be found on a ledge above the first room of the cave. |
| 7 | 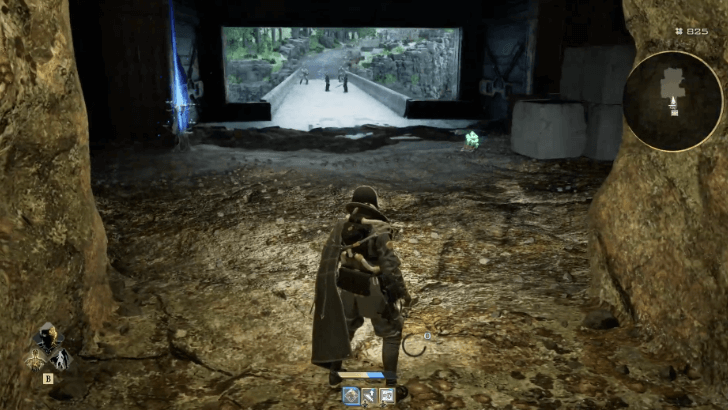 Go back, and you will find an elevator on the right wall, leading to the cave's exit. Don't forget to activate the Mistle before leaving. |
| 8 | 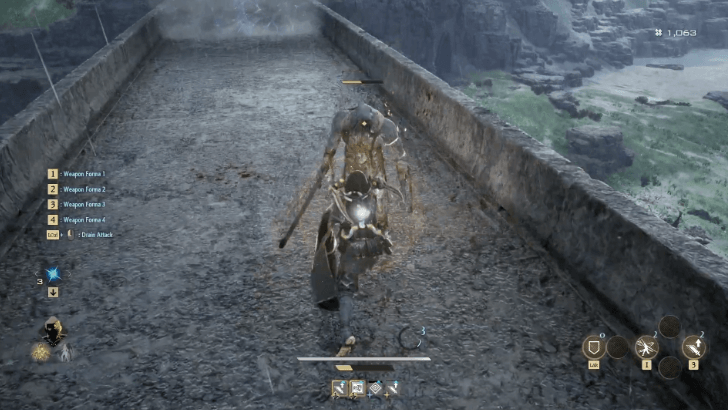 Defeat enemies on the way to the north of MagMell Island. Pick up the blue item in front of a tent. Anti-Stone: Can be found in front of a tent on the path towards the road's intersection. |
| 9 | 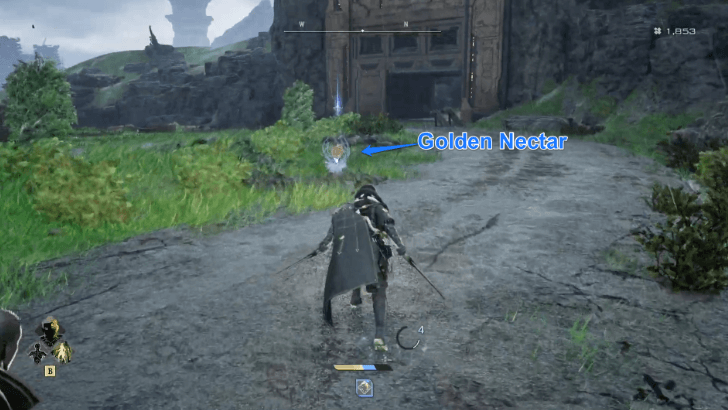 Before reaching the metal gate, a Golden Nectar plant can be found. Pick up the Golden Nectar for a Regeneration Count upgrade at the Mistle. Golden Nectar: Can be found near the Mistle statue at the road intersection. |
| 10 | 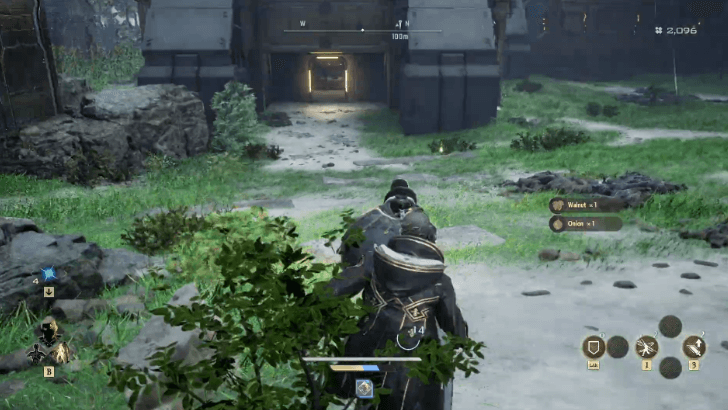 Pure Platinum 1: Can be found next to Jadwiga's Minion by the entry to the Training Area. |
Inside MagMell Forma Institute
| Step | Objectives |
|---|---|
| 1 | 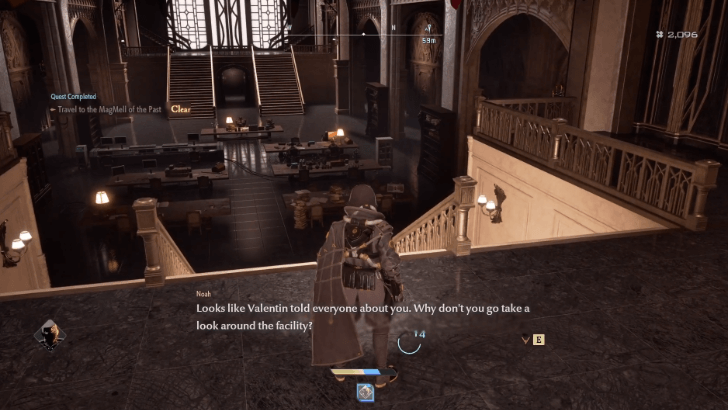 To clear the top floors of the MagMell building, the right room from the elevator is Jadwiga's Tool Shop. Along the shelves to the far side of the room, there is a purple item. Vintage Wine: Can be found near Jadwiga's Tool Shop. |
| 2 | 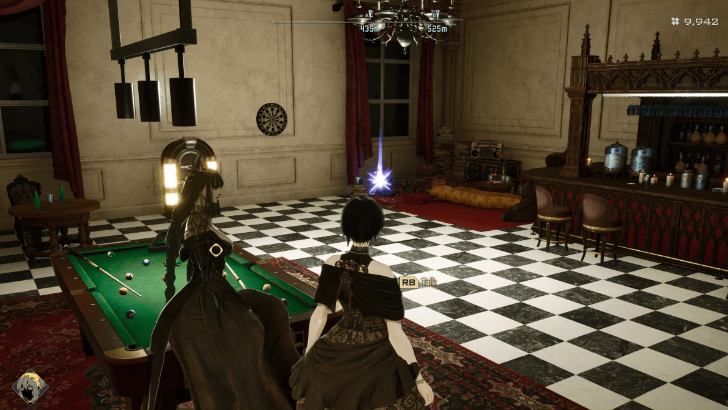 From Jadwiga's Tool Shop, go up the stairs and follow the corridor until you find an open room with a bar and a billiards table inside. Pick up the purple item in front of the resting Jadwiga. Pre-Collapse Fashion Mag: Can be found in front of Jadwiga in the bar room. |
| 3 | 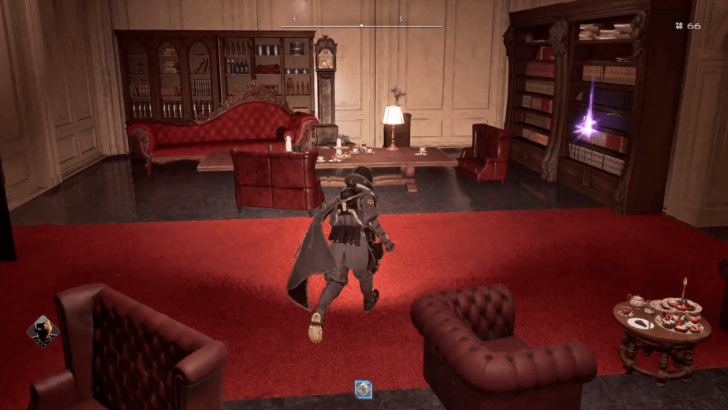 Go back out to the corridor and make your way to the top level on the other side of the building. Enter the nearby open lounge room and find another purple item on the bookshelves. Heavy History Book: Can be found on the shelves in the lounge room with a dog. |
| 4 | 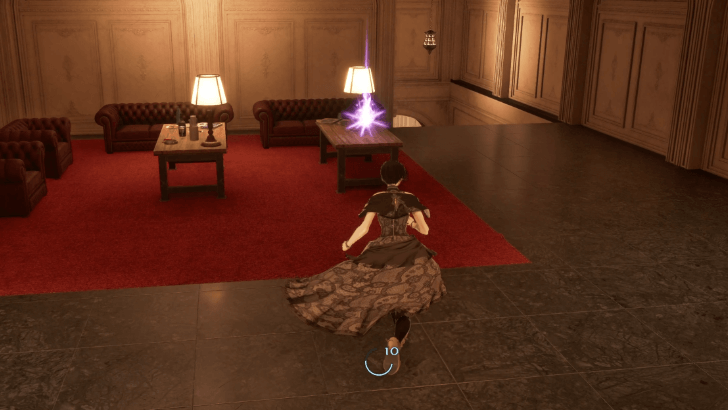 Go down the stairs past the bookshelves to find a purple item on the table on the right. Organic Soap: Can be found in the room connected to the lounge room. |
| 5 | 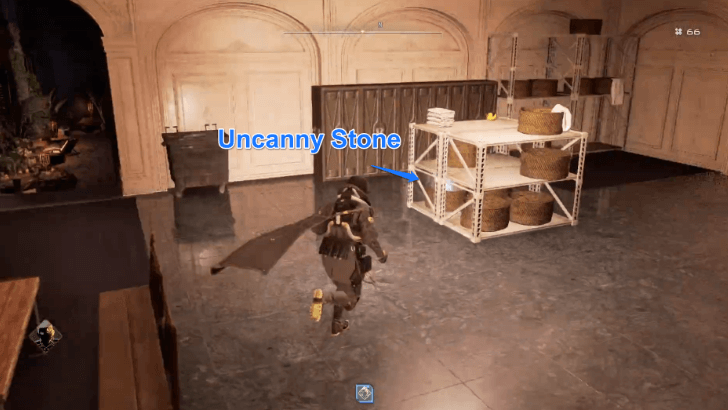 Inside the room that has a doorway with curtains is a spa room. One of the baskets in the center shelves contains a purple item. Uncanny Stone: Can be found in the spa room. |
| 6 | 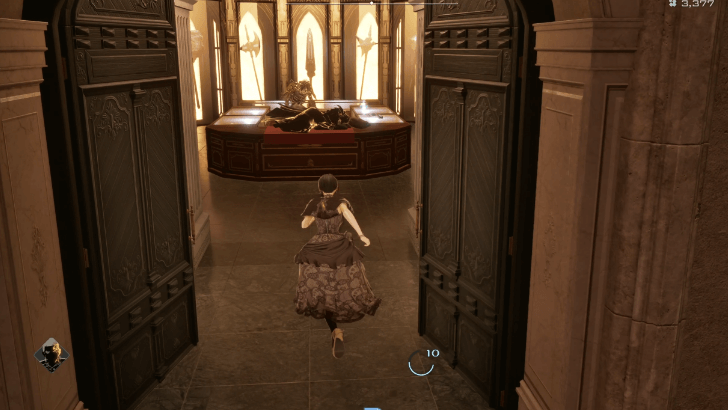 To finish the top floors of the MagMell building, exit from the spa room and lounge room, and go to the end of the corridor. Descend the staircase to find Jadwiga's Weapons Shop. |
| 7 | 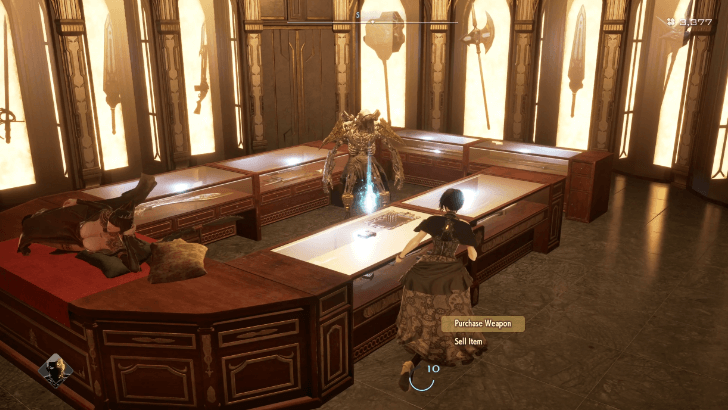 On the right glass surface, pick up the blue item. Talk to Jadwiga's Minion to get Bolt Blast Formae. You can go back to the elevator from here. Rifle Ammo: Can be found near Jadwiga's Weapons Shop.
Bolt Blast Formae: Can be found near Jadwiga's Weapons Shop. |
| 8 | To clear the bottom floors of the MagMell building, you can go from the Weapons Shop and go down another set of stairs. |
| 9 | 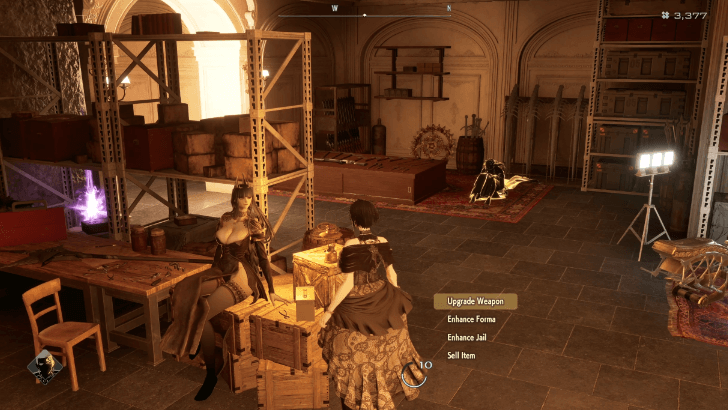 This leads you to the room where you can find Jadwiga's Upgrade Workshop and Transformation Workshop. On one of her shelves, there is a purple item. Tender Crimson Stone 1: Can be found near Jadwiga's Upgrades Workshop. |
| 10 | 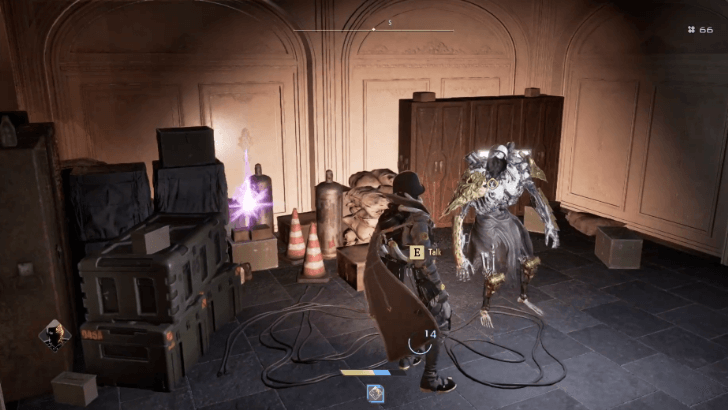 Going to the path on the left, you will find a purple item next to one of Jadwiga's Minions. Pure Platinum 1: Can be found next to one of Jadwiga's Minions outside the Training Area. |
| 11 | 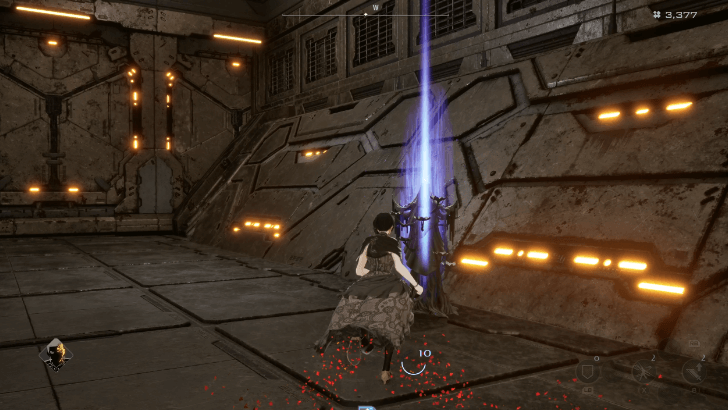 Make sure to activate the Mistles by the elevator and inside the Training Area before leaving for ease of access. |
Mechanic's Requests
| Step | Objectives |
|---|---|
| 1 | 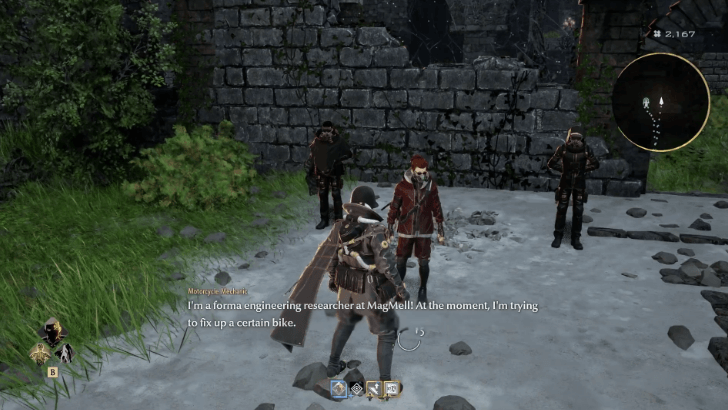 Head to the southern side of MagMell island and talk to the Motorcycle Mechanic in the Ruins to learn the details of the mission. Don't forget to activate the Mistle beside the researchers. |
| 2 | 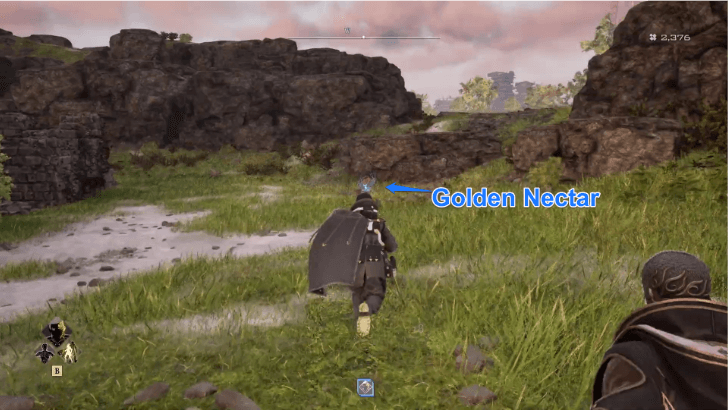 Before entering the Ruins, head to the right from the entrance to see a Golden Nectar plant. Along the right wall of the Ruins, you will also find a purple item. Golden Nectar: Can be found to the right of the Ruins.
Tender Crimson Stone 1: Can be found to the right of the Ruins. |
| 3 | 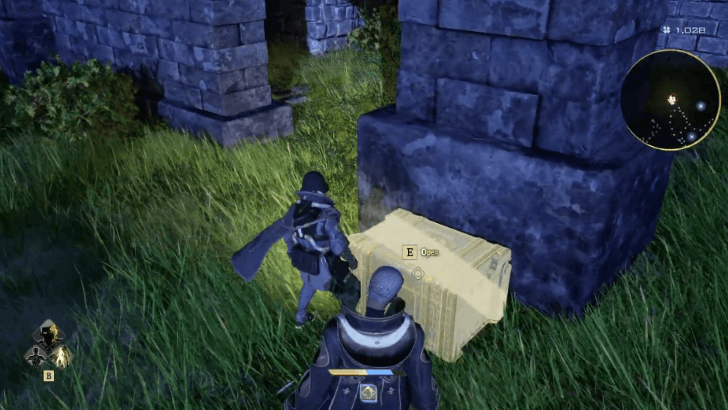 Defeat a couple of enemies to reach the chest in the middle of the area. There is also a blue item towards the far right corner of the chest that is accessible. Statesman's Longbow: Can be found in a chest in the middle of the Ruins.
Chemical Light: Can be found near a chest in the middle of the Ruins. |
| 4 | 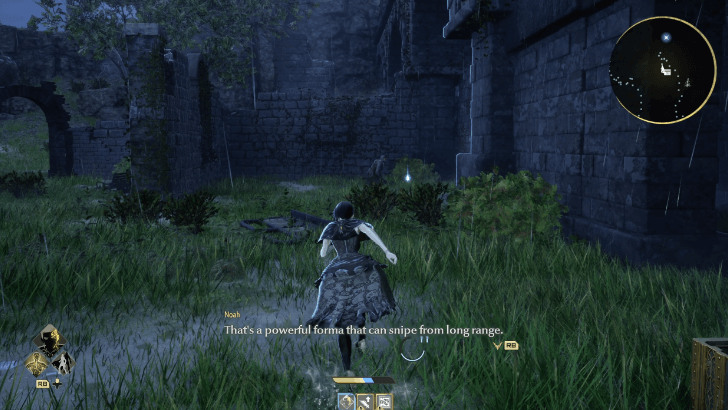 Face left from the chest and defeat the enemy guarding a blue item. Luna Suppresant: Can be found left of the chest in the middle of the Ruins. |
| 5 | 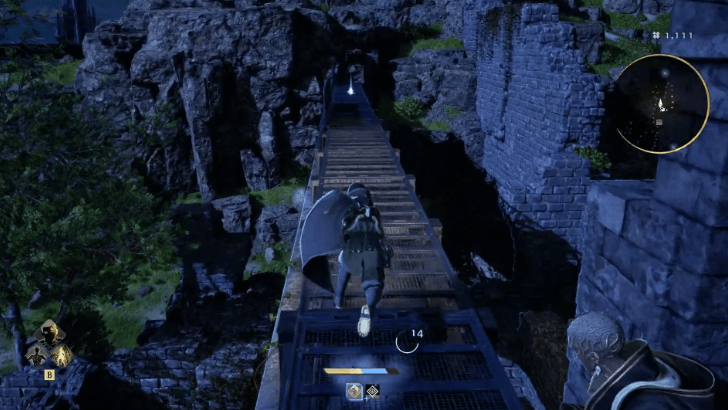 Go up the ramp behind the wall, then make a U-turn onto the metal walkway where you'll find a purple item at the end, and a blue item when you jump down from the walkway. Tender Crimson Stone 1: Can be found at the end of the metal walkway in the Ruins.
Bloody Weapon Salve: Can be found below the metal walkway at the west side of the Ruins. |
| 6 | 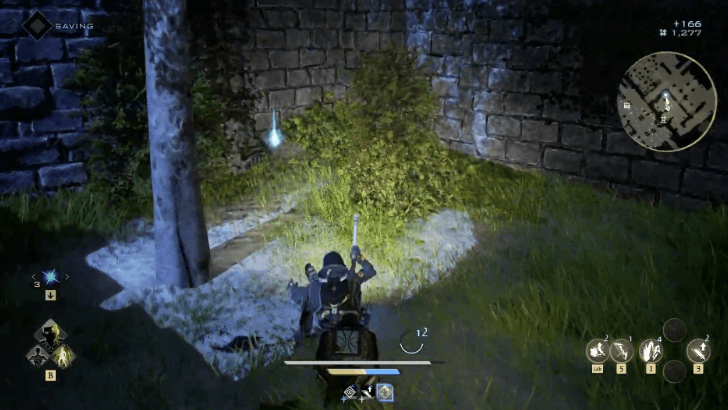 Ascend the ramp again and lower the ladder in one of the small towers for an easier exit later on. From the ladder, turn around and jump off the metal walkway to reach another blue item on one of the walls. Progenitor's Bloodstain: Can be found on a wall in the middle of the Ruins. |
| 7 | 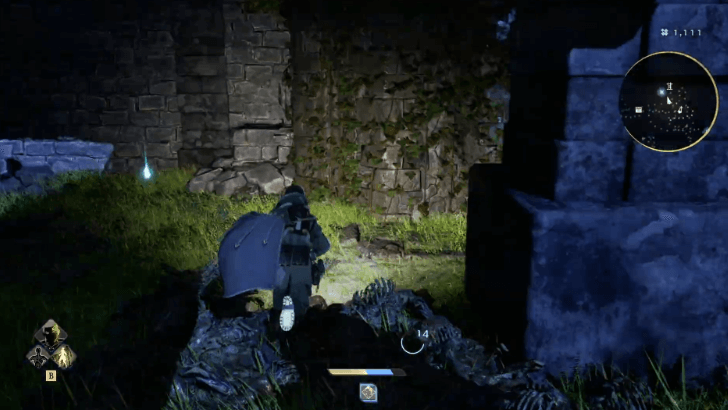 Drop down from the wall to reach another blue item at the top of the stairs in the corner of the Ruins. Luna Suppresant: Can be found at the top of the stairs in the corner of the Ruins. |
| 8 | 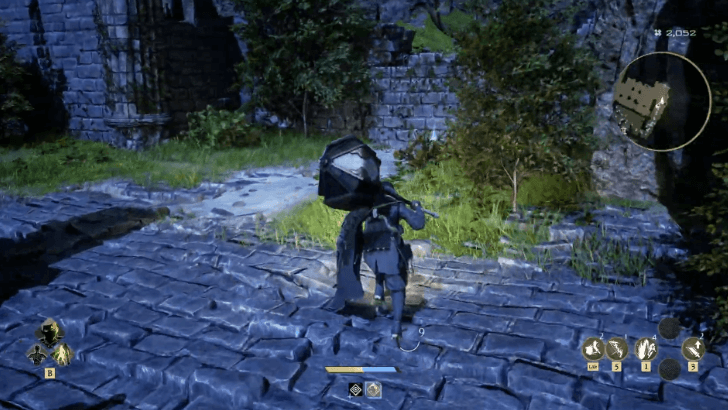 Go up the ramp again and jump to the ledge left of the Map Jammer, then go over the wall. Face left, and there will be two blue items close to each other. Attack Resistax: Can be found next to a collection of statues in the Ruins.
Stone Vaccine: Can be found next to a collection of statues in the Ruins. |
| 9 | 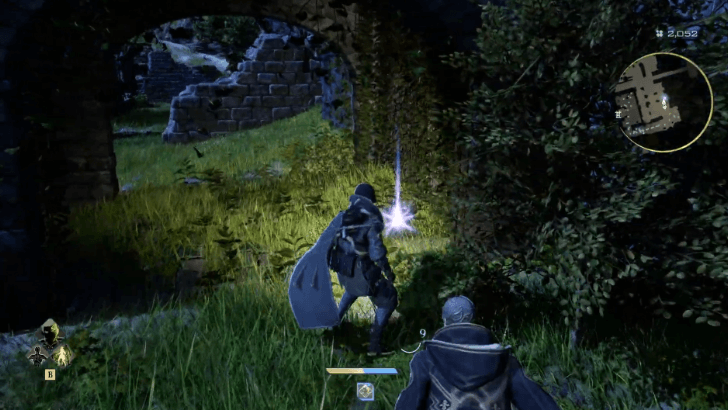 On the other side of the Map Jammer, there are two purple items. Pure Platinum 1: Can be found near the Map Jammer by the archways in the Ruins.
Gyokuro: Can be found near the Map Jammer by the archways in the Ruins. |
| 10 | 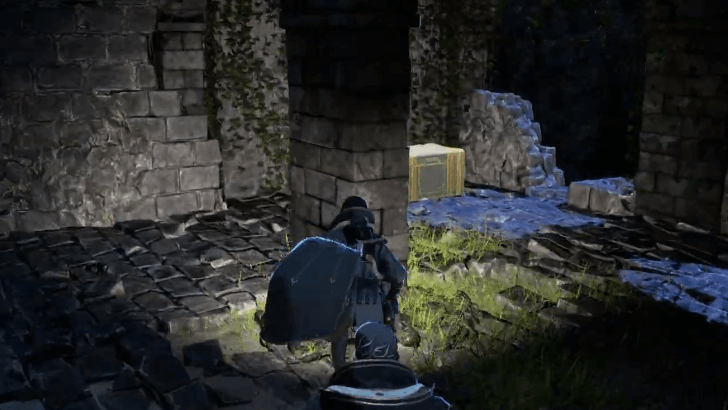 Further in, defeat two enemies to get a chest and one blue item. Ancient Hunter's Rune Blades: Can be found near the Map Jammer by the archways in the Ruins.
Attack Resistax: Can be found near the Map Jammer by the archways in the Ruins. |
| 11 | 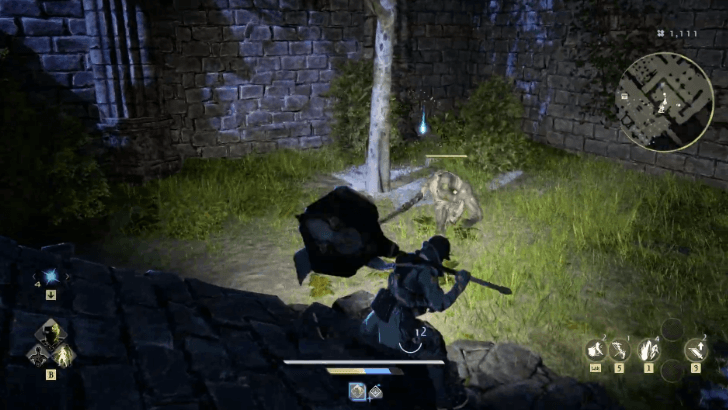 Follow the stairs downward and make your way to the bottom of the ladder you lowered earlier. Defeat a few enemies here to reach another blue item before heading up the ladder. Luna Vaccine: Can be found near the bottom of the lowered ladder of the Ruins. |
| 12 |  Drop from the left of the ladder's tower, enter a tunnel going into the sewers of the Ruins. Defeat a few enemies to freely get the purple item and the blue item down here. Be careful of the enemies who can do long-range attacks. Pure Platinum 1: Found in the sewers section of the Ruins, across the enemy that pelts you with ranged attacks.
Glowing Haze 1: Can be found behind a rock near one of the sewer entrances in the Ruins. |
| 13 | 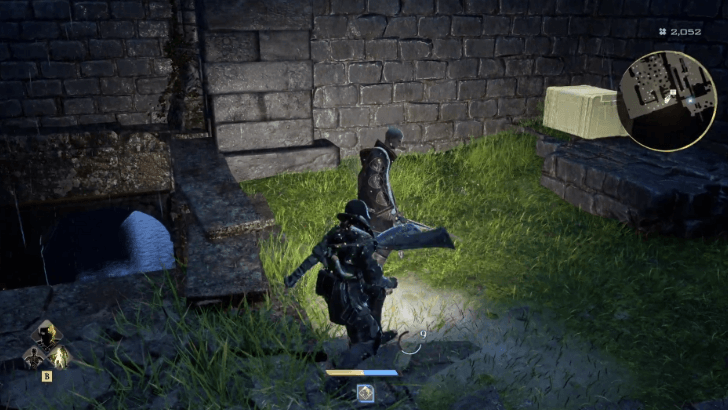 Ascend the stairs to exit the sewers and face left to see a chest sitting on a ledge. When you go up the slope, you'll find yourself in the area of the Map Jammer. Bleeding Shield (Light): Can be found outside the Ruin's sewers. |
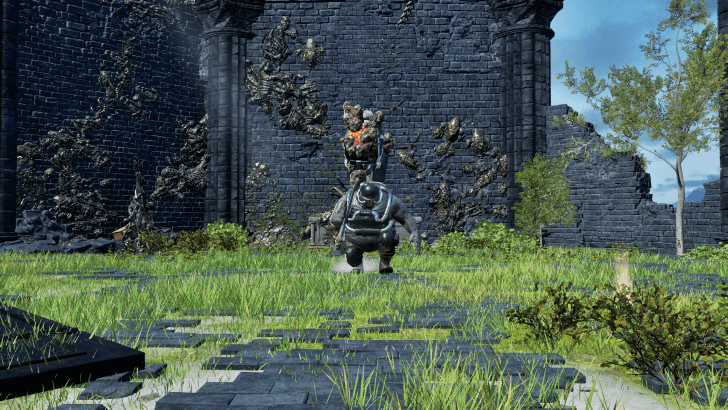
| 14 | 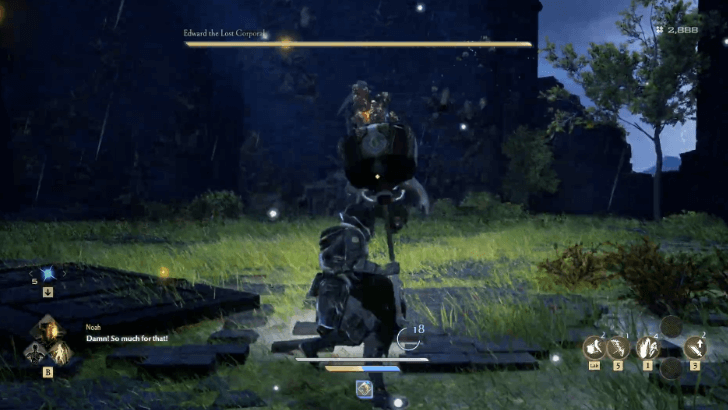 Finally, ascend the middle path to confront the boss, Edward the Lost Corporal. Register at the Revival Point to respawn next to it should you be defeated in the fight. |
Builder's Requests
| Step | Objectives |
|---|---|
| 1 | 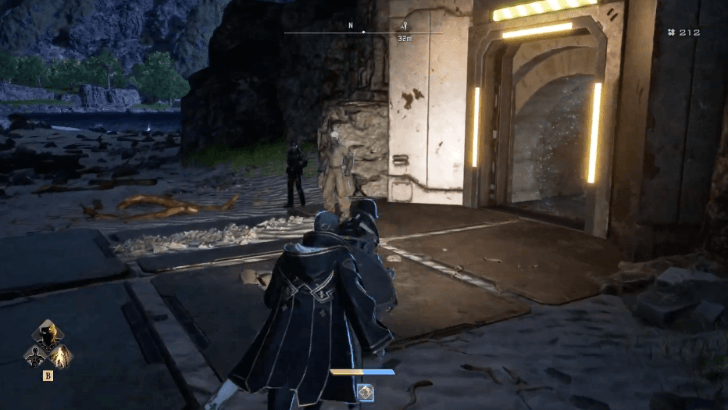 Head towards the western side of MagMell Island to get to the Water Treatment Plant by the beach. Talk to the Bridge Builder in front of the entrance to get the details of the mission. |
| 2 | 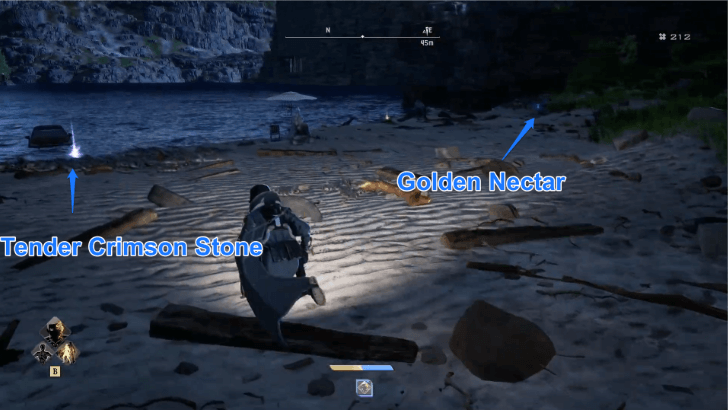 Before going inside, go to the leftmost end of the beach and defeat a few enemies to reach a purple item and a Golden Nectar plant. Tender Crimson Stone 1: Can be found at the west end of the beach near the Water Treatment Plant.
Golden Nectar: Can be found at the west end of the beach near the Water Treatment Plant. |
| 3 | 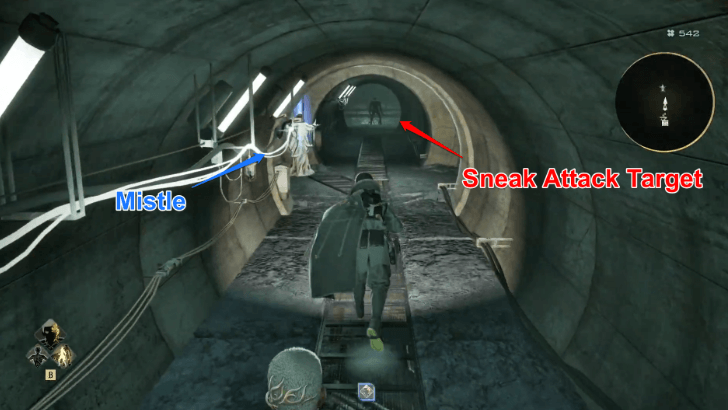 Upon entering the Water Treatment Plant, descend using the elevator. Activate the Mistle statue once out of the elevator and try to perform a sneak attack on the enemy in front. Face left after defeating it to pick up a blue item. Resurgence Inhibitor: Can be found by the elevator at the entrance of the Water Treatment Plant. |
| 4 |  Follow the path on the right into a circular hallway and eliminate the enemy blocking the path, as well as the ones playing rock-paper-scissors at the top of the staircase. |
| 5 | 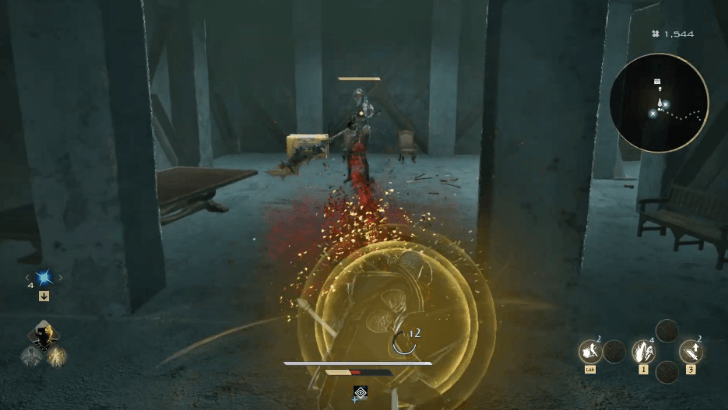 Go towards the room in the middle and defeat a couple more enemies. You will find two blue items and a chest in this room. Anti-Leak: Can be found in the long room in the Water Treatment Plant next to an empty bookshelf.
Anti-Stone: Can be found in the long room in the Water Treatment Plant by one of its entrances.
Reaper Jail Formae: Can be found in the long room in the Water Treatment Plant by the far wall. |
| 6 | 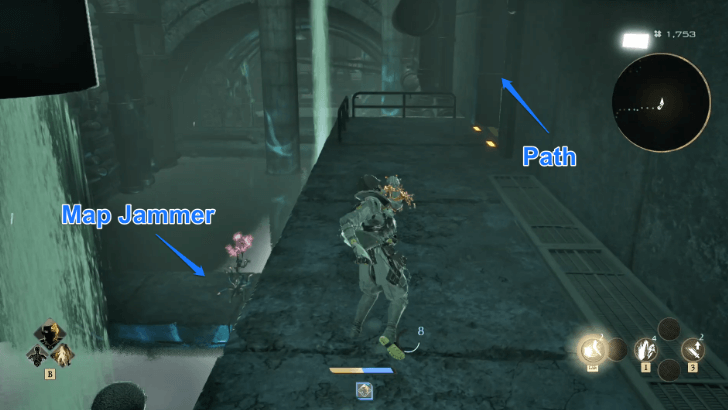 Exit the room and go down multiple sets of stairs to reach the center of the area. You can destroy the Map Jammer with ranged attacks or by hopping down and destroying it with a melee attack. Once the Map Jammer has been destroyed, you can take the path to the right. ┗ Alternate Path |
| 7 | 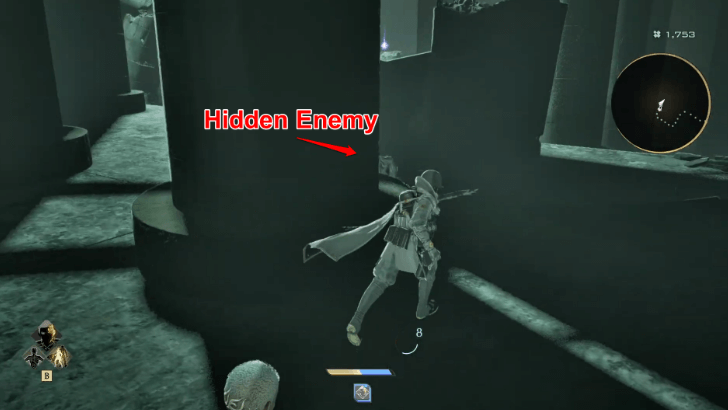 The next room will be filled with multiple enemies that lay dormant until you come in close proximity. Observe your surroundings and take them out one at a time to avoid being surrounded. After you clear the area, go to the exit by heading left and facing the entrance. Resurgence Vaccine: Found near the broken pillar near the first enemy.
Vintage Brandy: Can be found on the opposite side of the room entrance.
|
| 8 |  To get to the broken pillar, traverse the broken pillar in the middle of the room, then jump to the pillar below to get the Pure Platinum. Stone Vaccine: Can be found south, facing the Pure Platinum location, near another broken pillar. |
| 9 | 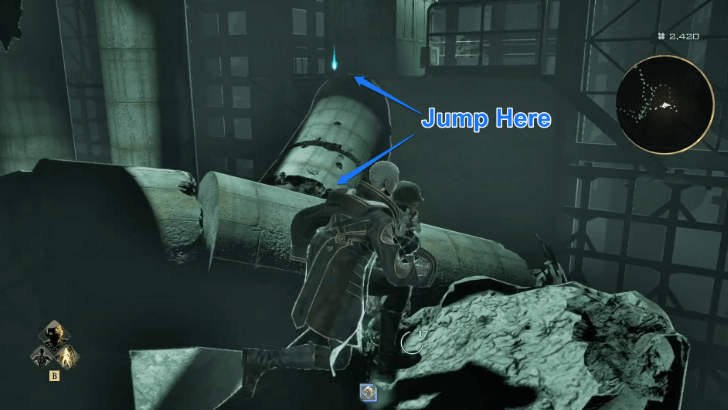 Return to the broken pillar and jump to the left to access a hidden area. Next, jump from the edge of the pillar to reach a platform with the Stone Trap item. |
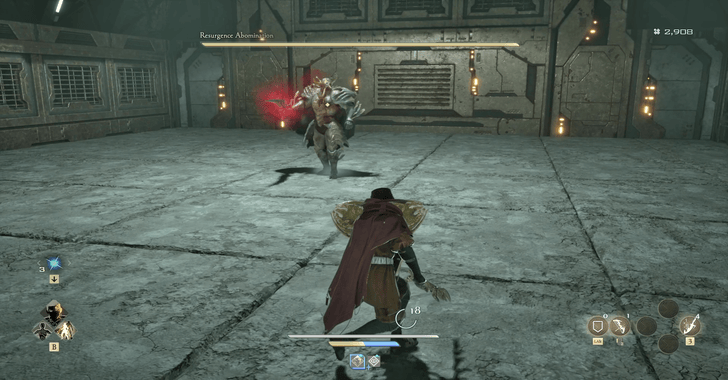
| 10 | 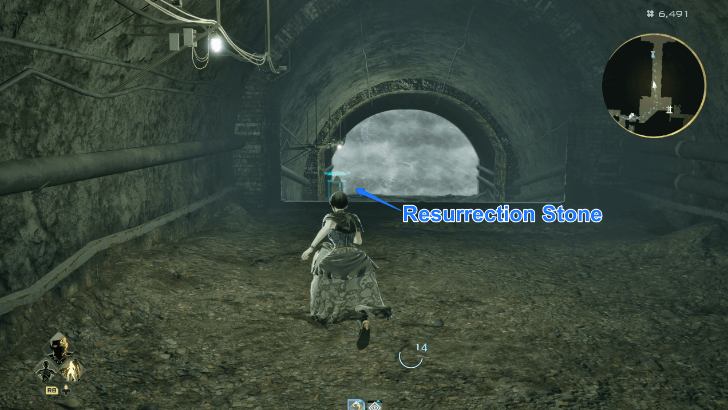 Upon entering the room, you can head left, which leads to the final boss area. Make sure to interact with the Resurrection Stone first, before facing the final boss, Resurgence Abomination. |
| 11 | 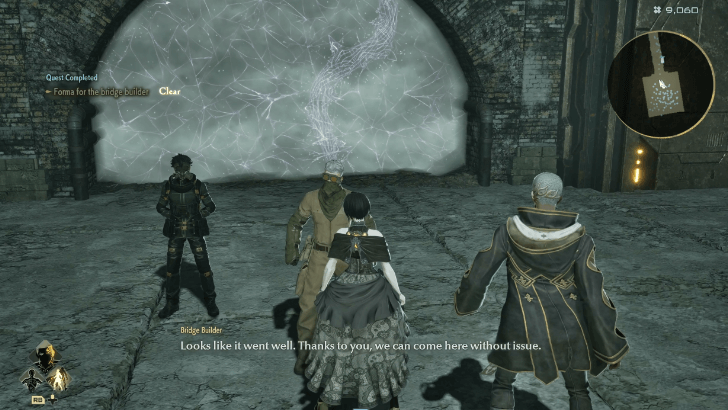 Once you have defeated Resurgence Abomination, the Bridge Builder will appear. After a brief dialogue, you can head back to MagMell, or you can continue to explore the previous areas to pick up items that you may have missed. |
Alternate Path
| Step | Objectives |
|---|---|
| 1 | 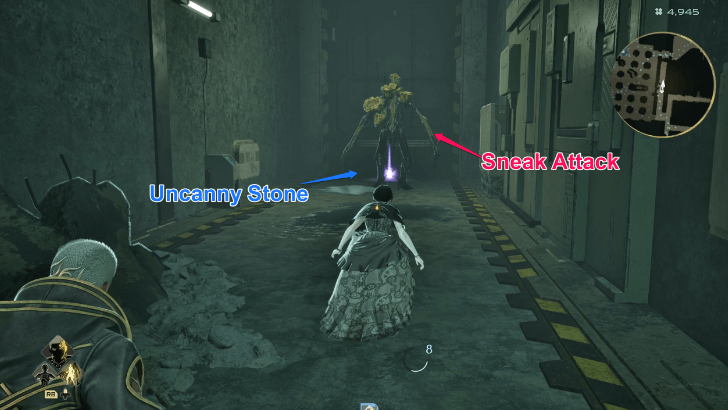 After destroying the Map Jammer, head south to find an enemy guarding a purple item. Use a sneak attack, followed by a Jail attack, to defeat it immediately before picking up the item. Uncanny Stone: Can be picked up after defeating the enemy guarding it.
Venom Vaccine: It can be found near the boxes to the left of the Uncanny Stone area.
|
| 2 | 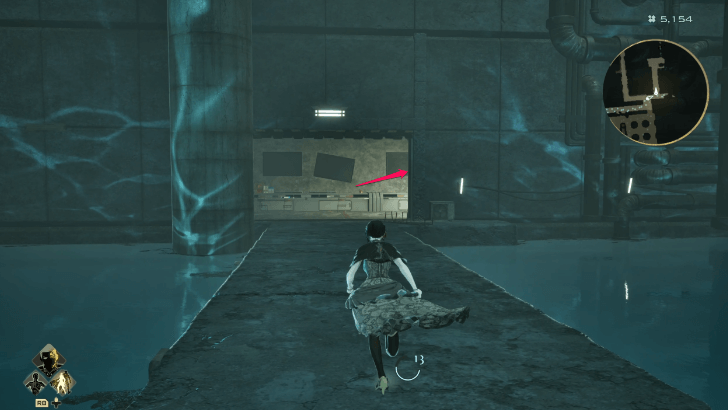 Go back to the central area north of the Map Jammer. Enter the room where you will encounter an enemy and find a purple item you can pick up. Tender Crimson Stone: Found north of the Map Jammer, opposite side of the Uncanny Stone location.
|
| 3 | 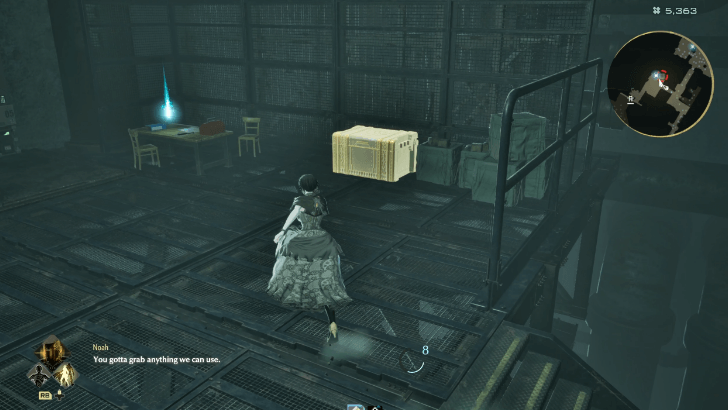 Head west near the Central Jammer, then go up the stairs. Go all the way to the top to find a chest and a Stone Vaccine. Glowing Haze: Found on the broken stairs, to the right of the second set of stairs on the way to the top floor.
Ancient Hunter's Greatsword: Found in a chest in the top area, after climbing all the stairs.
|
| 4 | 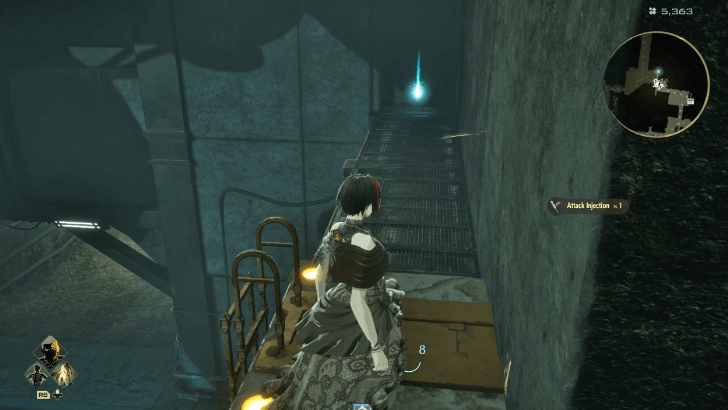 Head to the exit, located towards the left of the room, and you'll find a ladder that leads to the area next to the boss room. Pick up the blue item at the end of the platform before heading down. Attack Injection: Head right after exiting the room, and you'll find it in an area to the right, just before the ladder area.
Leak Vaccine: Found on the edge of the platform to the right of the ladder that leads to the area before the boss.
|
To the Forma Storage Tower
| Step | Objectives |
|---|---|
| 1 | 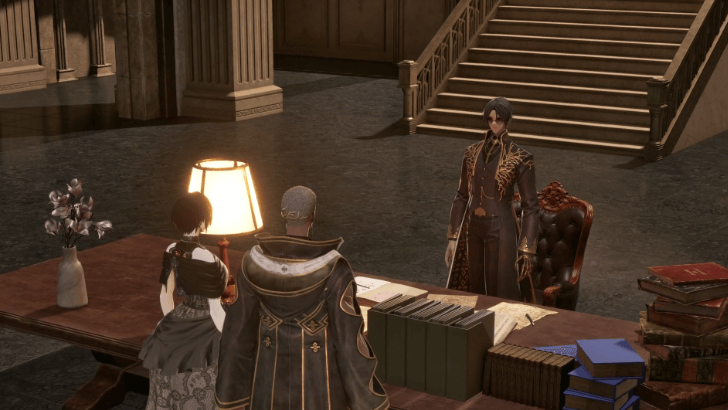 Head back to Magmell, and a brief cutscene will occur. Once your conversation with Valentin concludes, he will provide you with the key to the storage tower. |
| 2 | 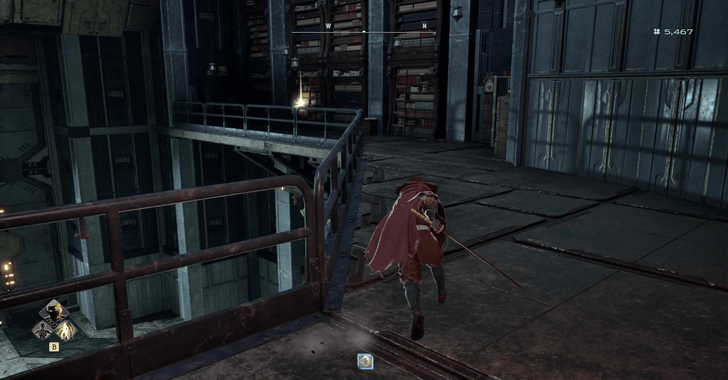 Head to the Storage Tower and use the stairs to head to the second level. Pick up the glowing item to complete the quest. Pathos-Weaving Forma: Can be found inside the forma storage tower in the MagMell of the Past |
Mastering Control of Time Bosses
Edward the Lost Corporal
 |
|||||||||||
| Boss Type | Related Quest | ||||||||||
|---|---|---|---|---|---|---|---|---|---|---|---|
| Mini Boss | Mastering Control of Time | ||||||||||
Edward the Lost Corporal can be found in the Ruins, where you'll need to complete the Motorcycle Mechanic's request. This boss can be found at the very top of the ruins.
Edward the Lost Corporal Fight Tips
- Move away from its Blood Attacks.
- Dodge forward to stay behind him.
Edward the Lost Corporal Boss Guide
Resurgence Abomination
 |
|||||||||||
| Boss Type | Related Quest | ||||||||||
|---|---|---|---|---|---|---|---|---|---|---|---|
| Mini Boss | Mastering Control of Time | ||||||||||
Resurgence Abomination can be found in the Water Treatment Plant, where you'll need to complete the Builder's request. This boss can be found at the very bottom of the dungeon.
Resurgence Abomination Fight Tips
- Use Defensive Formae to guard against its delayed attacks.
- Avoid dodging backwards to avoid follow-up hits.
Resurgence Abomination Boss Guide
Mastering Control of Time Rewards
Jails
 Bat Bat
|
Scaling | ||||||||||
|---|---|---|---|---|---|---|---|---|---|---|---|
|
|
 Reaper Reaper
|
Scaling | |||||||||
|
|
Weapons
 Ancient Hunter's Twin Blades Ancient Hunter's Twin Blades
|
 Ancient Hunter's Rune Blades Ancient Hunter's Rune Blades
|
 Ancient Hunter's Greatsword Ancient Hunter's Greatsword
|
Formae
 Statesman's Longbow Statesman's Longbow
|
||
| Category | Bequeathed Formae | |
|---|---|---|
| Ichor Consumption | 1 | |
 Bleeding Shield (Light) Bleeding Shield (Light)
|
||
| Category | Defensive | |
| Ichor Consumption | 0 | |
Items
| Vintage Brandy |
These are all the rewards you can get by doing Mastering Control of Time. The rewards listed above are the total earned as you progress through the quest and upon completing it.
Code Vein 2 Related Guides
| All Story Walkthroughs | |
|---|---|
| 1 | Follow Lou's Instructions |
| 2 | Mastering Control of Time |
| 3 | Timeline Shift Decision: Noah |
| 4 | Vanquishing the Heroes |
| 5 | Slaying the Hero Josee |
| 6 | Slaying the Hero Lyle |
| 7 | Slaying the Hero Holly |
| 8 | Timeline Shift Decision: Lyle |
| 9 | Timeline Shift Decision: Holly |
| 10 | Timeline Shift Decision: Josee |
| 11 | Slaying the Hero Zenon |
| 12 | Slaying the Hero Valentin |
| 13 | Timeline Shift Decision: Upheaval |
| 14 | Rescue Lou |
Comment
Author

Mastering Control of Time Quest Walkthrough and Rewards
Rankings
- We could not find the message board you were looking for.
Gaming News

![Monster Hunter Stories 3 Review [First Impressions] | Simply Rejuvenating](https://img.game8.co/4438641/2a31b7702bd70e78ec8efd24661dacda.jpeg/show)
![Marathon Cryo Archive Map Teased as [REDACTED] on Selection Screen](https://img.game8.co/4442236/6357203e58172f6de57f1991e7c39b22.png/thumb)


Popular Games

Genshin Impact Walkthrough & Guides Wiki
Umamusume: Pretty Derby Walkthrough & Guides Wiki
Pokemon Pokopia Walkthrough & Guides Wiki
Honkai: Star Rail Walkthrough & Guides Wiki
Monster Hunter Stories 3: Twisted Reflection Walkthrough & Guides Wiki
Arknights: Endfield Walkthrough & Guides Wiki
Wuthering Waves Walkthrough & Guides Wiki
Zenless Zone Zero Walkthrough & Guides Wiki
Pokemon TCG Pocket (PTCGP) Strategies & Guides Wiki
Monster Hunter Wilds Walkthrough & Guides Wiki


Recommended Games
Diablo 4: Vessel of Hatred Walkthrough & Guides Wiki
Cyberpunk 2077: Ultimate Edition Walkthrough & Guides Wiki
Fire Emblem Heroes (FEH) Walkthrough & Guides Wiki
Yu-Gi-Oh! Master Duel Walkthrough & Guides Wiki
Super Smash Bros. Ultimate Walkthrough & Guides Wiki
Pokemon Brilliant Diamond and Shining Pearl (BDSP) Walkthrough & Guides Wiki
Elden Ring Shadow of the Erdtree Walkthrough & Guides Wiki
Monster Hunter World Walkthrough & Guides Wiki
The Legend of Zelda: Tears of the Kingdom Walkthrough & Guides Wiki
Persona 3 Reload Walkthrough & Guides Wiki


All rights reserved
© Bandai Namco Entertainment America Inc. All third party content, brands, names, and logos are used under license and remain property of their respective owners. All rights reserved.
The copyrights of videos of games used in our content and other intellectual property rights belong to the provider of the game.
The contents we provide on this site were created personally by members of the Game8 editorial department.
We refuse the right to reuse or repost content taken without our permission such as data or images to other sites.