Slaying the Hero Josee Quest Walkthrough and Rewards
☆ Get 100,000 Haze with our Haze Farming Guide!
★ Story Walkthrough | Requests
☆ Gear up with our best Weapons | Partners | Blood Codes | Jails | Formae!
★ Obtain the best outcomes with our Choices Guide!
This is a walkthrough for the Slaying the Hero Josee quest in Code Vein 2. See this detailed guide to check out quest objectives and what rewards you receive upon completion.
List of Contents
How to Unlock Slaying the Hero Josee
Obtained During Vanquishing the Heroes
| Location | Sunken City |
|---|---|
| Unlock Requirements | ・Begin Vanquishing the Heroes |
Slaying the Hero Josee quest is obtained during Vanquishing the Heroes quest, which is after either Mastering Control of Time or Timeline Shift Decision: Noah. After you complete the prerequisite tasks, head to the Clock Tower (Josee's Outpost) in the Sunken City to reach her cocoon.
Vanquishing the Heroes Quest Walkthrough
Related Quests
| Main Story | ・Slaying the Hero Holly
・Timeline Shift Decision: Holly ・Timeline Shift Decision: Josee |
|---|
After you complete this quest, Josee's Fading Bond will appear. However, you cannot access this bond without progressing Timeline Shift Decision: Holly.
You need to obtain Lise's Hair Ornament near the end of Timeline Shift Decision: Holly to successfully interact with Josee's Fading Bond.
How to Repair Josee's Fading Bond
Slaying the Hero Josee Walkthrough
| Slaying the Hero Josee Objectives | |
|---|---|
| 1 | Searching for Josee's Cocoon ┗ Boss Battle: Mutated Survivor Bernd |
| 2 | Siezed Substation ┗ Boss Battle: Darkborn Leader |
| 3 | Sunken Pylon ┗ Boss Battle: Metagen Remnant |
| 4 | Unsealing Josee's Cocoon ┗ Boss Battle: Josee the Blind Hero |
Click on any of the links above to jump to the section!
Searching for Josee's Cocoon
| Step | Objectives |
|---|---|
| 1 | 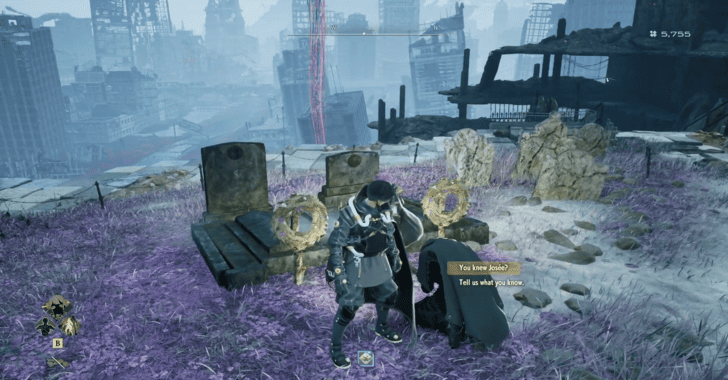 After crossing the bridge to the Sunken City, continue heading up the long ramp until you reach a cemetery on the left side of the path. Speak to the Elderly Revenant to obtain a clue about Josee. ┗ How to Get to the Sunken City |
| 2 | 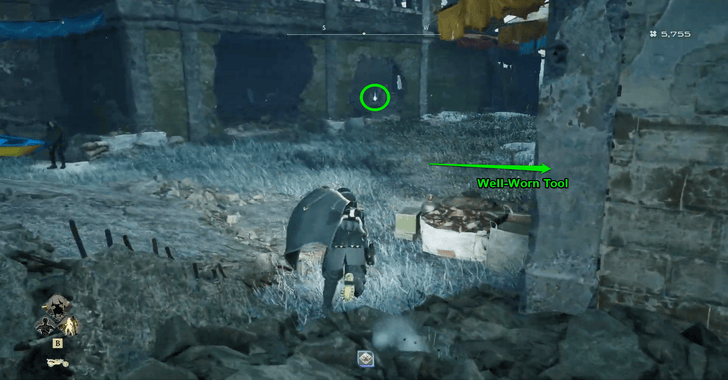 Use the staircase from the cemetery to head down and reach the Refugee Village. Pure Platinum 1: Can be found in the building on the right of the staircase.
Well-Worn Tool: Can be found in the building on the left of the staircase. |
| 3 | 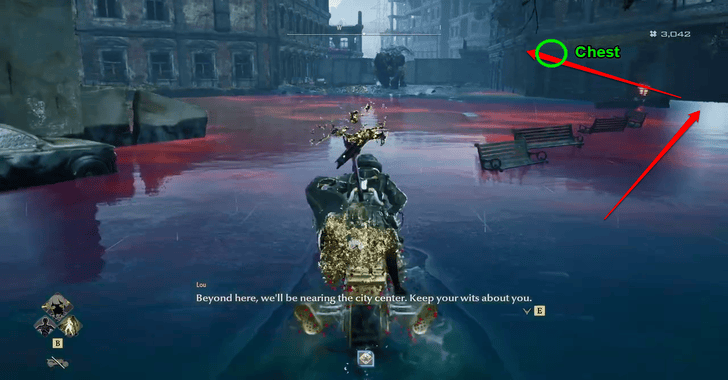 Continue through the path from the Refugee Village mistle until you reach an area guarded by a Lost Ape. You can fight the ape for Haze or take the path on the right to bypass the fight. Phantom Assault Forma: Found in the building on the right of the Lost Ape area. |
| 4 | 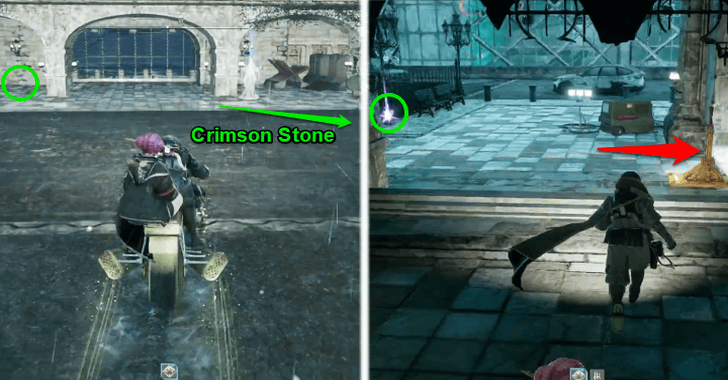 Continue through the path from ape until you reach the Clock Tower (Josee's Outpost). Afterwards, enter the outpost through the elevator found on the left side of the building. Tender Crimson Stone 1: Found under the first mistle you encounter in Josee's Outpost.
Pure Platinum 2: Found behind the columns to the left of the mistle in Josee's Outpost.
Tender Light Stone 1: Found in front of the elevator. |
| 5 | After reaching the top floor, navigate the hallways to reach the ladder leading down to the underground railway. The first hallway has 3 enemies; be careful with the last enemy in this location as it deals higher damage compared to the normal ones. |
| 6 | 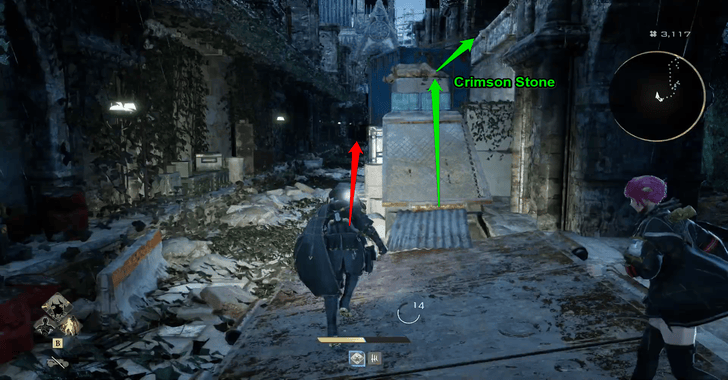 The second hallway has no enemies and directly leads you to the last hallway. However, be sure to check alternate paths as they can lead to valuable items. Tender Crimson Stone 1: Found on a stone slab above the first corridor, accessible through the crates stacked in the second hallway. |
| 7 | 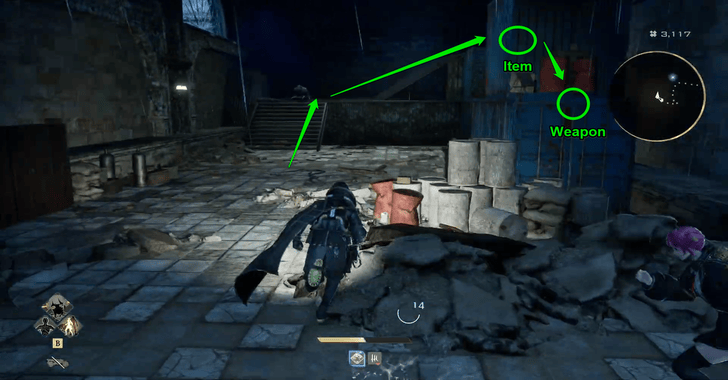 After reaching the last hallway, take a turn to the right to obtain the Cursed Black Blade Killer and the Aromatic Herbal Tea. Afterwards, return to the junction and proceed to the left path to find a Succubus near the ladder leading ot the second mistle. Aromatic Herbal Tea: Found on a ledge above the crates on the right side of the last hallway.
Cursed Black Blade Killer: Obtained after dropping down from the ledge where you obtain the Aromatic Herbal Tea. |
| 8 | 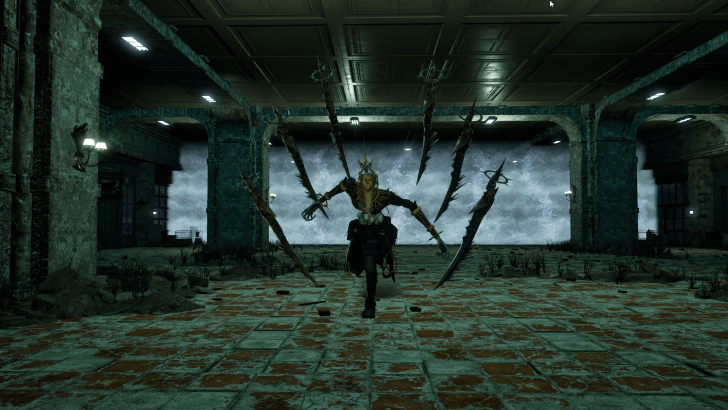 From the second mistle, head straight down the stairs to obtain the Stinger Jail. Afterwards, you can choose the left or right path to reach the boss room on the other end, then fight and defeat Mutated Survivor Bernd. Pure Platinum 2: Obtained from the wrecked train on the left path from the mistle.
Augmented Revenant Spinal Cord 1: Dropped by Mutated Survivor Brend after defeat. |
| 9 | 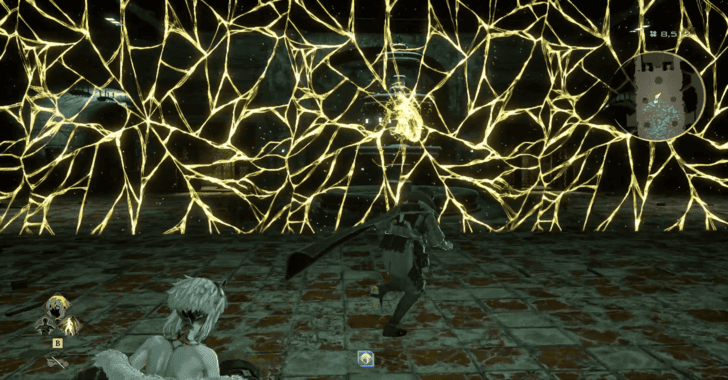 After defeating the boss, interact with the webbed Golden Heart and follow the bond. Proceed through the memories of the Sunken City's past. Afterwards, choose any elevator to reach Josee's Cocoon. |
| 10 | 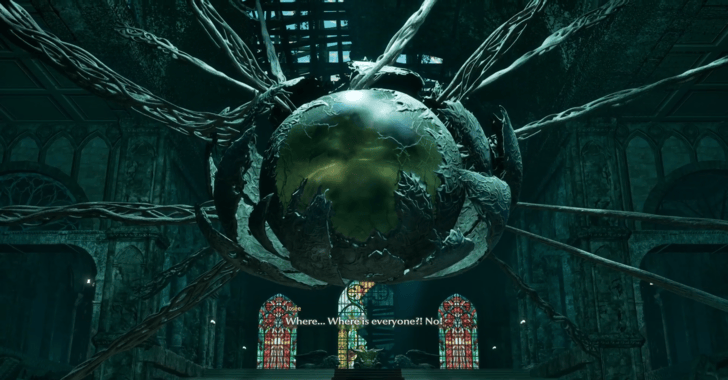 Interact with the bond directly under the Cocoon to travel back in time. Then use the stairs on the right side of your spawn point to reach Josee's quarters. After the cutscenes, Josee will ask you to clear the Seized Substation. |
Siezed Substation
| Step | Objectives |
|---|---|
| 1 | 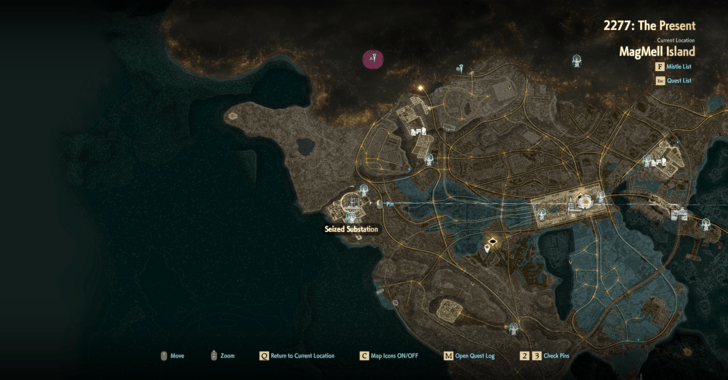 Head to the Siezed Substation found directly to the western direction of Josee's Outpost. Cookbook: Found inside the substation, near a rusted truck to the left of the substation entrance. |
| 2 | 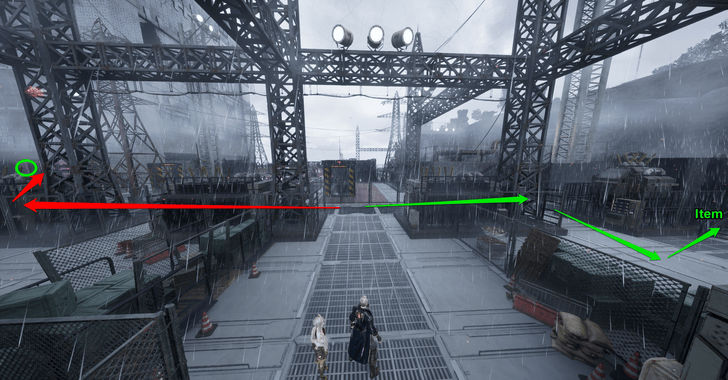 Make your way through the power grid by finding the entrances to each fence. You can pass through the first section of the substation by taking the left-most path. Tender Crimson Stone 1: Found above a staircase to the right of the power grid just before the first fence.
Umbral Shift: Found in a chest in the left-most path among the garbage dump. |
| 3 | 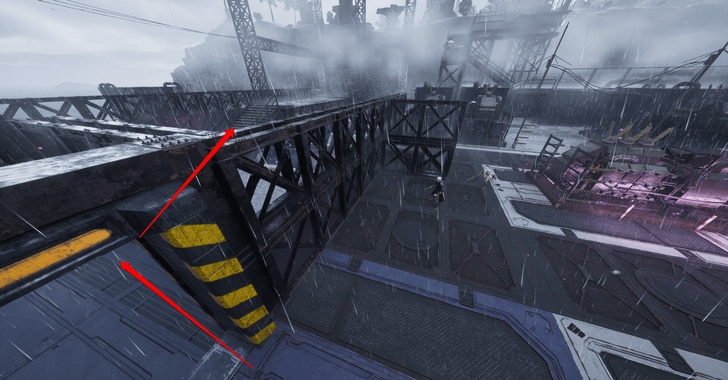 After crossing through the doorway with hazard painting, turn left to avoid the electric grid until you pass through another hazard door that leads to an elevated path. |
| 4 | 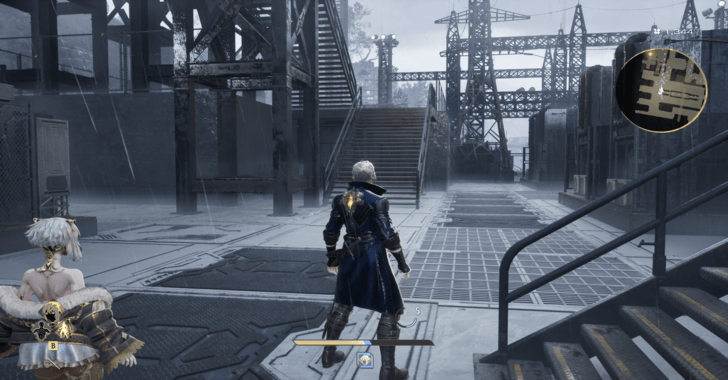 Use the elevated path to avoid the electrocuted floor, then take the stairs on your right; following this path should allow you to reach the Hazard door that leads to the Turbine Control Zone mistle. |
| 5 | 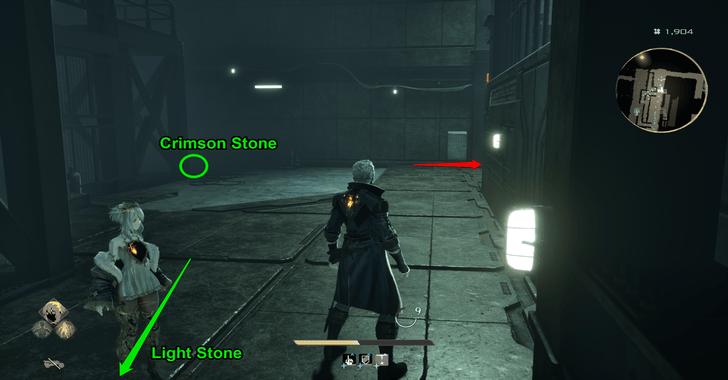 From the mistle, take the staircase that leads down, then take the path to the left and follow it until you reach a hazard door. Tender Light Stone 2: Found in the right corner below the staircase from the mistle.
Tender Crimson Stone 2: Found in the left corner below the staircase from the mistle in front of the path leading to the next area.
Pure Platinum 3: Obtained after passing through the hazard door, found on the left side. |
| 6 | 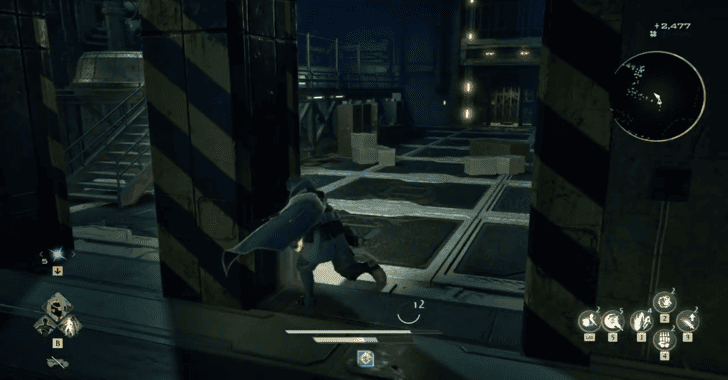 From the Hazard Door where you obtain a Pure Platinum 3, simply follow the path until you reach a storage room where a cutscene with Josee will play. After the cutscene, use the elevator to reach the surface level. |
| 7 | 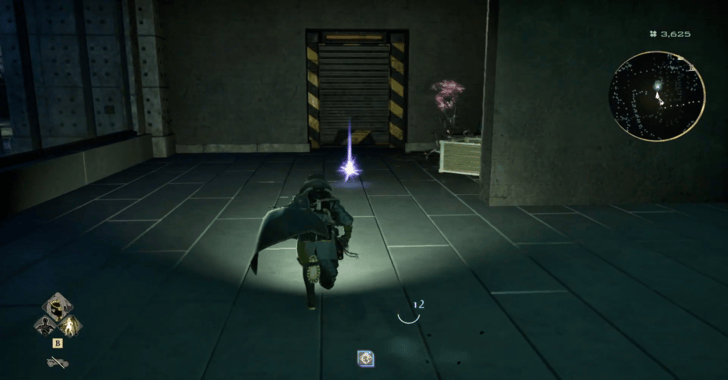 After reaching the surface level, proceed through the linear path until you reach a dead end. On your right, you'll find the map jammer for the substation. Uncanny Stone: Found beside the Map Jammer. |
| 8 | Return to the room with the elevators (just before the Map Jammer), and use one of the elevators to reach the upper levels. |
| 9 | 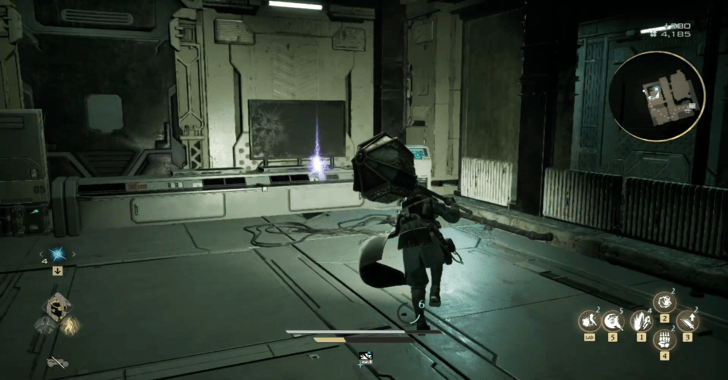 After using the elevator, make a right in the hallway and use the stairs from the second room on your left. Premium Cigar: Found above the control panel just beside the stairs.
Bottled Beer: Found inside the room on the right from the hallway. |
| 10 | 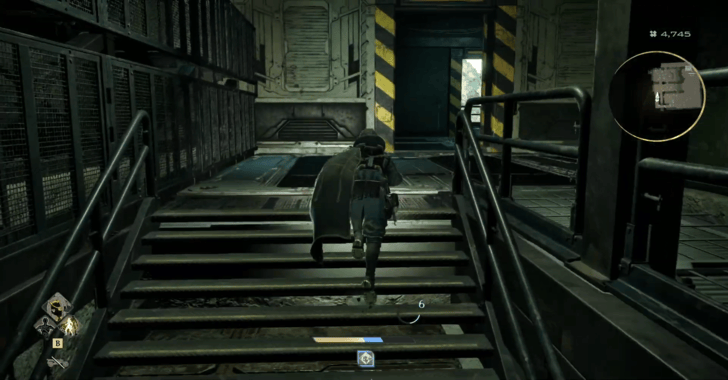 After climbing the stairs, follow the hazard doors that lead outside until you circle back to the staircase leading to the boss room, where you'll fight the Darkborn Leader. VK Longsword: Obtained in a chest which can be found beside the stairs.
Tender Crimson Stone 3: Found beside the stars, just in front of the mistle before the boss room.
Ivy Jail: Found in a chest in the control room after defeating the Darkborn Leader. |
| 11 | Return to Josee's Outpost and head up to Josee's quarters, where you'll be informed of the need to take the Sunken Pylon. |
Sunken Pylon
| Step | Objectives |
|---|---|
| 1 | 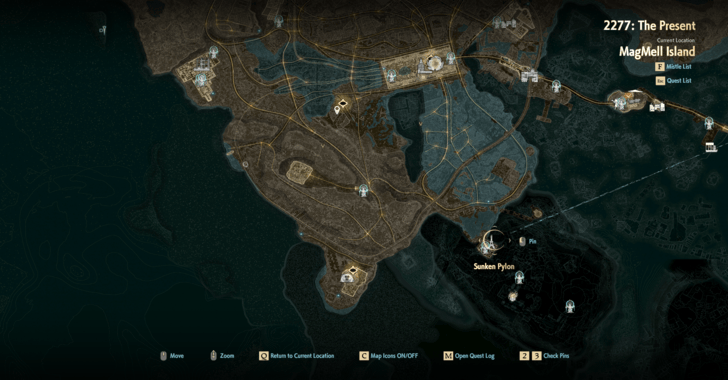 Head to the Sunken Pylon found directly to the southern direction of Josee's Outpost. |
| 2 | Upon arrival, activate the elevator near the door with glowing frames to reach the Mall below the Pylon mistle. |
| 3 | After reaching the mall, proceed with Josee and Lise's memories, then head down the escalator to the left of the mistle. |
| 4 |  After heading down the escalator, take a right on the bridge to reach the mall lobby. Tender Crimson Stone 2: Obtained in the room beside the bridge. Head straight after going down the escalator to reach the room.
Power Shot: Turn right after crossing the bridge to find the chest containing this item.
Classic Comic (Romance): Turn right, left, crossing the bridge to find this item near a ledge. |
| 5 | 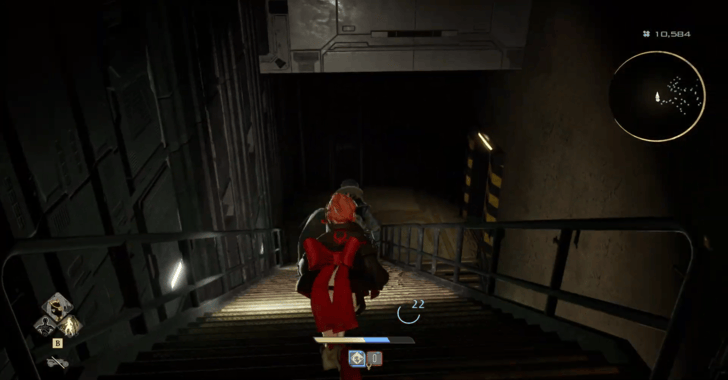 Proceed through the hazard door and make your way down the stairs until you reach another bridge that triggers a cutscene with Lise's illusion. Tender Crimson Stone 2: Obtained in the hazard door room after heading down the first set of stairs.
Tender Crimson Stone 2: Found on the left side of the bridge after crossing. |
| 6 | 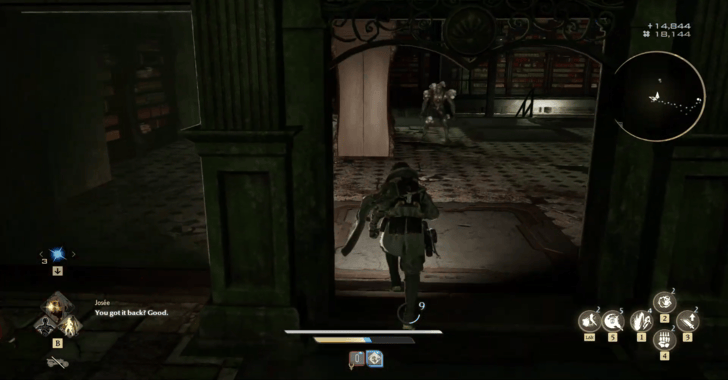 After crossing the bridge, make your way through the hazard door and follow its path until you reach the room with bookshelves. |
| 7 | 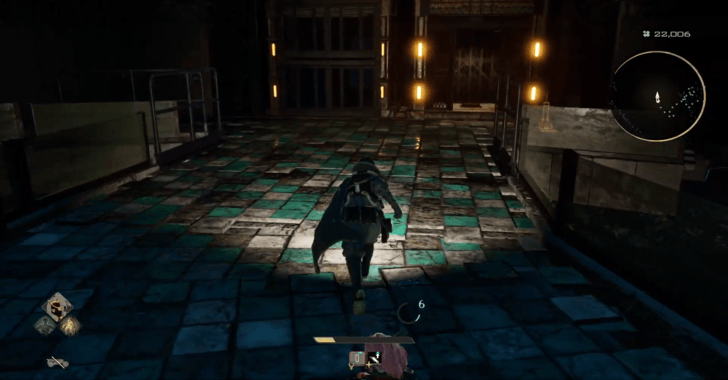 hr]
Make your way down the library until you reach the escalator. A nearby elevator unlocks a shortcut to the mistle above. To push through the mall, continue heading down the set of stairs until you reach a pathos. hr]
Make your way down the library until you reach the escalator. A nearby elevator unlocks a shortcut to the mistle above. To push through the mall, continue heading down the set of stairs until you reach a pathos.
Hound Jail: Obtained after using the elevator for the shortcut to the Mall below the Pylon mistle. |
| 8 | 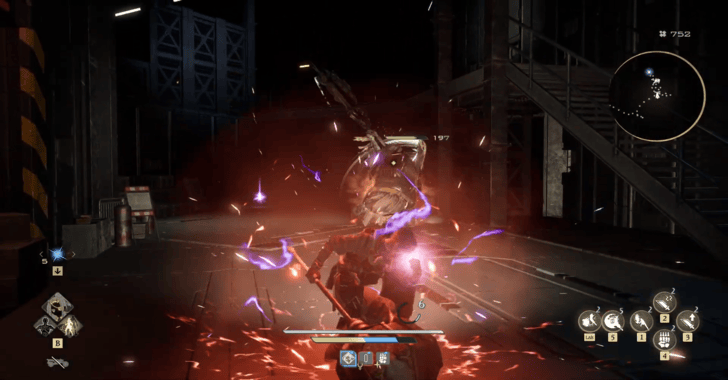 Interact with the pathos and proceed through the memory to unlock the bridge path. Afterwards, cross the bridge but take a right on the hanging pipes to access the next area with a bishop enemy. Pure Platinum 3: Found on the hanging pipes.
Heat Remnant 2:Found in the corner of the room where you fight a bishop enemy.
Uncanny Stone: Found near a ledge where you drop down after taking the stairs from the area of the bishop. |
| 9 | 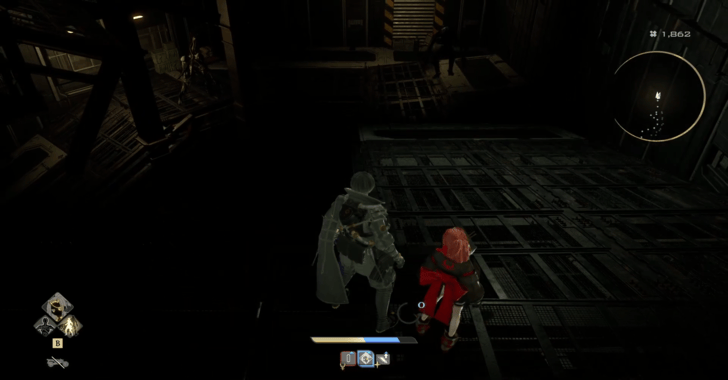 Drop down to the next area, then follow the hazard doors to make your way down until you reach a bridge that leads to a map jammer. |
| 10 | 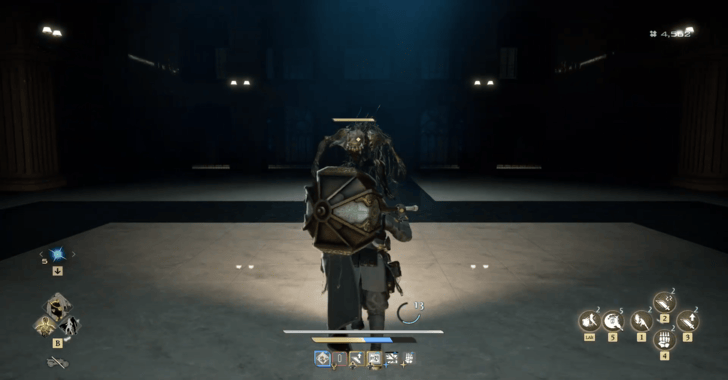 After crossing the bridge, defeat the enemy in the room with marble flooring to gain the key to the lower levels. Afterwards, use the key to unlock the door and use the elevator to delve deeper. Bloody Impact: Found in a chest to the right of the elevator after defeating the enemy in the marble room. |
| 11 |
When you've reached the lower levels, interact with another pathos and proceed through the memory to unlock the path moving forward.
Tender Crimson Stone 2: Found in the right corner after you exit the elevator. |
| 12 | 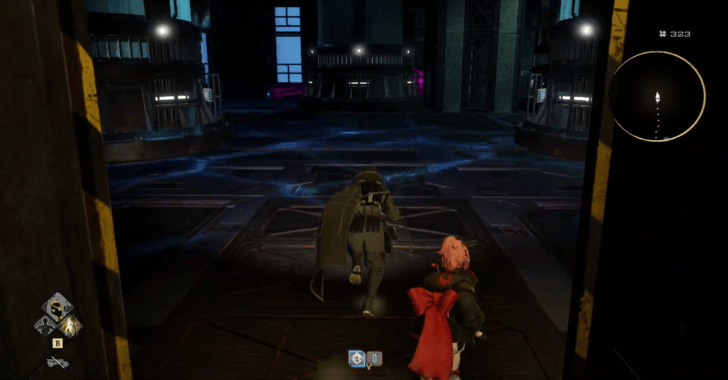 After interacting with the pathos, proceed through the linear path until you reach a mistle. From the mistle, follow the hazard doors until you reach the tube section. Golden Nectar: Found in the left corner of the room after the mistle.
Tender Crimson Stone 2: Found in the hallway just before reaching the tube section. |
| 13 | 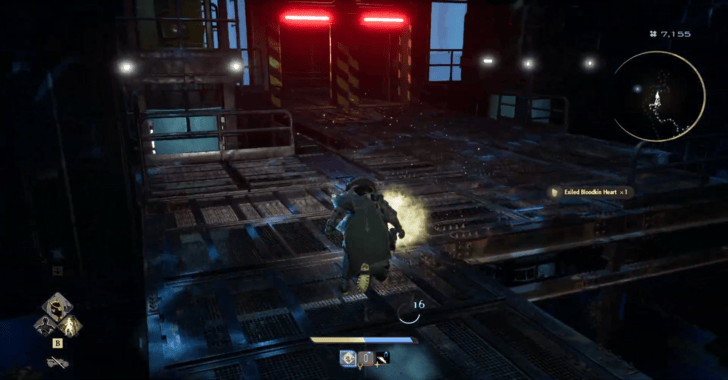 Cross the bridge in the tube section to reach the next area. Keep in mind of the ladders you can use in case you fall. Breath of Venom x3: Found in a chest below the tube section, guarded by a Succubus. |
| 14 | 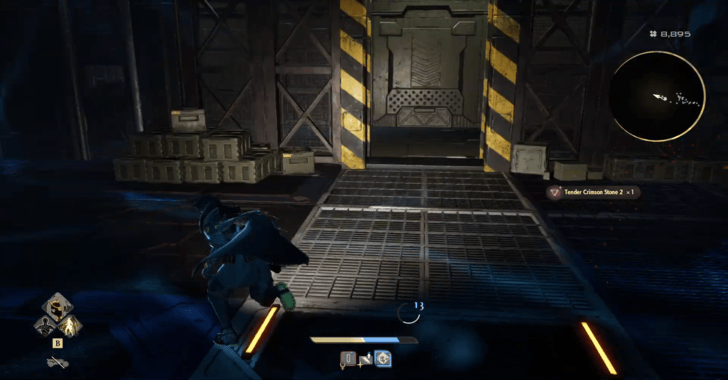 After crossing the tube section, follow the path until you reach a large room. Look for a door on the right side that leads to the walkways and map jammer above. Tender Crimson Stone 2: Found in front of the door on the right side of the large room.
Pure Platinum 2: Found below the map jammer. |
| 15 | 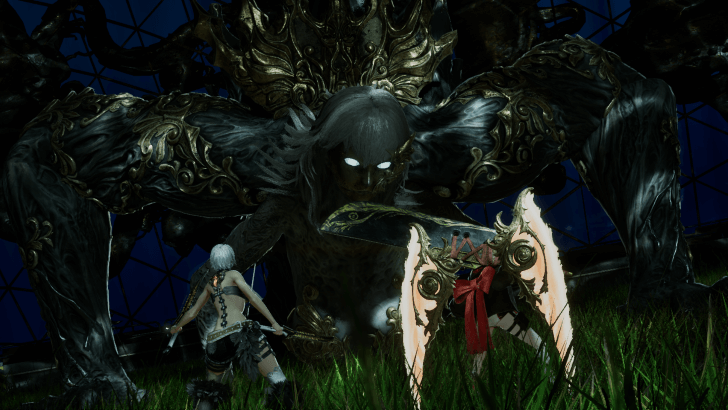 After dropping down from the map jammer, proceed through the hazard door, and another illusion of Lise will appear, which will be followed by a memory. Proceed through the memory and cutscenes, then head to the large area to fight the Metagen Remnant.
Glutton's Eyes: Obtained after defeating the Metagen Remnant. |
| 16 | Speak with Lou through a mistle, then speak to Josee afterwards to complete your quest. Interact or teleport to the Bond of Returning to return the present. |
Unsealing Josee's Cocoon
| Step | Objectives |
|---|---|
| 1 | 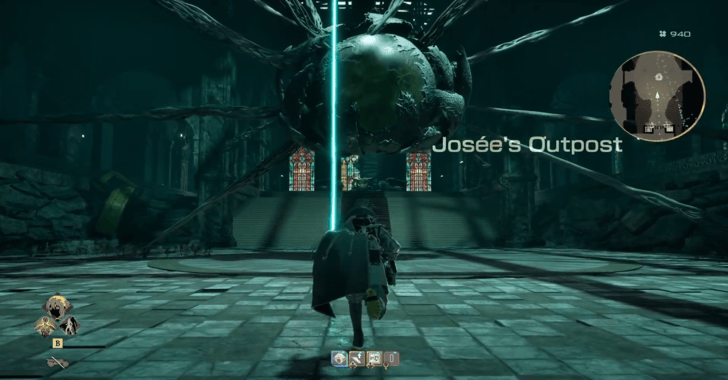 Teleport back to Josee's Outpost and interact with the Cocoon to unseal Josee. |
| 2 | 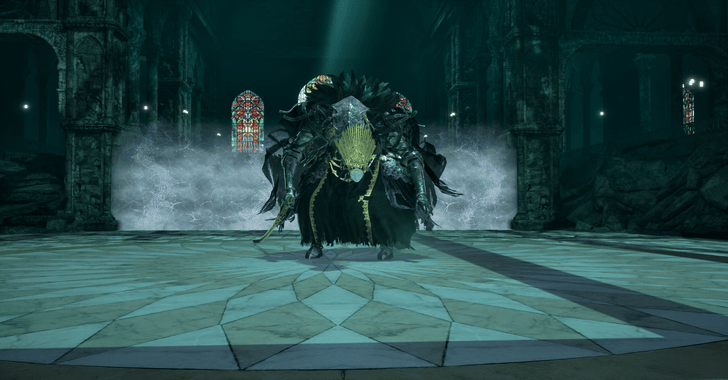 Fight and defeat Josee the Blind Hero and proceed with her memories to complete the questline. |
Slaying the Hero Josee Bosses
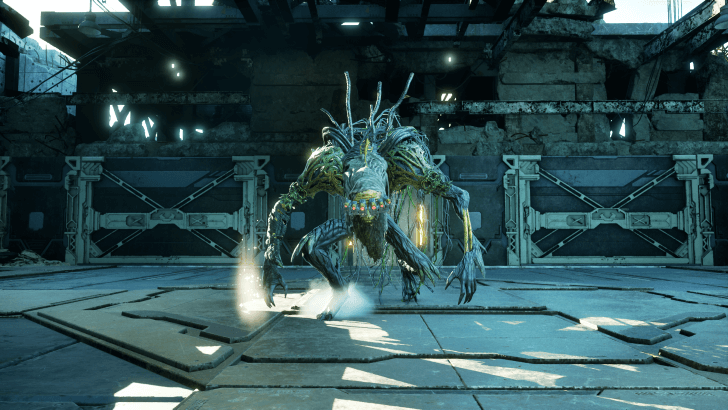
Mutated Survivor Bernd
|
|||||||||||
| Boss Type | Location | ||||||||||
|---|---|---|---|---|---|---|---|---|---|---|---|
| Mini Boss | Sunken City | ||||||||||
The Mutated Survivor Bernd is a boss you'll encounter in Josee's Outpost. You need this boss to reach Josee's cocoon in the outpost.
Mutated Survivor Bernd Fight Tips
- Parry the melee attacks to make him vulnerable to attacks.
- Use your Partner to draw the aggression of the boss to create a window to recover.
Mutated Survivor Bernd Boss Guide
Darkborn Leader
 |
|||||||||||
| Boss Type | Location | ||||||||||
|---|---|---|---|---|---|---|---|---|---|---|---|
| Mini Boss | Sunken City | ||||||||||
The Darkborn Leader is a boss you'll encounter in the Seized Substation. You need this boss to retake control over the Seized Substation.
Darkborn Leader Fight Tips
- Jump and dodge his lightning attacks as much as you can.
- Utilize your Partner to continue doing damage to the boss.
Metagen Remnant
|
|||||||||||
| Boss Type | Location | ||||||||||
|---|---|---|---|---|---|---|---|---|---|---|---|
| Mini Boss | Sunken City | ||||||||||
The Metagen Remnant is a boss you'll encounter in the Sunken Pylon. You need to defeat this boss to obtain the Glutton's Eyes Runeblade, which is needed for Josee the Blind Hero.
Metagen Remnant Fight Tips
- Aim for its head for higher damage.
- Patiently wait for openings before striking.
- This boss has a fixed moveset, which makes it easy to remember.
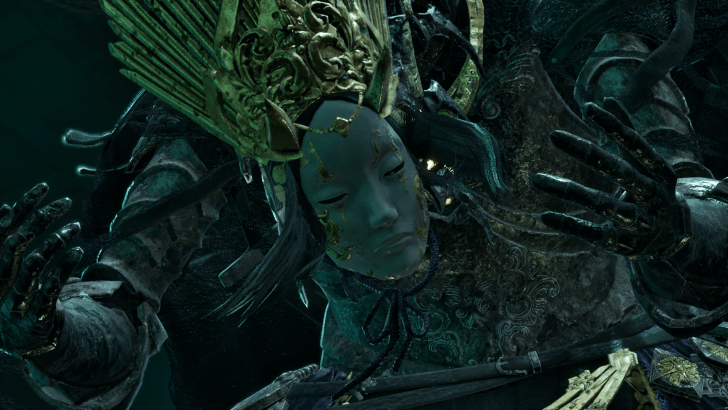
Josee the Blind Hero
 |
|||||||||||
| Boss Type | Location | ||||||||||
|---|---|---|---|---|---|---|---|---|---|---|---|
| Main Boss | Sunken City | ||||||||||
Josee the Blind Hero is the final boss encounter for this quest. You need to obtain Glutton's Eyes from the past to unseal her cocoon and fight her.
Josee the Blind Hero Fight Tips
- Try to parry most attacks for more openings.
- Stay behind her when she does her sheath stance.
- Adapt to her speed and aggression.
Josee the Blind Hero Boss Guide
Slaying the Hero Josee Rewards
| ・Josee the Blind Hero Blood Code ・Glutton's Eyes Rune Blade |
These are all the rewards you can get by doing Slaying the Hero Josee. The rewards listed above are the total earned as you progress through the quest and upon completing it.
Blood Codes
 Josee the Blind Hero Josee the Blind Hero
|
Bloodline | Gula | |||
|---|---|---|---|---|---|
| Rank |
|
||||
| Bleed Factor | 43 | ||||
| Max Ichor | 16 | ||||
| Balance | 68 |
Weapons
 Glutton's Eyes Glutton's Eyes
|
These are all the rewards you can get by doing Slaying the Hero Josee. The rewards listed above are the total earned as you progress through the quest and upon completing it.
Code Vein 2 Related Guides
| All Story Walkthroughs | |
|---|---|
| 1 | Follow Lou's Instructions |
| 2 | Mastering Control of Time |
| 3 | Timeline Shift Decision: Noah |
| 4 | Vanquishing the Heroes |
| 5 | Slaying the Hero Josee |
| 6 | Slaying the Hero Lyle |
| 7 | Slaying the Hero Holly |
| 8 | Timeline Shift Decision: Lyle |
| 9 | Timeline Shift Decision: Holly |
| 10 | Timeline Shift Decision: Josee |
| 11 | Slaying the Hero Zenon |
| 12 | Slaying the Hero Valentin |
| 13 | Timeline Shift Decision: Upheaval |
| 14 | Rescue Lou |
Comment
Author

Slaying the Hero Josee Quest Walkthrough and Rewards
Rankings
- We could not find the message board you were looking for.
Gaming News


![Monster Hunter Stories 3 Review [First Impressions] | Simply Rejuvenating](https://img.game8.co/4438641/2a31b7702bd70e78ec8efd24661dacda.jpeg/thumb)
Popular Games

Genshin Impact Walkthrough & Guides Wiki
Umamusume: Pretty Derby Walkthrough & Guides Wiki
Pokemon Pokopia Walkthrough & Guides Wiki
Honkai: Star Rail Walkthrough & Guides Wiki
Monster Hunter Stories 3: Twisted Reflection Walkthrough & Guides Wiki
Arknights: Endfield Walkthrough & Guides Wiki
Wuthering Waves Walkthrough & Guides Wiki
Zenless Zone Zero Walkthrough & Guides Wiki
Pokemon TCG Pocket (PTCGP) Strategies & Guides Wiki
Monster Hunter Wilds Walkthrough & Guides Wiki


Recommended Games
Diablo 4: Vessel of Hatred Walkthrough & Guides Wiki
Cyberpunk 2077: Ultimate Edition Walkthrough & Guides Wiki
Fire Emblem Heroes (FEH) Walkthrough & Guides Wiki
Yu-Gi-Oh! Master Duel Walkthrough & Guides Wiki
Super Smash Bros. Ultimate Walkthrough & Guides Wiki
Pokemon Brilliant Diamond and Shining Pearl (BDSP) Walkthrough & Guides Wiki
Elden Ring Shadow of the Erdtree Walkthrough & Guides Wiki
Monster Hunter World Walkthrough & Guides Wiki
The Legend of Zelda: Tears of the Kingdom Walkthrough & Guides Wiki
Persona 3 Reload Walkthrough & Guides Wiki


All rights reserved
© Bandai Namco Entertainment America Inc. All third party content, brands, names, and logos are used under license and remain property of their respective owners. All rights reserved.
The copyrights of videos of games used in our content and other intellectual property rights belong to the provider of the game.
The contents we provide on this site were created personally by members of the Game8 editorial department.
We refuse the right to reuse or repost content taken without our permission such as data or images to other sites.