All Map Jammer Locations
☆ Get 100,000 Haze with our Haze Farming Guide!
★ Story Walkthrough | Requests
☆ Gear up with our best Weapons | Partners | Blood Codes | Jails | Formae!
★ Obtain the best outcomes with our Choices Guide!
Map Jammers reveal sections of the map in Code Vein 2. See a map and a checklist of all the overworld Map Jammer locations and how to get to them to unlock the map.
List of Contents
Map Jammer Locations Map
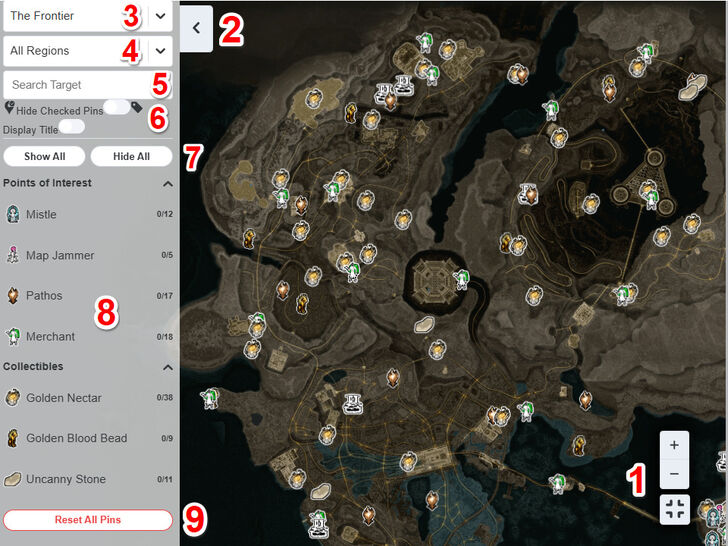
Interactive Map
 | ||
| # | Feature | Description |
|---|---|---|
| 1 | Fullscreen, Zoom In, and Zoom Out | Toggles fullscreen mode. The plus and minus buttons zooms the map in or out. |
| 2 | Show/Hide Sidebar | Show or hides the Sidebar on the left side of the map |
| 3 | Map Name | Select between a selection of maps. |
| 4 | Select Region | Choose a specific region to only show the map pins in that area. |
| 5 | Search Bar | Returns any map pins whose titles or descriptions contains the searched term. |
| 6 | Hide/Show Collected Pins and Display Pin Titles | The first option is a toggle that hides any map pins you’ve marked as collected. The second option shows the titles of all present map pins. |
| 7 | Show/Hide All Pins | Buttons that show or hide all the possible map pins. |
| 8 | Map Pin Categories | Select a certain category of pins to show or hide. |
| 9 | Reset All Pins | Resets all you're marked pins to the default unmarked option. Cannot be undone after confirming. |
Map Legend
| - |
List of Map Jammer Locations
| Map Jammers by Region | |
|---|---|
| MagMell Island | Sunken City |
| Corroded Scar | Undead Forest |
| Insula Carcere | - |
MagMell Island
| ✔️ | Overworld Location | Map Location |
|---|---|---|
 |
 |
|
|
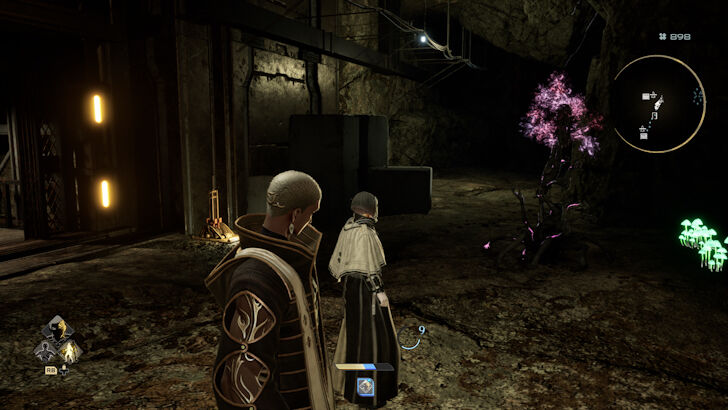
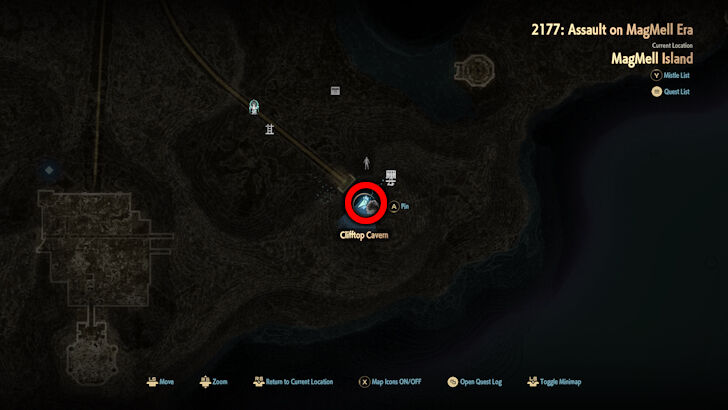
Region/Area:
Clifftop Cavern -
MagMell Island
How to Get: Underground. Found after using the elevator and opening the door. Innaccessible for a time after completing Timeline Shift Decision: Noah |
||
 |
 |
|
|
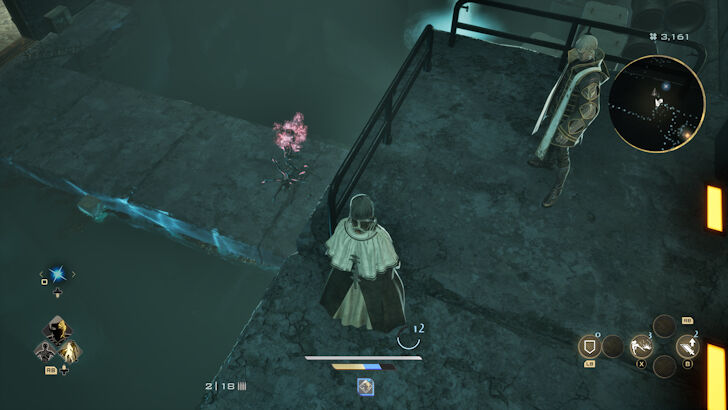
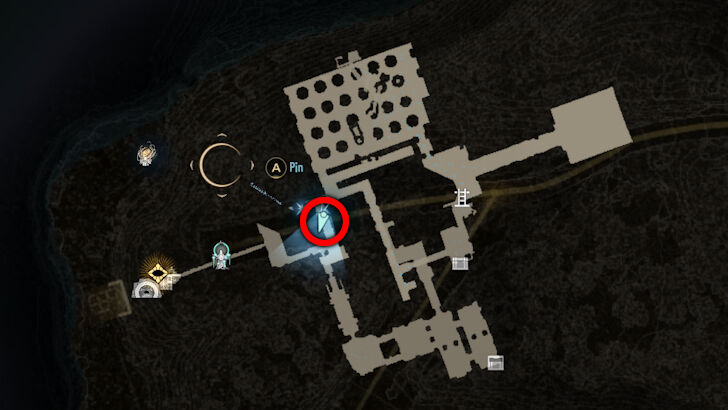
Region/Area:
Water Treatment Plant -
MagMell Island
How to Get: Underground. In the main water channel, jump down from the platform to the bridge where the jammer is. |
||
 |
 |
|
|
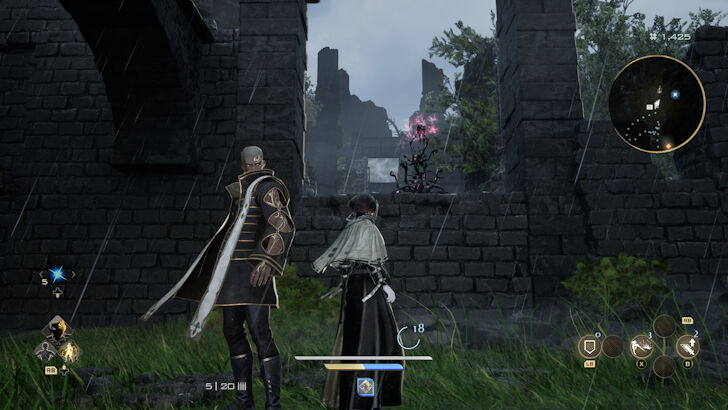
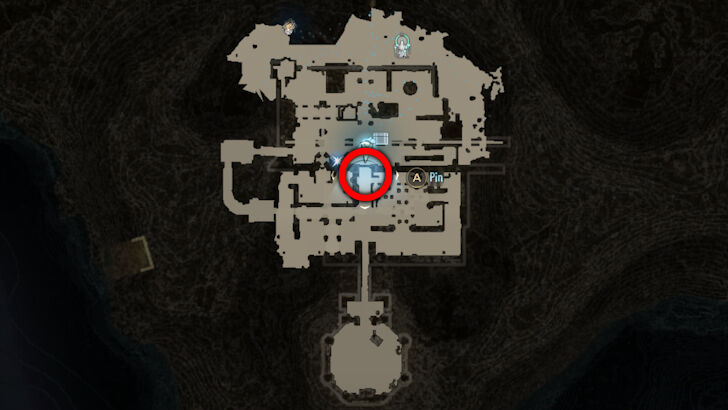
Region/Area:
Ruins -
MagMell Island
How to Get: Use a ranged weapon to take down the jammer in the middle of the ruins early. |
||
 |
 |
|
|
Region/Area:
East Bay Underground Ruins -
MagMell Island
How to Get: Underground. On the ramp just before the ladder shortcut. |
||
 |
 |
|
|
Region/Area:
Cliff Underground Ruins -
MagMell Island
How to Get: Underground. Found at the end of the dungeon just before the second elevator. |
||
MagMell Island 100% Exploration Guide
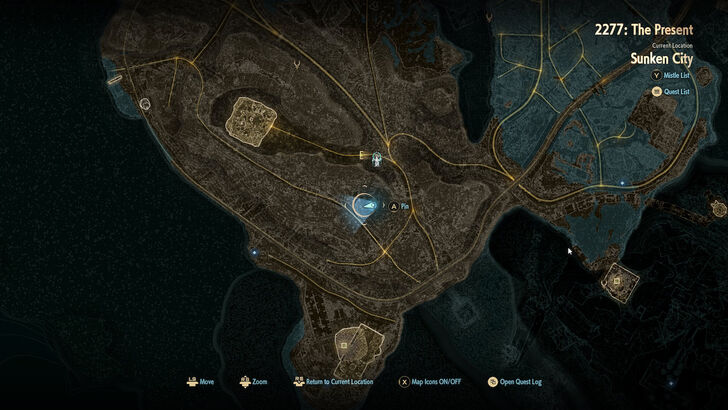
Sunken City
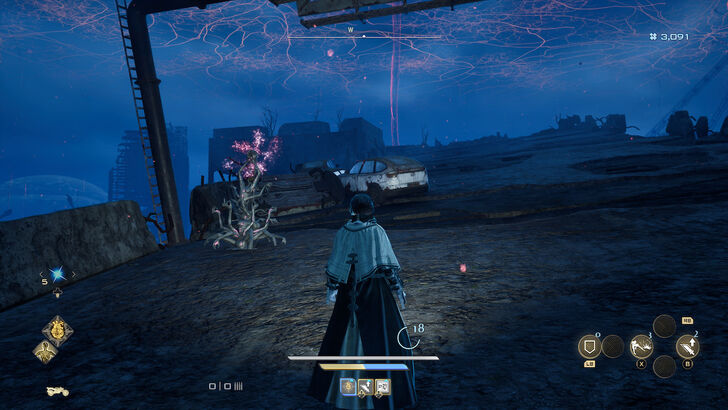
| Map Jammer Visual Guide | |
|---|---|
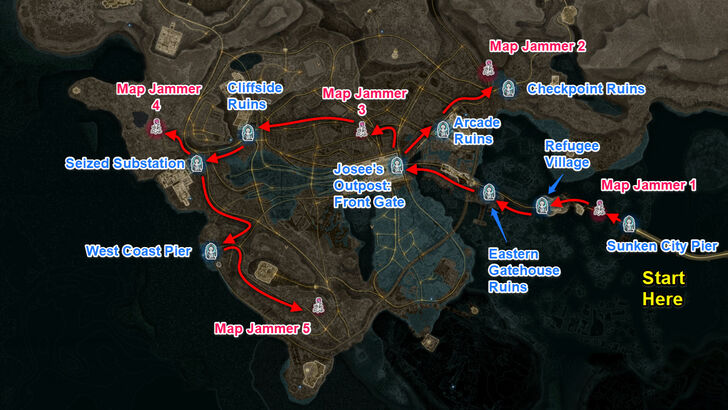 Sunken City |
|
| ✔️ | Overworld Location | Map Location |
|---|---|---|
 |
 |
|
|
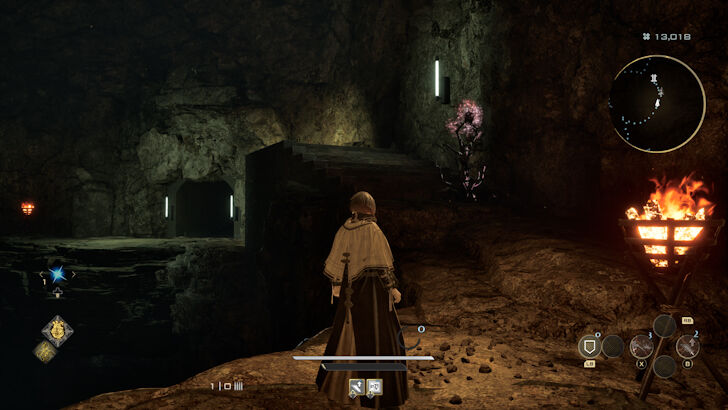
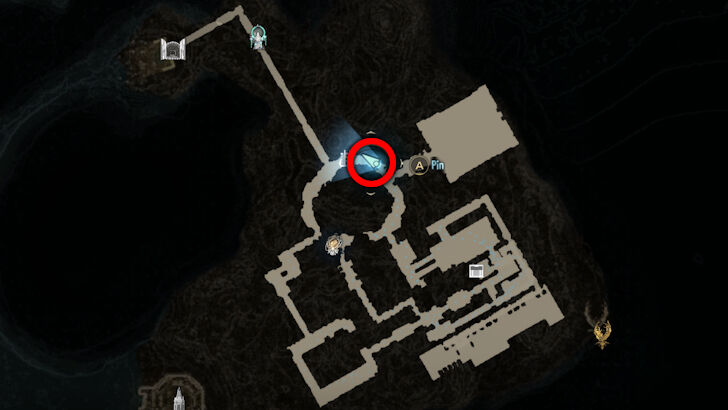
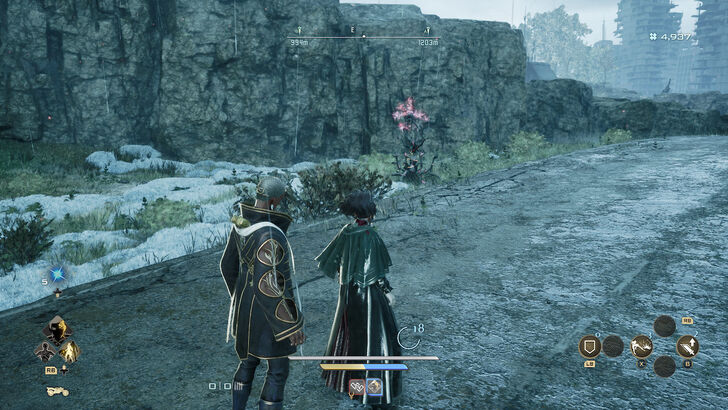
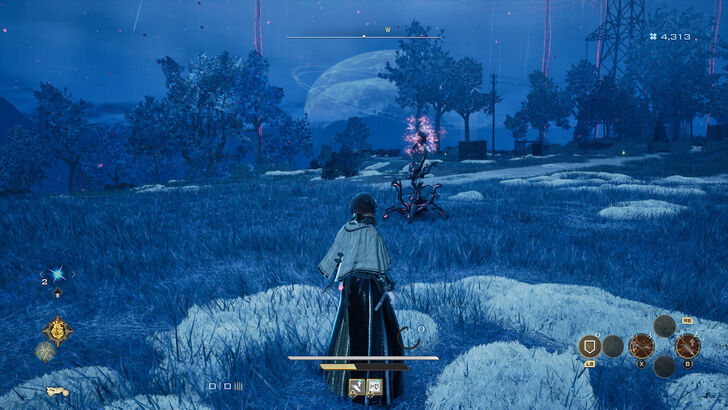
Region/Area:
Sunken City
How to Get: After reaching the Sunken City through the bridge or the pier, you'll find this Map Jammer on the road west of the Sunken City Pier Mistle. |
||
 |
 |
|
|
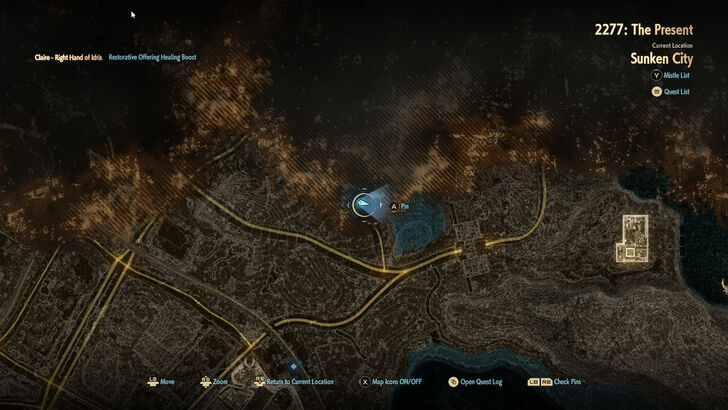
Region/Area:
Sunken City
How to Get: From the Josee's Outpost Mistle, head north then turn left. Take the next right turn and keep left until you can drop down to the Map Jammer below the highway. |
||
 |
 |
|
|
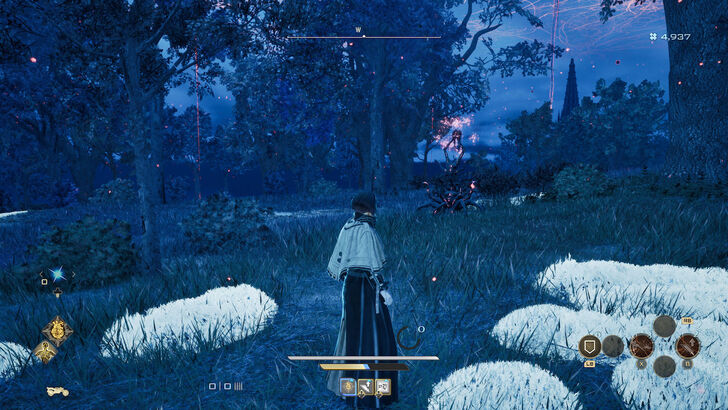
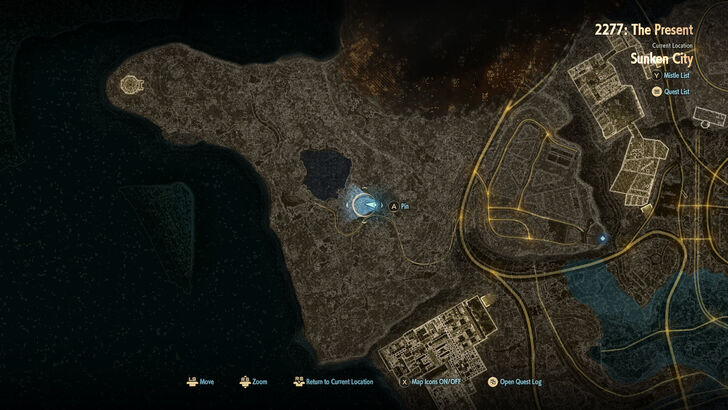
Region/Area:
Sunken City
How to Get: Follow the north road from the Josee's Outpost Mistle until you reach the road's end, then turn right. The Map Jammer is found beside the road, to your left. |
||
 |
 |
|
|
Region/Area:
Sunken City
How to Get: Head north from the Seized Substation Mistle, then turn left onto the road leading into the area on the left. |
||
 |
 |
|
|
Region/Area:
Sunken City
How to Get: Head south from the Seized Substation, then turn right into the tunnel to reach the West Coast Pier. From there, follow the road southeast up the hill to get to this area. |
||
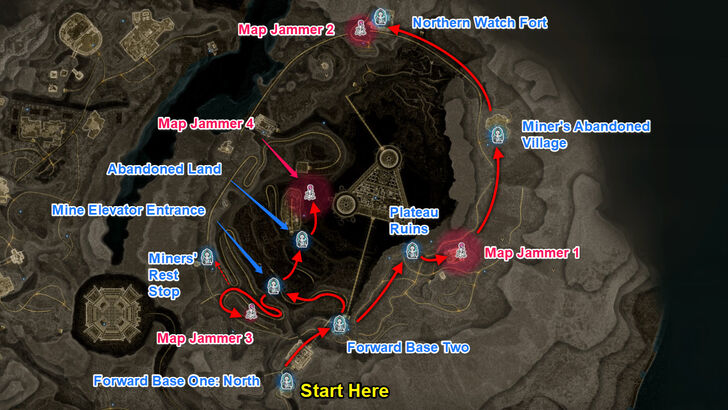
Corroded Scar
| Map Jammer Visual Guide | |
|---|---|
 Corroded Scar |
|
| ✔️ | Overworld Location | Map Location |
|---|---|---|
 |
 |
|
|
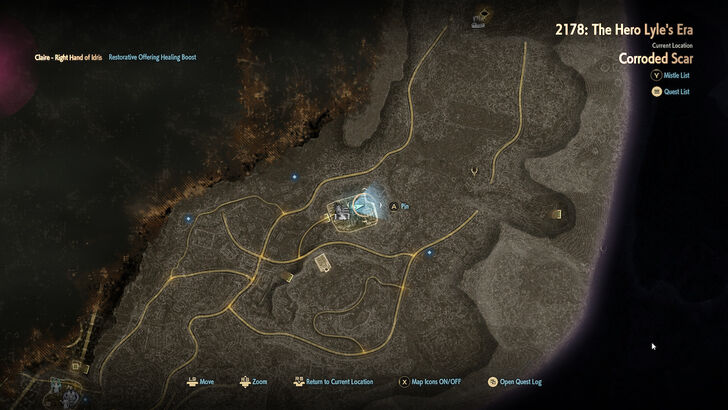
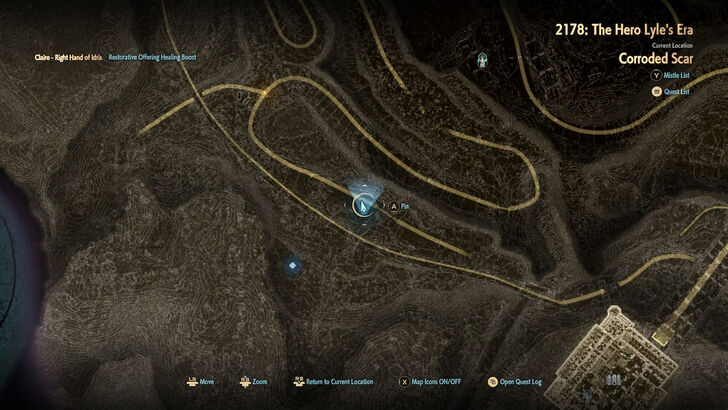
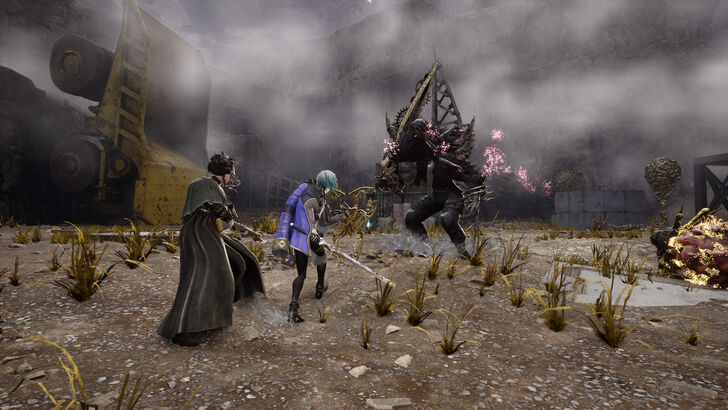
Region/Area:
Corroded Scar
How to Get: Use Forward Base Two's east exit and follow the road north until you reach the walled town. The Map Jammer is growing from the elite enemy in this area. Defeat it to reveal this section of the map. |
||
 |
 |
|
|
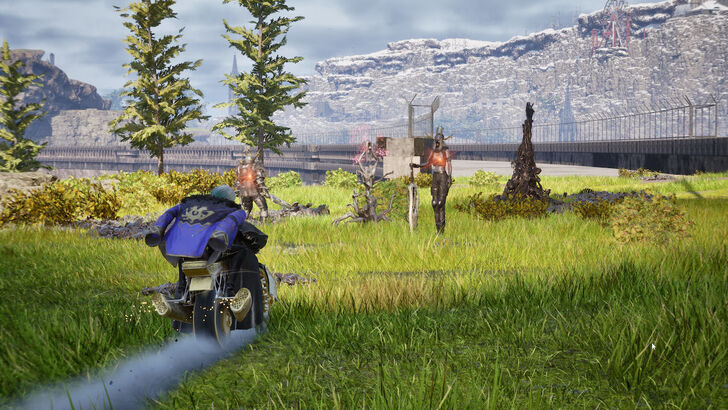
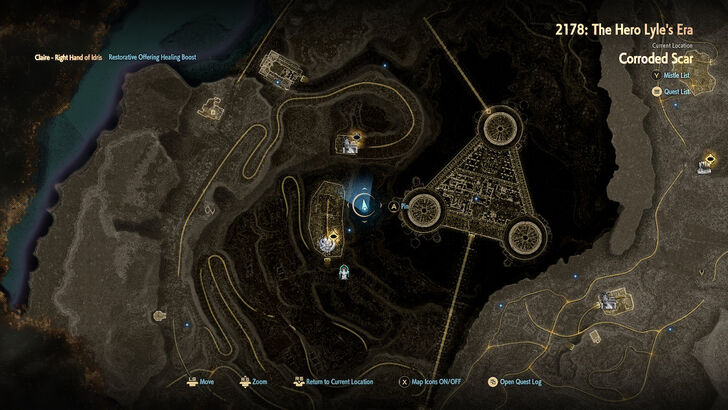
Region/Area:
Corroded Scar
How to Get: From the Plateau Ruins, follow the road north until you begin crossing the large bridge. The Map Jammer is located on the section of road where you return to land, between the village and the fort. |
||
 |
 |
|
|
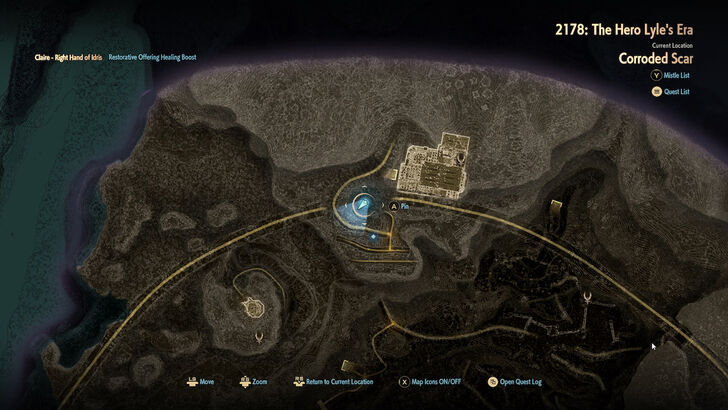
Region/Area:
Corroded Scar
How to Get: From Forward Base Two, go down the elevator and follow the quarry road that goes uphill. The Map Jammer is on the dirt road beside the large bridge. Alternatively, you can head southwest from the base camp and stick to the mountain ledge to get there. |
||
 |
 |
|
|
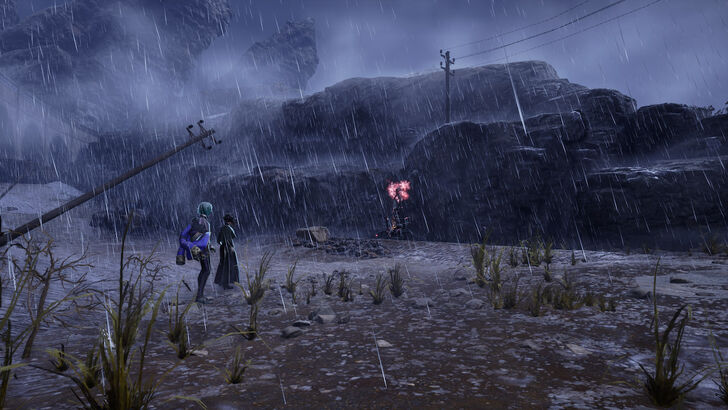
Region/Area:
Corroded Scar
How to Get: Go to the base of the quarry, starting from the Forward Base Two elevator. You'll find this Map Jammer growing on an elite enemy just east of the Abandoned Land. |
||
Corroded Scar Exploration Guide
Undead Forest
| Map Jammer Visual Guide | |
|---|---|
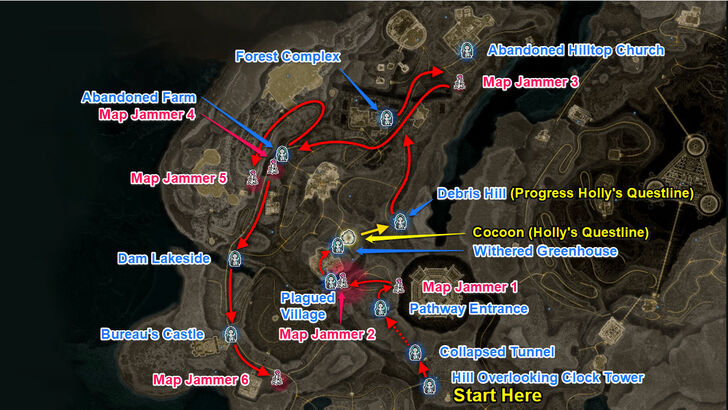 Undead Forest |
|
| ✔️ | Overworld Location | Map Location |
|---|---|---|
 |
 |
|
|
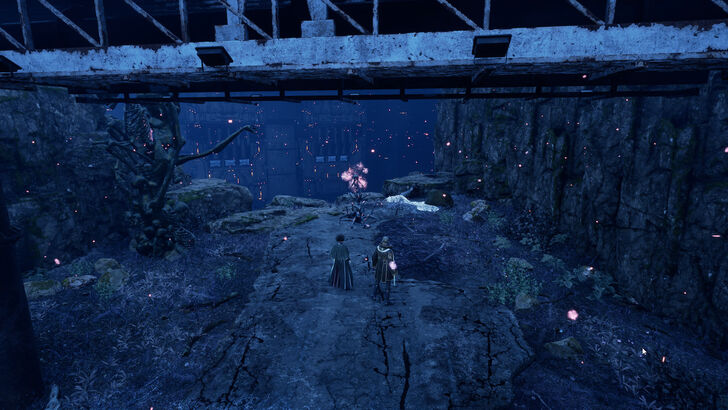
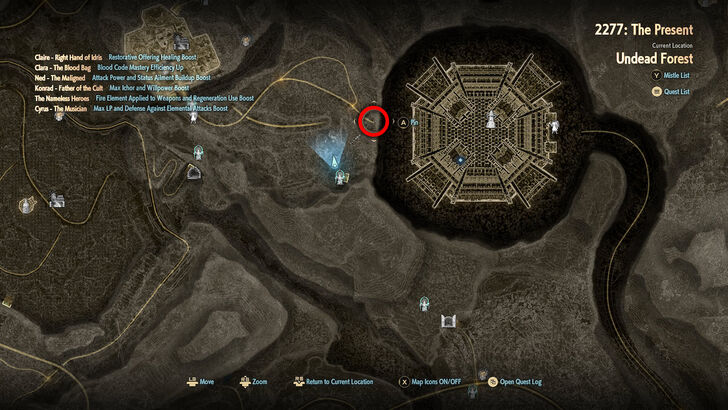
Region/Area:
Undead Forest
How to Get: After leaving the Collapsed Tunnel, follow the road east that leads to a cliff. |
||
 |
 |
|
|
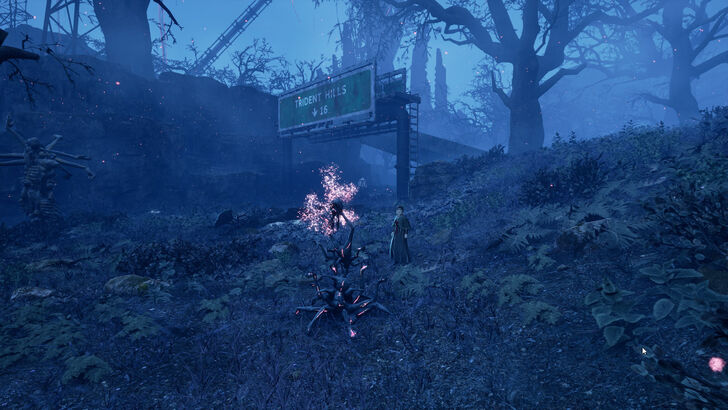
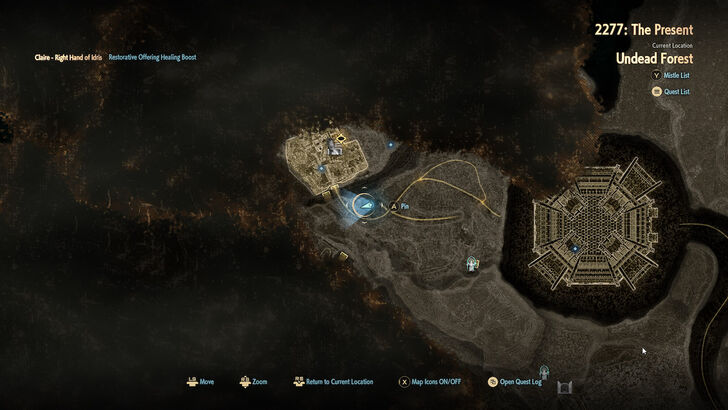
Region/Area:
Undead Forest
How to Get: Head west after leaving the Collapsed Tunnel and follow the road. The Map Jammer is located close to the green highway road sign just before the Plagued Village. |
||
 |
 |
|
|
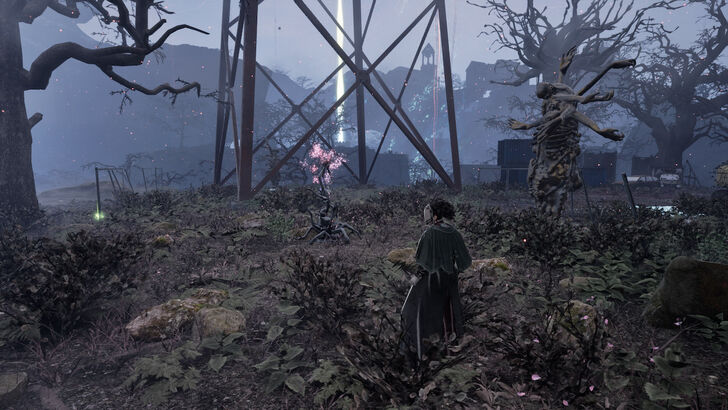
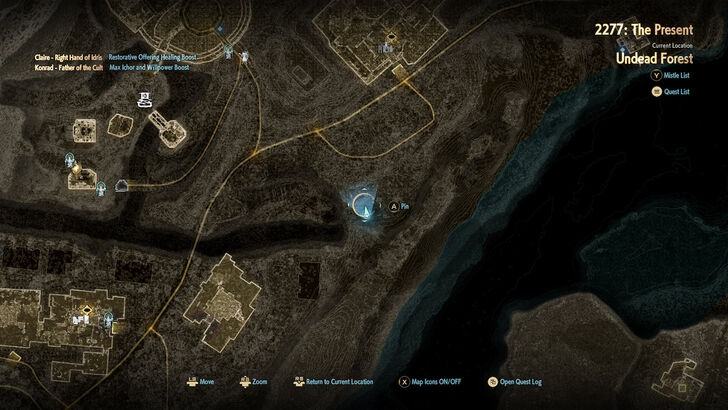
Region/Area:
Undead Forest
How to Get: From Debris Hill, head north along the road until you reach the large electrical tower. The Map Jammer will be located directly underneath it. |
||
 |
 |
|
|
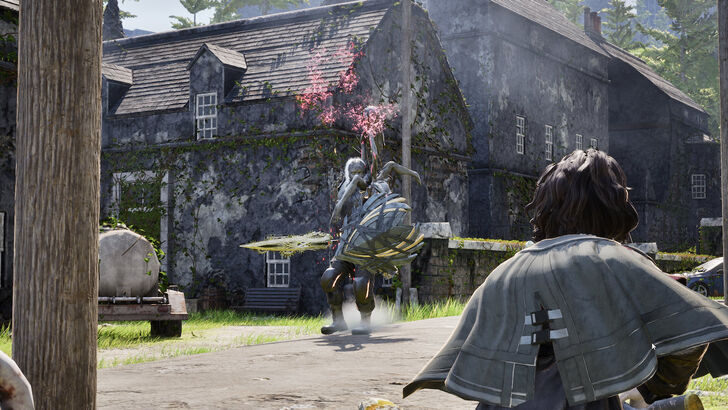
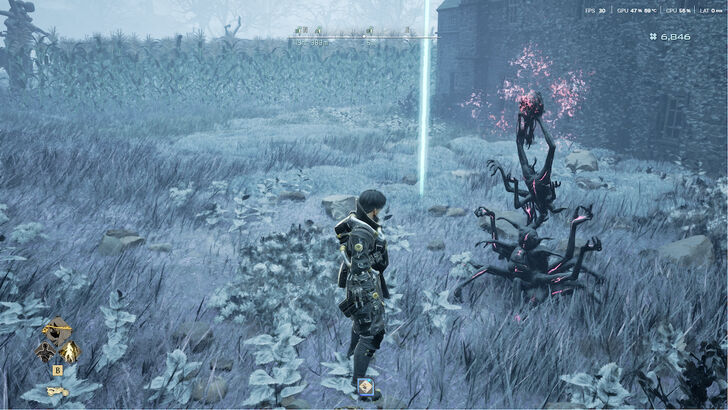
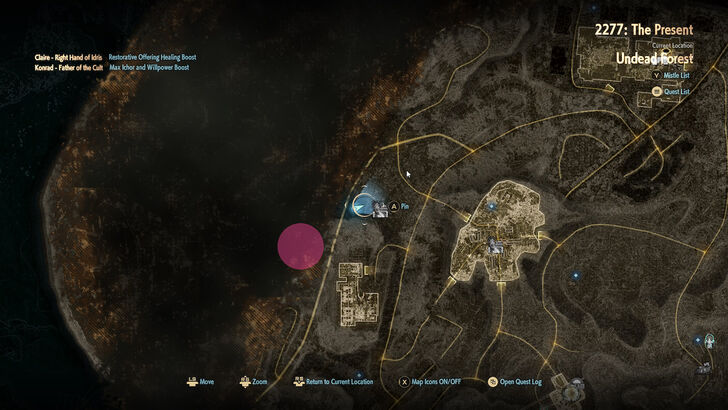
Region/Area:
Undead Forest
How to Get: This Map Jammer is beside the house on the Abandoned Farm, west of the Ruined Town. |
||
 |
 |
|
|
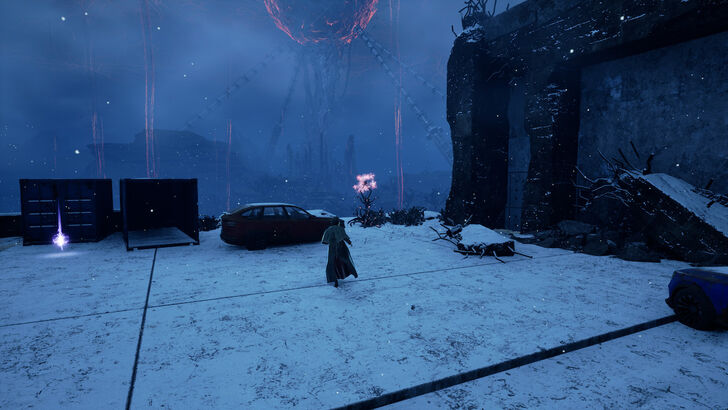
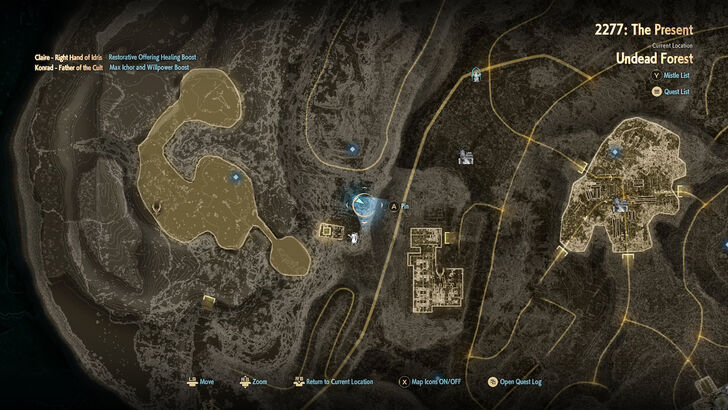
Region/Area:
Undead Forest
How to Get: Head north from the Abandoned Farm and continue along the road. Near the ledge beside the hairpin turn on the way to the Snowy Mountain Amusement Park, you’ll find the Map Jammer. |
||
 |
 |
|
|
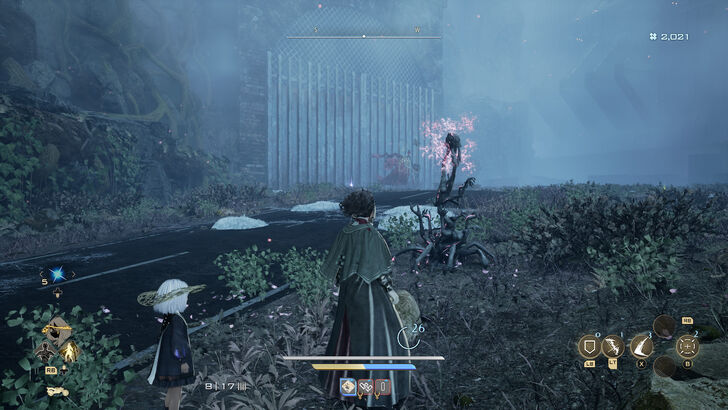
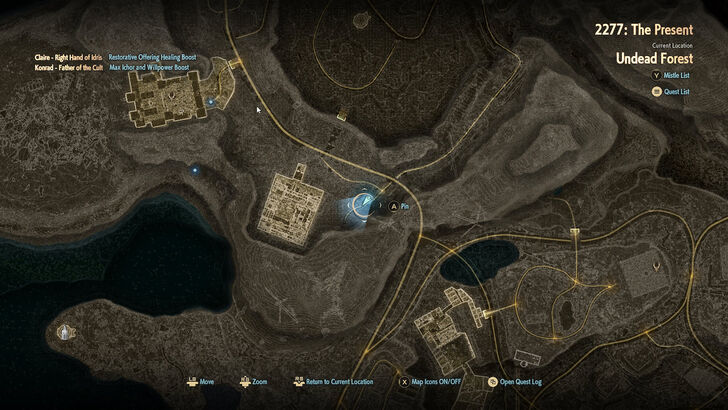
Region/Area:
Undead Forest
How to Get: From the Dam Lakeside Mistle, head south and follow the road beneath the highway. Continue along until you reach the off-shoot road near the end, where you'll find this Map Jammer and a powerful enemy. |
||
Undead Forest Exploration Guide
Insula Carcere
| ✔️ | Overworld Location | Map Location |
|---|---|---|
 |
 |
|
|
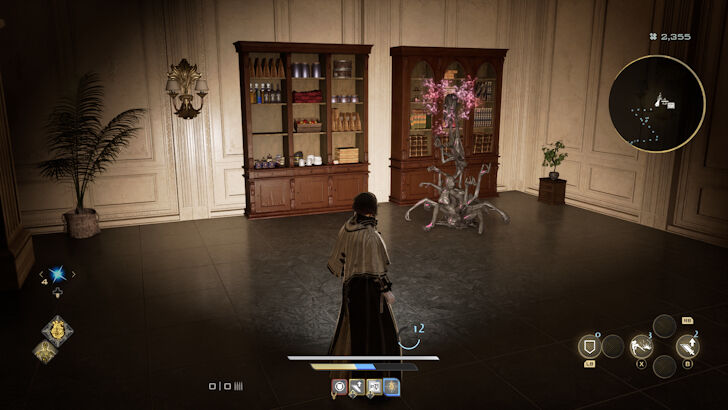
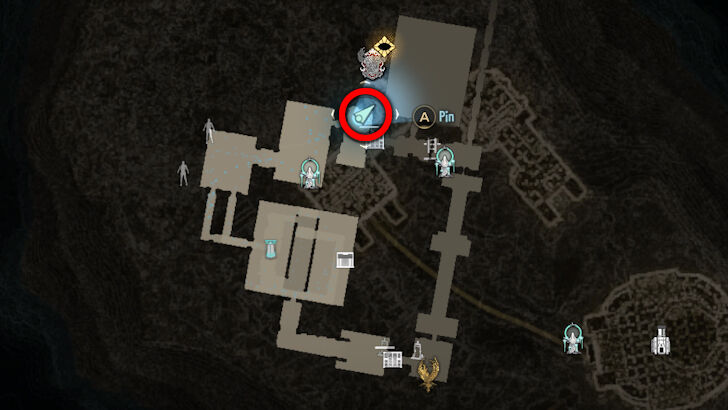
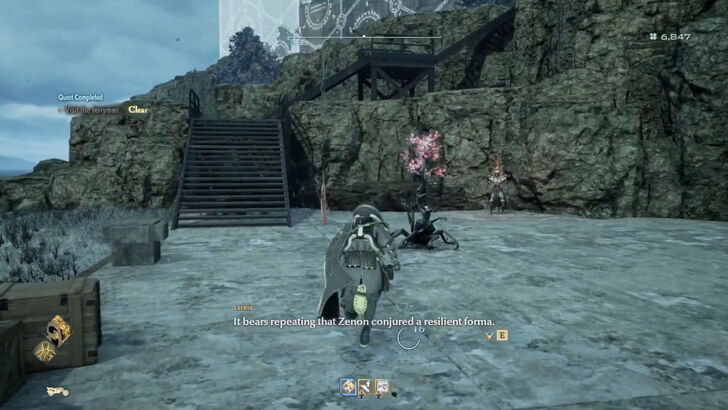
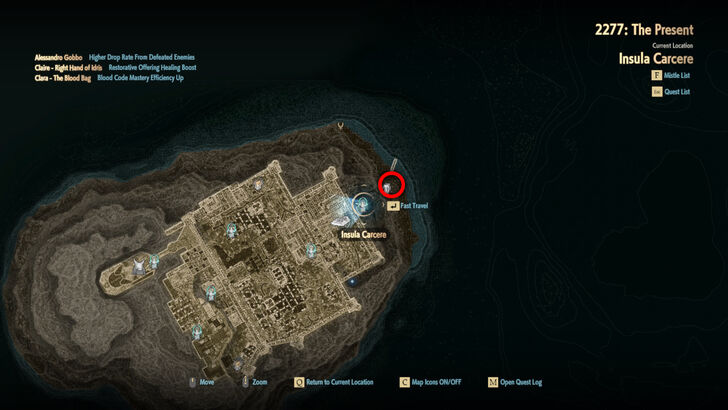
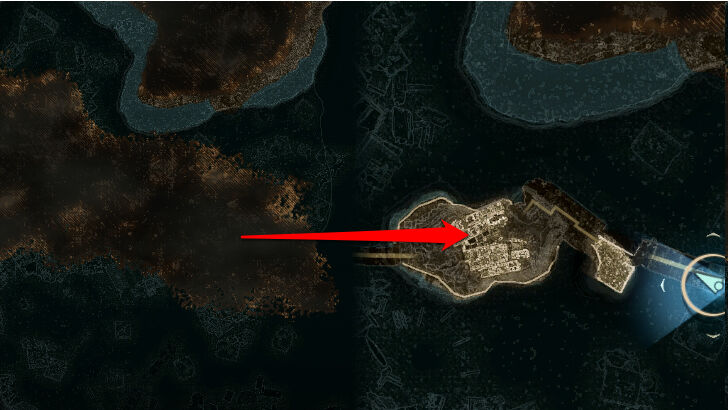
Region/Area:
Insula Carcere
How to Get: Found right at the Insula Carcere pier. |
||
Insula Carcere Map Exploration Guide
What Are Map Jammers?
| Map Jammers Explained |
|---|
|
|
Reveals Sections of the Map
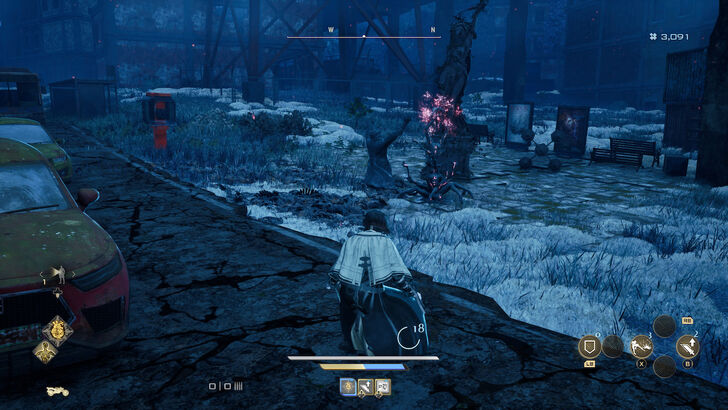
Attack and defeat Map Jammers to uncover the section of the map they're blocking and reveal the terrain in the area.
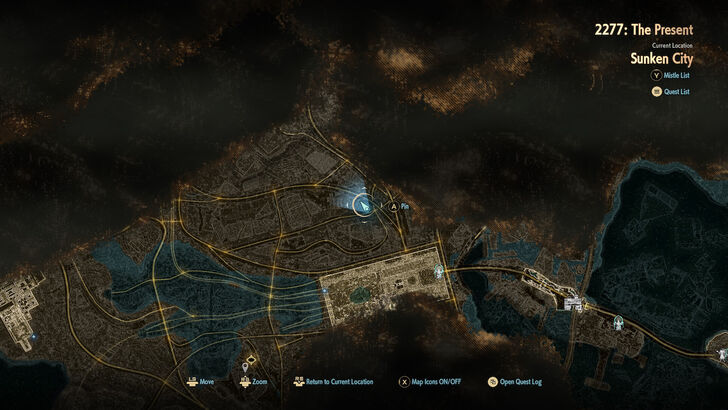
Marked as the Pulsing Circles on the Map
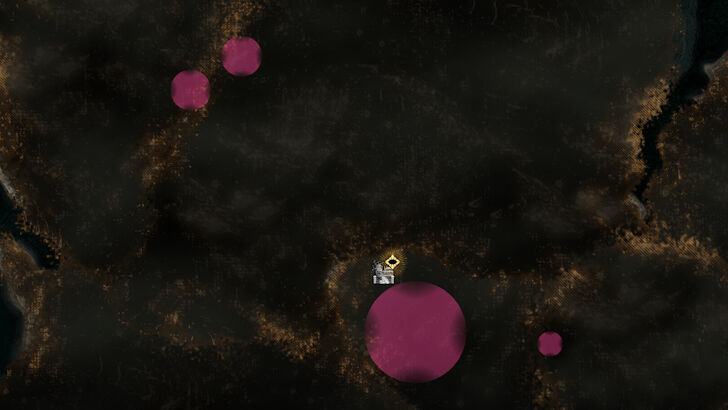
At a certain point in the story, Map Jammers appear on the map as pulsing red circles. These circles indicate the general area where a Map Jammer can be found to reveal part of the overworld map.
Map Jammers located inside dungeons, however, are not marked on the map.
Code Vein 2 Related Guides
Region Exploration Guides
| MagMell Island | Sunken City |
| Corroded Scar | Undead Forest |
| Insula Carcere | - |
Collectibles and Points of Interest
| Mistles | Map Jammers |
| Golden Blood Beads | Golden Nectars |
| Hot Springs | Regional Pathos |
| Jadwiga's Minions | - |
Comment
Author

All Map Jammer Locations
Rankings
- We could not find the message board you were looking for.
Gaming News


![Marathon Cryo Archive Map Teased as [REDACTED] on Selection Screen](https://img.game8.co/4442236/6357203e58172f6de57f1991e7c39b22.png/thumb)


Popular Games

Genshin Impact Walkthrough & Guides Wiki
Umamusume: Pretty Derby Walkthrough & Guides Wiki
Pokemon Pokopia Walkthrough & Guides Wiki
Honkai: Star Rail Walkthrough & Guides Wiki
Monster Hunter Stories 3: Twisted Reflection Walkthrough & Guides Wiki
Arknights: Endfield Walkthrough & Guides Wiki
Wuthering Waves Walkthrough & Guides Wiki
Zenless Zone Zero Walkthrough & Guides Wiki
Pokemon TCG Pocket (PTCGP) Strategies & Guides Wiki
Monster Hunter Wilds Walkthrough & Guides Wiki


Recommended Games
Diablo 4: Vessel of Hatred Walkthrough & Guides Wiki
Cyberpunk 2077: Ultimate Edition Walkthrough & Guides Wiki
Fire Emblem Heroes (FEH) Walkthrough & Guides Wiki
Yu-Gi-Oh! Master Duel Walkthrough & Guides Wiki
Super Smash Bros. Ultimate Walkthrough & Guides Wiki
Pokemon Brilliant Diamond and Shining Pearl (BDSP) Walkthrough & Guides Wiki
Elden Ring Shadow of the Erdtree Walkthrough & Guides Wiki
Monster Hunter World Walkthrough & Guides Wiki
The Legend of Zelda: Tears of the Kingdom Walkthrough & Guides Wiki
Persona 3 Reload Walkthrough & Guides Wiki


All rights reserved
© Bandai Namco Entertainment America Inc. All third party content, brands, names, and logos are used under license and remain property of their respective owners. All rights reserved.
The copyrights of videos of games used in our content and other intellectual property rights belong to the provider of the game.
The contents we provide on this site were created personally by members of the Game8 editorial department.
We refuse the right to reuse or repost content taken without our permission such as data or images to other sites.