Slaying the Hero Lyle Quest Walkthrough and Rewards
☆ Get 100,000 Haze with our Haze Farming Guide!
★ Story Walkthrough | Requests
☆ Gear up with our best Weapons | Partners | Blood Codes | Jails | Formae!
★ Obtain the best outcomes with our Choices Guide!
This is a walkthrough for the Slaying the Hero Lyle quest in Code Vein 2. See this detailed guide to check out quest objectives and what rewards you receive upon completion.
List of Contents
How to Unlock Slaying the Hero Lyle
Obtained During Vanquishing of Heroes
| Location | Corroded Scar |
|---|---|
| Unlock Requirements | ・Begin Vanquishing the Heroes |
Slaying the Hero Lyle quest is obtained during Vanquishing the Heroes quest, which is after either Mastering Control of Time or Timeline Shift Decision: Noah. After you complete the prerequisite tasks, head to Corroded Scar to meet with Iris MagMell to get to Lyle's cocoon.
Related Quests
| Main Story | ・Timeline Shift Decision: Lyle |
|---|
After you complete this quest, Lyle's Fading Bond will appear. However, you need to obtain Lyle's Rusted Sword back in his era at Forward Base One.
How to Repair Lyle's Fading Bond?
Slaying the Hero Lyle Walkthrough
| Slaying the Hero Lyle Objectives | |
|---|---|
| 1 | Lyle's Cocoon |
| 2 | Finding the Dawn Chorus |
| 3 | Abandoned Lands Retainer ┗ Boss Battle: Bernard the Dead-Eyed Retainer |
| 4 | Limestone Cave Retainer ┗ Boss Battle: Ravenous Predator |
| 5 | Conquering Pioneer Castle ┣ Boss Battle: Tainted Scout ┗ Boss Battle: Tainted Assassin |
| 6 | Returning to Lyle's Cocoon ┗ Boss Battle: One-Armed Hero Lyle |
Click on any of the links above to jump to the section!
Lyle's Cocoon
| Step | Objectives |
|---|---|
| 1 | 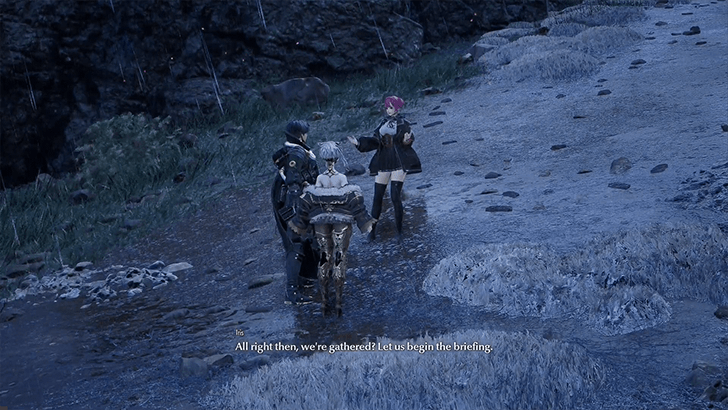 Fast travel to the Checkpoint Ruins in the Present, then make your way uphill towards Corroded Scar to meet with Iris MagMell. She will be briefing you regarding the mission for Lyle's Cocoon. ┗ How to Get to the Corroded Scar |
| 2 | 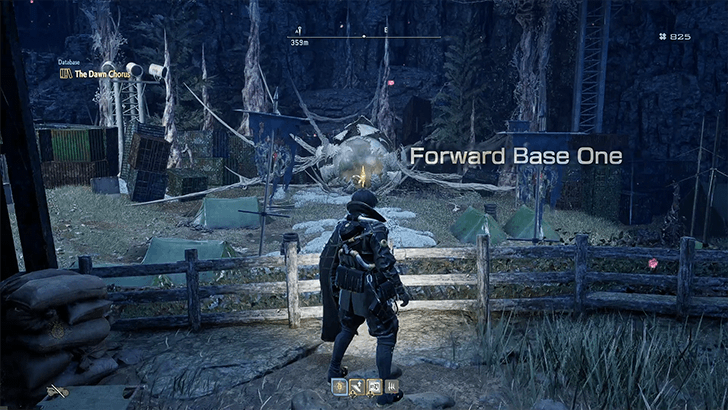 Continue up the hill to arrive at Forward Base One, where you will find Lyle's Cocoon. Interact with the time jump portal to access Lyle's past. |
| 3 | 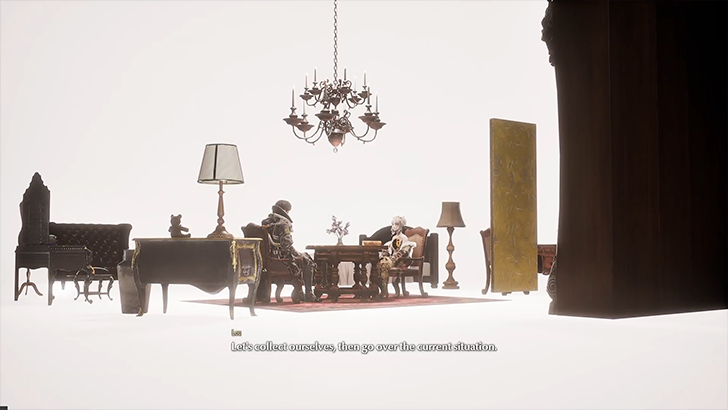 Find a nearby mistle to talk to Lou in The Confluence about the next steps in the mission. She points out that Lyle was still a part of the Dawn Chorus in this era. |
Finding the Dawn Chorus
| Step | Objectives |
|---|---|
| 1 | 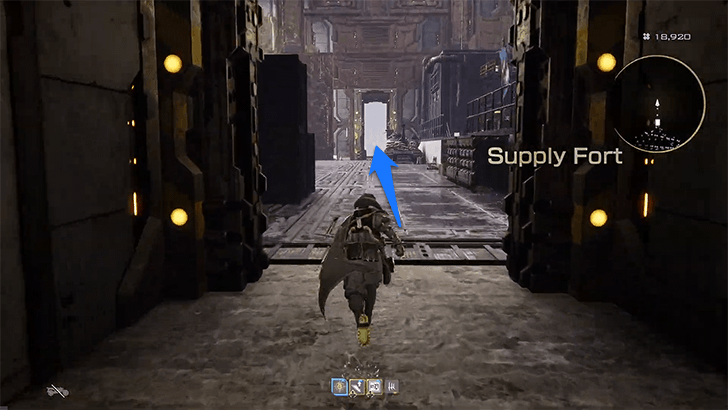 Pass through the Supply Fort to get to Forward Base Two in search of the Dawn Chorus. |
| 2 | 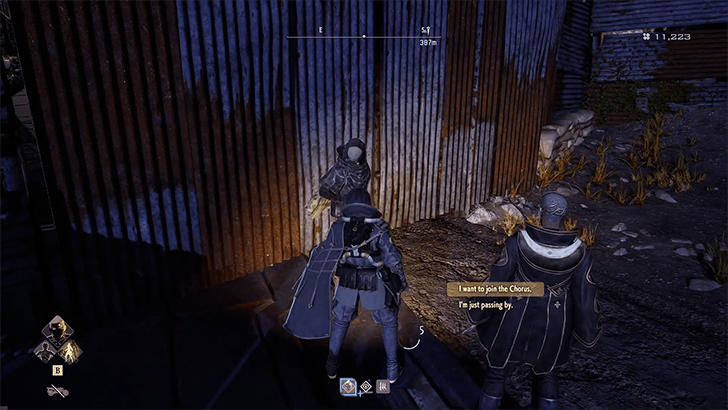 Approach the Chorus Guard in front of a rusted metal gate and tell him you want to join the Chorus to trigger a cutscene. |
| 3 | 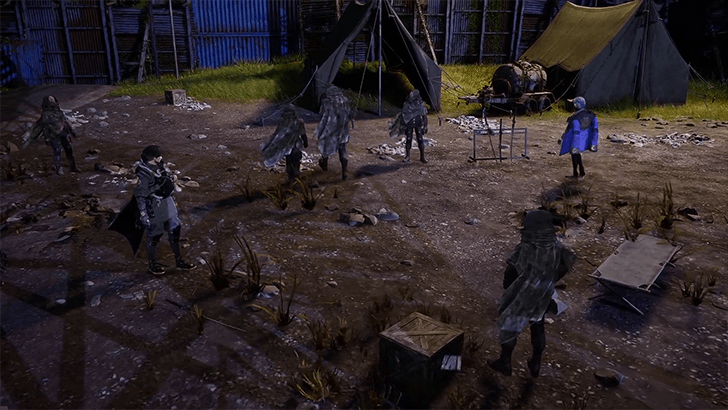 In the cutscene, you will meet both Lyle and Craig. After succeeding the initiation trial of the Chorus, Craig will ask you to help them take back the Pioneer Castle by defeating two retainers. Then, Lyle will join you as a partner. |
| 4 | 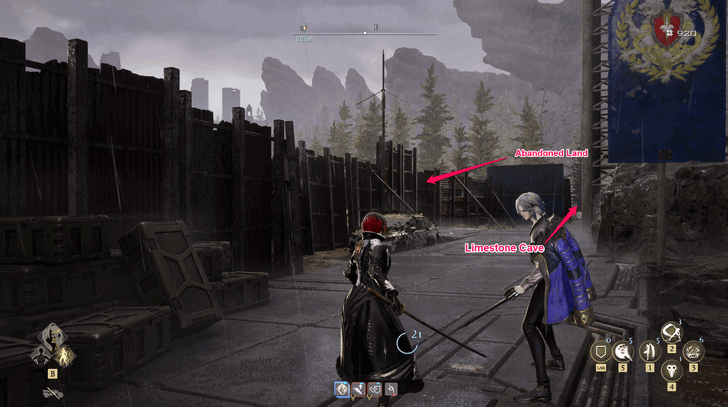 You can either start with the retainer in the Abandoned Lands or the retainer in the Limestone Cave. The order in which you choose to target these retainers does not matter since you need to complete both objectives. |
Abandoned Lands Retainer
| Step | Objectives |
|---|---|
| 1 | 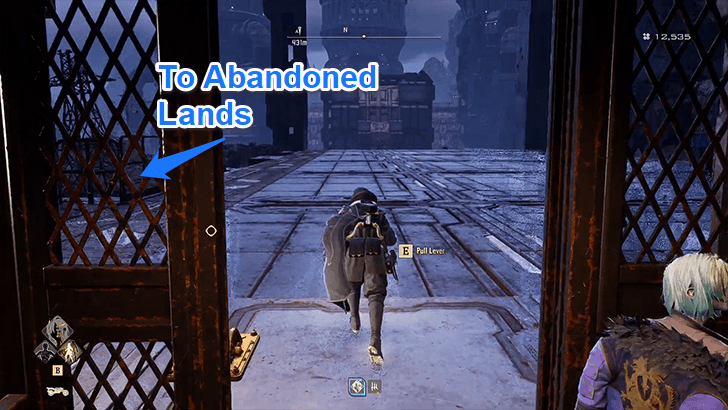 From Forward Base Two, take the South Bridge Elevator to descend. Once at the bottom, take the dirt path on the left and keep heading in the northwestern direction towards the Abandoned Lands. |
| 2 | 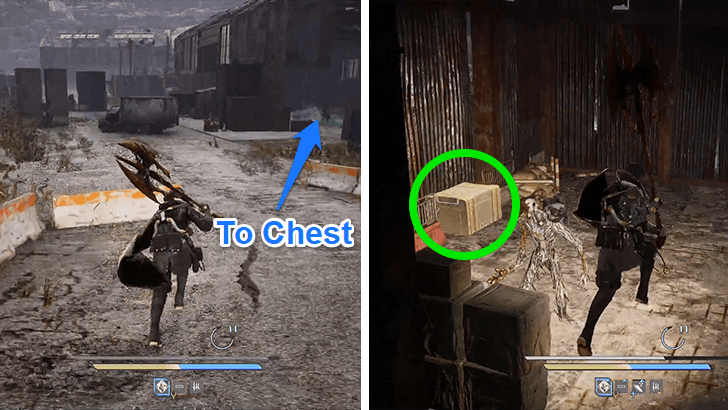 Upon arriving at the main entrance of the Abandoned Lands, defeat a few enemies, then head to the shed to the right. After defeating a couple more enemies, get the chest at the far left corner of the shed to obtain the Bleeding Shield Defensive Forma. Bleeding Shield Defensive Formae: Can be found at the right shed by the entrance of the Abandoned Lands. |
| 3 | 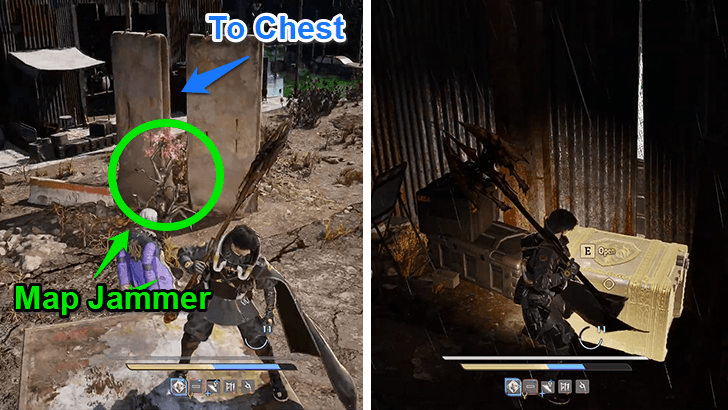 Turn back and exit the shed to destroy the Map Jammer. Head to the room northwest of the Map Jammer to find another chest containing the Orbital Blade Weapon Forma. Orbital Blade Weapon Forma: Can be found in a room near the Map Jammer in the Abandoned Lands. |
| 4 | 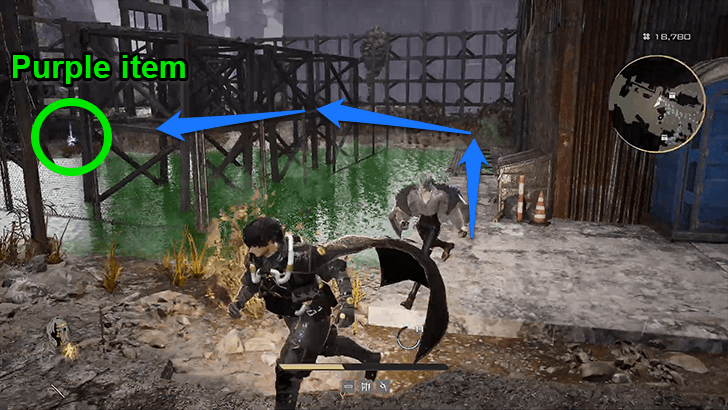 Right before the revival stone, head right near the green liquid and walk over some metal plates. Defeat the enemy to reach the Tender Crimson Stone 3. Tender Crimson Stone 3: Can be found on the other side of a green liquid pool in the Abandoned Lands. |
| 5 | 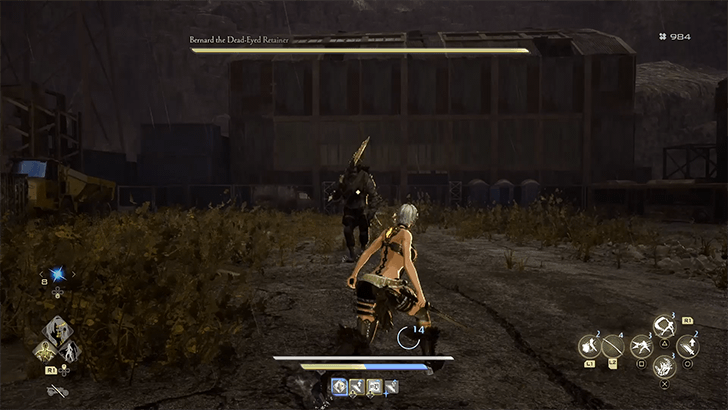 Head to the Revival Stone and register it to respawn next to it should you be defeated in the fight with the boss, Bernard the Dead-Eyed Retainer. Defeating the boss will complete this quest objective. |
Limestone Cave Retainer
| Step | Objectives |
|---|---|
| 1 | 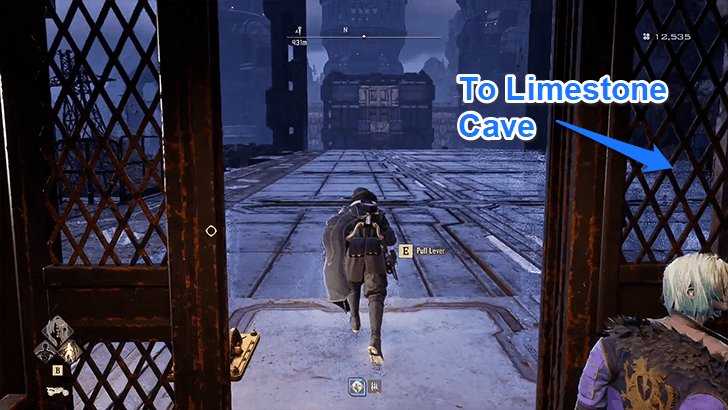 From Forward Base Two, take the South Bridge Elevator to descend. Once at the bottom, take the path on the right towards the cave into the Crystal Grotto. |
| 2 | 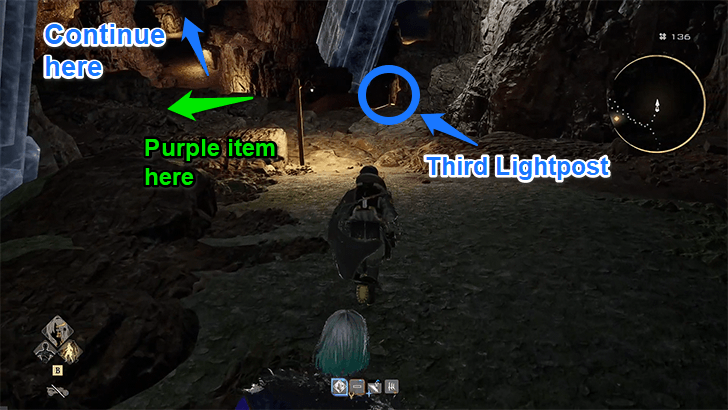 Upon entering the cave, take the right path, then turn left after the third lightpost. Defeat the enemy here to reach the Ukiyo-e. Then, head back to the original path downward. Ukiyo-e: Can be found near the entrance of the Crystal Grotto. |
| 3 | 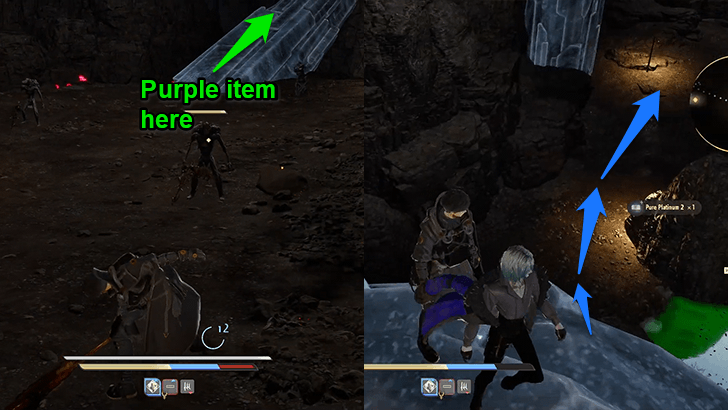 At the bottom, defeat a few enemies, then go up the nearby large crystal to get the Pure Platinum 2. Drop down the crystal, then head left until you reach an abandoned Dawn Chorus camp. Pure Platinum 2: Can be found at the tip of a crystal in the Crystal Grotto. |
| 4 | 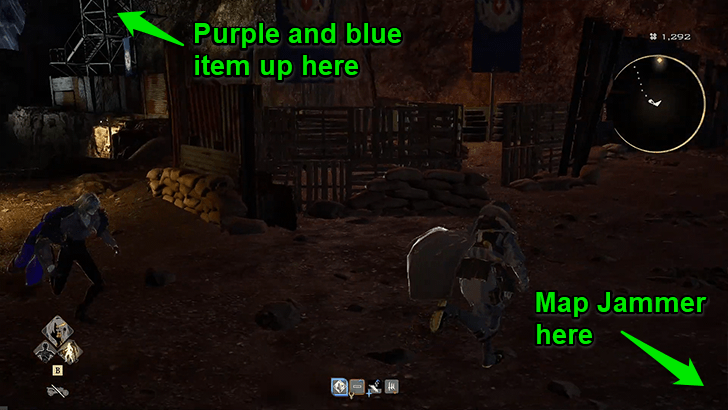 Once at the Chorus camp, head up the watch tower to pick up an Attack Injection item going up the stairs, and a Pure Platinum 5 at the top of the watch tower. Descend the tower, then destroy the nearby Map Jammer. Attack Injection: Can be found at the Dawn Chorus camp watch tower in the Crystal Grotto. Pure Platinum 5: Can be found at the Dawn Chorus camp watch tower in the Crystal Grotto. |
| 5 | 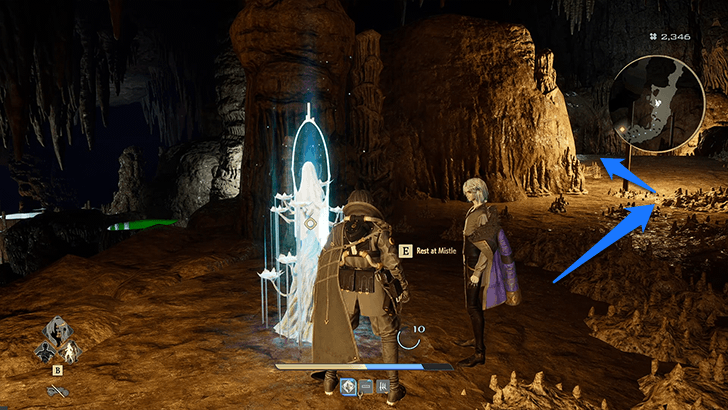 From the Map Jammer, drop down the ledge and keep heading down until you find the Limestone Cave mistle. Activate the mistle, then keep following the path downward. You will pass by a Pure Platinum 2 right before the boss room. Pure Platinum 2: Can be found right before the Ravenous Predator boss room in Limestone Cave. |
| 6 | 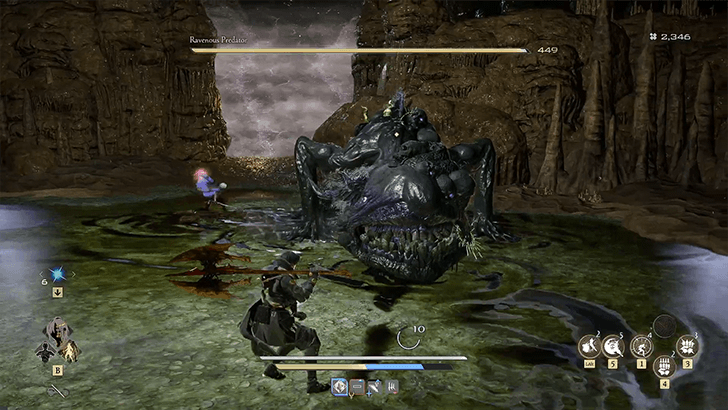 Fight the boss, Ravenous Predator. Defeat the retainer to trigger an incursion cutscene. After the cutscene, the quest objective is completed. |
Conquering Pioneer Castle
| Step | Objectives |
|---|---|
| 1 | 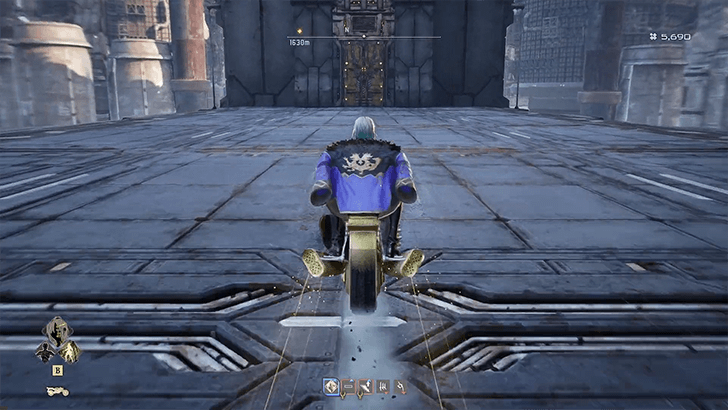 After defeating both retainers, fast-travel to Forward Base Two to automatically trigger a cutscene. Talk to Craig again to get the Bridge Gate Key from him. Head north and use the key on the bridge gate towards Pioneer Castle. Arriving at the castle entrance will trigger a cutscene. ┗ Pioneer Castle Dungeon Guide |
| 2 | 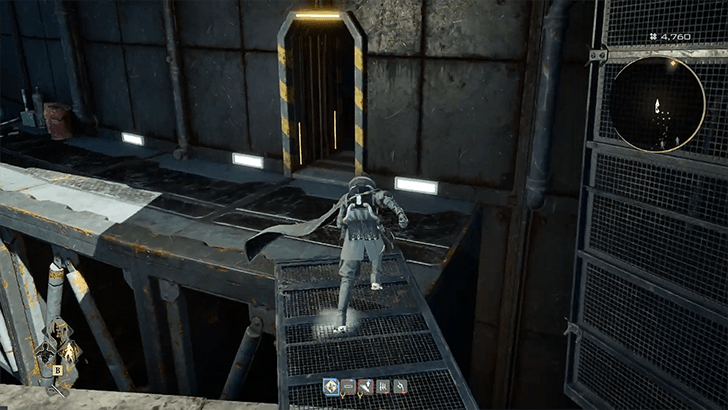 Interact with a nearby mistle to reconvene with Lou in The Confluence. Then, head towards the left of the castle entrance through the Chorus camps, and go down the stairs to make your entry through the yellow and black striped door. |
| 3 | 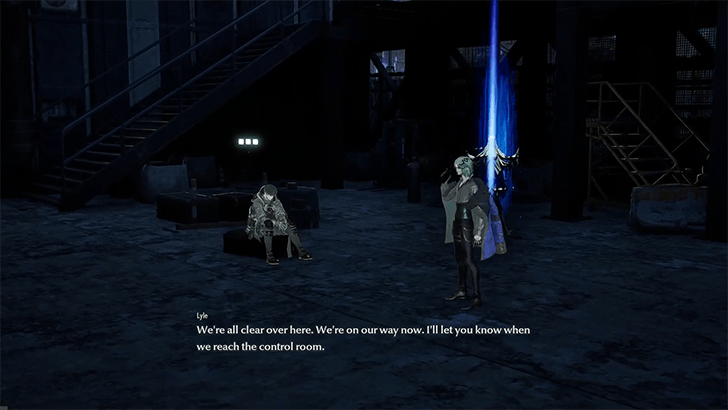 Make your way through the west side of the Pioneer Castle until you reach a room with an elevator. Use the elevator to go up and trigger a cutscene. You will also find the In Front of the West Wing Elevator mistlehere. |
| 4 | 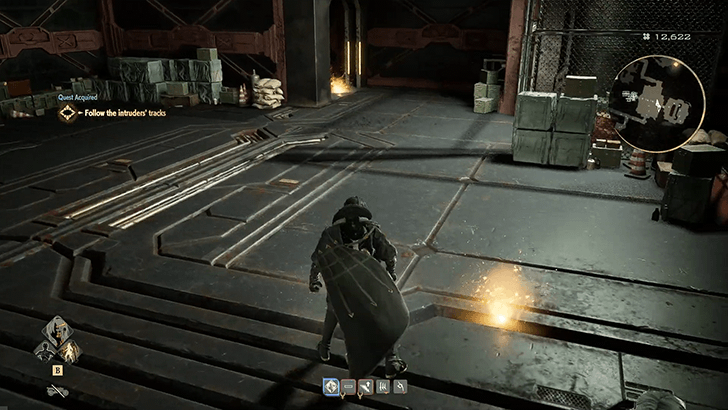 Find your way through the center of Pioneer Castle towards the Command Room to trigger another cutscene where Lyle calls in the Dawn Chorus. Exit the Command Room, and Lyle prompts you to follow the orange orb tracks to find your enemy. |
| 5 | 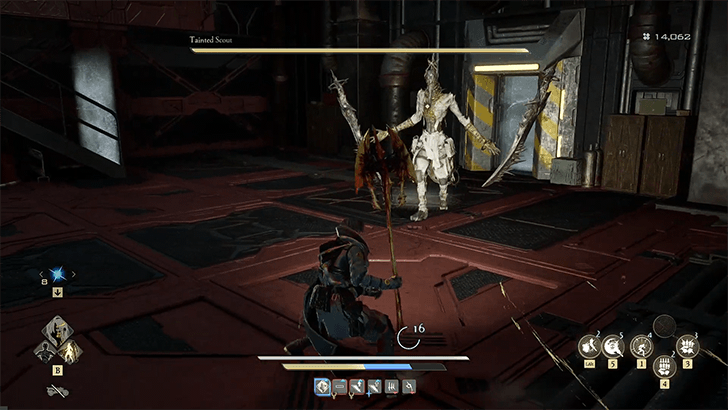 At the end of the orange orb tracks, the boss, Tainted Scout, will be awaiting your arrival. Defeating this boss will trigger a cutscene that ends with Lyle rushing back to the Command Room. |
| 6 | 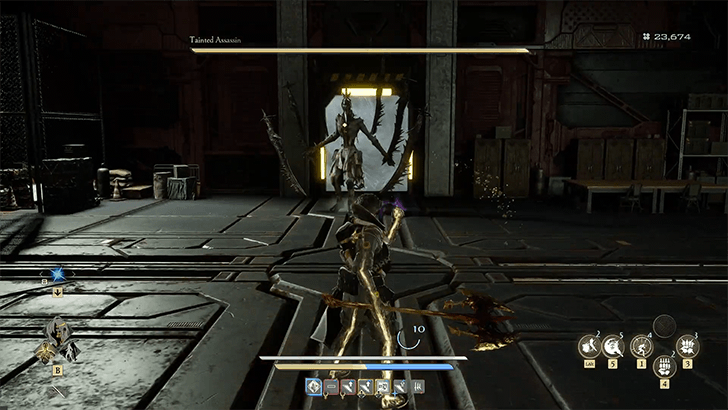 Upon returning to the Command Room, you will find the boss, Tainted Assassin, attacking Craig and the Dawn Chorus. After defeating the boss, talk to Craig, and he will ask you to light the furnace. |
| 7 | 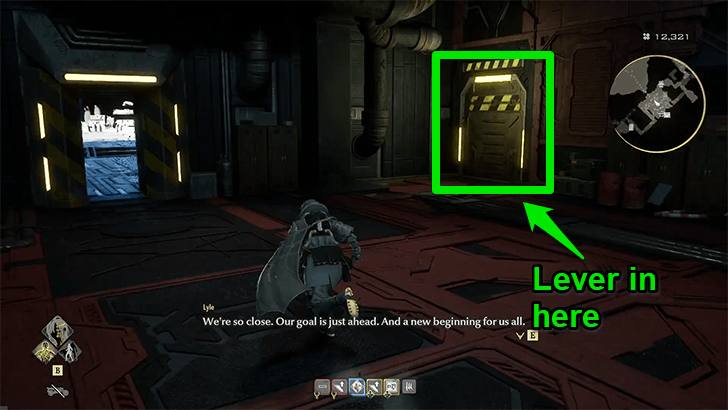 Take the elevator in front of the Command Room down to the room where you defeated the Tainted Scout. Head into the right door and pull the lever to turn on the furnace. |
| 8 | 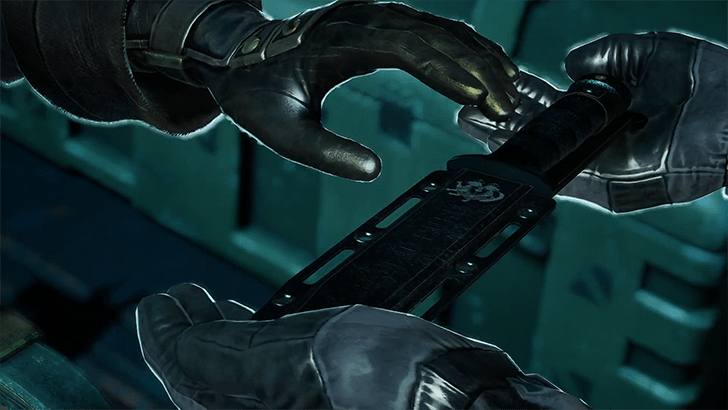 Afterwards, a cutscene will play where you receive the Engraved Chorus Dagger, the key to unseal Lyle's cocoon. Lyle will also be permanently unlocked as a Partner after the cutscene. |
Returning to Lyle's Cocoon
| Step | Objectives |
|---|---|
| 1 | 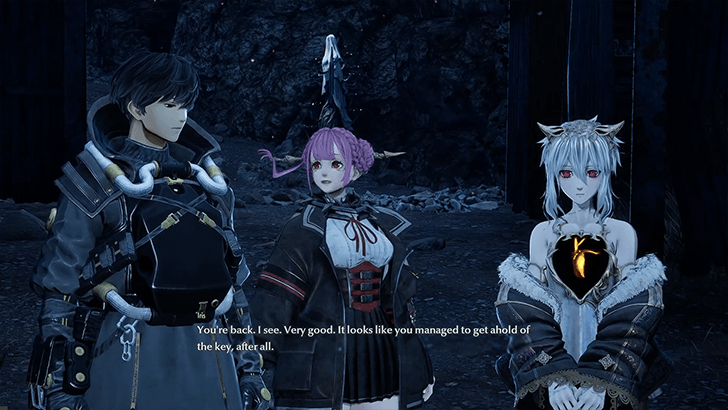 After the conversation with Lyle and Craig, fast-travel back to the Present with the Bond of Returning at Forward Base One. This triggers the cutscene with Iris and Lou. |
| 2 | 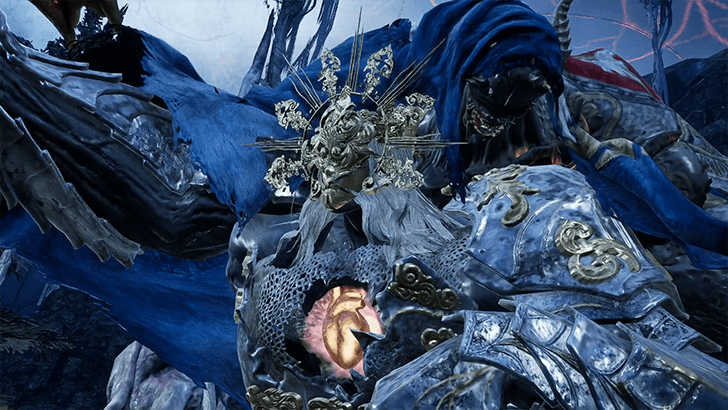 Approach Lyle's cocoon to use the Engraved Chorus Dagger to release him from his seal. You will enter a fight with the boss, One-Armed Hero Lyle. Defeating the boss will play a cutscene that completes the quest. Then, Lyle's fading bond will appear where his cocoon once was. |
Slaying the Hero Lyle Bosses
Bernard the Dead-Eyed Retainer
 |
|||||||||||
| Boss Type | Location | ||||||||||
|---|---|---|---|---|---|---|---|---|---|---|---|
| Mini Boss | Corroded Scar | ||||||||||
Bernard the Dead-Eyes Retainer is a boss you'll encounter during this quest. This boss can be found in the Abandoned Lands. Defeating the boss is needed to access Pioneer Castle.
Bernard the Dead-Eyed Retainer Fight Tips
- Parry his melee attacks since they have a long wind-up.
- Dodge his lightning attacks; one attack rains down lightning, and one is a melee combo that's infused with lightning.
Bernard the Dead-Eyed Retainer Boss Guide
Ravenous Predator
 |
|||||||||||
| Boss Type | Location | ||||||||||
|---|---|---|---|---|---|---|---|---|---|---|---|
| Mini Boss | Corroded Scar | ||||||||||
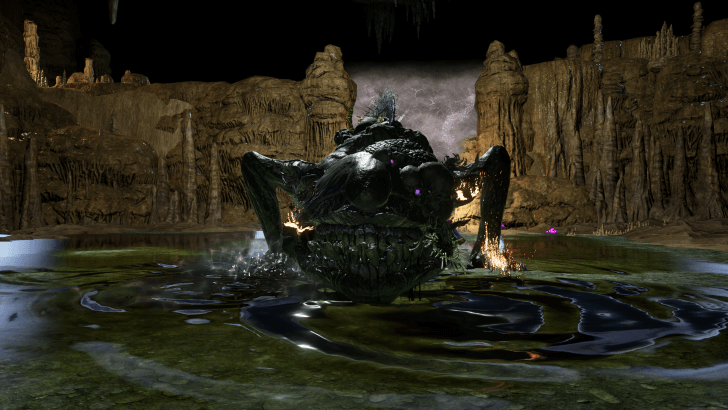
Ravenous Predator is a boss you'll encounter during this quest. This boss can be found in the Crystal Grotto. Defeating the boss is needed to access Pioneer Castle.
Ravenous Predator Fight Tips
- Dodge his movement-heavy attacks since this boss moves around a lot very quickly.
Tainted Scout
 |
|||||||||||
| Boss Type | Location | ||||||||||
|---|---|---|---|---|---|---|---|---|---|---|---|
| Mini Boss | Corroded Scar | ||||||||||
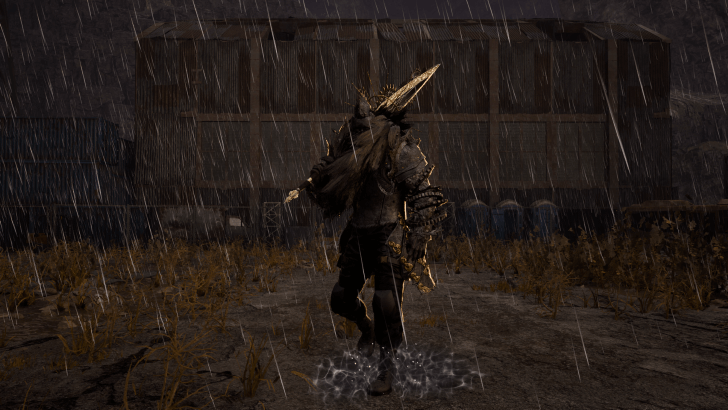
Tainted Scout is a boss you'll encounter during this quest. This boss can be found in the Pioneer Castle. Defeating the boss is needed for One-Armed Hero Lyle.
Tainted Scout Fight Tips
- Stagger him as much as possible to get a good amount of time to attack him consistently, since his attacks are always in quick succession.
Tainted Assassin
 |
|||||||||||
| Boss Type | Location | ||||||||||
|---|---|---|---|---|---|---|---|---|---|---|---|
| Mini Boss | Corroded Scar | ||||||||||
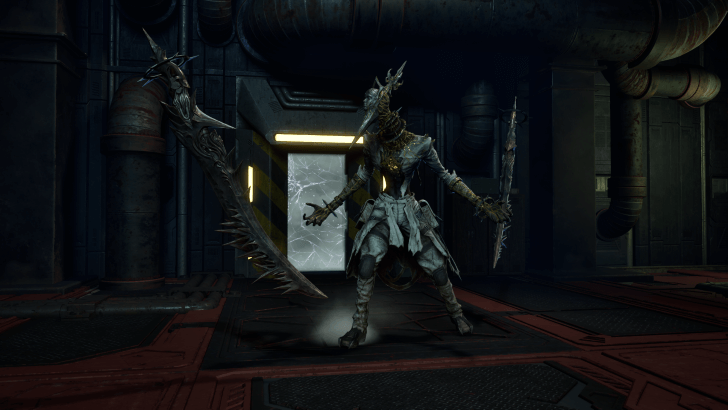
Tainted Assassin is a boss you'll encounter during this quest. This boss can be found in the Control Room in Pioneer Castle. Defeating the boss is needed for One-Armed Hero Lyle.
Tainted Assassin Fight Tips
- This boss extends his attacks farther to get you from behind. Try to dodge to the sides instead of to the front or back to avoid getting hit from behind when the attacks come back as well.
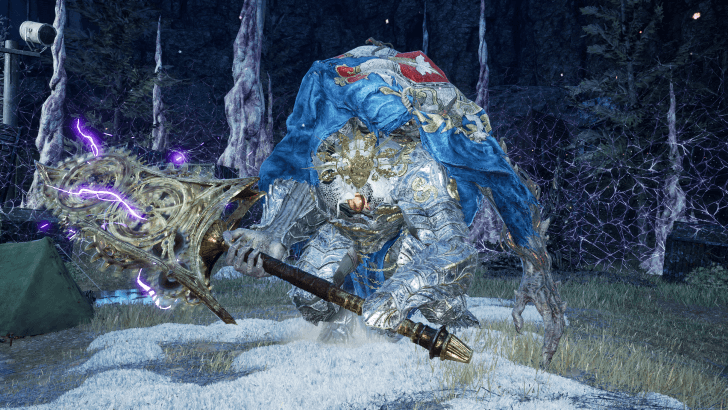
One-Armed Hero Lyle
 |
|||||||||||
| Boss Type | Location | ||||||||||
|---|---|---|---|---|---|---|---|---|---|---|---|
| Main Boss | Corroded Scar | ||||||||||
One-Armed Hero Lyle is the final boss encounter for this quest. You need to obtain the Engraved Chorus Dagger from the past to unseal his cocoon and fight him.
One-Armed Hero Lyle Fight Tips
- Delay your dodges towards his melee attacks since they have a long wind-up before they actually hit you.
- Utilize ranged attacks and/or Magic Formae to keep a good distance from him.
One-Armed Hero Lyle Boss Guide
Slaying the Hero Lyle Rewards
Blood Code
 One-Armed Hero Lyle One-Armed Hero Lyle
|
Bloodline | Patientia | |||
|---|---|---|---|---|---|
| Rank |
|
||||
| Bleed Factor | 35 | ||||
| Max Ichor | 15 | ||||
| Balance | 67 |
These are all the rewards you can get by doing Slaying the Hero Lyle. The rewards listed above are the total earned as you progress through the quest and upon completing it.
Code Vein 2 Related Guides

| All Story Walkthroughs | |
|---|---|
| 1 | Follow Lou's Instructions |
| 2 | Mastering Control of Time |
| 3 | Timeline Shift Decision: Noah |
| 4 | Vanquishing the Heroes |
| 5 | Slaying the Hero Josee |
| 6 | Slaying the Hero Lyle |
| 7 | Slaying the Hero Holly |
| 8 | Timeline Shift Decision: Lyle |
| 9 | Timeline Shift Decision: Holly |
| 10 | Timeline Shift Decision: Josee |
| 11 | Slaying the Hero Zenon |
| 12 | Slaying the Hero Valentin |
| 13 | Timeline Shift Decision: Upheaval |
| 14 | Rescue Lou |
Comment
Author

Slaying the Hero Lyle Quest Walkthrough and Rewards
Rankings
- We could not find the message board you were looking for.
Gaming News


![Monster Hunter Stories 3 Review [First Impressions] | Simply Rejuvenating](https://img.game8.co/4438641/2a31b7702bd70e78ec8efd24661dacda.jpeg/thumb)
Popular Games

Genshin Impact Walkthrough & Guides Wiki
Umamusume: Pretty Derby Walkthrough & Guides Wiki
Pokemon Pokopia Walkthrough & Guides Wiki
Honkai: Star Rail Walkthrough & Guides Wiki
Monster Hunter Stories 3: Twisted Reflection Walkthrough & Guides Wiki
Arknights: Endfield Walkthrough & Guides Wiki
Wuthering Waves Walkthrough & Guides Wiki
Zenless Zone Zero Walkthrough & Guides Wiki
Pokemon TCG Pocket (PTCGP) Strategies & Guides Wiki
Monster Hunter Wilds Walkthrough & Guides Wiki


Recommended Games
Diablo 4: Vessel of Hatred Walkthrough & Guides Wiki
Cyberpunk 2077: Ultimate Edition Walkthrough & Guides Wiki
Fire Emblem Heroes (FEH) Walkthrough & Guides Wiki
Yu-Gi-Oh! Master Duel Walkthrough & Guides Wiki
Super Smash Bros. Ultimate Walkthrough & Guides Wiki
Pokemon Brilliant Diamond and Shining Pearl (BDSP) Walkthrough & Guides Wiki
Elden Ring Shadow of the Erdtree Walkthrough & Guides Wiki
Monster Hunter World Walkthrough & Guides Wiki
The Legend of Zelda: Tears of the Kingdom Walkthrough & Guides Wiki
Persona 3 Reload Walkthrough & Guides Wiki


All rights reserved
© Bandai Namco Entertainment America Inc. All third party content, brands, names, and logos are used under license and remain property of their respective owners. All rights reserved.
The copyrights of videos of games used in our content and other intellectual property rights belong to the provider of the game.
The contents we provide on this site were created personally by members of the Game8 editorial department.
We refuse the right to reuse or repost content taken without our permission such as data or images to other sites.