
This survey will take about 1 minute.
Your answers will help us to improve our website.
Dragon Quest 3 HD-2D Remake (DQ3)
Gadabout Job Class and Best Personality
★ Best Personality | Best Equipment | Best Party
☆ Class Tier List | Vamp Guide | Monster Wrangler
★ Friendly Monsters | Sparkly Spots | Keys Guide
☆ EXP Farming | Money Farming | Seed Farming
★ Post Game (Spoilers!) | Missables | Trophy Guide
Here is a guide on the Gadabout Job Class in Dragon Quest 3 HD-2D Remake (DQ3). See how to get Gadabout, the best personalities, learned spells and abilities, equipment for the job class, and when to become a Gadabout in this guide!
List of Contents
Best Personality for Gadabout
| Personality | STR | RES | AGI | STA | WIS | LUK |
|---|---|---|---|---|---|---|
| Tough Cookie |
|
|
|
|
|
|
This personality increases your Strength, Resilience, and Stamina. Since most of the time, you're only going to be nurturing Gadabouts to get Sages, this personality can toughen them up until you get to level 20.
Best Personality for Each Job Class
Vamp
| Personality | STR | RES | AGI | STA | WIS | LUK |
|---|---|---|---|---|---|---|
| Vamp |
|
|
|
|
|
|
A perfectly balanced personality is the Vamp personality. It adds to all of the available stats and is no longer exclusive to female characters unlike previous Dragon Quest 3 versions.
Vamp Personality and How to Get
Gadabout Abilities Learned
Abilities and Level Learned
| Lvl. | Spell | MP | Effect |
|---|---|---|---|
| 9 | Sobering Slap | 4 | Cures one ally from paralysis, sleep, or confusion. |
| 13 | Whistle | 0 | Calls for a random monster encounter. |
| 22 | Kerplunk Dance | 0 | Revives all allies and fully recovers their HP in exchange for all of the caster's life and MP. |
| 31 | Egg On | 3 | Significantly increases attack of an ally for one turn. |
| 32 | Harvest Moon | 8 | Attacks all enemies. The fewer the number of enemies, the greater the damage. |
| 38 | Hustle Dance | 14 | Restores 70 HP to all allies. |
| 45 | Channel Anger | 16 | Increases the power of your attack spells. |
List of All Spells and Abilities
Best Equipment for Gadabout
Recommend Equipment
| Equipment | |
|---|---|
| Weapon | Gringham Whip |
| Armor | Male: Dark Cape Female: Shimmering Dress |
| Helmet | Horned Hat |
| Shield | Expel Shield |
| Accessory | Elevating Shoes |
All Gadabout Weapons
| Weapon | Attack | Effect |
|---|---|---|
| Cypress Stick | 2 | No Bonus Effect |
| Oaken Club | 5 | No Bonus Effect |
| Bronze Knife | 8 | No Bonus Effect |
| Copper Sword | 10 | No Bonus Effect |
| Divine Dagger | 12 | No Bonus Effect |
| Chain Sickle | 16 | No Bonus Effect |
| Thorn Whip | 19 | Inflicts damage to one group of enemies. |
| Boomerang | 11 | Inflicts damage to all enemies. |
| Edged Boomerang | 24 | Inflicts damage to all enemies. |
| Iron Lance | 24 | No Bonus Effect |
| Chain Whip | 27 | Inflicts damage to one group of enemies. |
| Slapstick | 31 | No Bonus Effect |
| Iron Axe | 37 | No Bonus Effect |
| Spiked Steel Whip | 40 | Inflicts damage to one group of enemies. |
| Flametang Boomerang | 65 | Inflicts damage to all enemies. |
| Siren Sword | 79 | Casts Fuddle when used as an item in battle. |
| Dragontail Whip | 62 | Inflicts damage to one group of enemies. |
| Gringham Whip | 118 | Inflicts damage to one group of enemies. |
| Hunter's Moon | 131 | Inflicts damage to all enemies. |
| Metal Wing Boomerang | 102 | Inflicts damage to all enemies. Guaranteed to hit metal-type enemies. |
| Swallowtail | 52 | Inflicts damage to all enemies. Increased damage to insect-type enemies. |
| Gusterang | 46 | Inflicts damage to all enemies. |
| Rubiss' Sword | 206 | Casts Kazapple when used as an item in battle. |
| Empress's Whip | 94 | Inflicts damage to one group of enemies. Increased damage to human-type enemies. |
| Beastly Bullwhip | 34 | Inflicts damage to one group of enemies. Increased damage to beast-type enemies. |
When to Gadabout Class Change
Change to a Sage Class at Level 20
The Gadabout can be changed to a Sage class without the use of the Words of Wisdom item. The only requirement to do this is to level up this class to level 20 and going to the Alltrades Abbey to make the change.
Gadabout Explained
Further Into Levels, They Move on Their Own
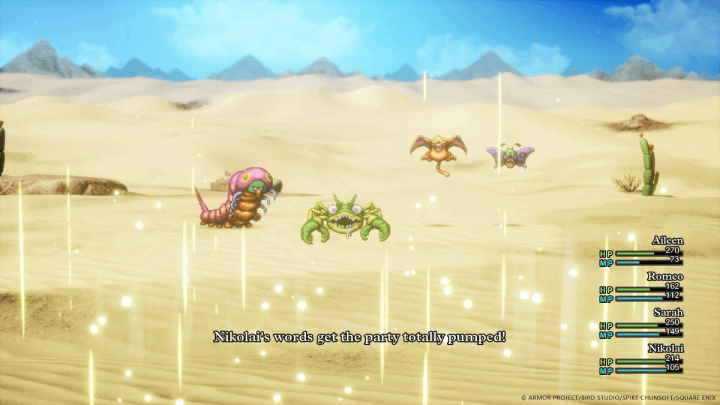
During its early levels, you can control what moves they will do. However, as you level them up, the Gadabout class will "ignore" your commands and will do its own moves. This can range from being beneficial for the team or downright disastrous. Beware!
Dragon Quest 3 HD-2D Remake (DQ3) Related Guides
All Vocations
| All Vocations/Job Classes | ||
|---|---|---|
Comment
2  Anonymous 5 months
yeah but the higher their level the less and less they're worth using because you can't control them is stupid.
Author
Gadabout Job Class and Best Personality
Please participate in our site
improvement survey
03/2026
improvement survey
03/2026
Would you assist in
improving Game8's site?
improving Game8's site?

×
We are listening to our users' valuable opinions and discussing how to act on them.
The information collected through this survey will be used for the purpose of improving our services. In addition, the information will only be disclosed a part of a statistic in a format that will not allow identification of personal information.
Begin Survey
Not Now
×
Please rate each item regarding Game8.co's Advertisements.
Amount of Ads
Very Dissatisfied
Somewhat Dissatisfied
Fine
Somewhat Satisfied
Highly Satisfied
Placement of Ads
Timing of Ad Display
Ad Loading Speed
Safeness of Ads
Content of Ads
×
Please rate each item regarding Game8.co's Quality of Articles.
Amount of information
Very Dissatisfied
Somewhat Dissatisfied
Fine
Somewhat Satisfied
Highly Satisfied
Frequency of updates
Speed of new information
Accuracy of articles
Understandibility of articles
Readability of sentences
×
Please rate each item regarding Game8.co's Usability of the Site.
Ease of finding information
Very Dissatisfied
Somewhat Dissatisfied
Fine
Somewhat Satisfied
Highly Satisfied
Loading Speed
Use of Color
Font Size
Visibility of Images
Easy to Understand Layout
×
Please rate each item regarding Game8.co's Message Boards, Comments.
Ease of Writing
Very Dissatisfied
Somewhat Dissatisfied
Fine
Somewhat Satisfied
Highly Satisfied
Readability
Ease in Finding Information
Comment Quality
Comment Quantity
Admin Response
×
Please rate each item regarding Game8.co's Site's new design.
Please rate our site's new design
Very Dissatisfied
Somewhat Dissatisfied
Fine
Somewhat Satisfied
Highly Satisfied
Do you think that the website's design change makes the site easier to use?
Has the new design made it easier for you to find information on the site?
Has the new design improved the overall visual appeal of the site?
How would you rate your overall satisfaction with the new design of the site?
×
How likely are you to recommend Game8 to someone you know?
Very Unlikely
0
1
2
3
4
5
6
7
8
9
10
Very Likely
If you have other opinions regarding potential improvement to the website, please share them with us. We would appreciate your honest opinion.
Note: This is a free response section, so you can proceed without entering anything.
Note: Please be sure not to enter any kind of personal information into your response.
Note: Please be sure not to enter any kind of personal information into your response.
×
Thank You
×
Thank you for participating in our survey! Your answers will help us to improve the quality of our website and services.
We hope you continue to make use of Game8.
We hope you continue to make use of Game8.
Close
Rankings
- We could not find the message board you were looking for.
Gaming News


Popular Games

Genshin Impact Walkthrough & Guides Wiki
Honkai: Star Rail Walkthrough & Guides Wiki
Umamusume: Pretty Derby Walkthrough & Guides Wiki
Pokemon Pokopia Walkthrough & Guides Wiki
Resident Evil Requiem (RE9) Walkthrough & Guides Wiki
Monster Hunter Wilds Walkthrough & Guides Wiki
Wuthering Waves Walkthrough & Guides Wiki
Arknights: Endfield Walkthrough & Guides Wiki
Pokemon FireRed and LeafGreen (FRLG) Walkthrough & Guides Wiki
Pokemon TCG Pocket (PTCGP) Strategies & Guides Wiki


Recommended Games
Diablo 4: Vessel of Hatred Walkthrough & Guides Wiki
Fire Emblem Heroes (FEH) Walkthrough & Guides Wiki
Yu-Gi-Oh! Master Duel Walkthrough & Guides Wiki
Super Smash Bros. Ultimate Walkthrough & Guides Wiki
Pokemon Brilliant Diamond and Shining Pearl (BDSP) Walkthrough & Guides Wiki
Elden Ring Shadow of the Erdtree Walkthrough & Guides Wiki
Monster Hunter World Walkthrough & Guides Wiki
The Legend of Zelda: Tears of the Kingdom Walkthrough & Guides Wiki
Persona 3 Reload Walkthrough & Guides Wiki
Cyberpunk 2077: Ultimate Edition Walkthrough & Guides Wiki


All rights reserved
© ARMOR PROJECT/BIRD STUDIO/SPIKE CHUNSOFT/SQUARE ENIX
© SUGIYAMA KOBO ℗ SUGIYAMA KOBO
The copyrights of videos of games used in our content and other intellectual property rights belong to the provider of the game.
The contents we provide on this site were created personally by members of the Game8 editorial department.
We refuse the right to reuse or repost content taken without our permission such as data or images to other sites.
still worth getting because the goof off can work wonders and you'll still have the abilities learned when you switch to another class.