This survey will take about 1 minute.
Your answers will help us to improve our website.
Hades 2
Weapon Aspects Guide: Best Aspects and Upgrades
This wiki is based on an earlier patch and may not be fully up to date.
☽ Tier Lists: Best Gods | Best Weapons | Best Boons
☽ Best Arcana Cards | Best Keepsakes | Best Aspects
☽ Lists: Prophecies | Incantations | Hammer Upgrades
☽ Duo Boons | Legendary Boons | Infusion Boons
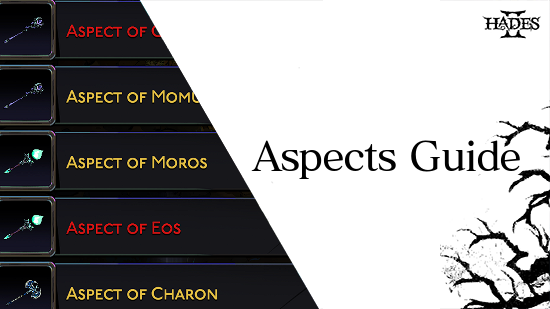
Weapon Aspects are variations of Nocturnal Arms that allow you to use new skills in Hades 2. See how to unlock Weapon Aspects, the best weapon aspect upgrades, and more in this guide!
List of Contents
How to Unlock Weapon Aspects
To unlock the different Weapon Aspects, you'll have to ensure you've completed the following steps:
- Craft All Base Weapons
- Receive the Aspects of Night and Darkness Incantation
- Cast the Incantation at the Crossroads
- Unlock Each Aspect at the Silver Pool
Craft All Base Weapons
| Weapon | Description | Crafting Materials |
|---|---|---|
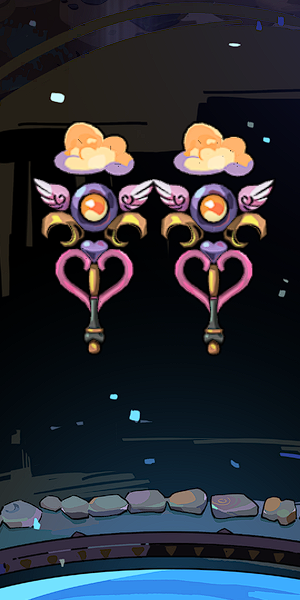
 Witch's Staff Witch's Staff
|
Strike with a quick close-range Attack, or long-range Specials and Omega Moves. | ・N/A |
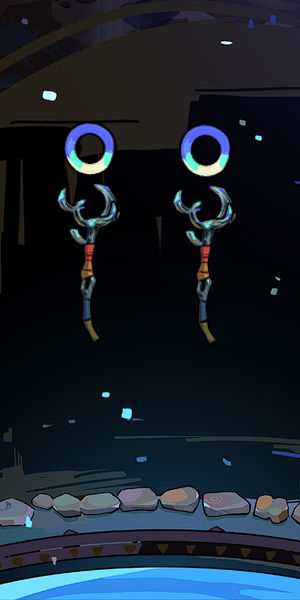
 Sister Blades Sister Blades
|
Slash with furious Attacks, or strike afar with a flurry of Specials. |
・
|
 Umbral Flames Umbral Flames
|
Launch damaging ranged Attacks as you move, or Specials that orbit around you. |
・
・
|
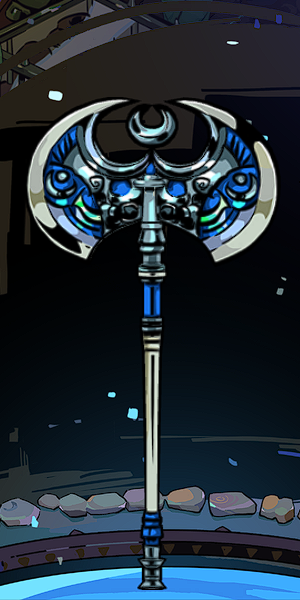
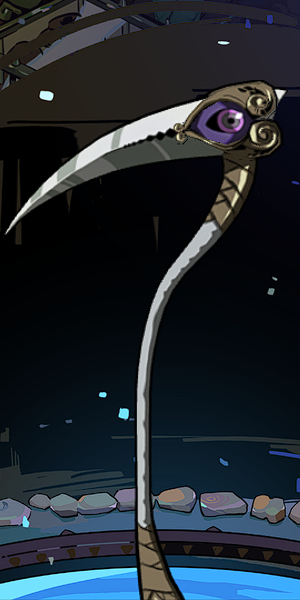
 Moonstone Axe Moonstone Axe
|
Deliver slow but devastating Attacks, or defend and retaliate with your Specials. |
・
|
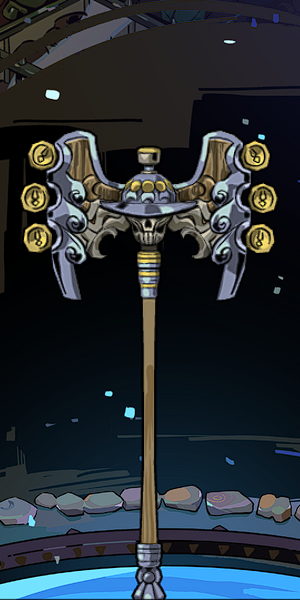
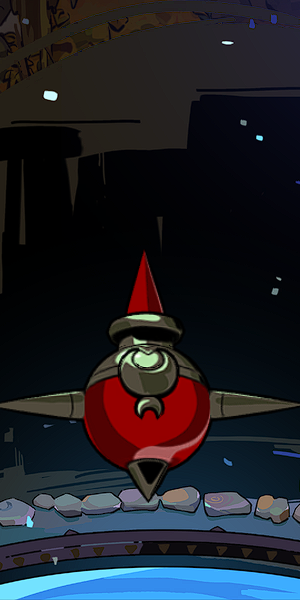
 Argent Skull Argent Skull
|
Blast foes with explosive Attacks, and retreive the Shells with lunging Specials. |
・
・
|
The first thing you'll have to do to unlock Weapon Aspects is to craft all of the Nocturnal Arms. These base versions serve as the Aspects of Melinoe and will be a prerequisite to unlocking the rest of the Aspects.
Best Weapons and Nocturnal Arms Tier List
Receive the Aspects of Night and Darkness Incantation
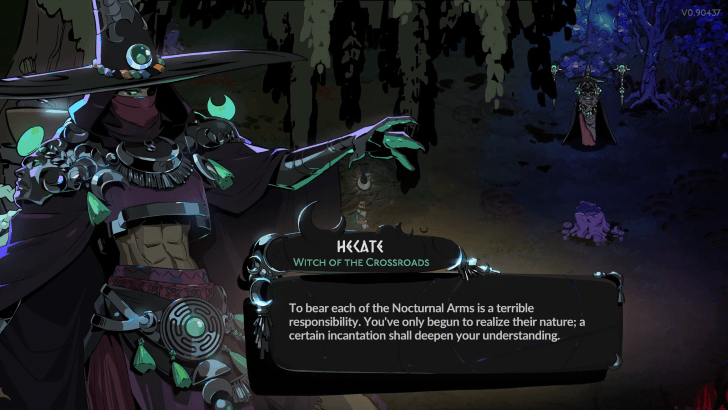
Once you have all the weapons crafted, and have defeated Hecate with each one, there is a chance that she will share the Aspects of Night and Darkness Incantation with you after you defeat her in combat.
You'll know you've unlocked it if you trigger her dialogue where she talks about a deeper understanding required to master the use of each Nocturnal Arm.
Cast the Incantation at the Crossroads
| Incantation | Effects | Cost |
|---|---|---|
 Aspects of Night and Darkness Aspects of Night and Darkness
|
Reveal Aspects within the Silver Pool that further empower each Main Weapon. |
・
・
|
When you return to the Crossroads, you should now find the Incantation that unlocks Aspects at the Witch's Cauldron. Casting it will require 1 Nightshade and 5 Bronze.
Nightshade can be grown from Nightshade Seeds found in Erebus, while Bronze can be mined in the City of Ephyra.
Unlock Each Aspect at the Silver Pool
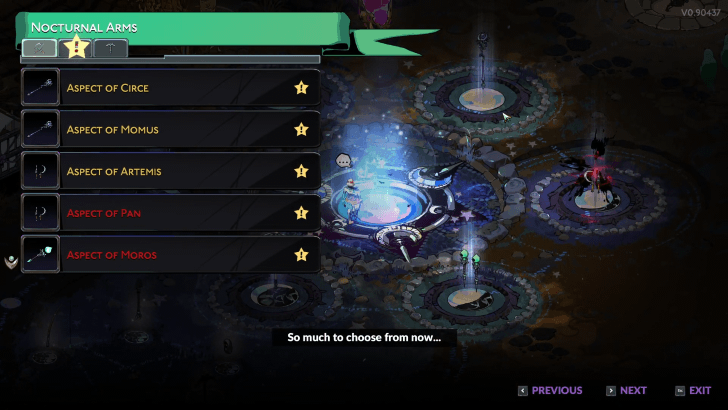
After successfully completing the incantation, a new menu will appear when you interact with the Silver Pool. The second tab will list each of the new Aspects you can unlock, while also letting you upgrade each aspect up to Rank 5.
Each upgrade will require increasingly more materials so be ready to farm more items to further strengthen your weapons.
Each Tool Required for Each Resource
List of Weapon Aspects
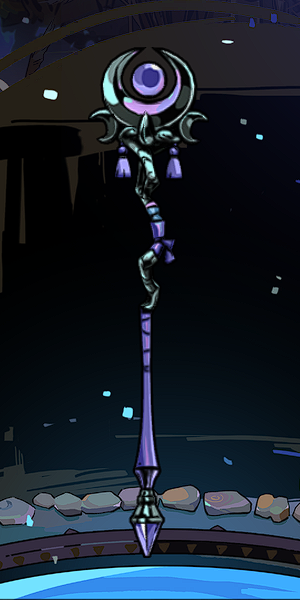
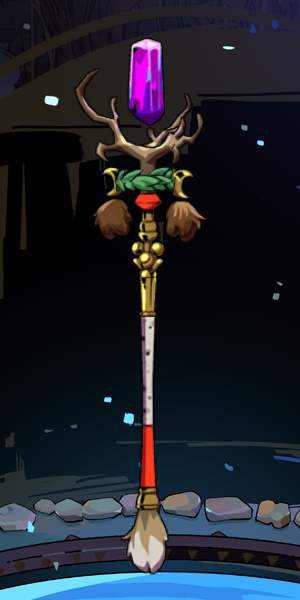
Witch's Staff Aspects
| Weapon | ||
|---|---|---|
|
Witch's Staff
|
||
| Aspect | Effect | Materials |
| Melinoe | You Channel your Omega Moves faster. | N/A |
| Circe | After landing 21 Attacks or Specials, gain Serenity. |
・
・ |
| Momus | While you have no more than 50% HP, absorb your Omega Special blast to restore 5 HP. |
・
・ |
Aspect of Melinoe is the default aspect, and focuses on Omega-heavy gameplay. Aspect of Circe grants Serenity, which makes Omega Moves faster, and rapidly recovers Magick. Circe's Aspect allows Melinoe to recover HP through her Omega Special's blast while also increasing its damage.
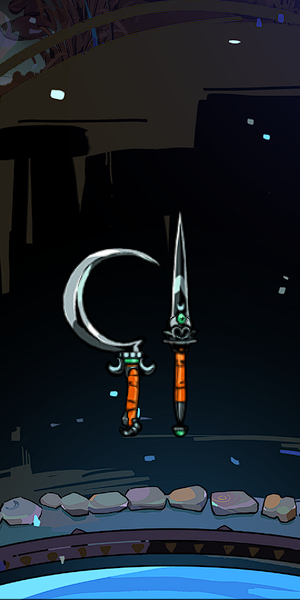
Sister Blades Aspects
| Weapon | ||
|---|---|---|
|
Sister Blades
|
||
| Aspect | Effect | Materials |
| Melinoe | Attacks deal more damage from behind. |
・ |
| Artemis | Channeling Omega Attacks have a chance to Parry and Riposte after. |
・
・ |
| Pan | Specials seek foes in Casts, and fires more blades after you Channel. |
・
・ |
Aspect of Melinoe provides additional backstab damage, which is easy to trigger through your Omega Attack. Artemis' aspect provides a decent defensive option, with an offensive buff payout. Aspect of Pan is more centered on Special usage, relying on your Cast in conjunction with your Specials.
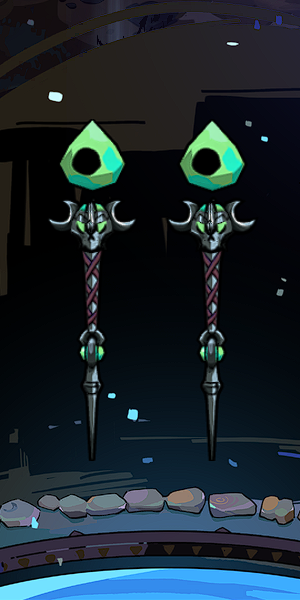
Umbral Flames Aspects
| Weapon | ||
|---|---|---|
|
Umbral Flames
|
||
| Aspect | Effect | Materials |
| Melinoe | Flames from your Omega Special burn longer before expiring. |
・
・ |
| Moros | Your Attacks linger for 6 Seconds, and explode in a blast if struck by your Special. |
・
・ |
| Eos | Your Attacks grow bigger and stronger over 4 Seconds, and return whenever you Sprint. |
・
・ |
The aspect of Melinoe and Moros are pretty similar, in the sense that they both capitalize on Specials to deal more damage. Aspect of Eos, on the other hand, focuses on buffing Attacks, essentially allowing you to focus on strafing while attacking.
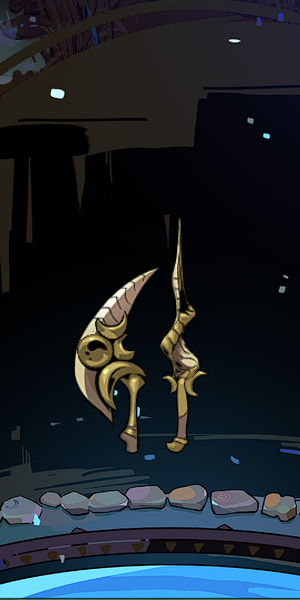
Moonstone Axe Aspects
| Weapon | ||
|---|---|---|
|
Moonstone Axe
|
||
| Aspect | Effect | Materials |
| Melinoe | You recover faster after using your Attacks and Specials |
・ |
| Charon | Your Cast lasts +3 Seconds, and erupts like your Omega Cast if struck by your Omega Special |
・
・ |
| Thanatos | Whenever you hit with Omega Moves, gain +1% Critical chance until you take damage. |
・
・ |
Melinoe's aspect allows you to recover faster, basically reducing the interval between your combos. Aspect of Charon focuses more on combining your Omega Special and Cast, to deal AoE damage. Thanatos' Aspect provides you with Critical Strike chance that persists until you take damage.
Argent Skull Aspects
| Weapon | ||
|---|---|---|
|
Argent Skull
|
||
| Aspect | Effect | Materials |
| Melinoe | Your Attacks have more Power for each Shell fired and not yet retrieved. |
・
・ |
| Medea | Your Attacks stays within reach, and explodes in a large area on impact or after 3 Seconds. |
・
・ |
| Persephone | Any damage you deal generates Glory, which enhances your Omega Special. |
・
・ |
Both Melinoe and Medea's Aspects focus on an attack-centered playstyle, with Melinoe's focusing on ranged playstyle, and Medea with more of a close-range playstyle. The Aspect of Persephone leans more into a Omega Special playstyle, since it buffs your damage and dash duration.
Best Aspect Upgrades
| Best Weapon Aspects | |
|---|---|
・
・
・
|
|
・
・
・
・
・
・ |
|
・
・
・
|
|
・
・
・ |
|
Witch's Staff Aspect Upgrades
| Aspect | Effect | Materials |
|---|---|---|
 Melinoe Melinoe |
Rank 1: Channel Speed +0% | ・N/A |
| Rank 2: Channel Speed +15% |
・
・
|
|
| Rank 3: Channel Speed +20% |
・
・
|
|
| Rank 4: Channel Speed +25% |
・
・
|
|
| Rank 5: Channel Speed +30% |
・
・
|
|
 Circe Circe |
Rank 1: Serenity Duration 6 Sec. |
・
・
|
| Rank 2: Serenity Duration 7 Sec. |
・
|
|
| Rank 3: Serenity Duration 8 Sec. |
・
|
|
| Rank 4: Serenity Duration 9 Sec. |
・
|
|
| Rank 5: Serenity Duration 10 Sec. |
・
|
|
 Momus Momus |
Rank 1: Special Power +10 |
・
・
|
| Rank 2: Special Power +15 |
・
|
|
| Rank 3: Special Power +20 |
・
|
|
| Rank 4: Special Power +25 |
・
|
|
| Rank 5: Special Power +30 |
・
|
While each aspect features a specific gameplay niche, the best Aspect to use is the Aspect of Circe. The Serenity buff essentially provides you with unlimited Magick Recovery, as long as you continue dealing damage with attacks and specials.
Witch's Staff Guide: Best Boons and Hammer Upgrades
Sister Blades Aspect Upgrades
| Aspect | Effect | Materials |
|---|---|---|
 Melinoe Melinoe |
Rank 1: Backstab Damage +0% |
・
|
| Rank 2: Backstab Damage +10% |
・
・
|
|
| Rank 3: Backstab Damage +20% |
・
・
|
|
| Rank 4: Backstab Damage +30% |
・
・
|
|
| Rank 5: Backstab Damage +40% |
・
・
|
|
 Artemis Artemis |
Rank 1: Faster Omega Attack +20% |
・
・
|
| Rank 2: Faster Omega Attack +30% |
・
|
|
| Rank 3: Faster Omega Attack +40% |
・
|
|
| Rank 4: Faster Omega Attack +50% |
・
|
|
| Rank 5: Faster Omega Attack +60% |
・
|
|
 Pan Pan |
Rank 1: Omega Bonus Blades +1 |
・
・
|
| Rank 2: Omega Bonus Blades +2 |
・
|
|
| Rank 3: Omega Bonus Blades +3 |
・
|
|
| Rank 4: Omega Bonus Blades +4 |
・
|
|
| Rank 5: Omega Bonus Blades +5 |
・
|
The best Aspect for Sister Blades is Melinoe at max rank, since the +40% Backstab Damage is extremely useful, especially when used with your Omega Attack.
Sister Blades Guide: Best Boons and Hammer Upgrades
Umbral Flames Aspect Upgrades
| Aspect | Effect | Materials |
|---|---|---|
 Melinoe Melinoe |
Rank 1: Omega Special Duration +0 Sec. |
・
・
|
| Rank 2: Omega Special Duration +1 Sec. |
・
・
|
|
| Rank 3: Omega Special Duration +2 Sec. |
・
・
|
|
| Rank 4: Omega Special Duration +3 Sec. |
・
・
|
|
| Rank 5: Omega Special Duration +4 Sec. |
・
・
|
|
 Moros Moros |
Rank 1: Blast Damage +0% |
・
・
|
| Rank 2: Blast Damage +15% |
・
|
|
| Rank 3: Blast Damage +30% |
・
|
|
| Rank 4: Blast Damage +45% |
・
|
|
| Rank 5: Blast Damage +60% |
・
|
|
 Eos Eos |
Rank 1: Full Grown Damage +40% |
・
・
|
| Rank 2: Full Grown Damage +50% |
・
|
|
| Rank 3: Full Grown Damage +60% |
・
|
|
| Rank 4: Full Grown Damage +70% |
・
|
|
| Rank 5: Full Grown Damage +80% |
・
|
While the other aspects open unique gameplay mechanics, the best Aspect for Umbral Flames is the Aspect of Eos. When paired with Magick Recovery boons, you should be able to effortlessly maintain the +80% Damage Buff.
Umbral Flames Guide: Best Boons and Hammer Upgrades
Moonstone Axe Aspect Upgrades
| Aspect | Effect | Materials |
|---|---|---|
 Melinoe Melinoe |
Rank 1: Recovery Speed +0% |
・
|
| Rank 2: Recovery Speed +10% |
・
・
|
|
| Rank 3: Recovery Speed +15% |
・
・
|
|
| Rank 4: Recovery Speed +20% |
・
・
|
|
| Rank 5: Recovery Speed +25% |
・
・
|
|
 Charon Charon |
Rank 1: Cleave-Cast Size and Damage +10% |
・
・
|
| Rank 2: Cleave-Cast Size and Damage +15% |
・
|
|
| Rank 3: Cleave-Cast Size and Damage +20% |
・
|
|
| Rank 4: Cleave-Cast Size and Damage +25% |
・
|
|
| Rank 5: Cleave-Cast Size and Damage +30% |
・
|
|
 Thanatos Thanatos |
Rank 1: Max Critical Chance +4% |
・
・
|
| Rank 2: Max Critical Chance +8% |
・
|
|
| Rank 3: Max Critical Chance +12% |
・
|
|
| Rank 4: Max Critical Chance +16% |
・
|
|
| Rank 5: Max Critical Chance +20% |
・
|
The best aspect for Moonstone Axe is the Aspect of Thanatos, since it provides Melinoe additional Crit Chance when landing Omega moves, which can be achieved easily by your Omega Attack or Special.
Moonstone Axe Guide: Best Boons and Hammer Upgrades
Argent Skull Aspect Upgrades
| Aspect | Effect | Materials |
|---|---|---|
 Melinoe Melinoe |
Rank 1: Power per Spent Shell +0 |
・
・
|
| Rank 2: Power per Spent Shell +5 |
・
・
|
|
| Rank 3: Power per Spent Shell +10 |
・
・
|
|
| Rank 4: Power per Spent Shell +15 |
・
・
|
|
| Rank 5: Power per Spent Shell +20 |
・
・
|
|
 Medea Medea |
Rank 1: Attack and Special Damage +20% |
・
・
|
| Rank 2: Attack and Special Damage +30% |
・
|
|
| Rank 3: Attack and Special Damage +40% |
・
|
|
| Rank 4: Attack and Special Damage +50% |
・
|
|
| Rank 5: Attack and Special Damage +60% |
・
|
|
 Persephone Persephone |
Rank 1: Omega Damage +10% |
・
・
|
| Rank 2: Omega Damage +15% |
・
|
|
| Rank 3: Omega Damage +20% |
・
|
|
| Rank 4: Omega Damage +25% |
・
|
|
| Rank 5: Omega Damage +30% |
・
|
The best aspect for the Ardent Skull is the Aspect of Melinoe, since it still revolves around the core strengths of the weapon. If you want to shift to a close-ranged approach, Aspect of Medea is great, but you will no longer be able to fight from a distance.
Argent Skull Guide: Best Boons and Hammer Upgrades
Hades 2 Related Guides

Weapons Guides
| Best Weapons Tier List | All Daedalus Hammer Upgrades |
| Aspects Guide |
Nocturnal Arms
| All Nocturnal Arms | ||
|---|---|---|
| Witch's Staff |
Moonstone Axe |
Umbral Flames |
| Sister Blades |
Argent Skull |
|
Author

Weapon Aspects Guide: Best Aspects and Upgrades
Please participate in our site
improvement survey
03/2026
improvement survey
03/2026
Would you assist in
improving Game8's site?
improving Game8's site?

×
We are listening to our users' valuable opinions and discussing how to act on them.
The information collected through this survey will be used for the purpose of improving our services. In addition, the information will only be disclosed a part of a statistic in a format that will not allow identification of personal information.
Begin Survey
Not Now
×
Please rate each item regarding Game8.co's Advertisements.
Amount of Ads
Very Dissatisfied
Somewhat Dissatisfied
Fine
Somewhat Satisfied
Highly Satisfied
Placement of Ads
Timing of Ad Display
Ad Loading Speed
Safeness of Ads
Content of Ads
×
Please rate each item regarding Game8.co's Quality of Articles.
Amount of information
Very Dissatisfied
Somewhat Dissatisfied
Fine
Somewhat Satisfied
Highly Satisfied
Frequency of updates
Speed of new information
Accuracy of articles
Understandibility of articles
Readability of sentences
×
Please rate each item regarding Game8.co's Usability of the Site.
Ease of finding information
Very Dissatisfied
Somewhat Dissatisfied
Fine
Somewhat Satisfied
Highly Satisfied
Loading Speed
Use of Color
Font Size
Visibility of Images
Easy to Understand Layout
×
Please rate each item regarding Game8.co's Message Boards, Comments.
Ease of Writing
Very Dissatisfied
Somewhat Dissatisfied
Fine
Somewhat Satisfied
Highly Satisfied
Readability
Ease in Finding Information
Comment Quality
Comment Quantity
Admin Response
×
Please rate each item regarding Game8.co's Site's new design.
Please rate our site's new design
Very Dissatisfied
Somewhat Dissatisfied
Fine
Somewhat Satisfied
Highly Satisfied
Do you think that the website's design change makes the site easier to use?
Has the new design made it easier for you to find information on the site?
Has the new design improved the overall visual appeal of the site?
How would you rate your overall satisfaction with the new design of the site?
×
How likely are you to recommend Game8 to someone you know?
Very Unlikely
0
1
2
3
4
5
6
7
8
9
10
Very Likely
If you have other opinions regarding potential improvement to the website, please share them with us. We would appreciate your honest opinion.
Note: This is a free response section, so you can proceed without entering anything.
Note: Please be sure not to enter any kind of personal information into your response.
Note: Please be sure not to enter any kind of personal information into your response.
×
Thank You
×
Thank you for participating in our survey! Your answers will help us to improve the quality of our website and services.
We hope you continue to make use of Game8.
We hope you continue to make use of Game8.
Close
Rankings
- We could not find the message board you were looking for.
Gaming News


![Monster Hunter Stories 3 Review [First Impressions] | Simply Rejuvenating](https://img.game8.co/4438641/2a31b7702bd70e78ec8efd24661dacda.jpeg/thumb)
Popular Games

Genshin Impact Walkthrough & Guides Wiki
Honkai: Star Rail Walkthrough & Guides Wiki
Umamusume: Pretty Derby Walkthrough & Guides Wiki
Pokemon Pokopia Walkthrough & Guides Wiki
Resident Evil Requiem (RE9) Walkthrough & Guides Wiki
Monster Hunter Wilds Walkthrough & Guides Wiki
Wuthering Waves Walkthrough & Guides Wiki
Arknights: Endfield Walkthrough & Guides Wiki
Pokemon FireRed and LeafGreen (FRLG) Walkthrough & Guides Wiki
Pokemon TCG Pocket (PTCGP) Strategies & Guides Wiki


Recommended Games
Diablo 4: Vessel of Hatred Walkthrough & Guides Wiki
Cyberpunk 2077: Ultimate Edition Walkthrough & Guides Wiki
Fire Emblem Heroes (FEH) Walkthrough & Guides Wiki
Yu-Gi-Oh! Master Duel Walkthrough & Guides Wiki
Super Smash Bros. Ultimate Walkthrough & Guides Wiki
Pokemon Brilliant Diamond and Shining Pearl (BDSP) Walkthrough & Guides Wiki
Elden Ring Shadow of the Erdtree Walkthrough & Guides Wiki
Monster Hunter World Walkthrough & Guides Wiki
The Legend of Zelda: Tears of the Kingdom Walkthrough & Guides Wiki
Persona 3 Reload Walkthrough & Guides Wiki


All rights reserved
© 2024 Supergiant Games.
The copyrights of videos of games used in our content and other intellectual property rights belong to the provider of the game.
The contents we provide on this site were created personally by members of the Game8 editorial department.
We refuse the right to reuse or repost content taken without our permission such as data or images to other sites.
I feel like aspect of momus fully upgraded with double homing special hammer should definitely be higher than b tier