This survey will take about 1 minute.
Your answers will help us to improve our website.
Dune: Awakening
Combat Guide and Tips
This guide will cover the combat system in Dune: Awakening, specifically the combat mechanics that cover both ranged combat and melee combat, as well as the PvP system available. Read on to find core mechanics on combat as well as useful tips and tricks to keep in mind during a fight!
List of Contents
Combat Basics
| Combat Basics |
|
|---|
A Mix Between Ranged and Melee Combat
The way the game is structured, you'll be forced to master both melee and ranged combat on the battlefield, especially when you're up against an entire group.
Using ranged weapons from a distance to get some easy kills on unsuspecting enemies is effective, though that won't be enough for the larger camps. There'll be moments when melee fighters charge forward for a fight, forcing you to switch weapons.
When this happens, using your abilities and using melee yourself can help you quickly dispatch them, especially when they're equipped with Holtzman shields themselves.
Remember, being outnumbered is the fastest way to get yourself killed. Divide and eliminate your enemies to have the best chance on the battlefield.
Using Ranged Combat to Clear Camps
Effective at Disposing Enemies
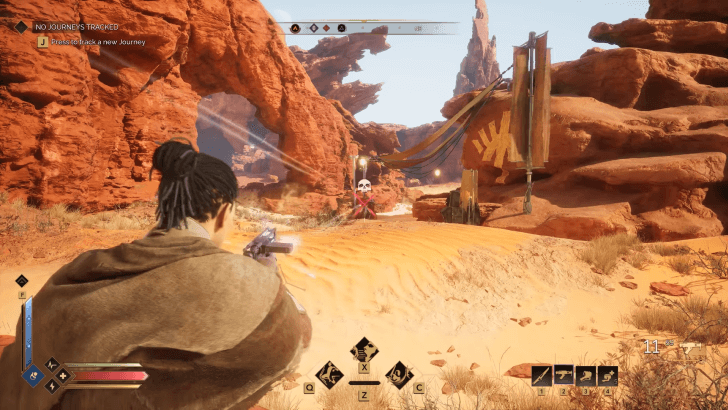
Firearms are extremely useful for quickly disposing enemies as they not only eliminate threats safely, unarmored enemies fall very quickly against them.
Movement and Cover
Using ranged against melee fighters won't be an issue, granted they don't have the Holtzman shield, but most likely you'll be contending with other ranged fighters in an area. You must have quick access to cover during a fight because without proper gear you are extremely vulnerable to projectiles.
Bypassing Shields
Though ranged fighting is extremely effective in clearing out enemies, more powerful ones will be making use of the Holtzman Shield. This effectively nullifies most shots made against them, and you'll either be forced to wear them down by depleting their shield, or get up close and landing a fatal hit with a slow strike.
That said, there are certain ranged weapons that the Holtzman shield is vulnerable against. The Disrupter is an excellent sidearm to deal with shielded enemies. Though you'll have to move closer to them to make the firearm effective, overloading their shields will make them vulnerable against normal melee strikes or to any rifle or scattergun you have in your arsenal.
There are also Drillshot type of firearms that will slowly drill through their defenses and damage the enemy despite the Holtzman shield.
Surprise is Your Best Friend
Quickly clearing out enemy camps can be simple when you're swift and efficient. The Scattergun is extremely effective at removing problems when they don't see you coming, especially as enemies don't have their shields up before you initiate combat.
Creeping up close to Heavy Fighters and making quick work of them using the scattergun ensures that they won't hassle you when clearing out their weaker allies.
Melee Combat Is Effective In 1v1s
Parrying Staggers Foes
Staggering a foe can either help you land a devastating blow, or regain precious energy or stamina back for the fight.
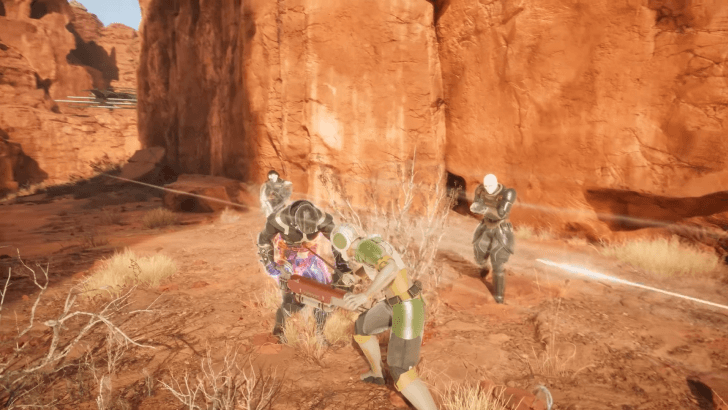
Melee Fights Are Overwhelming in Groups
While melee strikes don't cost stamina, they still leave you vulnerable when you don't land a hit. Fighting enemies gets trickier when you're up against multiple at once, and so it's important to either separate one from the flock or make use of your abilities to occupy them while you deal with the other.
Melee is the Best Counter against Shields
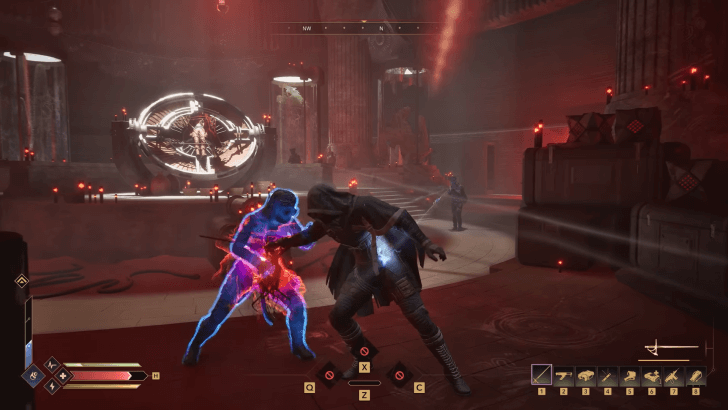
Melee is an effective counter against the Holtzman shield. The best way to get past the invulnerability is first staggering them with either a parry or a few quick melee strikes, then finishing them off with a slow strike with the blade.
Getting Knocked Down Is Not Game Over
Losing all your health isn't game over just yet; there is a small window for you to be able to revive yourself when you get knocked out. Taking enough damage while in this state will cause you to perish, so make sure to move behind cover before attempting to self-revive.
Abilities Expand Tactical Options
|
|
Their abilities allow them to get up close to their enemies to land fatal blows, and they are extremely deadly with a blade. Notable Abilities: Parry, Deflection, Knee Charge |
|---|---|
|
|
Their passive skills and powerful turret allow them to control the field, which is extremely useful for shifting your foes' attention elsewhere to land some devastating blows.. Notable Abilities: The Sentinel, Shield Wall, Poison Capsule |
|
|
Not only do enemies stop in their tracks against their abilities, they can also quickly close the distance between them to land some fatal blows, making them extremely powerful and deadly. Notable Abilities: Bindu Sprint, Compel, Recovery |
|
|
Extremely agile fighters that let them dominate the battlefield with their equipment and their combat experience. Notable Abilities: Shigawire Claw, Anti-Gravity Field, Assault Seeker |
Abilities can turn the tide to your favor when used in a tight spot. The different classes in Dune: Awakening have been specially tuned for specific playstyles.
Mixing your abilities from the other classes is an extremely viable option, and expands many of the available tactical options!
Infusing Spice to Shift the Battlefield
Spice is an extremely powerful boost to your character in a fight, doing things such as massively decreasing your ability cooldown, and improving your character's chances in a fight. Not only are they a powerful resource in a fight, but they are also used as a currency in trading hubs.
Too much will cause your character to be addicted, and will severely hamper your strength through withdrawals.
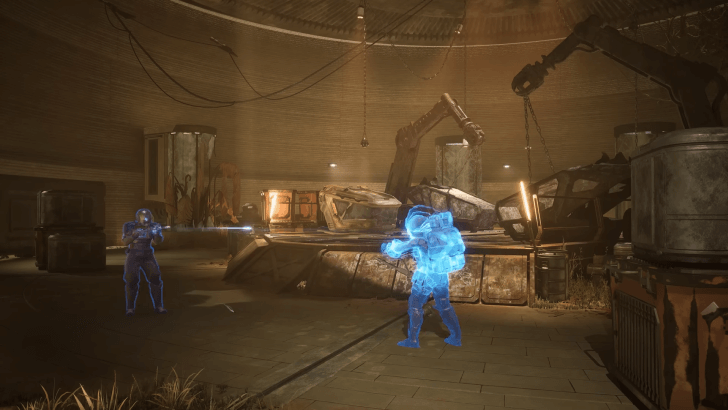
PvP Zone at the Deep Desert
Encountering other players is only dangerous in specific PvP zones. The Deep Desert will be host to thousands of players, and it's not recommended to venture out here without either being very prepared or having a party of allies to cover your blind spots.
Using firearms that make use of drillshot darts will be extremely useful in dispatching enemies with a shield, though you'll have to contend with other fighters using the same method. Always make sure that you have allies or at the very least environment awareness to always have cover when this happens!
Combat Tips
| Combat Tips |
|
|---|
Stamina is Your Currency in a Fight
Dodging Costs Precious Stamina
Dodging is an important mechanic for getting out of harm's way, though it uses a significant portion of your stamina bar when used. A skilled player will use their dodges efficiently in a fight to ensure that they will have enough energy and stamina when they need it.
After dodging, make sure to put more distance between you and your enemy as they recover from their strike.
Stamina Regeneration Is Not Instant
There is a two-second delay before a depleted stamina bar starts to fill back up. However, any actions that normally use stamina, or sprinting, melee, and taking damage, will restart the timer until regeneration starts again.
When your stamina is depleted in a fight, make sure to put some distance between you and who you're fighting with.
Hydrate Yourself to Get Bonus Stamina
Being fully hydrated before entering combat can be a lifesaver, as a full hydration bar gives you bonus stamina. Stamina will be important in a fight for the Dodge mechanic.
Take Stock of Your Abilities
Abilities play a big role in shaping how you'll take on enemies. These will vary in their cooldown timing and effectiveness in a fight, so ensuring you have some that can protect you in a fight can mean a lot.
Picking the right ones for your playstyle is crucial for being an effective fighter, especially when you can mix abilities learned from the different Masters at the trading posts.
Dune: Awakening Related Guides
| Dune: Awakening Wiki Contents | |
|---|---|
 Maps and Locations Maps and Locations |
 Builds Builds |
 Resources Resources |
 Uniques Uniques |
 Walkthrough Walkthrough |
 Weapons Weapons |
 Armor Armor |
 Skills Skills |
 Factions Factions |
 Classes Classes |
 Contracts Contracts |
 Characters Characters |
 Items Items |
 Vehicles Vehicles |
 Tools Tools |
 Base Structures Base Structures |
 Enemies Enemies |
 Decorations Decorations |
 Bugs and Error Codes Bugs and Error Codes |
 Cosmetics Cosmetics |
Comment
Author
Combat Guide and Tips
Please participate in our site
improvement survey
03/2026
improvement survey
03/2026
Would you assist in
improving Game8's site?
improving Game8's site?

×
We are listening to our users' valuable opinions and discussing how to act on them.
The information collected through this survey will be used for the purpose of improving our services. In addition, the information will only be disclosed a part of a statistic in a format that will not allow identification of personal information.
Begin Survey
Not Now
×
Please rate each item regarding Game8.co's Advertisements.
Amount of Ads
Very Dissatisfied
Somewhat Dissatisfied
Fine
Somewhat Satisfied
Highly Satisfied
Placement of Ads
Timing of Ad Display
Ad Loading Speed
Safeness of Ads
Content of Ads
×
Please rate each item regarding Game8.co's Quality of Articles.
Amount of information
Very Dissatisfied
Somewhat Dissatisfied
Fine
Somewhat Satisfied
Highly Satisfied
Frequency of updates
Speed of new information
Accuracy of articles
Understandibility of articles
Readability of sentences
×
Please rate each item regarding Game8.co's Usability of the Site.
Ease of finding information
Very Dissatisfied
Somewhat Dissatisfied
Fine
Somewhat Satisfied
Highly Satisfied
Loading Speed
Use of Color
Font Size
Visibility of Images
Easy to Understand Layout
×
Please rate each item regarding Game8.co's Message Boards, Comments.
Ease of Writing
Very Dissatisfied
Somewhat Dissatisfied
Fine
Somewhat Satisfied
Highly Satisfied
Readability
Ease in Finding Information
Comment Quality
Comment Quantity
Admin Response
×
Please rate each item regarding Game8.co's Site's new design.
Please rate our site's new design
Very Dissatisfied
Somewhat Dissatisfied
Fine
Somewhat Satisfied
Highly Satisfied
Do you think that the website's design change makes the site easier to use?
Has the new design made it easier for you to find information on the site?
Has the new design improved the overall visual appeal of the site?
How would you rate your overall satisfaction with the new design of the site?
×
How likely are you to recommend Game8 to someone you know?
Very Unlikely
0
1
2
3
4
5
6
7
8
9
10
Very Likely
If you have other opinions regarding potential improvement to the website, please share them with us. We would appreciate your honest opinion.
Note: This is a free response section, so you can proceed without entering anything.
Note: Please be sure not to enter any kind of personal information into your response.
Note: Please be sure not to enter any kind of personal information into your response.
×
Thank You
×
Thank you for participating in our survey! Your answers will help us to improve the quality of our website and services.
We hope you continue to make use of Game8.
We hope you continue to make use of Game8.
Close
Rankings
- We could not find the message board you were looking for.
Gaming News


![Slay the Spire 2 Review [Early Access] | Still the Deckbuilder to Beat](https://img.game8.co/4433115/44e19e1fb0b4755466b9e516ec7ffb1e.png/thumb)

![Resident Evil Village Review [Switch 2] | Almost Flawless Port](https://img.game8.co/4432790/e1859f64830960ce4248d898f8cd38d9.jpeg/thumb)
Popular Games

Genshin Impact Walkthrough & Guides Wiki
Honkai: Star Rail Walkthrough & Guides Wiki
Umamusume: Pretty Derby Walkthrough & Guides Wiki
Pokemon Pokopia Walkthrough & Guides Wiki
Resident Evil Requiem (RE9) Walkthrough & Guides Wiki
Monster Hunter Wilds Walkthrough & Guides Wiki
Wuthering Waves Walkthrough & Guides Wiki
Arknights: Endfield Walkthrough & Guides Wiki
Pokemon FireRed and LeafGreen (FRLG) Walkthrough & Guides Wiki
Pokemon TCG Pocket (PTCGP) Strategies & Guides Wiki


Recommended Games
Fire Emblem Heroes (FEH) Walkthrough & Guides Wiki
Diablo 4: Vessel of Hatred Walkthrough & Guides Wiki
Yu-Gi-Oh! Master Duel Walkthrough & Guides Wiki
Super Smash Bros. Ultimate Walkthrough & Guides Wiki
Pokemon Brilliant Diamond and Shining Pearl (BDSP) Walkthrough & Guides Wiki
Elden Ring Shadow of the Erdtree Walkthrough & Guides Wiki
Monster Hunter World Walkthrough & Guides Wiki
The Legend of Zelda: Tears of the Kingdom Walkthrough & Guides Wiki
Persona 3 Reload Walkthrough & Guides Wiki
Cyberpunk 2077: Ultimate Edition Walkthrough & Guides Wiki


All rights reserved
© 2025 Funcom. All Rights Reserved.
The copyrights of videos of games used in our content and other intellectual property rights belong to the provider of the game.
The contents we provide on this site were created personally by members of the Game8 editorial department.
We refuse the right to reuse or repost content taken without our permission such as data or images to other sites.