This survey will take about 1 minute.
Your answers will help us to improve our website.
Dune: Awakening
Complete Story Walkthrough
HOT: Building Contest | Patch 1.1.15.0
★ Maintenance Times | Server Status
☆ Story Walkthrough | Contracts
┗ Interactive Map | Resources | Uniques
★ Best Builds | Best Class
✪ Base Design Sharing | Guild Recruitment
This is a complete story walkthrough for Dune: Awakening. See a full list of main quests and their objectives here!
| Quest Guides | |
|---|---|
| Walkthrough | Contracts |
List of Contents
All Main Story Questlines
| Jump to a Section! | |||||||||||
|---|---|---|---|---|---|---|---|---|---|---|---|
| The Fall of Proteus | A New Beginning | Vermillius Gap | |||||||||
| Jabal Eifrit & Hagga Rift | Find the Fremen | Shield Wall and O'odham | |||||||||
| The Sheol | Deep Desert | Assassin's Handbook | |||||||||
| Miscellaneous | |||||||||||
The Fall of Proteus
| Step | Objective |
|---|---|
| 1 |  Exit the cave you start in and speak to Zantara. Then, proceed to the Proteus wreck and loot a corpse for a Cutteray. |
| 2 |  Use the Cutteray to proceed through the ship, and fight your way through. Collect the Pentashield Key, then head to the Captain and use the transmitter. ▶︎ Escape Full Walkthrough |
The Fall of Proteus questline introduces your character to the survival methods needed in Arrakis. The basics, such as salvaging materials and simple crafting, are taught for your survival, along with navigation methods used for traversing terrain.
The Fall of Proteus Questline Walkthrough
A New Beginning
| Step | Objective |
|---|---|
| 1 | 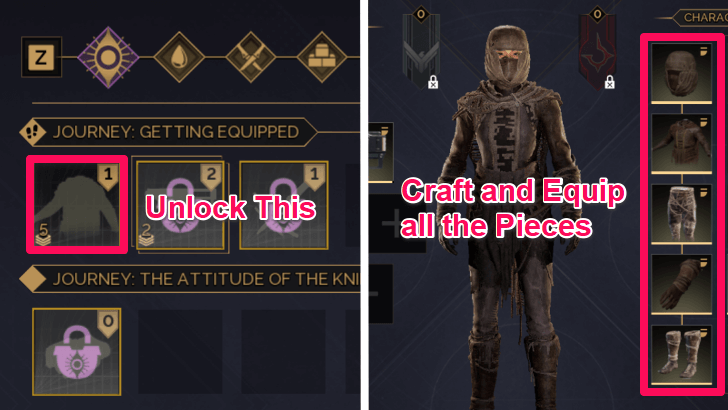 After the cutscene, gather the materials required from the surrounding area to craft Makeshift Clothing and a Maula Pistol. ▶︎ Getting Equipped Walkthrough |
| 2 |  Unlock and craft Binoculars, then use them to find a Scavenger Camp. You can also check your map for their locations. Head to any that you spot, and defeat the hostiles to earn a level-up and a new skill. ▶︎ The Attitude of the Knife Walkthrough |
| 3 | 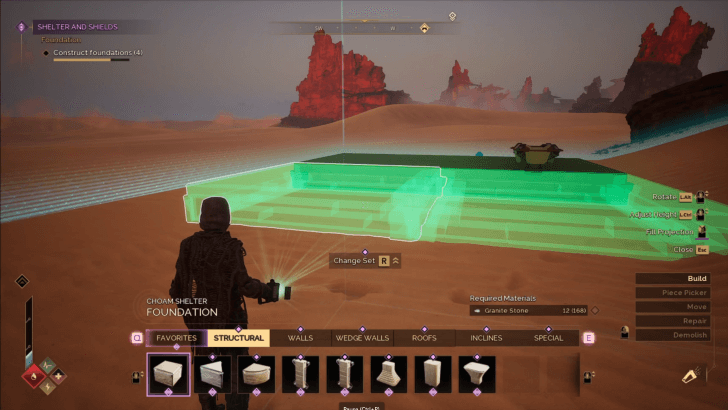 You will have to keep raiding Scavenger Camps for Salvaged Metal and Fuel Cells. Then, gather Granite, and research the Basic Construction Kit to build your first base. ▶︎ Shelter and Shields Walkthrough |
| 4 |  Next, research and craft the items in the Basic Exsanguination Kit. Use it on dead enemies to collect blood. Then, construct a Blood Purifier in your base and process the blood for water. ▶︎ Water from Blood Walkthrough |
| 5 | 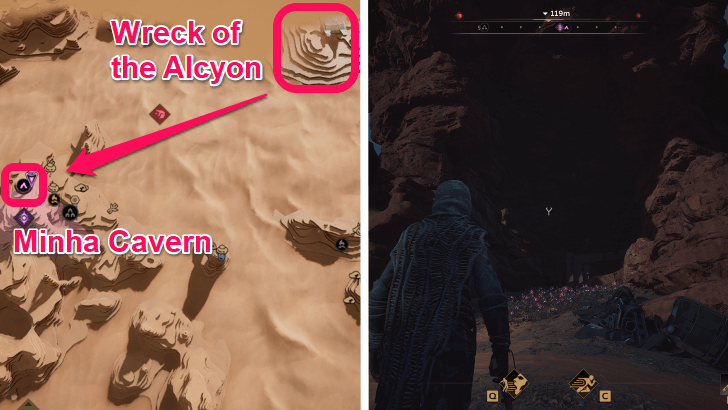 You will then experience a Spice Dream. Once you awaken, head to the marked location on the map to start The First Trial of Aql. ▶︎ The First Trial of Aql Walkthrough |
| 6 |  Once the trial is complete, begin looking for moisture-sealed caves. Raid these and defeat the enemies inside for the materials you need to craft a Stillsuit. You will also need to mine Copper, and build a Fabricator. ▶︎ Echoes of the Past Walkthrough |
| 7 | 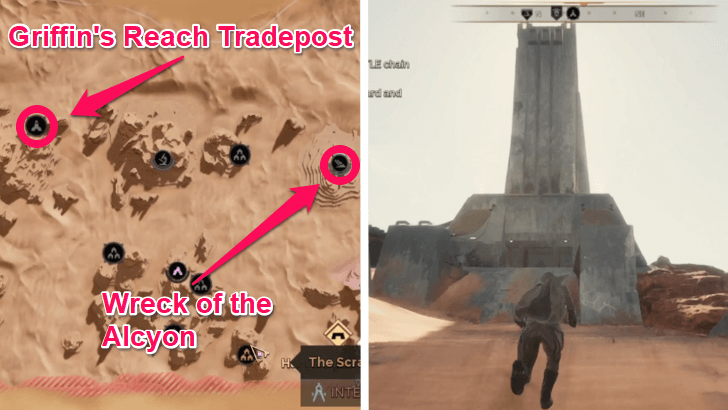 You are now better equipped for exploration, so research and craft a Survey Probe and its launcher to reveal the map. Make your way to the Griffin's Reach Tradepost and take on your first Contract. ▶︎ A Touch of Civilization Walkthrough |
| 8 | 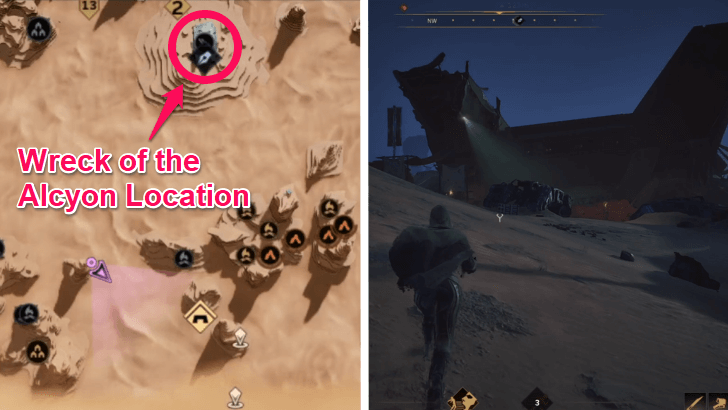 Now, you'll need stronger weapons and armor. Head to the wreck of the Alcyon to gather materials for a new set of garments and weapons to fight with. ▶︎ The Wreck of The Alcyon Walkthrough |
| 9 | 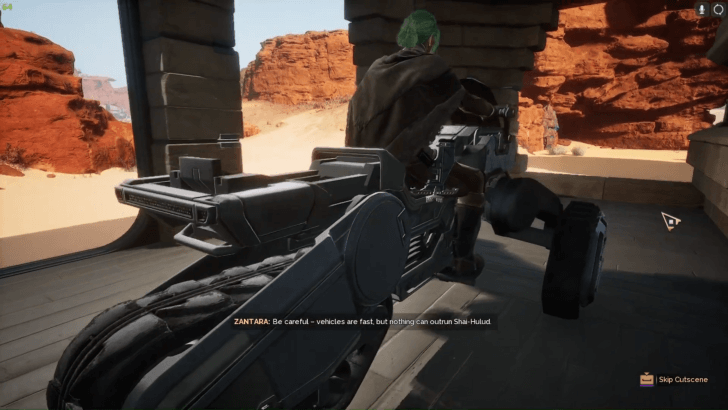 Finally, you'll have to enter the Imperial Testing Station No. 2 to gather even more materials that you will use to craft a Sandbike. This Sandbike will allow you to go meet up with Zantara in Mirzabah. ▶︎ Across the Gap Walkthrough |
A New Beginning sets up your new life in Arrakis. Building a new home and learning to trade with locals, as well as knowing hostiles such as Sandworms and Scavengers, are a few of the things you learn during this questline.
A New Beginning Questline Walkthrough
Vermillius Gap
| Step | Objective |
|---|---|
| 1 | 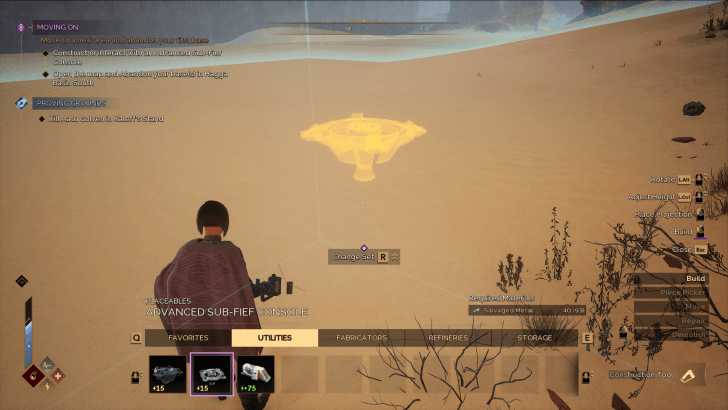 With your newly constructed Sandbike, it's time to head further into the deserts of Arrakis and construct a new base in the Vermillius Gap. ▶︎ Moving On Walkthrough |
| 2 |  You will need better gear to take on the more dangerous areas in the Vermillius Gap. Craft a Holtzmann Shield to protect yourself. ▶︎ Preparing for Life in Vermillius |
| 3 | 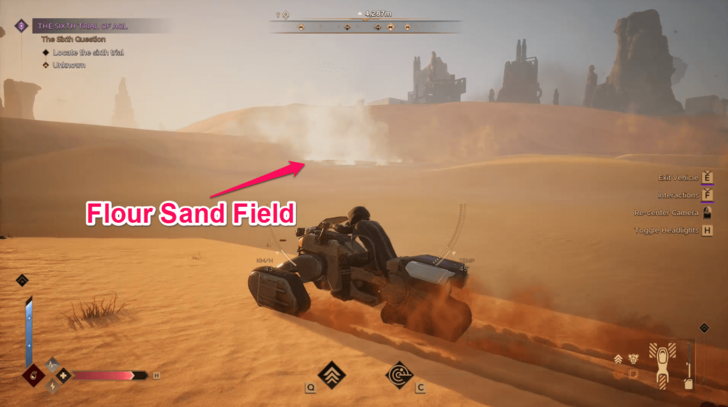 Start collecting new resources by unlocking and fabricating the Handheld Resouce Scanner. Use it to find Flour Sand Fields, and harvest from there. ▶︎ Styles of Sand Walkthrough |
| 4 | 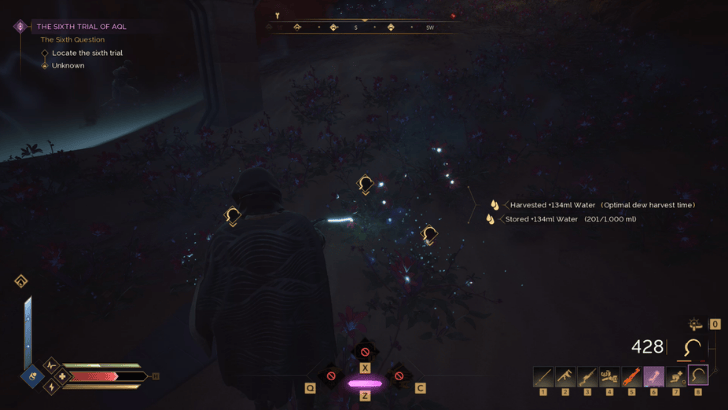 Next, upgrade your water-collection tools by researching and crafting the Dew Reaper and Literjon. Collect dew from flowers with these, then research the Water Cistern to store the water in. ▶︎ Reap and Stow Walkthrough |
| 5 | 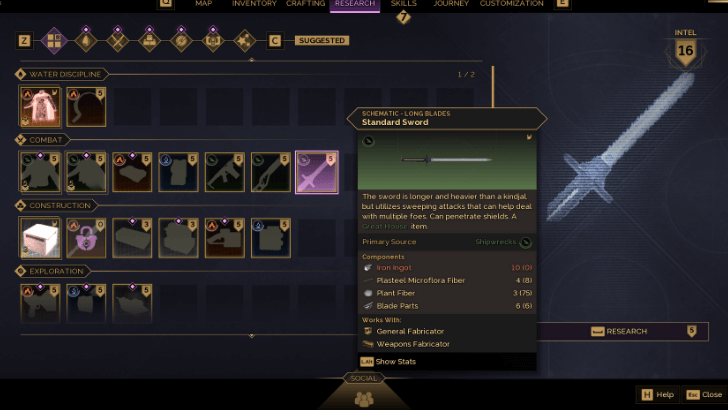 Your weapons and armor are next on the list. Research and craft a Standard Sword, Standard GRDA 44, and Standard Disruptor M11. Use each of these weapons to take down 15 enemies each. Finally, research, craft, and equip a full Kirab Heavy Armor set. ▶︎ Weapons of War Walkthrough |
| 6 | 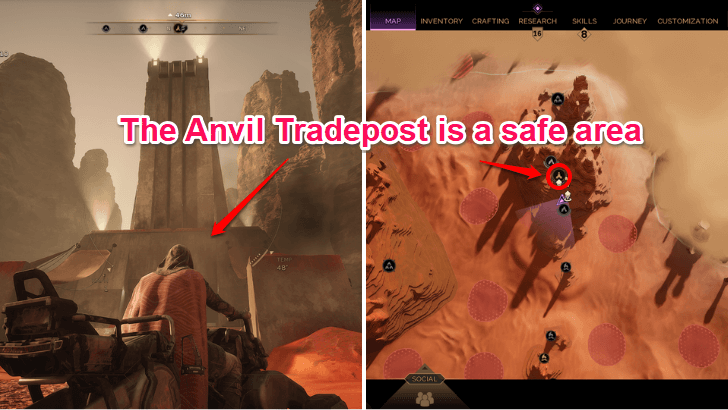 The next step in this questline is to learn about new areas you can access in the Vermillius Gap. You will once again have to use Survey Probes to map the area, and then visit specific locations aftewards. ▶︎ Touring the Gap Walkthrough |
| 7 | Now that you've discovered a new Tradepost, head to The Anvil and take the Stealing From Thieves and Put Out The Eyes contracts for useful rewards. ▶︎ The Vermillius Contract Walkthrough |
| 8 |  As you've progressed relatively far into the game, your gear has likely taken some damage. Research and create a Welding Torch and Welding Wire, Repair Station, and Recycler. Use these to repair or recycle your damaged items and vehicles. ▶︎ Maintenance Walkthrough |
| 9 | 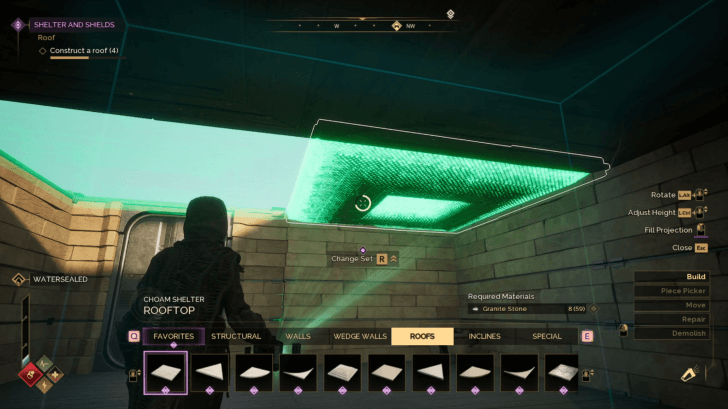 Next, you'll be tasked with putting down furniture. Head back to The Anvil Tradepost and buy a CHOAM Furniture Set. Then, head back to your base and construct any decoration from the set. ▶︎ Interior Decoration Walkthrough |
| 10 | 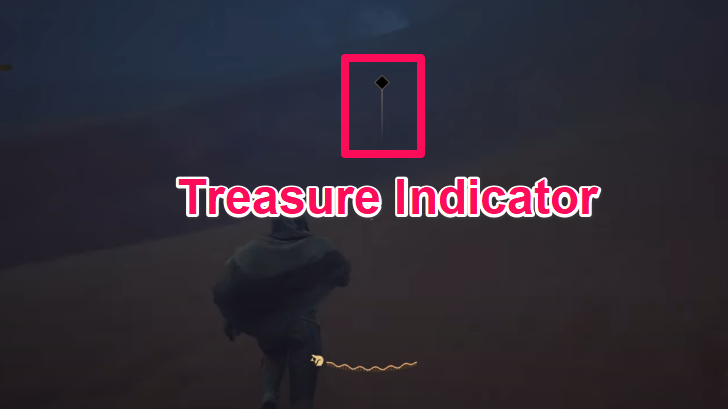 The final mission in this questline tasks you with using the Handheld Resource Scanner to locate buried treasure, shown by the indicator above. Use the Static Compactor to dig the treasure up. ▶︎ Buried Treasure Walkthrough |
Vermillius Gap brings you to the harsher areas of Arrakis, introducing more efficient ways of survival to match the increased heat levels and tougher enemies you'll face.
Vermillius Gap Questline Walkthrough
Jabal Eifrit and Hagga Rift
| Step | Objective |
|---|---|
| 1 | 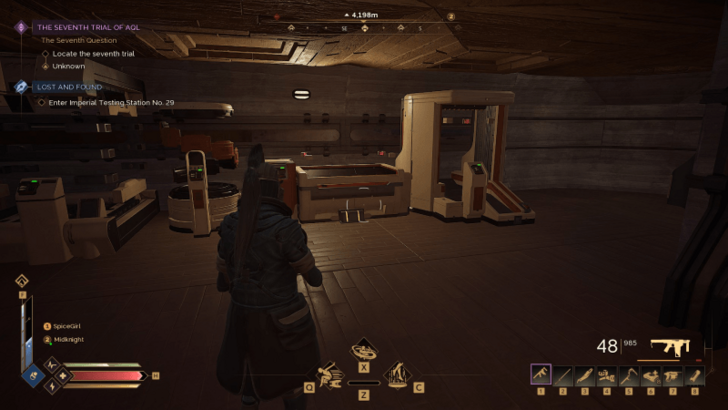 You will now be introduced to specialized fabrication to begin crafting better equipment, more suited for harsher environments. ▶︎ Specialized Fabrication |
| 2 | 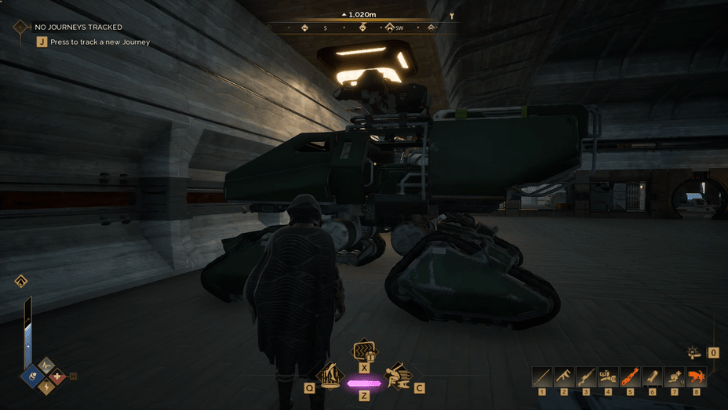 While traversing the northern part of Arrakis, you will need a better vehicle capable of carrying more cargo to reduce the number of trips required. ▶︎ A Bigger Haul |
| 3 | 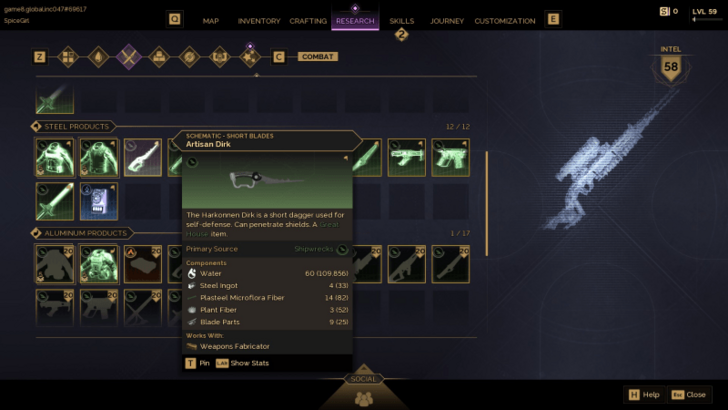 Research and craft new weapons and armor using the materials you have obtained from the regions of Jabal Eifrit and the Hagga Rift. ▶︎ Weapons of War II |
| 4 | 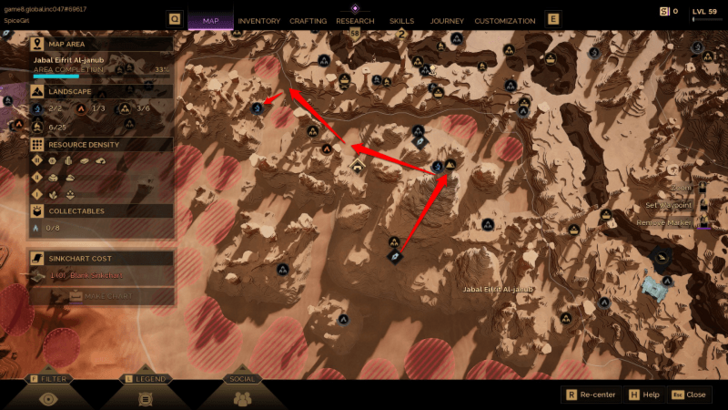 Learn about all the important locations within the Jabal Eifrit and Hagga Rift regions, and explore them to better prepare for your next journey. ▶︎ The Jabal Spires |
| 5 | 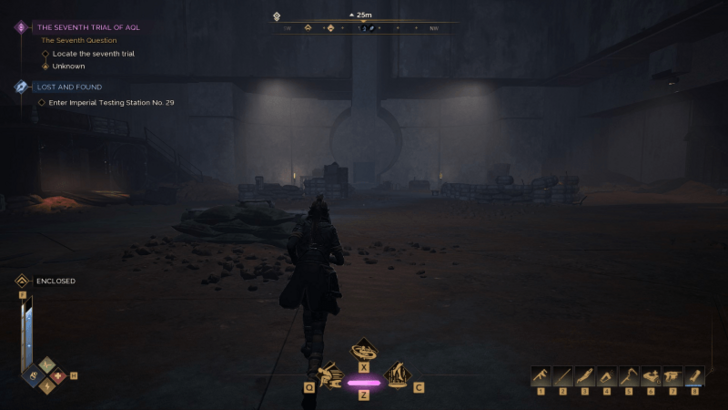 Venture deeper into the Hagga Rift with your new equipment and explore different areas to gather rarer resources and eventually find your way back to the surface. ▶︎ Depths of the Rift |
| 6 | 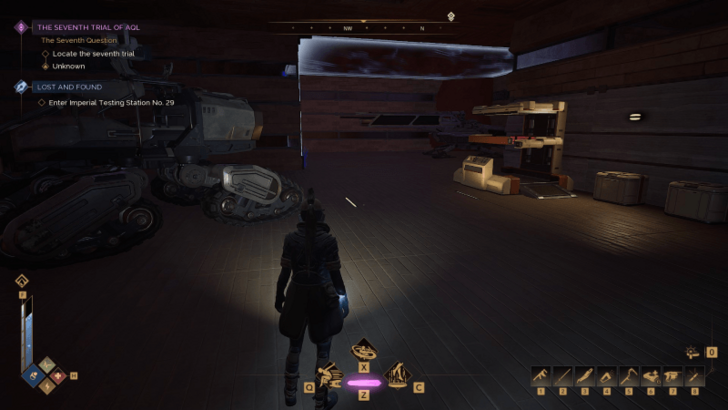 After learning about the dangers within the Rift, you will craft a tool to improve visibility inside the Hagga Rift. ▶︎ A Light in the Darkness |
| 7 | 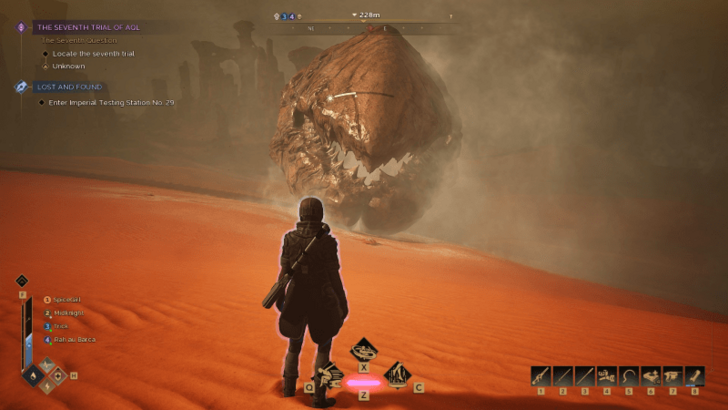 You are now required to craft a new tool that can help you traverse the open desert and lure the sandworm for a safer navigation before moving to the next region. ▶︎ Calling The Worm |
The Jabal Eifrit and Hagga Rift questline is the start of your endgame journey as it introduces pinnacle gear, as well as the most efficient ways of gathering and building.
Jabal Eifrit and Hagga Rift Questline Walkthrough
Find the Fremen
| Step | Objective |
|---|---|
| 1 | 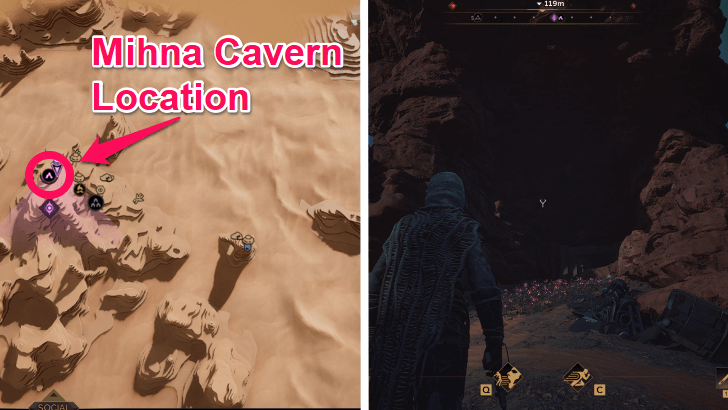 The first trial of Aql is encountered in Mihna Cavern, while progressing the events of A New Beginning. The trial involves evading sentries guarding the way to the end of the trial. ▶︎ First Trial of Aql |
| 2 | 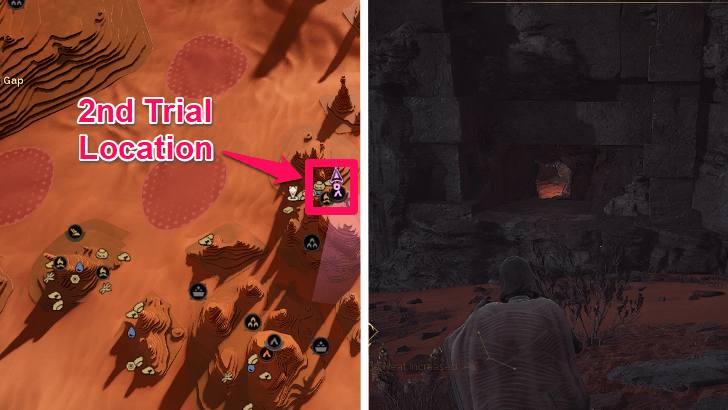 The next trial is found in the Eastern Vermillius Gap, in The Deep Struggle cave. This time, you need to use a Spice Compactor to clear obstacles along the path to the end. ▶︎ Second Trial of Aql |
| 3 |  The third trial is in the Cave of the Lost Pilgrim in the Western Vermillius Gap area. Upon entering, you'll discover that the spice altar was destroyed, and need to listen to a recording instead. ▶︎ Third Trial of Aql |
| 4 | 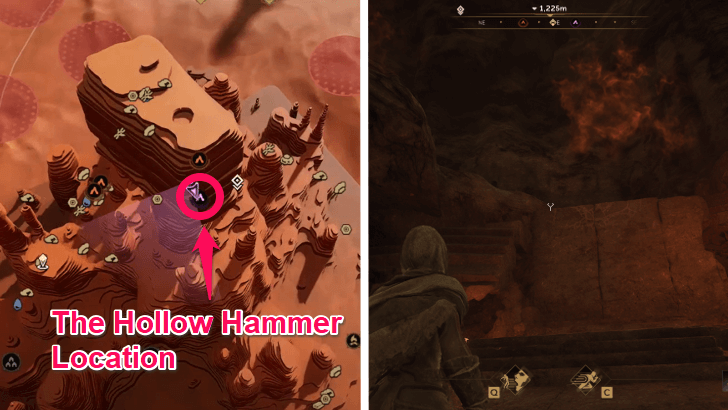 The next trial can be found in the middle of the Vermillius Gap, in The Hollow Hammer. This is a combat-based trial that will help you unlock the Prescient state. ▶︎ Fourth Trial of Aql |
| 5 | 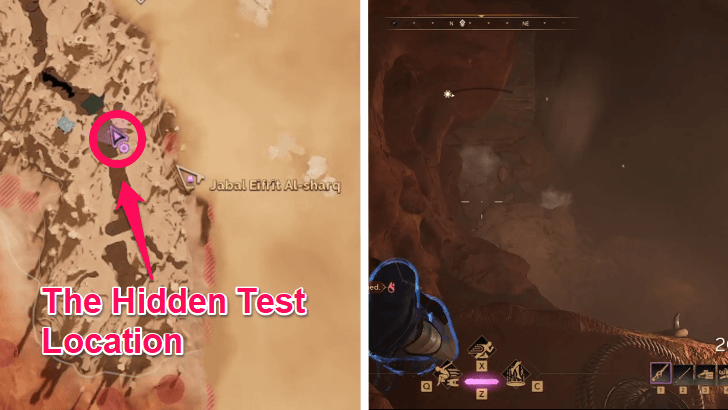 The fifth trial in this quest chain is found in the Hagga Rift, in The Hidden Test cave. You'll need to do parkour and use a Thumper to evade a Sandworm in the trial. ▶︎ Fifth Trial of Aql |
| 6 |  The sixth trial is located in the Devil’s Eye Cavern in Jabal Eifrit Al-Sharq. This location is found in the upper-right corner of the map. ▶︎ The Sixth Trial of Aql |
| 7 | 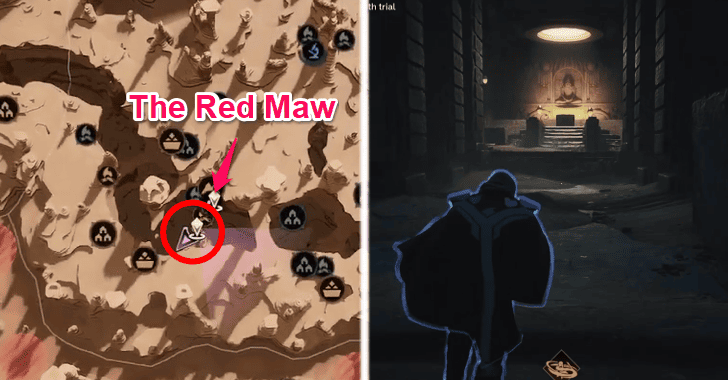 The Seventh Trial of Aql is located in The Red Maw in Hagga Rift. This trial requires you to hide in stilltents to survive the sandstorms. ▶︎ Seventh Trial of Aql |
| 8 | 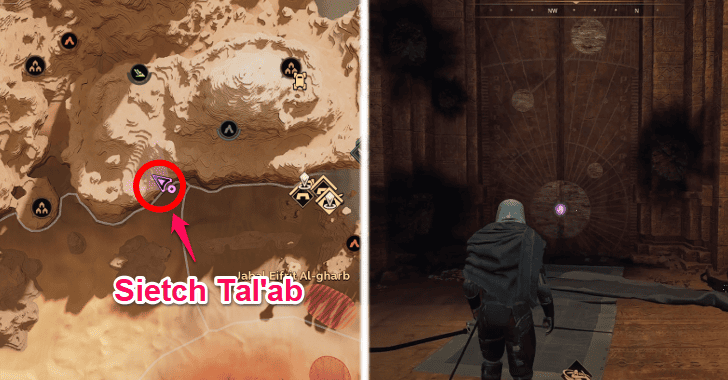 The final trial in this quest chain can be found in the Sietch Tal'ab accessible at the border of the Eastern Shield Wall and Mysa Tarill. ▶︎ Eight Trial of Aql |
| 9 | 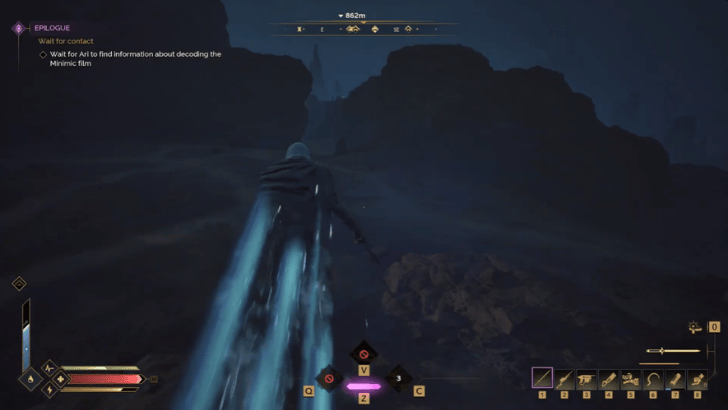 Reach your base to receive a call from Ari and complete the questline. ▶︎ Epilogue (Find the Fremen) |
Find the Fremen is a main story questline that rewards players with various items and abilities related to spice and its abilities. Completing each quest will reward players with items and skills that buff players.
Find the Fremen Questline Walkthrough
Shield Wall and O'odham Quests
| Step | Guide |
|---|---|
| 1 | 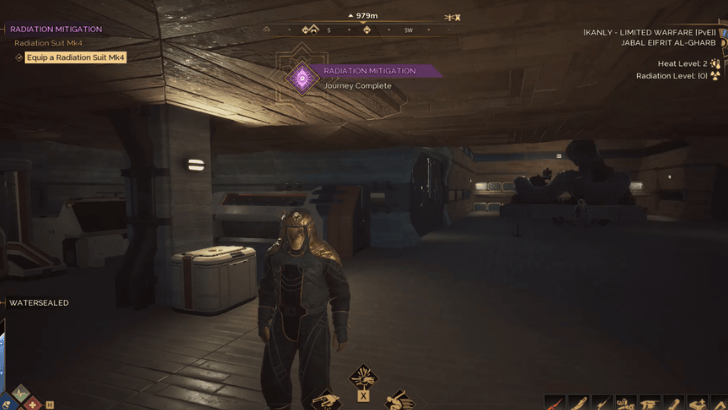 Craft a Radiation Suit to prepare for your exploration on areas with high levels of radiation. ▶︎ Radiation Mitigation |
| 2 |  Research and fabricate Aluminum-tier weapons and armor for better survivability in high-difficulty areas. ▶︎ Weapons of War III |
| 3 | 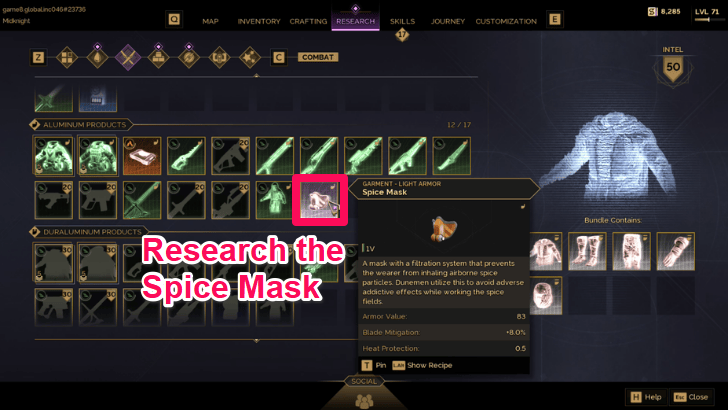 Research and fabricate a Spice Mask to avoid the harsh effects of spice while harvesting spice fields. ▶︎ The Spice Must Flow |
| 4 | 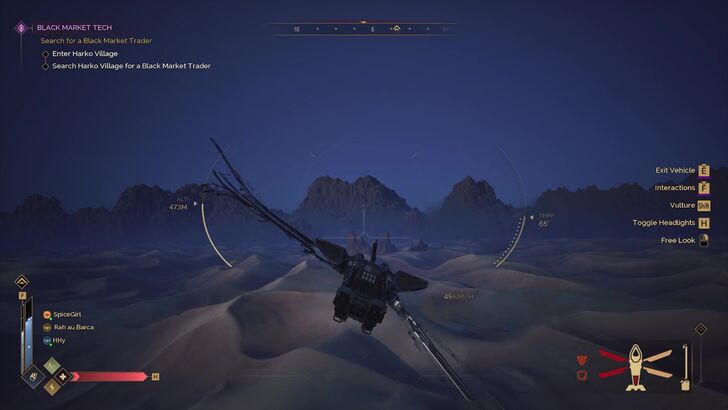 Assemble your first ornithopter and take it to the skies. You can craft the base parts through the vehicle fabricator, or use scrap parts that you can pickup as a fast method. ▶︎ Airborne |
| 5 | 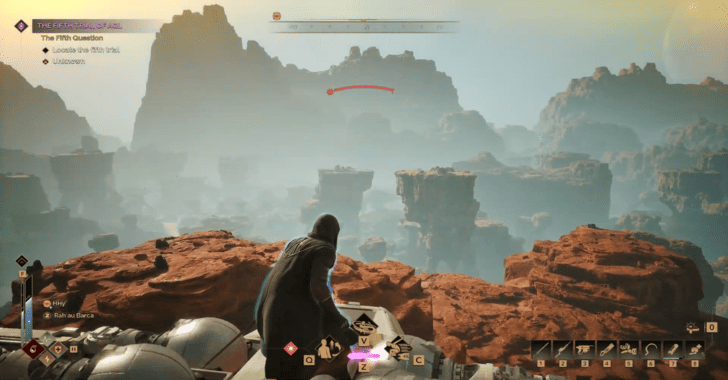 Survey the regions of the Eastern and Western Shield Wall, as well as the O'odham and Mysa Tarill. On your way to each region, visit their points of interest like Imperial Testing Stations and Shipwrecks. ▶︎ The Wall and the Valley |
Shield Wall and O'odham quests guide players to the lands of Mysa Tarill and O'odham by adapting to harsher environment and obtaining better equipment.
The Sheol Quests
| Step | Objective |
|---|---|
| 1 | 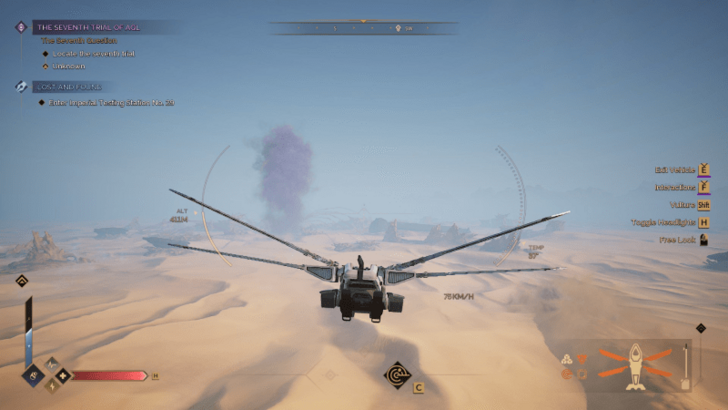 Now that you have decent gear and are fully prepared for any environment, it is time to explore the final region called The Sheol. ▶︎ The Graveyard |
| 2 | 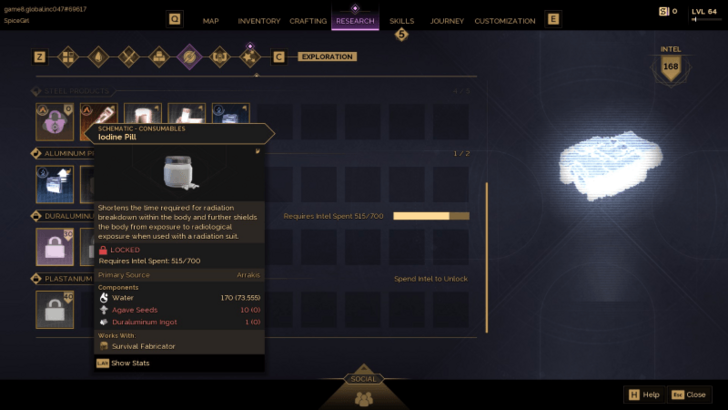 To survive longer in areas with radiation, you will need to craft a consumable item that boosts your radiation mitigation. ▶︎ Mitigation Iteration |
The Sheol quests act as a guide to players exploring the radioactive lands of Sheol. Following this questline helps players understand how to mitigate the effects of radiation.
The Sheol Questline Walkthrough
Deep Desert
| Step | Objective |
|---|---|
| 1 | 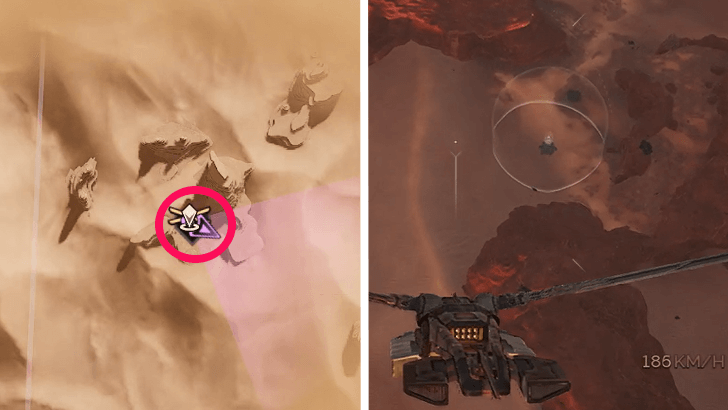 Explore the Deep Desert using your Ornithopter to scout for Points of Interest. Imperial Testing Stations are mostly found in sectors A to C of the Deep Desert. While Shipwrecks and Control Points are mostly seen together in all sectors. ▶︎ Charting the Depths |
| 2 | 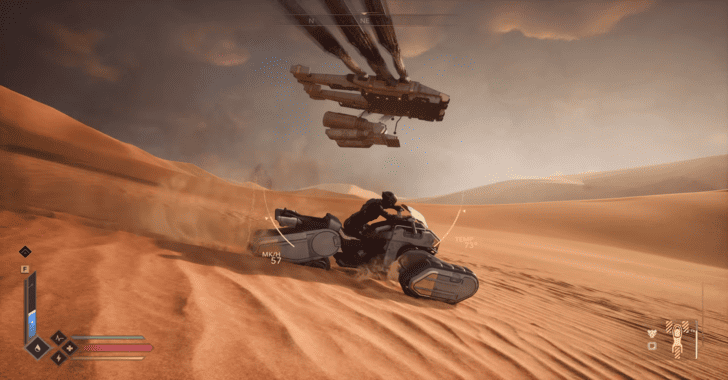 Research and construct a Sandcrawler and a Carrier Ornithopter for large-scale spice harvesting in the Deep Desert. ▶︎ Operational Readiness |
| 3 | 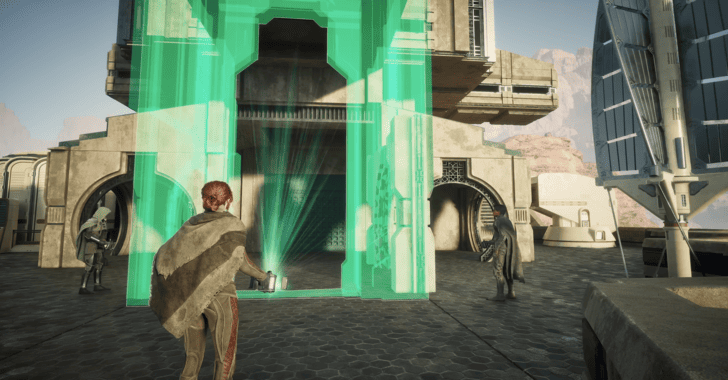 Build a base in the Deep Desert to temporarily store your haul before moving them back to Hagga Basin. ▶︎ Logistical Issues |
| 4 | 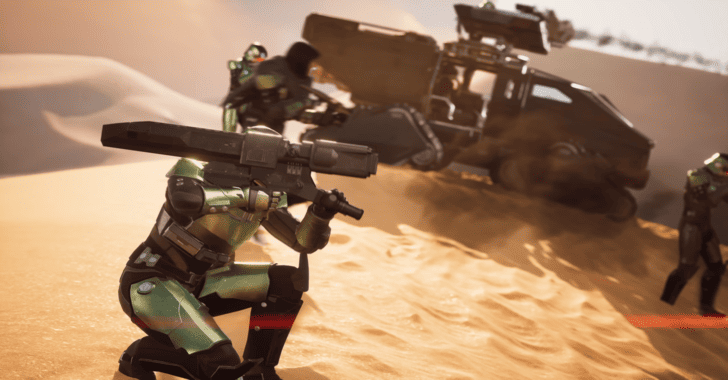 Research and fabricate a Regis Missile Launcher and use it to kill 15 enemies. You can easily clear this mission by using it on enemies in the outposts scattered in Hagga Basin. ▶︎ Smoke Trail |
| 5 | 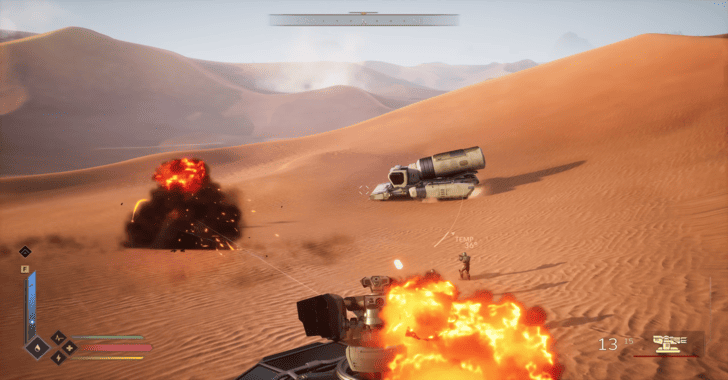 Use a Sandcrawler on large Spice Fields which can only be found in the Deep Desert. You should also set a Thumper far from the Spice Field to distract sandworms. ▶︎ There is Never Enough |
The quests for the Deep Desert are a set of guidelines to make your trip to the Deep Desert useful. It teaches the most optimal ways of farming spice and introduces technology which will help for harvesting spice.
Deep Desert Questline Walkthrough
Assassin's Handbook
| Step | Objective |
|---|---|
| 1 | 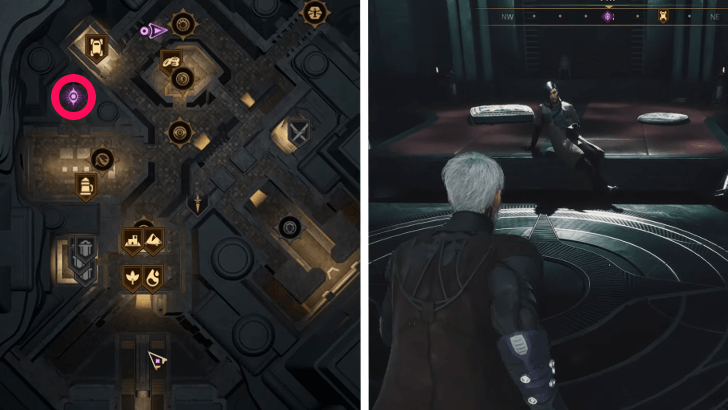 To begin the Assassin's Handbook questline, head to Harko Village when you are contacted by Ari. While looking for a Trader, you'll be intercepted by Count Fenring's forces and sent to Elara Tuek for missions. ▶︎ Black Market Tech Walkthrough |
| 2 | 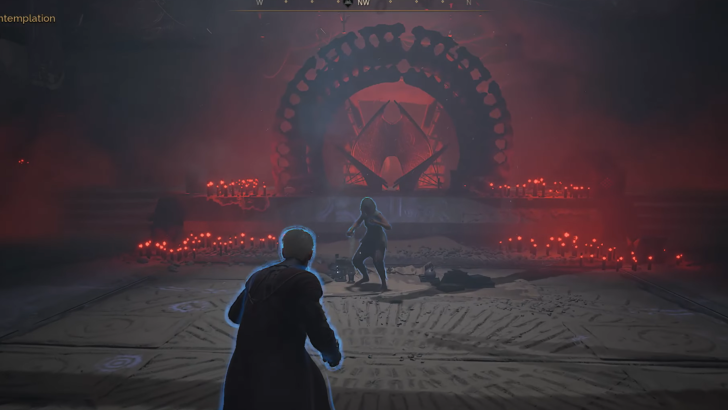 Elara will provide you with two targets initially. The first is The Paranoid, in the O'odham area. She is protected by several pentashields, and requires you to hunt down the people with the codes for said shields. ▶︎ The Paranoid Walkthrough |
| 3 | 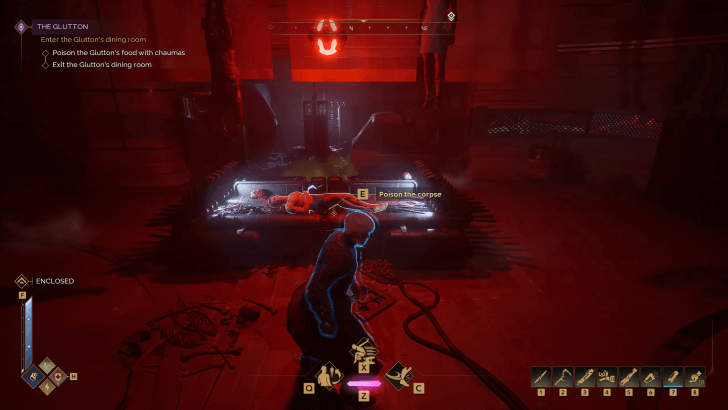 Your other option for a target is The Glutton, who resides in the Khidr's Shadow base, in the Jabal Eifrit Al-janub. You'll need to find a way into his dining room and poison his food to take him down. ▶︎ The Glutton Walkthrough |
| 4 |  After defeating either The Paranoid or The Glutton, Elara will send you after the other target you didn't pick first. ▶︎ The Next Target Walkthrough |
| 5 | 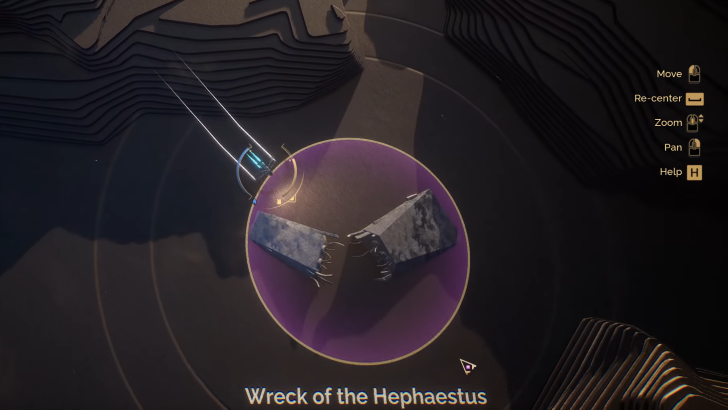 Once you've taken down both The Paranoid and The Glutton, Ari will get in touch about searching the Wreck of the Hephaestus for an Ixian Decoder. ▶︎ Further Instructions Walkthrough |
| 6 |  Once you arrive at the Wreck of the Hephaestus, you'll have to work with a Nobleman to explore the wreck and find the Ixian Decoder. ▶︎ A Sign From Above Walkthrough |
| 7 | 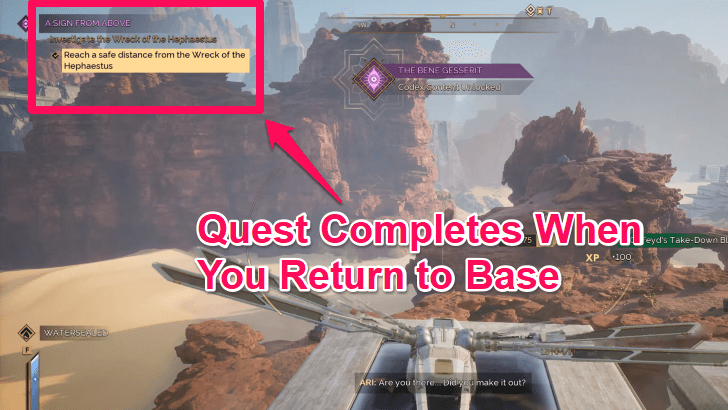 Once you've acquired the decoder and escaped the Wreck, head back to your base to experience a Spice Dream. Elara will contact you after with a new assassination target, so go meet her at Harko Village. ▶︎ New Targets Walkthrough |
| 8 | 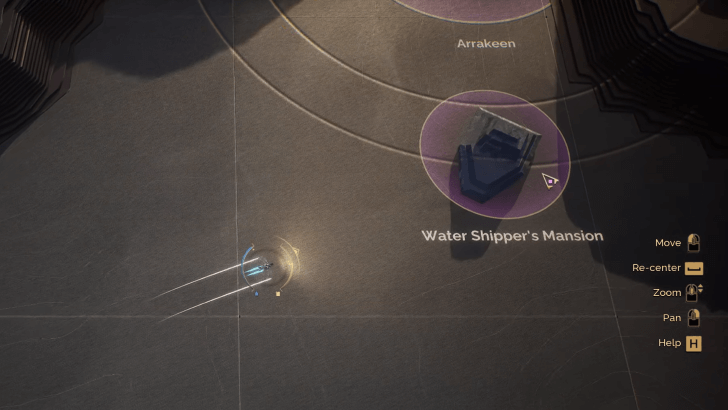 The next target you have to go for has his own heavily-guarded mansion you'll have to fly to. You'll need to sneak in and poison the water supply, while avoiding the spotlights and guards in the area. ▶︎ Water Fat Walkthrough |
| 9 | 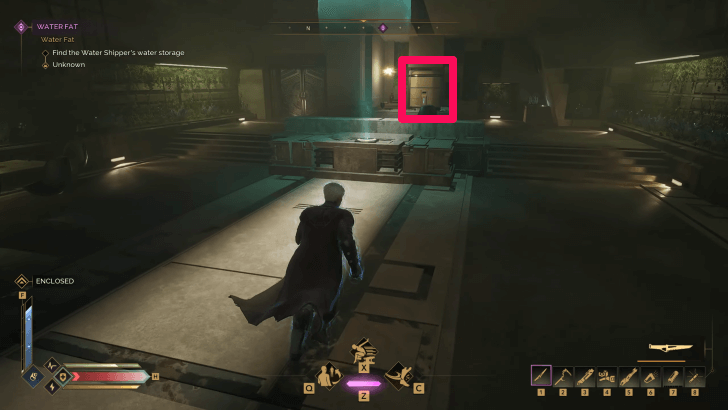 Once you've poisoned the water supply and escaped, go back to base once again to complete the quest. Then, return to Harko Village once more for your final target. ▶︎ Last Target Walkthrough |
| 10 |  Head to Arrakeen and seek out The Jackal, who resides in an Abandoned Alleyway in the southwestern portion of the location. You'll need to piece together a phrase to be able to speak to him. ▶︎ The Jackal Walkthrough |
| 11 | 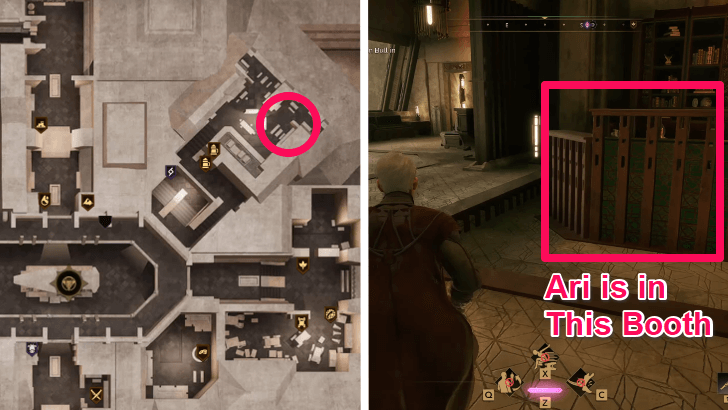 Once you take down The Jackal, head to the Salusan Bull's second floor to speak with Ari. You'll obtain a location from the decoded message; this will be the focus of the next step in the mission chain. ▶︎ A Rendezvous with Ari Walkthrough |
| 12 | 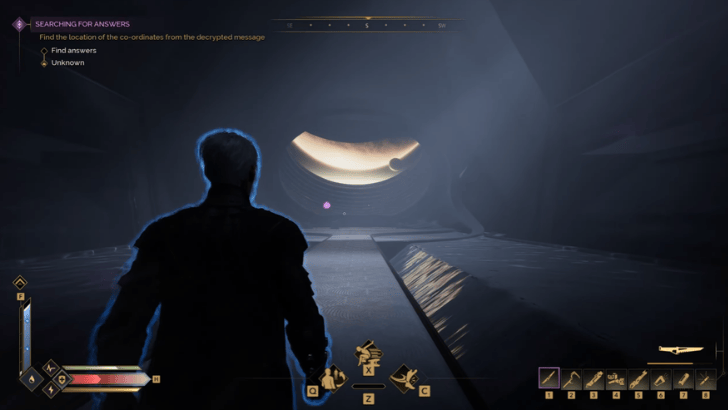 You'll have to meet with Zantara in Harko Village. Together, you will go to a Lab under Old Carthag, and you'll need to explore deep within the facility for the information you seek. ▶︎ Searching for Answers Walkthrough |
| 13 | 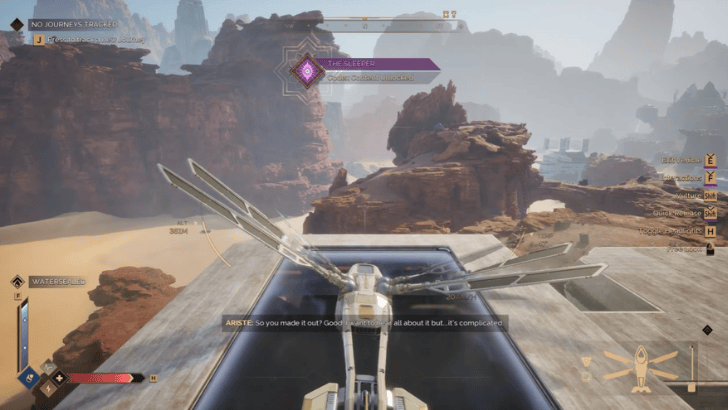 After you leave the facility, head back to base and wait for Ari to reach out to you for the final legs of this mission chain. ▶︎ Epilogue (Assassin's Handbook) Walkthrough |
The Assassin's Handbook is an entirely driven-story questline which introduces you to key characters in Arrakis, particularly a few key members of House Atreides.
Assassin's Handbook Questline Walkthrough
Miscellaneous Quests
| Step | Objective |
|---|---|
| 1 | 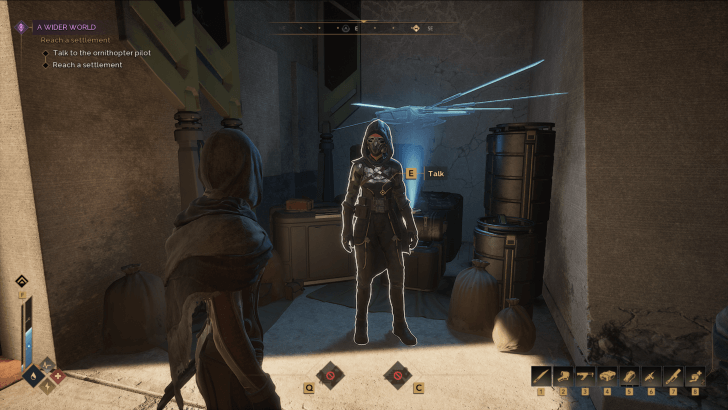 A Wider World is a quest that introduces players to the Ornithopter Pilot NPC, who you can pay to fly you to a Settlement. ▶︎ A Wider World Walkthrough |
| 2 | 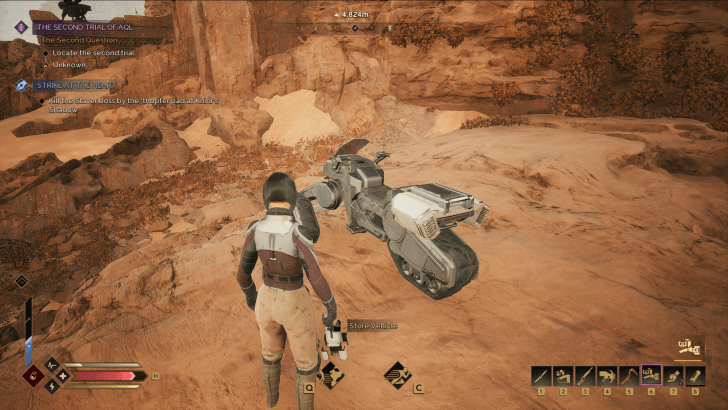 A Backup Plan lets you unlock the Vehicle Backup Tool, which you can use to store your vehicles. ▶︎ A Backup Plan Walkthrough |
| 3 |  Location, Location, Location involves researching and creating the Solido Replicator, which allows you to save and reconstruct the blueprint of your base. ▶︎ Location, Location, Location |
| 4 | 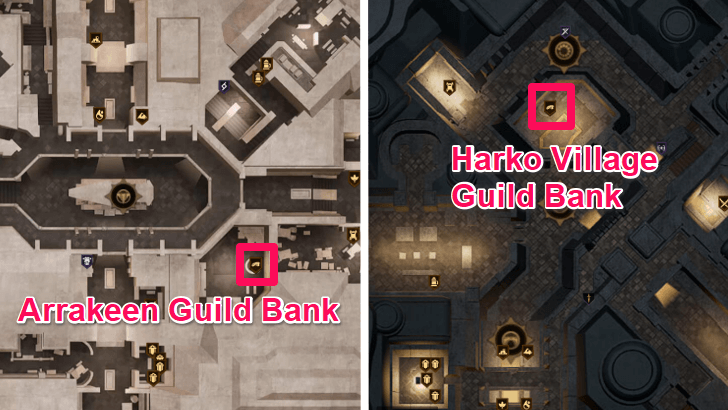 Banking Solaris introduces the Banker to the player, allowing you to deposit your Solaris and avoid losing them on death. ▶︎ Banking Solaris Walkthrough |
| 5 | 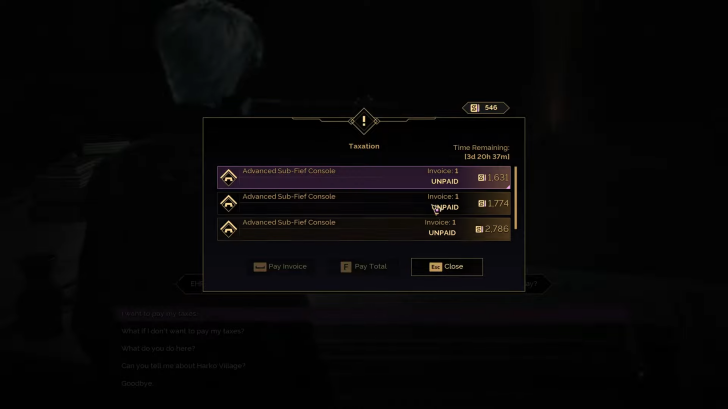 Taxation requires the player to head to a Settlement and find a Tax Representative, who will collect taxes from you based on how many Sub-Fiefs you have. This is to avoid having the Sardaukar tear down your bases. ▶︎ Taxation Walkthrough |
Miscellaneous quests teach players how to traverse Arrakis using various vehicles and the importance of saving money and paying tax.
Miscellaneous Quests Walkthrough
How Many Acts are There?
2 Main Story Acts
Dune: Awakening has 2 main story questlines, Find the Fremen and Assassin's Handbook, along with 8 chapters that act as a progression guide for each region. If you are to focus on these quests without doing contracts and exploring, the game can take at least 40 hours to reach the endgame.
Dune Awakening Related Guides

| Dune: Awakening Wiki Contents | |
|---|---|
 Maps and Locations Maps and Locations |
 Builds Builds |
 Resources Resources |
 Uniques Uniques |
 Walkthrough Walkthrough |
 Weapons Weapons |
 Armor Armor |
 Skills Skills |
 Factions Factions |
 Classes Classes |
 Contracts Contracts |
 Characters Characters |
 Items Items |
 Vehicles Vehicles |
 Tools Tools |
 Base Structures Base Structures |
 Enemies Enemies |
 Decorations Decorations |
 Bugs and Error Codes Bugs and Error Codes |
 Cosmetics Cosmetics |
Comment
Author
Complete Story Walkthrough
Please participate in our site
improvement survey
03/2026
improvement survey
03/2026
Would you assist in
improving Game8's site?
improving Game8's site?

×
We are listening to our users' valuable opinions and discussing how to act on them.
The information collected through this survey will be used for the purpose of improving our services. In addition, the information will only be disclosed a part of a statistic in a format that will not allow identification of personal information.
Begin Survey
Not Now
×
Please rate each item regarding Game8.co's Advertisements.
Amount of Ads
Very Dissatisfied
Somewhat Dissatisfied
Fine
Somewhat Satisfied
Highly Satisfied
Placement of Ads
Timing of Ad Display
Ad Loading Speed
Safeness of Ads
Content of Ads
×
Please rate each item regarding Game8.co's Quality of Articles.
Amount of information
Very Dissatisfied
Somewhat Dissatisfied
Fine
Somewhat Satisfied
Highly Satisfied
Frequency of updates
Speed of new information
Accuracy of articles
Understandibility of articles
Readability of sentences
×
Please rate each item regarding Game8.co's Usability of the Site.
Ease of finding information
Very Dissatisfied
Somewhat Dissatisfied
Fine
Somewhat Satisfied
Highly Satisfied
Loading Speed
Use of Color
Font Size
Visibility of Images
Easy to Understand Layout
×
Please rate each item regarding Game8.co's Message Boards, Comments.
Ease of Writing
Very Dissatisfied
Somewhat Dissatisfied
Fine
Somewhat Satisfied
Highly Satisfied
Readability
Ease in Finding Information
Comment Quality
Comment Quantity
Admin Response
×
Please rate each item regarding Game8.co's Site's new design.
Please rate our site's new design
Very Dissatisfied
Somewhat Dissatisfied
Fine
Somewhat Satisfied
Highly Satisfied
Do you think that the website's design change makes the site easier to use?
Has the new design made it easier for you to find information on the site?
Has the new design improved the overall visual appeal of the site?
How would you rate your overall satisfaction with the new design of the site?
×
How likely are you to recommend Game8 to someone you know?
Very Unlikely
0
1
2
3
4
5
6
7
8
9
10
Very Likely
If you have other opinions regarding potential improvement to the website, please share them with us. We would appreciate your honest opinion.
Note: This is a free response section, so you can proceed without entering anything.
Note: Please be sure not to enter any kind of personal information into your response.
Note: Please be sure not to enter any kind of personal information into your response.
×
Thank You
×
Thank you for participating in our survey! Your answers will help us to improve the quality of our website and services.
We hope you continue to make use of Game8.
We hope you continue to make use of Game8.
Close
Rankings
- We could not find the message board you were looking for.
Gaming News


![Slay the Spire 2 Review [Early Access] | Still the Deckbuilder to Beat](https://img.game8.co/4433115/44e19e1fb0b4755466b9e516ec7ffb1e.png/thumb)

![Resident Evil Village Review [Switch 2] | Almost Flawless Port](https://img.game8.co/4432790/e1859f64830960ce4248d898f8cd38d9.jpeg/thumb)
Popular Games

Genshin Impact Walkthrough & Guides Wiki
Honkai: Star Rail Walkthrough & Guides Wiki
Umamusume: Pretty Derby Walkthrough & Guides Wiki
Pokemon Pokopia Walkthrough & Guides Wiki
Resident Evil Requiem (RE9) Walkthrough & Guides Wiki
Monster Hunter Wilds Walkthrough & Guides Wiki
Wuthering Waves Walkthrough & Guides Wiki
Arknights: Endfield Walkthrough & Guides Wiki
Pokemon FireRed and LeafGreen (FRLG) Walkthrough & Guides Wiki
Pokemon TCG Pocket (PTCGP) Strategies & Guides Wiki


Recommended Games
Fire Emblem Heroes (FEH) Walkthrough & Guides Wiki
Diablo 4: Vessel of Hatred Walkthrough & Guides Wiki
Yu-Gi-Oh! Master Duel Walkthrough & Guides Wiki
Super Smash Bros. Ultimate Walkthrough & Guides Wiki
Pokemon Brilliant Diamond and Shining Pearl (BDSP) Walkthrough & Guides Wiki
Elden Ring Shadow of the Erdtree Walkthrough & Guides Wiki
Monster Hunter World Walkthrough & Guides Wiki
The Legend of Zelda: Tears of the Kingdom Walkthrough & Guides Wiki
Persona 3 Reload Walkthrough & Guides Wiki
Cyberpunk 2077: Ultimate Edition Walkthrough & Guides Wiki


All rights reserved
© 2025 Funcom. All Rights Reserved.
The copyrights of videos of games used in our content and other intellectual property rights belong to the provider of the game.
The contents we provide on this site were created personally by members of the Game8 editorial department.
We refuse the right to reuse or repost content taken without our permission such as data or images to other sites.