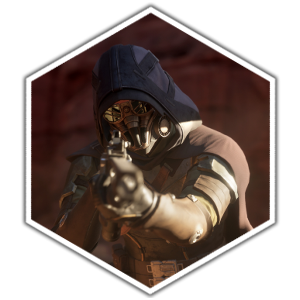
Storm Swordmaster Build

The Swordmaster excels at melee combat, cutting down every foe in their way. Check out the Swordmaster build, skills, loadouts and playstyle in this guide!
| All Swordmaster Guides | |
|---|---|
| Storm Swordmaster Build | Swordmaster Class Guide |
 Attention! Attention! |
This build is made for late-game Hagga Basin. Stay tuned for Deep Desert build updates! |
|---|
List of Contents
Storm Swordmaster Build Guide
Build Summary
| Build Summary | ||
|---|---|---|
 Storm Swordmaster Storm SwordmasterUP |
The Swordmaster uses their rigorous training and a fine blade to clash against any and every enemy, cutting down anyone in their path. Focus: Melee, Single-Target, Tank |
|
| Abilities | ||
 Knee Charge
 Knee Charge You propel yourself forward into battle with a terrific knee charge into the enemy. Deals damage and severely staggers your opponent but costs stamina.
|
 Solido Decoy
 Solido Decoy You use a miniature solido projector to project a near-perfect image of yourself onto the battlefield. Triggering it again will force the projection to move forward, fooling enemies into attacking.
|
 Eye of the Storm
 Eye of the Storm You pirouette with your blade, becoming a whirlwind of piercing damage that cuts everything around you. While seemingly chaotic, the swordmaster maintains calm - the eye at the heart of the storm.
|
| Techniques | ||
 Reckless Lunge
 Reckless Lunge Lunging at an enemy will often provide them with an easy opening to attack, but you have learned to turn a lunge into an advantage. Sprint attacks provide bonus damage mitigation for a short while after a lunge.
|
 Dance of Blades
 Dance of Blades Defeating an enemy with a blade empowers your next attack with the blade for a brief period. The skilled swordmaster dances between opponents, keeping their damage high.
|
 Disciplined Breathing
 Disciplined Breathing When you focus on your technique and breathing, you can recuperate your stamina reserves more quickly.
|
The Swordmaster specializes in close-range combat, focusing almost entirely on enhancing melee damage. Rush into battle and cut through enemies, showcasing your unmatched skill with the blade.
| Date | Changes |
|---|---|
| 06/06/25 | ・Build Created |
| 06/14/25 | ・Added Mendek's Rattle and Piter's Disruptor for late-game build ・Replaced Slaver Heavy Armor set with Acheronian Set ・Replaced The Emperor’s Wings Mk1 with Full Suspensor Belt |
Best Skills
| Class | Skill Trees |
|---|---|
| Swordmaster |
Skill Tree:
The Blade
Blade Damage (Swordmaster) You've learned the difference between a cut and a slice, a point and an edge. You do more damage with bladed weapons.
┗
Retaliate You enter a heightened state of awareness and when next attacked in melee, you parry and counterattack with a savage riposte that bleeds and damages your enemy.
┗
Dance of Blades Defeating an enemy with a blade empowers your next attack with the blade for a brief period. The skilled swordmaster dances between opponents, keeping their damage high.
┗
Long Blade Damage You training with long blades such as swords and rapiers gives you increased damage with those weapons.
┗
Eye of the Storm You pirouette with your blade, becoming a whirlwind of piercing damage that cuts everything around you. While seemingly chaotic, the swordmaster maintains calm - the eye at the heart of the storm.
|
|
Skill Tree:
The Will
Deflection You enter a defensive stance, deflecting darts that are fired at you. This ability lasts as long as your stamina holds out.
┗
Reckless Lunge Lunging at an enemy will often provide them with an easy opening to attack, but you have learned to turn a lunge into an advantage. Sprint attacks provide bonus damage mitigation for a short while after a lunge.
┗
Bleed Tolerance You have become harder to bleed due to a combination of training and resistance. Bleeding status takes a longer time to build on you.
┗
Solid Stance As your training increases, you have learned to avoid being knocked around by enemy attacks. You can take more poise damage before being staggered.
┗
Confidence Every time you attempt a difficult attack like a sprint attack or a slow blade, you gain increased confidence, which reflects as damage mitigation.
|
|
|
Skill Tree:
The Way
Knee Charge You propel yourself forward into battle with a terrific knee charge into the enemy. Deals damage and severely staggers your opponent but costs stamina.
┗
Optimized Hydration Your body knows how to make optimal use of water, so you have additional stamina reserves when well-hydrated.
┗
Field Medicine You recover more health immediately when using healkits due to your excellent conditioning.
┗
Disciplined Breathing When you focus on your technique and breathing, you can recuperate your stamina reserves more quickly.
┗
General Conditioning Your extensive physical training has increased your maximum stamina.
┗
Prescient Strike When your blood is saturated with melange, you see multiple ways in which to damage your enemies. After using any swordmaster ability, your next strike will strike twice, reflecting two possible versions of the future converging in a single spacetime.
|
|
| Trooper |
Skill Tree:
Tactical Tech
Shigawire Claw You use a wrist-mounted launcher to fire off a claw attached to a cable of shigawire. The extreme tensile strength of shigawire launches you in the direction of the cable. It can also be used to stagger opponents during combat.
|
| Planetologist |
Skill Tree:
Scientist
Cutteray Mining Your understanding of structural and mineral composition leads to an increase in the resource yield when using a cutteray.
┗
Rerouting Tinkering with your power pack allows you to increase the recharge rate.
┗
Overcharge You have learned to push your power pack beyond its limits, allowing you to increase the maximum power capacity.
|
| Bene Gesserit |
Skill Tree:
Weirding Way
Bindu Sprint You override your nervous system and musculature with an immense surge of activity, allowing you to run forward at an incredible speed.
┗
Manipulate Instability Once an enemy is stunned, staggered, or knocked back, you strike in vulnerable nerve endings to cause more damage.
┗
Blade Damage (Bene Gesserit) You know exactly where and how to strike with a blade to cause additional damage.
|
|
Skill Tree:
Body Control
Recovery You are able to heal your body more effectively after suffering catastrophic injury - regenerating your health to a higher threshold than normal.
┗
Trauma Recovery You can use your own body to effectively heal catastrophic damage - improving both the rate at which healing occurs and the amount.
┗
Self-Healing You are strongly in touch with your own nervous and immune systems and are able to boost any healing that you perform yourself.
┗
Vitality Through careful tuning of your internal enzyme balance and musculature,you can increase your overall health.
|
|
| Mentat |
Skill Tree:
Tactician
Shield Wall You deploy a half-height holtzman shield that provides cover during combat for you and your allies. It will also slow enemies who attempt to pass through it - giving you time to take them down.
┗
Solido Decoy You use a miniature solido projector to project a near-perfect image of yourself onto the battlefield. Triggering it again will force the projection to move forward, fooling enemies into attacking.
|
All of the Swordmaster's skill trees are incredibly effective for improving melee gameplay. These passives and techniques Boost Melee Damage, Damage Mitigation, and Stamina Efficiency, which are all perfect for an aggressive melee playstyle.
Additionally, you will pair them with passive effects from the Bene Gesserit class to further enhance your survivability and damage output.
Best Weapons
| Type | Weapons |
|---|---|
| Guns |
Mendek's Rattle Piter's Disruptor |
| Melee | Jolt-sword |
The Jolt-sword is a unique long blade that provides a small stamina boost whenever you parry an enemy. This enables those with parry-heavy playstyles to fight for longer. For your ranged weapon, bring a Mendek's Rattle to deal with enemies from a distance and a Piter's Disruptor to remove enemy shields.
In the early game, consider using the Shock-sword, Standard Karpov 38, and Legion Tattoo as these are lower-tiered versions of the weapons above. These are also fairly easy to get early on, so you can familiarize yourself with the Swordmaster playstyle.
Best Armor and Tools
| Type | Equipment |
|---|---|
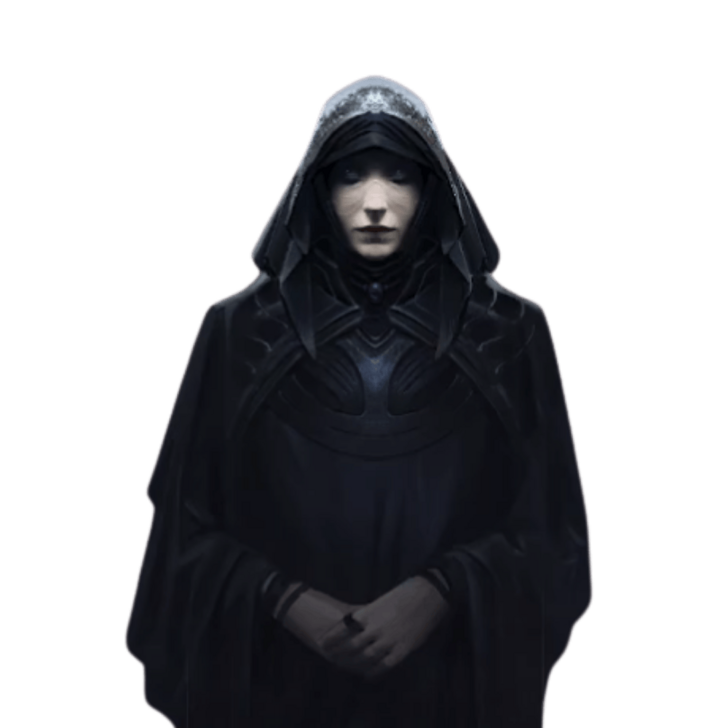
| Head | Acheronian Helmet |
| Chest | Acheronian Chestplate |
| Arms | Archeronian Gauntlets |
| Pants | Archeronian Pants |
| Feet | Acheronian Boots |
| Shield | Holtzman Shield Mk5 Old Imperial origin. Deflects projectiles when active. Melee circumvents shields. Deflections drain shield energy. Activate by holding the shield input for a bit. Can be recharged with a power pack.
|
| Belt | Full Suspensor Belt Removes gravity’s influence on the user while active, allowing for extending traversal in any vertical direction. Depletes power from a Power Pack when in use. Old Imperial origin.
|
The Archeronian Set is the best option for Heavy Armor in the game. Since you will be constantly charging at enemies with your long blade, increasing your armor should be a top priority for survival. Then, use a Full Suspensor Belt for additional mobility options.
How to Play Storm Swordmaster
|
|
Switch Out Your Abilities for Exploration
With this build, you lack mobility skills for traversing the desert. You can choose to swap in abilities like Bindu Sprint and Shigawire Claw to make exploration easier and only switch to offensive abilities before engaging in combat. Bindu Sprint can be effective since its duration depends on your stamina and the Swordmaster has stamina-boosting passives.
Craft Multiple Healkits

The Swordmaster takes on a very aggressive melee playstyle that can take some time to get used to, Be sure to craft plenty of Healkits so you can stay in the fight. Also, remember that you can use Solido Decoy to escape when you need to heal.
Master the Art of Parrying
One of the Swordmaster's most significant mechanics would be parrying. Once you become used to predicting incoming melee attacks, enemy blades won't even touch you.
Don't Hesitate to Dodge
Your passive abilities increase your Maximum Stamina and improve Stamina Regeneration. If you miss a parry, do not hesitate to dodge away from incoming attacks.
Spam Your Swordmaster Abilities
For this build, you will be using low cooldown abilities to spam your Swordmaster skills as much as possible when Prescient is active. This will trigger the effects of Prescient Strike, which doubles the damage of your next attack.
Dune: Awakening Related Guides
All Build Guides
 Short Blade Bene Gesserit Build
 Sniper Mentat Build
 Explorer Planetologist Build
 Shotgun Trooper Build
Comment
Personally, I dont think you need to swap for Bindu Sprint or the Grapple for Swordmaster Build. With the Leap suspensor and knee charge you can traverse super well across large distances.
Author

Storm Swordmaster Build
Rankings
- We could not find the message board you were looking for.
Gaming News


Popular Games

Genshin Impact Walkthrough & Guides Wiki
Umamusume: Pretty Derby Walkthrough & Guides Wiki
Crimson Desert Walkthrough & Guides Wiki
Monster Hunter Stories 3: Twisted Reflection Walkthrough & Guides Wiki
Honkai: Star Rail Walkthrough & Guides Wiki
Pokemon Pokopia Walkthrough & Guides Wiki
The Seven Deadly Sins: Origin Walkthrough & Guides Wiki
Wuthering Waves Walkthrough & Guides Wiki
Zenless Zone Zero Walkthrough & Guides Wiki
Arknights: Endfield Walkthrough & Guides Wiki


Recommended Games
Fire Emblem Heroes (FEH) Walkthrough & Guides Wiki
Diablo 4: Vessel of Hatred Walkthrough & Guides Wiki
Cyberpunk 2077: Ultimate Edition Walkthrough & Guides Wiki
Yu-Gi-Oh! Master Duel Walkthrough & Guides Wiki
Super Smash Bros. Ultimate Walkthrough & Guides Wiki
Pokemon Brilliant Diamond and Shining Pearl (BDSP) Walkthrough & Guides Wiki
Elden Ring Shadow of the Erdtree Walkthrough & Guides Wiki
Monster Hunter World Walkthrough & Guides Wiki
The Legend of Zelda: Tears of the Kingdom Walkthrough & Guides Wiki
Persona 3 Reload Walkthrough & Guides Wiki


All rights reserved
© 2025 Funcom. All Rights Reserved.
The copyrights of videos of games used in our content and other intellectual property rights belong to the provider of the game.
The contents we provide on this site were created personally by members of the Game8 editorial department.
We refuse the right to reuse or repost content taken without our permission such as data or images to other sites.
Decoy is listed as an ability to get but you don’t mention mentat at all.