Mentat Class Guide
The Mentat is one of five playable classes in Dune: Awakening that focuses on recon and strategy. Learn more about the Mentat, their skills and mechanics, and whether to start with this class!
| All Mentat Guides | |
|---|---|
| Sniper Mentat Build | Mentat Class Guide |
Mentat Overview
Starting Ability, Focus, and Description
| Mentat | |
|---|---|
|
|
| Starting Ability | The Sentinel |
| Focus | Recon & Strategy |
| Skill Trees | |
| Mental Calculus | Boosts ranged damage while also providing utility |
| Assassination | Focuses on using poison and precise positioning |
| Tactician | Provides advantages in the battlefield |
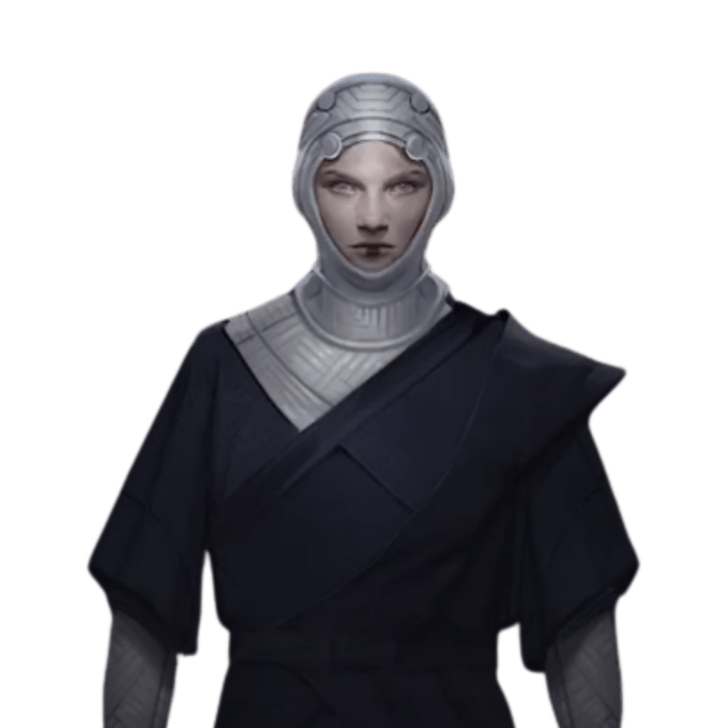
A secretive and insular organization, the Order of Mentats conditions their adherents to store and analyze vast amounts of data at superhuman speeds.
All Mentat Skills
Mental Calculus Skill Tree
| Mental Calculus | Assassination | Tactician |
 |
||
| 1 |
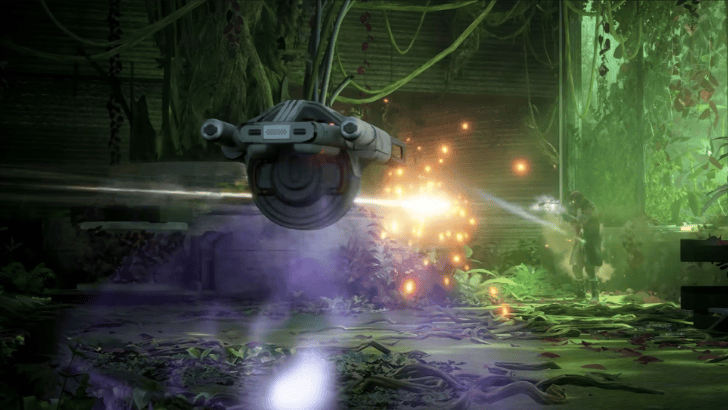
 The Sentinel
|
You deploy a suspensor buoyed dart projector that uses motion detection to cover a field of fire. Trigger a second time to activate.
Lv. 1: ・ Cooldown 30 ・ Stamina Cost 30 ・ Duration 15 ・ Damage 25 Lv. 2: ・ Cooldown 25 ・ Stamina Cost 30 ・ Duration 20 ・ Damage 55 Lv. 3: ・ Cooldown 20 ・ Stamina Cost 30 ・ Duration 25 ・ Damage 150 |
|---|---|---|
| 2 |
 Garment Keeper
|
You are able to spot the flaws in any garment and see where it is most likely to tear first. This allows you to reinforce it, preventing wear and tear. Your garments maintain their durability for longer.
Lv. 1: Reduce Durability Loss 15% Lv. 2: Reduce Durability Loss 20% Lv. 3: Reduce Durability Loss 25% |
| 3 |
 Ranged Damage (Mentat)
|
You use your considerable mental prowess to calculate the most impactful trajectories for your darts - increasing your damage with all ranged weapons.
Lv. 1: Ranged Damage 5% Lv. 2: Ranged Damage 10% Lv. 3: Ranged Damage 15% |
| 4 |
 Tailoring
|
Your skills with a needle are legendary. Every time you repair a garment, you reduce the maximum durability damage the repair would cause.
Lv. 1: Reduce Max Durability Loss 15% Lv. 2: Reduce Max Durability Loss 20% Lv. 3: Reduce Max Durability Loss 25% |
| 5 |
 Marksman
|
You are an expert at focusing on the most vulnerable part of the human body, the head. However, your training to hit smaller targets has actually made you worse at putting darts into the center of gravity. Your headshot damage is increased but your body shot damage is decreased.
Lv. 1: ・ Headshot Damage 20% ・ Body Damage -15% Lv. 2: ・ Headshot Damage 25% ・ Body Damage -15% Lv. 3: ・ 30% Headshot Damage ・ -15% Body Damage |
| 6 |
 Pistol Damage
|
Handfired weapons are usually less lethal the further away they are, but you have used your mental training to optimize your shots. All damage with pistol style weapons such as the Maula Pistol and Rafiq Subnose is increased.
Lv. 1: Pistol Damage 10% Lv. 2: Pistol Damage 15% Lv. 3: Pistol Damage 20% |
| 7 |
 Exploit Weakness
|
You have learned to observe your enemies and predict their weaknesses based on a thousand minutiae. When you damage an unshielded enemy with a ranged weapon, the hit location becomes a weak point which you can target to increase the damage of subsequent attacks. Only one weak point may be visible at a time.
Lv. 1: ・ Duration 10 ・ Ranged Damage 50% |
| 8 |
 Rifle Damage
|
Learning to overcome the drop in trajectory that occurs when firing rifles at long range, you have increased your lethality with rifles such as the Karpov 38 and JABAL Spitdart. All damage with these weapons is increased.
Lv. 1: Rifle Damage 10% Lv. 2: Rifle Damage 15% Lv. 3: Rifle Damage 20% |
| 9 |
 Shield Overcharge
|
When your blood is saturated with the melange, any ranged attack on a shield will reveal a vulnerability in the Holtzman shield. Continual attacks against this vulnerability will overcharge the enemy shield, causing it to drain their power pack more quickly.
Lv. 1: Duration 10 |
Mental Calculus Skill Tree and How to Unlock
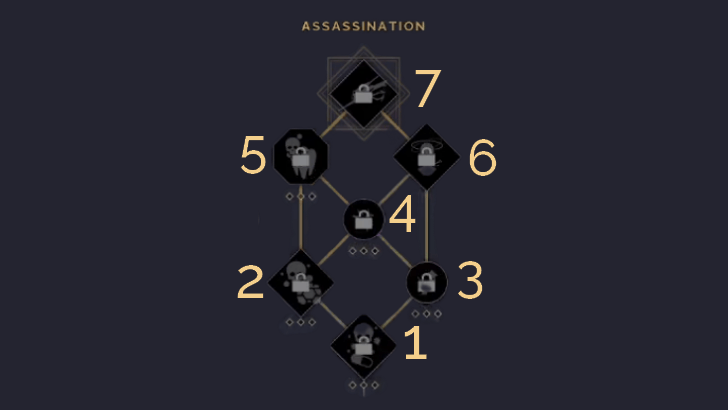
Assassination Skill Tree
| Mental Calculus | Assassination | Tactician |
 |
||
| 1 |
 Poison Capsule
|
You have a hidden dart dispenser that fires off a specially prepared capsule filled with poisonous spores. On impact, a cloud of poison spores appears, building poison on all who remain within.
Lv. 1: ・ Cooldown 20 ・ Stamina Cost 30 ・ Duration 8 ・ Damage 3 Lv. 2: ・ Cooldown 18 ・ Stamina Cost 30 ・ Duration 8 ・ Damage 9 Lv. 3: ・ Cooldown 16 ・ Stamina Cost 30 ・ Duration 8 ・ Damage 18 |
|---|---|---|
| 2 |
 Poison Mine
|
You can place a remotely triggered mine that, once triggered, releases a cloud of poisonous spores - stacking poison on all who stand within.
Lv. 1: ・ Cooldown 18 ・ Stamina Cost 15 ・ Duration 8 ・ Damage 3 Lv. 2: ・ Cooldown 16 ・ Stamina Cost 15 ・ Duration 8 ・ Damage 9 Lv. 3: ・ Cooldown 14 ・ Stamina Cost 15 ・ Duration 8 ・ Damage 18 |
| 3 |
 Headshot Damage
|
As you train with ranged weapons, you beome more proficient at shooting the vulnerable parts of the human body. Your headshot damage is increased.
Lv. 1: Headshot Damage 10% Lv. 2: Headshot Damage 15% Lv. 3: Headshot Damage 20% |
| 4 |
Assassin's Shot
|
You do not squander an advantage in battle. Ever. You deal additional damage to your enemies when shooting them in the back.
Lv. 1: Ranged Damage 15% Lv. 2: Ranged Damage 20% Lv. 3: Ranged Damage 25% |
| 5 |
 Poison Tooth
|
Installed by a Suk Doctor, you can activate this poison tooth when downed in combat, causing a cloud of poison mist that damages and poisons anybody nearby. The downside, of course, is that it damages you as well.
Lv. 1: ・ Duration 6 ・ Damage 3 Lv. 2: ・ Duration 6 ・ Damage 9 Lv. 3: ・ Duration 6 ・ Damage 18 |
| 6 |
 Stunner
|
You have a hidden dart dispenser that fires off a specially prepared sedative tipped dart. On impact, this dart stuns the enemy, locking their muscles and rendering them unable to move or attack.
Lv. 1: ・ Cooldown 35 ・ Stamina Cost 45 ・ Duration 6 |
| 7 |
 Hunter-Seeker
|
You have been trained in the use of the Hunter-Seeker, a specialized assassination device used to kill enemies without causing alarm. You pilot a thin sliver of metal that, when it strikes, burrows inside the arteries of the enemy and causes them incredible pain and often, instant death. You are vulnerable while piloting the device.
Lv. 1: ・ Cooldown 60 ・ Stamina Cost 30 ・ Damage 1,200 |
Assassination Skill Tree and How to Unlock
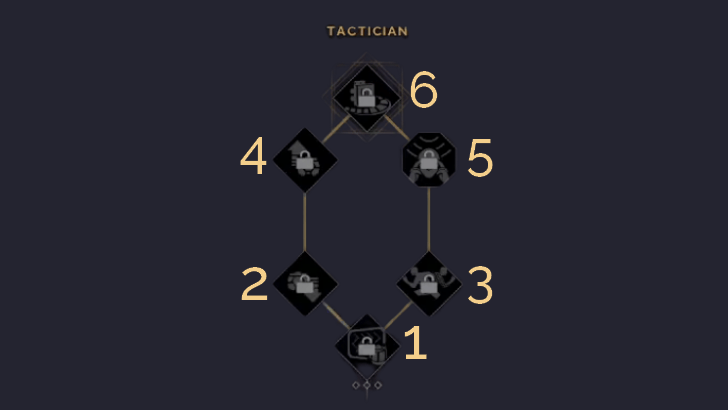
Tactician Skill Tree
| Mental Calculus | Assassination | Tactician |
 |
||
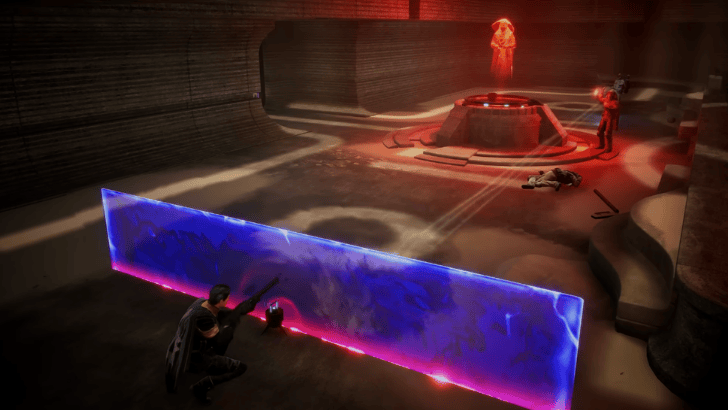
| 1 |
 Shield Wall
|
You deploy a half-height holtzman shield that provides cover during combat for you and your allies. It will also slow enemies who attempt to pass through it - giving you time to take them down.
Lv. 1: ・ Cooldown 22 ・ Stamina Cost 15 ・ Duration 25 Lv. 2: ・ Cooldown 20 ・ Stamina Cost 15 ・ Duration 30 Lv. 3: ・ Cooldown 18 ・ Stamina Cost 15 ・ Duration 35 |
|---|---|---|
| 2 |
 Gravity Mine
|
This mine, when triggered, uses a modified secondary phase Holtzman field to amplify the effect of gravity in a spherical area. You can use the sphere to slow enemies and drain their power or decrease the speed of projectiles.
Lv. 1: ・ Cooldown 30 ・ Stamina Cost 15 ・ Duration 17 ・ Power Drain 2% |
| 3 |
 Solido Decoy
|
You use a miniature solido projector to project a near-perfect image of yourself onto the battlefield. Triggering it again will force the projection to move forward, fooling enemies into attacking.
Lv. 1: ・ Cooldown 23 ・ Stamina Cost 15 ・ Duration 15 |
| 4 |
 Anti-Gravity Mine
|
This mine, when triggered, uses a modified secondary phase Holtzman field to negate the effect of gravity in a spherical area. You can use the sphere to life enemies or prevent fall damage during traversal.
Lv. 1: ・ Cooldown 25 ・ Stamina Cost 15 ・ Duration 17 |
| 5 |
 Iron Will
|
You have developed such a strong sense of self, that you are able to alter your thought patterns to avoid the manipulations of the Bene Gesserit voice at the cost of stamina. At least, those of lesser practitioners.
Lv. 1: Stamina Cost 45 |
| 6 |
 Source of Power
|
You place out a powerful generator that continuously regenerates power for nearby allies. Though the device uses a form of nuclear fission, it is small enough to be safe provided that it is given adequate time to cool between uses.
Lv. 1: ・ Cooldown 35 ・ Stamina Cost 15 ・ Duration 20 |
Tactician Skill Tree and How to Unlock
Mentat Gameplay
Precision and Strategy are Key
The Mentat's Skill Trees focus heavily on precision and strategic positioning. You gain access to ranged weapon damage and headshot damage boosts, which are helpful for builds that focus more on sniping enemies before they know you are there.
The Assassination Skill Tree also provides poison damage, which can be used to your advantage towards unsuspecting enemies. It also has support capabilities through mines and devices that offer advantages on the battlefield.
Mentat Tips
|
|
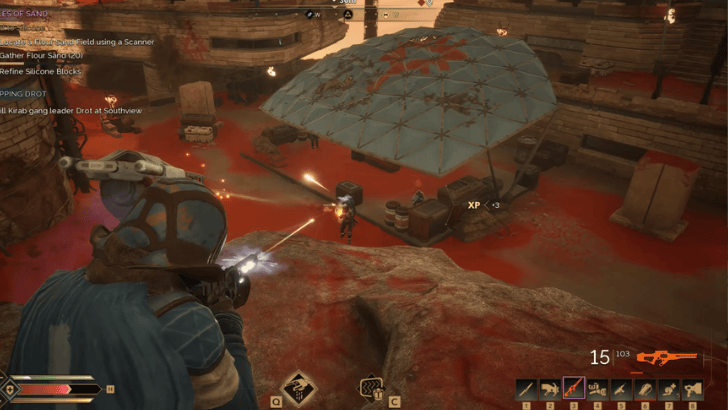
Deploy Your Sentinel Before Fights
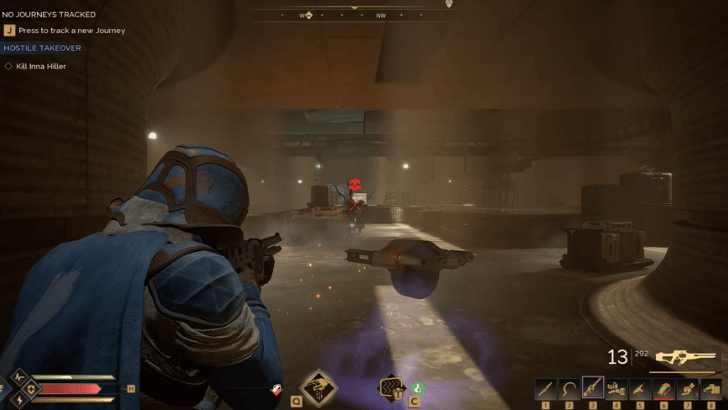
In the early game, your Sentinel is more than capable enough to take out your enemies without you firing a single dart. You can deploy it along halls or at the entrance of caves or buildings where enemies are most likely to funnel through when they chase you.
Stock Up on Darts
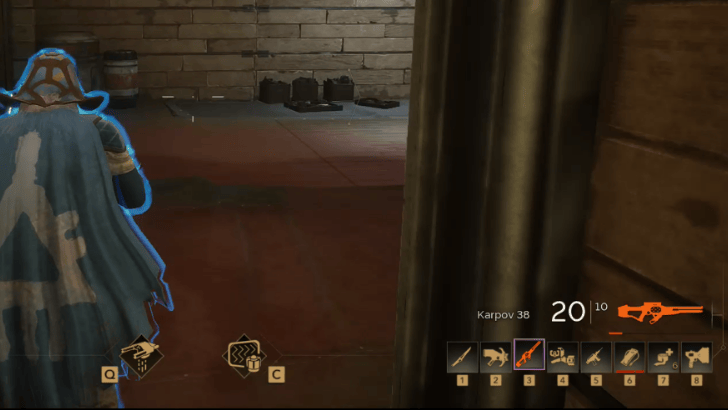
Ideally, enemies do not get the chance to get anywhere close to you when using Mentat since your primary weapon would be rifles. As such, gunfights can stretch out, especially when playing solo. Make sure you never run out of ammunition!
Always Retreat When Needed
When enemies start surrounding you, running in and trying to outgun your enemies can be tempting. As a Mentat, you are not as strong in melee range as other classes. Use everything in your disposal such as your Shield Wall to retreat and reposition.
Should You Start with Mentat?
Starting Ability Provides Early Damage
While the Mentat class may lack utility in the early game, its starting ability, The Sentinel, delivers strong early damage. This ability is also effective against groups of enemies, especially when they charge towards you.
If you are looking for stronger mobility or utility early on, consider starting with a class like Swordmaster or Bene Gesserit, which offer movement-focused starting abilities. You can always build into Mentat later through quest progression.
Dune: Awakening Related Guides

List of All Classes
 Bene Gesserit Bene Gesserit |
Mentat |
 Planetologist Planetologist |
 Swordmaster Swordmaster |
 Trooper Trooper |
- |
Comment
Author
Mentat Class Guide
Rankings
- We could not find the message board you were looking for.
Gaming News

![Star Savior Review [First Impressions] | Engaging, Entertaining, and Expensive](https://img.game8.co/4447603/8f500e9bf666bdb8adb1af478e9dfdbd.png/show)


Popular Games

Genshin Impact Walkthrough & Guides Wiki
Umamusume: Pretty Derby Walkthrough & Guides Wiki
Crimson Desert Walkthrough & Guides Wiki
Monster Hunter Stories 3: Twisted Reflection Walkthrough & Guides Wiki
Honkai: Star Rail Walkthrough & Guides Wiki
Pokemon Pokopia Walkthrough & Guides Wiki
The Seven Deadly Sins: Origin Walkthrough & Guides Wiki
Wuthering Waves Walkthrough & Guides Wiki
Zenless Zone Zero Walkthrough & Guides Wiki
Arknights: Endfield Walkthrough & Guides Wiki


Recommended Games
Fire Emblem Heroes (FEH) Walkthrough & Guides Wiki
Diablo 4: Vessel of Hatred Walkthrough & Guides Wiki
Cyberpunk 2077: Ultimate Edition Walkthrough & Guides Wiki
Yu-Gi-Oh! Master Duel Walkthrough & Guides Wiki
Super Smash Bros. Ultimate Walkthrough & Guides Wiki
Pokemon Brilliant Diamond and Shining Pearl (BDSP) Walkthrough & Guides Wiki
Elden Ring Shadow of the Erdtree Walkthrough & Guides Wiki
Monster Hunter World Walkthrough & Guides Wiki
The Legend of Zelda: Tears of the Kingdom Walkthrough & Guides Wiki
Persona 3 Reload Walkthrough & Guides Wiki


All rights reserved
© 2025 Funcom. All Rights Reserved.
The copyrights of videos of games used in our content and other intellectual property rights belong to the provider of the game.
The contents we provide on this site were created personally by members of the Game8 editorial department.
We refuse the right to reuse or repost content taken without our permission such as data or images to other sites.