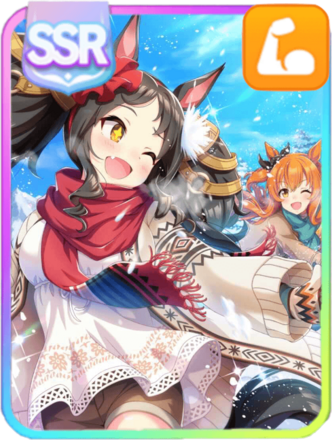
Haru Urara (New Year ♪ New Urara!) Build Guide and Character Info
This is a build guide for Haru Urara (New Year ♪ New Urara!) in Umamusume: Pretty Derby. Find out how to build Haru Urara, her preferred tracks, distances, and style, as well as her basic character information, here!
| Haru Urara Related Guides | |
|---|---|
|
|
|
List of Contents
Haru Urara (New Year ♪ New Urara!) Character Info
Haru Urara (New Year ♪ New Urara!) Stats
| Haru Urara (New Year ♪ New Urara!) | |||||||||||||||||||
|---|---|---|---|---|---|---|---|---|---|---|---|---|---|---|---|---|---|---|---|

|
|||||||||||||||||||
| Overall | Ease (TB) | T.Trials | CM11 | ||||||||||||||||
|
|
|
|
| ||||||||||||||||
| Track Aptitude | |||||||||||||||||||
| Turf: G | Dirt: A | ||||||||||||||||||
| Distance Aptitude | |||||||||||||||||||
| Sprint: A | Mile: A | Med: G | Long: G | ||||||||||||||||
| Pace Aptitude | |||||||||||||||||||
| Front: G | Pace: G | Late: A | End: B | ||||||||||||||||
| Stat Growth | |||||||||||||||||||
| SPD: 0% | STA: 0% | POW: 20% | GUT: 10% | WIT: 0% | |||||||||||||||
Haru Urara (New Year ♪ New Urara!) Unique Skill
|
|
Give max effort when far from the lead on the final corner, moderately increasing velocity steadily for a duration proportional to distance from the lead |
|---|
114th Time's the Charm increases Haru Urara's velocity when she's further behind from the Umamusume in the first place. This skill will only activate when the condition is met during the final corner of the race.
Haru Urara (New Year ♪ New Urara!) Innate Skills
| All Innate Skills |
|---|
Haru Urara (New Year ♪ New Urara!) Potential Skills
| Skill Per Potential Level |
|---|
| Potential 2: Potential 3: Potential 4: Potential 5: |
Haru Urara (New Year ♪ New Urara!) Career Skills
| All Career Event Skills |
|---|
Is Haru Urara (New Year ♪ New Urara!) Worth It
She's Fine, but Focus on Saving
Haru Urara (New Year ♪ New Urara!) can be considered an improvement over her original counterpart because of her new stat distribution and her new Unique Skill that gives her a speed boost instead of a recovery skill that her original version has. She also has an A aptitude on her Mile now compared to the original. However, consider saving your Carats for upcoming Umamusume, such as Mihono Bourbon Valentine, as they offer much better value in terms of meta.
Otherwise, pull for Haru Urara if you are a huge fan of her and find her cute.
Haru Urara (New Year ♪ New Urara!) Career Training Tips
| Training Tips |
|---|
|
|
Train in the Trackblazer (MANT) Scenario
When training Haru Urara, use the brand new Trackblazer (MANT) scenario, as this will allow you to get higher stats than before. Try to participate in 30 to 35 races during your career runs while making sure to prioritize winning G1 races.
It is important to note that Haru Urara is at a big disadvantage thanks to her low aptitude for Turf, which greatly reduces her eligible races. To counteract this, you must increase her Turf aptitude using at least 10 Turf sparks to get her aptitude to C. This increases her chances of winning in Turf races and allows Rivals to appear. This can go even higher during the Inspiration event.
To compensate for the Power penalty from having a low Turf aptitude, you can focus on training her Power during the Junior Year, as well as get Power sparks to improve her starting stats. Once you have enough Power, you can start participating in G1 Mile and Sprint races, which will help you get even more stats.
Trackblazer (Make a New Track) Scenario Guide
Run Her as a Late Surger in Team Trials
Running Haru Urara as a Late Surger in Team Trials is recommended, as she has an A aptitude to the running style. It also makes it easier to bump it to S with Sparks. This will allow her to activate Fighter and Hard Worker quite easily to earn more points.
Run as End Closer in Champions Meeting
Choose End Closer as the running style for Champions Meeting instead, as this will make Haru Urara's Unique Skill activate much more easily since she will be far from the first place with this style. Not only that, but her Unique Skill gets stronger the farther she is from the first place, which synergizes well with this running style.
Race As Much As Possible
Unique Skill Level Up Requirements
| Fans Required | Deadline |
|---|---|
| At least 40,000 Fans | Valentine's Day Senior Year Early Feb |
| At least 60,000 Fans Director Yayoi Akikawa's Friendship Bond is green or 60%. |
Fan Appreciation Event Senior Year Early Apr |
| At least 80,000 Fans | Christmas Senior Year Late Dec |
Haru Urara's first three objectives after her Debut race involve getting enough fans. This can prove a little difficult, as most of the Dirt Sprints and Mile races are Pre-OP and OP, with only a few at G3 and even fewer at G2 and G1.
As such, it is important to race as much as possible while making sure not to sacrifice stat training. Prioritize running the graded races (G3-G1) to get more fans per race, but race the OP races when needed. Additionally, make sure to meet the fan requirements to upgrade her Unique Skill.
Do More Training Instead in Unity Cup
When running in the Unity Cup, prioritize training instead of joining races. Do the minimum needed to meet the goal, then resume training to improve your teams. You will end up sacrificing levels for your Unique Skill, but winning the Unity Cup races is a bigger priority.
Improve Her Mile Aptitude
We recommend increasing Haru Urara's Mile aptitude to S not only because she has two Mile races in her career, but also because most of the Dirt races in the game are Mile length, especially in Team Trials.
As such, try to get Mile sparks from Legacies.
Haru Urara (New Year ♪ New Urara!) Build
Recommended Stats
| 1200 | 600 | 1000 | 500 | 800 |
Since Haru Urara will be part of your Dirt Team in Team Trials as a Late Surger, we recommend getting the stats above so she has enough Stamina and Power to beat the competition. There is
If you are only planning to clear a career run with Haru Urara, then you can aim for lower stat numbers, as the stats above are for Team Trials.
Training Guide: Which Stats to Train?
Recommended Support Cards
Trackblazer (MANT) Build
For Support cards, we recommend a mixed deck consisting of 2 Speed and 2 Wit cards, as well as 2 Race Bonus fillers. This will help Haru Urara get all of the stats she needs as a Late Surger in Dirt races. The filler cards can be for any stat as long as you have at least 50 Race Bonus.
Due to the nature of the Trackblazer (MANT) Scenario, it is important to prioritize cards with high Race Bonus.
Budget Build


This deck consists mostly of SR cards and is meant for players who do not have many SSR Support Cards. Despite the lower rarity, this deck can still hold up and perform well in the latest scenario. Take advantage of the game's borrowing feature to borrow a powerful MLB SSR, like Matikane Fukukitaru (Touching Sleeves Is Good Luck! ♪).
Alternate Cards
| Recommended Alternative Support Cards | |
|---|---|
| Speed |
 Biko Pegasus Rarity: SSR Type: Speed  Gold City Rarity: SSR Type: Speed  Nishino Flower Rarity: SSR Type: Speed  Zenno Rob Roy Rarity: SSR Type: Speed  Narita Top Road Rarity: SSR Type: Speed  Shinko Windy Rarity: SR Type: Speed  Eishin Flash Rarity: SR Type: Speed  Narita Taishin Rarity: SR Type: Speed  Sweep Tosho Rarity: SR Type: Speed  King Halo Rarity: SR Type: Speed |
| Wit | |
| Race Bonus |


These cards will help Haru Urara level her needed Stats (especially with Rainbow/Friendship Training), as well as provide some needed skills. Try to prioritize cards with a high Race Bonus, as you want at least 50% Race Bonus in your deck.
Previous Scenario Builds
Unity Cup Build

If you plan to run the Unity Cup, we recommend using either a Speed-Wit deck or a Speed-Power deck to help Haru Urara get the stats she needs.
Unity Cup (Aoharu Hai) Scenario Guide
URA Finale Build
If you plan to run the URA Finale, we recommend using a Speed-Power deck to help Haru Urara get the stats she needs.
Recommended Legacy Sparks
| Recommended | |
|---|---|
| 6★ Stamina 12★ Power |
|
| 3★ Late Surger 3★ Mile 10★ Turf (Trackblazer) |
For Legacy Sparks, we recommend giving Haru Urara Stamina and Power sparks so she can get the Stamina and Power she needs for her races. Combine this with Mile sparks so she can perform better in her Team Trial races. Fully commit to being a Late Surger with a Late Surger spark instead of trying to increase her other running style aptitudes.
If you are training in the Trackblazer scenario, we recommend getting at least 10 Turf sparks so Haru Urara can participate and win in even more races. Additionally, get more Power sparks to help mitigate the Power penalty from only having a C aptitude in Turf.
You can use either your own Veterans, or borrow the ones from your friends. If you do not have Veterans with full sparks, you can go with whatever you have access to.
Recommended Skills
 Uma Stan
 Updrafters
 Professor of Curvature
 On Your Left!
 Center Stage
When getting skills, prioritize getting velocity skills to help Haru Urara keep her place in the race, as well as acceleration skills to help her get to the front in the late race. Good velocity skills include Professor of Curvature, Ramp Up, and Late Surger and Mile Corners. For acceleration skills, Updrafters and On Your Left! are great options.
Do note that Center Stage and Hard Worker are only there to boost points in Team Trials, not to win races. If you cannot get the recommended skills, you can replace them with similar skills that you have access to. You will just need to make sure that Haru Urara (New Year ♪ New Urara!) can activate said skills in a race.
Haru Urara (New Year ♪ New Urara!) Events
C'mon, It's a Snowball Fight!
| Choice | Outcome |
|---|---|
| Choice 1 (Random) | ・ 10 Wit |
| Choice 1 (Random) |
・ 10 Speed ・ 10 Wit |
| Choice 1 (Random) |
・ 10 Speed ・ 10 Power ・ 10 Wit |
Look! You Can See the Feelings!
| Choice | Outcome |
|---|---|
| Choice 1 (Random) |
・ 10 Power ・ 40 Skill Pts ・ Fighter +2 Skill Hint |
| Choice 1 (Random) |
・ 5 Power ・ 30 Skill Pts |
Wait Up, Little Fishies!
| Choice | Outcome |
|---|---|
| Choice 1 |
・ Practice Perfect ◯ (Random) ・ Pace Strategy +2 Skill Hint ・ Practice Perfect ◯ (Random) |
A Little Detour!
| Choice | Outcome |
|---|---|
|
Choice 1
(Whisper "One hundred carrot cakes.") |
・ 30 Skill Pts |
|
Choice 2
(Let her sleep and give her a piggyback ride home.) |
・ 10 Stamina |
Forgot to Eat!
| Choice | Outcome |
|---|---|
|
Choice 1
(Let's save it for another day.) |
・ 10 Guts |
|
Choice 2
(We gotta book it!) |
・ 10 Stamina |
Parks Are Fun!
| Choice | Outcome |
|---|---|
|
Choice 1
(All right... I choose the swings.) |
・ 10 Speed |
|
Choice 2
(I'll just watch, thanks.) |
・ 10 Power |
Secret Day Off Plan!
| Choice | Outcome |
|---|---|
|
Choice 1
([Pretend to sleep.]) |
・ 10 Speed |
|
Choice 2
(Let's nap together.) |
・ 10 Power |
|
Choice 3
(I'm not tired at all.) |
・ 10 Wit |
Arm-Wrestling Contest
| Choice | Outcome |
|---|---|
|
Choice 1
(Fulcrum, load, and effort!) |
・ 10 Wit |
|
Choice 2
(Giving it your all!) |
・ 10 Power |
Dance Lesson (Haru Urara)
| Choice | Outcome |
|---|---|
|
Choice 1
(They'll be thrilled!) |
・ 10 Speed |
|
Choice 2
(It'll be even better if you memorize the lyrics!) |
・ 10 Wit |
Looking for Something Important
| Choice | Outcome |
|---|---|
|
Choice 1
(Let's keep going!) |
・ -10 Energy ・ 20 Guts |
|
Choice 2
(Let's head back to the academy for now.) |
・ 10 Stamina |
Sand Training!
| Choice | Outcome |
|---|---|
|
Choice 1
(Let's decorate it!) |
・ 10 Guts ・ 15 Skill Pts |
|
Choice 2
(Let's make it even bigger!) |
・ 15 Energy |
So Cool!
| Choice | Outcome |
|---|---|
|
Choice 1
(I'd love to!) |
・ 30 Skill Pts |
|
Choice 2
(What about your test?) |
・ 10 Wit |
The Final Boss... Spe!
| Choice | Outcome |
|---|---|
|
Choice 1
(Let's beat her in a race instead!) |
・ 10 Energy ・ 5 Skill Pts |
|
Choice 2
(Success)
(We gotta take on this challenge!) |
・ 30 Energy ・ 10 Skill Pts |
|
Choice 2
(Fail)
(We gotta take on this challenge!) |
・ 30 Energy ・ -5 Speed ・ 5 Power ・ 10 Skill Pts ・ Slow Metabolism |
At Summer Camp (Year 2) (Haru Urara)
| Choice | Outcome |
|---|---|
|
Choice 1
(Drag a tire across the sand!) |
・ 10 Power |
|
Choice 2
(Do sprints on the beach till sunset!) |
・ 10 Guts |
New Year's Resolutions (Haru Urara)
| Choice | Outcome |
|---|---|
|
Choice 1
(Use your fighting spirit to overcome your weaknesses!) |
・ 10 Guts |
|
Choice 2
(Sleep will aid in growth!) |
・ 20 Energy |
|
Choice 3
(Come up with your own original killer technique!) |
・ 20 Skill Pts |
New Year's Shrine Visit (Haru Urara)
| Choice | Outcome |
|---|---|
|
Choice 1
(Health! Wish to run races in good condition!) |
・ 30 Energy |
|
Choice 2
(Overall improvement! Wish to level up!) |
・ 5 All Stats |
|
Choice 3
(Strong technique! Wish to be skilled enough for the big leagues!) |
・ 35 Skill Pts |
Don't Over Do it! (Haru Urara)
| Choice | Outcome |
|---|---|
| Choice 1 |
・ 10 Energy ・ -2 Mood ・ Last trained stat and two other random stat -10 ・ Practice Poor (random) |
| Choice 2 (Success) | ・ Practice Perfect ◯ |
| Choice 2 (Fail) |
・ -3 Mood ・ 3 Random stat -10 ・ Practice Poor |
Extra Training (Haru Urara)
| Choice | Outcome |
|---|---|
|
Choice 1
(Go for it!) |
・ -5 Energy ・ Last trained stat +5 ・ 5 Friendship with Director |
|
Choice 2
(Strength also requires rest.) |
・ 5 Energy |
Get Well Soon! (Haru Urara)
| Choice | Outcome |
|---|---|
|
Choice 1
(Please just stay still...) |
・ -1 Mood ・ Last trained stat -5 ・ Practice Poor (random) |
|
Choice 2
(Success)
(Stop! Moving! Around!) |
・ Practice Perfect ◯ |
|
Choice 2
(Fail)
(Stop! Moving! Around!) |
・ -1 Mood ・ Last trained stat -10 ・ Practice Poor (random) |
Defeat (G1) (Haru Urara)
| Choice | Outcome |
|---|---|
|
Choice 1
(That's the spirit!) |
・ -25 Energy ・ 25 Skill Pts ・ Random Stat +4 |
|
Choice 2
(Success)
(It'd be nice to answer those cheers with a win, though.) |
・ -15 Energy ・ 25 Skill Pts ・ Random Stat +4 |
|
Choice 2
(Fail)
(It'd be nice to answer those cheers with a win, though.) |
・ -35 Energy ・ 25 Skill Pts ・ Random Stat +4 |
Defeat (G2) (Haru Urara)
| Choice | Outcome |
|---|---|
|
Choice 1
(That's the spirit!) |
・ -25 Energy ・ 20 Skill Pts ・ Random Stat +3 |
|
Choice 2
(Success)
(It'd be nice to answer those cheers with a win, though.) |
・ -15 Energy ・ 20 Skill Pts ・ Random Stat +3 |
|
Choice 2
(Fail)
(It'd be nice to answer those cheers with a win, though.) |
・ -35 Energy ・ 20 Skill Pts ・ Random Stat +3 |
Defeat (G3) (Haru Urara)
| Choice | Outcome |
|---|---|
|
Choice 1
(That's the spirit!) |
・ -25 Energy ・ 20 Skill Pts ・ Random Stat +3 |
|
Choice 2
(Success)
(It'd be nice to answer those cheers with a win, though.) |
・ -15 Energy ・ 20 Skill Pts ・ Random Stat +3 |
|
Choice 2
(Fail)
(It'd be nice to answer those cheers with a win, though.) |
・ -35 Energy ・ 20 Skill Pts ・ Random Stat +3 |
Defeat (OP and Pre-OP) (Haru Urara)
| Choice | Outcome |
|---|---|
|
Choice 1
(That's the spirit!) |
・ -25 Energy ・ 10 Skill Pts |
|
Choice 2
(Success)
(It'd be nice to answer those cheers with a win, though.) |
・ -15 Energy ・ 10 Skill Pts |
|
Choice 2
(Fail)
(It'd be nice to answer those cheers with a win, though.) |
・ -35 Energy ・ 10 Skill Pts |
Solid Showing (G1) (Haru Urara)
| Choice | Outcome |
|---|---|
|
Choice 1
(Your efforts have finally paid off.) |
・ -20 Energy ・ 45 Skill Pts ・ Random Stat +8 |
|
Choice 2
(Success)
(You still have a long way to go!) |
・ -10 Energy ・ 45 Skill Pts ・ Random Stat +8 |
|
Choice 2
(Fail)
(You still have a long way to go!) |
・ -30 Energy ・ 45 Skill Pts ・ Random Stat +8 |
Solid Showing (G2) (Haru Urara)
| Choice | Outcome |
|---|---|
|
Choice 1
(Your efforts have finally paid off.) |
・ -20 Energy ・ 35 Skill Pts ・ Random Stat +5 |
|
Choice 2
(Success)
(You still have a long way to go!) |
・ -10 Energy ・ 35 Skill Pts ・ Random Stat +5 |
|
Choice 2
(Fail)
(You still have a long way to go!) |
・ -30 Energy ・ 35 Skill Pts ・ Random Stat +5 |
Solid Showing (G3) (Haru Urara)
| Choice | Outcome |
|---|---|
|
Choice 1
(Your efforts have finally paid off.) |
・ -20 Energy ・ 35 Skill Pts ・ Random Stat +5 |
|
Choice 2
(Success)
(You still have a long way to go!) |
・ -10 Energy ・ 35 Skill Pts ・ Random Stat +5 |
|
Choice 2
(Fail)
(You still have a long way to go!) |
・ -30 Energy ・ 35 Skill Pts ・ Random Stat +5 |
Solid Showing (OP and Pre-OP) (Haru Urara)
| Choice | Outcome |
|---|---|
|
Choice 1
(Your efforts have finally paid off.) |
・ -20 Energy ・ 30 Skill Pts ・ Random Stat +3 |
|
Choice 2
(Success)
(You still have a long way to go!) |
・ -10 Energy ・ 30 Skill Pts ・ Random Stat +3 |
|
Choice 2
(Fail)
(You still have a long way to go!) |
・ -30 Energy ・ 30 Skill Pts ・ Random Stat +3 |
Victory! (G1) (Haru Urara)
| Choice | Outcome |
|---|---|
|
Choice 1
(Me too!) |
・ -15 Energy ・ 45 Skill Pts ・ Random Stat +10 |
|
Choice 2
(Success)
(This is only the beginning!) |
・ -5 Energy ・ 45 Skill Pts ・ Random Stat +10 |
|
Choice 2
(Fail)
(This is only the beginning!) |
・ -20 Energy ・ 45 Skill Pts ・ Random Stat +10 |
Victory! (G2) (Haru Urara)
| Choice | Outcome |
|---|---|
|
Choice 1
(Me too!) |
・ -15 Energy ・ 35 Skill Pts ・ Random Stat +8 |
|
Choice 2
(Success)
(This is only the beginning!) |
・ -5 Energy ・ 35 Skill Pts ・ Random Stat +8 |
|
Choice 2
(Fail)
(This is only the beginning!) |
・ -20 Energy ・ 35 Skill Pts ・ Random Stat +8 |
Victory! (G3) (Haru Urara)
| Choice | Outcome |
|---|---|
|
Choice 1
(Me too!) |
・ -15 Energy ・ 35 Skill Pts ・ Random Stat +8 |
|
Choice 2
(Success)
(This is only the beginning!) |
・ -5 Energy ・ 35 Skill Pts ・ Random Stat +8 |
|
Choice 2
(Fail)
(This is only the beginning!) |
・ -20 Energy ・ 35 Skill Pts ・ Random Stat +8 |
Victory! (OP and Pre-OP) (Haru Urara)
| Choice | Outcome |
|---|---|
|
Choice 1
(Me too!) |
・ -15 Energy ・ 30 Skill Pts ・ Random Stat +5 |
|
Choice 2
(Success)
(This is only the beginning!) |
・ -5 Energy ・ 30 Skill Pts ・ Random Stat +5 |
|
Choice 2
(Fail)
(This is only the beginning!) |
・ -20 Energy ・ 30 Skill Pts ・ Random Stat +5 |
Haru Urara (New Year ♪ New Urara!) Secret Event
| Notes on Hidden Events |
|---|
|
The Hidden Event rewards listed below are the base values, and can increase based on your Race Bonus. Hidden Events do not occur in the following scenarios: ・Trackblazer (Make a New Track) |
After the Arima Kinen: I Need Better
| Event Conditions | Event Effects |
|---|---|
| Place any rank in Arima Kinen (Classic Year) | No Energy consumption |
If you decide to participate in the Arima Kinen during Classic Year, it won't consume any energy.
After the Arima Kinen: Way, Way Better
| Event Conditions | Event Effects |
|---|---|
| After the Arima Kinen: Way, Way Better Win the Arima Kinen (Senior Year) |
All Stats +3 Skill Points +45 Long Shot ◯ +1 Director Akikawa Bond +4 |
Stats are affected by Race Bonus.
Haru Urara has a secret event if you manage to win the Arima Kinen during her Senior Year.
This is a very difficult requirement, as you will need to improve her Turf and Long aptitude to at least B to even have a chance of winning the race.
After the JBC Sprint: Rival
| Event Conditions | Event Effects |
|---|---|
| Win the JBC Sprint during Senior Year. (Part of Career Goal) | All Stats +3 Skill Points +45 Meticulous Measures +1 Director Akikawa Bond +4 |
Stats are affected by Race Bonus.
You can get a boost in all of your stats, skill points, and hints for Meticulous Measures by winning the JBC Sprint during Senior Year as part of her Career Goal.
Haru Urara (New Year ♪ New Urara!) Career Goals
| Goal | Race/Goal |
|---|---|
| Run in Junior Make Debut | Junior Make Debut |
| Earn 5000 Fans | 5000 or above Classic Year Early Jul |
| Earn 9000 fans | 9000 or above Classic Year Early Nov |
| Earn 12000 fans | 12000 or above Classic Year Late Dec |
| Place top 5 in Negishi S. |
 Negishi Stakes Negishi Stakes
(Sprint - 1400m) Senior Year Late Jan |
| Place top 5 in February S. |
 February Stakes February Stakes
(Mile - 1600m) Senior Year Late Feb |
| Place top 5 in Elm S. |
 Elm Stakes Elm Stakes
(Mile - 1700m) Senior Year Late Feb |
| Place 1st in JBC Sprint |
 JBC Sprint JBC Sprint
(Sprint - 1200m) Senior Year Early Nov |
| Run in Arima Kinen |
 Arima Kinen Arima Kinen
(Long - 2500m) Senior Year Late Dec |
Haru Urara Profile
Basic Information
 Haru Urara Haru Urara"I won't let losing get me down! Urara, la la la! ♪" | Voice Actress | Yukina Shuto |
|---|---|---|
| Height | 140cm / 4'7" | |
| Weight | Slight increase (but unphased) | |
| Birthday | Feb 27 | |
| Three Sizes | B 74 | W 51 | H 73 | |
| She's on a losing streak... but she never gives up! While she may not be the most skilled, she experienced the excitement of racing back in Kochi and wanted more. While she completely flunked Tracen's entrance exam, her admissions officer was nonetheless impressed when they spoke by her boundless positivity—which she spreads to all the Umamusume around her. | ||
Costumes
| Uniform | Racewear |
|---|---|
 |
 Bestest Prize Bestest Prize |
Umamusume: Pretty Derby Related Guides

Character Guides
| Height and Weight | Voice Actors | Three Sizes | List of Birthdays |
Characters (Trainees) by Rarity
| 3-Star Characters | 2-Star Characters | 1-Star Characters |
Current Uma Musume Characters (Trainees)
 Matikane Tannhauser (Clippety Tippety Clop)
 Kitasan Black (Gilded Shrine to Glory)
 Admire Vega (Starry Nocturne)
 Mejiro Ardan (Crystalline)
 Eishin Flash (Precise Chocolatier)
 Mihono Bourbon (CODE: ICING)
 Sakura Chiyono O (Strength in Full Bloom)
 T.M. Opera O (New Year, Same Radiance!)
 Tamamo Cross (Fast as Lightning)
 Fine Motion (Noble Seamair)
 Biwa Hayahide (Rouge Caroler)
 Oguri Cap (Ashen Miracle)
 Mejiro Dober (Off the Line)
 Tosen Jordan (Jokester ☆ Vibes)
 Gold City (Autumn Cosmos)
 Symboli Rudolf (Archer by Moonlight)
 Manhattan Cafe (Creeping Shadow)
 Kawakami Princess (Princess of Pink)
 Super Creek (Chiffon-Wrapped Mummy)
 Rice Shower (Vampire Makeover!)
 Agnes Digital (Full-Color Fangirling)
 Hishi Akebono (Buono☆Alla Moda)
 Matikane Fukukitaru (Lucky Tidings)
 Eishin Flash (Meisterschaft)
 Meisho Doto (Turbulent Blue)
 Maruzensky (Hot☆Summer Night)
 Special Week (Hopp'n♪Happy Heart)
 Gold City (Authentic / 1928)
 Fuji Kiseki (Shooting Star Revue)
 Grass Wonder (Saintly Jade Cleric)
 El Condor Pasa (Kukulkan Warrior)
 Hishi Amazon (Azure Amazon)
 Seiun Sky (Reeling in the Big One)
 Air Groove (Quercus Civilis)
 Mayano Top Gun (Sunlight Bouquet)
 Narita Brian (Maverick)
 Smart Falcon (LOVE☆4EVER)
 Narita Taishin (Nevertheless)
 Curren Chan (Fille Éclair)
 Tokai Teio (Beyond the Horizon)
 Mejiro McQueen (End of the Skies)
 Biwa Hayahide (pf. Winning Equation...)
 Mihono Bourbon (MB-19890425)
 T.M. Opera O (O Sole Suo!)
 Rice Shower (Rosy Dreams)
 Symboli Rudolf (Emperor's Path)
 Mejiro McQueen (Frontline Elegance)
 Taiki Shuttle (Wild Frontier)
 Oguri Cap (Starlight Beat)
 Maruzensky (Formula R)
 Tokai Teio (Peak Joy)
 Silence Suzuka (Innocent Silence)
 Special Week (Special Dreamer)
 Super Creek (Murmuring Stream)
 Mayano Top Gun (Scramble Zone)
 Air Groove (Empress Road)
 El Condor Pasa (El Numero 1)
 Grass Wonder (Stone-Piercing Blue)
 Daiwa Scarlet (Peak Blue)
 Vodka (Wild Top Gear)
 Gold Ship (Red Strife)
 King Halo (King of Emeralds)
 Nice Nature (Poinsettia Ribbon)
 Matikane Fukukitaru (Rising Fortune)
 Haru Urara (Bestest Prize)
 Sakura Bakushin O (Blossom in Learning)
 Winning Ticket (Get to Winning!)
 Agnes Tachyon (Tach-nology)
 Mejiro Ryan (Down the Line)
Comment
Author

Haru Urara (New Year ♪ New Urara!) Build Guide and Character Info
Premium Articles

Rankings
- We could not find the message board you were looking for.

Gaming News


Popular Games

Genshin Impact Walkthrough & Guides Wiki
Umamusume: Pretty Derby Walkthrough & Guides Wiki
Crimson Desert Walkthrough & Guides Wiki
Monster Hunter Stories 3: Twisted Reflection Walkthrough & Guides Wiki
Honkai: Star Rail Walkthrough & Guides Wiki
Pokemon Pokopia Walkthrough & Guides Wiki
The Seven Deadly Sins: Origin Walkthrough & Guides Wiki
Wuthering Waves Walkthrough & Guides Wiki
Zenless Zone Zero Walkthrough & Guides Wiki
Arknights: Endfield Walkthrough & Guides Wiki


Recommended Games
Fire Emblem Heroes (FEH) Walkthrough & Guides Wiki
Diablo 4: Vessel of Hatred Walkthrough & Guides Wiki
Cyberpunk 2077: Ultimate Edition Walkthrough & Guides Wiki
Yu-Gi-Oh! Master Duel Walkthrough & Guides Wiki
Super Smash Bros. Ultimate Walkthrough & Guides Wiki
Pokemon Brilliant Diamond and Shining Pearl (BDSP) Walkthrough & Guides Wiki
Elden Ring Shadow of the Erdtree Walkthrough & Guides Wiki
Monster Hunter World Walkthrough & Guides Wiki
The Legend of Zelda: Tears of the Kingdom Walkthrough & Guides Wiki
Persona 3 Reload Walkthrough & Guides Wiki


All rights reserved
© Cygames, Inc.
The copyrights of videos of games used in our content and other intellectual property rights belong to the provider of the game.
The contents we provide on this site were created personally by members of the Game8 editorial department.
We refuse the right to reuse or repost content taken without our permission such as data or images to other sites.