This survey will take about 1 minute.
Your answers will help us to improve our website.
Modern Warfare 2 (MW2)
Alone Mission Walkthrough
☆ Camo Challenges | List of Blueprints
★ DMZ Key Locations and Map
☆ Ashika Island: DMZ Keys | Weapon Cases | Map Guide
★ How to Get Weapon Cases
Alone is a campaign story mission in Call of Duty: Modern Warfare II (MW2). Read on for a complete walkthrough of Alone including how to find a sharp weapon, tips for beating the mission on Realism Difficulty, a list of achievements, as well as a list of weapons you can find & use.
| ◄ Previous Mission | Next Mission ▶ |
|---|---|
| Dark Water | Prison Break |
List of Contents
Alone Overview
Mission Information
| Alone | |
|---|---|
 |
|
| Description | Alone, unarmed and hunted, Soap must improvise to survive. |
| Place | Las Almas, Mexico |
| Date & Time | 03 November 2022, 0000 |
| Character | Soap |
| Completion Reward |  Shadow Company Ops Calling Card Shadow Company Ops Calling Card |
Starting Loadout
| No Weapons at the Start |
Soap will start out the mission with no weapons to his name. Players will have to kill soldiers, open safes, or loot bodies in order to get guns to use during this level.
Alone Walkthrough
Alone Realism Difficulty and Gunless Video Playthrough
Complete Mission Walkthrough
| 1 | 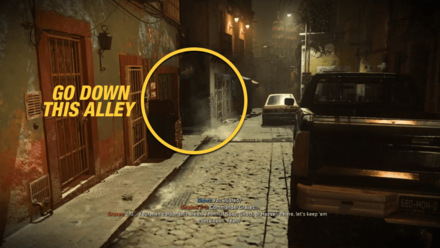 When the cutscene ends, press your crouch or jump button to get up. Go down the street and take the first left where you should see Graves talking to his men. Do not go down the main street as an APC will spawn there if you do. |
|---|---|
| 2 | 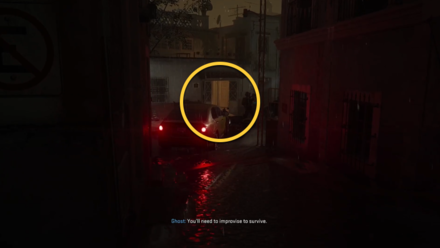 Wait for Graves and his men to take away the hostage. Once clear, head into the open garage in front of you. |
| 3 | 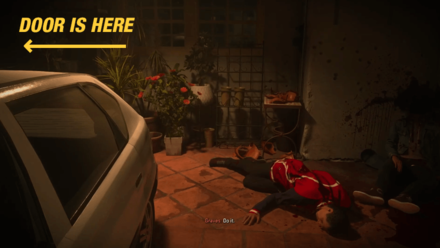 Get behind the car. There should be a doorway for you to enter. |
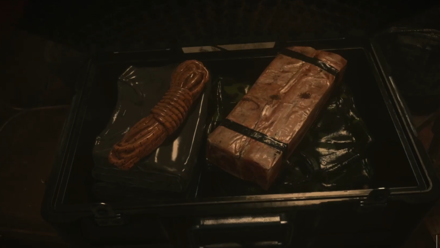
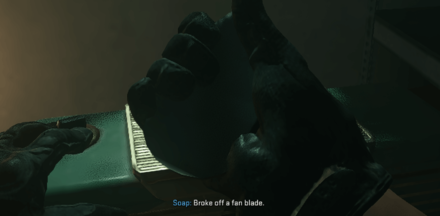
| 4 | 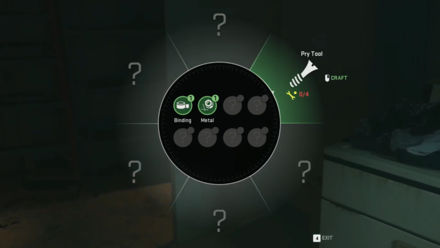 Head inside. Pick up the Binding from the dead body and the Metal from the fan. Use them to craft a Pry Tool. |
| 5 | Exit the room and head for the door across it. Use the Pry Tool to force it open. |
| 6 | 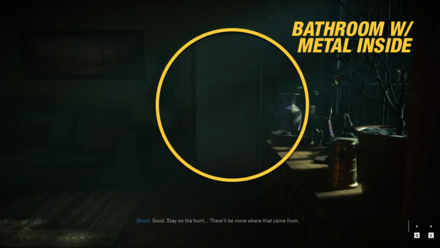 Head down the hallway and to the door at the end. Fetch the Metal inside. |
| 7 | 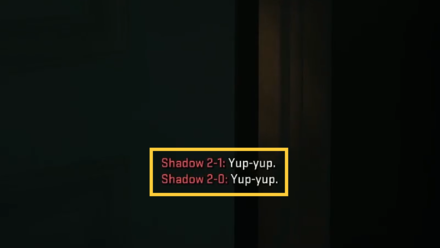 After securing the resource, head over to the door to your right (as you exit the bathroom). Open it slightly and listen to Graves' conversation. Wait for the conversation to end before entering otherwise you will be shot. When you hear the Yup Yup from Graves' men, you should be safe to enter. |
| 8 | 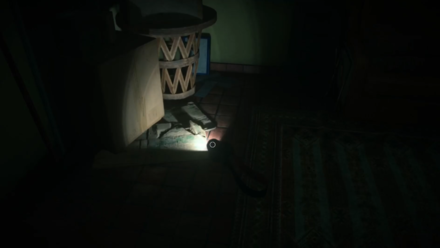 Take the stairs next to the kitchen. Head up and past 2 dead/dying victims. Look for the Headlamp in the 2nd floor. |
| 9 | With the headlamp equipped, search for the 2 Bindings in the same room. One of them should be inside a blue end table. |
| 10 | Once you have the materials secure, head inside the door leading to the bathroom. Inside, craft another Pry Tool to open the locked door. |
| 11 | 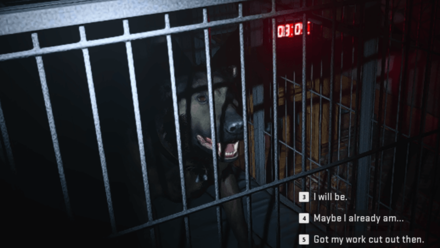 When you enter the next room, a caged dog will start barking. Head over to the balcony and jump down before the soldiers see you. |
| 12 | 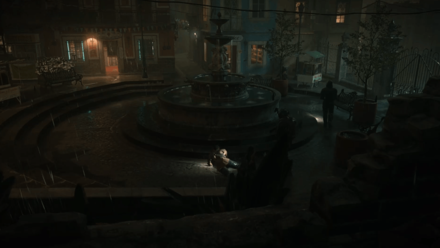 After jumping, turn left and head up the stairs to the upper levels of the next building. Follow the path to reach a fountain area where 2 Shadow Company soldiers are executing dirty cops. |
| 13 | 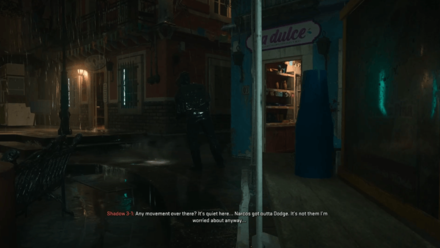 Jump down after the soldier nearest to you has left the area. Grab Bottles and make your way to the food stand near the 2nd soldier. |
| 14 | Distract this soldier by throwing a bottle. Head inside the doorway he was blocking and continue through the shop before exiting at the opposite end. |
| 15 | 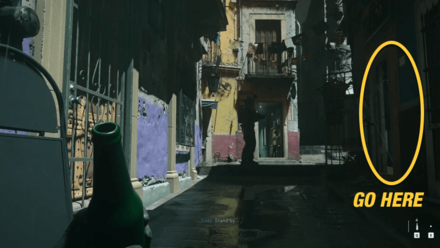 After exiting the shop, you will be at an intersection. Approach the soldier in front of you and head into the open shop doorway to your right. Use a bottle to distract the soldier if needed. |
| 16 | 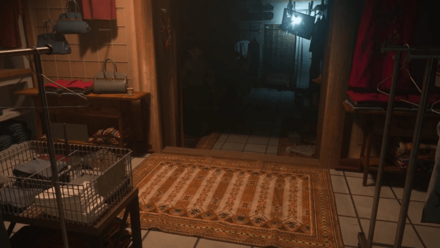 Make your way to the back of the darkened shop. Use your headlamp to find the back door. Enter it to arrive at the changing rooms. |
| 17 | 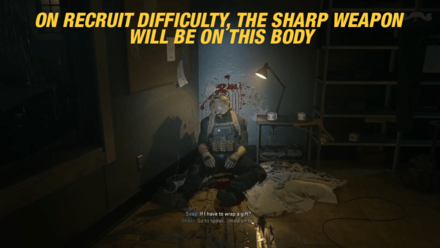 Exit through the end of the changing room hallway. If you're not playing on Veteran or Realism, the Sharp Weapon (knife) should be on the dead soldier you find in this room. Materials in this Room: ・Explosive x1 ・Binding x1 ・Trap x1 |
| 18 | 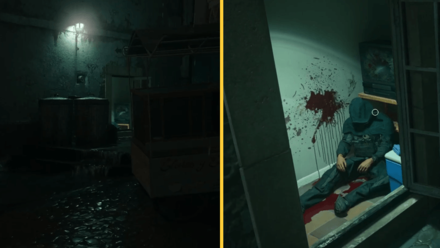 If playing on Realism or Veteran, the Sharp Weapon (knife) will be found in the building across from where you are currently. Exit through the window, turn left, and head inside the open window next to the trash cans. The knife should be on the dead soldier's body. NOTE: Distract the soldier in front of the 2nd building using a bottle if he is looking towards the interior of the building. |
| 19 | 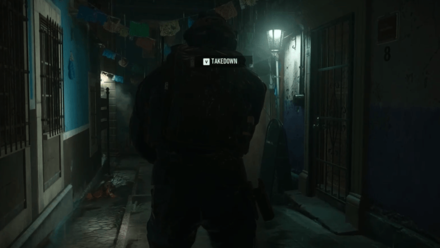 With the knife secure, kill the soldier nearest to you via takedown and secure his handgun. You can use it to clear out the other 4 soldiers in this area or stick to knives and traps. |
| 20 | 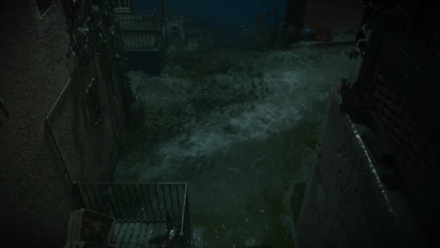 Once all the guards are dealt with, jump down to the flooded street. Turn right and head up the alley. |
| 21 | Do not go into the green door since there is a shotgun trap behind it. Instead, go further down the alley and into the garage. Enter the building via the window and disable the trap to get a free shotgun. |
| 22 | 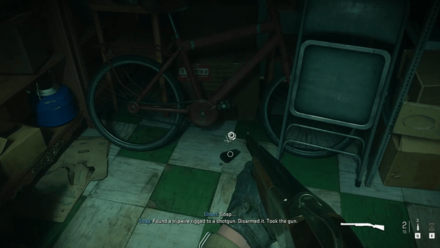 Loot the Metal in the room with a shotgun trap and make another Pry Tool. |
| 23 | 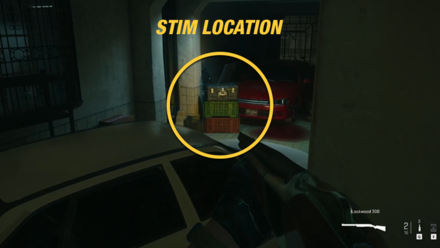 Once crafted, return to the garage again and climb over the white car. Open the box on the other side of it to get the Stim which allows your movement to return to normal. |
| 24 |  After Soap takes the Stim, return to the interior of the building and head up the stairs. Go to the end of the dark corridor on the 2nd floor and answer the knocking by opening the door. |
| 25 |  Go past the dead guy and collect materials from the well-lit area. When ready, drop down to the first floor of the diner to begin the next segment. |
| 26 | Shadow Company mercenaries are closing in on the diner. As soon as you drop down, head right and look for a door that leads out into the street. |
| 27 | 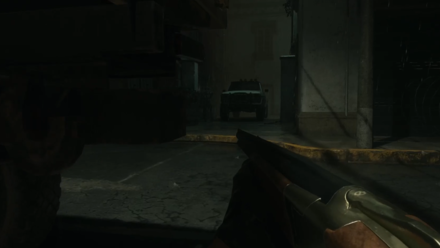 Exit through that and skirt the right edge of area until you arrive at a pickup truck. Go behind it to find the door into the building in front of you. |
| 28 | 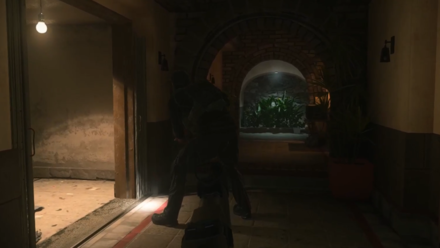 Enter the building and make your way through the hallways. You goal is to exit at the opposite side. If any Shadows are lurking around, the small area will be perfect for using your knife or suppressed weapons for quick kills. |
| 29 | 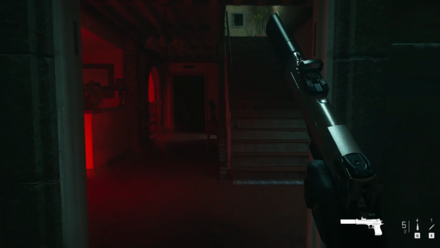 Instead of fighting enemies head on, turn right and into a building with a red-lit hallway. Go up to the 2nd floor apartment so you can see all the guards blocking the way to the tunnel. |
| 30 | Throw bottles to the left side of the balcony to lure them away before dropping down. If you aren't detected, immediately turn right and make your way to the flooded tunnel. NOTE: If there are still guards in the plaza area, use additional bottles to lure them away. You will have to be quick though. |
| 31 | 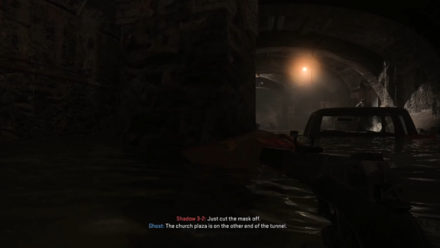 Inside the flooded tunnel, wait for the 2 heavy soldiers to pass by hiding behind a pillar or diving down into the water. Once they're past you, continue through the tunnel. |
| 32 | 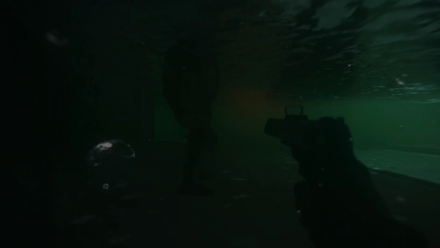 2 more heavies will be in the tunnel. Either dodge them by swimming past, or kill them using knife takedowns. It is not advisable to shoot them as ammo is very limited and cover is pretty sparse in the tunnel. |
| 33 | 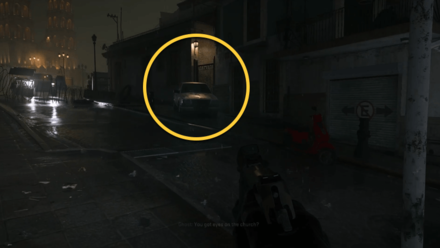 At the tunnel's end, use the stairs to head up to street level. Climb the white sedan to your right as you emerge to enter a back alley. |
| 34 | 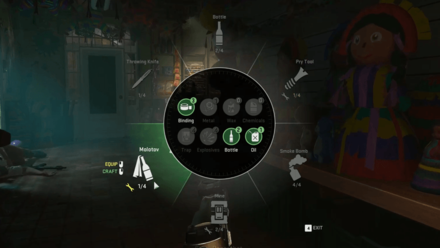 Enter the shop and prepare to run or fight. It is recommended that you craft all the Smoke Bombs that you can before exiting the shop as the next section will have enemies actively hunting you. |
| 35 | 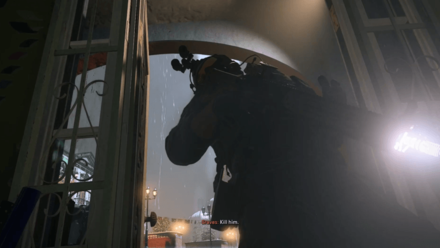 When ready, open the door and watch Ghost kill the Shadows that ambush you. Once Ghost gives the order, exit the shop and start running towards the church. NOTE: Players can choose to fight the enemies in this area until they reach the church. However, it is easier to use a Smoke Bomb against the approaching heavies before cutting through the center of the large plaza to make a beeline for the church. |
| 36 | 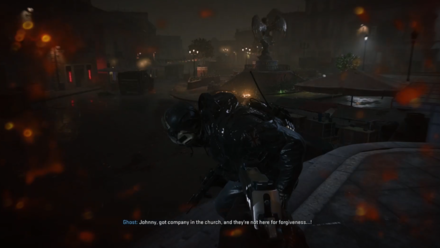 Once at the church steps, Ghost will join you. Make your way back to the opposite end of the plaza to secure the pickup truck that you'll be using to escape. NOTE: Again, you can skip most of these enemies by simply using Smoke Bombs to cover your approach to the pickup. |
| 37 | 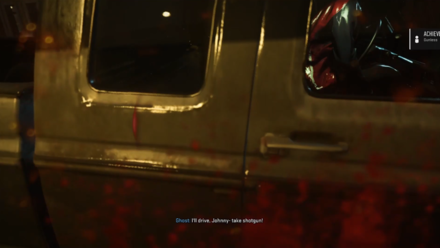 After Ghost gives the signal, enter via the passenger side door to complete the mission. |
How to Beat Alone in Realism Difficulty
| Realism Difficulty Tips |
|---|
|
|
Take Your Time and Collect Materials
Realism will test how well you can improvise and use the different craftable items in your arsenal. To take make full use of the only advantage you have, make sure to take your time and collect materials for your crafting needs. Here is a short summary of what you can craft and how they can be used:
| Pry Tool | Used to open locked doors and locked cases. Make sure to look for the materials for these since some areas will require you to open locked doors in order to progress. |
|---|---|
| Bottle | Used to distract guards or craft Molotovs. You can hold a maximum of 4 at a time. |
| Smoke Bomb | Used to stun enemies or conceal yourself when detected. |
| Mine | Can be placed on the ground, triggering an explosion when enemies walk over it. Do note, this is not C4 so it cannot be remote detonated. |
| Throwing Knife | Used to one-hit-kill enemies while remaining hidden. Do note that this will not insta-kill armored soldiers. |
| Molotov | Used to set enemies on fire. Can be used to insta-kill even armored soldiers. |
Craft Smoke Bombs for Quick Escapes or Easy Takedowns
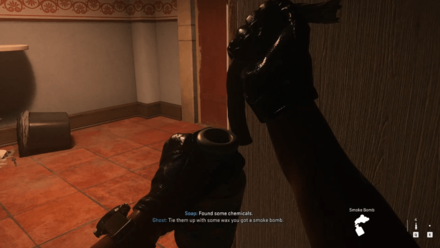
Smoke Bombs are by far the best items you can craft when playing Alone on Realism difficulty. If you're detected in an area where you cannot take cover or escape easily, use a Smoke Bomb to stun enemies in order to make a quick getaway.
Alternatively, you can also use Smoke Bombs to set up kills. Throw one at an enemy (especially heavily armored enemies) and take advantage of the stun to get close for a knife takedown.
Use Bottles to Divert Enemy Attention
Bottles are your best friend especially when going for a Gunless run in Alone. Throw them at the area you want the soldiers to investigate so you can quietly slip past them. However, do remember to wait until the soldiers have moved and started investigating before you make your own move. Passing too near to a guard, even when distracted, will usually end up in detection.
Stick to Suppressed Weapons to Avoid Detection
If you do plan to use weapons, make sure you are using suppressed weapons only since any loud sound made usually alerts all the guards in a given area. If you aren't careful, you can end up with highly alert guards which then compromises your stealth runs.
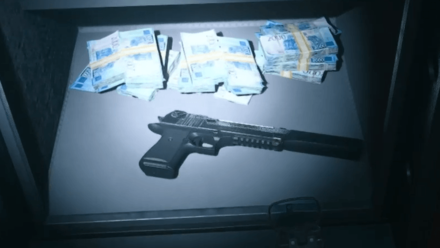
One option you can resort to is opening the 2 Safes found in this level. One of them gives a suppressed .50 GS, while the other gives a Crossbow. Both weapons will not alert enemies when used.
Only Kill Enemies When Necessary
Remember to only kill enemies when necessary. If you're a bit too trigger or knife happy in this level, you could end up in some rather unfortunate checkpoints. If you do end up in a checkpoint where detection is unavoidable, use Smoke Bombs to stun enemies before making a beeline for the next area (hopefully triggering a better checkpoint in the process).
Use Smoke Bombs to Skip the Last Fight
Once you link up with Ghost, multiple soldiers will start pushing your location. If you want to skip the final fight of this level, use smokes bombs to carve a path towards the pickup truck at the opposite end of the plaza. This bypasses all the enemies making this endgame portion a breeze to complete.
Alone Achievements
Gunless Achievement
The Gunless achievement is accomplished in the Alone mission. This can be achieved by not firing a single bullet during the duration of the mission.
Soap will start this mission without any weapons and will scavenge for supplies to outthink his enemies. To accomplish the Gunless achievement, Soap will have to be stealthy as he rendezvous with Ghost.
While navigating through certain areas, Soap will obtain items such as a knife, smoke bomb, bomb trap, and throwing knives that can be used to kill Shadows without failing the achievement.
Safe Codes and Gentleman Thief Achievement

The Gentleman Thief achievement can be accomplished in the Alone and El Sin Nombre missions. In the Alone mission, Soap will have to open two safes which contains weapons.
The first safe can be found in the coffee shop. Soap will have to pry open the door and look for clues in a calendar to open the safe. The code for this safe is 10-10-80.
For the second safe, Soap will examine a computer containing the safe code. The location of this safe is found inside a repair shop that appears after exiting the coffee shop. The code for this safe is 37-60-80.
All Safe Codes and Safe Locations for Alone and El Sin Nombre
Weapons Found in Alone
| All Weapons | |||
|---|---|---|---|
 .50 GS .50 GS
|
 Bryson 800 Bryson 800
|
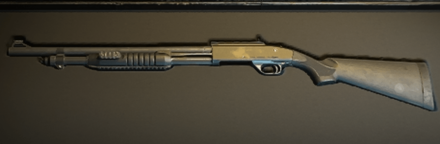
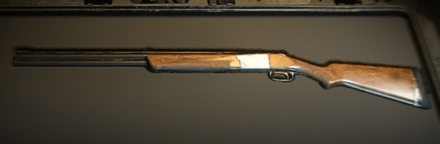 Lockwood 300 Lockwood 300
|
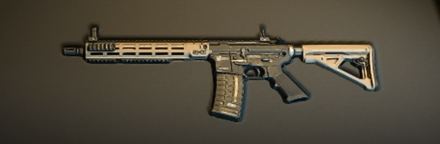 M4 M4
|
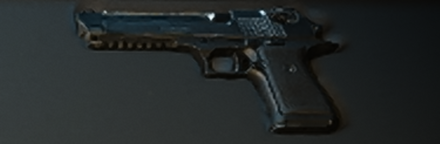
 P890 P890
|
|||
Call of Duty: Modern Warfare 2 (MW2) Related Guides

All Campaign Missions
| List of Campaign Missions | |
|---|---|
| 1 | Strike |
| 2 | Kill or Capture |
| 3 | Wetwork |
| 4 | Tradecraft |
| 5 | Borderline |
| 6 | Cartel Protection |
| 7 | Close Air |
| 8 | Hardpoint |
| 9 | Recon by Fire |
| 10 | Violence and Timing |
| 11 | El Sin Nombre |
| 12 | Dark Water |
| 13 | Alone |
| 14 | Prison Break |
| 15 | Hindsight |
| 16 | Ghost Team |
| 17 | Countdown |
Author
Call of Duty: Modern Warfare 2 (MW2) Walkthrough & Guides Wiki
Alone Mission Walkthrough
Please participate in our site
improvement survey
03/2026
improvement survey
03/2026
Would you assist in
improving Game8's site?
improving Game8's site?

×
We are listening to our users' valuable opinions and discussing how to act on them.
The information collected through this survey will be used for the purpose of improving our services. In addition, the information will only be disclosed a part of a statistic in a format that will not allow identification of personal information.
Begin Survey
Not Now
×
Please rate each item regarding Game8.co's Advertisements.
Amount of Ads
Very Dissatisfied
Somewhat Dissatisfied
Fine
Somewhat Satisfied
Highly Satisfied
Placement of Ads
Timing of Ad Display
Ad Loading Speed
Safeness of Ads
Content of Ads
×
Please rate each item regarding Game8.co's Quality of Articles.
Amount of information
Very Dissatisfied
Somewhat Dissatisfied
Fine
Somewhat Satisfied
Highly Satisfied
Frequency of updates
Speed of new information
Accuracy of articles
Understandibility of articles
Readability of sentences
×
Please rate each item regarding Game8.co's Usability of the Site.
Ease of finding information
Very Dissatisfied
Somewhat Dissatisfied
Fine
Somewhat Satisfied
Highly Satisfied
Loading Speed
Use of Color
Font Size
Visibility of Images
Easy to Understand Layout
×
Please rate each item regarding Game8.co's Message Boards, Comments.
Ease of Writing
Very Dissatisfied
Somewhat Dissatisfied
Fine
Somewhat Satisfied
Highly Satisfied
Readability
Ease in Finding Information
Comment Quality
Comment Quantity
Admin Response
×
Please rate each item regarding Game8.co's Site's new design.
Please rate our site's new design
Very Dissatisfied
Somewhat Dissatisfied
Fine
Somewhat Satisfied
Highly Satisfied
Do you think that the website's design change makes the site easier to use?
Has the new design made it easier for you to find information on the site?
Has the new design improved the overall visual appeal of the site?
How would you rate your overall satisfaction with the new design of the site?
×
How likely are you to recommend Game8 to someone you know?
Very Unlikely
0
1
2
3
4
5
6
7
8
9
10
Very Likely
If you have other opinions regarding potential improvement to the website, please share them with us. We would appreciate your honest opinion.
Note: This is a free response section, so you can proceed without entering anything.
Note: Please be sure not to enter any kind of personal information into your response.
Note: Please be sure not to enter any kind of personal information into your response.
×
Thank You
×
Thank you for participating in our survey! Your answers will help us to improve the quality of our website and services.
We hope you continue to make use of Game8.
We hope you continue to make use of Game8.
Close
Rankings
- We could not find the message board you were looking for.
Gaming News


![Everwind Review [Early Access] | The Shaky First Step to A Very Long Journey](https://img.game8.co/4440226/ab079b1153298a042633dd1ef51e878e.png/thumb)

![Monster Hunter Stories 3 Review [First Impressions] | Simply Rejuvenating](https://img.game8.co/4438641/2a31b7702bd70e78ec8efd24661dacda.jpeg/thumb)
Popular Games

Genshin Impact Walkthrough & Guides Wiki
Honkai: Star Rail Walkthrough & Guides Wiki
Umamusume: Pretty Derby Walkthrough & Guides Wiki
Pokemon Pokopia Walkthrough & Guides Wiki
Resident Evil Requiem (RE9) Walkthrough & Guides Wiki
Monster Hunter Wilds Walkthrough & Guides Wiki
Wuthering Waves Walkthrough & Guides Wiki
Arknights: Endfield Walkthrough & Guides Wiki
Pokemon FireRed and LeafGreen (FRLG) Walkthrough & Guides Wiki
Pokemon TCG Pocket (PTCGP) Strategies & Guides Wiki


Recommended Games
Diablo 4: Vessel of Hatred Walkthrough & Guides Wiki
Fire Emblem Heroes (FEH) Walkthrough & Guides Wiki
Yu-Gi-Oh! Master Duel Walkthrough & Guides Wiki
Super Smash Bros. Ultimate Walkthrough & Guides Wiki
Pokemon Brilliant Diamond and Shining Pearl (BDSP) Walkthrough & Guides Wiki
Elden Ring Shadow of the Erdtree Walkthrough & Guides Wiki
Monster Hunter World Walkthrough & Guides Wiki
The Legend of Zelda: Tears of the Kingdom Walkthrough & Guides Wiki
Persona 3 Reload Walkthrough & Guides Wiki
Cyberpunk 2077: Ultimate Edition Walkthrough & Guides Wiki


All rights reserved
© 2021-2022 Activision Publishing, Inc. ACTIVISION, CALL OF DUTY, CALL OF DUTY VANGUARD, CALL OF DUTY WARZONE, WARZONE, and RICOCHET ANTI-CHEAT are trademarks of Activision Publishing, Inc. All other trademarks and trade names are the property of their respective owners.
The copyrights of videos of games used in our content and other intellectual property rights belong to the provider of the game.
The contents we provide on this site were created personally by members of the Game8 editorial department.
We refuse the right to reuse or repost content taken without our permission such as data or images to other sites.