Practice Makes Perfect Trophy Guide | All Target Locations
☆ Camo Challenges | List of Blueprints
★ DMZ Key Locations and Map
☆ Ashika Island: DMZ Keys | Weapon Cases | Map Guide
★ How to Get Weapon Cases
Practice Makes Perfect is a trophy/achievement in Call of Duty: Modern Warfare 2 (MW2) that requires you to shoot all 33 targets found in the practice area during the Ghost Team mission. Read on to learn how to easily get this achievement!
List of Contents
Practice Makes Perfect Achievement Information
 |
|
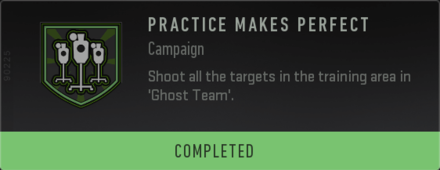
| How to Get | Shoot all 33 Targets in the Practice Area |
|---|---|
| Mission | Ghost Team |
How to Complete Practice Makes Perfect Achievement
Practice Makes Perfect Video Playthrough
Complete Achievement Walkthrough
The Practice Makes Perfect Achievement will require the player to hit 33 targets in the practice area during the boss fight against Graves in the Ghost Team mission. To accomplish the Practice Makes Perfect achievement, follow the indicated steps below:
| Steps | |
|---|---|
| 1 |
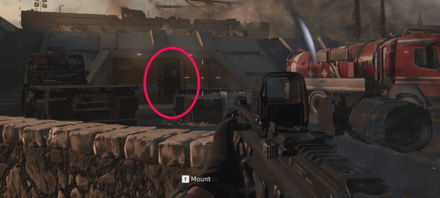 OPTIONAL: Prior to reaching the practice area, the player can equip an M4 with a thermal scope found in the bunker where the tower falls. This makes it easier to spot targets later on during the boss fight against Graves. |
| 2 |
Make your way around the practice area using a clockwise motion. Use the green gate as a starting point during this run. |
| 3 | 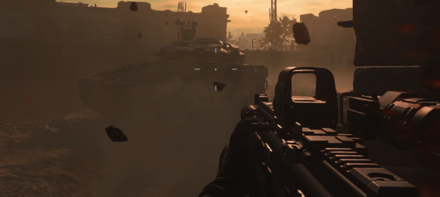 Do not run out in the open as the tank will easily spot you. It is also recommended to sprint during this run since the tank is slow and will be unable to adapt if the player is constantly moving. |
| 4 | Use damaged vehicles and containers as cover against the tank. Hiding behind wooden objects or even the buildings will be ineffective as these are vulnerable to the tank's arsenal. |
| 5 | 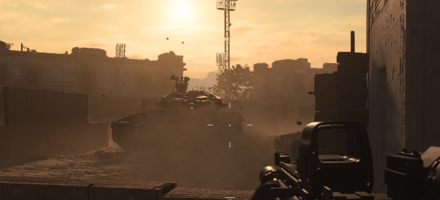 Do not damage Grave's tank. Doing so will spawn enemy reinforcements in the practice area making it more difficult to shoot the targets. |
| 6 | 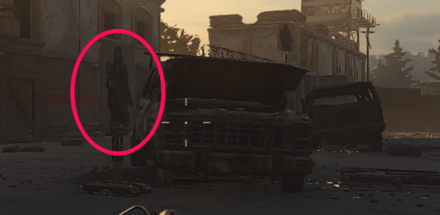 Prioritize taking out the targets near the destroyed vehicles first. These can be found at the edges of the practice area or near the buildings. NOTE: When you have a clear shot on a target from afar, shoot it down but maintain the clockwise motion to clear out the entire area. |
| 7 | 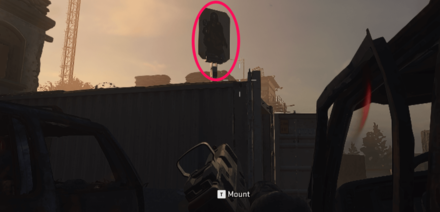 Also spot the targets found inside and above containers. Most of the containers can be found at the corners of the practice area so make sure that you are clearing out the edges of the map while following the clockwise motion. |
| 8 | 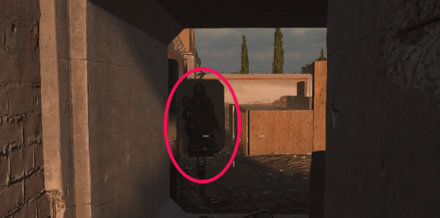 There will be a hidden target near the northeast direction. The target will be inside a concrete box. |
| 9 | 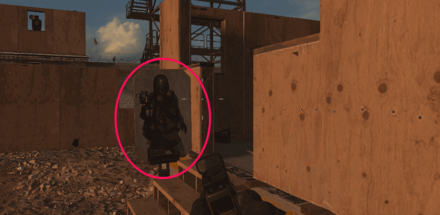 There are also small infrastructures apart from the four buildings. These will have targets as well so make sure to clear these out. |
| 10 | 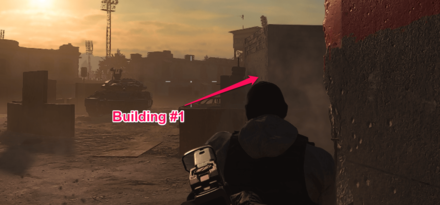 Start targeting each building based on the clockwise motion. Go back to your starting point (green gate) and start shooting down targets in the first building on the right. |
| 11 | 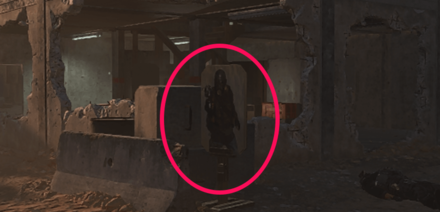 Shoot down targets near the exterior of the building. Make sure to go around the building to ensure that you did not miss a target. |
| 12 | 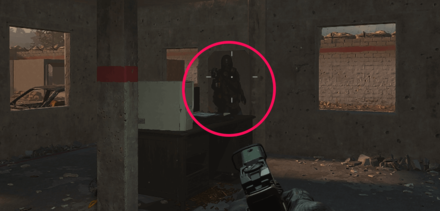 The interior of the building will also have targets so make sure to go inside after clearing all the targets found in its exterior. |
| 13 | 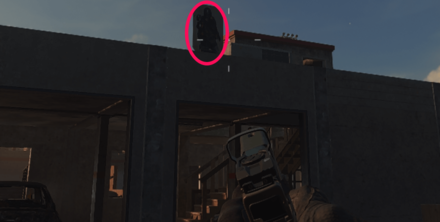 There are also targets on the second floor of the building so keep in mind to go up stairs. |
| 14 | 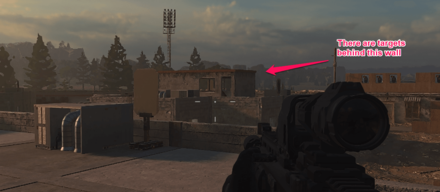 It is not advisable to shoot down targets in other buildings from the second floor as some areas might be covered. This makes it easy to miss targets and can be confusing once you hit majority of the targets. |
| 15 | 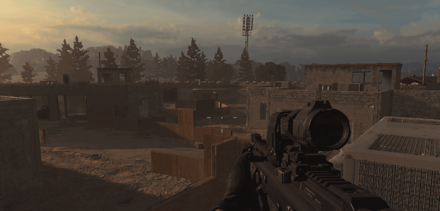 Proceed with shooting down targets in the next three buildings. Maintain the clockwise motion to know which buildings have already been cleared. |
Ghost Team Mission Walkthrough
Practice Makes Perfect Achievement Tips
| Achievement Tips |
|---|
|
|
Use the Green Gate as a Marker or Starting Position
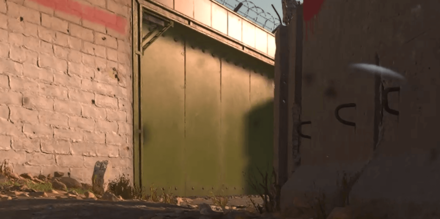
Upon starting the mission, a green gate can be found behind Soap and Rodolfo. The player can use this as a marker or starting point to come back to after clearing targets found in the open spaces of the practice area.
Clear Out All 4 Buildings of Targets
Building #1
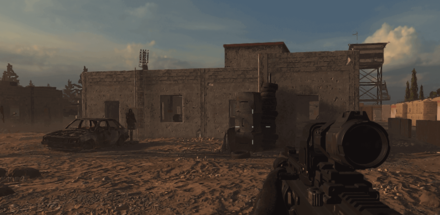
The first building will be in front the green gate, located in the southeast direction.
Building #2
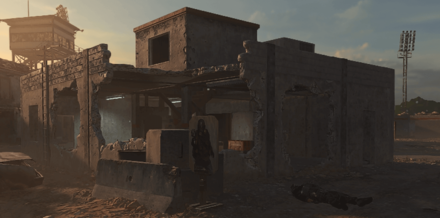
On the left of the building, the second building can be found. This is located in the southwest direction. Take note that there are no targets on the second floor so proceed to the next building after clearing the first floor.
Building #3
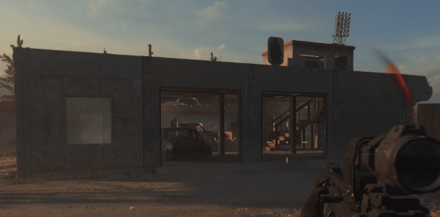
The third building can be located in the northwest direction behind the second building.
Building #4
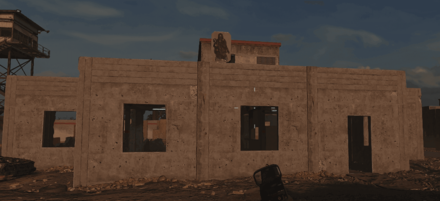
The last building can be found in the northeast direction to the right of the third building. This building is next to the small wooden infrastructure found in the right side of the map.
Some Targets Will Not Count
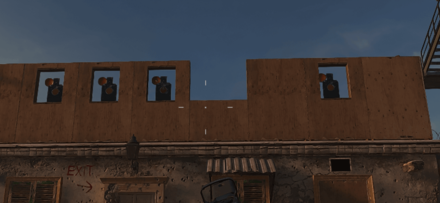
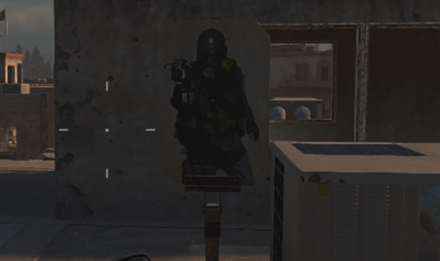
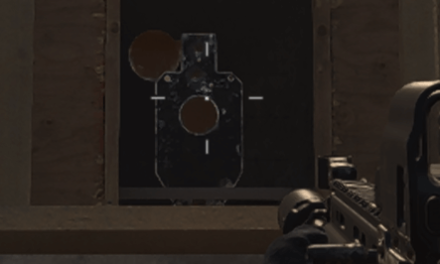
Not all targets in the practice area are part of the Practice Makes Perfect achievement and can be distinguished by the outlook of the shooting target. These can easily be recognized as the actual targets will fall down when penetrated by a bullet.
| Actual Targets | False Targets |
|---|---|
 |
 |
Do Not Pick Up a C4 as This Will Trigger a Checkpoint
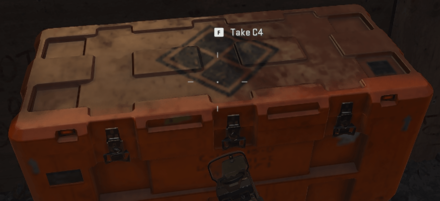
The C4 is the primary equipment used to defeat Graves in this objective. However, when accomplishing the Practice Makes Perfect achievement, avoid picking these up and damaging the tank as it will trigger a checkpoint. This makes it more difficult to shoot down targets as hostiles will start spawning.
NOTE: If you die during your first attempt, there is a possibility that enemy reinforcements will show up even though you had not damaged the tank. If this happens, prioritize eliminating the hostiles first before proceeding with the achievement.
Do This Achievement in Recruit Difficulty
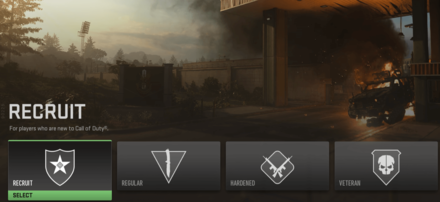
If you are looking to accomplish this achievement with ease, it would be best to choose the Recruit difficulty. The player will be constantly hunted by the tank and playing in harder difficulties will cause the player to die often.
Call of Duty: Modern Warfare 2 (MW2) Related Guides

Campaign Trophies and Achievements
| Crocodile | Must be Wind | No Time to Lose |
| A Crappy Way to Die | Don't Touch the Deck! | Practice Makes Perfect |
| Gentleman Thief | Test Drive | Nessie |
| Gunless | - | - |
Author
Call of Duty: Modern Warfare 2 (MW2) Walkthrough & Guides Wiki
Practice Makes Perfect Trophy Guide | All Target Locations
improvement survey
03/2026
improving Game8's site?

Your answers will help us to improve our website.
Note: Please be sure not to enter any kind of personal information into your response.

We hope you continue to make use of Game8.
Rankings
- We could not find the message board you were looking for.
Gaming News
Popular Games

Genshin Impact Walkthrough & Guides Wiki

Honkai: Star Rail Walkthrough & Guides Wiki

Umamusume: Pretty Derby Walkthrough & Guides Wiki

Pokemon Pokopia Walkthrough & Guides Wiki

Resident Evil Requiem (RE9) Walkthrough & Guides Wiki

Monster Hunter Wilds Walkthrough & Guides Wiki

Wuthering Waves Walkthrough & Guides Wiki

Arknights: Endfield Walkthrough & Guides Wiki

Pokemon FireRed and LeafGreen (FRLG) Walkthrough & Guides Wiki

Pokemon TCG Pocket (PTCGP) Strategies & Guides Wiki
Recommended Games

Diablo 4: Vessel of Hatred Walkthrough & Guides Wiki

Fire Emblem Heroes (FEH) Walkthrough & Guides Wiki

Yu-Gi-Oh! Master Duel Walkthrough & Guides Wiki

Super Smash Bros. Ultimate Walkthrough & Guides Wiki

Pokemon Brilliant Diamond and Shining Pearl (BDSP) Walkthrough & Guides Wiki

Elden Ring Shadow of the Erdtree Walkthrough & Guides Wiki

Monster Hunter World Walkthrough & Guides Wiki

The Legend of Zelda: Tears of the Kingdom Walkthrough & Guides Wiki

Persona 3 Reload Walkthrough & Guides Wiki

Cyberpunk 2077: Ultimate Edition Walkthrough & Guides Wiki
All rights reserved
© 2021-2022 Activision Publishing, Inc. ACTIVISION, CALL OF DUTY, CALL OF DUTY VANGUARD, CALL OF DUTY WARZONE, WARZONE, and RICOCHET ANTI-CHEAT are trademarks of Activision Publishing, Inc. All other trademarks and trade names are the property of their respective owners.
The copyrights of videos of games used in our content and other intellectual property rights belong to the provider of the game.
The contents we provide on this site were created personally by members of the Game8 editorial department.
We refuse the right to reuse or repost content taken without our permission such as data or images to other sites.




![Everwind Review [Early Access] | The Shaky First Step to A Very Long Journey](https://img.game8.co/4440226/ab079b1153298a042633dd1ef51e878e.png/thumb)

![Monster Hunter Stories 3 Review [First Impressions] | Simply Rejuvenating](https://img.game8.co/4438641/2a31b7702bd70e78ec8efd24661dacda.jpeg/thumb)


