Atomgrad EP. 01 Raids Walkthrough
☆ Camo Challenges | List of Blueprints
★ DMZ Key Locations and Map
☆ Ashika Island: DMZ Keys | Weapon Cases | Map Guide
★ How to Get Weapon Cases

Atomgrad EP. 01 is a co-op Raid mission featured in Call of Duty: Modern Warfare 2. Read on for a complete walkthrough of Atomgrad EP. 01 including how to locate Echo Team, the locations of all intel fragments, the list of weapons found in the mission, and the rewards obtained from completing the mission.
List of Contents
Atomgrad EP. 01 Mission Walkthrough
Atomgrad EP. 01 Mission Overview

Captain Price, Gaz, and Farah return in episode 1 of the new Raids game mode as they infiltrate enemy lines presumed to be a Soviet-era fallout shelter.
With Alex Keller and the rest of the Echo Team yet to return, the three are assigned to locate their whereabouts and complete a reconaissance of the facility.
Raids Guide: How to Unlock and Play Raids
Atomgrad EP. 01 Walkthrough
| No. | Steps |
|---|---|
| 1 |  At the beginning of the mission, you will be asked to locate the Echo Team by opening the submarine doors. Prepare first by equipping armor before heading out. |
| 2 |  Clear out enemy hostiles in the tunnels. NOTE: Move cautiously as there will be claymores situated in corners. |
| 3 |  Avoid enemy contact by diving underwater. You can also make your way to the second floor to gain a better view of the area. |
| 4 |  Refill you weapon ammo, equipment, and plates through restock crates. You can also loot up dead soldiers to recover some resources. |
| 5 |  Make you way to the control room and use the CCTV cameras to find the codes. You can find them on the Control Room A2 Sec. 5 and Control Room B2 Sec. 10. |
| 6 |  After opening the submarine doors, get the oxygen tank found on the left side of the tunnel. |
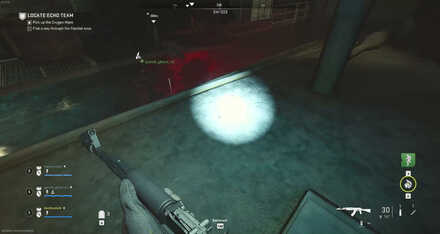
| 7 |  Submerge underwater and swim through the gap found in the wall. This hole can be found in front of the red light. |
| 8 |  Swap out the air tank among your squadmates to maintain your oxygen levels and avoid drowning. |
| 9 |  Swim until you reach the stairs. There's only one path here so it should not cause you to get lost. |
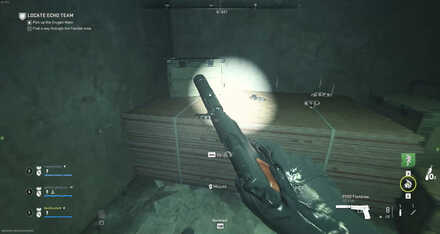
| 10 |  Equip the P890's found on the upper floor before heading to the red light found at the bottom floor. These will be used to shoot the trip mines. |
| 11 |  Swim to the left where you will find a door at the end of the hallway. |
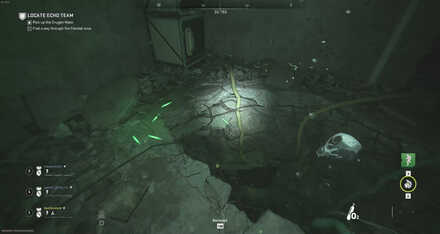
| 12 |  Pass through the door besides an elevator with Trap Wires. It will get you to the hole will have green lights marking it, and swimming through it will lead you to the safe area. |
| 13 |  Make your way down and swim through the debris while following the yellow markers. You will then find the second control room on the left side. |
| 14 |  Open the generator and make your way through the doors one by one to reach the second safe area. There will be times that the switch won't work after using it once or twice. You can fix that by restarting to the last checkpoint and it will spawn you on the next area. |
| 15 |  Clear out enemies in the armory. There will be a juggernaut at the far right of the hallway so make sure you have armor plates equipped. NOTE: There will be a second juggernaut at the left side of the hallway. |
| 16 |  Find the room lit by a green light and make your way past the vents. Make your way to the flooded tunnels and shoot down the bomb drone near the armory. |
| 17 |  Keep following the red marker where you will eventually reach a hallway. Eliminate the enemy hostiles and reach the control room where you can activate a console. |
| 18 |  Coordinate with your squadmates to enter the codes. NOTE: Cyphers will only be displayed for a limited time so make sure to catch them all before the timer on the third Cypher runs out. |
| 19 |  You will be engaged by enemy hostiles as well as bomb drones during this sequence. Make sure to equip armor plates and have sufficient ammo to fend them off. |
| 20 |  Wait for the Keypad Blast Doors to be unlocked. Hold your ground as enemy reinforcements engage you. NOTE: You and your squadmates will have to wait for four minutes for the door to unlock. |
| 21 |  Regroup with your squadmates at the Blast Doors. Watch the cutscene and that will be the end of the Raid. |
How to Solve Atomgrad EP. 01 Raid Puzzles
First Sequence Code
| No. | Step |
|---|---|
| 1 |  The puzzle requires you to enter a passcode based on the American and Russian letters displayed on the Red Terminal found at the corner of the room. |
| 2 |  Use the CCTV Station to navigate to the cameras of Control Room A2 Sec. 5 and Control Room B2 Sec. 10 where you'll find the letters paired with their corresponding code number. |
| 3 |  There will be two CCTV stations. One beside the passcode terminal and the other one will be located in the room next to the one you're currently in. |
| 4 |  You will have to enter three different codes. Two party members will have to man the CCTV Stations while the third member will enter the codes. NOTE: Each member will have to take turns in entering the passcode as the previous person who entered the correct code will be locked out of the terminal. |
| 5 |  Take note of the letters shown on the Red Terminal. These will be the letters that the CCTV members will have to look for and relay the information back to the person entering the codes. |
| 6 |  FIRST CODE: Three letters will be displayed on the terminal for the first set of codes. Input the correct deciphered number on the passcode terminal starting from left to right. |
| 7 |  SECOND CODE: Four letters will be displayed - one of them is a decoy in order to confuse you and will not be shown on the CCTV. If a letter is confirmed to be fake, ignore and skip to the next letter code to decipher. |
| 8 |  THIRD CODE: Five letters will be displayed with two decoys. Again, ignore and skip the fake codes. |
Second Sequence Code
| No. | Step |
|---|---|
| 1 |  Activate the Blue Room Control Panel and leave one member stationed in this area as the first set of letter codes will be displayed here. |
| 2 |  Same as the previous step, activate the Red Room Control Panel and have one member handle this room. |
| 3 |  Third member should head to the passcode terminal which will be located at the middle of this sector and will have the responsibility of entering the codes. |
| 4 |  The person in charge of entering the codes will have to call out the letters displayed on the terminal to the other two team members. |
| 5 |  Blue and Red room members will have to respond quickly with the correct number codes back to their teammate entering the codes. |
| 6 |  Once all codes have been correctly entered, the Blast Doors will slowly open and you'll have to defend the area against waves of enemies. |
Second Sequence Codes Have A Time Limit

The Second Sequence Codes will require your team to enter the codes within a given time frame, otherwise the letters will change to a different one and your team will have to enter the passcode all over again once the timer runs out.
- First Code: 60 Seconds
- Second Code: 40 Seconds
- Third Code: 30 Seconds
Bomb Drones and Enemy Soldiers Will Continously Spawn

Red Room and Blue Room members will have to keep an eye out for Bomb Drones and Enemy Soldiers as they will constantly spawn and attack them.
Atomgrade EP. 01 Intel Fragment Locations
How to Get the Intel Fragments
| No. | Location |
|---|---|
| 1 | Upon entering the safe area, jump past the gap. You will then find an intel fragment in a crate. |
| 2 | After defeating the two juggernauts, you will find a hard drive on the left room at the end of the hallway. |
Note: We're currently updating this section.
Atomgrad EP. 01 Weapon List
All Atomgrad Weapons
| Type | Weapons |
|---|---|
| Assault Rifle | Kastov-74u, Kastov 545, & TAQ-M |
| SMG | Vaznev-9K, Minibak & VEL 46 |
| Marksman | EBR-14 (Starting Weapon) |
| Shotgun | Lockwood 300 |
| Handgun | P890 (Starting Weapon) |
| LMG | RAPP H |
All three players will start the mission with the EBR-14 and P890.
List of Rewards on Atomgrad EP. 01
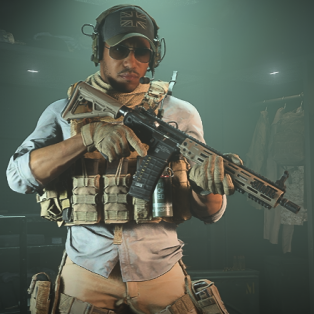
Gaz Operator
| Operator | Information |
|---|---|
 |
・Faction: SpecGru ・Citizenship: Great Britain ・Gender: Male ・Language: English How to Unlock: Complete the Atomgrad Raids to unlock. |
All players who completed the Atomgrap EP. 01 Raid can unlock Gaz as a new Operator under SpecGru faction.
How to Unlock All Operators and Skins
Veteran Difficulty

Players can challenge a higher difficulty level for the Atomgrad EP. 01 Raid by choosing the Veteran Level. You can also unlock it by finishing the Atomgrad EP. 01 Raid at least once.
Mystery Case Reward

You can also get a Mystery Case upon finishing the Atomgrad Raid. The Mystery Case contains random items like the exlusive Gaz's Emblem and Calling Card!
Call of Duty: Modern Warfare 2 (MW2) Related Guides

Raids Guide: How to Unlock and Play Raids
All Raids Missions
| No. | Mission Name |
|---|---|
| 1 | Atomgrad EP. 01 |
Other Raids Guides
| Raids Guides | |
|---|---|
| How to Get Raids Assignments and Keys | Does Raids Have Matchmaking? |
| List of Mystery Case Rewards | - |
Author
Call of Duty: Modern Warfare 2 (MW2) Walkthrough & Guides Wiki
Atomgrad EP. 01 Raids Walkthrough
improvement survey
03/2026
improving Game8's site?

Your answers will help us to improve our website.
Note: Please be sure not to enter any kind of personal information into your response.

We hope you continue to make use of Game8.
Rankings
- We could not find the message board you were looking for.
Gaming News
Popular Games

Genshin Impact Walkthrough & Guides Wiki

Honkai: Star Rail Walkthrough & Guides Wiki

Umamusume: Pretty Derby Walkthrough & Guides Wiki

Pokemon Pokopia Walkthrough & Guides Wiki

Resident Evil Requiem (RE9) Walkthrough & Guides Wiki

Monster Hunter Wilds Walkthrough & Guides Wiki

Wuthering Waves Walkthrough & Guides Wiki

Arknights: Endfield Walkthrough & Guides Wiki

Pokemon FireRed and LeafGreen (FRLG) Walkthrough & Guides Wiki

Pokemon TCG Pocket (PTCGP) Strategies & Guides Wiki
Recommended Games

Diablo 4: Vessel of Hatred Walkthrough & Guides Wiki

Cyberpunk 2077: Ultimate Edition Walkthrough & Guides Wiki

Fire Emblem Heroes (FEH) Walkthrough & Guides Wiki

Yu-Gi-Oh! Master Duel Walkthrough & Guides Wiki

Super Smash Bros. Ultimate Walkthrough & Guides Wiki

Pokemon Brilliant Diamond and Shining Pearl (BDSP) Walkthrough & Guides Wiki

Elden Ring Shadow of the Erdtree Walkthrough & Guides Wiki

Monster Hunter World Walkthrough & Guides Wiki

The Legend of Zelda: Tears of the Kingdom Walkthrough & Guides Wiki

Persona 3 Reload Walkthrough & Guides Wiki
All rights reserved
© 2021-2022 Activision Publishing, Inc. ACTIVISION, CALL OF DUTY, CALL OF DUTY VANGUARD, CALL OF DUTY WARZONE, WARZONE, and RICOCHET ANTI-CHEAT are trademarks of Activision Publishing, Inc. All other trademarks and trade names are the property of their respective owners.
The copyrights of videos of games used in our content and other intellectual property rights belong to the provider of the game.
The contents we provide on this site were created personally by members of the Game8 editorial department.
We refuse the right to reuse or repost content taken without our permission such as data or images to other sites.


![Monster Hunter Stories 3 Review [First Impressions] | Simply Rejuvenating](https://img.game8.co/4438641/2a31b7702bd70e78ec8efd24661dacda.jpeg/thumb)


