Best Loadouts
☆ Camo Challenges | List of Blueprints
★ DMZ Key Locations and Map
☆ Ashika Island: DMZ Keys | Weapon Cases | Map Guide
★ How to Get Weapon Cases
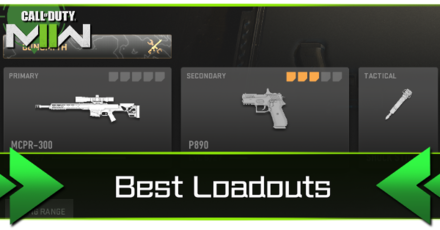
Are you looking for the best loadouts in Call of Duty: Modern Warfare 2 (MW2)? Game8's got you covered! Read on to find the best overall loadouts and best beginner loadouts you can make in the game.
| Best Loadouts, Guns, and Killstreaks Guides | ||
|---|---|---|
| Best Loadout | Best Guns | Best Killstreaks |
Best Loadouts
Mid & Close-Range Loadout
| Primary | Secondary | ||||||||||
|---|---|---|---|---|---|---|---|---|---|---|---|
 FSS Hurricane FSS Hurricane
|
 Expedite 12 Expedite 12
|
||||||||||
| Tactical | Lethal | ||||||||||
 Shock Stick Shock Stick
|
 Drill Charge Drill Charge
|
||||||||||
| Perk Package: Assault | |||||||||||
| Overkill | Scavenger | Hardline | Quick Fix | ||||||||
| Field Upgrade 1 | Field Upgrade 2 | ||||||||||
 Battle Rage Battle Rage
|
 Munitions Box Munitions Box
|
||||||||||
| Kill Streaks | |||||||||||
| UAV | Cruise Missile | SAE | |||||||||
This loadout specializes in close to mid-range encounters, which is great on small to medium size maps. It also houses easy-to-use weapons and equipment favorable for beginners. When using this loadout, don't roam in open areas, as it will be hard to fight back in those areas with this kit. Stay on narrow pathways and locations to make this loadout shine brighter.
Sniper Loadout
| Primary | Secondary | ||||||||||
|---|---|---|---|---|---|---|---|---|---|---|---|
 MCPR-300 MCPR-300
|
 P890 P890
|
||||||||||
| Tactical | Lethal | ||||||||||
 Shock Stick Shock Stick
|
 Proximity Mine Proximity Mine
|
||||||||||
| Perk Package: Sniper | |||||||||||
| Double Time | Extra Tactical | Focus | Birdseye | ||||||||
| Field Upgrade 1 | Field Upgrade 2 | ||||||||||
 Portable Radar Portable Radar
|
 Munitions Box Munitions Box
|
||||||||||
| Kill Streaks | |||||||||||
| UAV | Cluster Mine | Counter UAV | |||||||||
This loadout is best on large-scale maps and game modes with a good high ground cover and open areas. Its main killing weapon is the MCPR-300, which is used to snipe enemies from a distance. You can also fend off sneaking enemies trying to take you out with all the Perks, Killstreaks, and Equipment this loadout has.
Close-Range Loadout
| Primary | Secondary | ||||||||||
|---|---|---|---|---|---|---|---|---|---|---|---|
 Expedite 12 Expedite 12
|
 .50 GS .50 GS
|
||||||||||
| Tactical | Lethal | ||||||||||
 Flash Grenade Flash Grenade
|
 Thermite Thermite
|
||||||||||
| Perk Package: Phantom | |||||||||||
| Battle Hardened | Double Time | Cold Blooded | Ghost | ||||||||
| Field Upgrade 1 | Field Upgrade 2 | ||||||||||
 Munitions Box Munitions Box
|
 Battle Rage Battle Rage
|
||||||||||
| Kill Streaks | |||||||||||
| UAV | Counter UAV | Cluster Mine | |||||||||
This loadout excels at close-range combat, which makes it one of the best loadout to use on small and cramped maps. It's also the best loadout for players who want to kill enemies with one shot at a close-range distance and keep on hunting enemies down.
Support Loadout
| Primary | Secondary | ||||||||||
|---|---|---|---|---|---|---|---|---|---|---|---|
 M4 M4
|
 PILA PILA
|
||||||||||
| Tactical | Lethal | ||||||||||
 Stun Grenade Stun Grenade
|
 Proximity Mine Proximity Mine
|
||||||||||
| Perk Package: Support | |||||||||||
| Bomb Squad | Battle Hardened | Resupply | Survivor | ||||||||
| Field Upgrade 1 | Field Upgrade 2 | ||||||||||
 Deployable Cover Deployable Cover
|
 Trophy System Trophy System
|
||||||||||
| Kill Streaks | |||||||||||
| UAV | Care Package | Cluster Mine | |||||||||
This tanky loadout makes it best on game modes that require you to capture and hold points, no matter how small or big the map is. Use this loadout to make a defensive line towards the sectors and to hold it out for longer. However, it's also advisable not to go solo and try to stick close to your teammates to maximize this loadout's capabilities.
Best Beginner Loadout
Two Primary Weapons Loadout
| Primary | Secondary | ||||||||||
|---|---|---|---|---|---|---|---|---|---|---|---|
 M4 M4
|
 VEL 46 VEL 46
|
||||||||||
| Tactical | Lethal | ||||||||||
 Stun Grenade Stun Grenade
|
 Frag Grenade Frag Grenade
|
||||||||||
| Perk Package: Assault | |||||||||||
| Overkill | Scavenger | Hardline | Quick Fix | ||||||||
| Field Upgrade 1 | Field Upgrade 2 | ||||||||||
 Deployable Cover Deployable Cover
|
N/A | ||||||||||
| Kill Streaks | |||||||||||
| UAV | Counter UAV | Cruise Missile | |||||||||
This loadout is the easiest to acquire and use, which makes it the best loadout for beginners. It has the M4 weapon that can be used at any distance and the VEL 46 weapon with a fast fire rate that can quickly slay enemies up close. It also has all the basic but more than useful equipment that will help you kill enemies and survive longer on the field.
How to Customize Loadout
Reach Level 4 to Unlock and Customize
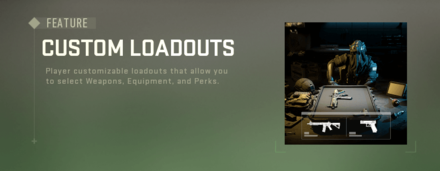
You can unlock the Loadout menu after progressing to level 4, which you can reach after 2-3 decent matches in multiplayer. That's the only way to edit and make the best loadout in the game, so you will need to grind levels!
Call of Duty: Modern Warfare 2 (MW2) Related Guides

All Tips & Tricks
Author
improvement survey
03/2026
improving Game8's site?

Your answers will help us to improve our website.
Note: Please be sure not to enter any kind of personal information into your response.

We hope you continue to make use of Game8.
Rankings
- We could not find the message board you were looking for.
Gaming News
Popular Games

Genshin Impact Walkthrough & Guides Wiki

Honkai: Star Rail Walkthrough & Guides Wiki

Umamusume: Pretty Derby Walkthrough & Guides Wiki

Pokemon Pokopia Walkthrough & Guides Wiki

Resident Evil Requiem (RE9) Walkthrough & Guides Wiki

Monster Hunter Wilds Walkthrough & Guides Wiki

Wuthering Waves Walkthrough & Guides Wiki

Arknights: Endfield Walkthrough & Guides Wiki

Pokemon FireRed and LeafGreen (FRLG) Walkthrough & Guides Wiki

Pokemon TCG Pocket (PTCGP) Strategies & Guides Wiki
Recommended Games

Diablo 4: Vessel of Hatred Walkthrough & Guides Wiki

Fire Emblem Heroes (FEH) Walkthrough & Guides Wiki

Yu-Gi-Oh! Master Duel Walkthrough & Guides Wiki

Super Smash Bros. Ultimate Walkthrough & Guides Wiki

Pokemon Brilliant Diamond and Shining Pearl (BDSP) Walkthrough & Guides Wiki

Elden Ring Shadow of the Erdtree Walkthrough & Guides Wiki

Monster Hunter World Walkthrough & Guides Wiki

The Legend of Zelda: Tears of the Kingdom Walkthrough & Guides Wiki

Persona 3 Reload Walkthrough & Guides Wiki

Cyberpunk 2077: Ultimate Edition Walkthrough & Guides Wiki
All rights reserved
© 2021-2022 Activision Publishing, Inc. ACTIVISION, CALL OF DUTY, CALL OF DUTY VANGUARD, CALL OF DUTY WARZONE, WARZONE, and RICOCHET ANTI-CHEAT are trademarks of Activision Publishing, Inc. All other trademarks and trade names are the property of their respective owners.
The copyrights of videos of games used in our content and other intellectual property rights belong to the provider of the game.
The contents we provide on this site were created personally by members of the Game8 editorial department.
We refuse the right to reuse or repost content taken without our permission such as data or images to other sites.


![Everwind Review [Early Access] | The Shaky First Step to A Very Long Journey](https://img.game8.co/4440226/ab079b1153298a042633dd1ef51e878e.png/thumb)

![Monster Hunter Stories 3 Review [First Impressions] | Simply Rejuvenating](https://img.game8.co/4438641/2a31b7702bd70e78ec8efd24661dacda.jpeg/thumb)


