Groal the Great: Bile Water Boss Guide
★ Sea of Sorrow Free DLC Announced!
☆ Walkthrough
★ Best Crest Builds | Best Tools
☆ Full Interactive Map of Pharloom!
★ Mask Shards | Spool Fragments | Abilities
☆ Boss Guides: The Unravelled | First Sinner
Groal the Great, the Bile Water boss, is located just before the entrance to Bilehaven in Hollow Knight: Silksong. See a loadout you can use to beat Groal the Great, how to reach its arena, its attack patterns, and rewards in this guide!
Groal the Great Recommended Loadout
| Silk Skill | ・Silkspear |
|---|---|
| Tools |
Optional |
| Crests |
 Voltvessels
 Cogfly
 Injector Band
 Druid's Eye
 Magnetite Dice
 Pollip Pouch
 Wreath of Purity
 Reaper Crest
 Witch Crest
 Architect Crest
✎ Press on either Silk Skills, Tools, or Crests to see a full list of each!
Generally, the tools equipped here mainly focus on countering the main mechanics of Groal the Great while allowing you to answer the Gauntlet!
Voltvessels is the main recommendation for this fight as it counters Groal the Great's most lethal attack: the Vacuum Suck. Additionally, the main fight's arena is filled with water, meaning the electricity can spread to fill the area! It is also recommended to slot in the Cogfly tool to answer the pesky enemies that spawn.
Injector Band is necessary to equip, as Groal the Great has few moments that give you an opening. Druid's Eye also has full value here as getting hit by its companions are pretty common, allowing you to build Soul passively.
However, if you are looking for a more offensive strategy you can replace the Druid's Eye with the Pollip Pouch. The Pollip Pouch will coat your tools in Poison, and you can inflict passive poison damage on the boss without needing to get close.
If you find yourself struggling with fighting around the infested waters, you can also bring the Wreath of Purity which can repel muckmaggot infections. Keep in mind that this tool can break if it is exposed to too many muckmaggots, but it can easily be repaired by sitting on a bench.
For the Yellow Tools, you can equip anything, as it is only for utility. However, consider equipping the Magnetite Dice to have an off-chance to negate damage from any of Groal the Great's attacks.
The difference of easily beating this boss and being one of the hardest is the way the player uses consistent Pogo Jumps, the Reaper Crest should be your best bet. Furthermore, it allows a balanced mix of all Tools.
If you are later in the game, you may also want to consider equipping the Witch Crest. Its attack speed is even faster than the Reaper Crest, and its moveset gives you enough range to maneuver away from projectiles and attacks. However, this comes at the cost of removing your Yellow Tool in exchange for an additional Blue Tool slot.
The Architect Crest is another option if you want to get the most value out of the tools. This crest removes the slot for the Silk Skill and replaces it with an additional Red Tool slot.
The Architect Crest can also repair tools without needing to sit on the bench so if you run out of tools midfight, you can easily craft on the spot. This is especially useful to carry if you want to throw Voltvessels or Pimpillos into Grol's mouth and cause massive damage.
Groal the Great Location
Located at the Top of Bilewater
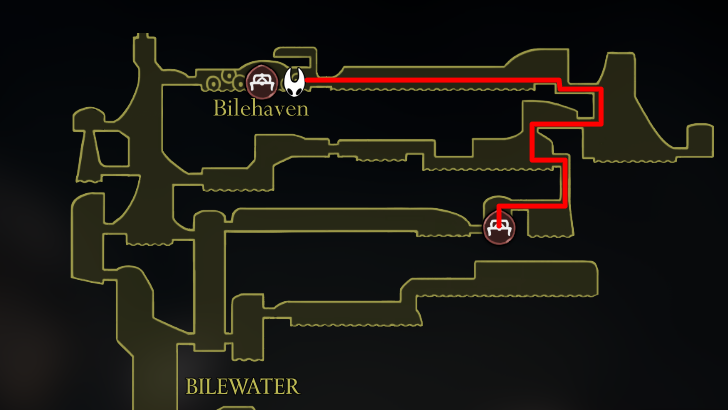
The Bile Water main boss, Groal the Great, can be found at the top of the section's layout. You will have to utilize both the Pogo Jump and Clawline on a series of enemies to get to their arena.
How to Get to Groal the Great
Memorizing the boss itself can be easy, but the difficulty mainly lies in getting to the arena in the best state possible to fight. Follow the path showcased in the video above to see the shortest route to the boss fight!
Secret Soul Flowers Before the Arena
If you are not able to get to the arena with the desired amount of health, you can get flowers that can regenerate your Soul at the area before the arena by reaching a hidden segment at the top (0:44).
How to Find the Hidden Bench
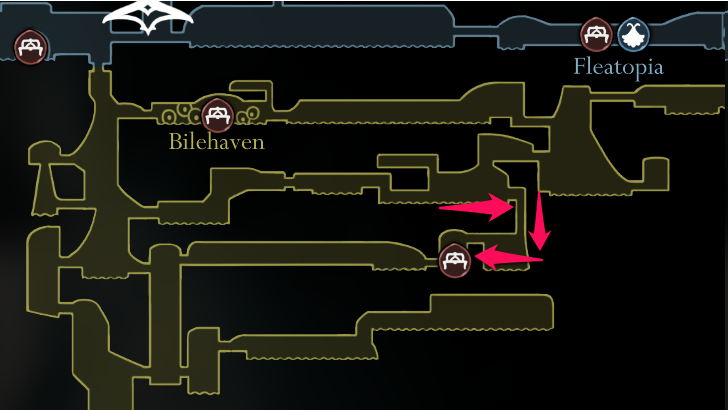
There is a very easily missable bench between Groal the Great and the Bellway station that cuts the runback in half. When you reach the elbow area on the level below Groal, keep going right instead of going up right away.
When you go right, you will drop down into a pool of maggots. Break the wall to the right of the infested waters to reveal a hidden path down. The path from here to the bench is straight forward and there are no enemies around so you do not have to worry about losing any masks on the way.
When you reach the end of the path, break the wall to the left and it will lead you to a large room with cocoons hanging above. Drop down and sit on the bench to mark it on your map.
How to Beat Groal the Great
| Groal the Great Boss Fight Tips |
|---|
|
|
Stay Healthy After the Gauntlet
| Wave | Enemies |
|---|---|
| 1 | 2x Stilkin Counter: Stack both of them by staying on the right-most platform to clear them in one fell swoop with Pogo Jumps as they attempt to surface below you. |
| 2 | 2x Stilkin Trapper Counter: Avoid all their pin attacks by staying on top of them with Pogo Jumps. After this phase, a Spike Ball will descend from the roof, so hug the corner to avoid damage. |
| 3 | 3x Swamp Squit Counter: Avoid the corners as the Swamp Squits will explode upon dying. |
| 4 | 1x Stilkin + 1x Stilkin Trapper Counter: Before this phase starts, position on the left platform to immediately get rid of the Stilkin Trapper while the Stilkin is out of range to do its attacks. Hug the corner afters to avoid the Spike Ball |
| 5 | 2x Swamp Squit + 1x Stilkin Trapper Counter: Pogo Jump on the nearest Swamp Squit to reach the Stilkin Trapper and immediately remove it from the fight. |
Arguably, the hardest part of fighting Groal the Great is the sequence you need to go through before fighting the boss itself. Consider following our recommended counters for each of the waves!
Use Voltvessels During the Vacuum Suck
To completely negate the threat of Groal's Vacuum Suck attack, lob a Voltvessel while he is channeling. Doing so will interrupt the attack, and he will immediately follow up with either a Poison Spit or Soul Projectile.
As a bonus, you can also use the Voltvessel to essentially electrify the water, damaging enemies that dive into it.
The Safest Areas are the Sides
While it may seem counterintuitive, the best way to avoid damage is to dive into the poison pool and position yourself just below the elevated platforms of each side. The only attacks you need to look out for while doing this are the Dive or Soul Projectile, so be vigilant!
Heal During the Dive
If you are trying to find moments to heal safely, the best time would be to recover while Groal is committing to his Dive and Surface attack; the reason being the attack itself takes a significant amount of time to finish and react to!
Summon Cogflies with the Pollip Pouch
If you have the Pollip Pouch equipped, you can use it with the Cogflies so that they can inflict Groal with poison damage. If you summon 4 poisonous Cogflies before Groal appears, you can inflict a ton of damage at the start and very quickly get to Phase 2.
Attack From the Water
While the infested waters may drain your Silk, they do not deplete any masks. If you stay in the infested waters during most of the fight, Groal will be unable to vacuum suck you into its mouth. Using this method, all you have to do is attack when he's near and use the cogflies to maximize damage.
You can also use the water to hide when Groal summons enemies. You can avoid taking damage from most projectiles since they disappear if they touch the water.
Groal the Great Attack Patterns
Poison Spit
Groal will heave and spit out orbs of condensed poison that will explode upon hitting Hornet or bouncing off a surface once. The safest way to counter this attack is to keep a safe distance and hit the ball back.
However, if you are positioned properly and willing to risk it, this is also the most optimal attack to get your damage in, as Groal is wide-open for multiple Pogo Jumps!
Dive and Surface
Groal will immediately dive into the maggot-infested waters and resurface near Hornet's location. Groal will often use this to mix up the player between summoning allies or immediately resurfacing.
However, this attack is the safest moment for you to either set up your abilities or heal. Take advantage of this momentary respite to gather your bearings!
Vacuum Suck
Groal starts trying to swallow Hornet by breathing in with great force. To counter this attack, use Voltvessels to interrupt his channeling while dealing a significant amount of damage to Groal.
Apart from using the Voltvessel, you can use a combination of a dash and Clawline to avoid being swallowed. If you are ever swallowed, repeatedly spam your attack so you can get out or suffer massive damage.
Soul Projectile
Groal will first bellow and glow a bright white, giving him the ability to shoot out up to three Soul Projectiles akin to the protagonist of Hollow Knight. Oftentimes, Groal will use this attack after using the Vacuum Suck or Dive and Surface.
The best way to dodge Soul Projectiles is to utilize the wall jump to have more control over your movement while giving you the necessary boost to reach him after the attack.
Summon Allies
| Variation | Video Sample |
|---|---|
| Spike Ball Only | |
| With Allies |
After diving, Groal will have the chance to summon two allies for a brief moment and/or swing the spike ball. This is entirely random, but you will know if it is only a spike ball if the roof starts crumbling immediately, or if enemies will spawn if two fountains appear from the pool of maggots.
While risky, the best way to deal with this is to wait at the platform on either side and then jump in the middle of a fountain to pogo jump on the enemies. This will allow you to get Silk and keep you out of range of the spike ball if it happens.
Groal the Great Rewards
Access to Bilehaven
Upon beating Groal the Great, you can now fully access the whole of Bilehaven. While the boss itself is optional, the area that unlocks upon defeating him contains an item that is crucial for accessing the Act 3 of the story!
Complete Walkthrough and Progression Guide
Hollow Knight: Silksong Related Guides

Act 1 Bosses
| Main Story Bosses | ||
|---|---|---|
 Moss Mother Moss Mother
|
 Bell Beast Bell Beast
|
 Lace Lace
|
 Fourth Chorus Fourth Chorus |
 Moorwing Moorwing |
 Sister Splinter Sister Splinter |
 Widow Widow |
 Last Judge Last Judge |
- |
| Optional Bosses | ||
 Savage Beastfly Savage Beastfly |
 Skull Tyrant Skull Tyrant |
 Great Conchflies Great Conchflies |
 Summoned Saviour Summoned Saviour |
- | - |
| Secret Bosses | ||
 Phantom Phantom |
- | - |
Act 2 Bosses
| Main Story Bosses | ||
|---|---|---|
 Cogwork Dancers Cogwork Dancers |
 Trobbio Trobbio |
 Lace (Act 2) Lace (Act 2) |
 Grand Mother Silk Grand Mother Silk |
- | - |
| Optional Bosses | ||
 Forebrothers Signis and Gron Forebrothers Signis and Gron |
 Raging Conchfly Raging Conchfly |
 Groal the Great Groal the Great |
 Disgraced Chef Lugoli Disgraced Chef Lugoli |
 Broodmother Broodmother |
 Father of the Flame Father of the Flame |
 Voltvyrm Voltvyrm |
- | - |
| Secret Bosses | ||
 First Sinner First Sinner |
 Unravelled Unravelled |
- |
Act 3 Bosses
 Bell Eater
 Skarrsinger Karmelita
 Nyleth
 Seth
Seth Crust King Khann
 Lost Lace
 Watcher at the Edge
 Gurr the Outcast
 Second Sentinel
 Lost Garmond
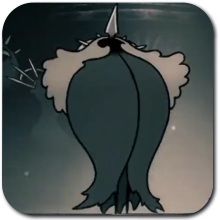 Crawfather
 Plasmified Zango
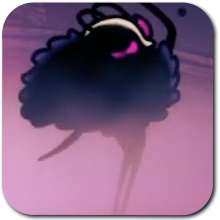 Tormented Trobbio
 Clover Dancers
 Pinstress
 Palestag
Comment
Author

Groal the Great: Bile Water Boss Guide
Rankings
- We could not find the message board you were looking for.
Gaming News


![The Liar Princess and the Blind Prince Review [PC] | Lovely to Look at but Tedious to Play](https://img.game8.co/4442586/8d95f5faf05780f1765ce7e0938bd825.jpeg/thumb)
![Marathon Cryo Archive Map Teased as [REDACTED] on Selection Screen](https://img.game8.co/4442236/6357203e58172f6de57f1991e7c39b22.png/thumb)

Popular Games

Genshin Impact Walkthrough & Guides Wiki
Umamusume: Pretty Derby Walkthrough & Guides Wiki
Pokemon Pokopia Walkthrough & Guides Wiki
Honkai: Star Rail Walkthrough & Guides Wiki
Monster Hunter Stories 3: Twisted Reflection Walkthrough & Guides Wiki
Arknights: Endfield Walkthrough & Guides Wiki
Wuthering Waves Walkthrough & Guides Wiki
Zenless Zone Zero Walkthrough & Guides Wiki
Pokemon TCG Pocket (PTCGP) Strategies & Guides Wiki
Monster Hunter Wilds Walkthrough & Guides Wiki


Recommended Games
Diablo 4: Vessel of Hatred Walkthrough & Guides Wiki
Cyberpunk 2077: Ultimate Edition Walkthrough & Guides Wiki
Fire Emblem Heroes (FEH) Walkthrough & Guides Wiki
Yu-Gi-Oh! Master Duel Walkthrough & Guides Wiki
Super Smash Bros. Ultimate Walkthrough & Guides Wiki
Pokemon Brilliant Diamond and Shining Pearl (BDSP) Walkthrough & Guides Wiki
Elden Ring Shadow of the Erdtree Walkthrough & Guides Wiki
Monster Hunter World Walkthrough & Guides Wiki
The Legend of Zelda: Tears of the Kingdom Walkthrough & Guides Wiki
Persona 3 Reload Walkthrough & Guides Wiki


All rights reserved
© 2025 Team Cherry
The copyrights of videos of games used in our content and other intellectual property rights belong to the provider of the game.
The contents we provide on this site were created personally by members of the Game8 editorial department.
We refuse the right to reuse or repost content taken without our permission such as data or images to other sites.