Broodmother Boss Guide
★ Sea of Sorrow Free DLC Announced!
☆ Walkthrough
★ Best Crest Builds | Best Tools
☆ Full Interactive Map of Pharloom!
★ Mask Shards | Spool Fragments | Abilities
☆ Boss Guides: The Unravelled | First Sinner

The Broodmother in Hollow Knight: Silksong can be found at the top-left portion of The Slab. See a loadout you can use to beat Broodmother, their location, its attack patterns, and rewards in this guide!
Broodmother Recommended Loadout
| Silk Skill | ・Rune Rage |
|---|---|
| Tools | |
| Crests |
 Voltvessels
 Cogfly
 Pollip Pouch
 Druid's Eye
 Magnetite Dice
 Reaper Crest
 Witch Crest
 Architect Crest
✎ Press on either Silk Skills, Tools, or Crests to see a full list of each!
Generally, the tools equipped here mainly focus on countering the main mechanics of Broodmother by fully leaning in on the Area-of-Effect damage, including Rune Rage!
Voltvessels is the main recommendation for this fight as it will be your main source of damage due to Broodmother's slow movement and reliance on minions. Additionally, slot in the Cogfly tool to increase your damage uptime.
Equip Pollip Pouch for your Cogfly to deal poison damage as well, allowing you to defeat the summons much faster. Druid's Eye allows you to build Soul passively, as it is fairly common to get hit here, especially when rushing. Alternatively, we also recommend slotting in Memory Crystal to deal damage when you take a hit.
For the Yellow Tools, you can equip anything, as it is only for utility. However, consider equipping the Magnetite Dice to have an off-chance to negate damage from any of Broodmother's attacks.
The keyword for this fight is reach, as you would want to easily hit the spawns and the Broodmother, so Reaper Crest and its wide Pogo Jumps and slashes can carry you!
If you are later in the game, the Witch Crest could also benefit you in this fight. Its long and fast moveset can help you with jumps just like the Reaper Crest, and you can equip up to 3 Blue Tools to improve your battle effects. However, the Witch Crest does not have a yellow slot so you will not be able to equip the Magnetite Dice.
Because of the enclosed room, you could also consider using the Architect Crest. The Architect Crest replaces the Silk Skill with another Red Tool so you can use it to be more aggressive with your tool use. If you run out of tools, you will also be able to craft them on the spot without needing to return to a bench.
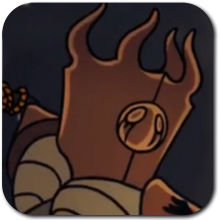
Broodmother Location
At the Top Left of The Slab

The Broodmother can be located in a room at the top-left portion of the Slab by following the tracks. The fight itself cannot commence without the "The Wailing Mother" wish!
How to Beat Broodmother
| Broodmother Boss Fight Tips |
|---|
|
|
Properly Deal With the Waves
| Wave | Enemies |
|---|---|
| 1 | 4x Spawn Counter: Hit them once each time, 1-2 Cogflies should easily clear this. |
| 2 | 1x Broodcane 3x Spawn Counter: Quickly defeat the Broodcane before the Spawn get to bounce off from the walls. |
| 3 | 1x Broodguard 3x Spawn Counter: Deal with the Spawn first since the Broodguard is slow. |
The fight against The Broodmother is fairly simple, but you can set yourself up for failure if you are not prepared to face her minions before her fight. Consider following our advice for each of the waves!
Charge Up Tools
Seeing that the bench is near the arena while being relatively devoid of enemies, charging up your tools on the bench should go unpunished and set you up for success. However, do not use your tools just yet!
Make Use Area-of-Effect Utilities
Using Area-of-Effect tools trivializes the fight against the Broodmother due to her slow pacing, size, reliance on fodder minions, and the area's small nature. Essentially, it is almost guaranteed to hit most, if not all, of your Tools to melt the Broodmother's health.
Avoid the Slime Instead
Broodmother will often try to limit your ground movement by spreading viscous slime, stopping Hornet in her tracks if touched. These blobs are durable when you try to remove them manually, so it is better to jump over them as they will expire fairly quickly.
Prioritize Defeating the Summons
The Broodmother's attacks are fairly easy to dodge, given that everything has a tell before she commits to the attack. Position yourself in the corners of the room and wait for her to jump towards you for a free punishment!
Instead of rushing her, try focusing on removing her spawn since they will severely limit your movement with their erratic movement and imminent explosions. We recommend using your Red Tools like the Cogfly to take out the summons!
Broodmother Attack Patterns
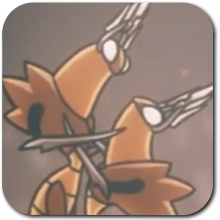
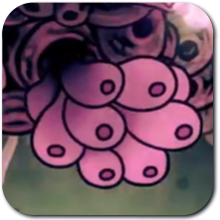
Spawn Brood
The Broodmother takes flight and releases one or two spawns from her sac. These flies will not despawn and continue to bounce around the arena if left alone, serving as a hazard when going for aerial attacks.
Make it your priority to remove them as soon as possible while maintaining vigilance, as they explode upon death.
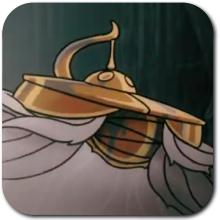
Sloppy Fling
The Broodmother hovers near the ground and raises her hands before flinging herself towards Hornet. She can repeat this move up to three times, depending on whether Hornet's in range. Managing to stay in the middle allows you to possibly go for three successive pogo jumps!
Slime Spit
The Broodmother tilts her head back and spits out a globule of slime. Upon getting hit, Hornet will get stuck to the ground; spam your movement button to escape.
If the attack misses, it stays on the ground for some time before dissipating, actively remaining as a hazard that can trap you.
Body Flop
The Broodmother lifts her head high before desperately flopping all around the arena to hit Hornet. She will bounce diagonally across every time, so it is easily dodged by dashing towards her if you are near her.
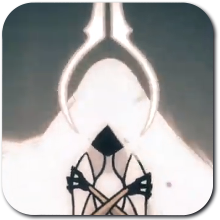
Broodmother Rewards
Broodmother's Eye
| Item | Details |
|---|---|
| Broodmother's Eye | Gelatinous organ collected from the defeated Broodmother. |
Upon defeating The Broodmother, you can take her eye as a trophy. Submit this back at the Songclave’s Wishwall to deliver the item to complete the Wailing Mother wish!
All Wishes and Side Quest Locations and Rewards
Hollow Knight: Silksong Related Guides

Act 1 Bosses
| Main Story Bosses | ||
|---|---|---|
 Moss Mother Moss Mother
|
 Bell Beast Bell Beast
|
 Lace Lace
|
 Fourth Chorus Fourth Chorus |
 Moorwing Moorwing |
 Sister Splinter Sister Splinter |
 Widow Widow |
 Last Judge Last Judge |
- |
| Optional Bosses | ||
 Savage Beastfly Savage Beastfly |
 Skull Tyrant Skull Tyrant |
 Great Conchflies Great Conchflies |
 Summoned Saviour Summoned Saviour |
- | - |
| Secret Bosses | ||
 Phantom Phantom |
- | - |
Act 2 Bosses
| Main Story Bosses | ||
|---|---|---|
 Cogwork Dancers Cogwork Dancers |
 Trobbio Trobbio |
 Lace (Act 2) Lace (Act 2) |
 Grand Mother Silk Grand Mother Silk |
- | - |
| Optional Bosses | ||
 Forebrothers Signis and Gron Forebrothers Signis and Gron |
 Raging Conchfly Raging Conchfly |
 Groal the Great Groal the Great |
 Disgraced Chef Lugoli Disgraced Chef Lugoli |
 Broodmother Broodmother |
 Father of the Flame Father of the Flame |
 Voltvyrm Voltvyrm |
- | - |
| Secret Bosses | ||
 First Sinner First Sinner |
 Unravelled Unravelled |
- |
Act 3 Bosses
 Bell Eater
 Skarrsinger Karmelita
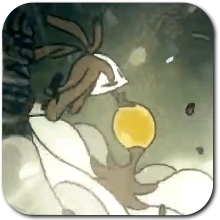 Nyleth
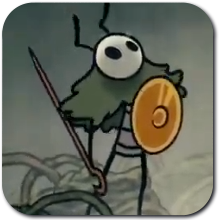 Seth
Seth Crust King Khann
 Lost Lace
 Watcher at the Edge
 Gurr the Outcast
 Second Sentinel
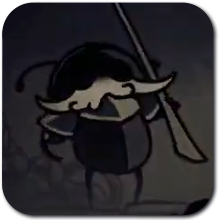 Lost Garmond
 Crawfather
 Plasmified Zango
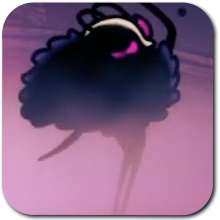 Tormented Trobbio
 Clover Dancers
 Pinstress
 Palestag
Comment
Author

Broodmother Boss Guide
Rankings
- We could not find the message board you were looking for.
Gaming News

![Monster Hunter Stories 3 Review [First Impressions] | Simply Rejuvenating](https://img.game8.co/4438641/2a31b7702bd70e78ec8efd24661dacda.jpeg/show)
![The Seven Deadly Sins: Origin [First Impressions] | A Promising Start](https://img.game8.co/4440581/584e0bfb87908f12c4eab6e846eb1afd.png/thumb)
![The Liar Princess and the Blind Prince Review [PC] | Lovely to Look at but Tedious to Play](https://img.game8.co/4442586/8d95f5faf05780f1765ce7e0938bd825.jpeg/thumb)
![Marathon Cryo Archive Map Teased as [REDACTED] on Selection Screen](https://img.game8.co/4442236/6357203e58172f6de57f1991e7c39b22.png/thumb)
Popular Games

Genshin Impact Walkthrough & Guides Wiki
Umamusume: Pretty Derby Walkthrough & Guides Wiki
Pokemon Pokopia Walkthrough & Guides Wiki
Honkai: Star Rail Walkthrough & Guides Wiki
Monster Hunter Stories 3: Twisted Reflection Walkthrough & Guides Wiki
Arknights: Endfield Walkthrough & Guides Wiki
Wuthering Waves Walkthrough & Guides Wiki
Zenless Zone Zero Walkthrough & Guides Wiki
Pokemon TCG Pocket (PTCGP) Strategies & Guides Wiki
Monster Hunter Wilds Walkthrough & Guides Wiki


Recommended Games
Diablo 4: Vessel of Hatred Walkthrough & Guides Wiki
Cyberpunk 2077: Ultimate Edition Walkthrough & Guides Wiki
Fire Emblem Heroes (FEH) Walkthrough & Guides Wiki
Yu-Gi-Oh! Master Duel Walkthrough & Guides Wiki
Super Smash Bros. Ultimate Walkthrough & Guides Wiki
Pokemon Brilliant Diamond and Shining Pearl (BDSP) Walkthrough & Guides Wiki
Elden Ring Shadow of the Erdtree Walkthrough & Guides Wiki
Monster Hunter World Walkthrough & Guides Wiki
The Legend of Zelda: Tears of the Kingdom Walkthrough & Guides Wiki
Persona 3 Reload Walkthrough & Guides Wiki


All rights reserved
© 2025 Team Cherry
The copyrights of videos of games used in our content and other intellectual property rights belong to the provider of the game.
The contents we provide on this site were created personally by members of the Game8 editorial department.
We refuse the right to reuse or repost content taken without our permission such as data or images to other sites.